gronlit
-
Posts
40 -
Joined
-
Last visited
-
Days Won
4
Content Type
Profiles
Articles
Forums
Gallery
Events
Everything posted by gronlit
-
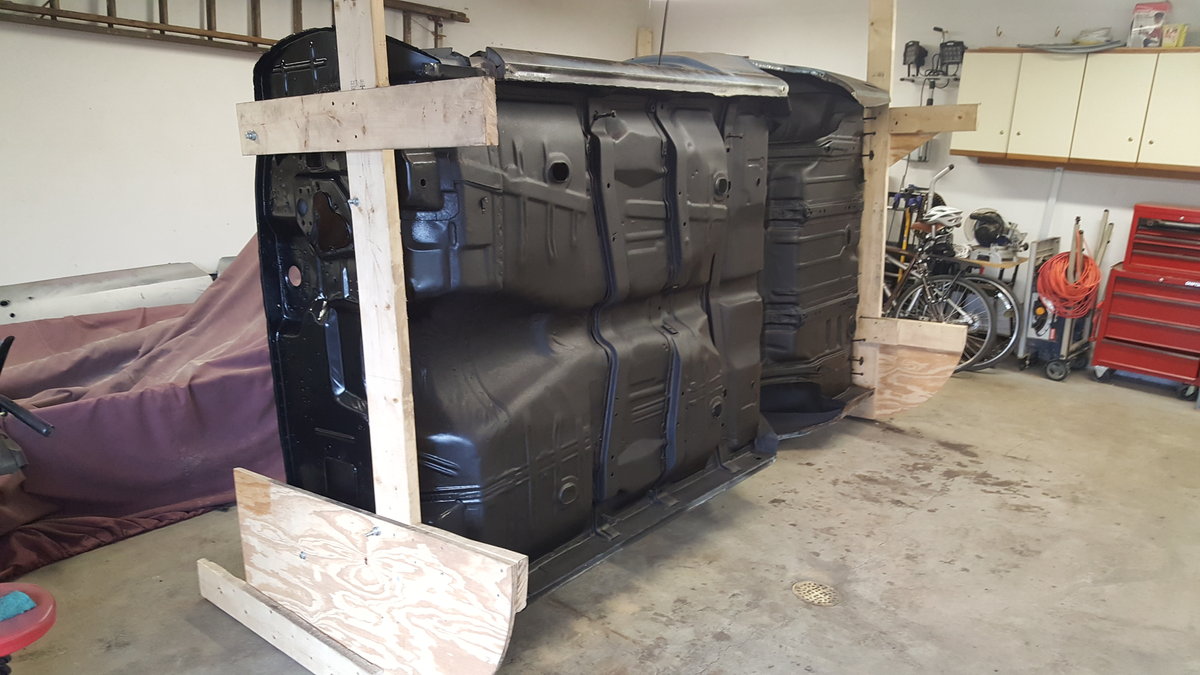
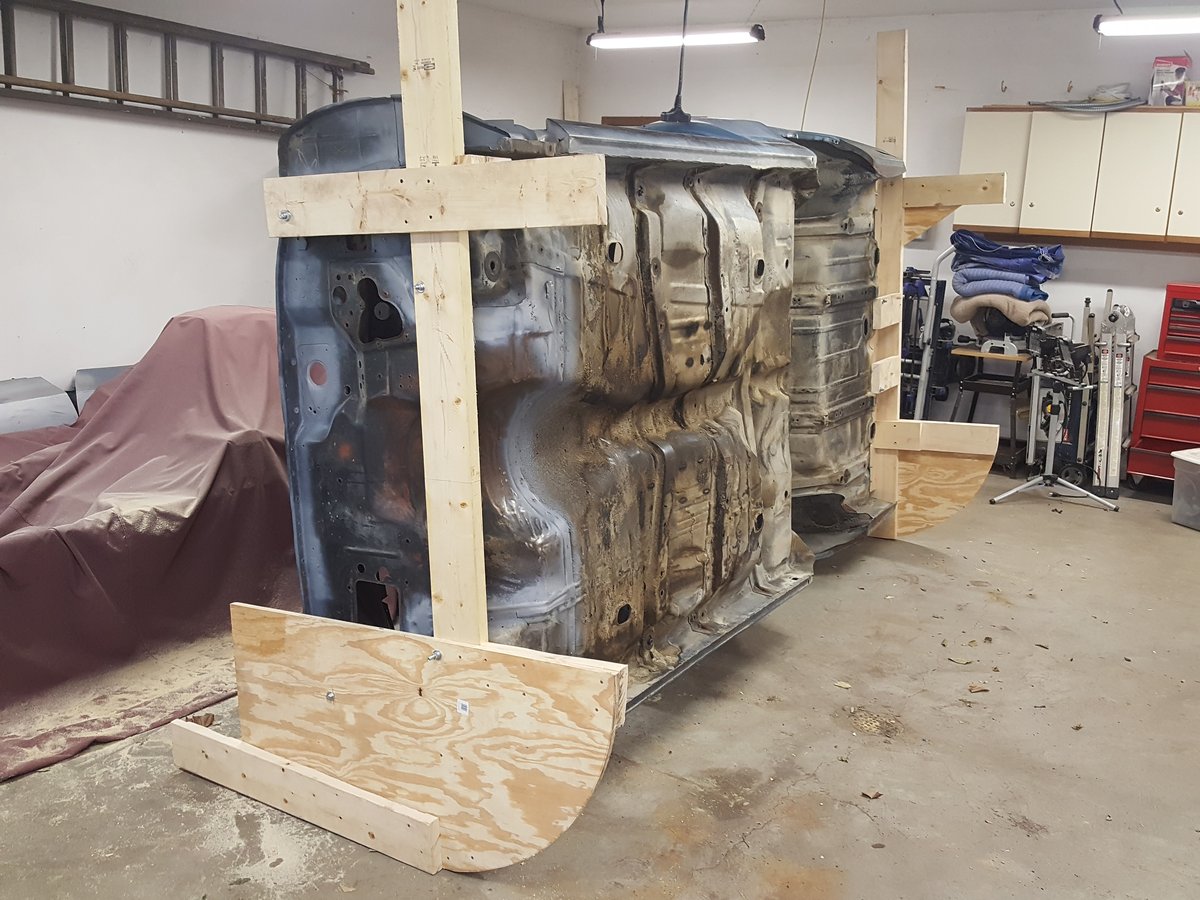
Not too bad actually. I've flipped it back and forth a couple times and am able to do it on my own. I think I measured the car to be roughly 6ft wide and the tip radius is 2ft so the center of gravity is about 1 foot from the fulcrum when the car is down and when I lift from the panel I'm about 4 ft from the fulcrum so I get a 4to1 mechanical advantage. Not sure how much the shell weighs, but let's say it is 600lbs then it takes 150lb lifting to get it started and it gets easier as its tipped. Lifting with your legs at the start and it's not bad. When bringing it down I just make sure I keep it slow.
-
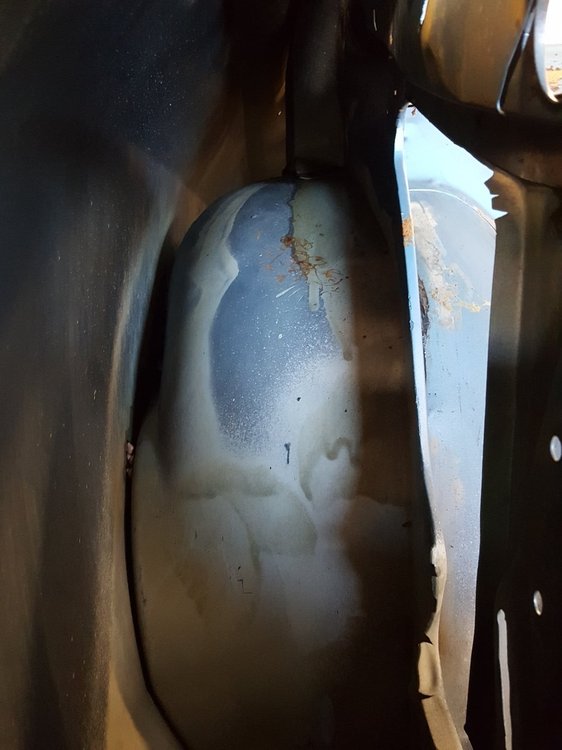
I thought about making a metal one, I however lack those metalworking skills! Yours turned out well Dan. I finished the underside of the body this weekend. I used por15 for the first time...I read that you can't wash the stuff off if it gets on your skin so I wore long sleeves, pants, and gloves. Well I can confirm that it will stain skin through denim...Going on a week and a half and I still don't have it all off... Tim

-
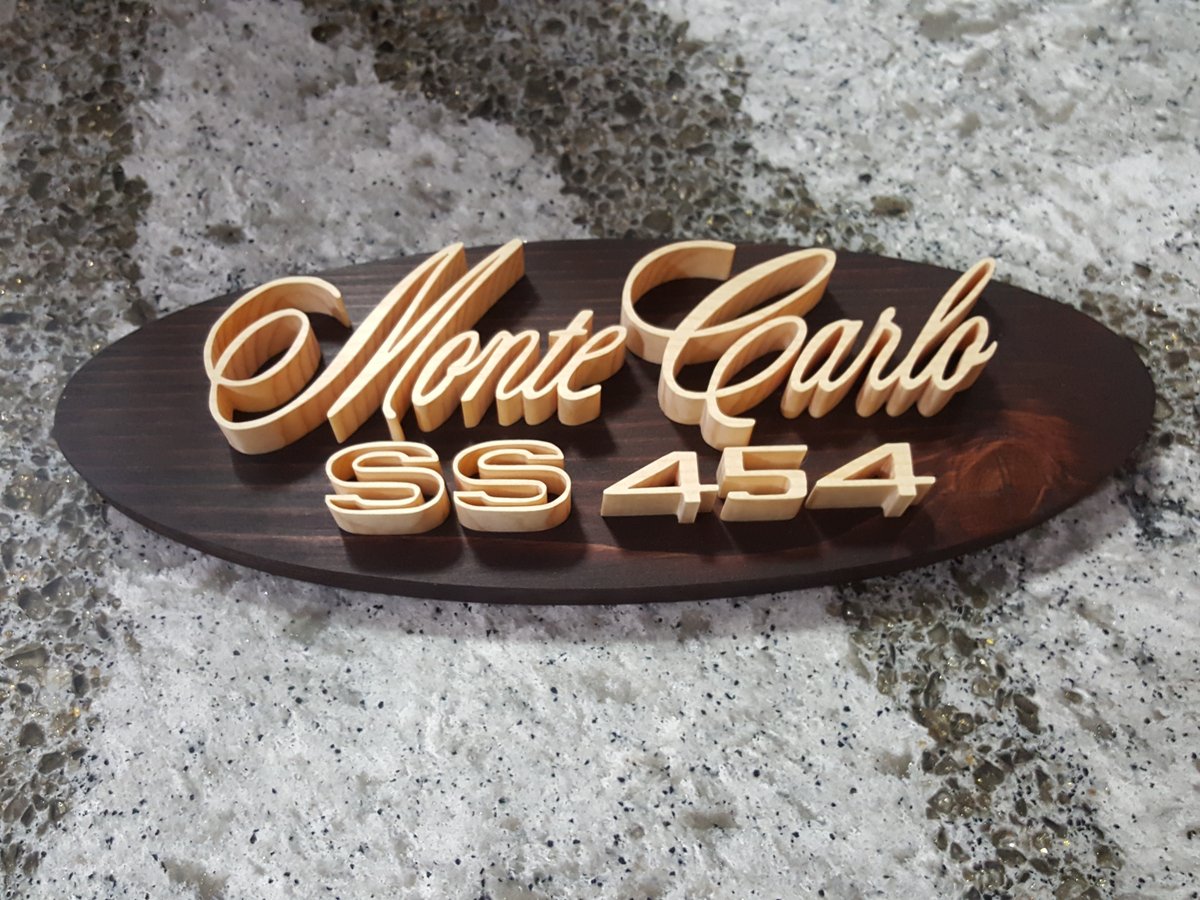
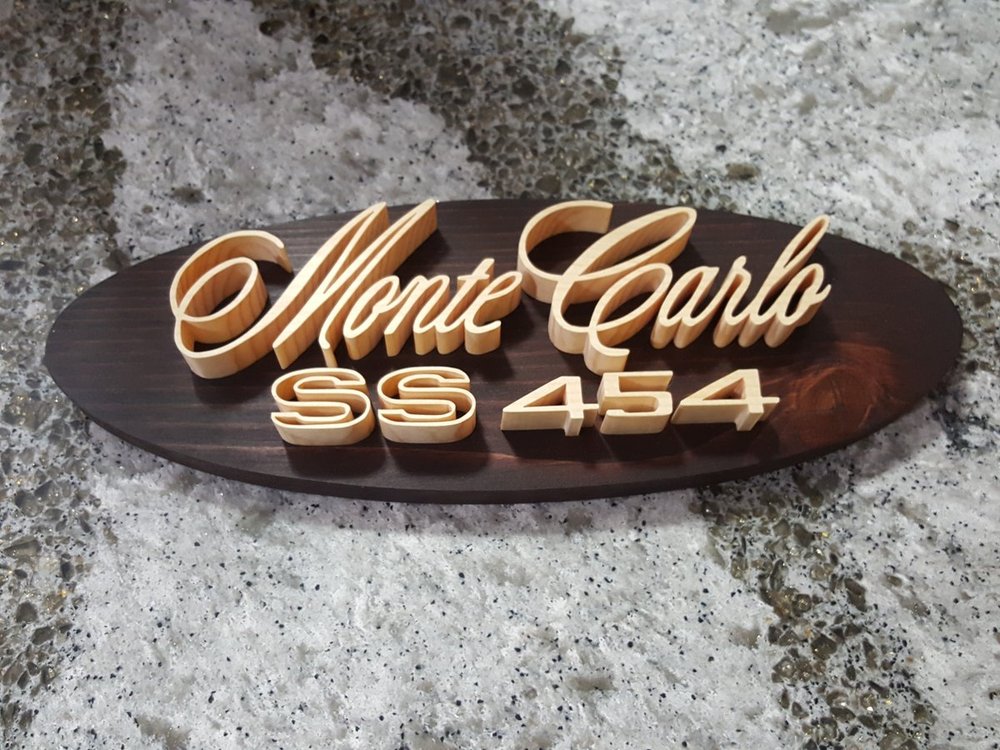
Check out the wall plaque my sister gave me for my birthday this year. She got it here: https://www.etsy.com/shop/StreetArtDesigns
-
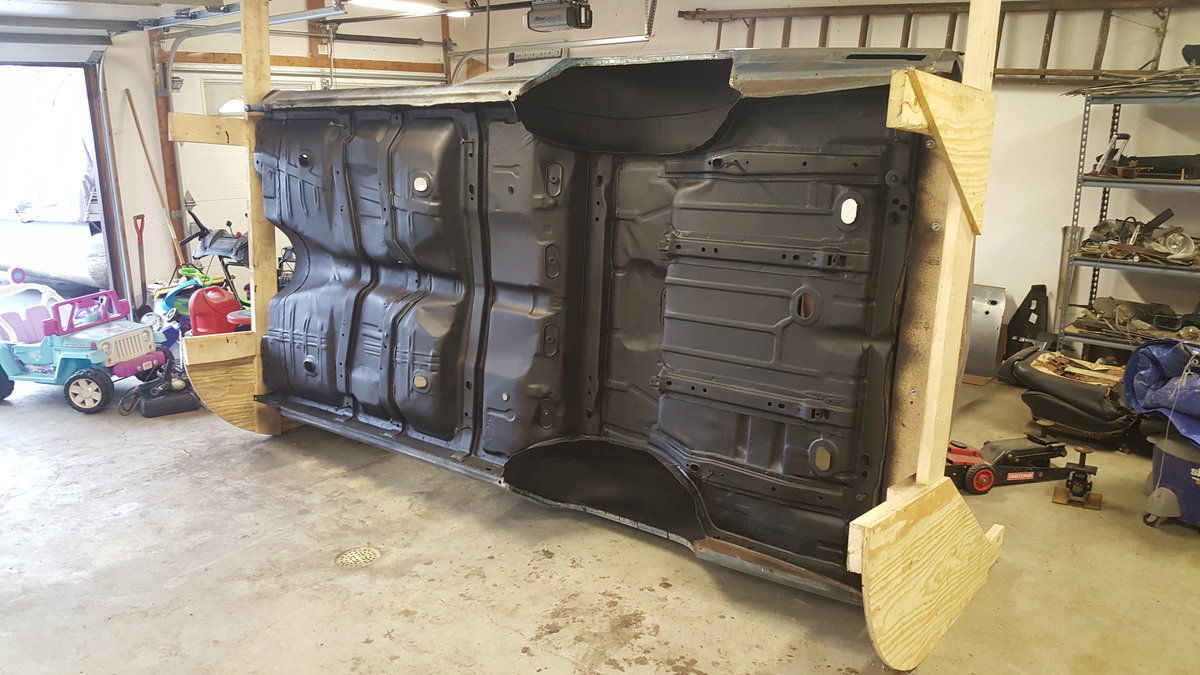
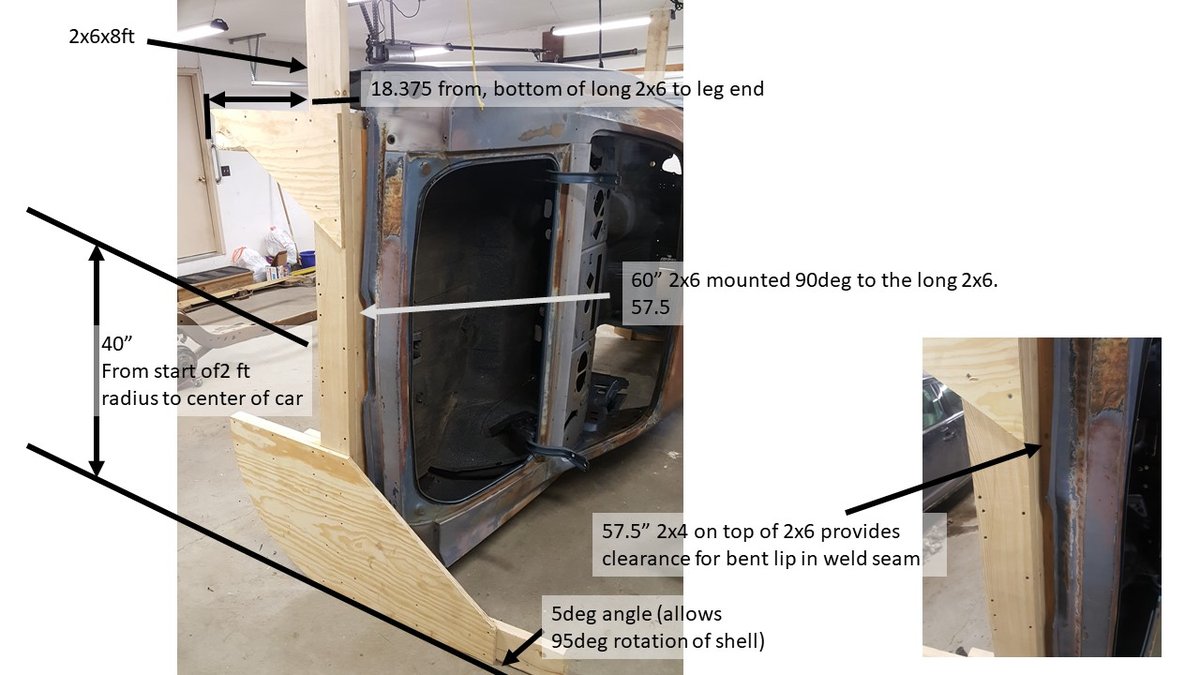
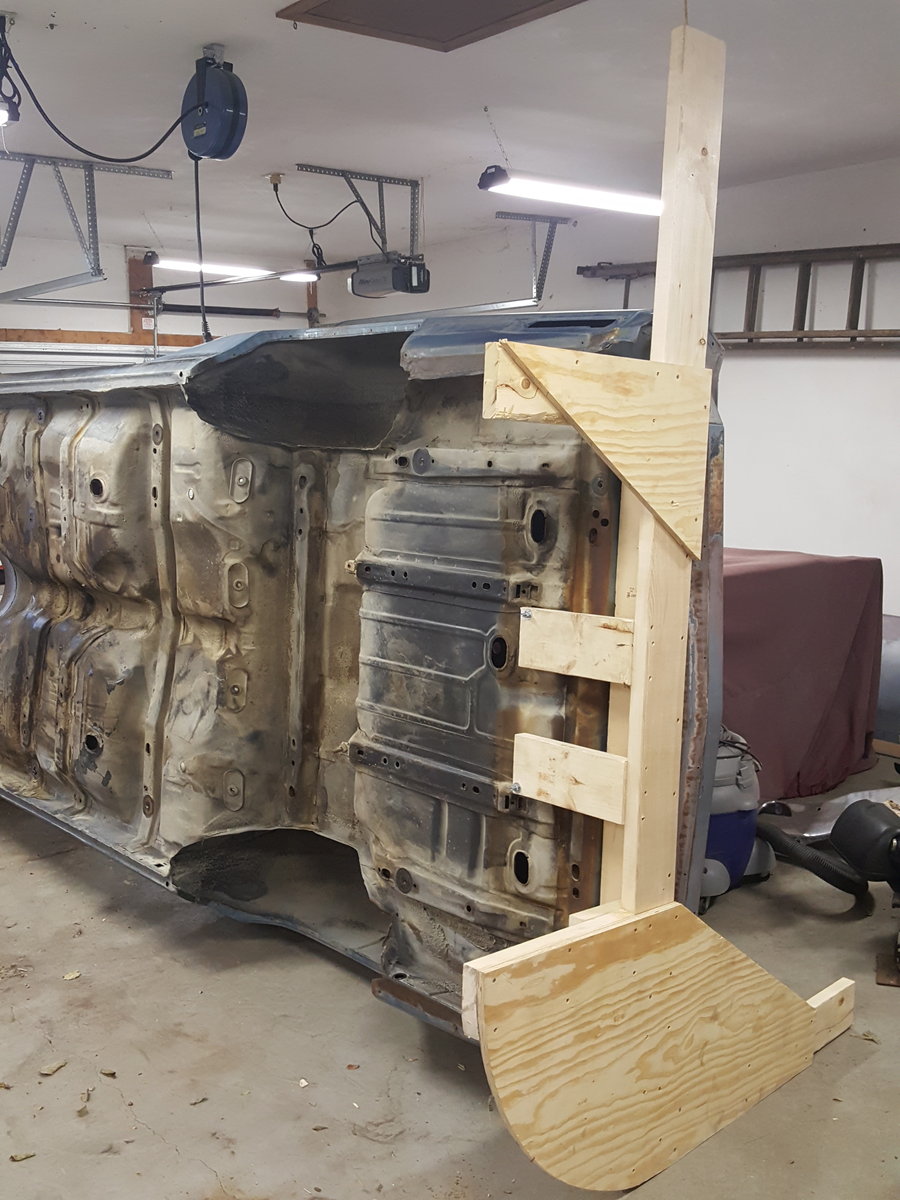
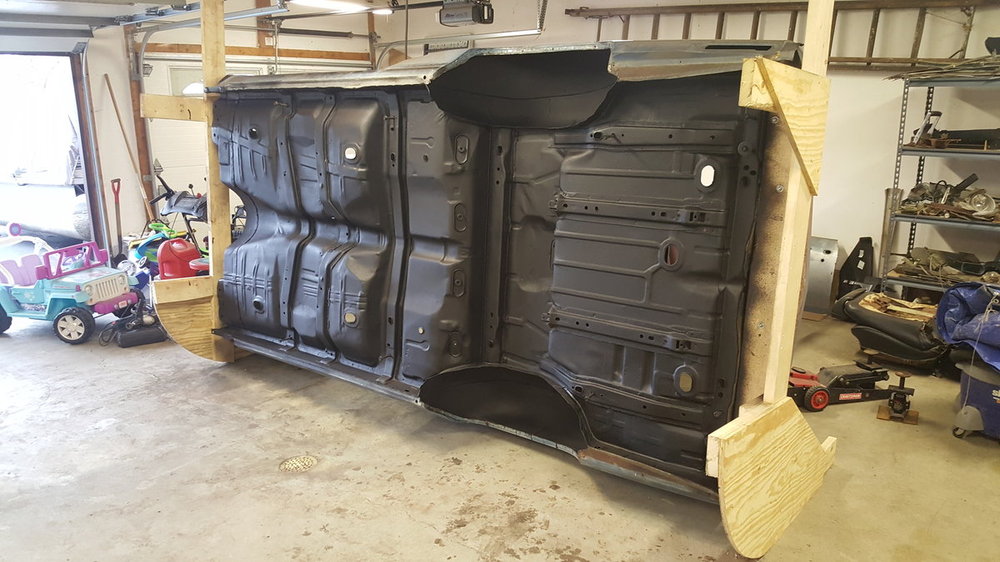
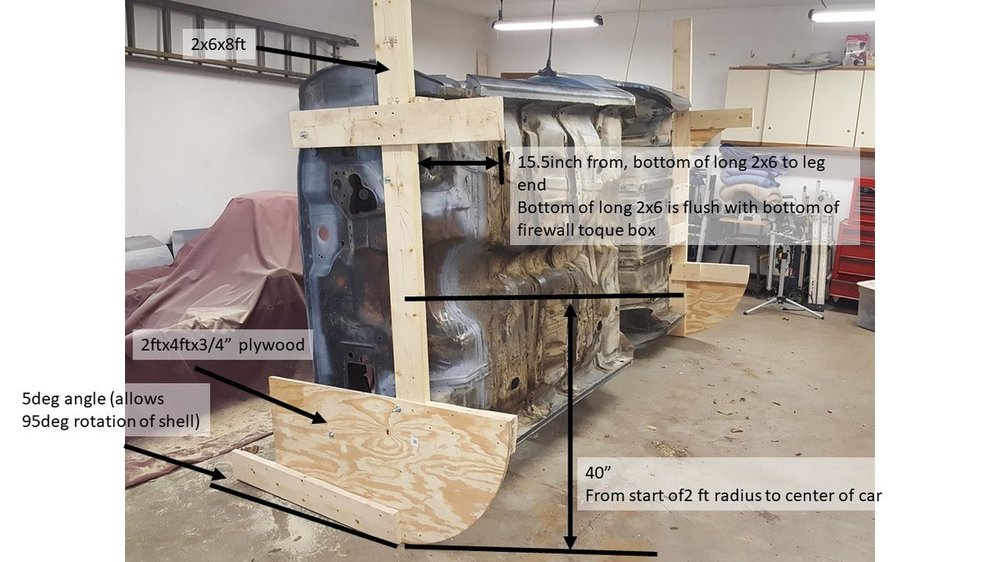
Here are the main dimensions...if anyone else makes one be sure to post some pictures. After I had everything cut and fastened together and it looked like it would work I took it all apart and then rebuilt it using liquid nails as well as the screws and bolts so some extra strength The bolts/nuts going into the torquebox body mounts were tough to fasten....I can't access the nut I used in the torquebox box and had to rely on friction to keep the nut from spinning while tightening. If I were todo it again i'd find a better way. I am considering trying to sell it once im done, I think someone would buy it and save the couple nights of fab work

-
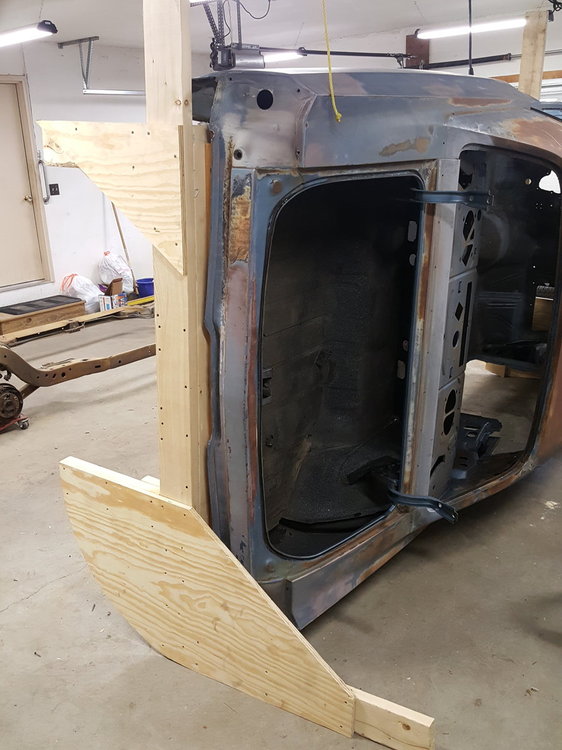
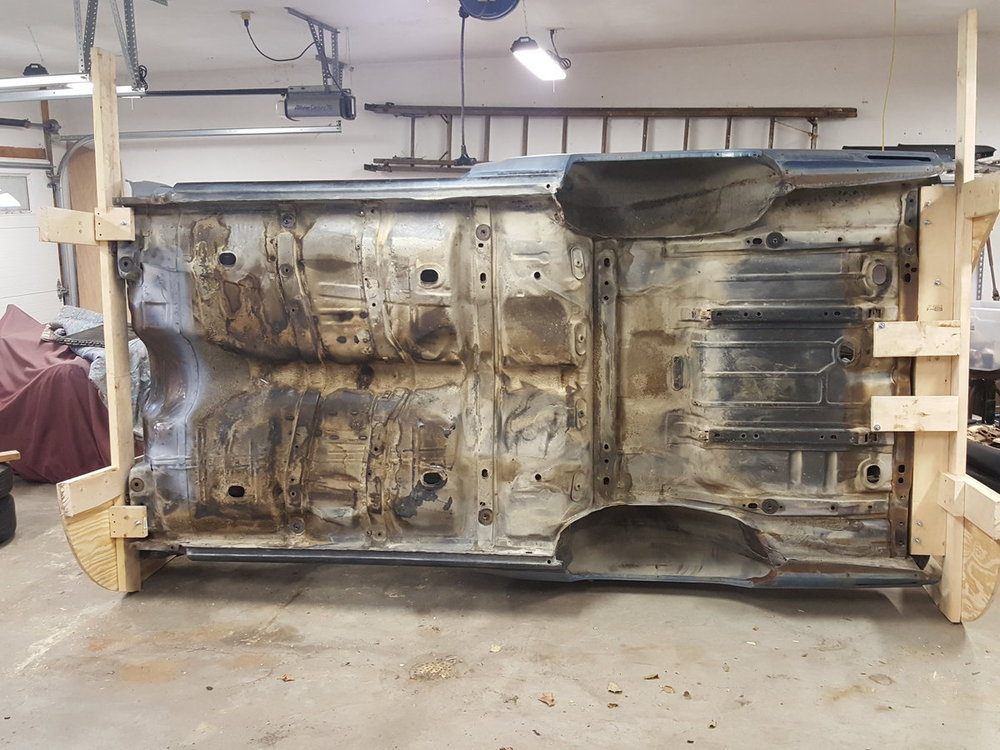
I decided go with a wooden tip over jig instead of buying a rotisserie after seeing some pictures of other people's online. 5 2x6s, half a sheet of plywood, and some fasteners. For less than $100 it was pretty easy to build and I was easily able to tip over the shell by myself.


-
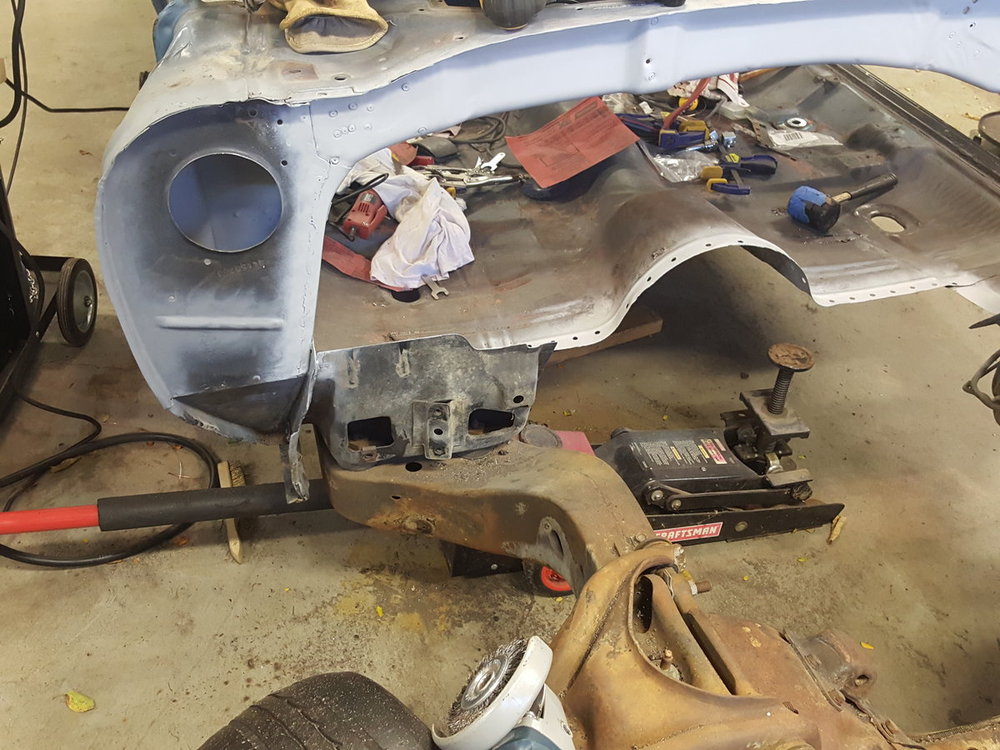
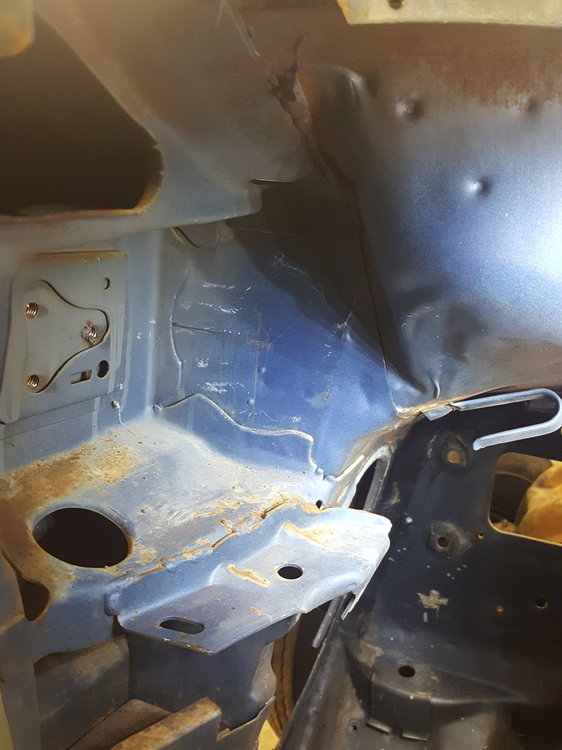
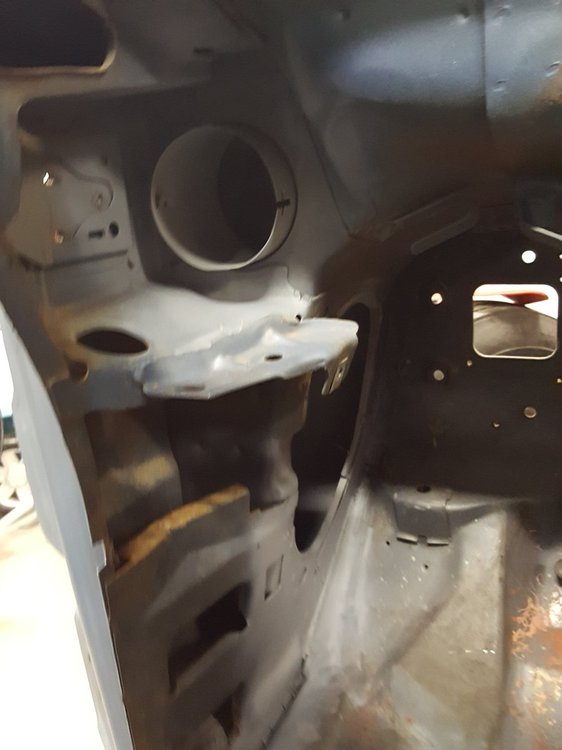
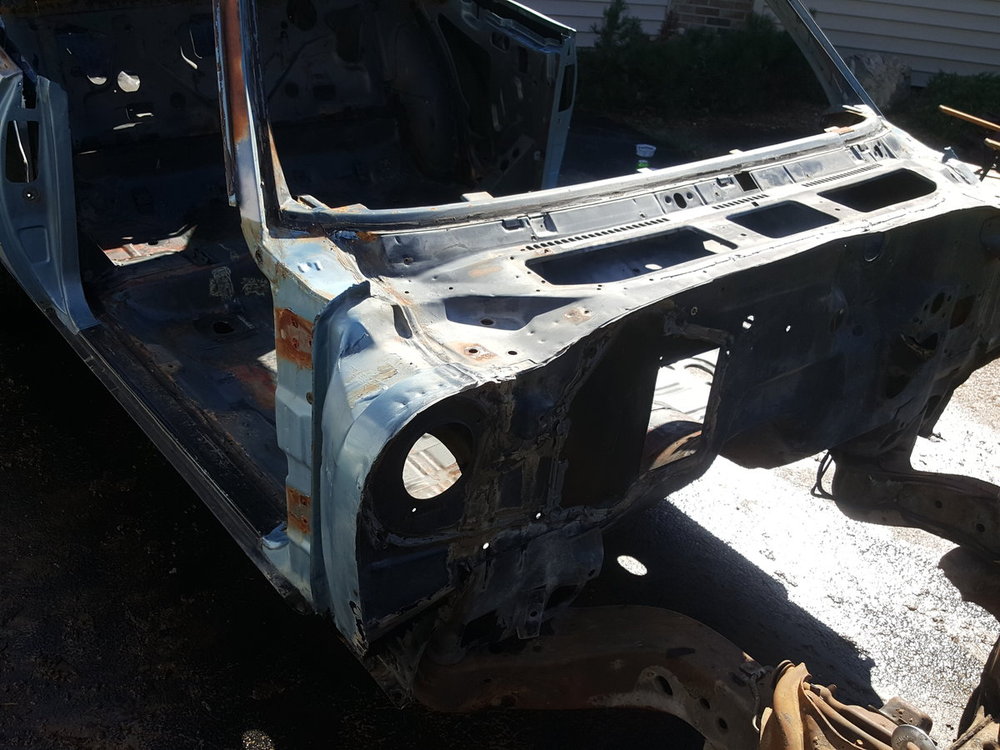
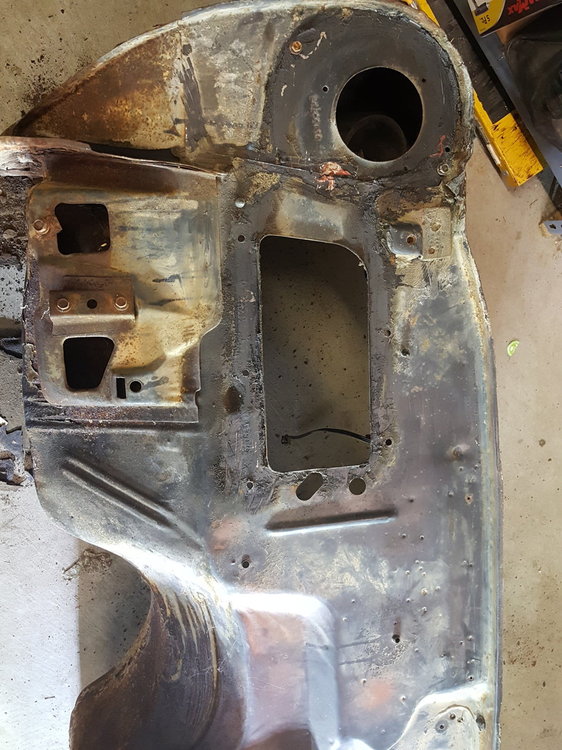
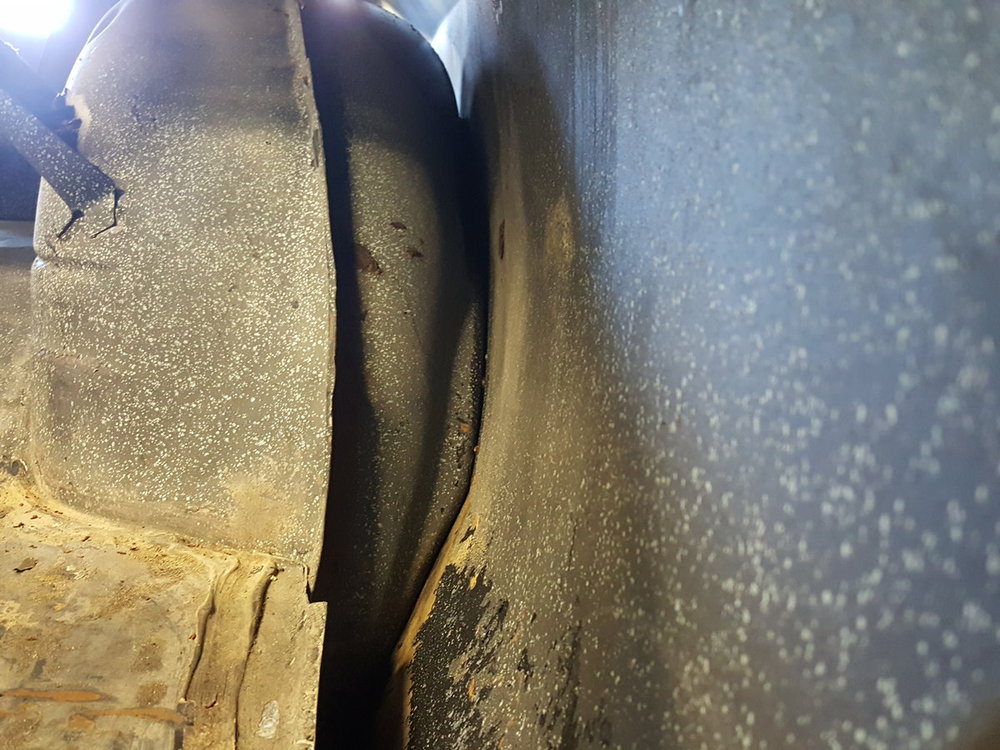
I'm in the process of going the opposite direction on my donor body shell. I was surprised to find out the firewalls and cowl areas of the body shell have differences. After much debate I decided to move the firewalls from my original body to the donor as ac and non-ac have different openings. I also transferred the ducts for the upper cowl vents. The lower cowl vent on the drivers side had a block-off plate on the ac car and a vacuum actuator on the passenger side in place of the hand pull operated flaps on each side of non ac car. I have all of the ac components except the compressor from the donor car if you need anything. Here's the drivers side ac car without the upper cowl duct (drivers side) After adding the duct Non ac firewall Ac firewall Firewall out after drilling out many spot welds
-
What did you do to your Monte Carlo today?
gronlit replied to Canuck's topic in General 70-72 Monte Carlo Forum
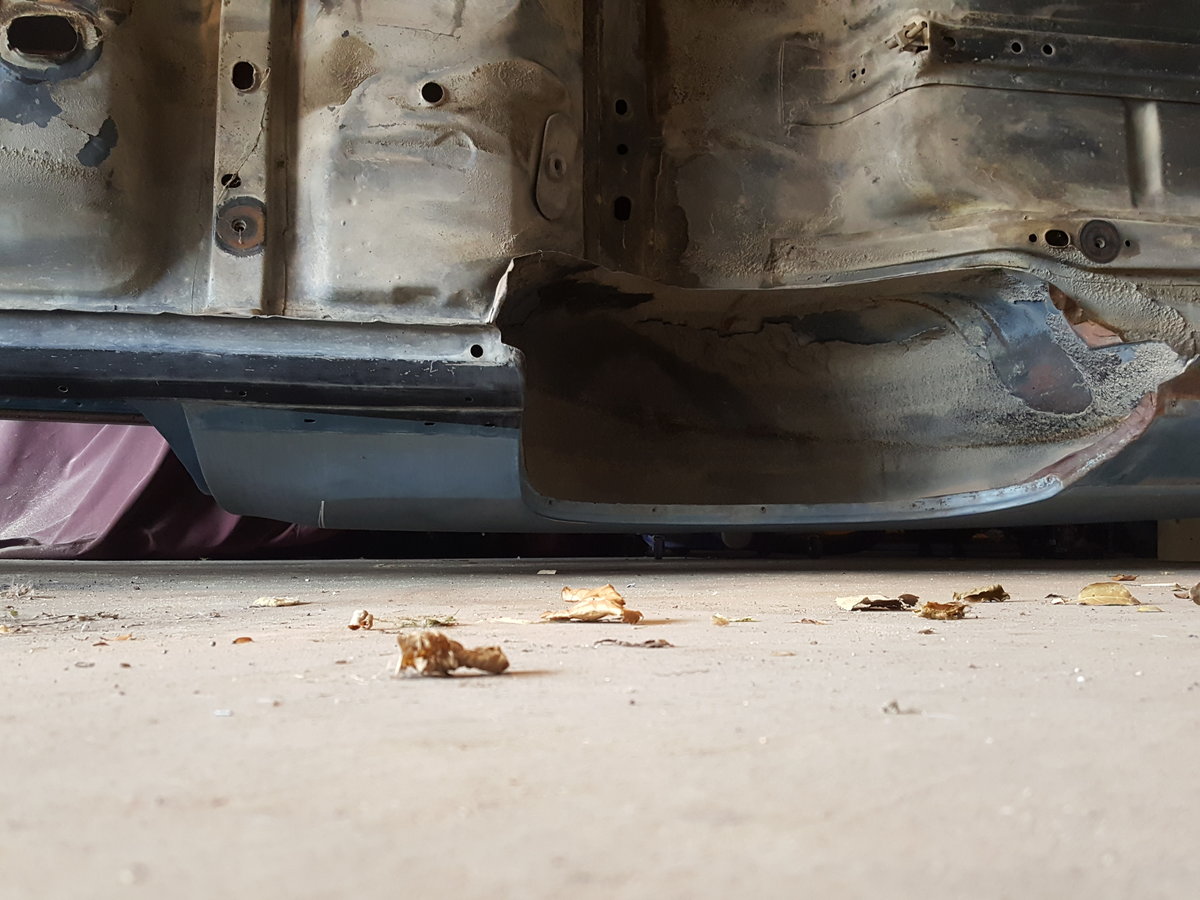
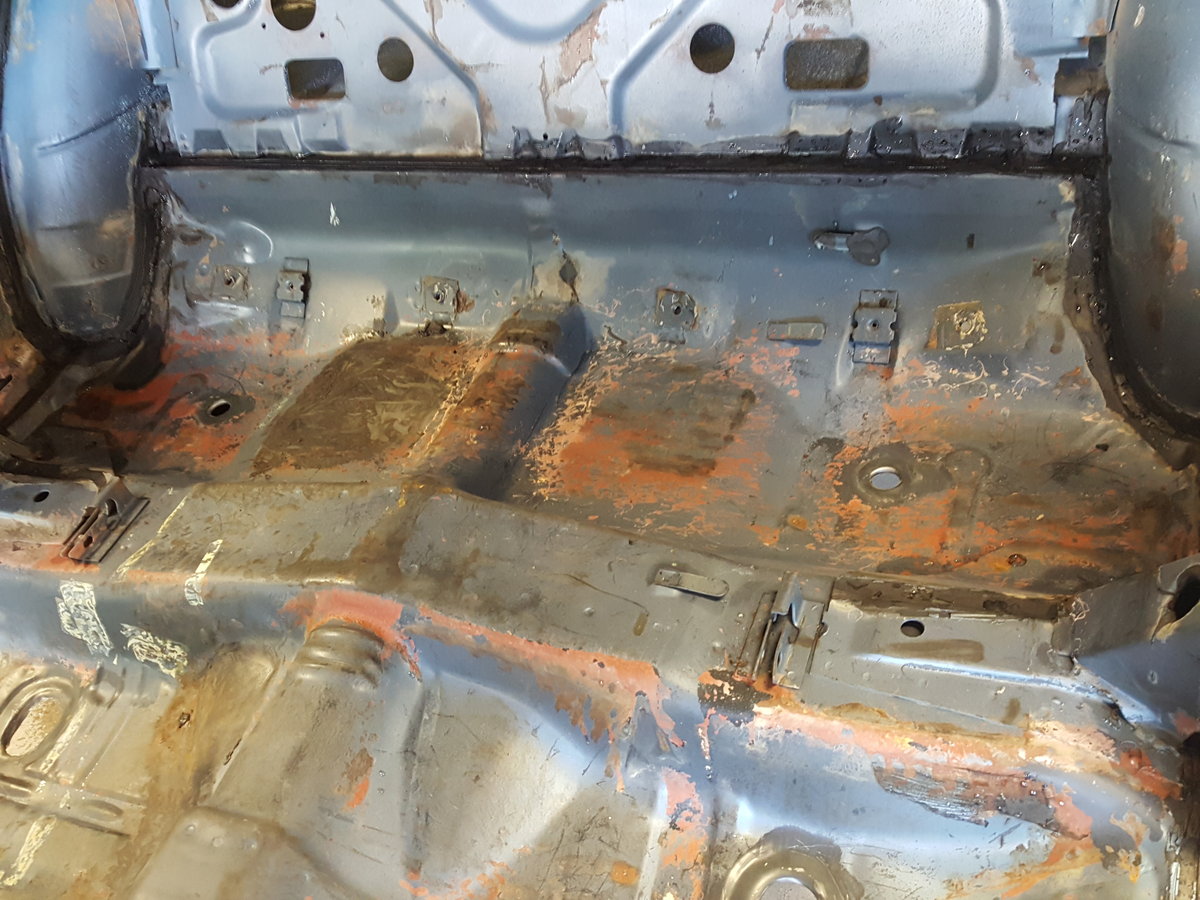
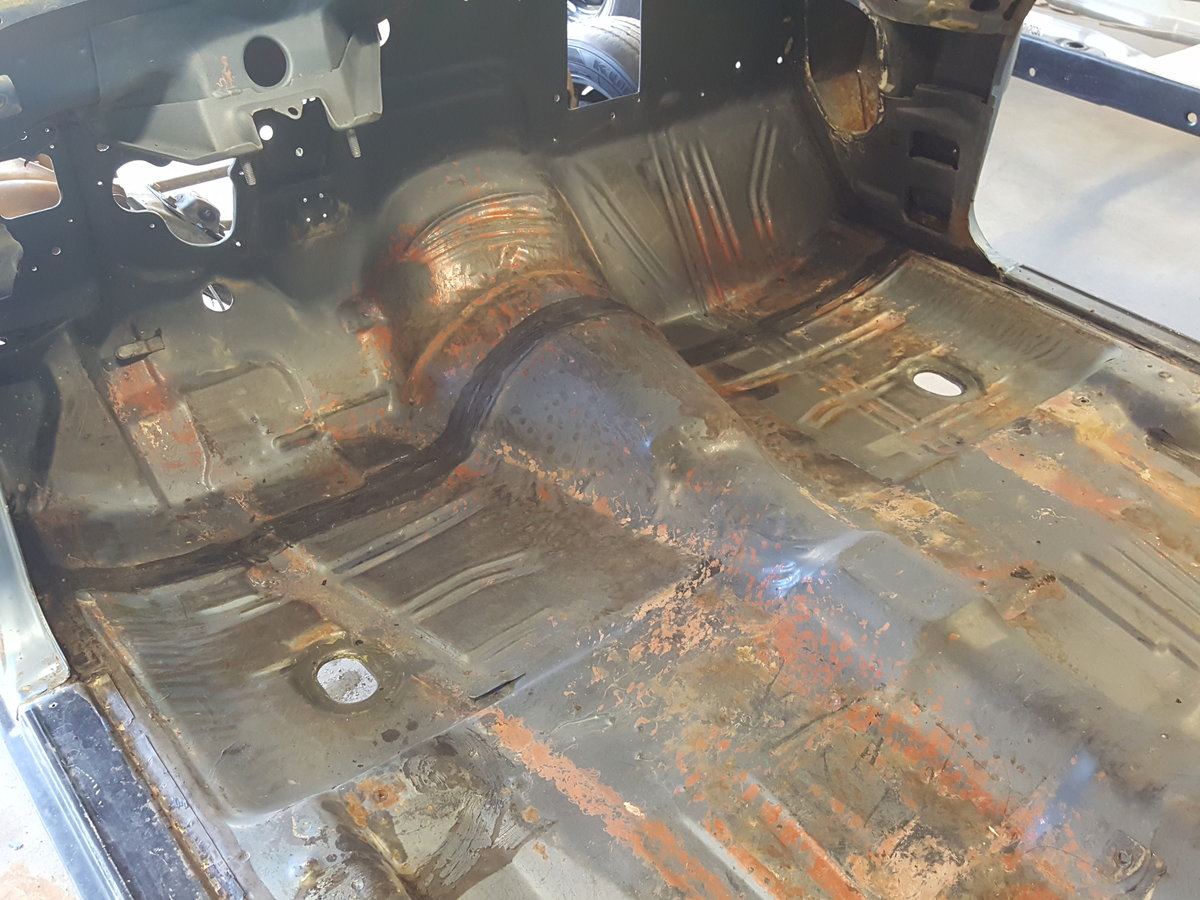
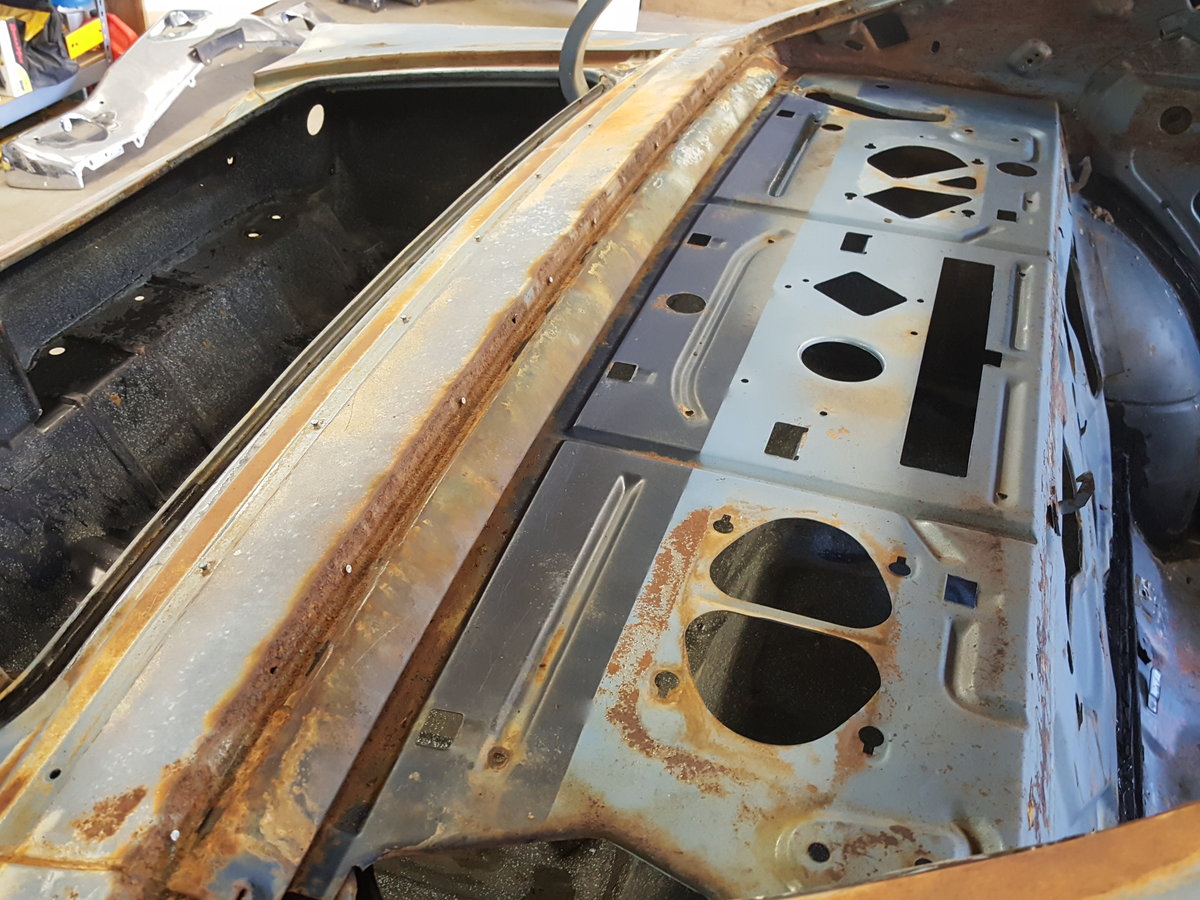
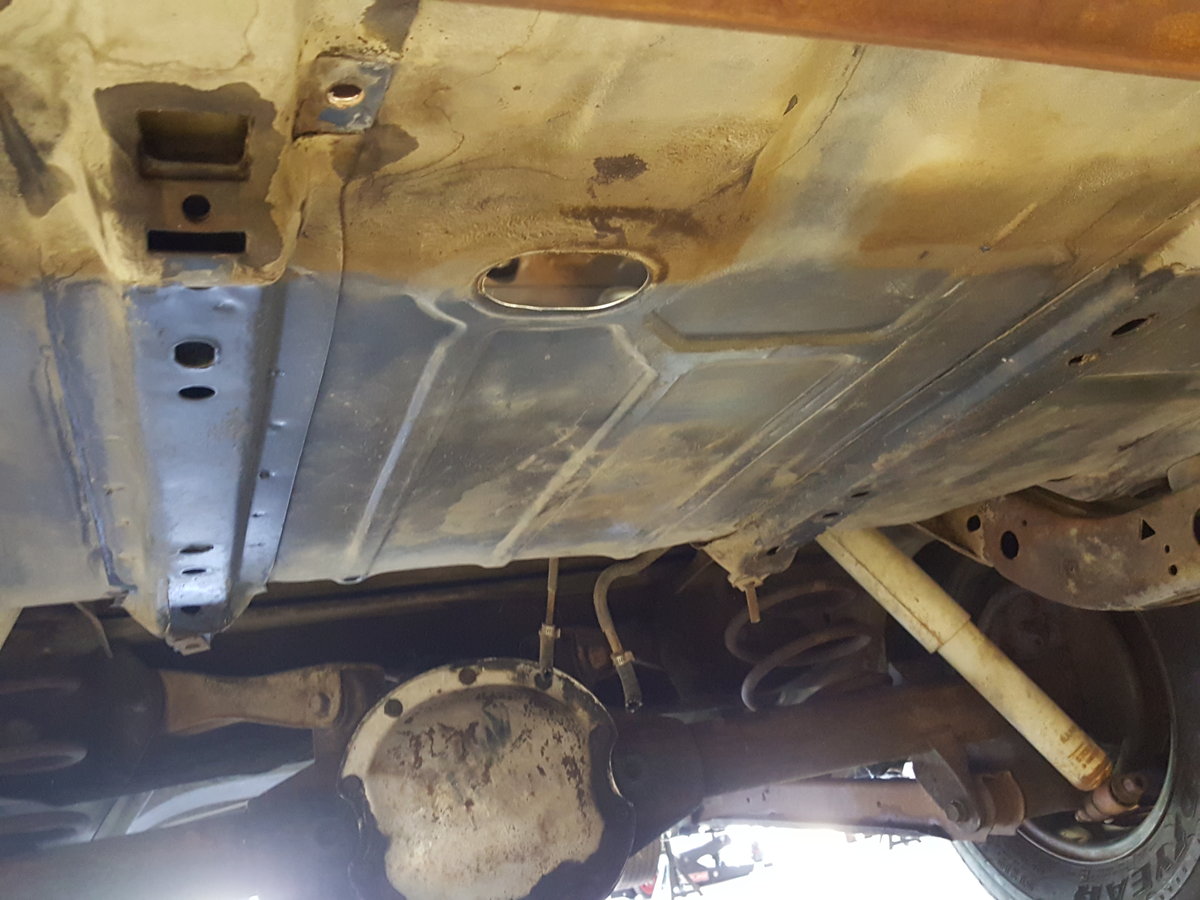
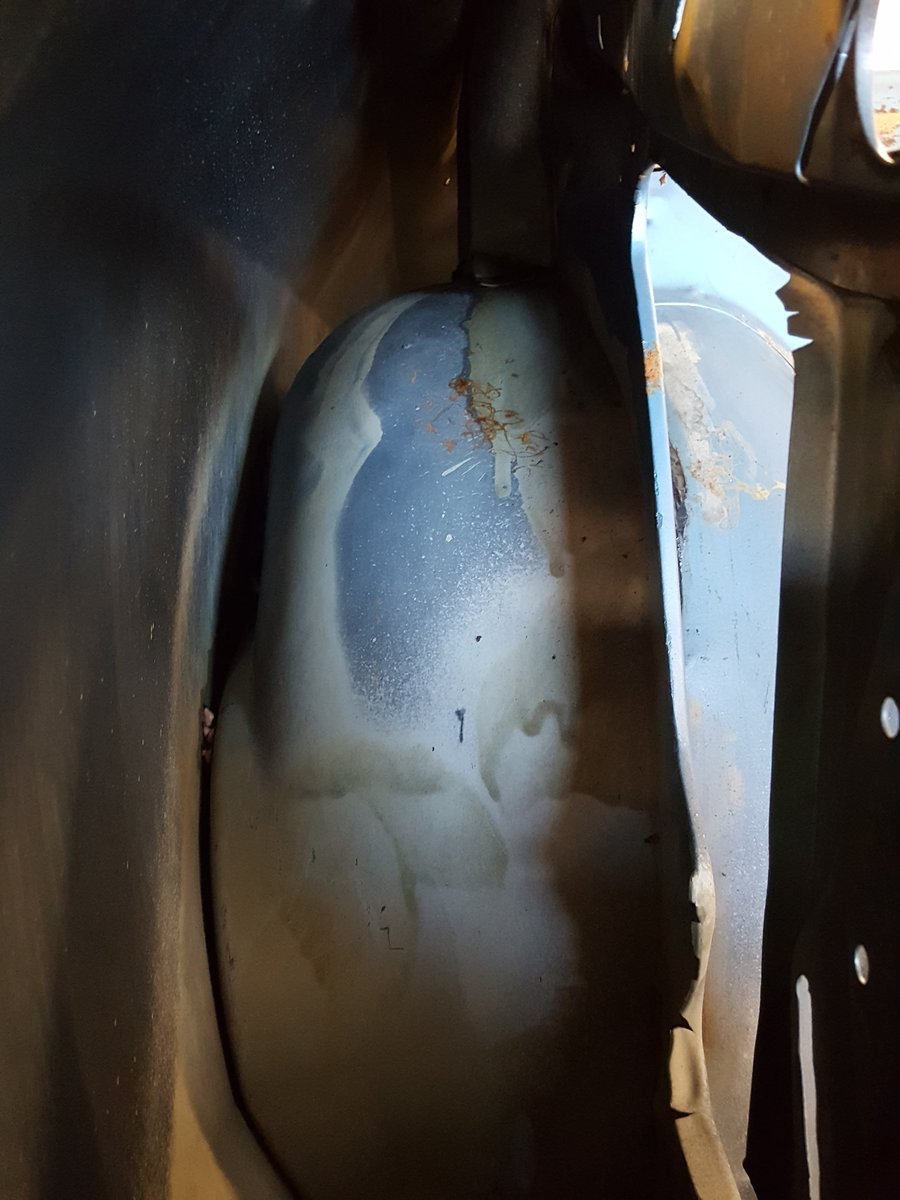
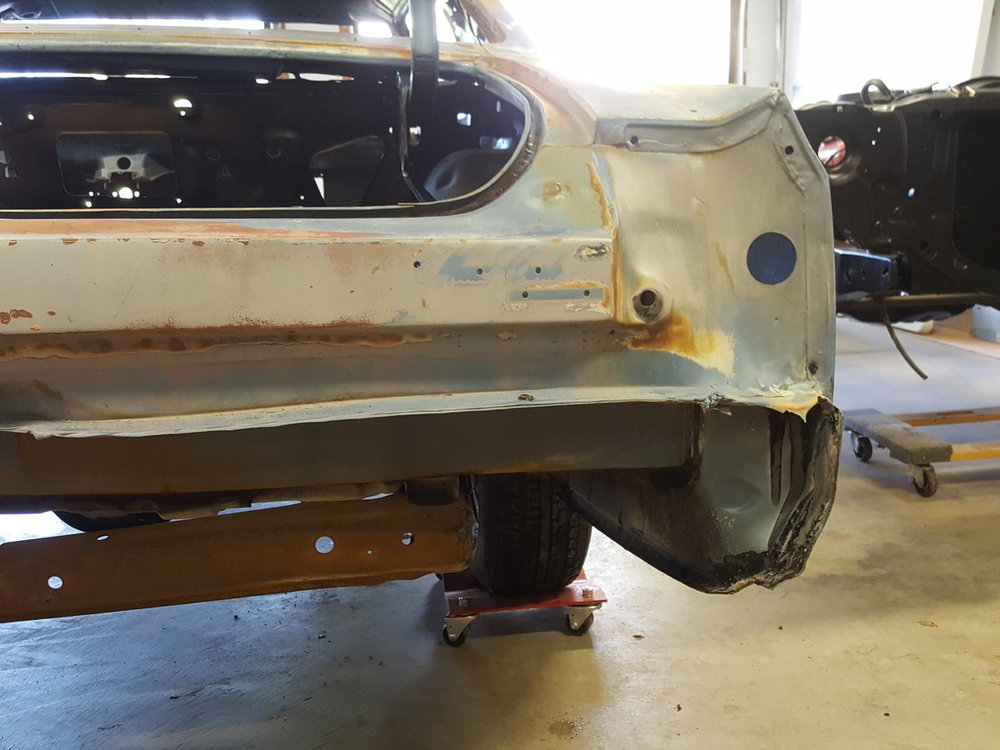
Gave the donor body shell a bath to get ready for body work this fall/winter. I couldn't believe how much sand came out of the rocker panels and all the floor braces and then how much mouse nest debris came out of all the structure around the roof. Looks like the only rust repairs needed are drivers side outer cowl and some of the rear window channel. No rust rot on floors, trunk, or quarter panels .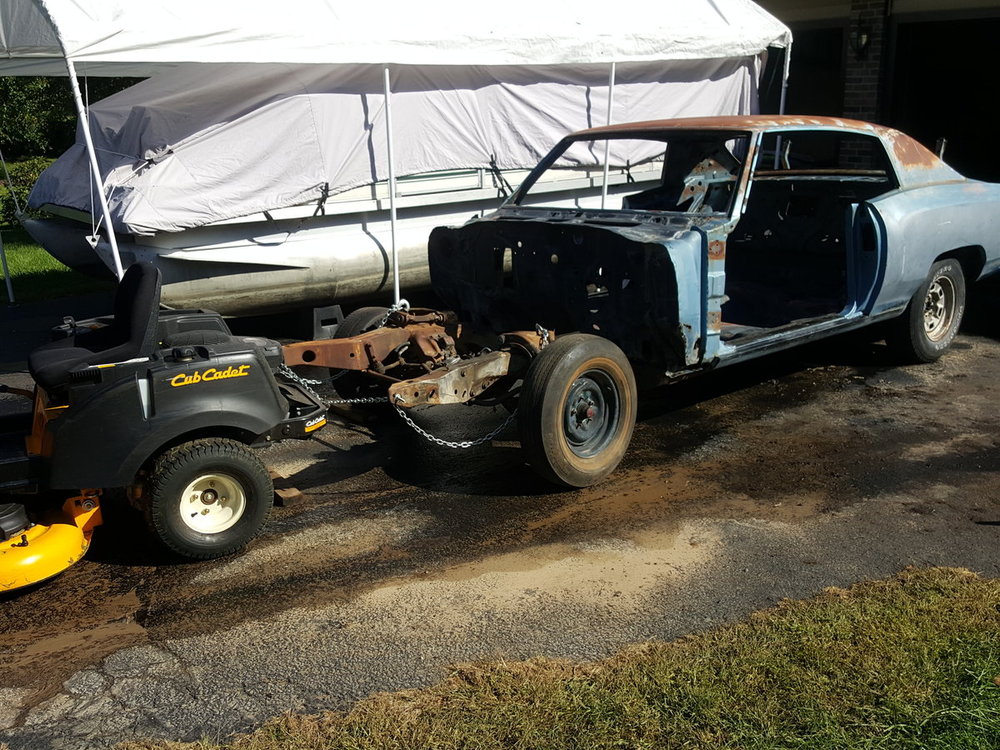


-
My 70ss is stamped by the oil filter
-
Sounds like it might be mine
-
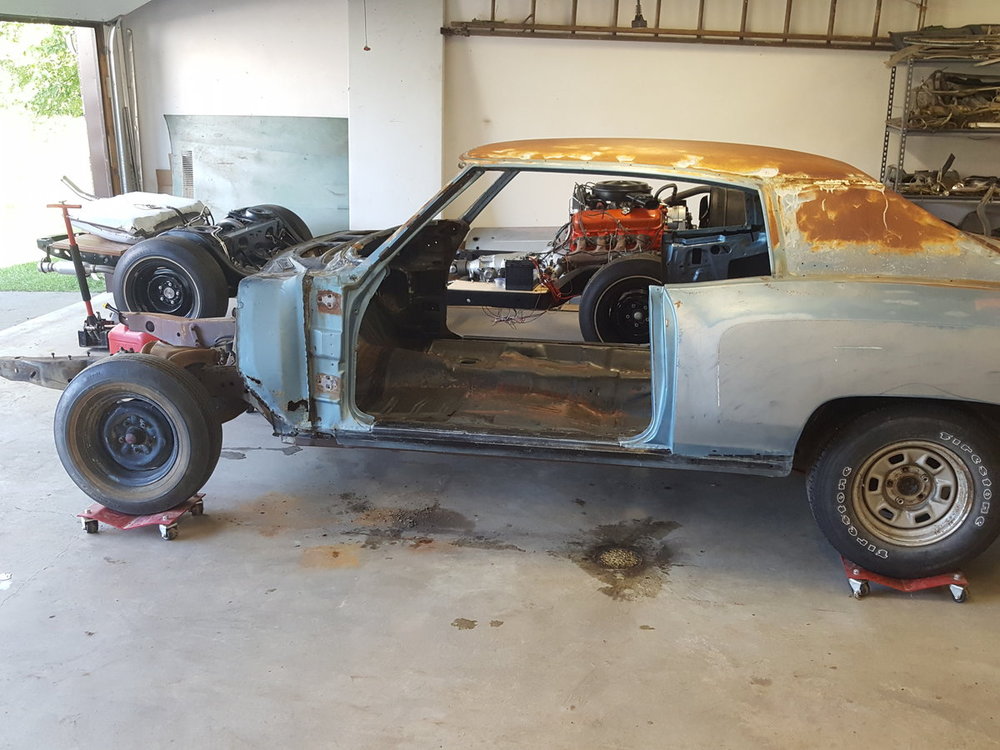
Thanks All!, It was pretty surreal when it started and stayed running. It went much smoother than I anticipated; other than fixing a couple cooling leaks no issues. Now onto the daunting task of body work
-
Been a slow process so far but finally started the engine for the first time today, pretty great to see some work pay off. My dad purchased the car ~30years ago and it wasn't running at that time and he never got around to fixing it up. He gave it to me when i graduated college and I've been slowly working on it for about 10years now. http://youtu.be/N0cEWXefXXE
-
Yep. The small flat washer is the one I'm having trouble with. If i use it on top of the Upper cushion it will pull though the hole. If i use it on the bottom underneath the frame it looks like the od of the washer is the same size as the hole in the frame and will pull through when i try to torque it
-
Thanks. I've checked all of those places but can't find them. Everywhere has the needle idle mixture screws and sinew places have the springs for the idle/fast idle speed screws. Here are pictures of the screws I'm looking for http://www.vetteprojects.com/kstyer/images/qjet/thumbs/sm-vette1_020.jpg http://repairguide.autozone.com/znetrgs/repair_guide_content/en_us/images/0900c152/80/05/5d/a2/large/0900c15280055da2.gif
-
Does anyone know where i can get replacement Idle and Fast idle screws for a 70 quadrajet used on a big block? Or the correct thread/length for these I moved in the middle of rebuilding my carb and it looks like i lost these two screws. I can't find anyone who sells a replacement Thanks
-
I have the following body bushing set from OPGI: https://www.opgi.com/monte-carlo/SB614K/ It comes with mostly large OD washers, but it has a pair of smaller OD flat washers and lock washers i believe are supposed to be used with the core support bushings but i can't figure out how to assembly everything. The smaller flat washers don't look large enough to compress the top bushing half w/o slipping thought. If i use them on the underside of the frame it seems like they will pull through the hole. I can use the large washers on the top and bottom at the core support but then i don't think i'll have enough large washers everywhere else. Anyone know how to set these up?
-
Need advice---can't push frame with TH400 backward
gronlit replied to gronlit's topic in Drivetrain Tech
Thanks, looks like I'll be tearing down the Trans. Once I get it back together, how easy should it be to turn the input and output shafts by hand? -
I've been slowly making progress with the frame-off restoration; this past weekend i was able to get the driveshaft installed among otherthings. When i tried to roll the frame (w/ engine, trans, differential, etc) back into the garage it won't budge going backwards. I can push it forwards although its a little jerky. It acts the same when the gear selector is in all positions out of park. When i removed the driveshaft i was able to push it backwards again just fine. My father and I rebuild the TH400 a couple years ago...and apparently did something wrong that is preventing the transmission from being backdriven. Since the car still isn't drivable the transmission hasn't been operated since the rebuild. The only thing i can think of is it has something to do with the sprag clutch due to the direction dependancy. Anyone have some suggestions of what the cause could be so i know where to start/focus on when i pull the transmission out to investigate. I know the best way to get the poblem fixed would be to have a professional do the rebuild, but as my hobby i prefer to do it myself. Thanks Tim
-
My 70 454 with gauges, no AC has two...one with two prongs, and the otherside has one with a stud and nut You can see them on my cardomain link below, page 6 of 7
-
Yep, that's what I received, minus the brass T....should here back from inline tomorrow whether or not they have the correct line...hoping someone else here had fit the correct line from them so I knew for sure
-
All the pieces were lines, but I believe it is meant for a holly carb
-
All, I ordered a new pump to carb fuel line from inline tube, pn cme7002 " 1970 Carb Line 454, 4bbl Long Fuel Pump". it came as a 3 piece set, but my engine only has a single line that doesn't match any in the three piece set. I called and they said that is what they had listed as the correct line. I sent them some pics of my original line and they're going to see if they can match to any existing lines they have....if not they said they'd want my original line to try and recreate it. So far their customer service has been really good, so I how they can find the right line...I was wondering has anyone else had this issue? I'm guessing its the same line used on an ls5 Chevelle....anyone here bought the correct line from inline, or somewhere else, and know the correct pn?
-
Pm sent
-
Thanks for all the info, i'll stick with the long pump.....Everywhere i looked indicated i should use the short pump, but i wasn't convinced....thanks for the confirmation. I do have the the return line. After some more hunting around online and cleaning off my pump i believe its the original pump, so i'm thinking about taking a shot at rebuilding it. Anyone rebuilt one of these, any tips? Just bought a rebuilt pump with some big dents in the side of the can with the same numbers (...40768) stamped on the housing for $10....figure i can use it to get a new diaphragm and valves and practice the disassembly.....if i fail i'm out $10
-
My 70454SS had a long style fuel pump on it when i started the resto. im looking for a new fuel pump, and everywhere i look indicates that a short style pump is the correct pump for a 70. If i instead look for a 71, then they show the long style pump. Does anyone know the difference between the two styles (besides length)? Is the short style correct for a 70454? Are the short and long style interchangable that the previous owner could have installed the wrong pump (would the line from the carb to the pump still work?) Thanks Tim
-
Machesney Park, just North of Rockford