
jja
-
Posts
64 -
Joined
-
Last visited


-
Am looking to replace the original style black rubber wiper refills only. Not the metal/plastic part that holds the rubber refills. Any idea where to find?
-
Anyone ever install a cup holder in their car? I'm looking for one that can be installed over the hump in the floor just in front of the bench seat. I don't need it to have a storage compartment, just to hold a few bottles or coffee cups. JA
-
thanks folks for the info. Interesting that my 70 stock radio seems to have the white lettering. Wonder if there is anyone who has a 70 radio with the light green letters/numbers.
-
I have a 1970 MC that came with a stock am radio. Because the lettering on the dash is that one year only light green, should the lettering (and station numbers) on the radio face plate also be light green or are they just white? Mine are white. Also, anyone have aa picture of an AM/FM stock Delco radio for that year? Any idea where to get another cruise control transducer device? Am told my old one has the bearings worn out.
-
Thank you everyone. So what is supposed to be attached to the hole in the thermostat housing? My 70 MC came with cruise control from the factory.
-
Recently been updating my engine bay back to original. Was wondering whether anyone else with a 1970 MC (with 4bbl rochestor carb) has the throttle return spring attached? I'm assuming this is the name of the spring (green?) that is supposed to be attached to the small hole of the thermostat housing and attached somewhere else on the carburetor? Appreciate any help on this topic, including pictures.
-
Hey Scott, It is rubber insulated. So where should I attach it to? A bolt on the engine I presume?
-
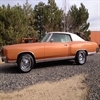
Hey Aaron, Thanks for the pictures you have of your engine bays. I have the car with a radiator cover that has four bolts in the front instead of the one with 3 bolts. In that setup, I have the decal that goes on the passenger side, but no the one on the driver's side. Was your car originally Canadian built ? Mine in California and we are notorious for air pollution control devices and notices. I can't remember if the decal on the driver's side looked like that, but if it looks car generic (regardless of country/state), I look for it online. Any luck with those upper radiator hose straps would be appreciated. Sounds like I'm not the only one.
-
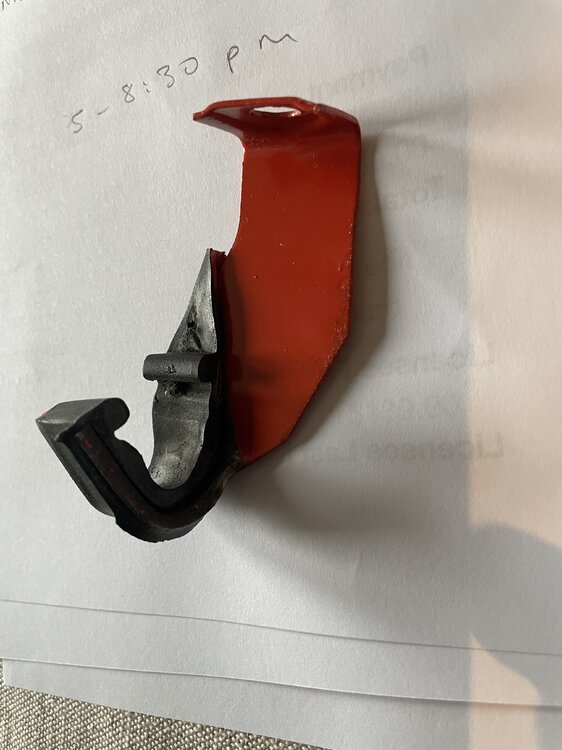
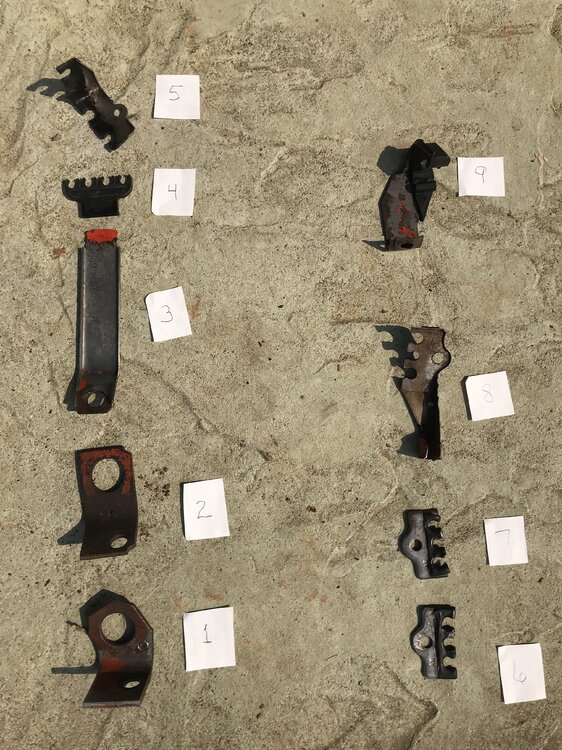
(1) I need any help (pictures preferably) of what stickers are accurate for the radiator panel cover, and where on that top panel they should be affixed? (2) I am trying to find an upper radiator hose strap (GM 3981017) but no luck. I found an earlier thread that mentioned Carl might have a few. No luck in contacting him. Anyone else have a picture of what the original one looks like? (3) I had my small (?) block original 350 engine rebuilt last year and the one piece of the engine that was not reaffixed is the following (see picture). I'm not sure I can figure out where it goes. Does not seem to be a spark plug harness. Maybe a battery cable holder? Anyone know what it is for and which bolt it should be attached to?
-
The factory cruise control (cc) on my 1970 MC was working before I replaced the vacuum hoses. The new vacuum hoses seem a little more rigid, but seem to have the same inside diameter as the old hoses. The darn thing won't engage like before. Switch at blinker has always been a little iffy. Kinda goes in slowly when you press it in. Was going to start with the obvious making sure current is flowing to the appliance. I understand some folks have figured a way to take CC unit apart and clean it ? Any help is appreciated.
-
Hey Mark, I think I understand the way the circuit works but am trying to learn to troubleshoot the problem step by step. As I think I understand what you are saying, I was going to test the voltage (12-13 v) on the wire for the Temp sensor by setting my multimeter to 15 DC V and attaching to that wire one of the meter's clips and affix the other clip end to some ground. With the ignition turned to the on position, the temp gauge needle should move ? (in what direction?). If I do that same step but without the key in ignition, what should the meter read? Should I test the resistance of this same connection setup with the key off? I was also going to test resistance on the temp sensor without taking it out of side of engine by taking off the wire, setting the multimeter to ohms, connecting a clip of the meter to top end of the sensor (where the wire connects) and touch the other clip of the meter to the engine block to get a sense of whether it is bad. It should register resistance if it is still operable, right? I just find it funny that both gauges revert to working fine once I've driven car and engine is at usual operating temp. This is one of the last things on the car that don't work as they should but are kind of important to monitor. May have other questions after I perform each of those steps. I realize it is probably an easy fix but wan t to make sure my fix is not hinky.
-
Just had my 70 MC engine rebuilt (350 5.7). Car came from factory with the gauge package. Before I took it to the rebuild shop the temperature gauge and the fuel level gauge which sits right below the temp gauge on the dash worked fine. Temp gauge would always read zero until needle slowly moved to the right as engine heated up. Can't remember how my fuel gauge read but I think it either went to far left when car was off and moved to the correct reading when car started or always remained at correct gas level reading whether care was on or off. Got the car back from the shop and noticed that the temp gauge was not reading correctly, as it laid to the far right regardless whether car was on or not. Also noticed that the fuel gauge was not reading correctly Funny thing is, they both start to work correctly after I have driven the car for some time (1 hr or so). Also, because I suspect the water temp sensor may be faulty (it was not replaced in rebuild), I went to buy one at NAPA and it seems to be a little different that the one currently affixed. The parts guy stated that the sensor for a car with gauges is slightly different than the sensor for a car with idiot lights. Could this be the problem? I think someone mentioned that the sensor wire from the engine block goes to a relay (?) near the firewall that regulates the signal (?) to the gauge on the dash? Trying to figure out what to fix or replace and trying to determine why the gas gauge problem would be related to the temp gauge. I thought they were independent. As usual, any advice is appreciated.
-
Perfect. Thank you everyone. So the lifting eyes (?) were to help take the engine out of the bay? I guess I should repaint and reinstall if I'm trying to stay original stock even though I won't likely ever lift the engine out again.
-
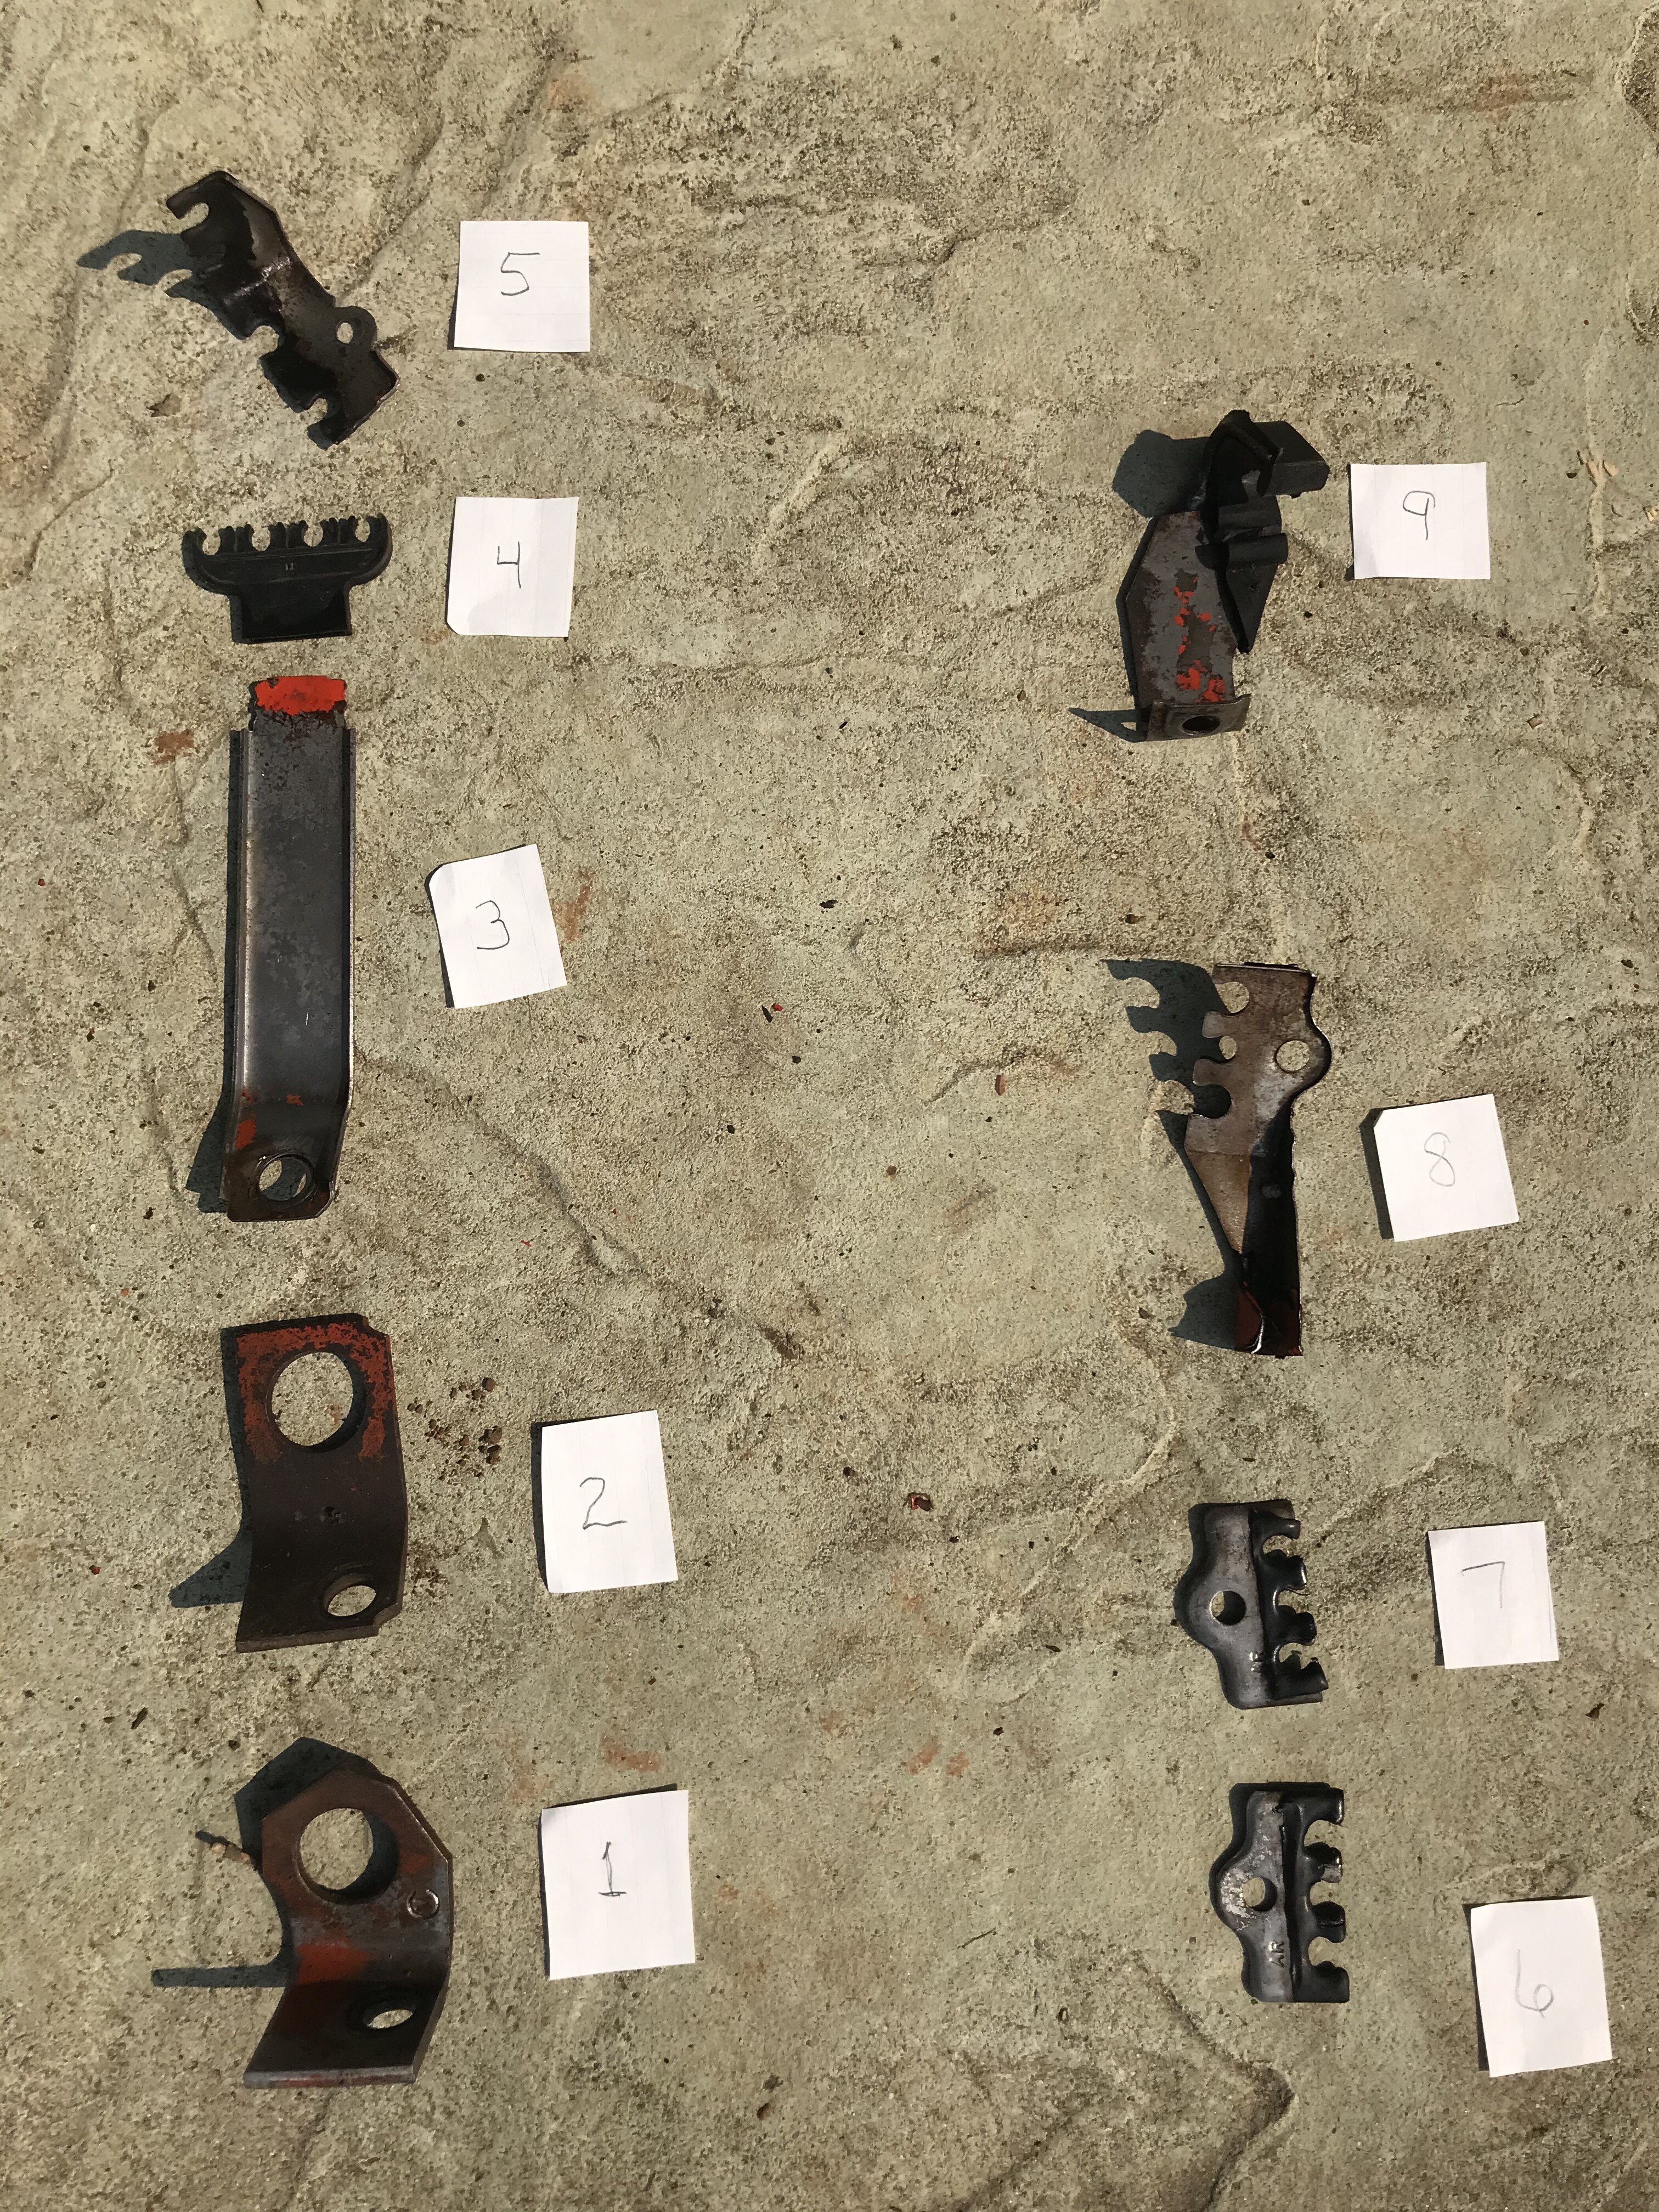
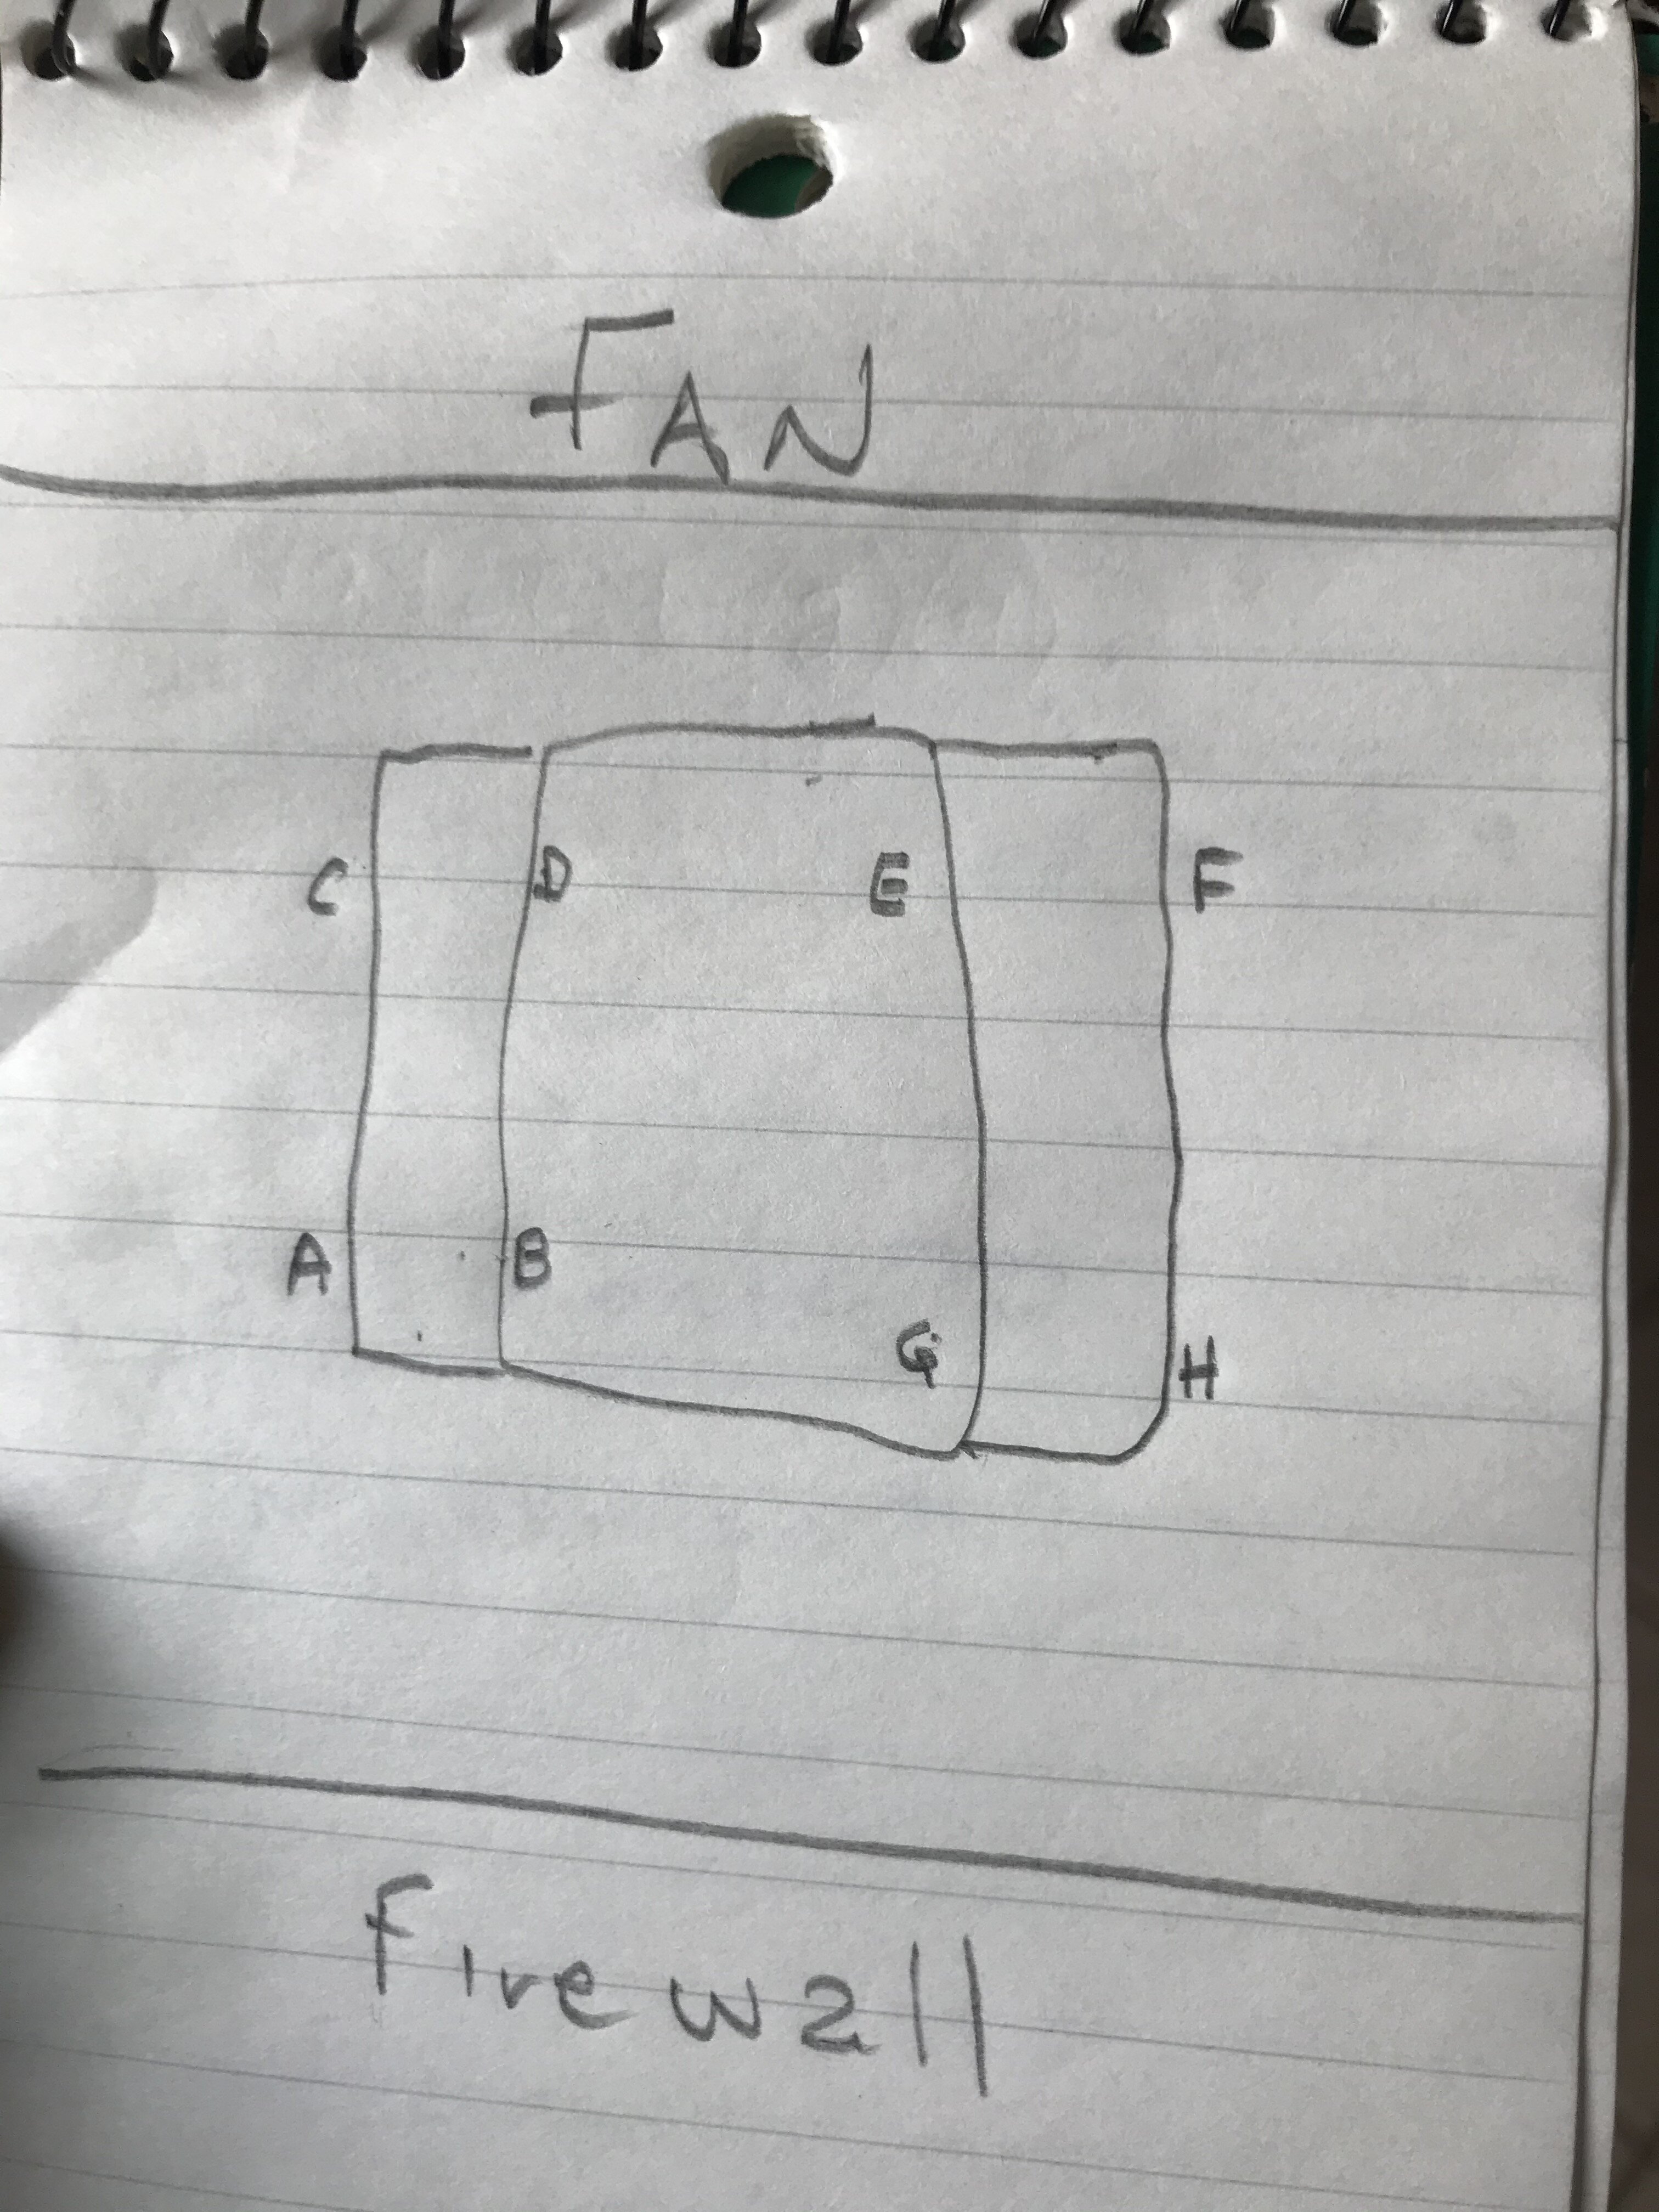
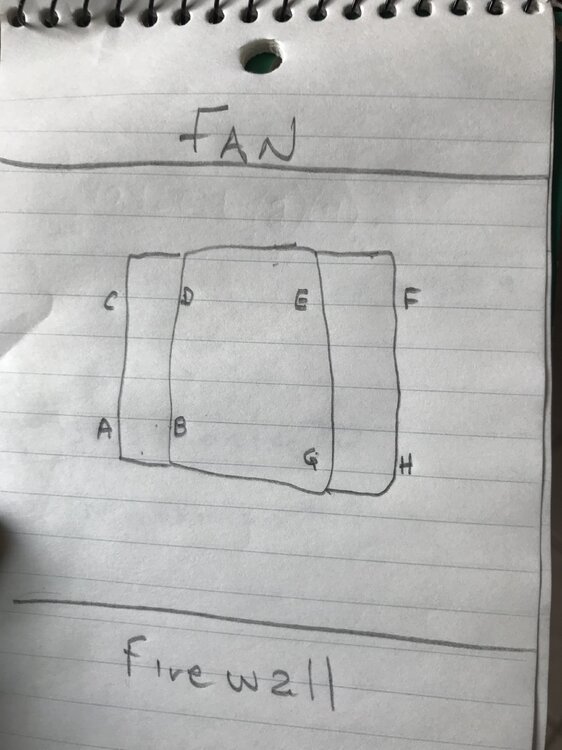
Just had engine rebuilt on my 70 MC and painted the original chevy red. Ended up with a few pieces to reattach to engine to restore to original look. Am hoping some of you folks could help me figure out what piece goes where. Also, some of the looms seem as if they have a black rubber/plastic sheath that attaches to end to protect spark plug wires from damage. Any idea where to get new black plastic/rubber sheaths? I numbered the pieces for reference and know they may all apply to the spark plugs (or other things) but i'm not sure where exactly to attach them. I also assume some of them attach to a valve cover bolt (below/above contoured washer), but not sure where/which ones. I attached a crude engine diagram that has letters to represent the location of the valve cover bolts. I seem to recall that some of these loom pieces would be affixed under the contoured valve cover washer but am not sure. I have only one pix from the engine before it was rebuilt and it seems to show the piece numbered #3 (with #4 affixed to top) located at valve cover position B. Kinda of assuming most of these pieces would be affixed to valve cover locations closest to distributor. Have no clue where pieces #1 or #2 are supposed to be attached. ANY help is appreciated.
-
Hey Canuck, Coated with what ? I've read somewhere of a spray paint that restores the color but i've also heard of powder coating.