colonel
-
Posts
96 -
Joined
-
Last visited
Content Type
Profiles
Articles
Forums
Gallery
Events
Everything posted by colonel
-
Just got an email saying registration open for the meet. We are registered for the meet under the FGMCC category.
-

Cool 1970 Monte Carlo GM display vehicle.
colonel replied to WOES's topic in General 70-72 Monte Carlo Forum
That is totally awesome that it was made to showcase our cars and amazing that it survived and is making it around to car shows again. -
For documentation sake I have finally solved my Hydraboost Issues and have been able to drive the car a couple times now. I had the driveshaft worked on by a different company and they found excess weight on the driveshaft and it had .018" of runout at the front, .022 in the middle and .008 at the back. So the previous company tried to balance it without adjusting the runout. It now has .01, .008, .006 respectively and only 1.5 onunces of weight on it rather the 4-5 ounces. I am sure that would have made a difference all on it's own but I also changed the pinion angle to 2.25 degrees up. That moved the trans to 2.4 degrees down now and the driveshaft has a small angle down towards the pinion. At 60-70 MPH there is no vibration at all where before there was a steady surge of it coming in and out. Really unexpected thing with this is the rear main seal in my new engine is no longer leaking like a siv. There are no 3" puddles under the car anymore overnight. Seems like that was a far worse problem than I believed and am very glad it has been fixed before causing me any further failures or issues.
-
That is a good article. I haven't seen it before. I measured the trans at the edge of the tailshaft housing. You can't measure the shaft as it moves and will obviously alter the readings. You can also measure the balancer pulley unless you suspect it is bent a bit but it should give the same angle. Pinion and driveshaft are measured as they do in the article. Spoke with Global West and they suggested to start with pinion at 0 and see what happens with the vibration. Ideally the angle should be equal but opposite or as you said earlier within 1 degree. The driveshaft will be what ever it is. The other thing to consider is how much applying power would cause the pinion angle to move. Perhaps I should move it to 2 degrees up. At sruising speed it may move up to 2.8 and be equal. With regular rubber bushing it would certainly move more than with the setup I have but don't know how much. Perhaps with rubber bushing keeping it at 0 degrees would be OK That is why I was asking for what the angles are in a more or less factory setup. I could have measured mine before the mods but too late now. Can't make an educated guess without knowing those numbers so hopefully someone can supply them.
-
So you are suggesting I change the pinion angle to 1.8 degrees down to get rid of the vibration? You don't have what to original angles are though?
-
Does anyone out there have what the stock transmission angle and pinion angle are in or cars? Is it different for TH350 and TH400 trans? How about 10 bolt vs 12 bolt. Trying to decide on starting point for changing mine as my 4l60e and 12 bolt pinion are both pointing down about 2.8 degrees. It does not like that after about 60 mph you feel a vibration. Didn't have this vibration problem with this drivetrain in other 70 but do in this one. Trans is as high as it can go and is about 3/8 inch to drivers side of center so changes have to come in pinion. Have global west control arms so no rubber bushing to flex and new coil springs. Driveshaft has new u joints and is rebalanced.
-
I had a look through my reproduced Chassis Manual and found a similar picture but it didn't have the nice additional info of the part numbers and such. Is that picture from an original assembly manual or are those available as reproductions as well? Found an assembly manual and a body manual on amazon.com but have spent the last hour trying to find someone that would ship them to Canada. Will ship to a friend in the US and he will forward it on to me instead. Can find the assembly manual on amazon.ca but it is roughly 4 times the price..............stupid!!!!!!!!!!!!!
-
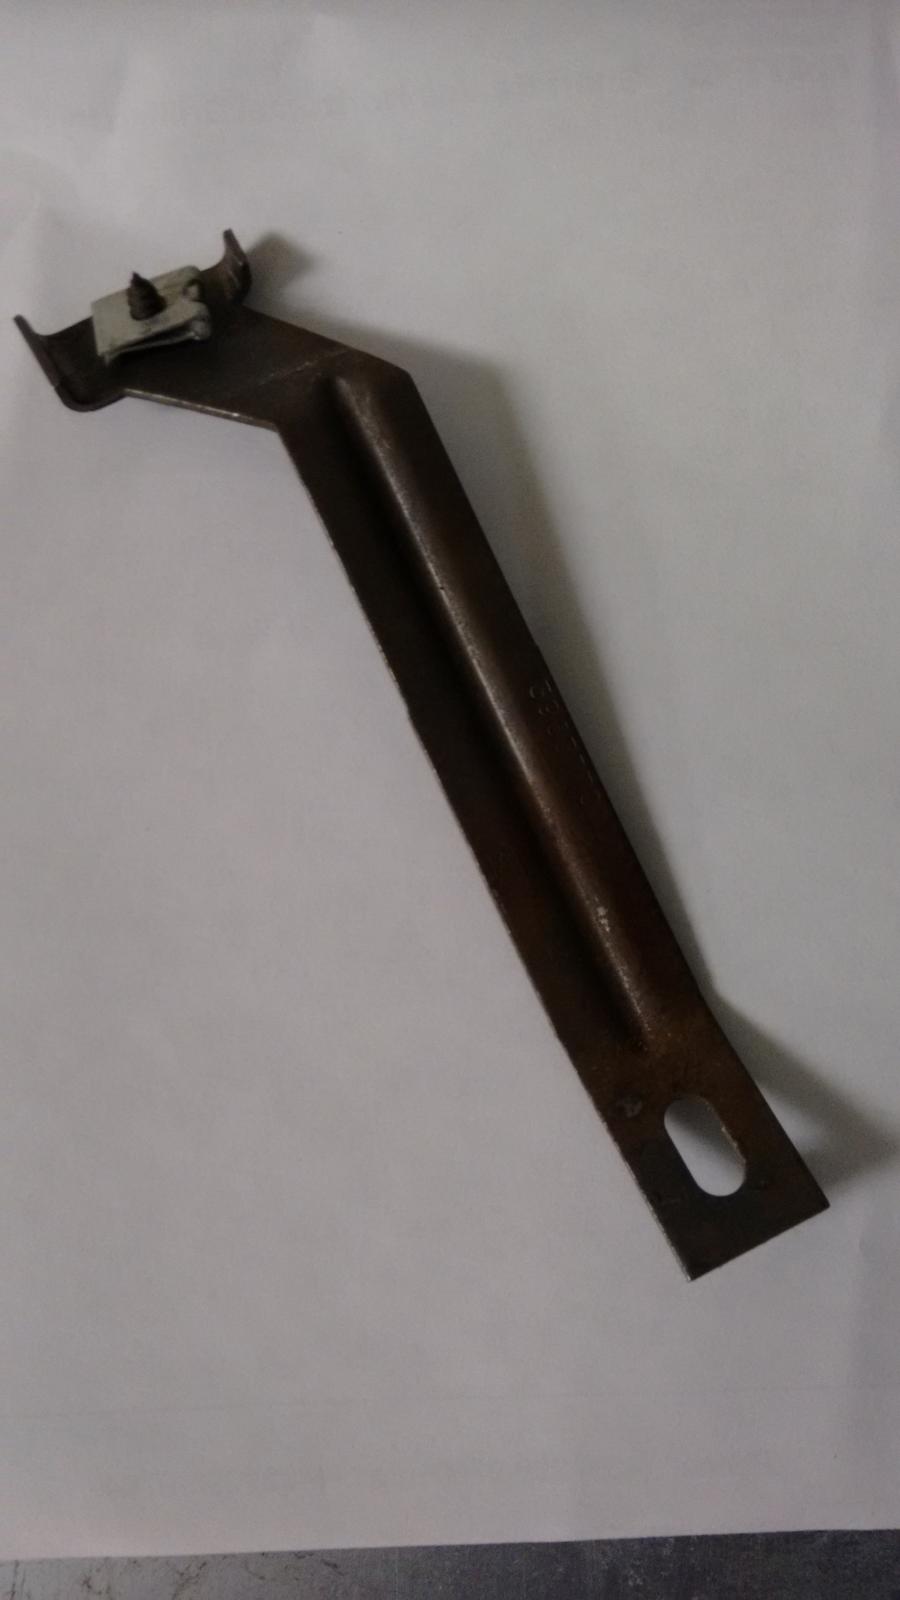
Excellent. My first 70 didn't have that bracket by the time I got it so I was a bit surprised when I found it in my "new" 6 week older 70 I have now. It only has one u-nut so hopefully the other one is still with the heater controls. Thanks again.
-
This came out/fell out with my dash when I took it out last year and I can't see any place for it now that I am putting it back in this year. It doesn't even seem to have wear marks around the holes. Maybe it was for AC but this car never had it so it just got dropped in behind the dash and forgotten 3963770 is the GM part # on it but I don't find anything when I search it so perhaps someone has a parts book that lists it and we can find out where it is supposed to go if anywhere on my car. Kevin
-
Thanks. I looked through The Parts Place catalogue and couldn't find them so thought they were going to be tough to find but a google search shows they were used well beyond the First Gen Monte's. Found them on ss396 site and for $3 I was willing to order them until they wanted $46, also in US money for shipping with UPS. That only further confirmed my loathing of Ultra Poor Shipping (UPS) so will find elsewhere. Not sure how the u joints will move the tail shaft closer to center but so long as it is not a concern I will carry on. Thanks
-
Are the little clips that go on the radiator support that hold up the fan shroud still available?? I let the 2 I had go with the other car thinking there were 2 with new one but I can only find 1 on the fan shroud and need 2 for the modified set up I am installing. Also, put engine and trans in a different Monte and the trans tail shaft is about 3/8 inch off center towards the drivers side. Big deal or not? Still lots of clearance for driveshaft.
-
I have found my windshield wiper doesn't seem to work either. I have confirmed switch was OK and just removed motor and tried powering up with spare battery and hear clicks but get no movement. I didn't understand the Black and Yellow was the ground but either way I try it it doesn't turn. Are these worth trying to fix?? Mine has oil on the bottom of the motor casing so I suspect bearing failure. Shop manual seems to think you can tear into it but that was back when parts for it were available. Where is the best to get a replacement for a 1970?
-
Wilwood Brake Kits and 15" Rally Wheels
colonel replied to colonel's topic in Brakes and Suspension Tech
Hello Scott: I was just going to keep my SSBC rear disc setup as the rally wheels fit fine over that setup. My desire was to get a front setup that still uses a 12 inch rotor but uses the stock spindle to give my car a bit of extra ride height. What setup are you using on the front that fits over the rally wheels??? My current SSBC setup uses an AFX aluminum spindle with C5 hubs bolted in them which drops the ride height 7/8 of an inch and I need that space to keep my headers from grinding away. Otherwise I have to change headers and go with a 1 3/4 primary rather than the 1 7/8 ones I have now. Likely won't make a performance diff anyway. -
Wilwood Brake Kits and 15" Rally Wheels
colonel replied to colonel's topic in Brakes and Suspension Tech
Well that isn't a problem I was thinking I was going to have but I can see what you mean about the hub differences. It does appear those Wilwood hubs are not made for stock steel wheels but rather after market wheels which doesn't work with what I want to do. Bugger!!!! I would consider a rally wheel genuine if it has some stamping marks around the valve stem that indicate where and when it was made among other things. That info can be found on the net and help you identify specifics about it. Many thanks for your efforts in finding the answer to my question and uncovering an unknown issue. Thanks again, Kevin -
Wilwood Brake Kits and 15" Rally Wheels
colonel replied to colonel's topic in Brakes and Suspension Tech
Ryan, If you are willing to take the time to do a check with genuine 15x7 GM Rally Wheels to verify clearances that would be of great help. I would like to go with the 6 piston setup but that caliper is larger than the other 7675 kit that I think would have clearance. I am reluctant to take the chance on the 6 piston kit not clearing when I am sure the 7675 kit will clear based on rough measurements I have made. I have used an after market rally wheel in the past but they are not made the same. I had to get rid of them as they did not fit over the SSBC rear disc setup that does clear the GM Rally Wheels I use now so hopefully you will find that the GM wheels have more clearance than the other ones you have checked. Thanks, Kevin -
Just trying to find anyone that has used either of these Wilwood kits with 15" GM Rally Wheels. http://www.wilwood.com/Images/BrakeKits/WCD_Drawings/WCD_dwg-Large/ds448_wcd-lg.jpg http://www.wilwood.com/Images/BrakeKits/WCD_Drawings/WCD_dwg-Large/ds617_wcd-lg.jpg Wilwood gives you great drawings but without comparative info on the inside of the GM Rally Wheel it doesn't do you much good. I did ask Wilwood if they test fit them or even designed them with that wheel in mind and they said they don't test any wheels and they were not designed with that wheel in mind. Not a lot of help. Maybe I should phone again and see if I get a different person that has the info I need. The SSBC kit I have on there now was specifically designed to fit in that wheel so I thought that would have been a consideration given those kits are for GM A body cars, specifically Monte Carlo's. They commonly came with them so it seemed logical to me. Anyway if someone has some info with regards to this please let me know as I am interested in switching to one of these kits and using the stock disc brake spindle to help increase my ride height among other benefits.
-
I think the fact the factory order sheet says 4 speed and the bill of sale says turbo hydramatic is cool as obviously something changed. Either the buyer changed their mind or GM put in the TH350 and they accepted it. Maybe they didn't have any clutches that day so if it was going to go out the door on its own power it was getting an auto or who knows???? It would be neat to get a letter from the original owner as to what happened to kind of complete the story. I know it isn't a Canadian built car but as stated above any cars built in Canada or imported by GM Canada had their info kept so you can get the "build sheet" the factory assembled the car to and you can see what it has now vs what it was supposed to have. The fact we can get a "build sheet" for a Flint made car simply because it came to Canada is a great benefit to documenting the cars made there. The fact that the build sheet says TH350 likely means Mr. Newman changed his mind on the trans choice he made after ordering it but we would never know if the factory order sheet didn't exist. As for nothing special about it I thought a bucket/console car that had a 300 hp small block would have been somewhat uncommon. Only about 1/3 of all 70 Monte's had that engine, 17% had buckets, 8% had the 8 track and a little over 10% had power windows. There are no numbers here that say how common that lighting option UF1 is or how many got the LH remote mirror D33 so I thought there was some unique stuff assembled in this car. All those combined I think there is some uncommon qualities to the car all be it not SS rare but uncommon. Unfortunately having 2 cars to drive is not in the "car"ds and my desire is to have a "Modern Monte". Old car class and appeal with modern electronics, power, safety and handling. If I was extremely careful I could blend them in this car but have to keep the mechanical stuff I take off so it can be reassembled again if the next owner desired it. Paint and top can be changed back to original anytime but you only have the original mechanical once so can't sell it off due to documentation this car has. Doing this is more work than I desired but I would really like the final results having the cool documentation side and the owner installed options side. I would actually like to take the finished product and do the same tests that were done in the 70's and show how much the braking, acceleration, mileage etc. has been improved by the owner installed options. I am leaning towards trying to find the perfect combination of new owner that will restore it and getting my money back out of it. If it isn't worth what I paid for it to someone else then I will proceed with my plan and go to great lengths to be as true as I can to the original. Have not decided just yet though. Thanks for your input.
-
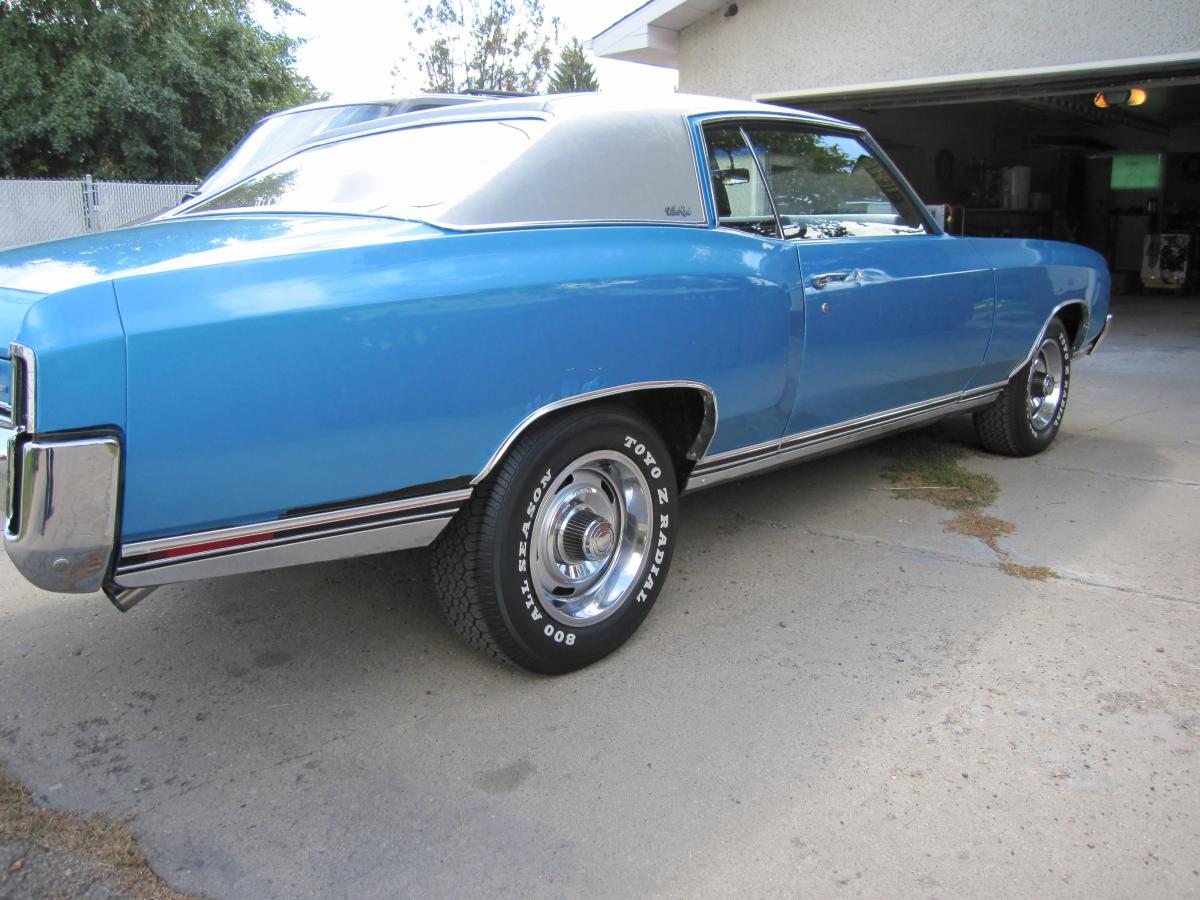
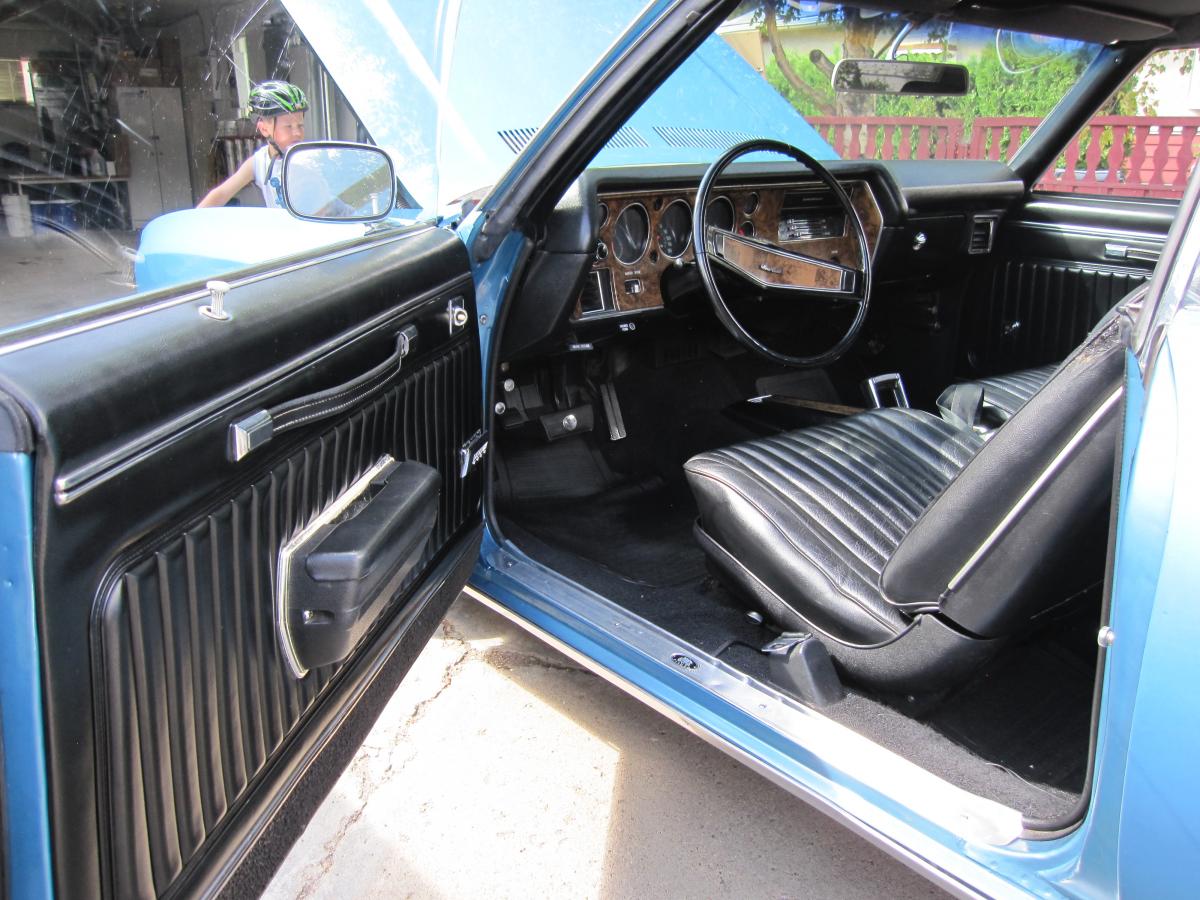
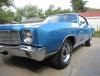
Found this car recently and had planned to swap out my drive train and suspension and finally have my Blue Monte. Would have liked to have found a Halo car and will settle for black bucket/console interior now that I know they never made a blue one but the more I looked into the car the more I get concerned it is too original to mess with and has documents I think rarely stay in contact with the car. The body has been messed with and is no longer the Fathom Blue with Dark Blue Top as the info shows it was but I do like the, I believe it is, Mulsanne Blue and Grey Top combo. The paint and body has some dings scratches and rust on RR wheel well but that can be put back to the original combo just as easily keeping it this way but either way it isn't the original undisturbed body of the car. My plan would replace everything under the hood and body from the rad to the gas tank and all the suspension. I guess the diff could be saved if I transplanted all the guts from mine into it but was not planning on doing more than swapping the diffs and then the original is gone for good. I have verified that the engine and diff are date code correct for this car but have not found any partial VIN stamps anywhere on this drivetrain as yet. Anyway have a look at the pics (more avail if you want them), options and supporting documents and let me know what you think about me making changes or should this car get to someone that wants to restore it??? Factory Order.pdf Bill of Sale.pdf BOS Receipt.pdf CDN Build Sheet Pg1.pdf CDN Build Sheet Pg2.pdf


-
I found this on the General Motors Heritage Site that allows you to find a complete book of your model year of car options and info. Very neat stuff here. https://gmheritagecenter.com/gm-heritage-archive/vehicle-information-kits.html Just scroll down to Monte Carlo, click on it and then select your year. I downloaded all 3 and saved them on my puter for later perusal. It did let me know I will never find strato buckets in blue so my desire for a blue interior is limited to bench seats.
-
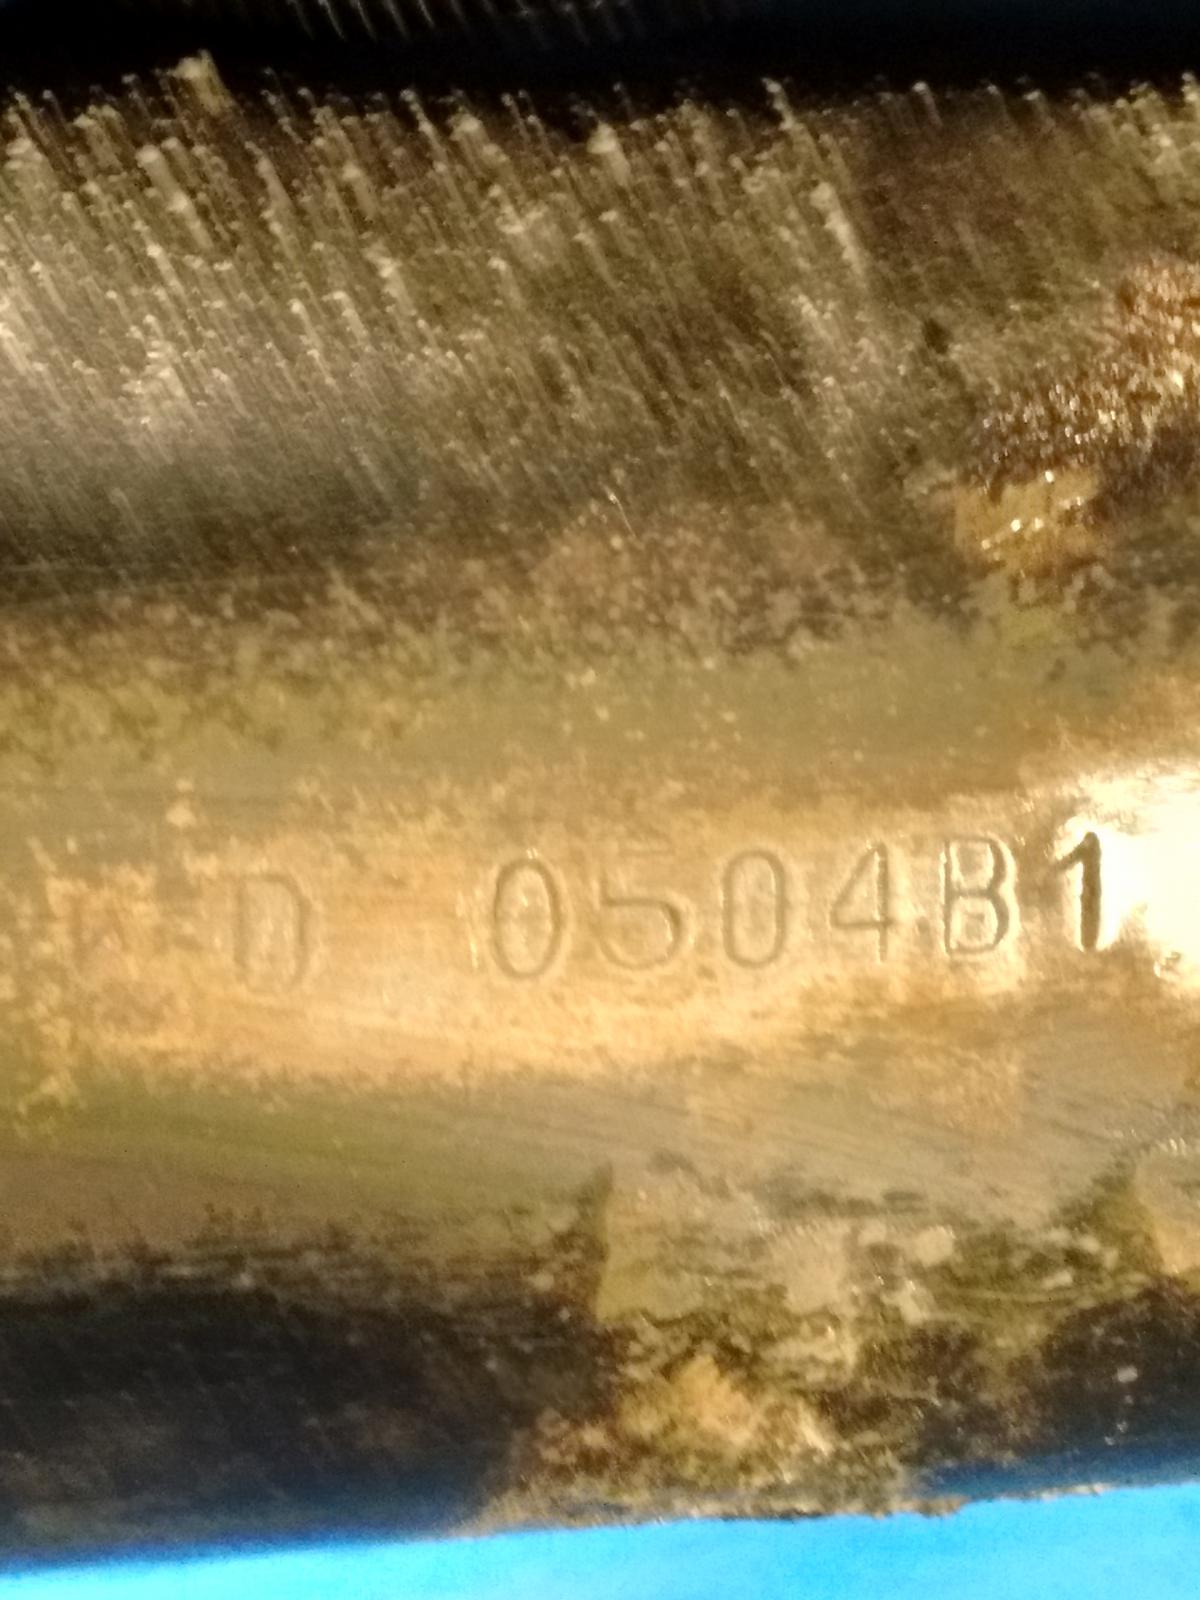
OK. Spent some time searching online and found this website that has all the codes I think one could ask for and it includes engine suffix codes. http://www.chevy-camaro.com/chevy-camaro-engine-codes.asp My code is V0509CRE not 5 like I thought as the last 3 are letters Looking at them the first one is the manufacturing plant and V which is Flint which matches the VIN and the diff code that I got off the FGMCC tech area. So that makes sense. 0509 is the date which is close to the 0504 from the diff so that makes sense. CRE from the above websites listing shows a 1970 350-300 4 bbl th 350 which is what is in the car so I think I can rest assured it is the original engine but will still have another look for the partial vin stamping to see if I can verifiy this is the one made for this car. Perhaps the folks that make this website work can add the info from the camaro site to the tech section on our site to ease decoding in the future. ***I could have sworn I posted this last night but obviously didn't but looks like I found some of what you guys just mentioned.*** ***Thanks for the help.*** ***Good to know what that 1 means at the end of the diff numbers***
-
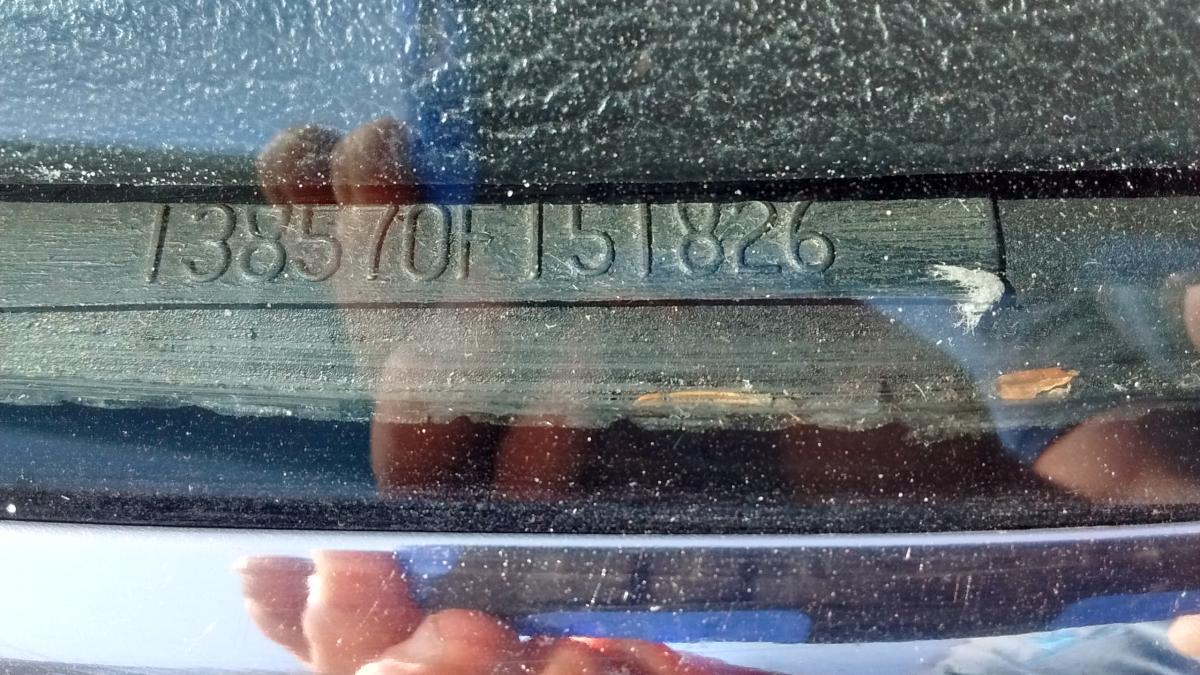
This is as good as it gets for the engine pic and there does not seem to be any other #'s on that same ledge. Can't see anything in the oil filter area either except I noticed a couple oil pan bolts missing but the holes seem filled in???? Any hints as to where the numbers might be in the oil filter area? Last # still looks like a 5 to me. Tech info does not have anything to decode this so is it possible it is the original engine or do I need the other #'s that are part of the vin to tell? The trans does not seem to have that flat area the other thread in this section shows where to look. Is it a diff spot for TH350 and TH400?? This one is a TH350 and I don't see anything that could have the numbers on it. Found these numbers on the diff in the right spot though. I didn't notice while under the car but it looks like there is a KD not just a D so will recheck that but the last digit is a 1 and I gather there should be nothing there if it isn't a posi which it isn't but there is a 1 so what does that mean???

-
It looks like the last number is a 5 as well. It is a small block. I will try and get a better picture with clearer focus on those numbers and try to have a look by the oil filter. Will I need to remove the oil filter to see those #'s if they are there? I will also try and get the trans ones so long as I am under there.
-
From what I can figure the numbers I find here tell me this engine is not the original one for this car. Can anyone confirm this for me from just these pictures?


-
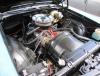
Sam: Head bolts are brand new ARP head bolts and as you can see they are fine. The block is just missing the threads now. I am certain they were not cross threaded as I put them in by hand and the long ones especially have a long way to go through the head to help align them. So this makes 3 holes on the drivers side that have stripped out in total now. The first time I got the hole coil of threads in one piece these ones are broken up a bit but still held then let loose later. Darren: I can't see there being an issue with the heads not having holes there but do recall diff blocks having diff size holes and the rad cap is only a 7 psi cap so there is never much pressure in the system. Even if you wiped off the coolant and checked the next day without the engine running it was back so it seeps out somehow. Don't get it but something isn't right in the same area of the block on each side. That engine would be an option but the cost might be out of reach. As it is I have now paid for 2.5 engines and still don't have one that works. I also just bought another 70 monte to put my drive train and suspension in but am concerned it is a bit too well optioned to alter from its very stock state. It has a light in the rear view mirror, remote driver side mirror, washer fluid light, black bucket/console interior and a 12 bolt non posi rear end. Still has all the stock wiring too. The body has been messed with but should take less work to fix then my green car or at least that is the hope. Still unsure I should tear into it though.
-
I am finally getting around to looking into the coolant leak problem on my 496 with Brodix aluminum heads that I noticed at the western meet this year. Noticed the leak on the drivers side right at bolt 10 in the torquing sequence. Originally thought it was part of the oil leak problem I found at the meet as well but realized it was coolant. The head gasket is wet in that area only and sometimes it leaks enough to run down block but not much. I initially just did a random check of the head bolts I could reach and found # 15 had stripped out so I then removed the headers and valve train and went through and rechecked all the head bolts and found # 10 had actually stripped out the threads as well. # 6 did the same thing when I was reassembling it just before the meet as I had to get the valve train redone due to mistakenly setting them up into a bind situation. # 6 was successfully repaired as it made it to the 70lb/ft mark that time just like all the other head bolts but now 2 more holes have had the same fate. # 10 of course it right at the point of the leak so figured I found the problem but figured I would take the pass side apart and check it as well. I had never checked that side for a leak in that spot but did find the same problem with coolant soaking the head gasket at the # 11 bolt area so took everything apart on that side and checked the head bolts there. I found none stripped out and only 3 with a slight movement to reach the 70lb/ft mark again so there went my theory about the bolt simply being loose enough to create the leak on the drivers side. So looking for advice on #1 what you think the leak problem may be as it is in the same spot on the block which rules out the head or the gasket as switching them to the other side would put the leak at the front. Perhaps the thread sealant didn't work in exactly the same bolt hole on each side of the block but that seems a bit unlikely although this engine seems to be all about the unlikely. #2 is the thread stripping issue. Do I rip the D/S head off and repair the other 2 holes that have stripped out and hope no more occur?? Or with the combined leak and thread problem just consider this block done and put all the parts in a new block?? A bit of other info. The #6 cylinder has been scored with something as well. Looks like the same type of thing that scored #1 cyl when this block was a 489. I think something went wrong with the rings during installation but never did find out what caused the scoring in #1 the first time around so am only guessing at likely causes.