

pab3589
-
Posts
79 -
Joined
-
Last visited
-
Days Won
7
Content Type
Profiles
Articles
Forums
Gallery
Events
Everything posted by pab3589
-
71 MC. Just purchased. Have Questions.
pab3589 replied to GraniteGuy88's topic in General 70-72 Monte Carlo Forum
William, I think you stole that thing ! Great deal...I know everyone has commented on the 1970 front bumper , BUT, so you are aware as I saw you mention in an earlier post, that you read " that the 1971 should have square headlights. " Not sure if you mispoke , but just so you dont think the whole front end is frankensteined its just the front bumper. The 1970 front bumper has the round directional, which you have now, the 1971 has a rectangle directional. Not a big deal right now change some day if you wish , but priority, get it running and driving and enjoy it, make changes as you go .. good luck look forward to see it progress . -
LOL I know that area well my old stomping grounds. I know others that live on Paisley as well, also bought my first race car from a family on Paisley. My mother actually worked at Cottrell Paper Company on Rock city Rd right by the falls.
-
Interesting and the world gets smaller .. I was born in Syracuse moved to Ballston Spa at about age 2 , graduated from High school there in 88 left there about 2009 but my family is still there in he house we grew up in.
-
Yes you don't want to risk that, if there is anything I can do from here at a safe distance supplies or anything , disinfect and safely deliver etc.. let me know. She is literally around the corner.
-
When it gets closer will definitely be in touch would love to check it out.
-
LOL I didn't realize that was yours .. right over my head.. we stay down off of Lake Arrowhead Rd .. May be in touch to stop by and see it .
-
Hi Rick, Welcome.. solid looking car, love the pics and keep up the good work!
-
Latham is a decent area really like it here .I was hoping to make the Syracuse Nationals, did they cancel that yet ?
-
Thanks All, Will be down there in September I think is when we go this year , love it down there .. I hope I see it Roaming the streets would like to check it out, we stay in North Myrtle. It really is gratifying ..At times you think it will never get done looking at all the totes of parts hoping to remember where they go, LOL .. I think I may put the passenger side mirror on just used to using them nowadays. Bump guards not sold on yet I will be there if we have it ,,really looking forward to it ..
-
Thanks all.. really looking forward to Carlisle now that I am ready .
-
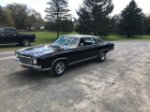
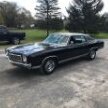
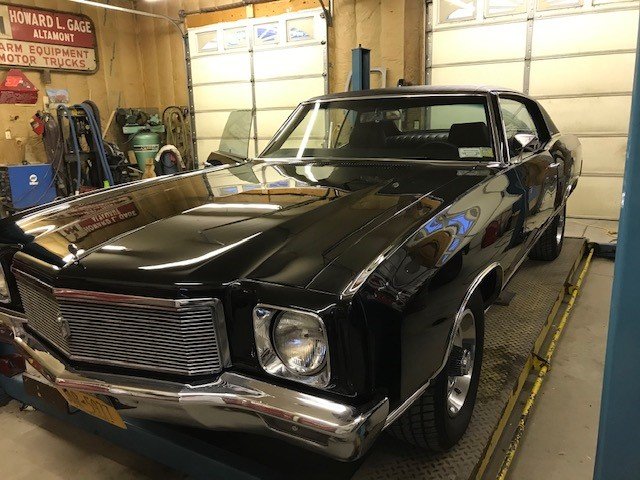
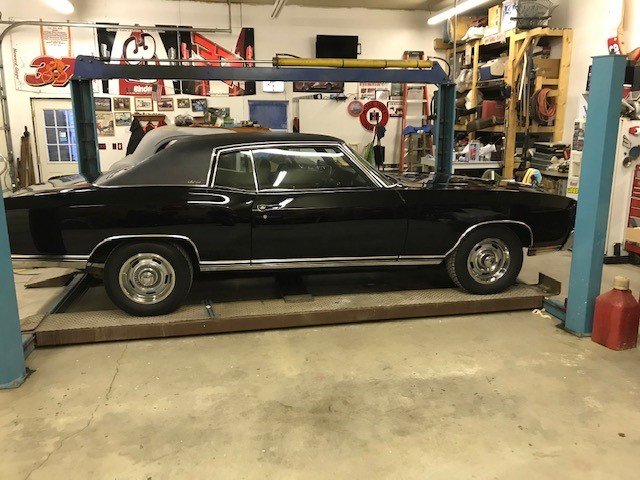
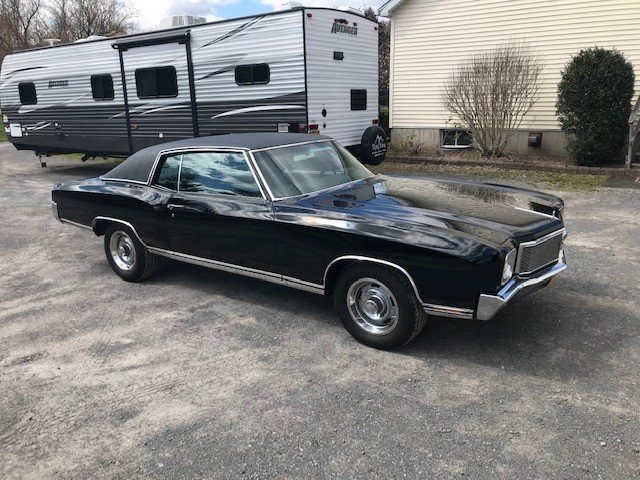
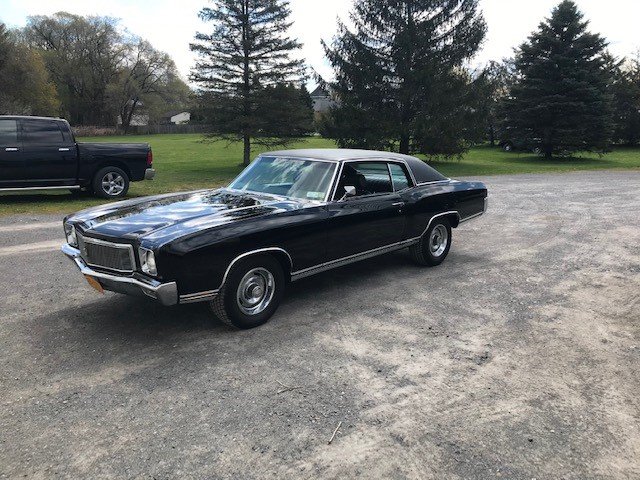
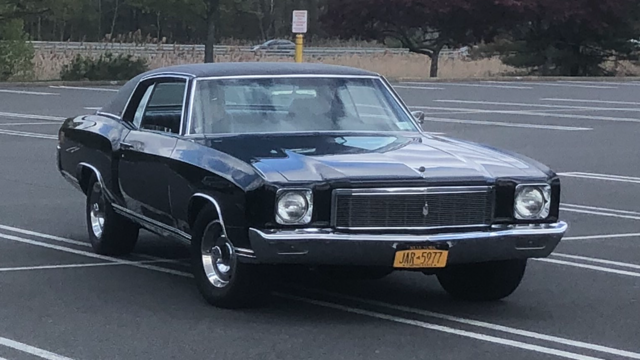
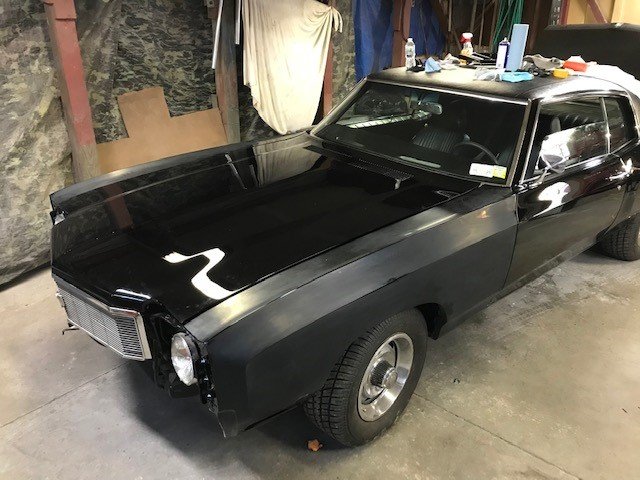
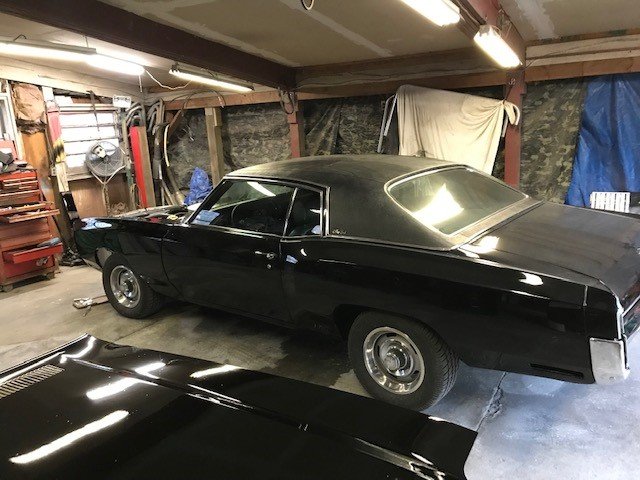
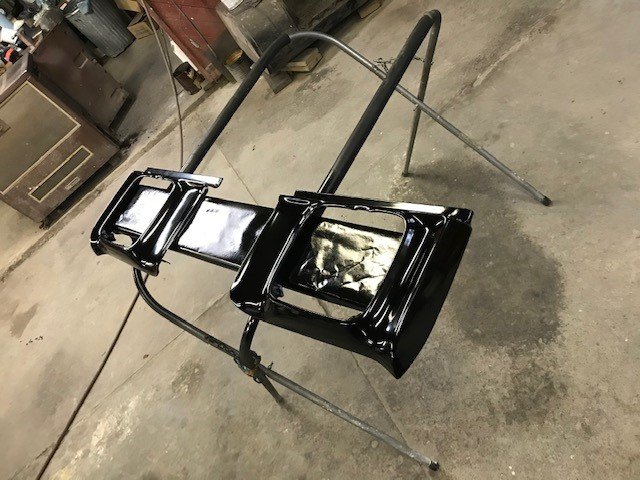
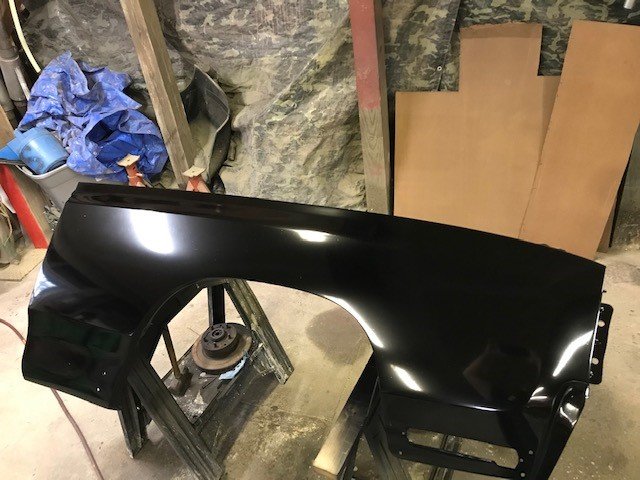
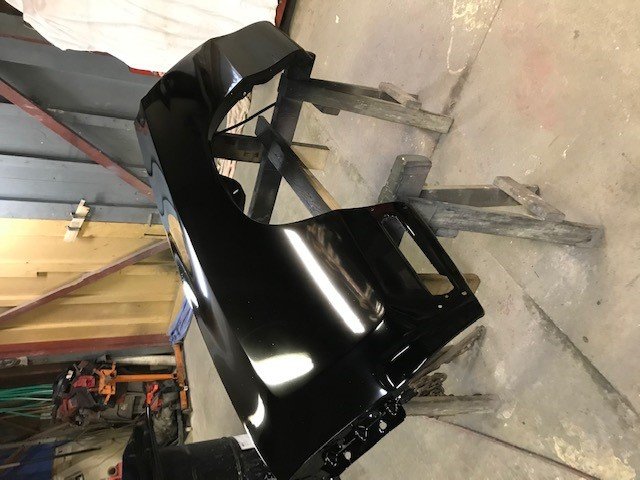
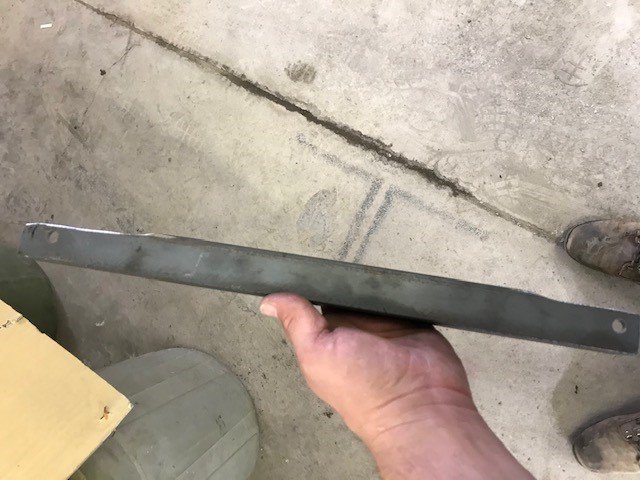
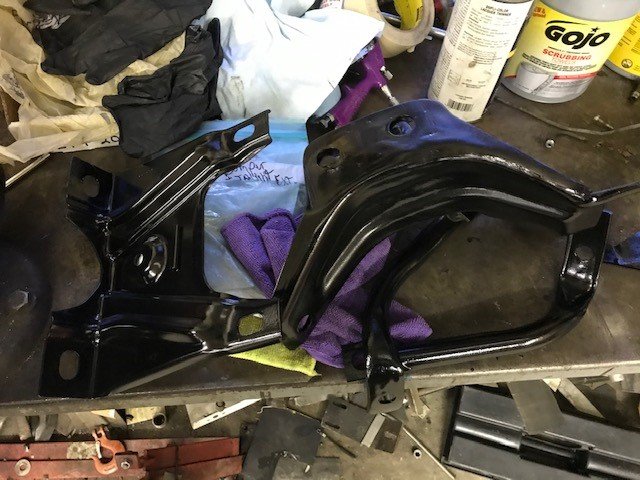
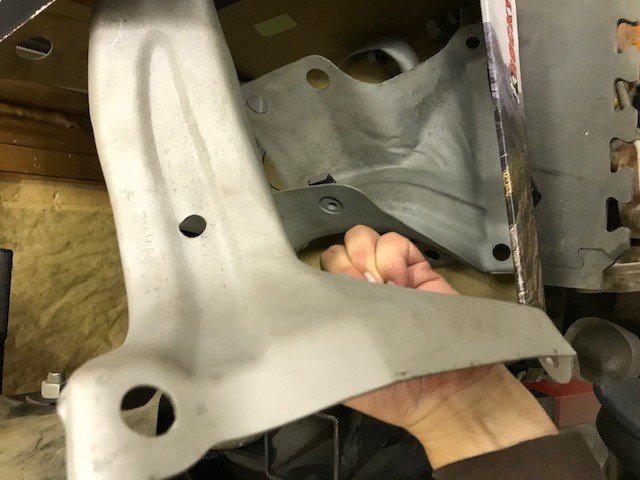
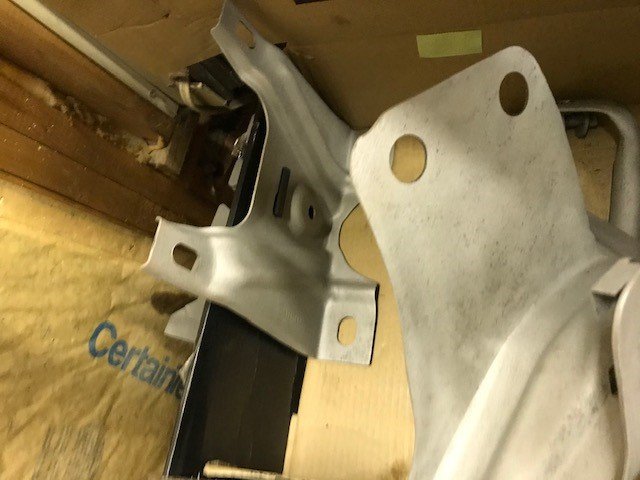
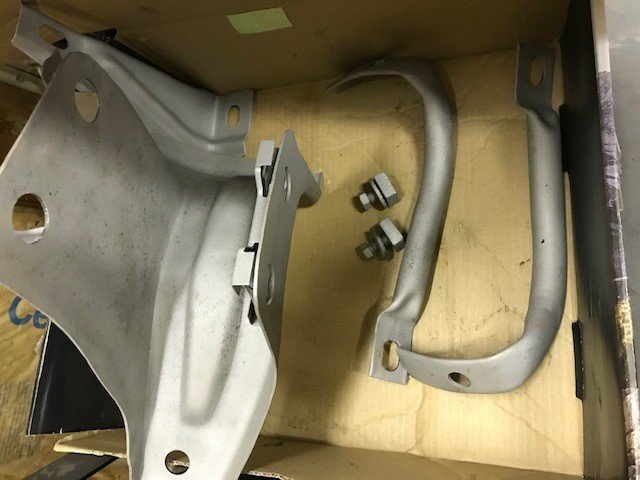
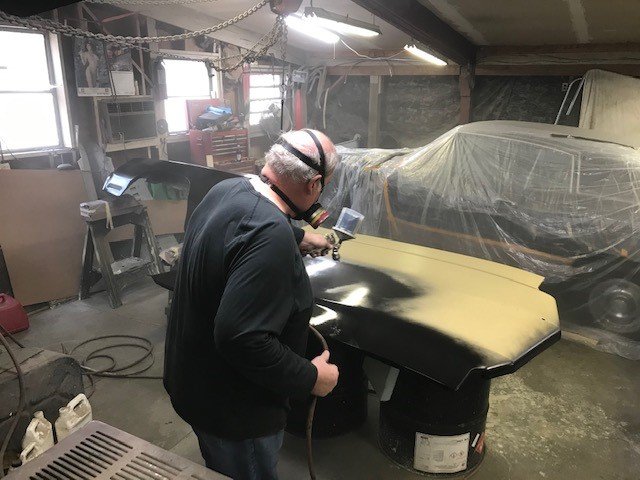
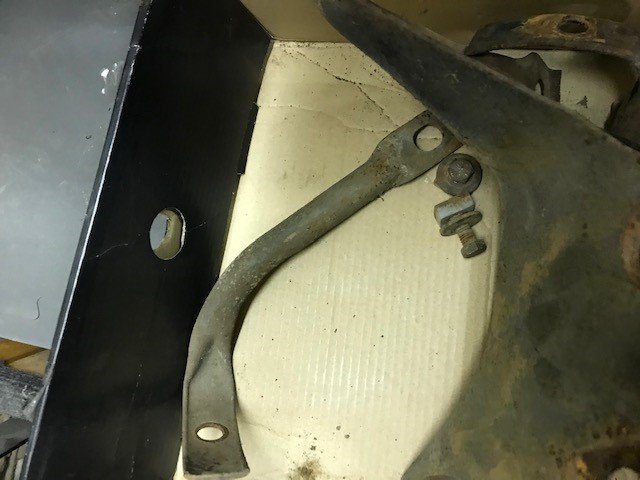
Hey All, Hope everyone is doing well and staying healthy. Its been a bit since an update. Time is getting closer to being able to get the cars out and need to get this done. So made some progress did a lot of waiting on parts being shipped, delays , damaged trim ( because its the thinnest stuff on the planet) sand blasting and painting a few remaining parts. I am using the original front bumper I have for now, not perfect but really good shape. i just wanted a new one to match the new back bumper, but it can wait for now. Got the new inner wheel wells , new wheel well trim , new rocker molding and new lower molding installed, car buffed and polished (needs a little more to get rid of some swirl marks) good enough so it could see the light of day this mothers day and stretch her legs a bit. Still have more things to work on as it will never be done but the majority is done to make it respectable. Still a bit of detailing and cleaning but for now was good enough to get it out and enjoy a nice day. Well all... here she is , after a few progress pics you can see how she looks. Thank you all for looking , following and helping along the way , it's not over and I will post more stuff as I do things but overall the big part is completed. I cant wait to see you all in Carlisle hopefully, that is what I was shooting for and she is good enough to go now. It's not perfect but for what we had to work with work space , painting environment etc.. I am very happy with results. As always thank you all for looking. Sand blasted and painted fender braces Sandblasted and painted the hood latch ...whoops forgot the pictures of the painted hood latch Some before, after and during pictures of the bumper brackets from crusty to looking like brand new the new inner wheel well installed after some wrestling with it .. And the final pics after hours of massaging, filing, trimming, installing ,uninstalling all while trying not to scratch the paint.Finding clips that work best etc.,,, and trying to make them look halfway respectable.. But here she is . Here is the before and after for for those that have missed it Before After

-
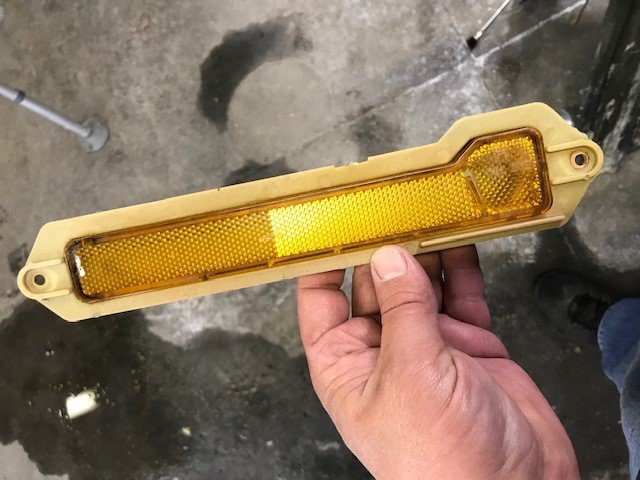
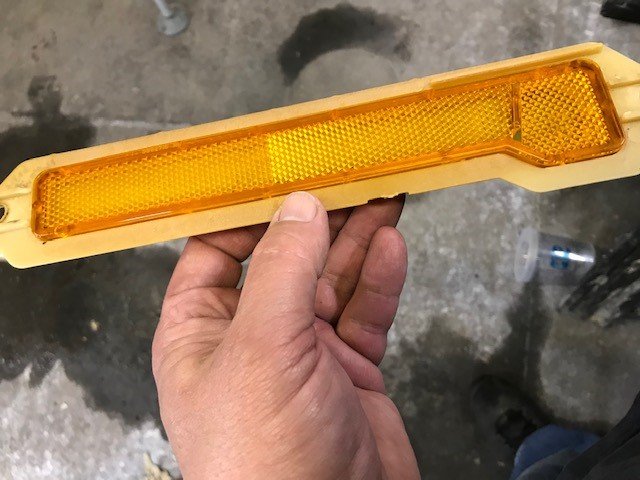
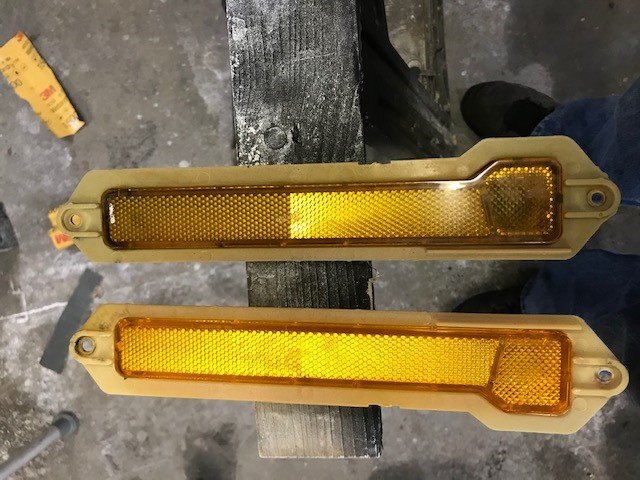
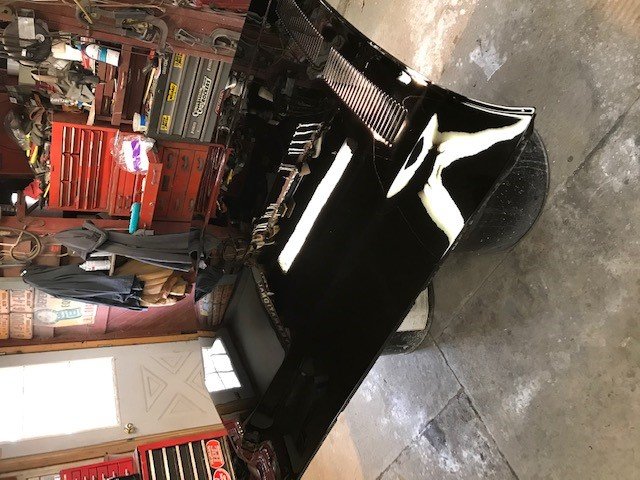
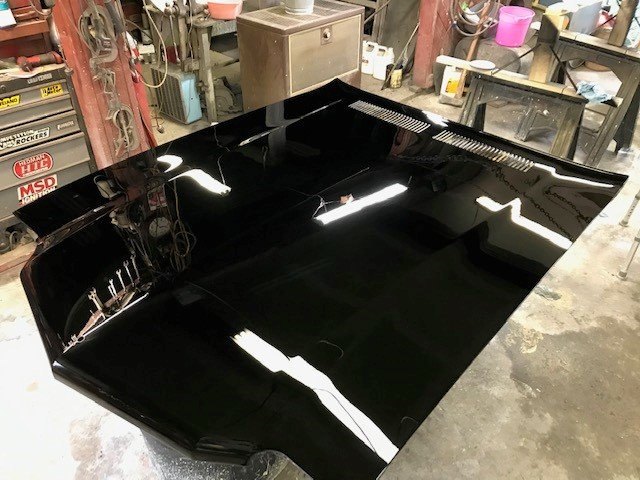
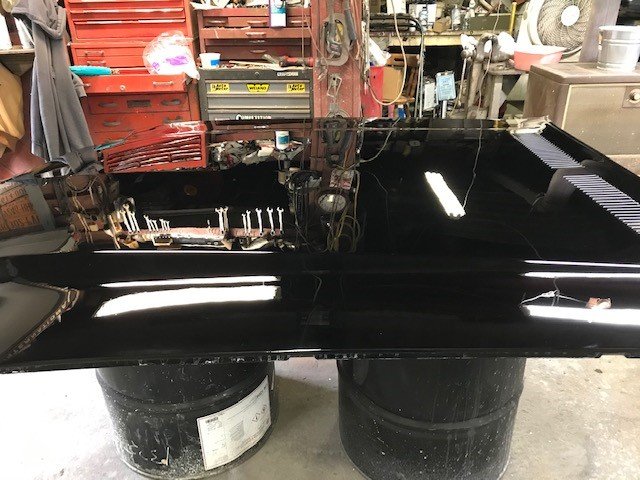
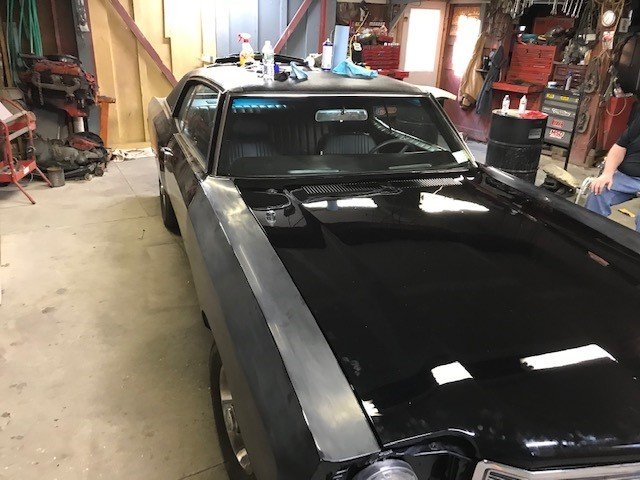
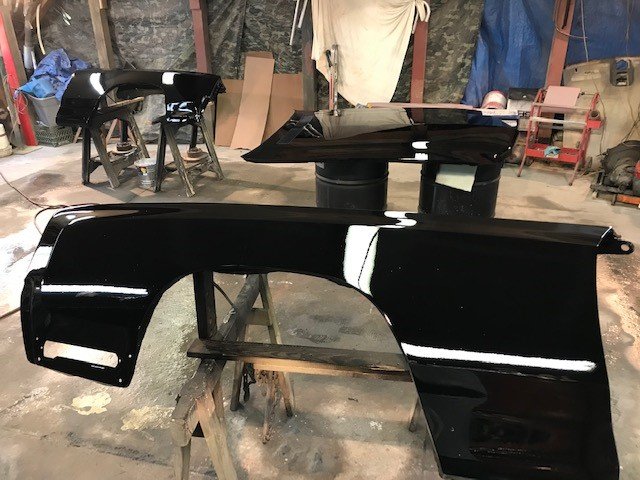
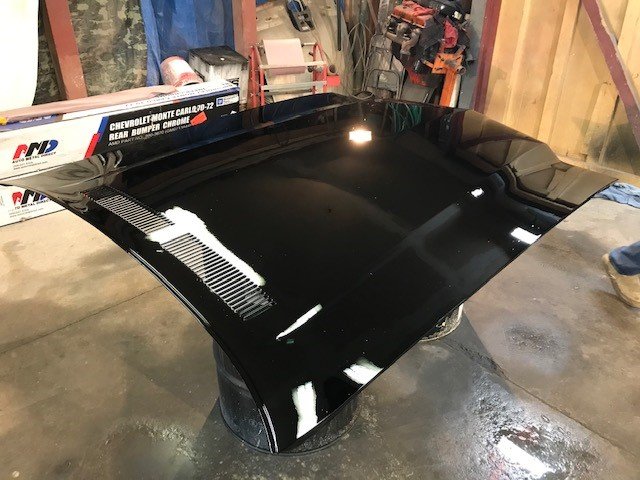
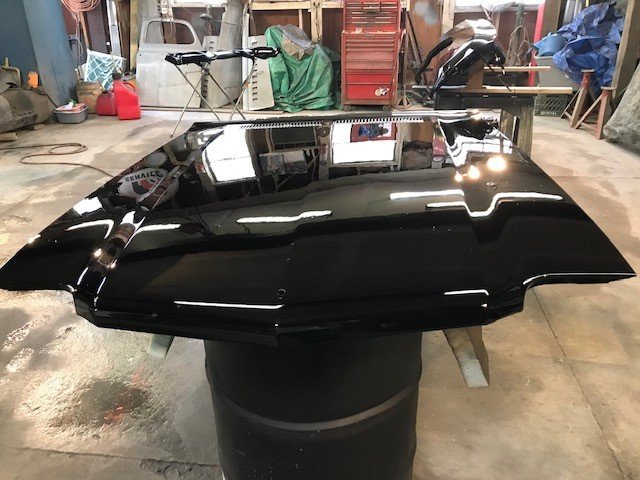
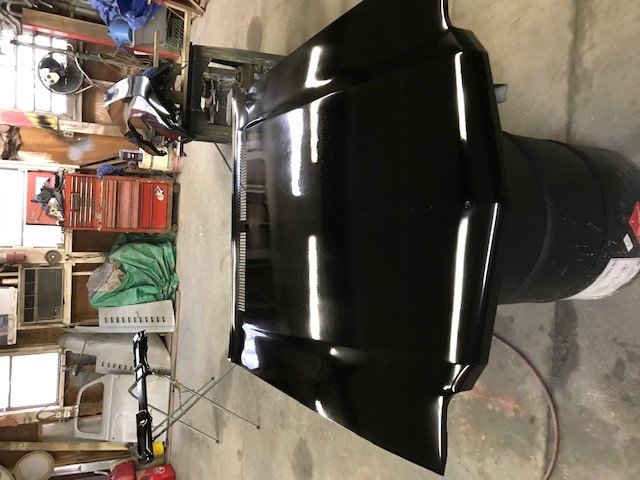
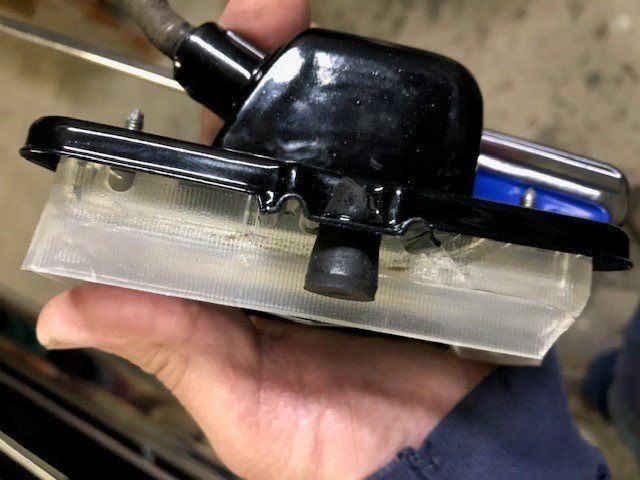
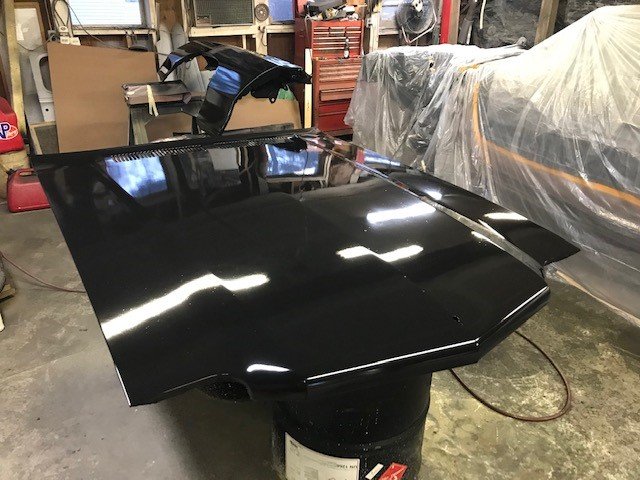
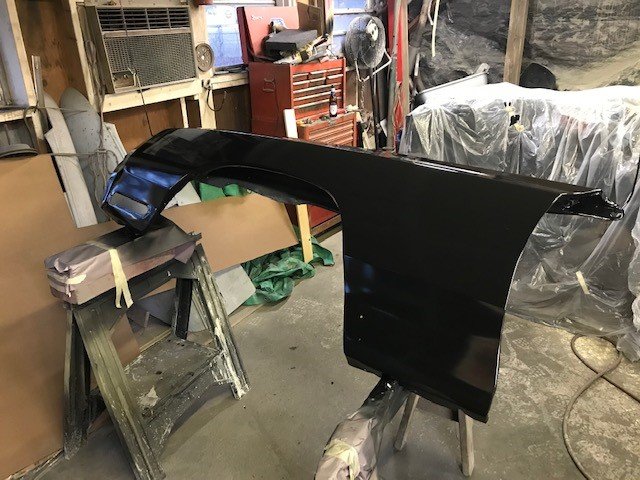
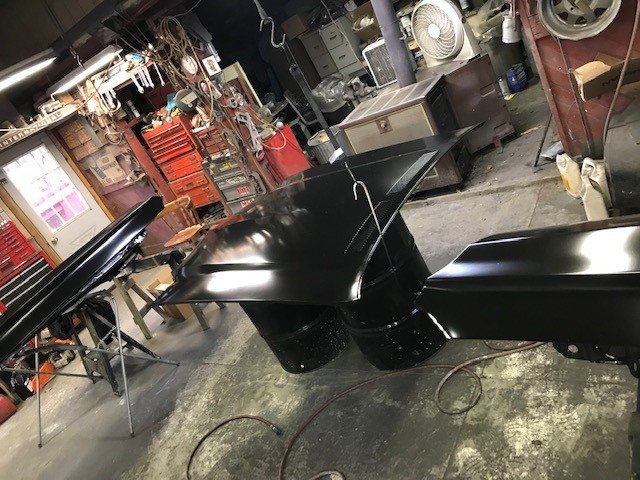
Hey All, Hopefully everyone is staying safe and healthy. Made some more progress since last time. Have everything almost completely wet sanded , buffed the hood for now was easier to buff while off the car will finish when all is together.Also getting some other smaller parts cleaned up. Like the front side markers. Started to clean and one was looking real dirty so I popped out the lens and cleaned it all up. Now the cleaner one is the dirty one and Iwill end up doing that one too, need to make it look the same. Any way here are some pics. As always enjoy and thanks for looking. Just the front fender braces rusty nasty , so sand blasted and painted. The first pic is the cleaner of the 2 side marker lights to start , the second pic was the dirtier one cleaned up now, the third pic you can see the difference and why I need to do the other one now. Here is the hood wet sanded and buffed before installation, will still do final buff after installed and for final clean up. Here is the hood finally installed with the front end all back on , still need to do inner wheel wells when they get here , tighten things up , buff fenders etc. but got the hood on and all the gaps looking pretty good. I am getting closer. Carlisle is getting close.

-
Thank you all again , Googled the part#OQW702 you gave Rob, and they actually came up on Ebay from Fusick, $65 + $7.50 shipping+ tax $5.80 total $78.30. Got them while I can , thank you for finding info, that much closer.
-
Thank you all very much for information.
-
Great thank you Rob have been searching the forums and have had no luck.
-
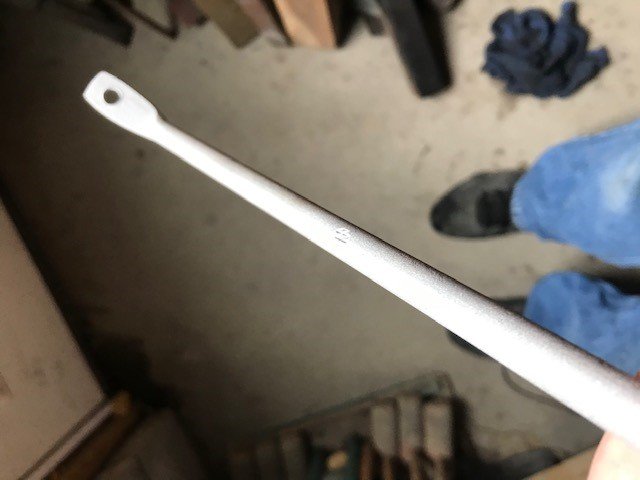
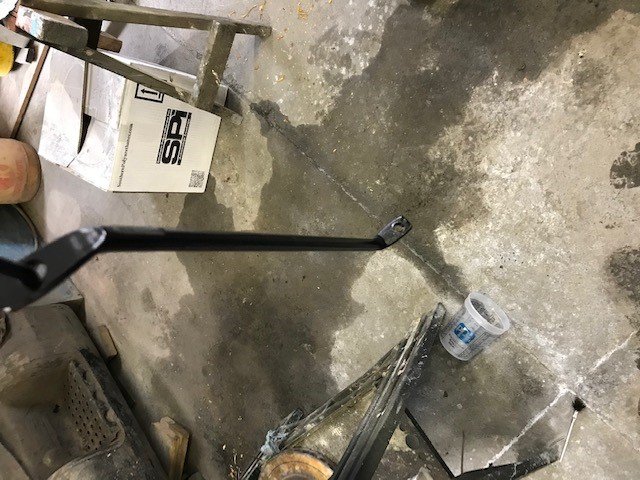
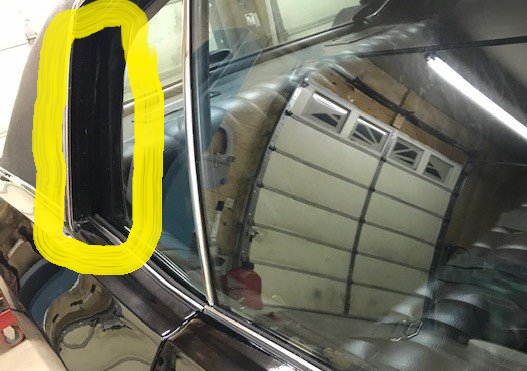
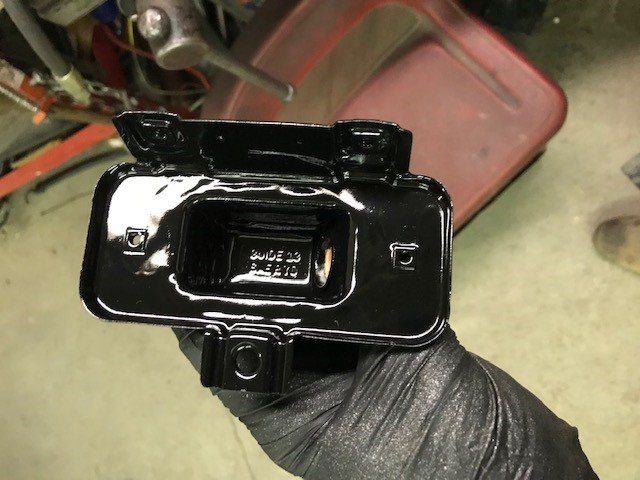
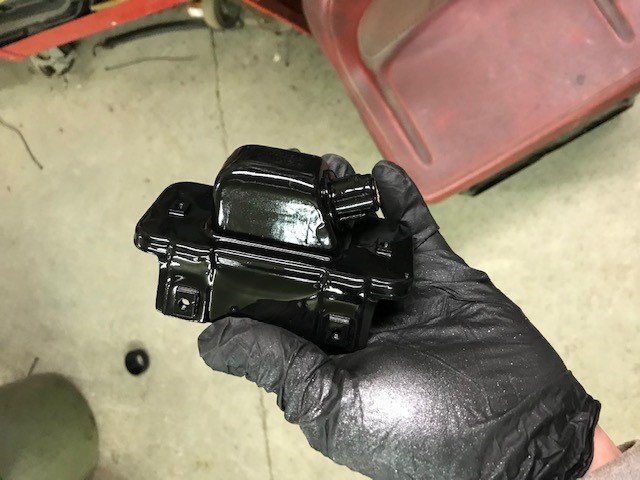
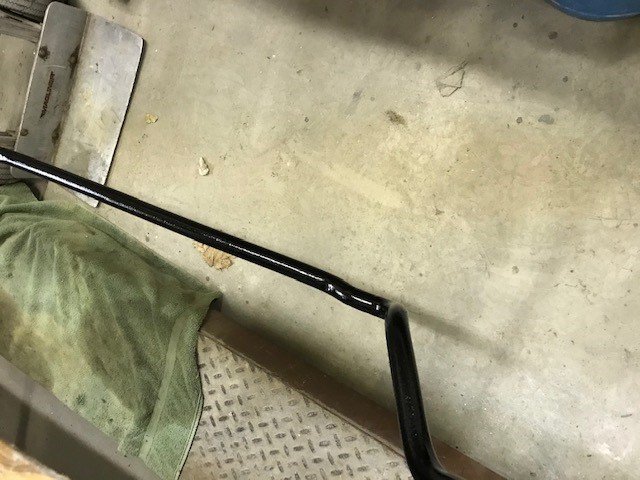
Hey All, I keep looking and don't remember if I took anything off from the rear of the quarter window both inside and out vertically. I keep seeing seals for the inside, which I may recall taking off, but for the outside it doesn't look finished vertically like it should be chrome and or at least a seal to seal out the weather. I have added a picture as to where I am talking. Any info of what to get and where to purchase would be helpful. Both inside and out if you know.Thank you , I have added picture below.
-
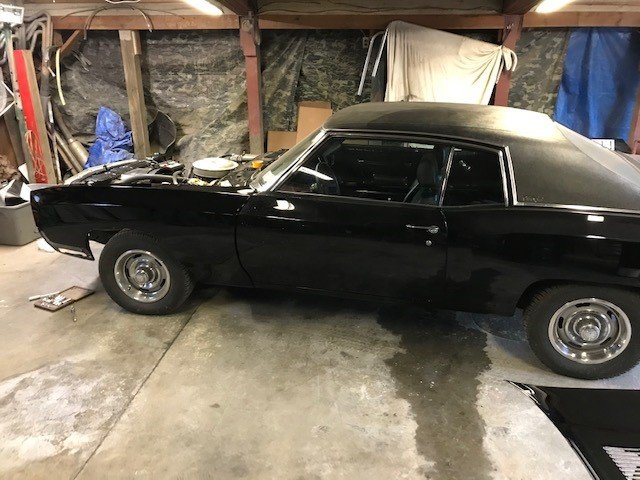
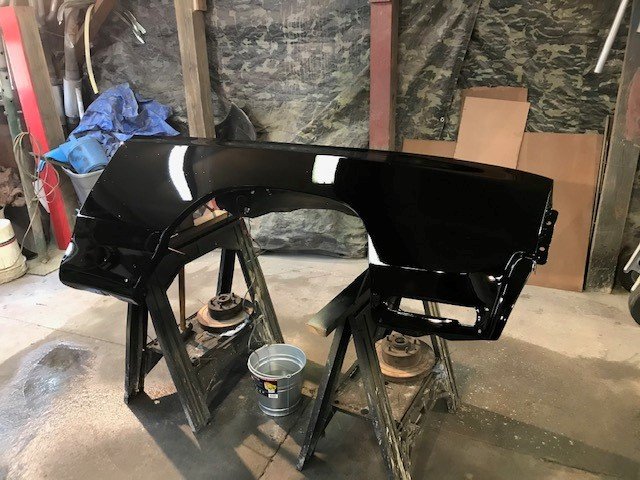
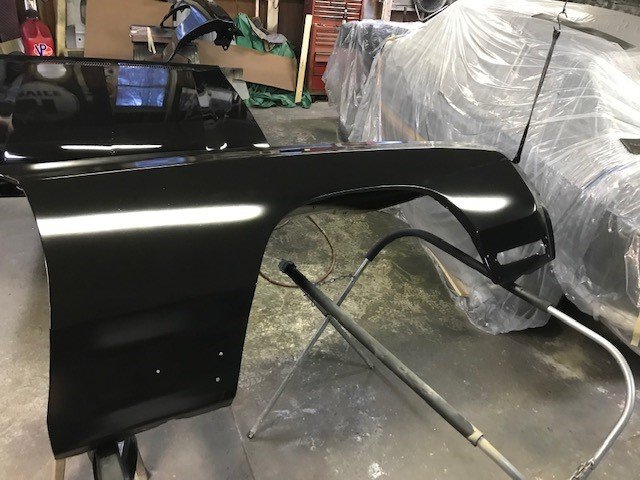
Hey All, Hope you are all staying healthy, not much of an update but just wanted to post a pic of the fender just sitting on the car. Its been a while since its been together so thought I would just see what it looks like and thought I would post it. Enjoy and thanks for looking.
-
Hey All, Hope everyone is staying safe and keeping healthy. Just an update , finally got everything wet sanded after spraying base and got it cleared today. Will hopefully start reassembly in the next day or two and get this thing back together. Here are a couple pics. Hopefully the next pics will be of the front end assembled. Enjoy and as always thanks for looking.
-
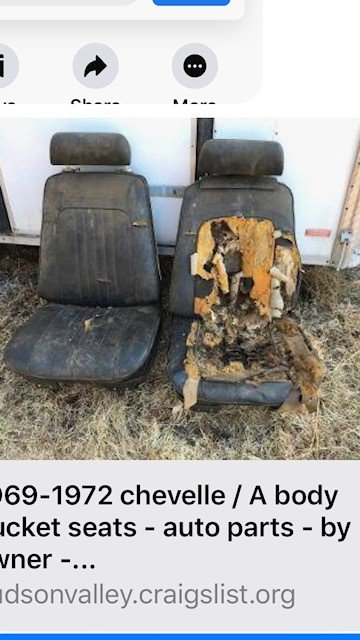
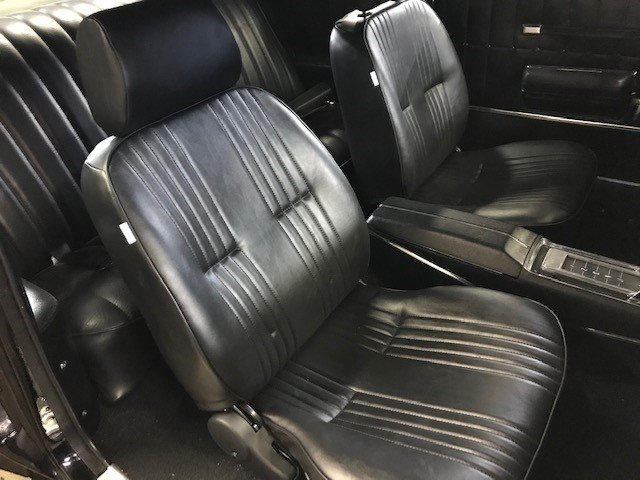
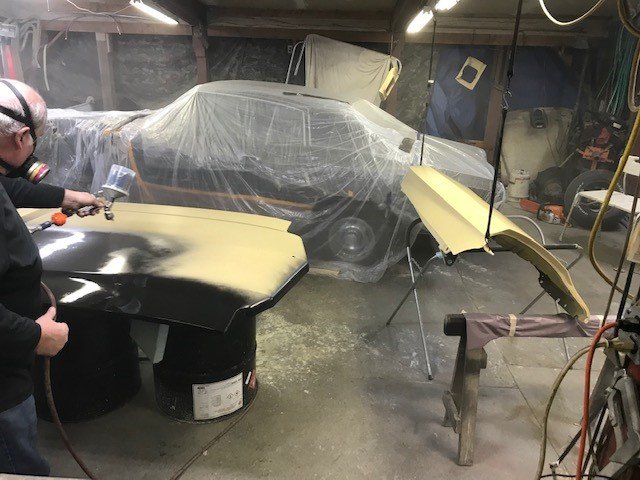
Hey all, Hope everyone is doing well and staying safe through this crazy time. Haven't posted in a bit but finally got the hood and fenders wet sanded, then sealed, wet sanded and finally today got the SPI Base coat on. Now will hopefully get wet sanded in the next few days and get them cleared. Getting close to getting this done so hopefully will be ready by end of April. Also after installing the after market seats found a pair of factory seats that I will have to redo (of course) but picked them up about 3hr round trip last weekend . Picked them up for $300 with tracks and everything there, plastics aren't to bad will clean up and paint. Probably in no hurry now with them as the after markets are good enough for now till I get these done. Will post some pics and as always thanks for looking and stay safe. Here is the front end in SPI Black Basecoat. And here are my seats I picked up they are mint!

-
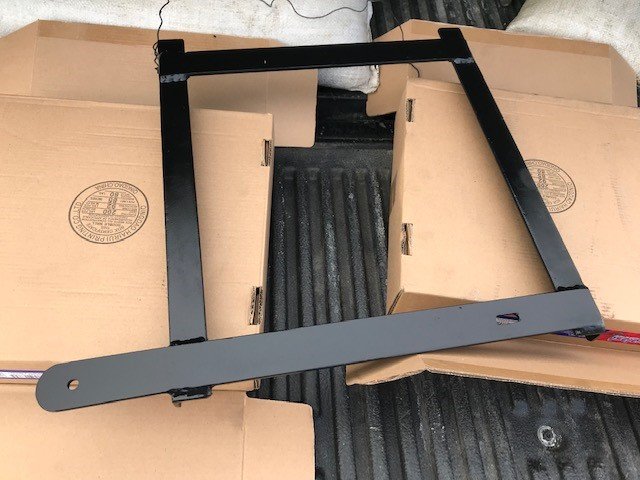
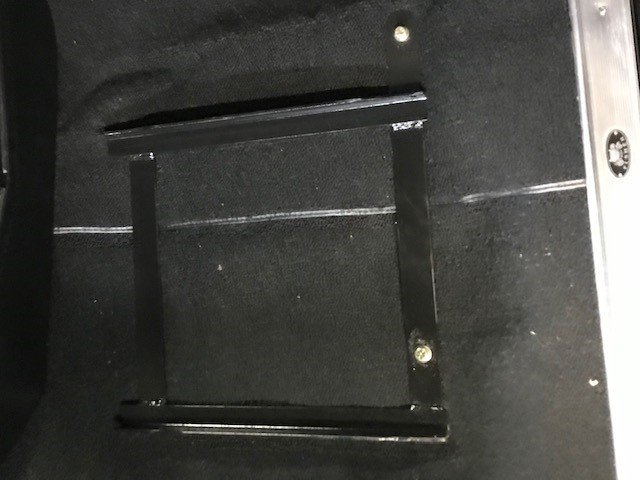
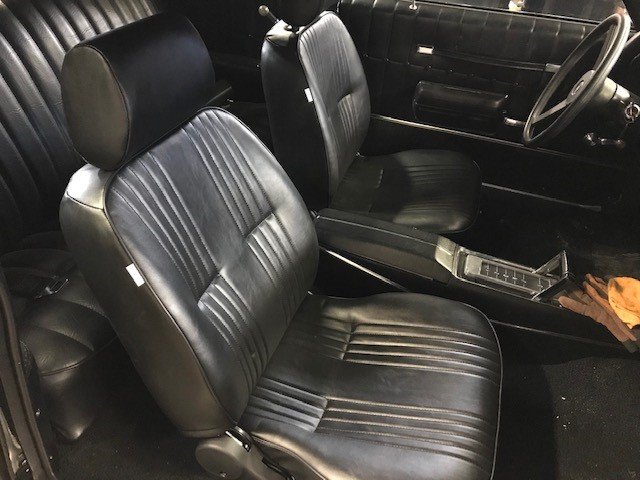
Hey All, Just an update of recent progress. Waiting for weather to warm up a little bit, need to get the hood and fenders wet sanded and painted and clear coated, hopefully in the next month or so. While I was waiting for weather to warm up a little, I ordered the Pro Car classic seats, hopefully some point in the future I will find that set of buckets for the right price and worth redoing or already done for the right price. These were about $600 for the pair, made my own brackets nothing fancy but I think they look better than the ones you pay for from Pro Car. The seats are decent, a hair narrower, about an inch narrower than factory. I know the Mrs will like the fact that they tilt back because she will complain when her hair is in a pony tail on the factory ones that they wont tilt back. Either way will work for now. Like I said I made my own brackets as a lot of reviews said the seats sit up to high with the brackets they supply so I made my own to get them lower. I am 6' and didn't want to be to high up, so I am happy with how they look and feel and with doing my own brackets. Here is just a couple pics enjoy and as always thanks or looking. Fabricating the brackets from some flat stock and angle iron Bolted bracket into the car, still need to do the in board bolts but will do once I bring over to other garage on lift and install seat belts. Here they are installed, don't perfectly match the back seat but good enough for now. Till I find others. P.S I still need to vacuum the carpet.
-
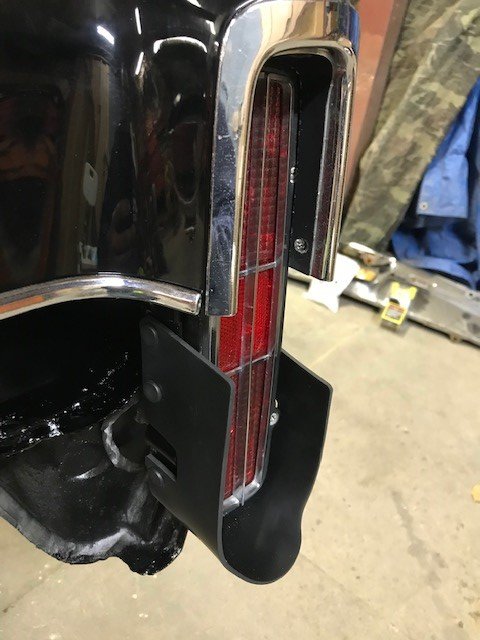
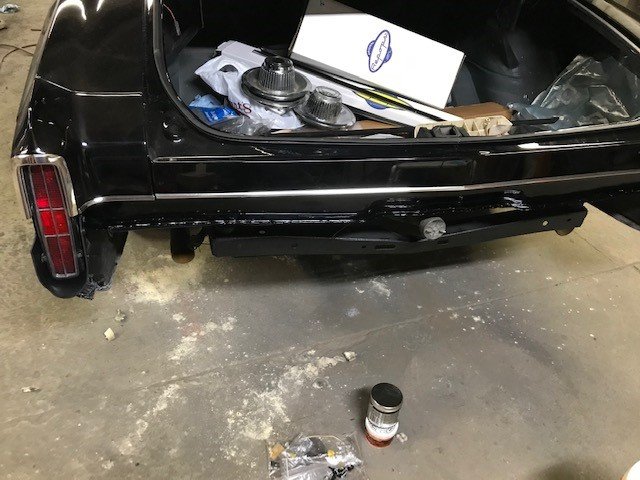
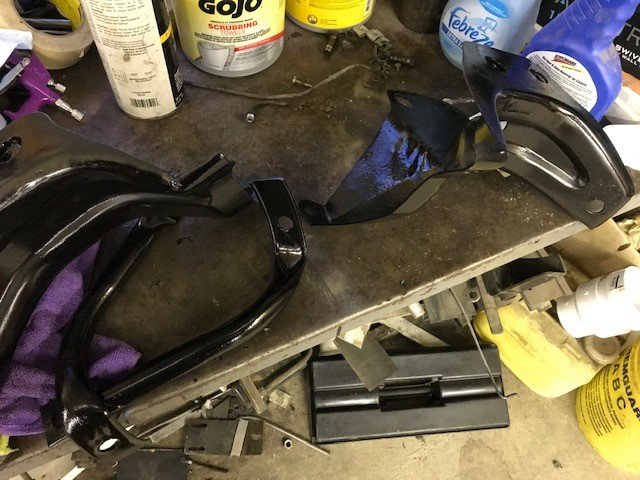
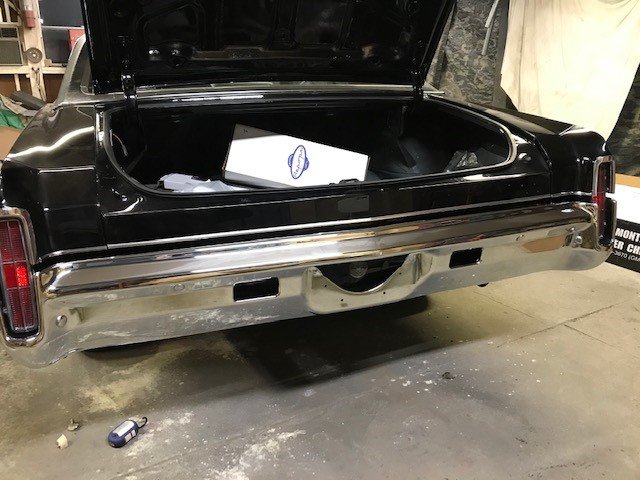
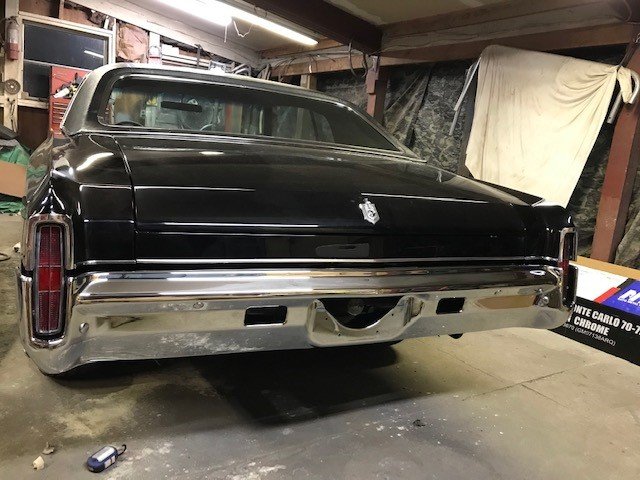
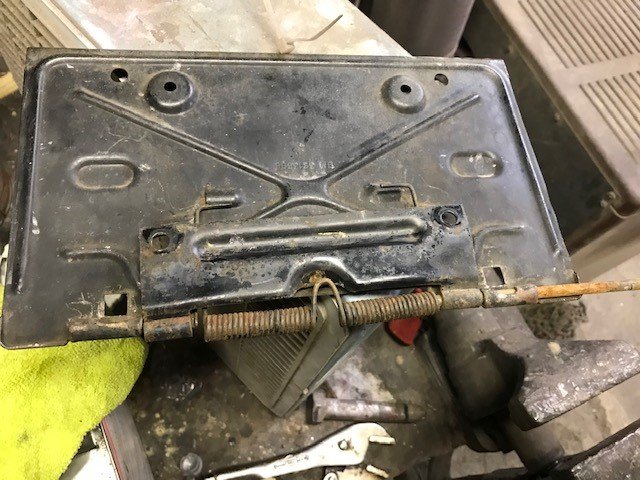
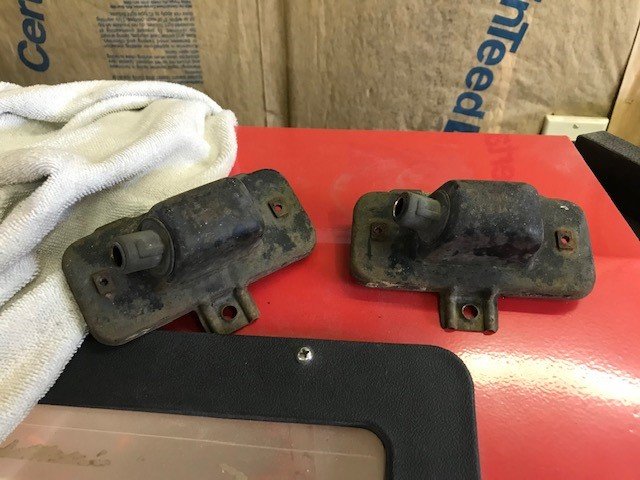
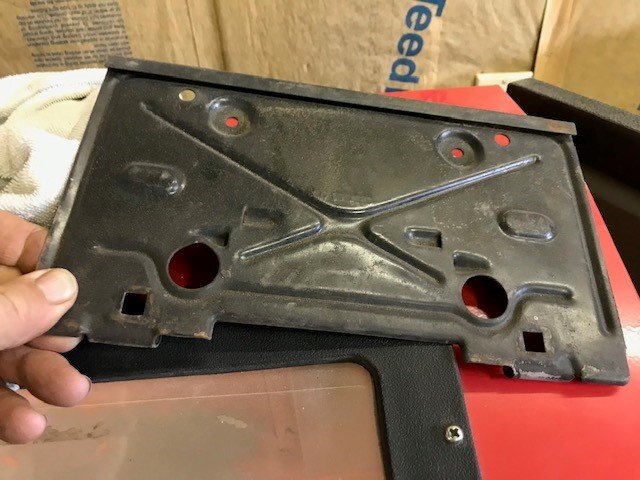
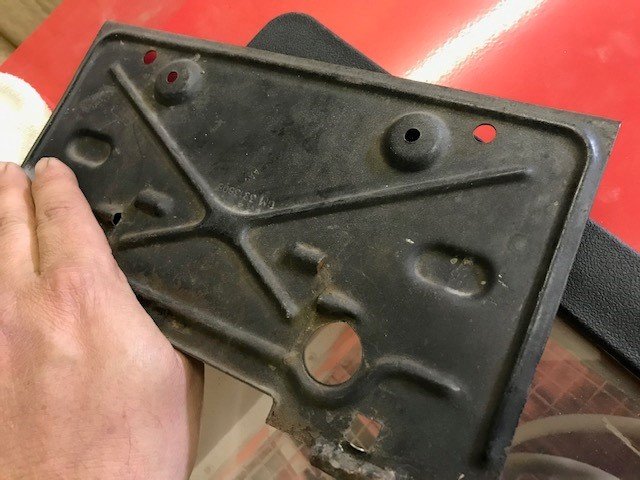
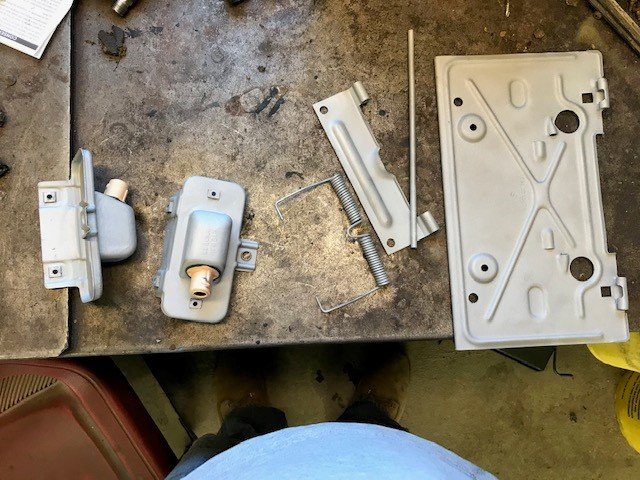
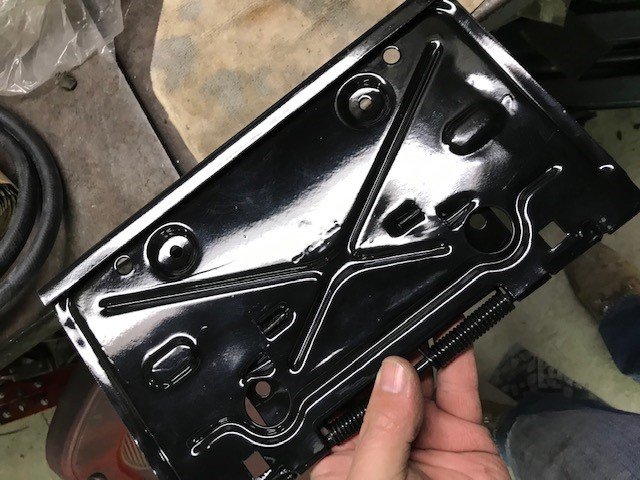
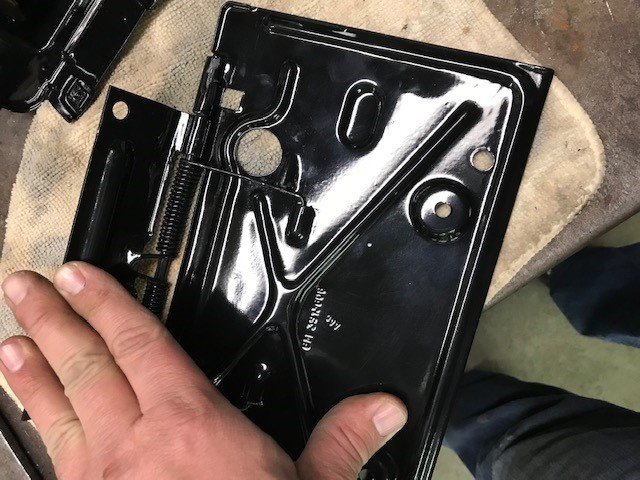
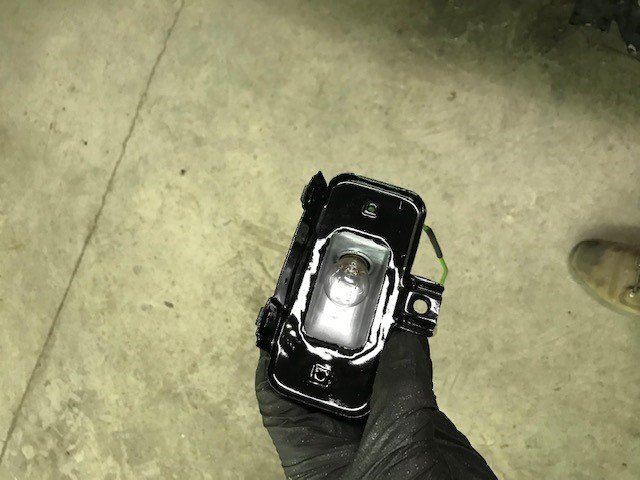
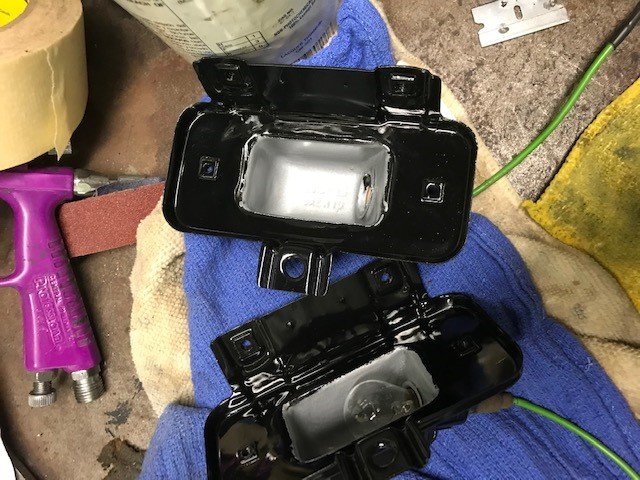
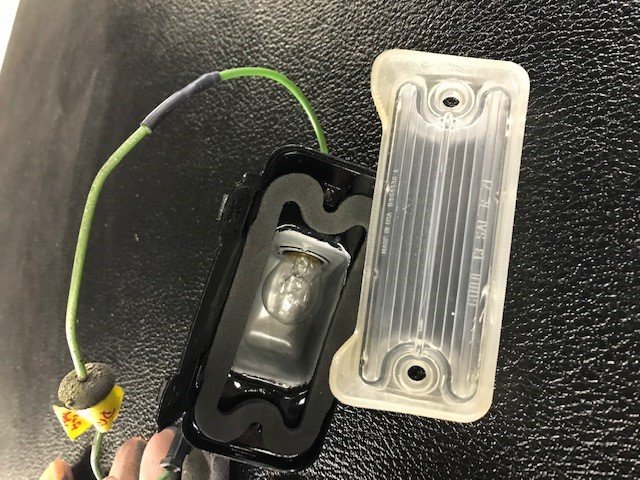
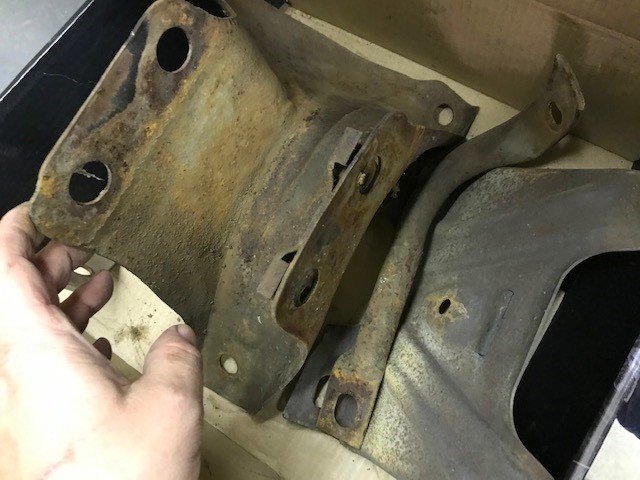
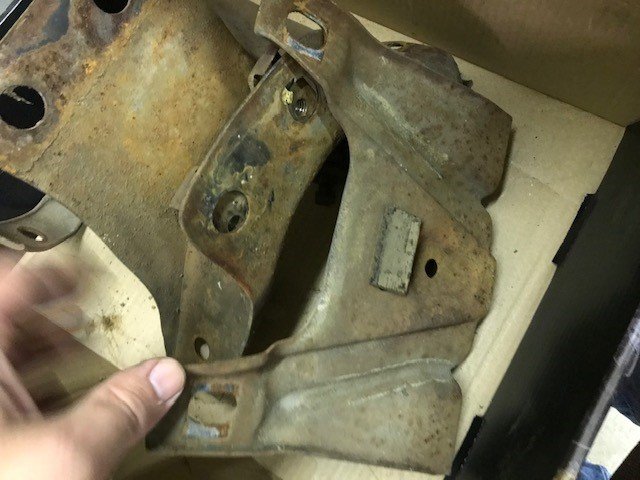
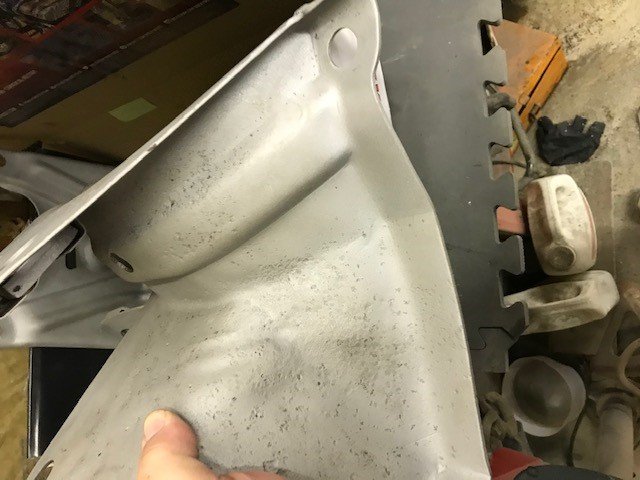
Hello All, Here is an update of recent progress. Received the new rear bumper so as previously shown, sandblasted the brackets and finally finished getting them painted to install the new rear bumper. Installed bumper and went to switch the reverse lights and tag light and realized I just cant put them in like they were (don't know what I was thinking). Ordered the new tag lamp as that was a decent price about $20 as the socket was to far gone to reuse. The reverse lights were actually $90 (don't recall if each or pair)and have better things to spend my money on so a little work and they are as good as or better than new and the lenses cleaned up really well at least to use for now. Same with the license plate bracket wasn't horrible but wanted it fresh so sand blasted it all and cleaned up installed everything with stainless screws and or bolts to help rusting/corrosion. One funny note, I installed the back up lights checked them to make sure they worked and my buddy says" they are working, ones a little brighter than the other" and of course just couldn't have that so popped the lenses back off replaced the bulbs so they matched. Wished he never told me LOL. Anyway here are some pics and as always enjoy and thanks for looking. Bumper brackets cleaned and Painted up New body to bumper seals installed, nice flexible rubber compared to the 50 year old ones which are as hard as plastic. Installed the new bumper Getting ready to swap stuff over and found they needed attention Dismantled everything and sand blasted Got them all painted up and reassembled Taped up and painted for the reflective part, ( its a glare around the outside not a bad tape job LOL) Cleaned up lenses and made the little rubber bumper (from some rubber stoppers from hardware store) that sits against the actual bumper assuming for vibration, rattling and keep from rubbing on the light etc.. Here is all finally assembled and done with the back bumper I think Here is one last thing I kept forgetting to do as I put in garage and stood in corner so I kept missing it, front sway bar cleaned painted and installed that today. Enjoy and thanks.


-
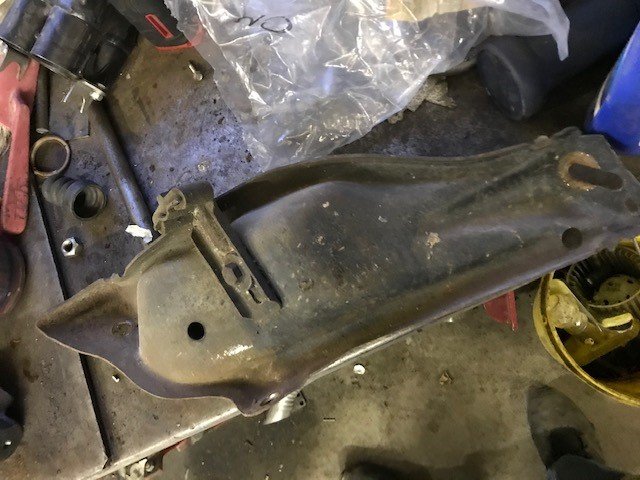
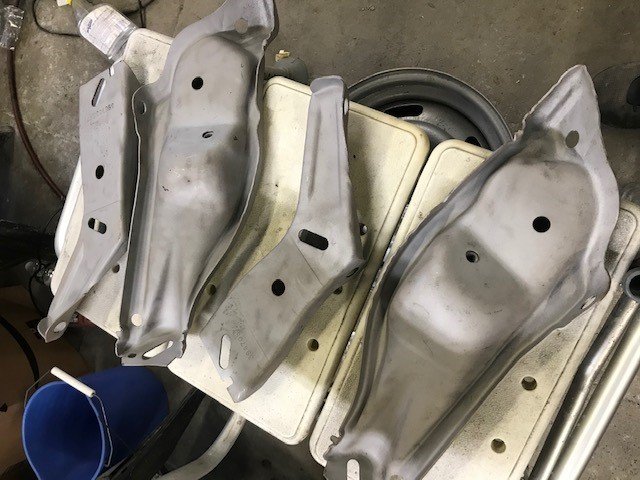
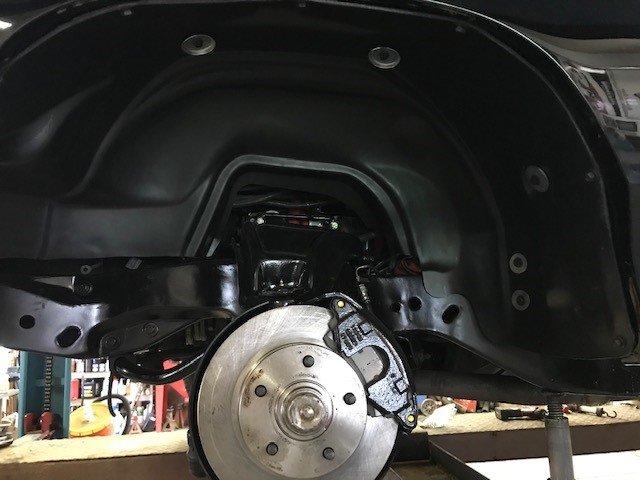
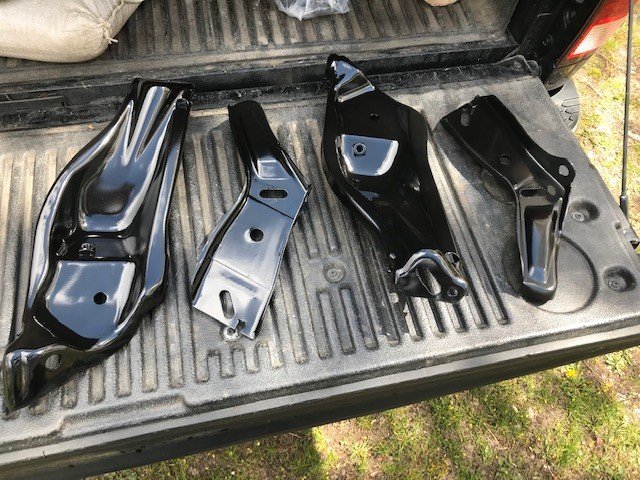
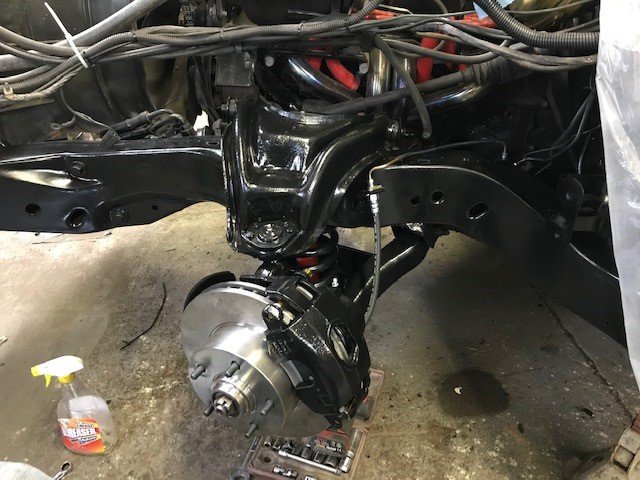
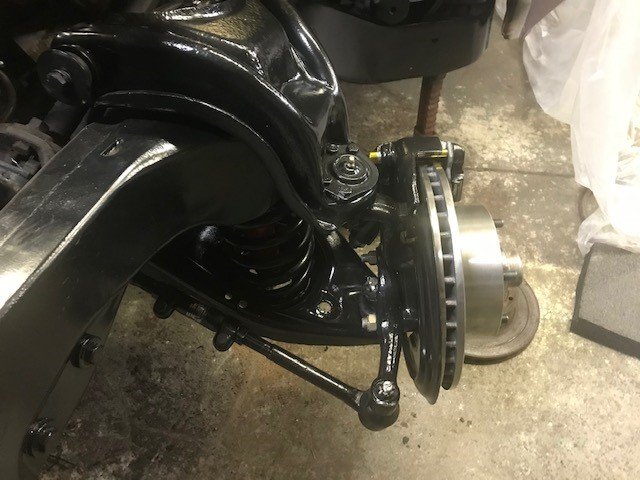
Hey All, Just an update of recent progress. Started sandblasting the rear bumper brackets hopefully get the new bumper installed this week, Finally got the remaining parts delivered for the front end. Did everything new and painted up, to at least try to keep it clean and rust free will see how long it lasts for. Used the SPI Epoxy again for all those parts . The weather was warm this weekend in upstate NY so was able to get the other garage heated up enough to get the SPI Epoxy /Sealer as the metal needs to be at minimum of 65degrees and then it needs to stay 65 degrees for at least 24 hours after painting for the epoxy to cure. So that was my focus this weekend . As always enjoy the pics and thanks for looking. A coupld of pics of the err bumper brackets before pretty rusty. here are some after sand blasting, cleaned up fine still some pitting on some pieces but solid and no holes etc.. will be good for now once painted up. A pic of my buddy spaying the epoxy over the weekend. A couple pics right after being sprayed. Here is a pic after they cured Here is a few of the front end buttoned up still need to bleed master cylinder and brakes , but installed the new rotors, calipers and painted brake lines , bump stops and all steering components. Just the sway bar left to do on the front along with the bleeding the brakes.
-
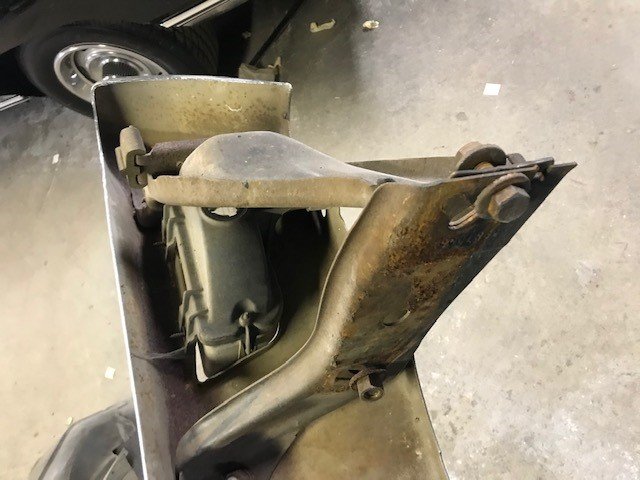
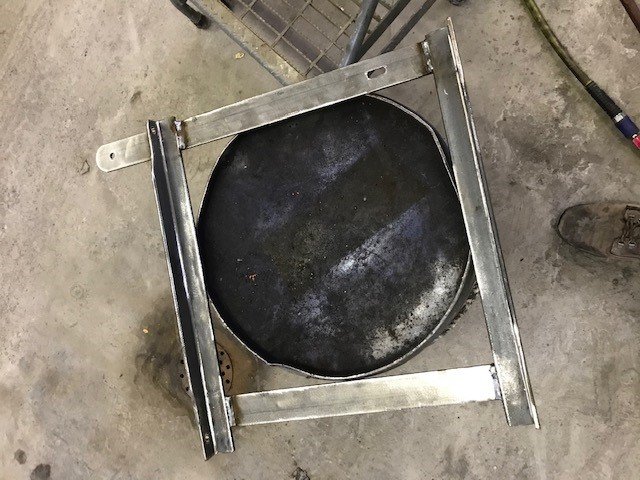
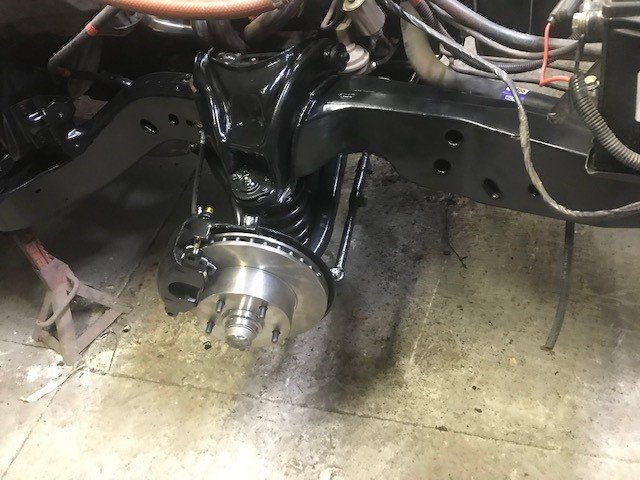
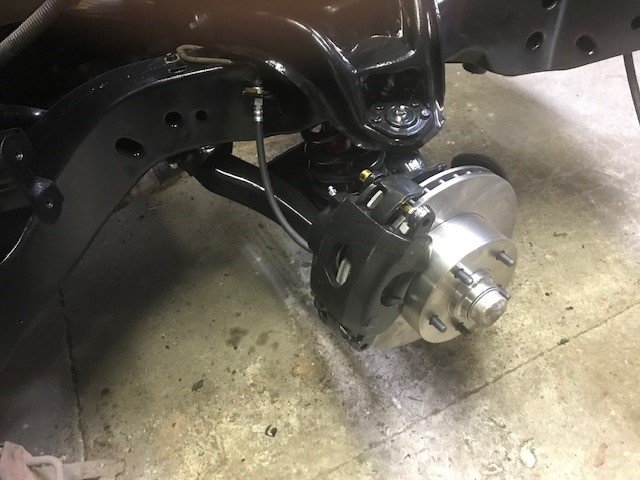
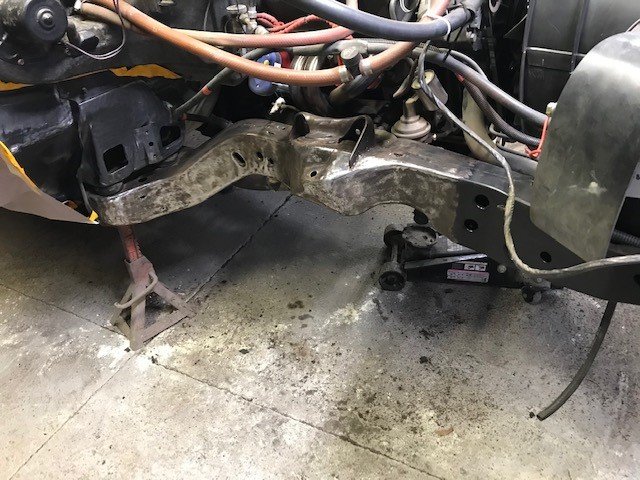
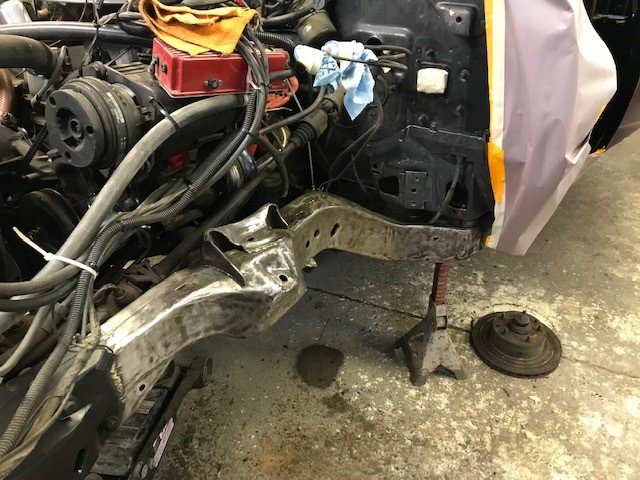
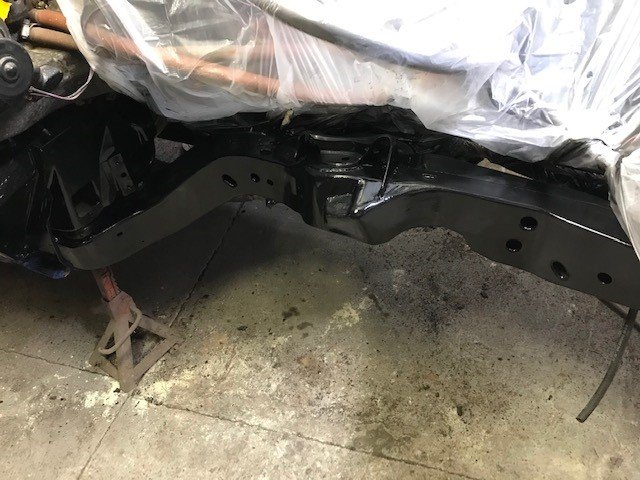
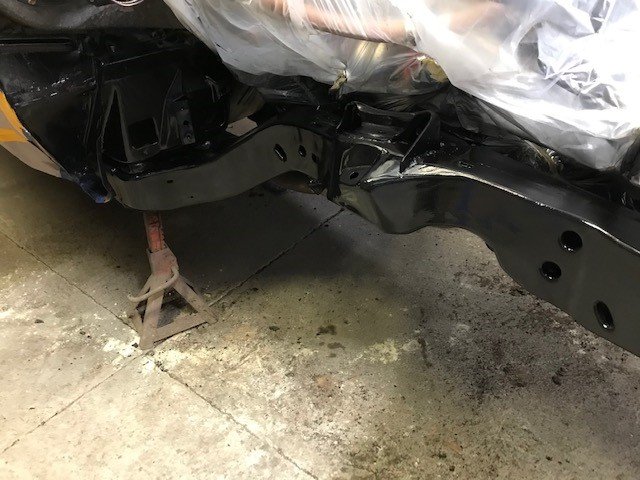
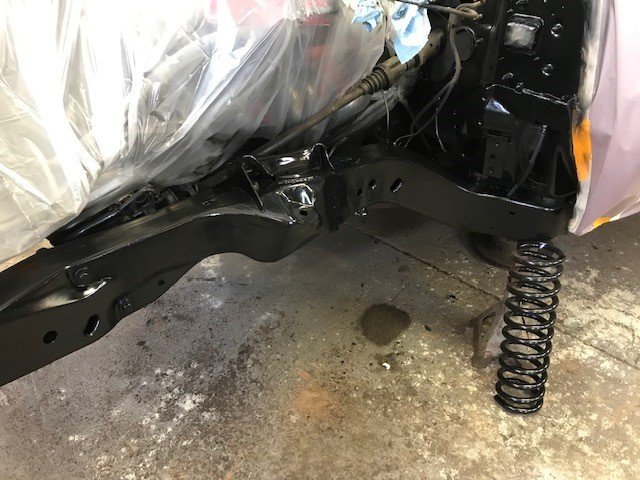
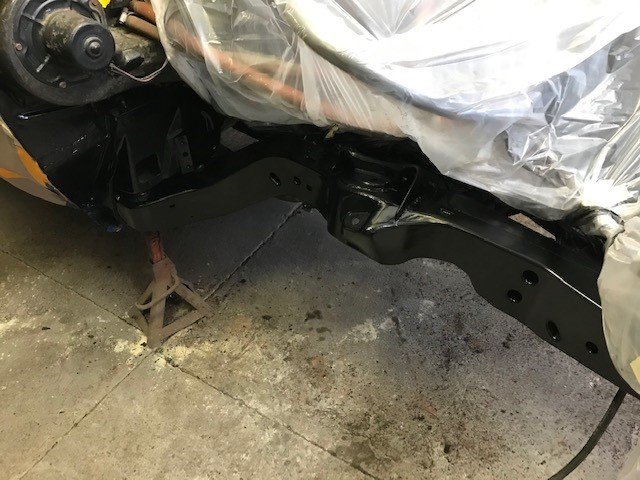
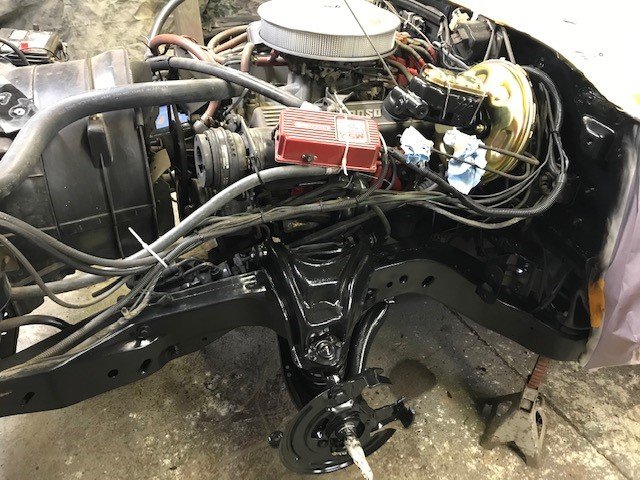
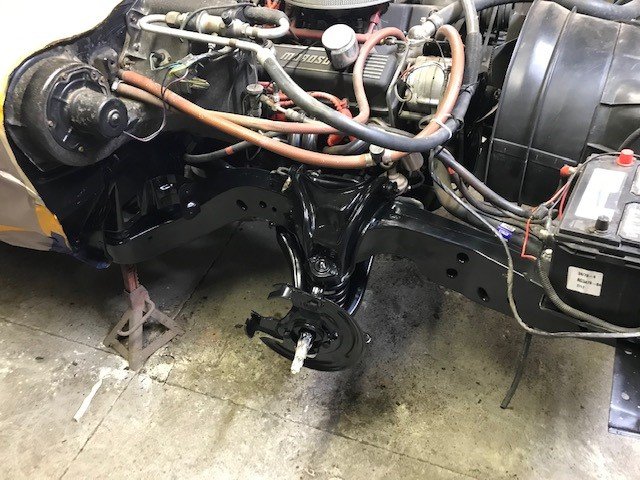
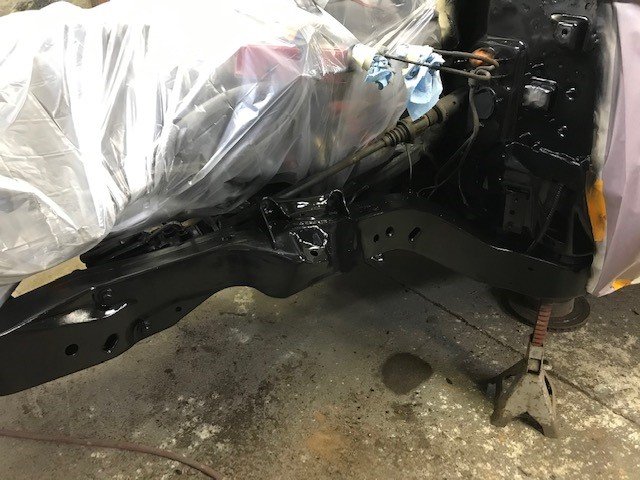
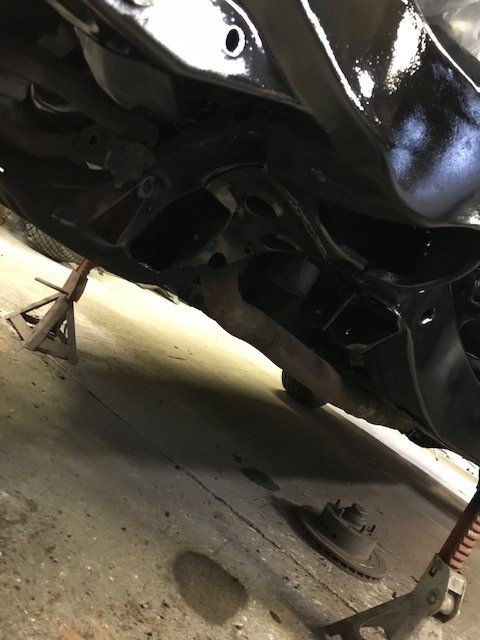
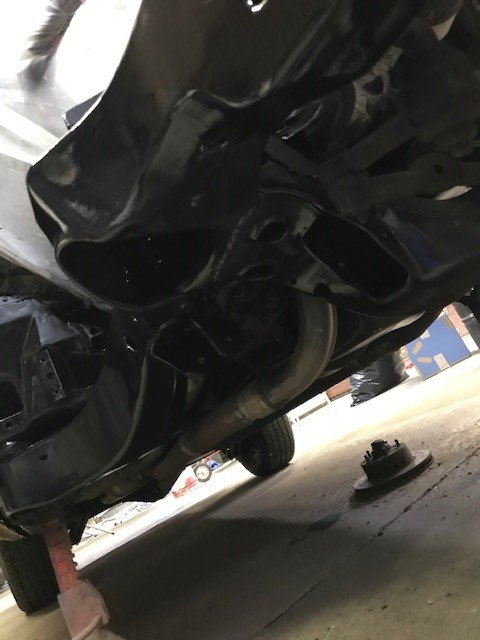
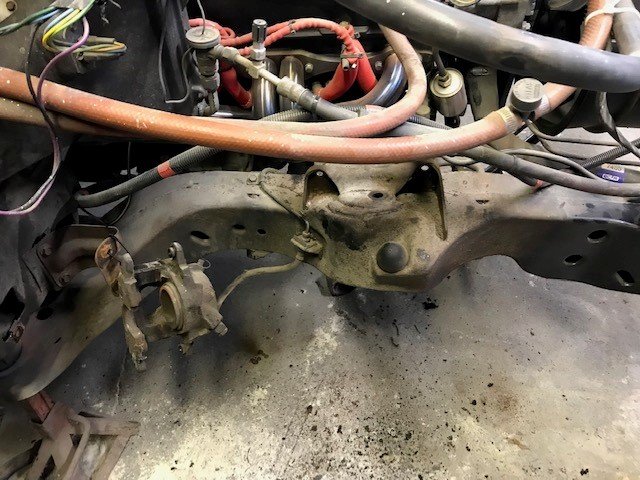
Hey All, After getting all (most) of the individual front end parts sanded and painted. I moved on to the front frame rails and firewall. Got that cleaned up removed the booster and master cylinder, practically hermetically sealed the rest of the car as to not get dirty from grinding and sanding on the frame rails or overspray from painting the frame. Got it painted up with SPI epoxy primer and started reassembly with the parts I had. Enjoy the pics and as always thanks for looking. Getting the frame cleaned up. Here is a couple of the frame painted up. Where I am at now, partially assembled waiting for some more parts to come , but have the new master and booster installed along with the new moog springs. Thanks for looking!!
-
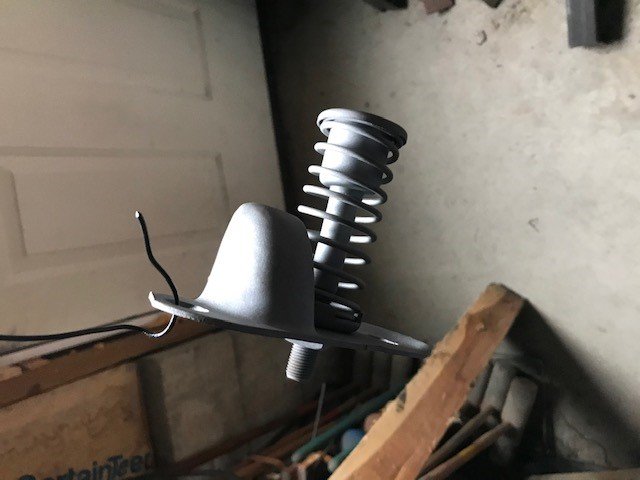
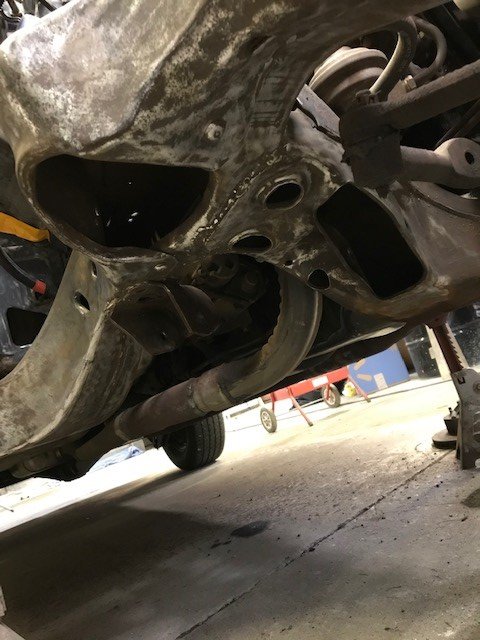
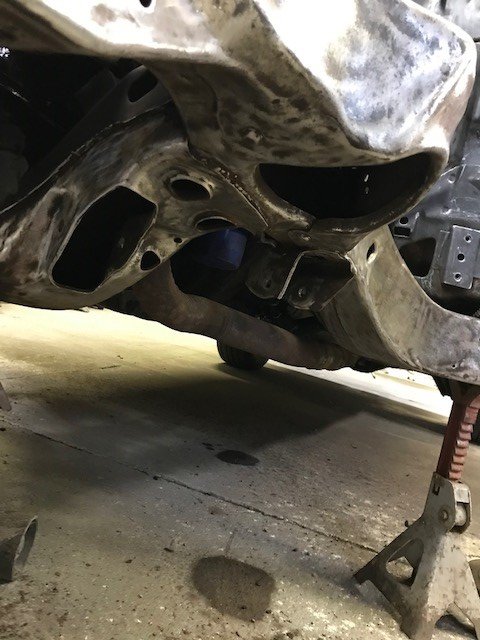
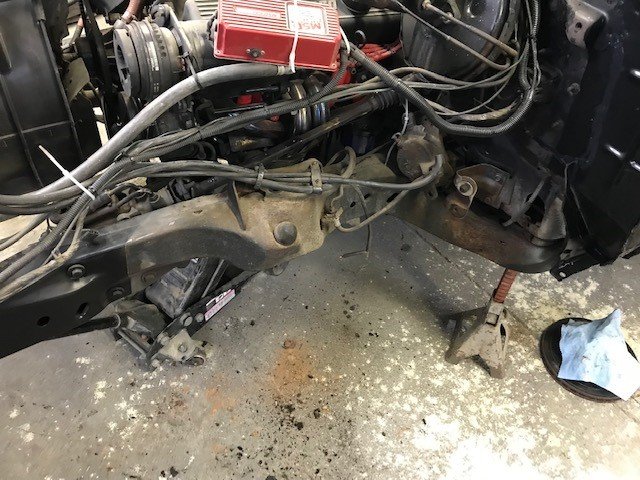
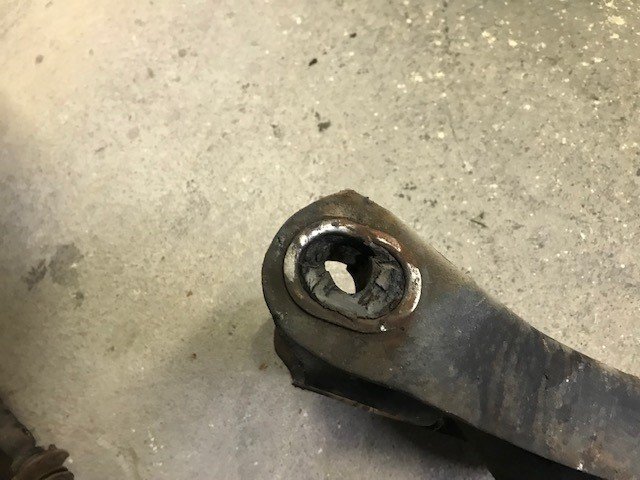
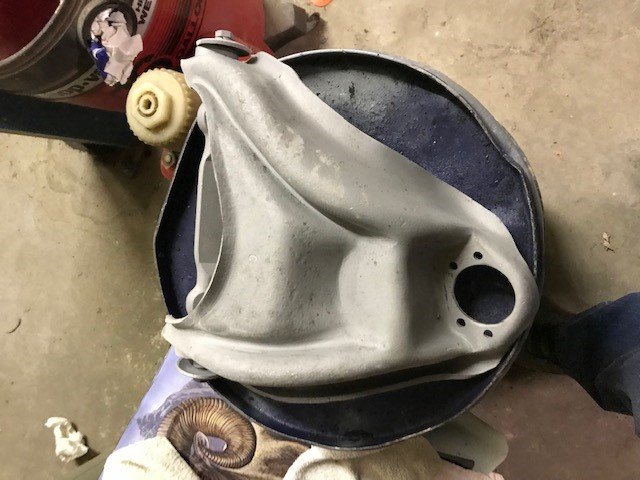
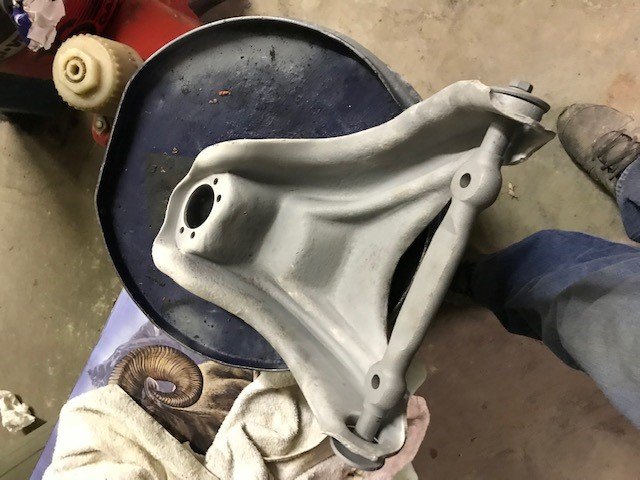
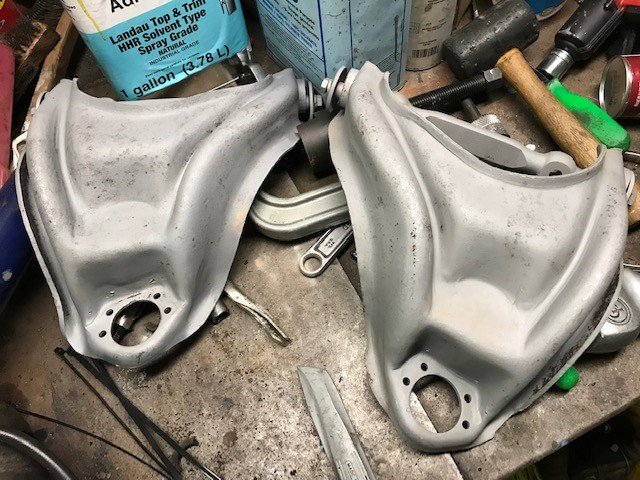
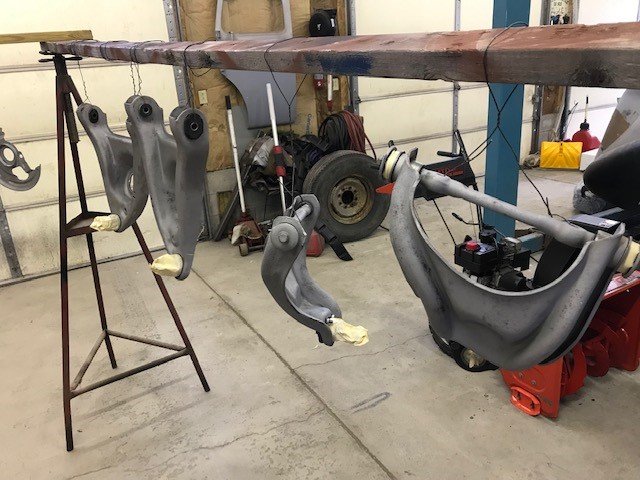
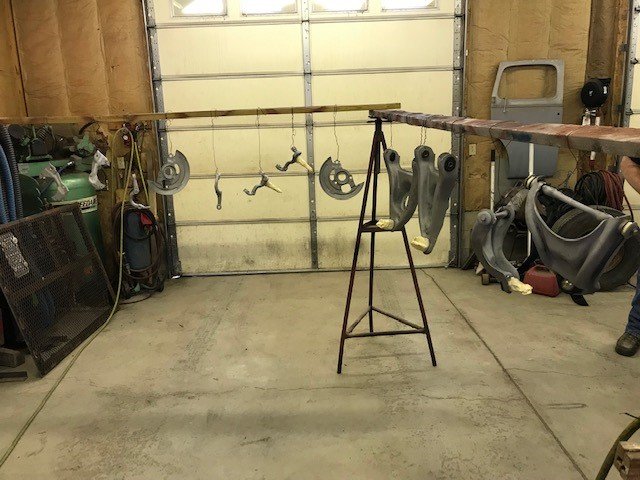
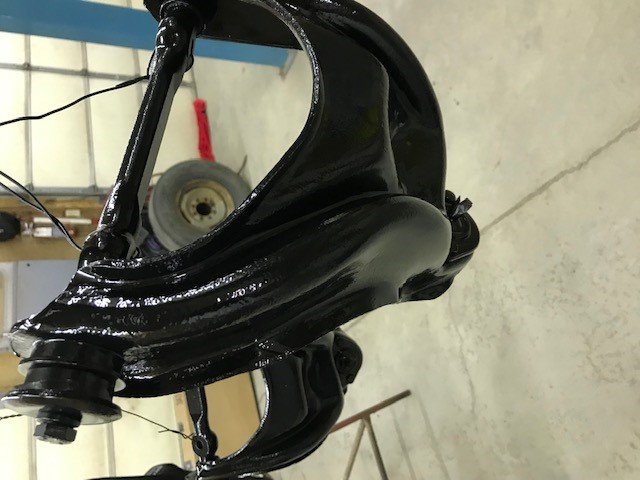
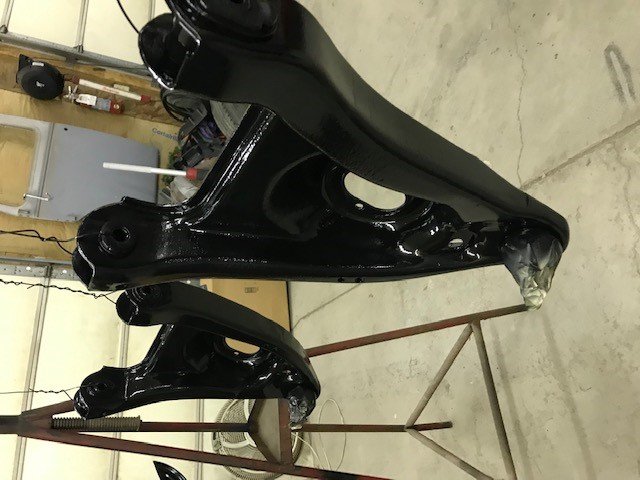
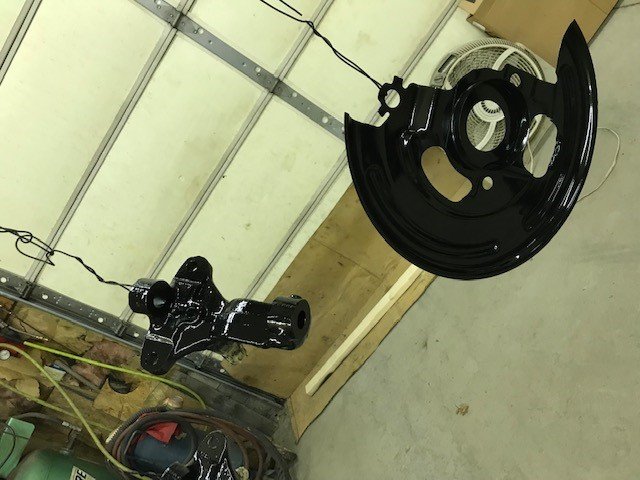
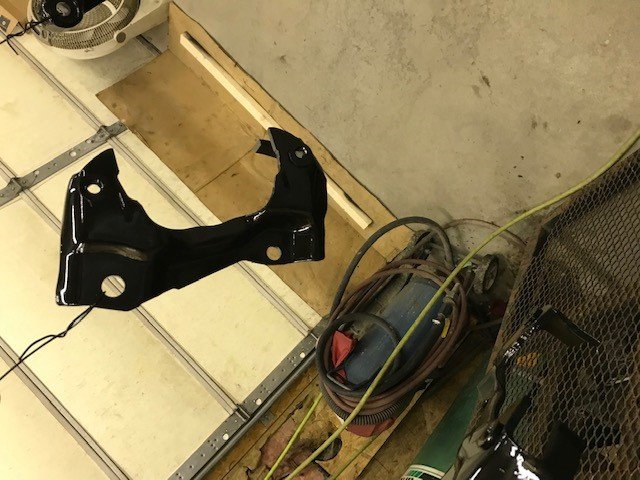
Hey All , Happy Holidays to all. Just a quick update. Haven't gotten a whole lot done after getting back from cruise on Dec 12th , my fiancés Bday, Christmas and parties and everything. So a little progress here and there just started disassembly of the front end to get that cleaned up and painted etc.. Still need to do the frame but took control arms and all off, got them sand blasted and painted . Obviously did the ball joints and control arm bushings while I have it apart.They are/were original bushings and ball joints (not the parts you want original on a 50 year old car) Here are just a few pics of the progress. Hopefully will get the frame cleaned up this coming week. Happy Holidays and as always enjoy and thanks for looking. Just a pic of the front end disassembled Here is one of the bushings to show how bad they were, explains why she wandered... Control arms and other items all cleaned up . Joints and bushings installed and hanging for paint. A few of the parts painted with SPI Epoxy Primer, no top coat needed , supposed to be great for chassis coating and parts.
-
Rob, That is great and glad I could actually contribute something on here as I have received plenty of info in the short time I have been on here. It's a wonderful group on here!
