BobW
-
Posts
133 -
Joined
-
Last visited
-
Days Won
3
Content Type
Profiles
Articles
Forums
Gallery
Events
Everything posted by BobW
-
Is this the correct propotioning valve for my '72 disc/drum, small block? It looks like it will mount the valve on top of the frame to clear the headers. https://chevelle.com/1970-72-distribution-valve-w-bracket-pv07/?sku=DV7007&gad_source=1&gclid=CjwKCAiA6KWvBhAREiwAFPZM7qoGq0HwtjFtwSbNN8uP7Us1lqQuPO0uXXQuOTFT-l7h6xRAJgqqWhoCWqoQAvD_BwE
-
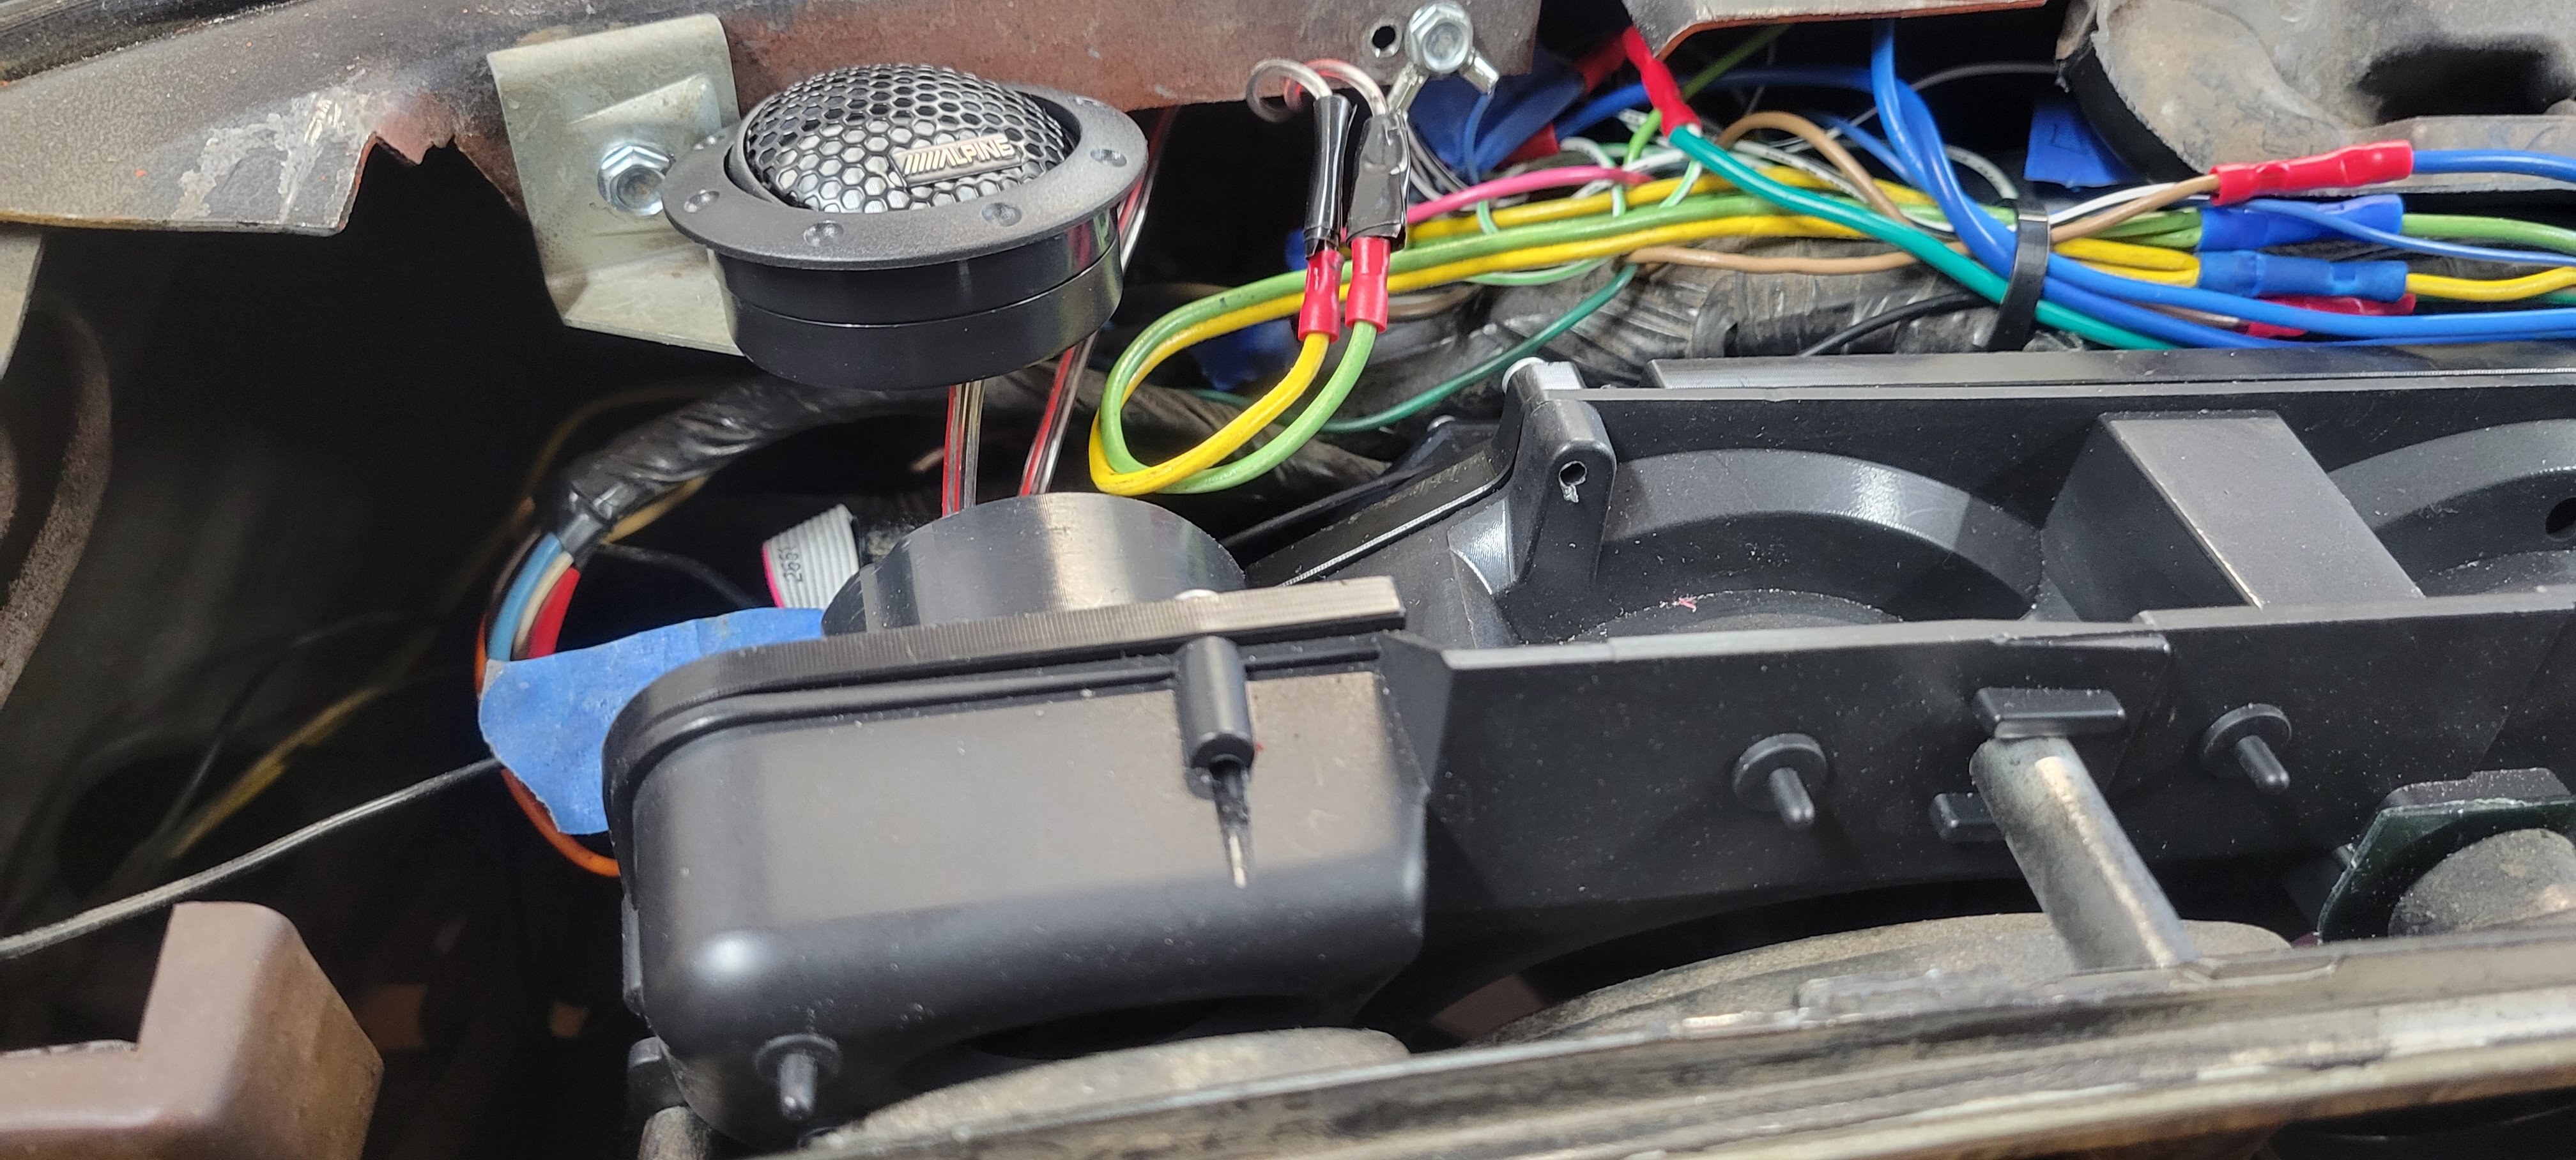
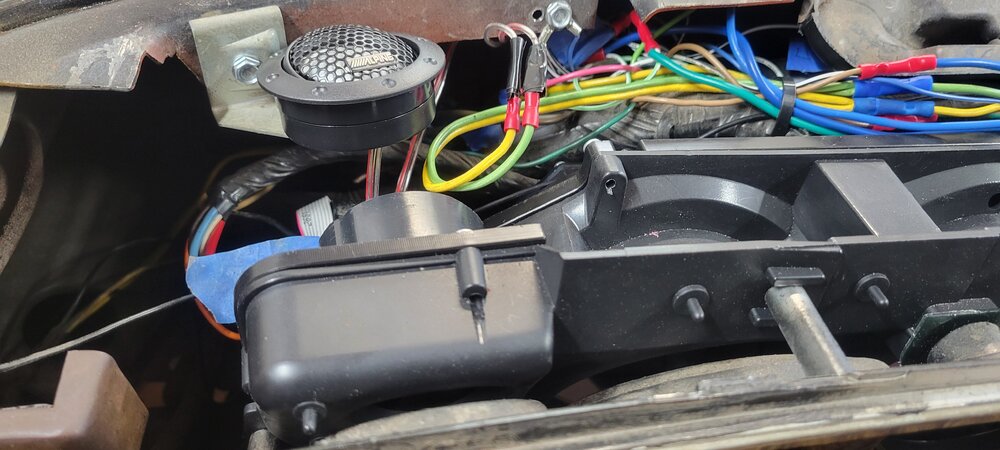
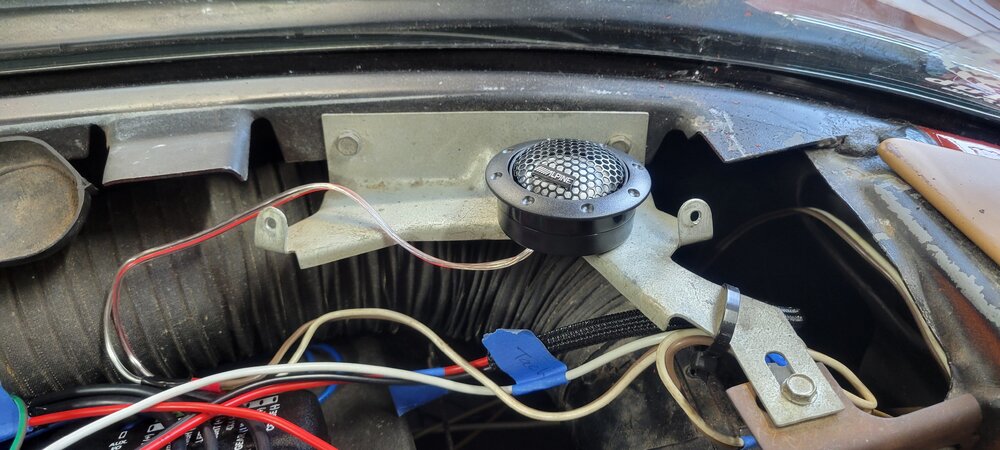
While I am happy with the kick panel speakers, I hoped I could do a bit better. Talked with a friend that does hi-power stereos. He'saware of my hearing difficulties and understands that pure volume is not the answer for me. He suggested I try some tweeters in the dash position, and he was right on! A pair of Alpine tweeters fit with no intereference and deliver the sound quality I wanted.
-
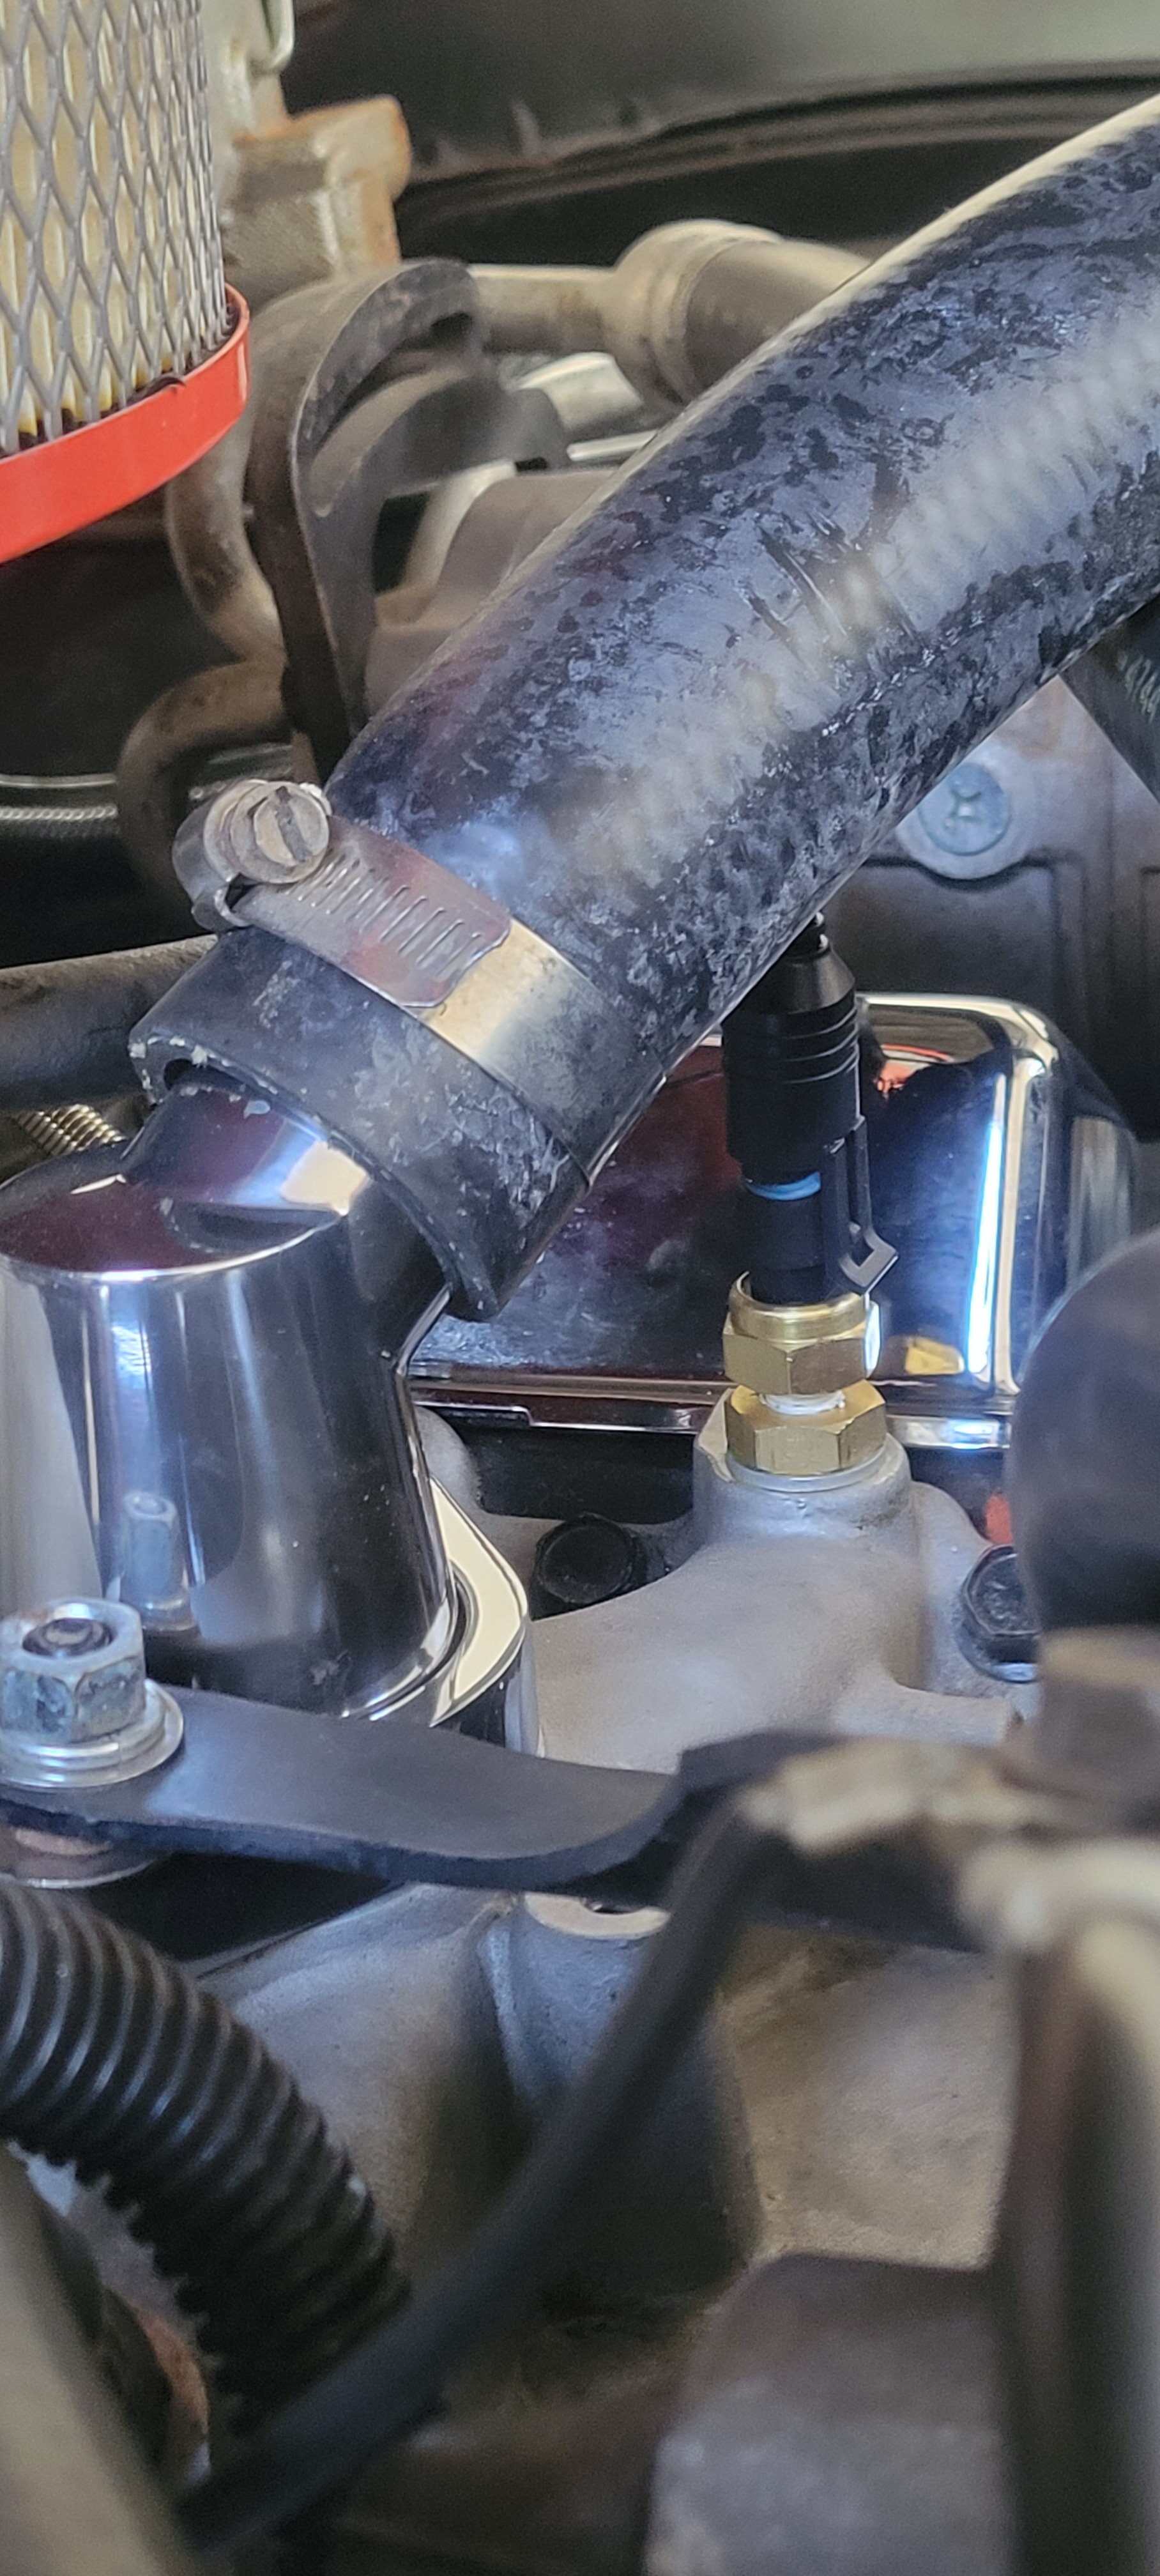
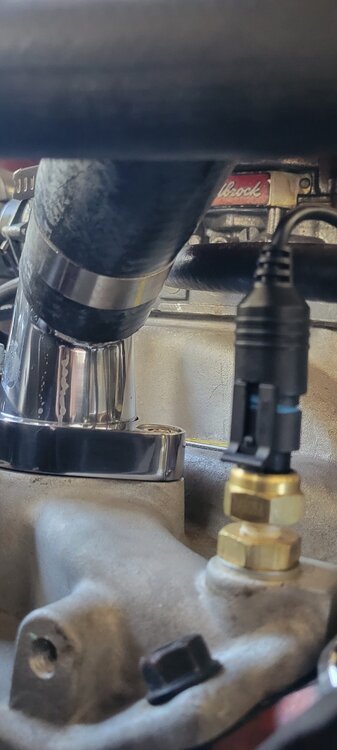
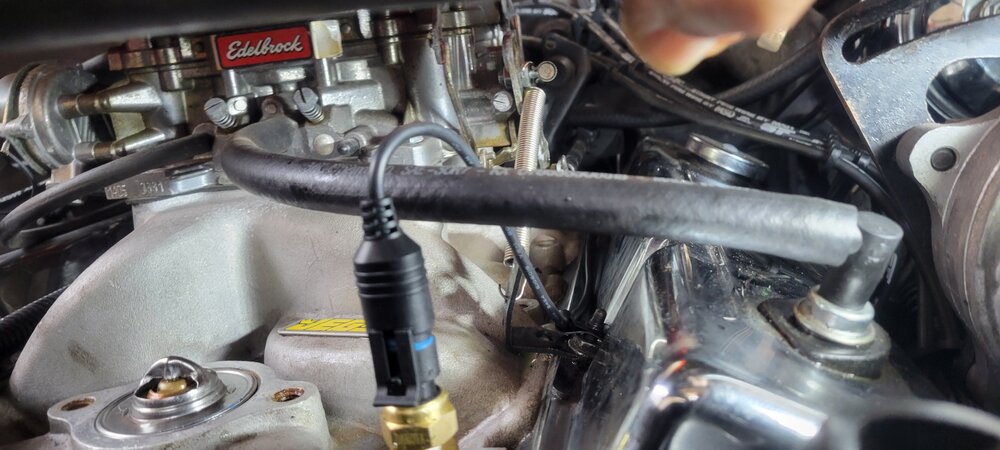
Finally got some pics showing the new thermostat housing and DD temp sender, plenty of clearance now.

-
On my install I was able to slightly trim the rubber on the pedal pad to clear the speaker.
-
I've had 4x6 Kickers in the front with 6x9's in the back. With my hearing loss (and exhaust) I was constantly adjusting the volume as cruising speed changes. I bought a pair of the speaker kick panels from Classic Car Stereos (https://www.classiccarstereos.com/1964-1967-chevelle-speaker-kick-panels-with-ac-65-pair-no-speakers.html?rrec=true) and installed them at the same time I installed a Dakota Digital dash. Needless to say, the 4x6 just barely fit with the DD dash, but, the magnet interefers with the volt meter (it pegged the needle). Finished the install with the new kick panel speakers and no dash speakers. Took 40 mile ride today, and barely changed the stereo volume fromin town to highway. I'm very pleased with the new setup. I'm going to see about getting some small tweeters to put under the dash, hoping the magnet will be far enough away to not effect the volt meter, and give me some more clarity.
-
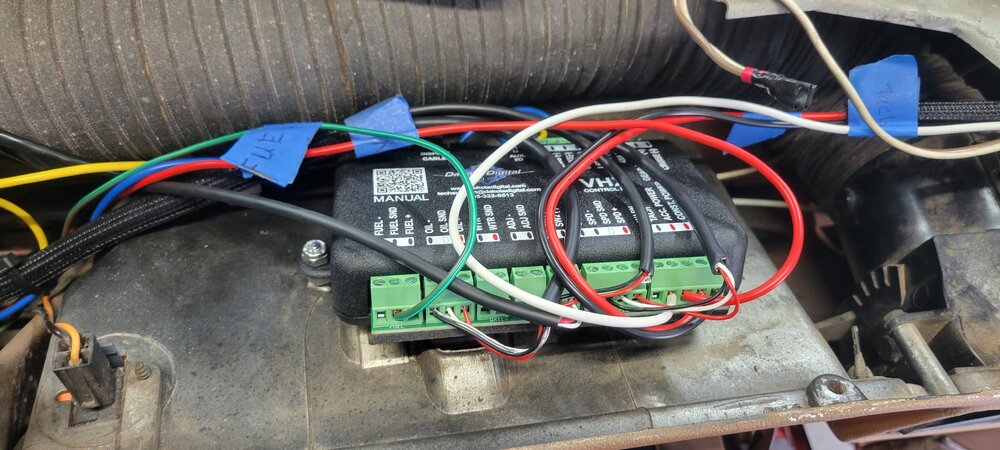
Yep, that was the most convenient spot. I ran a 10-24 machine screw up through the glove box top to hold it in place, though I don't think the wires will let it move much! I did end up needing a new gauge carrier, the old one had one crack that I noticed when I did led bulbs. It was so brittle the screw holes crumbled as I removed them! Fortunately NPD in Ocala has them in stock, 3 hour round trip and I was home with the new part. Spent a lot of time reading the manual, verifying and re-verifying the wiring, along with cleaning up some previously installed wiring form an older radio. Only had to make one call to Daytona Digital to figure out how to get the readings I wanted to show in the tach LCD display. Everything else programmed and works as it should! I'll get a pic of the new thermostat housing that shows the clearance of the temp sensor at tomorrow's car show.
-
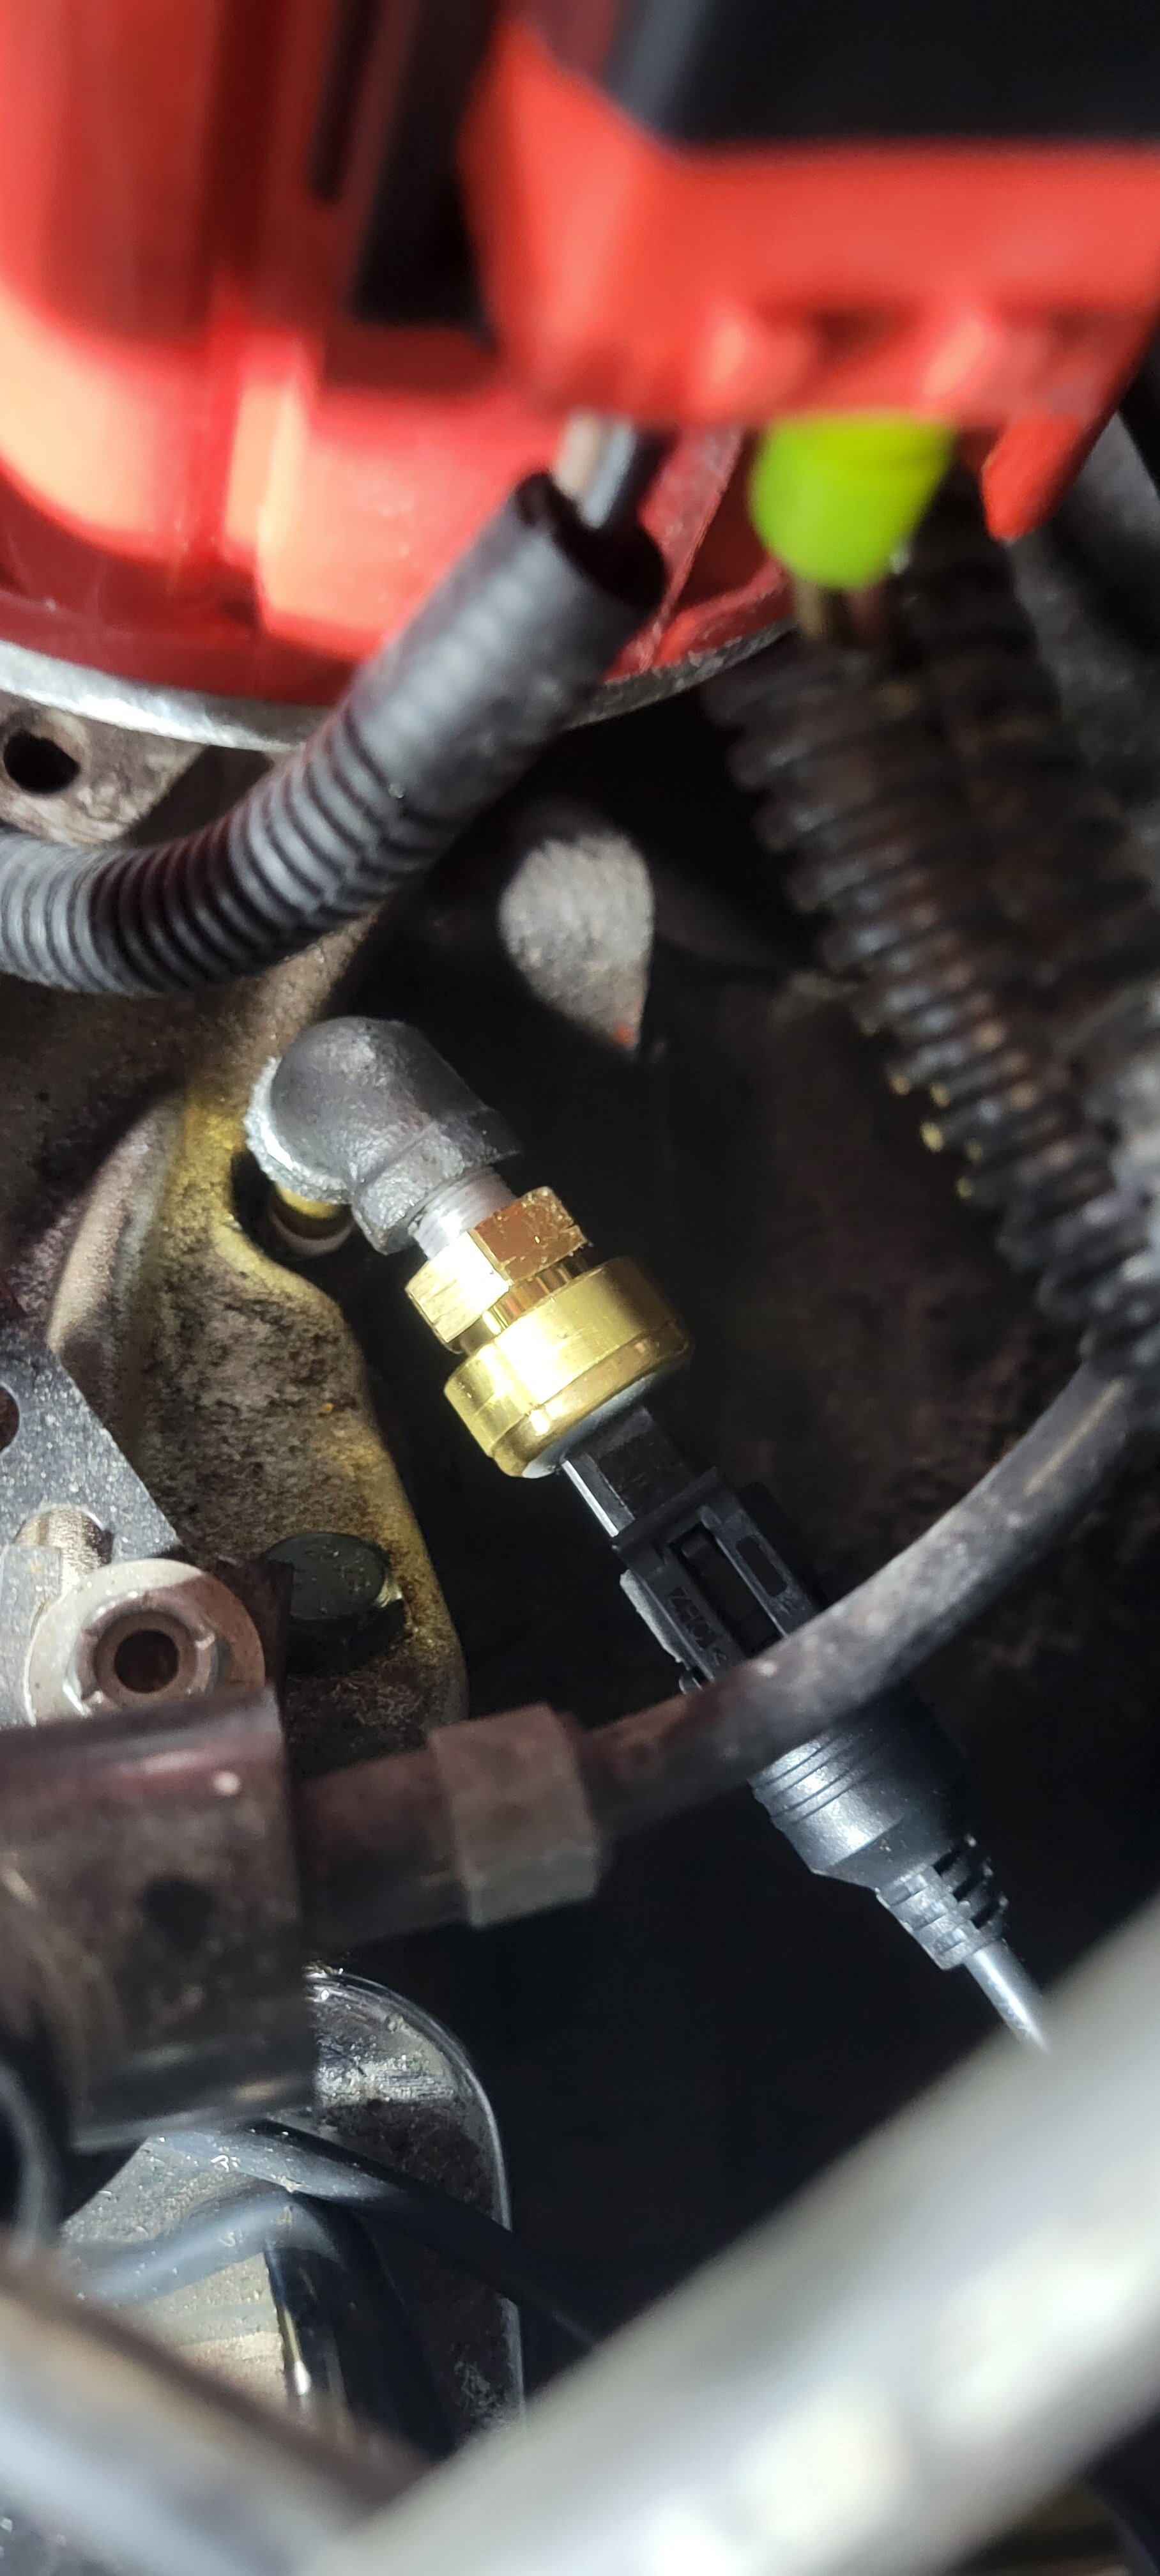
Senders installed and wiring run through the dash. Biggest problem today was getting the speedo cable disconnected. Yes I pushed the spring clip to release it and then pushed the cable in and tried to pull it out. It just wouldn'tcome free! Finally grabbed it with a pair of pliers and levered it free! Gauge panel is now out and ready for the change to the DD gauges. Still have to route the new sender wires inside the dash and clean up some other loose wires in the dash.

-
Yesterday's start of installation went fairly well. Began by removing the 3 mechanical under dash accessory gauges to install the DD sending units and cables. Speedo and oil pressure senders installed easily. Temp sender not so much! The Jegs 4 bbl manifold has the sender directly under the hose, and the height of the sender doesn't clear the hose. Tried installing the sender in the side of the block but again, the height of the sender was within 1/4" of the header! Solution: Found a 45* swivel thermostat housing on Summit, I'll get a pic when it's installed. https://www.summitracing.com/parts/sum-371100 Today's plan is the get the old gauge panel out and get the wiring run to where I plan to mount the box on top of the glove compartment.
-

What did you do to your Monte Carlo today?
BobW replied to Canuck's topic in General 70-72 Monte Carlo Forum
Car shows & Daytona rained out for the weekend, gonna install the Dakota Digital gauges.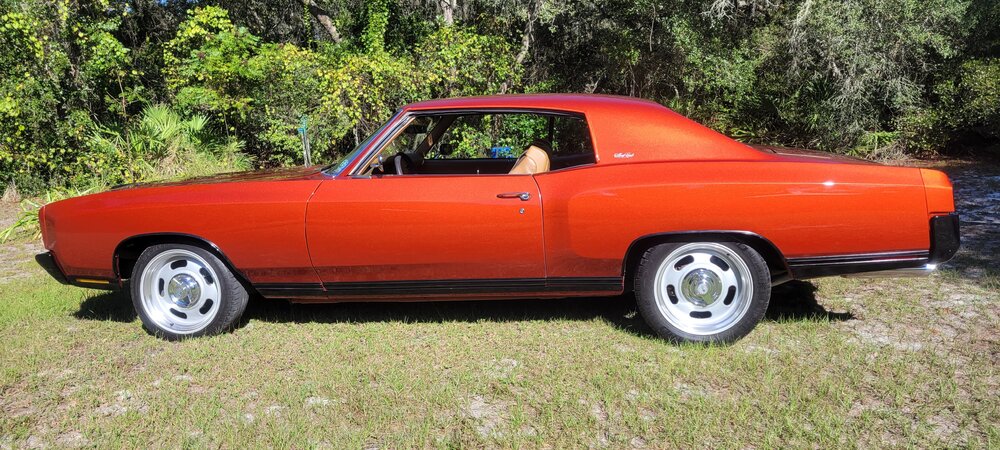
-
Question for those who have installed the Dakota Digital gauge package. I'm reading (& re-reading) the install for Dakota Digital dash and have a question re the fuel gauge. DD says to run a ground wire as well as a signal wire from the sender & mount bolts. The sender is grounded to the body. Have any of you run a new direct ground or wire pair to the DD panel? Or did the gauge work using the current dash wire and a chassis/body ground?
-
I'm on well water that has some iron content. Softener system and filtration significantly reduces it but doesen't eliminate it. Distilled water always.
-
Thanks, that's what I was hoping!
-
I just picked up a new CPP 50004 box (for $100!) and ordered a new rag joint. Do I need to loosen and pull back the steering column for additional room to install the new rag joint when the new box is bolted in?
-
Where did you find a 10" dual diaphragm booster?
-
1972 MC 350/Auto - Roof, Sail Panel and Trunk Repair / Replace
BobW replied to B-Man's topic in Auto Body Repair
I just went this route, my car was in similar condition! Full right quarter, full roof, rear deck filler panel, right wheel house, right trunk drop down, full left quarter just to get the sail panel. $2,300 in parts, $4,000 for install..... No more rust!
-
Thanks Jim! Not planning on Daytona, but there are some regular shows on Deland. I'll keep an eye on what's listed and get in touch! I've got to make the time do do a build thread .....
-
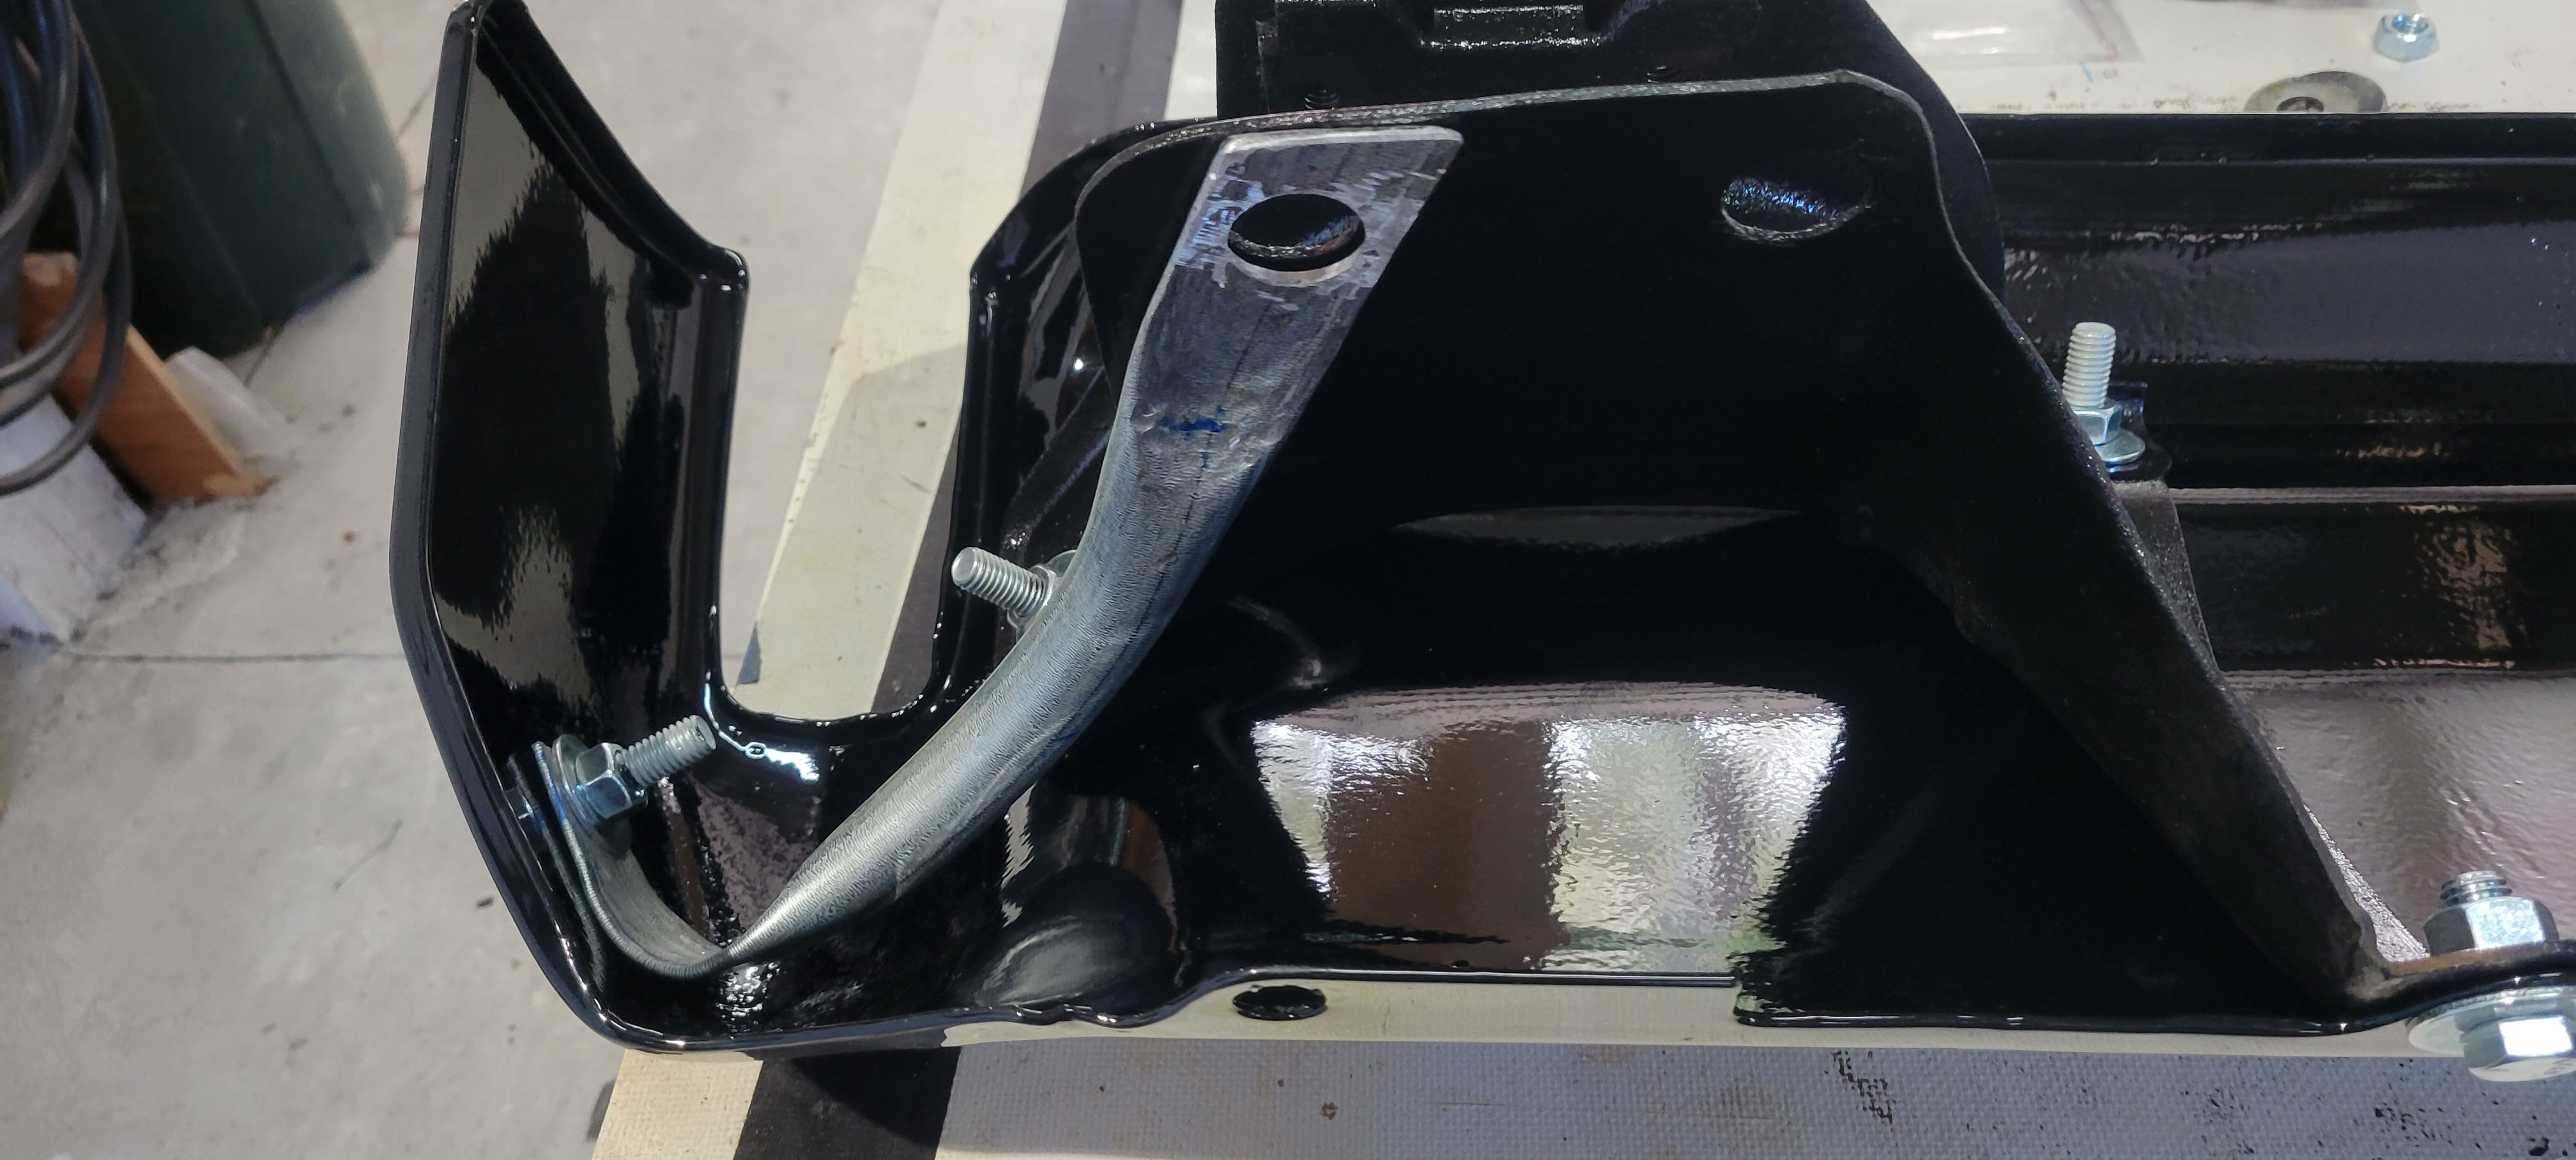
First step was finding a piece of tubing to use. Never throw anything potentially reusable away! This was a mount from a solar panel, had just the right bend! Next step was to turn on my dyslexia to create a mirror image. 🤔 After an hour or so with judicious use of a BFH, here's the resulting test fit.🔨 And mounted on the Monte! Thanks to all for the advice, and an extra thankyou to Jim (cbolt) for his generosity! 👍


-
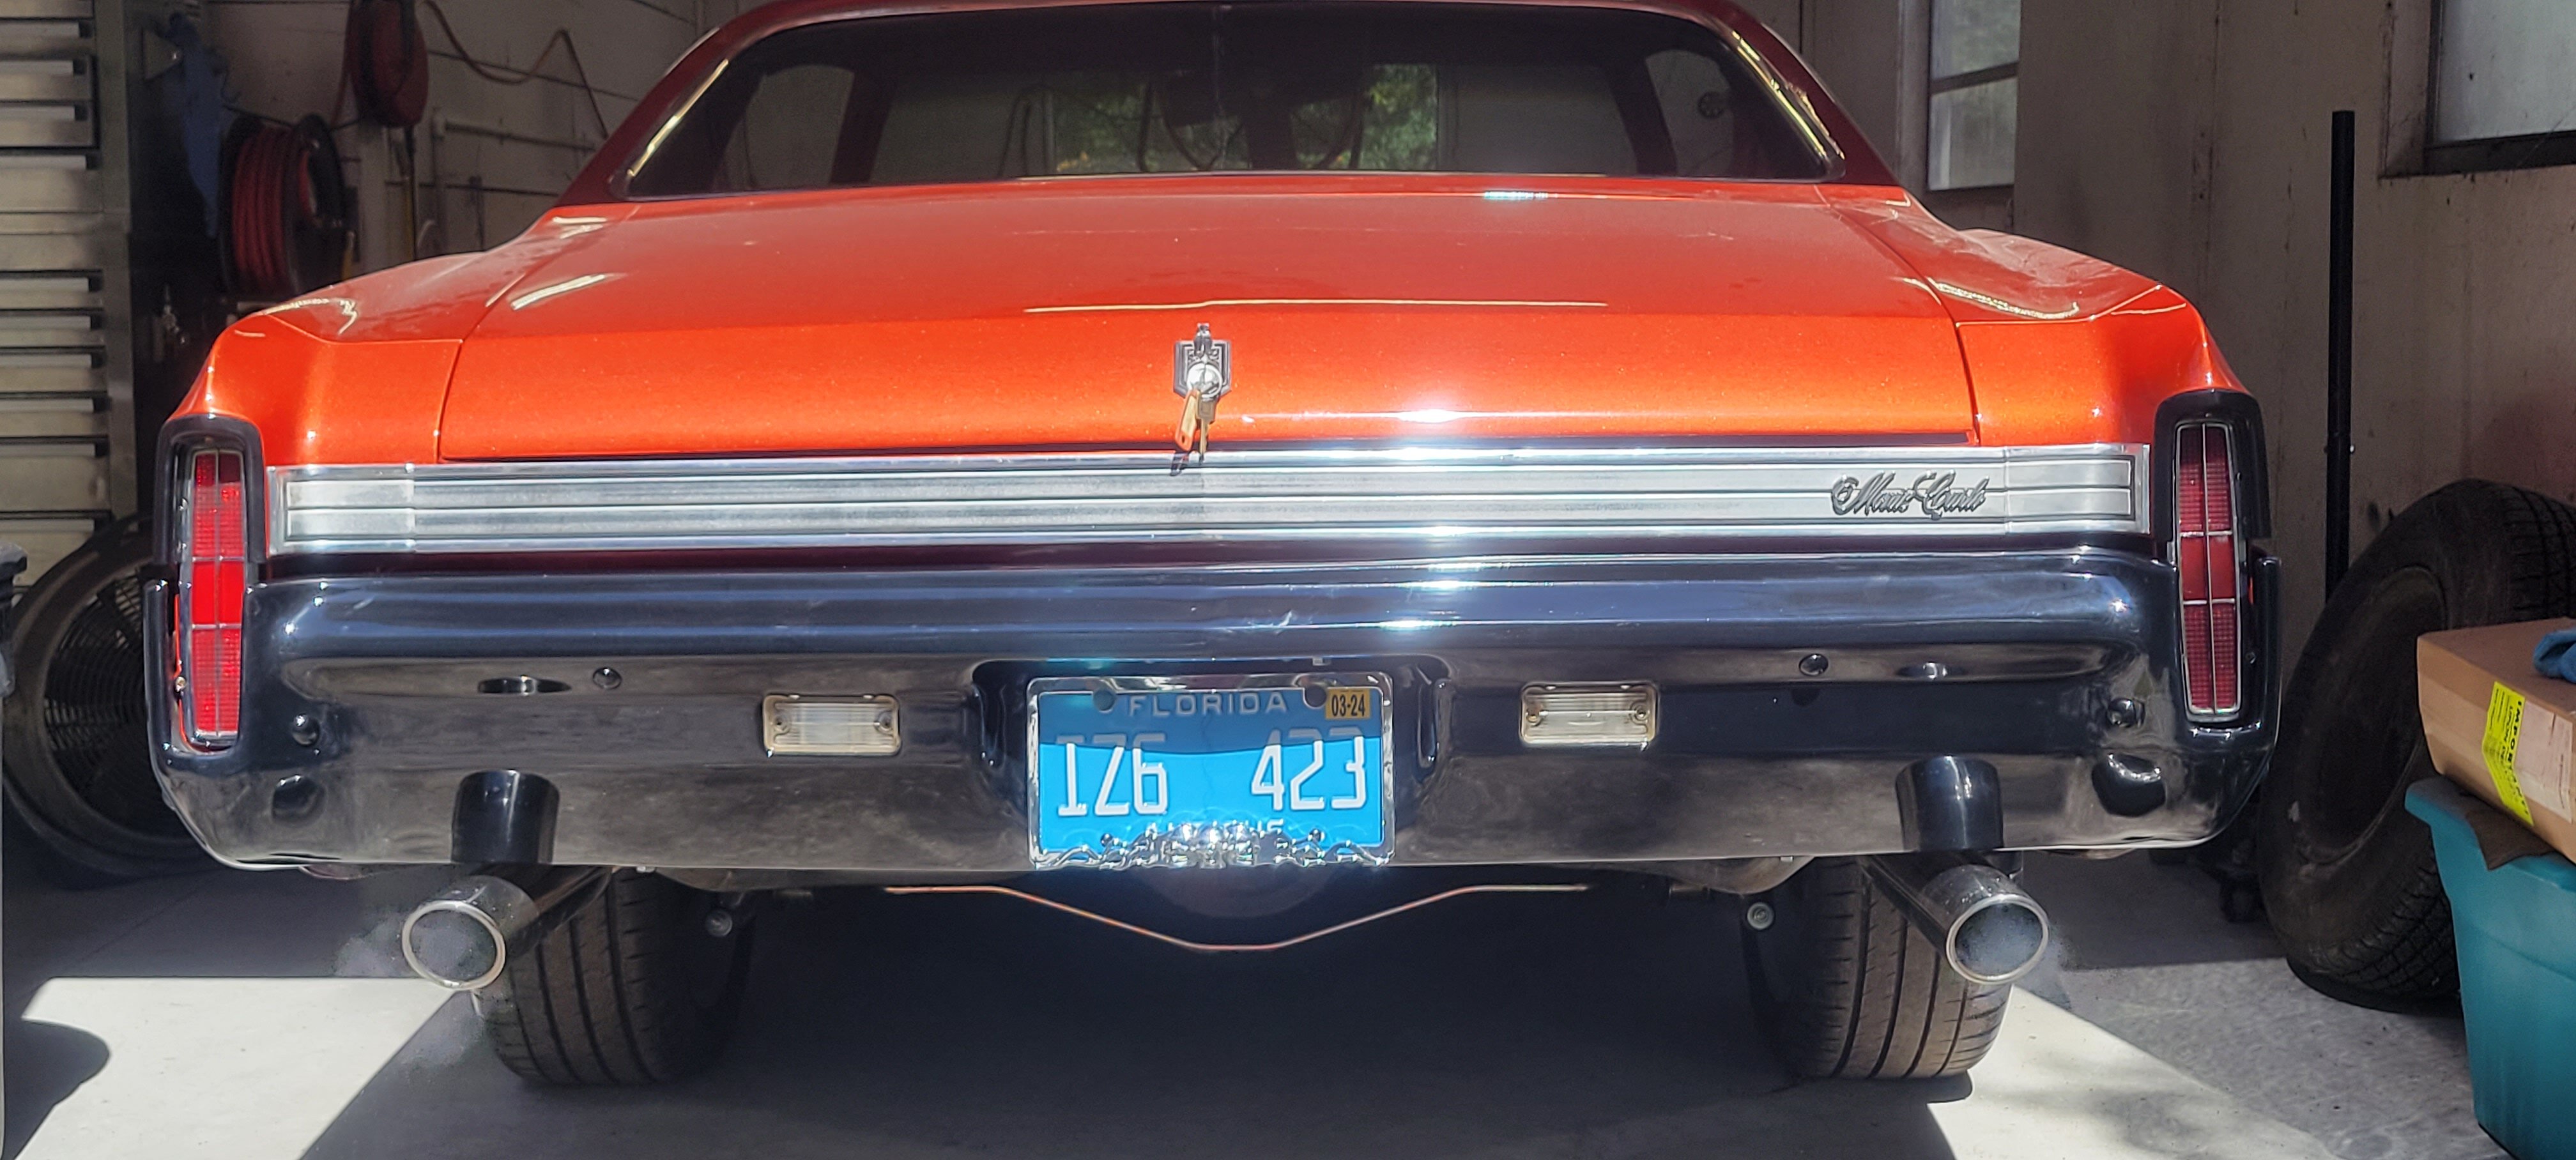
Thanks for the offer Dennis, I have them. I had them powdercoated black with the bumpers. Please don't fall down..... 🍌
-
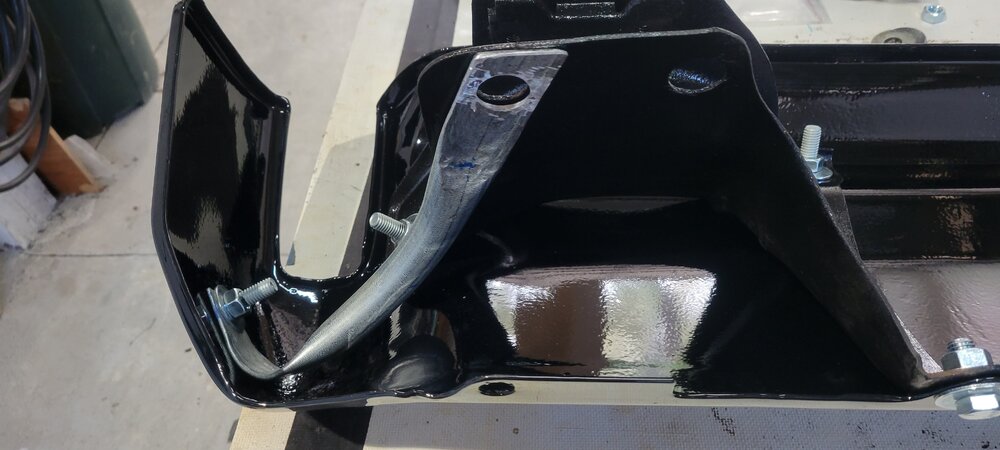
Looking at the one I got from cbolt, I'm pretty sure I can make a brace for that side. Cleaned up what I have and painted them. Figured out what I need for bolts and visited my local Ace store. I should get it mounted tomorrow. Much thanks to Jim (cbolt) for offering the parts!
-
If any of you are following along, I've made arrangements with cbolt to pick up the brackets he has. I'm still in need of the left side outer brace if anybody has one available. A pitted one would be OK....... I did manage to hang the front bumper today.

-
Thanks James, PM on the way!
-
Excellent, let me know and I'll make arrangements to come over.
-
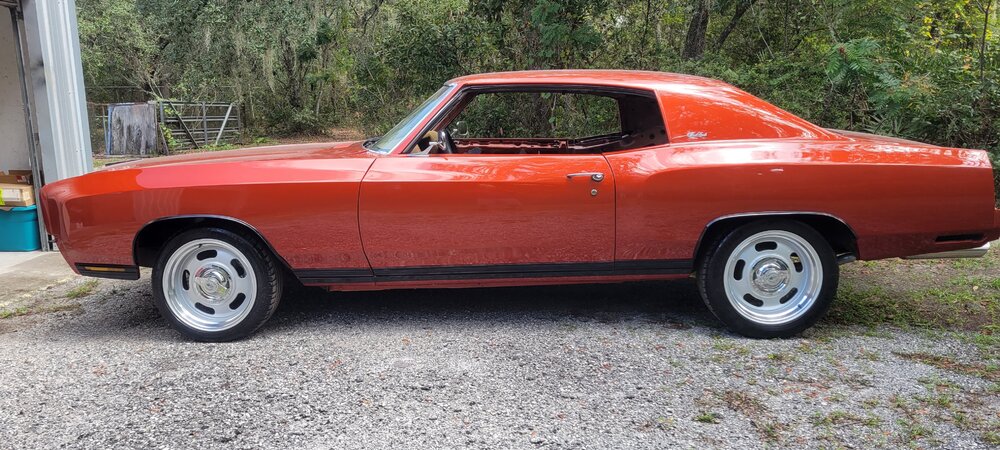
OK, I'm not 'that guy'! My MC is being done as driver, not frame off restoration. When the vinyl came off, the rust was at a point where the roof, right quarter, right wheelhouse, right trunk dropdown, rear deck panel, and a full left quarter to source the left sail. Lower trim and bumpers blacked out, Daytona Sunrise Orange Metallic. Interior is custom. So after unknowingly driving the car for 5 months with only the center bracket, I really need some functional brackets for the rear. Disclaimer: I was 3 weeks out from spinal fusion surgery when I bought this car, couldn't really climb under it, regardless of bananna peels......

-
Great, let me know! And you're almost local!
-
But better than nothing!