riverdogs00
-
Posts
102 -
Joined
-
Last visited
-
Days Won
2
Content Type
Profiles
Articles
Forums
Gallery
Events
Everything posted by riverdogs00
-
awesome - I will be in touch if I cannot find
-
outstanding -thank you!
-
Group, has anyone found somewhere that reproduces this script? OPG does not, and I have not found anything on the threads here.

-
Another way to help pinpoint is to drive vehicle and have someone follow you. If it smokes on decel, then likely valve seals. If it smokes on acceleration, likely rings. Of course on a manual car its easier to do the decel test, but you could lock it in 2nd for example and test it that way so it does not upshift. Agreed on the answer above regarding start up / valve seals.
-
thank you! thank you!
-
No heat shields on my SS
-
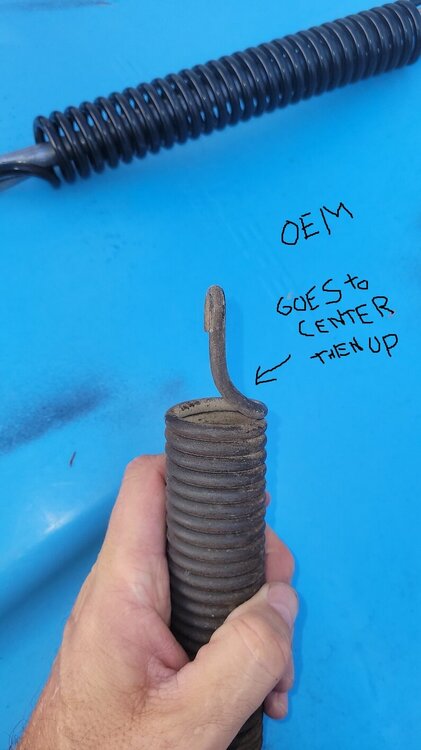
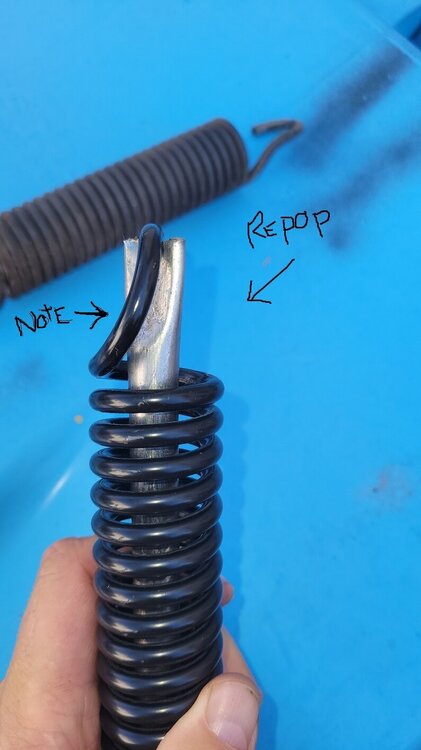
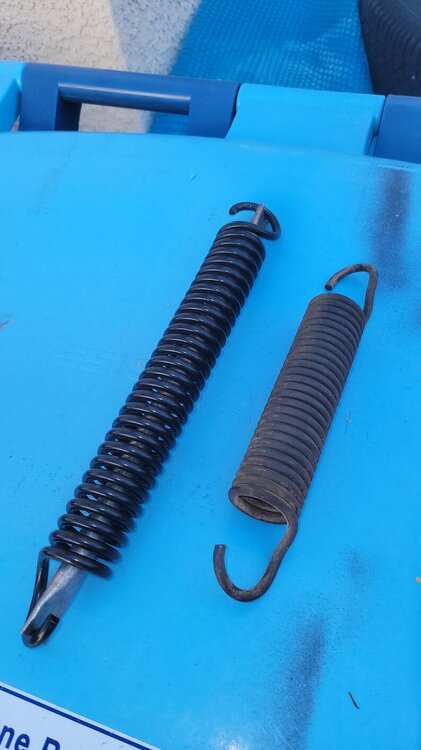
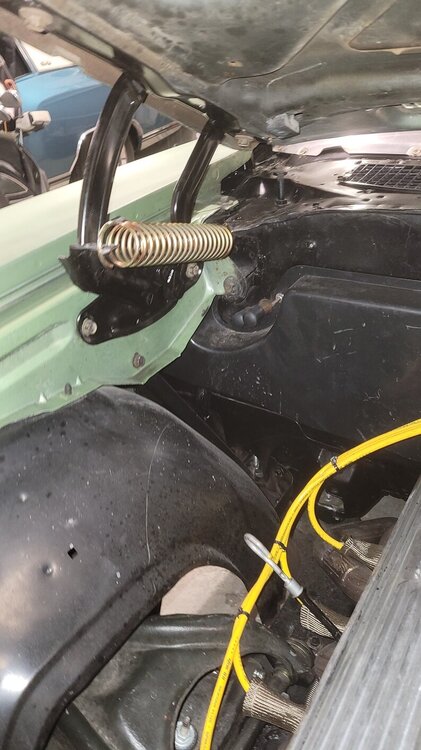
Group, I looked and saw a few threads on Hood springs but wanted to share what I found and what worked for me. Maybe this will help others. I bought new springs as my OE's were crusty and I had new Repop hinges. Tried to put springs on hinges in a vise, ultimately installed after I mounted the hinges in car using the prybar method. One thing I noticed is that the coil to hook end transition on the repos is different than the OE's. On the OE, the top of the coil travels about half way across the diameter of the coil before it goes vertical. The repops do not do this, and as a result I had some interference with the hinge and ended up swapping the spring end for end to get it to work properly. On my car, I cut a hole in the hood and thereby lost a lot of rigidity. Closing was a delicate balance of shimmying side to side so I did not bend the hood. I bought a pair of lower tension springs for a fiberglass hood and then promptly spent a day looking at the repops installed on the hinges, on the car trying to find a way to get them off without a prybar. I tried the rope/vbelt trick where you loop in onto the hooked end, but found I was not strong enough in my old age to pull it off. I chose not to do the stacked washers method. What did work, and worked very well was this. I opened the hood and measured the spring end to end with it as small as it was going to be on the car (hood all the way open). Then I closed the hood 3/4 of the way and measured. There was about 2-3 inch length difference . I took some steel tube I had (about 7/16 of 1/2 diameter) and cut to just under my 3/4 closed measurement. I flattened the ends with a hammer, and notched them with my bench grinder. Inserted into the springs, lined up the notches and opened the hood. The springs fell off. So easy. Installation would be the reverse. I left the tubes in the repop springs, and will make installation easier if/when I use them. I then used the rope trick on my low tension springs; hooked the firewall end of the spring on the perch, ran a rope through the other end and simply stretched the spring onto the forward perch. See pics....after the fact of course ha
-
I struggled with my choke linkage for a time as well. I replaced the bimetal, and made my own linkage rod. I used "E" clips on the linkage after scribing a shallow groove in the rod. Thats a scary situation ha
-
1983 Hot Rodding magazine w/Monte on cover
riverdogs00 replied to Gregs70's topic in General 70-72 Monte Carlo Forum
MC1of80 - Didnt mean for it to come across that way. I just remember following that series a lot. 🙂 -
1983 Hot Rodding magazine w/Monte on cover
riverdogs00 replied to Gregs70's topic in General 70-72 Monte Carlo Forum
Pretty sure the actual name was econo performer - I remember reading those articles. They did a pretty good job with it in terms of both economy and performance as a combo. -
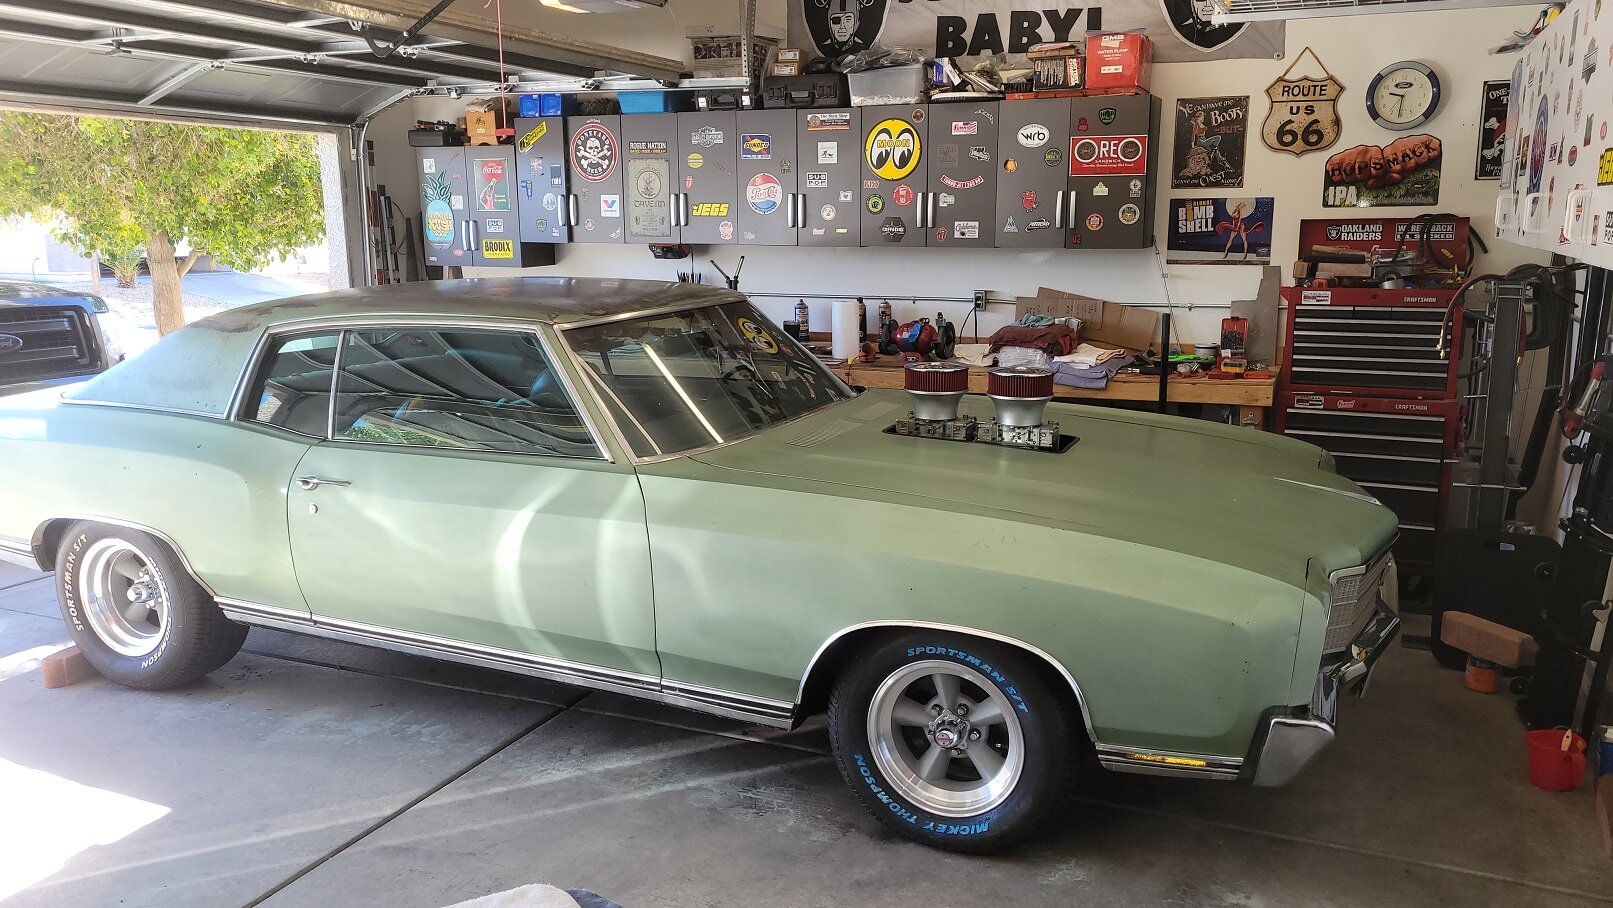
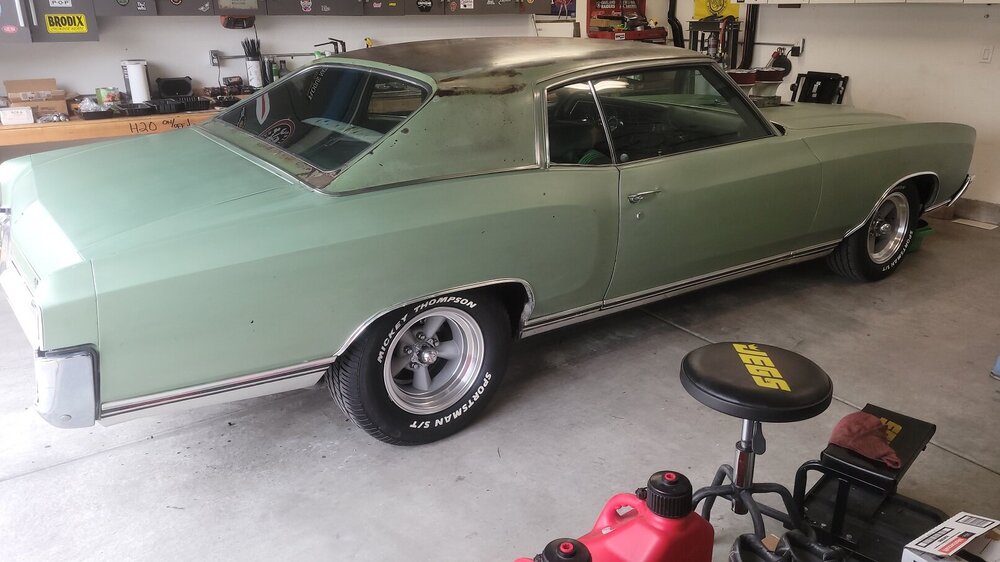
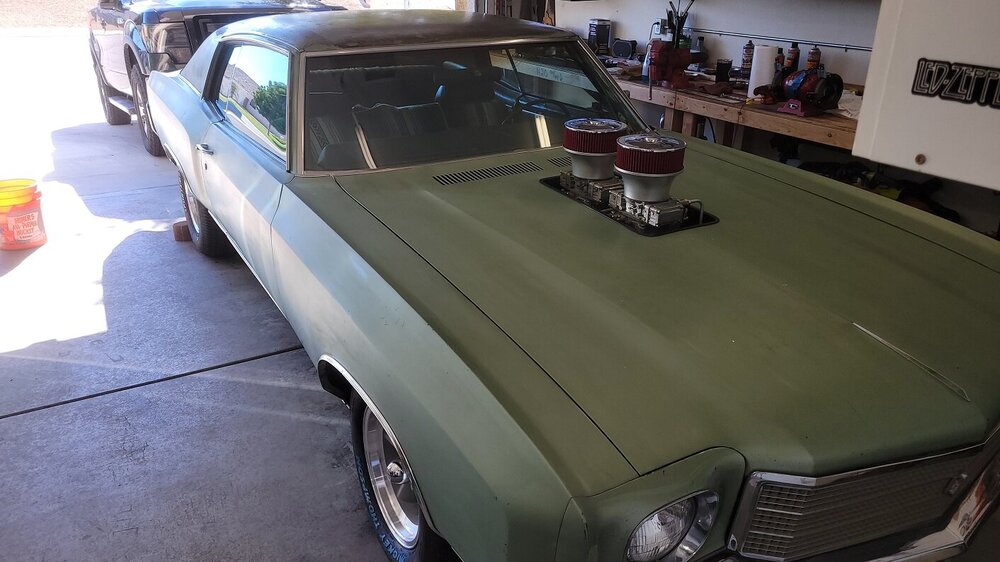
Licensed / insured / and turn key now. That was the goal for this year - happy its accomplished. Next year a radiator upgrade and maybe coil overs / drag radials. we will see. for now, fun to fire it up and continue to break in the trans and rear diff.

-
I did on mine. converted to 4 wheel, manual discs and removed that valve. I was plumbing new lines anyway.
-
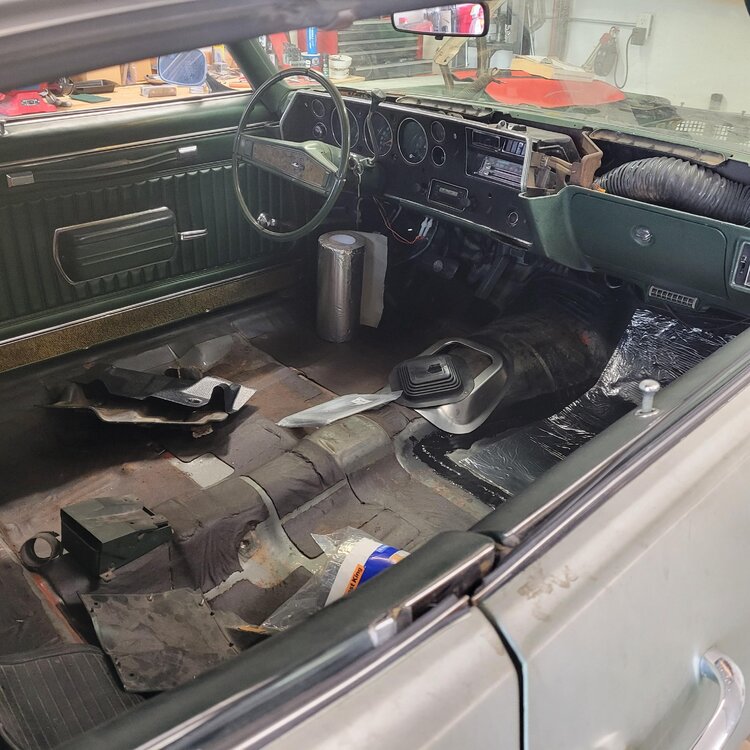
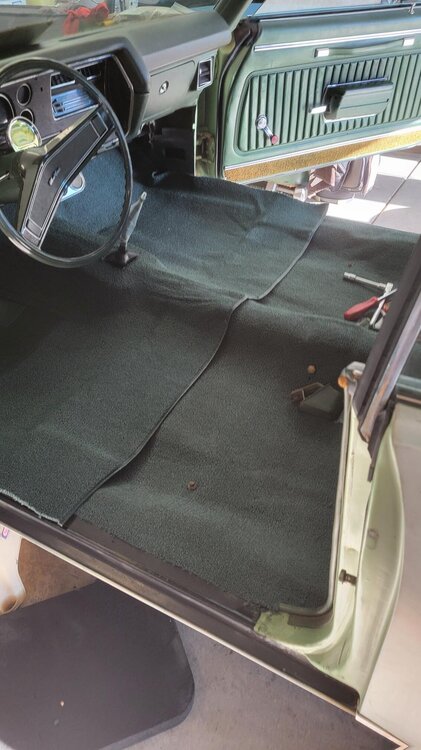
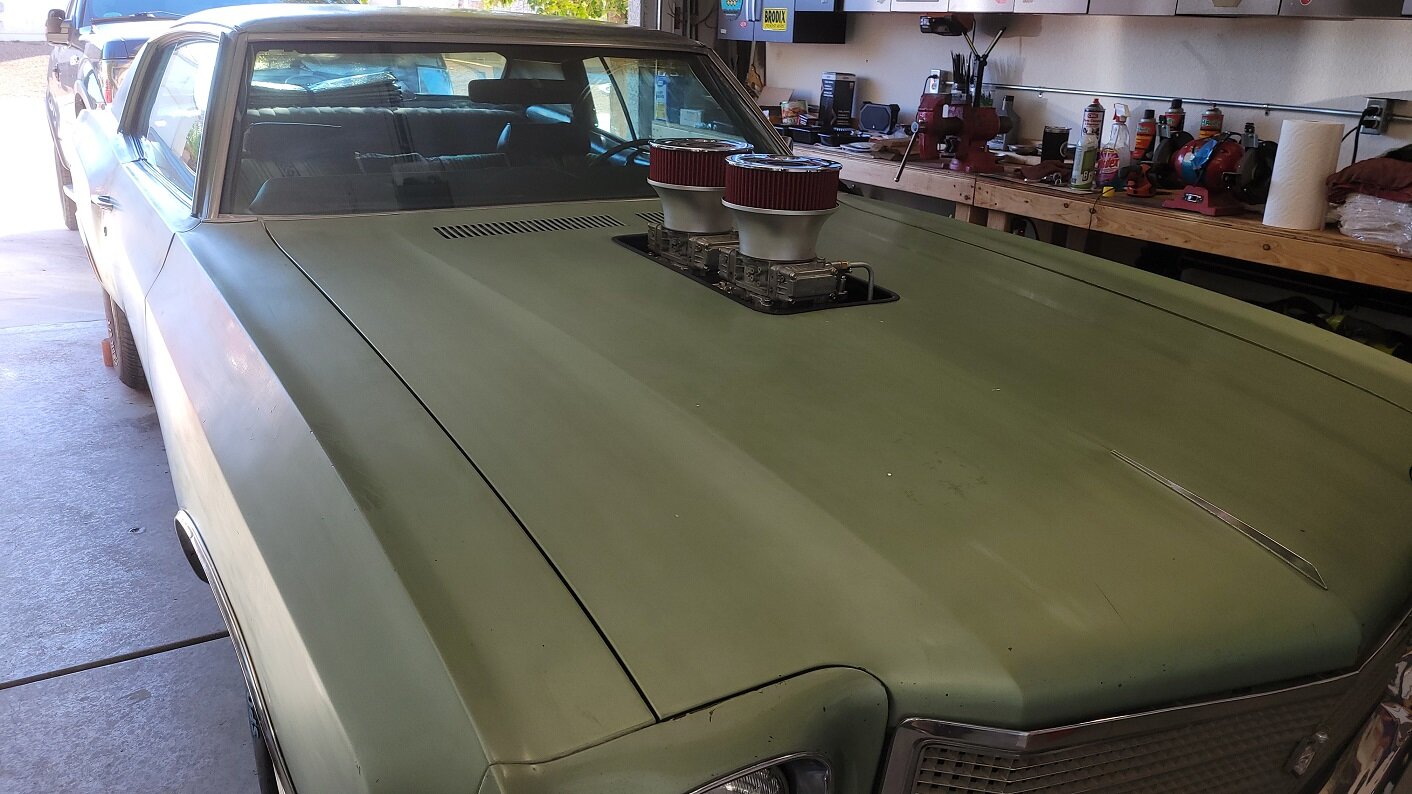
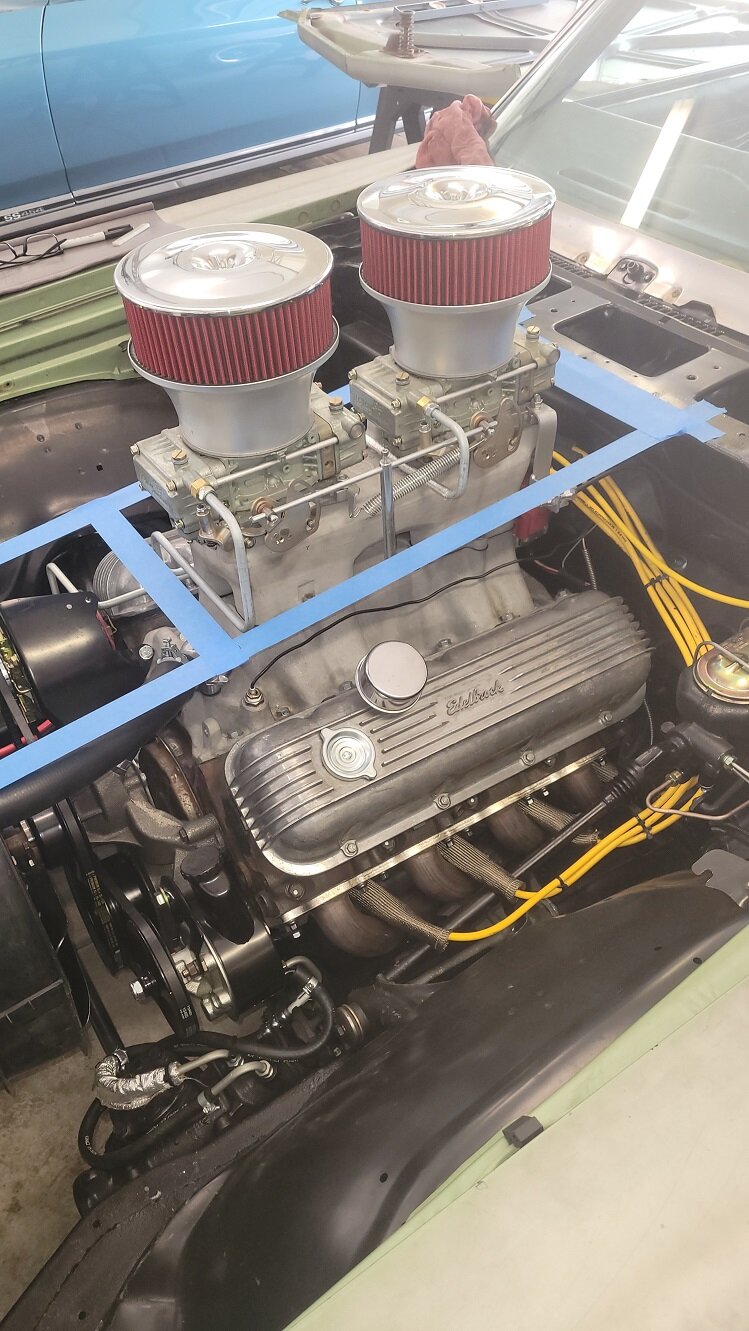
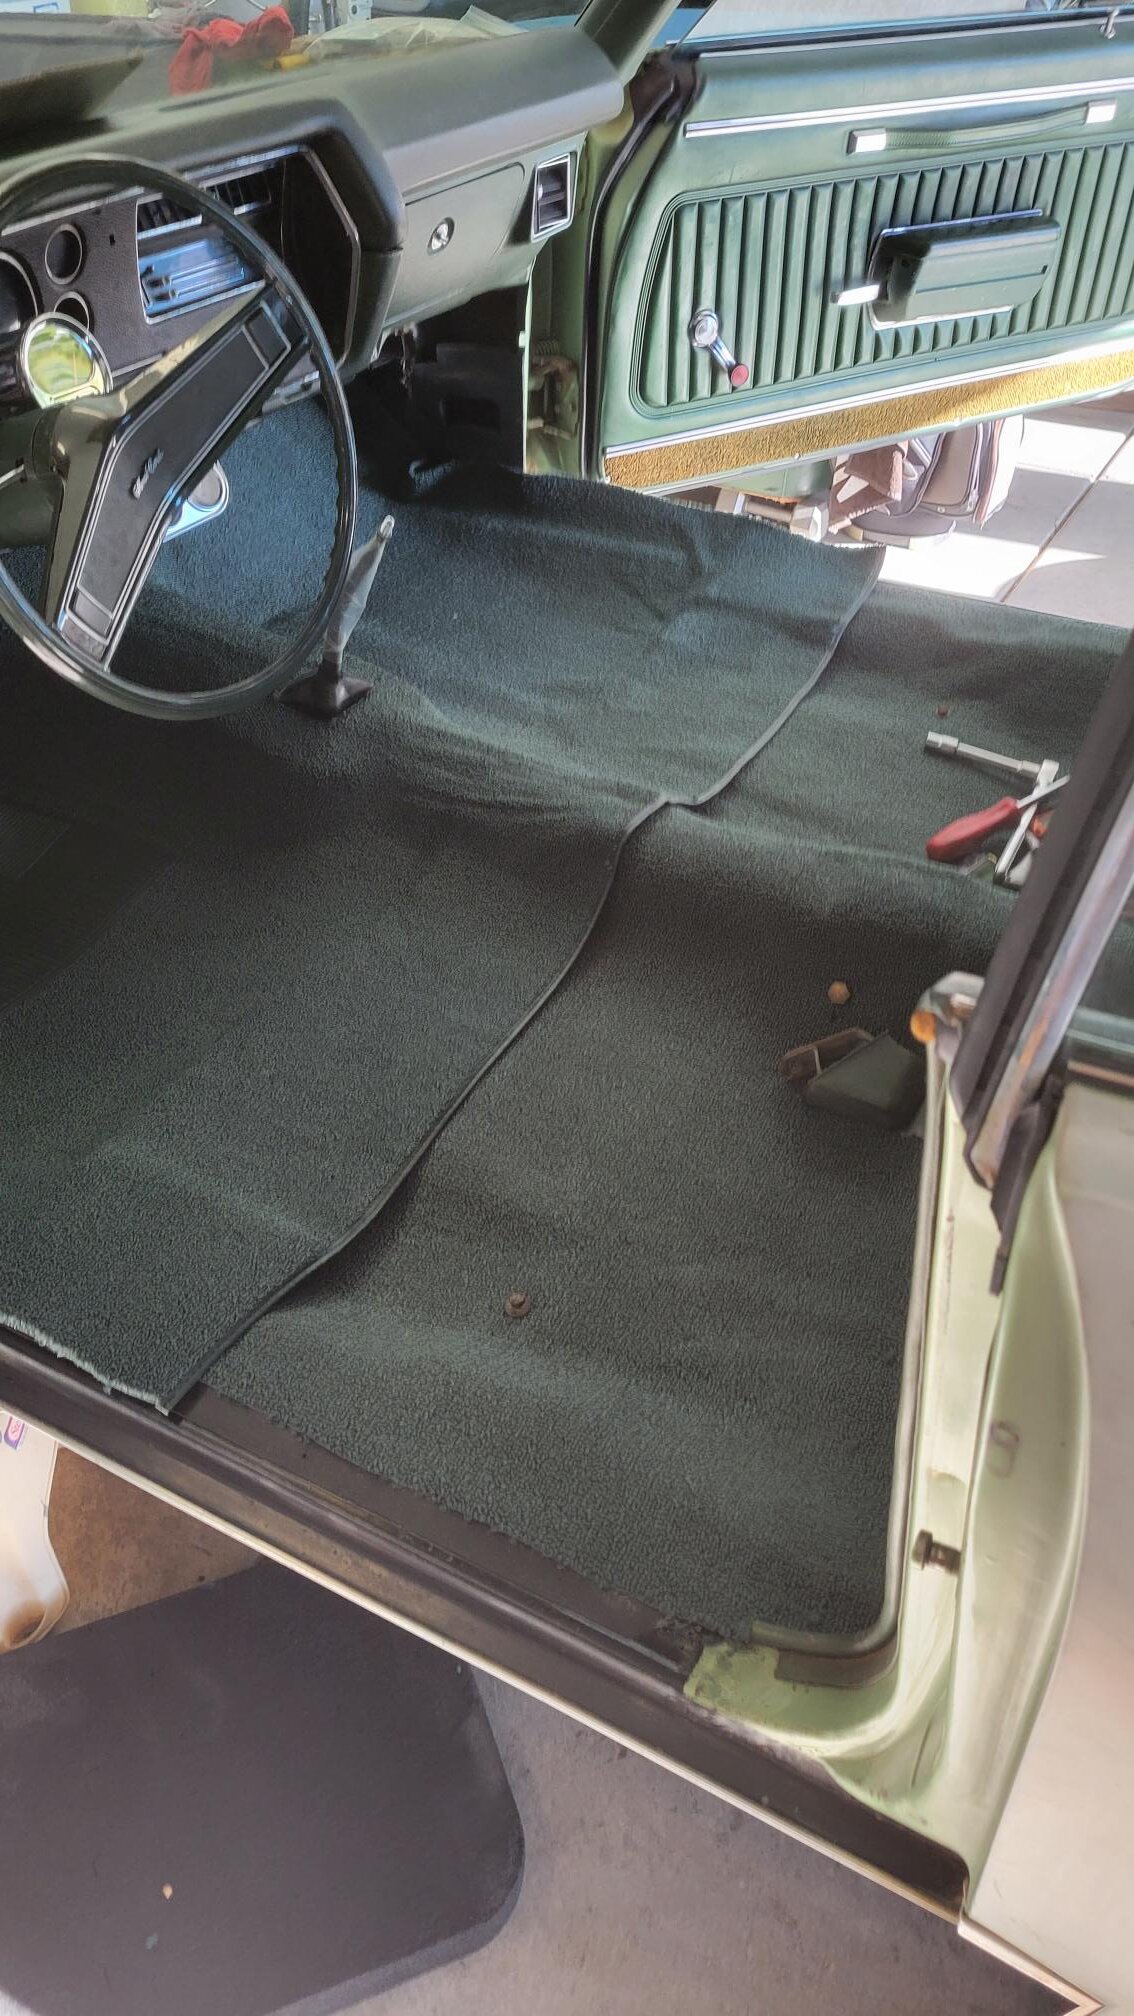
A few more pics, as things are wrapping up.


-
Engine Oil, synthetic Oil or Conventional oil?
riverdogs00 replied to stangeba's topic in General 70-72 Monte Carlo Forum
Amsoil Z-Rod 10/40 -
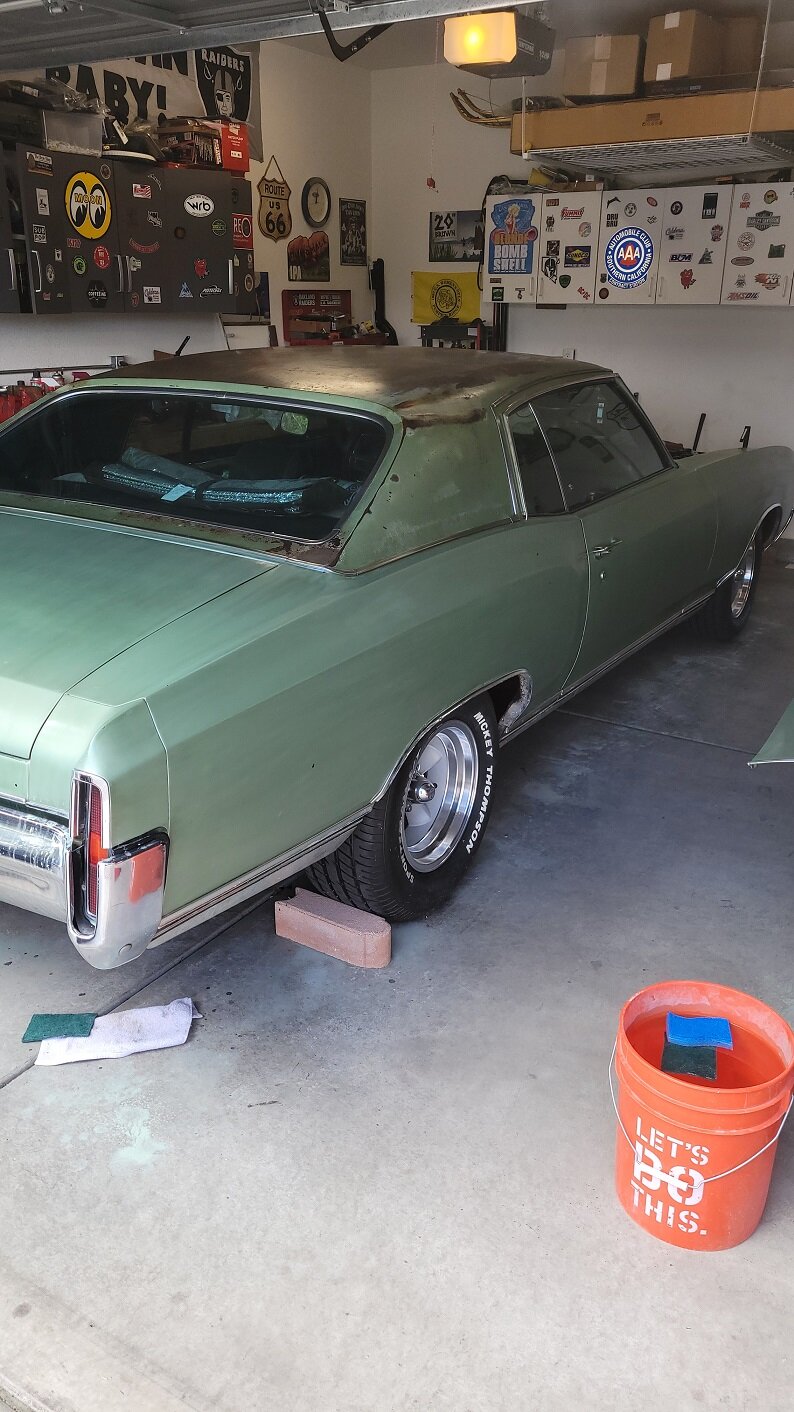
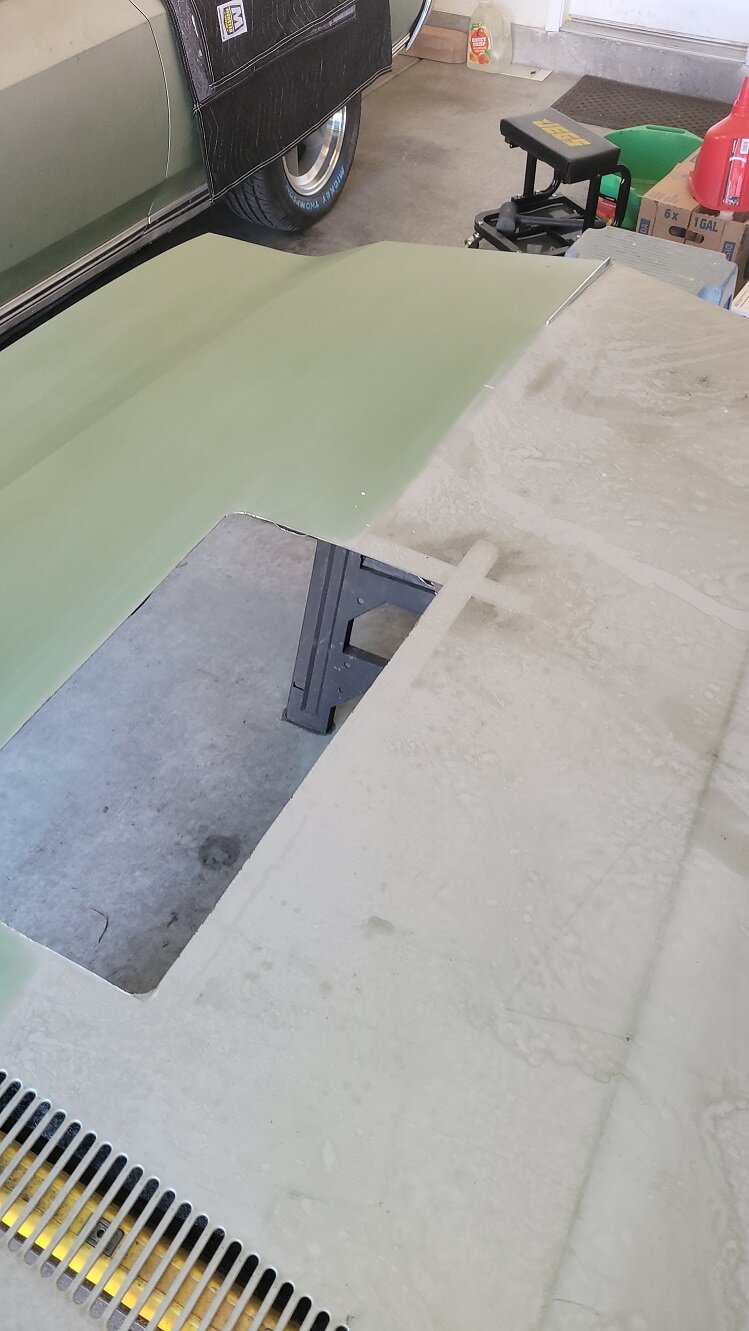
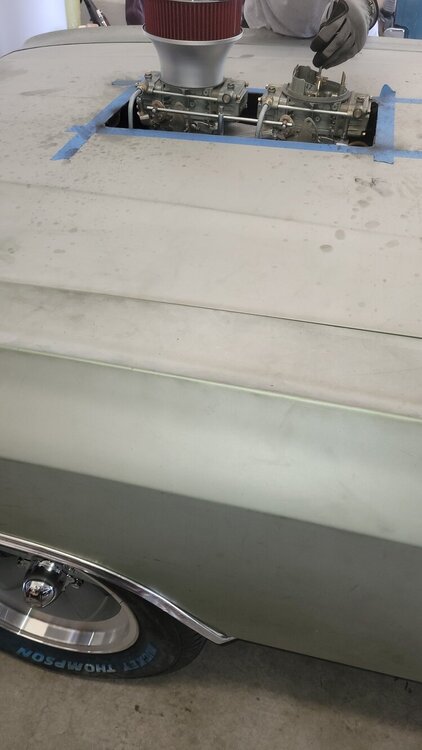
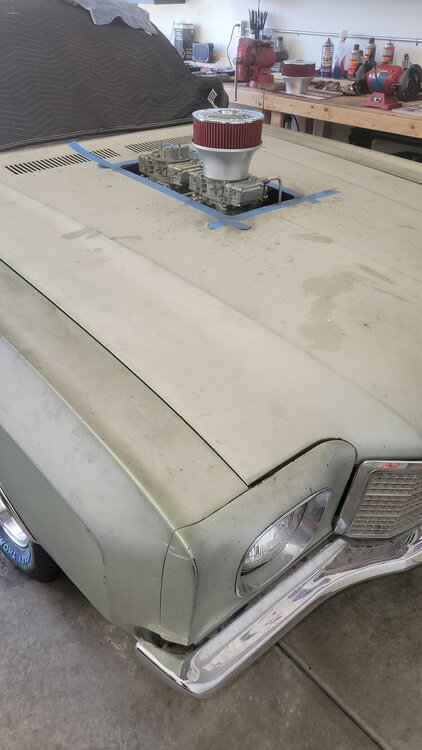
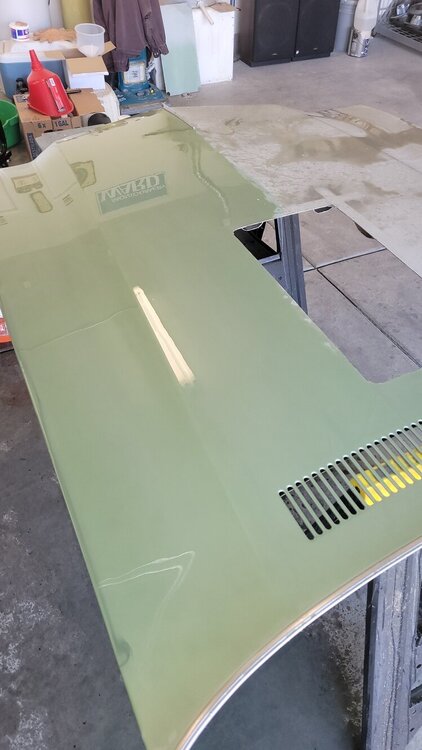
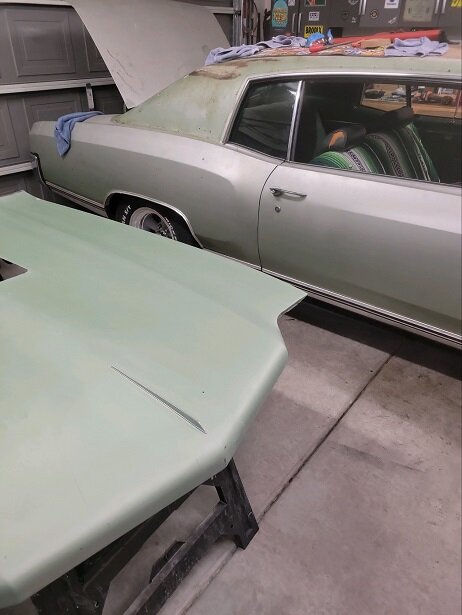
Coolant issue resolved, test drove vehicle for about a mile and all went well except brake lights which are now corrected. Decided to convert from rubber fuel likes to steel once I realized I would have a lot narrower hole in the hood. Cut the hood - it went well. Waiting on the little vinyl pinch weld to finish trimming it. Once I had the piece cut out, I experimented with it as I could not tell if the grey color was a repaint, or simply oxidized original green. Turns out the only respray was on the front after a fender bender. The rest of the car has original paint which I love. Just scuffing with scotch brite and water for now. Once the car is all scuffed, then will re group and decide next steps - if any.


-
I dont know if this issue was ever resolved, but i find myself in the same situation, after taking my 4spd conversion on its maiden voyage. I have power to the brake switch. Inserted a jumper to "open" the brake switch and no change. At the drivers rear connector in the trunk, I find that I have power to the tan wire (fuel sender), and the brown wire (presuming its running lights/turn signals). I believe when the brake switch opens (pedal depressed), power should end up at the yellow wire, but I have nothing. My question is this: Does that yellow wire get its power off of the turn signal switch? Looking at the schematics, it appears there may be another connector between the one in the trunk and under the dash. Thoughts? in the A.M, I'm going to just run 12v to the yellow terminal and see if the lights get brighter (aka brake light). new bulbs of course already and the ground checked and cleaned.
-
3-row reproduction radiator for sale
riverdogs00 replied to TheBMan's topic in Cars and Parts For Sale/Wanted
Good morning, Did you experience any overheating with the 3 row? I currently have a similar, albeit older radiator in my car and am unsure if it will be enough for a 454 in the desert heat. -
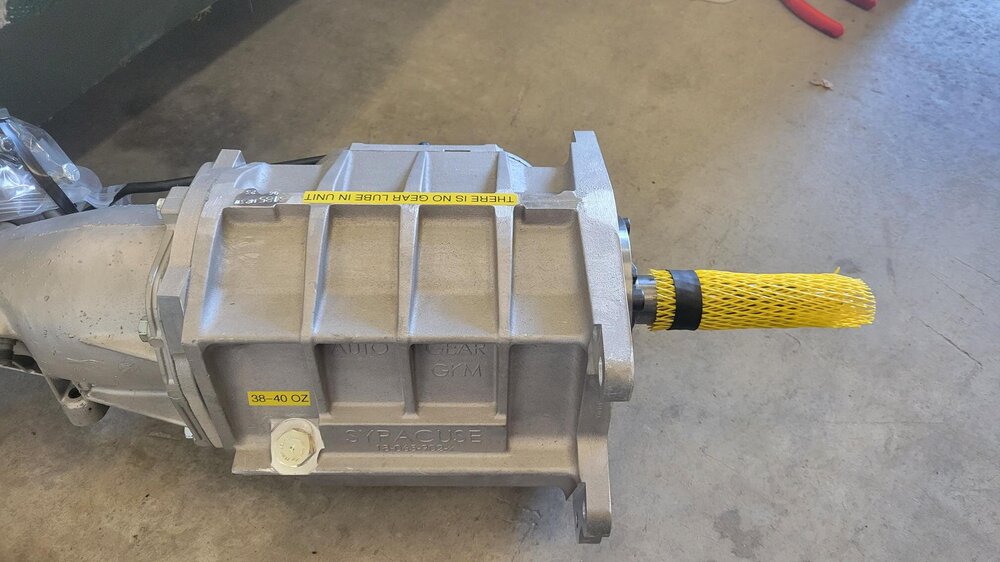
Clutch Linkage / 4 spds and Conversions
riverdogs00 replied to riverdogs00's topic in Drivetrain Tech
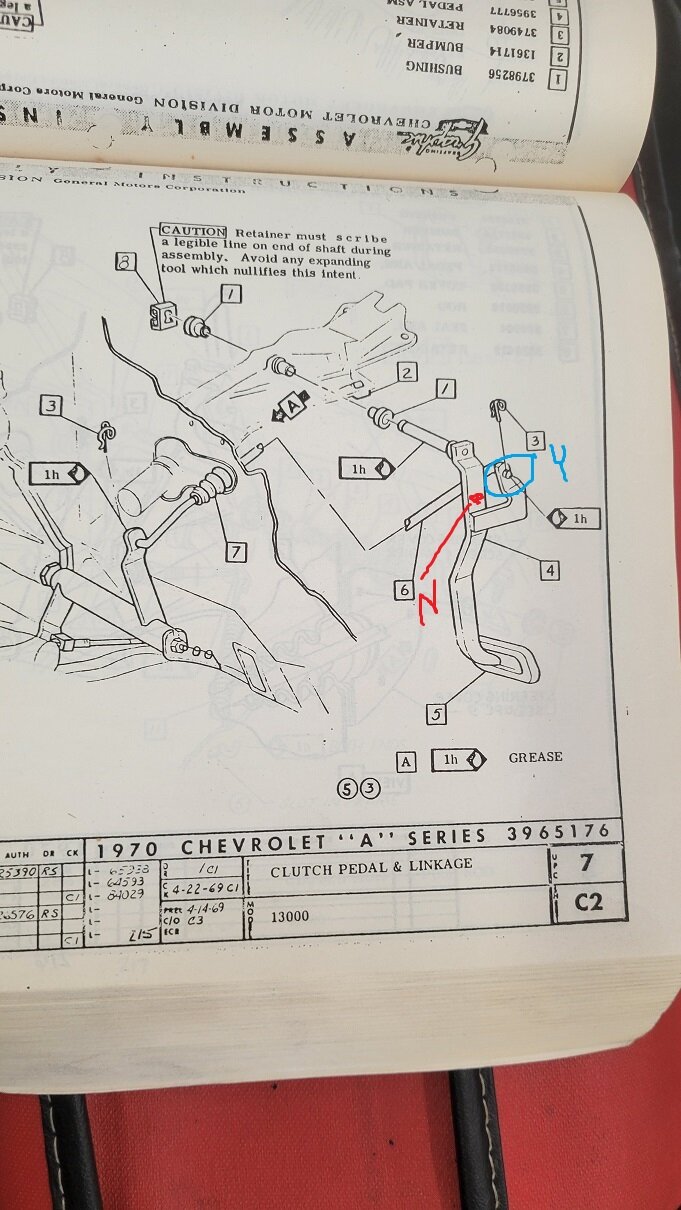
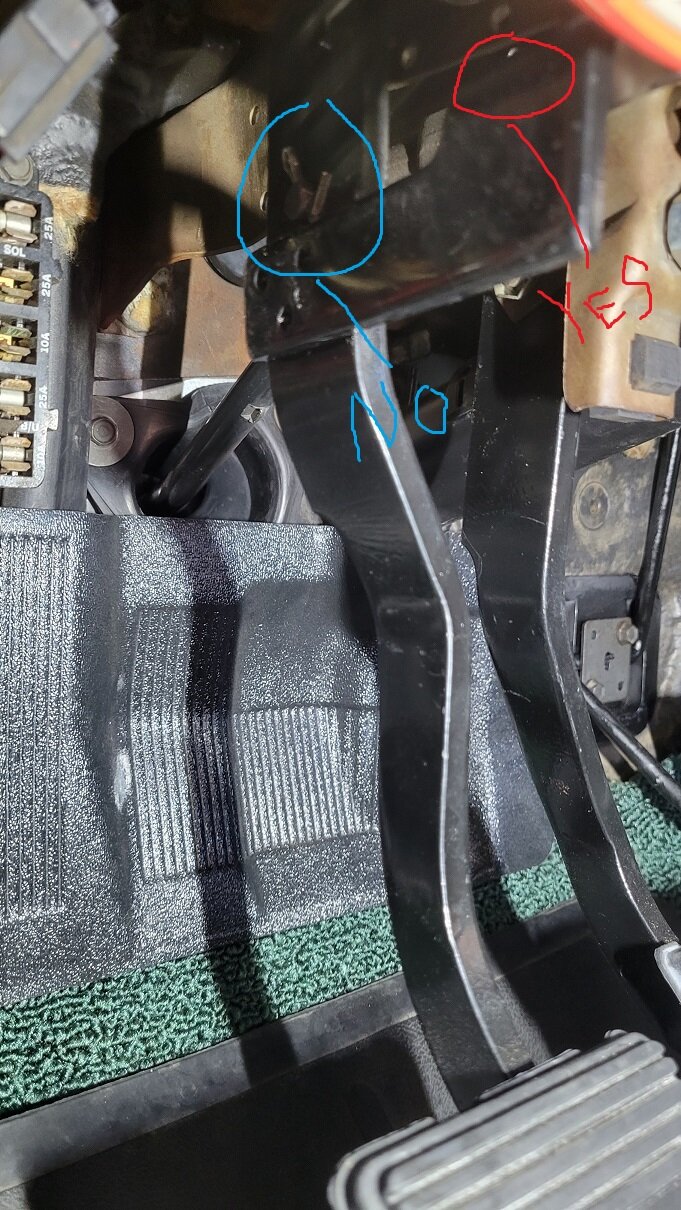
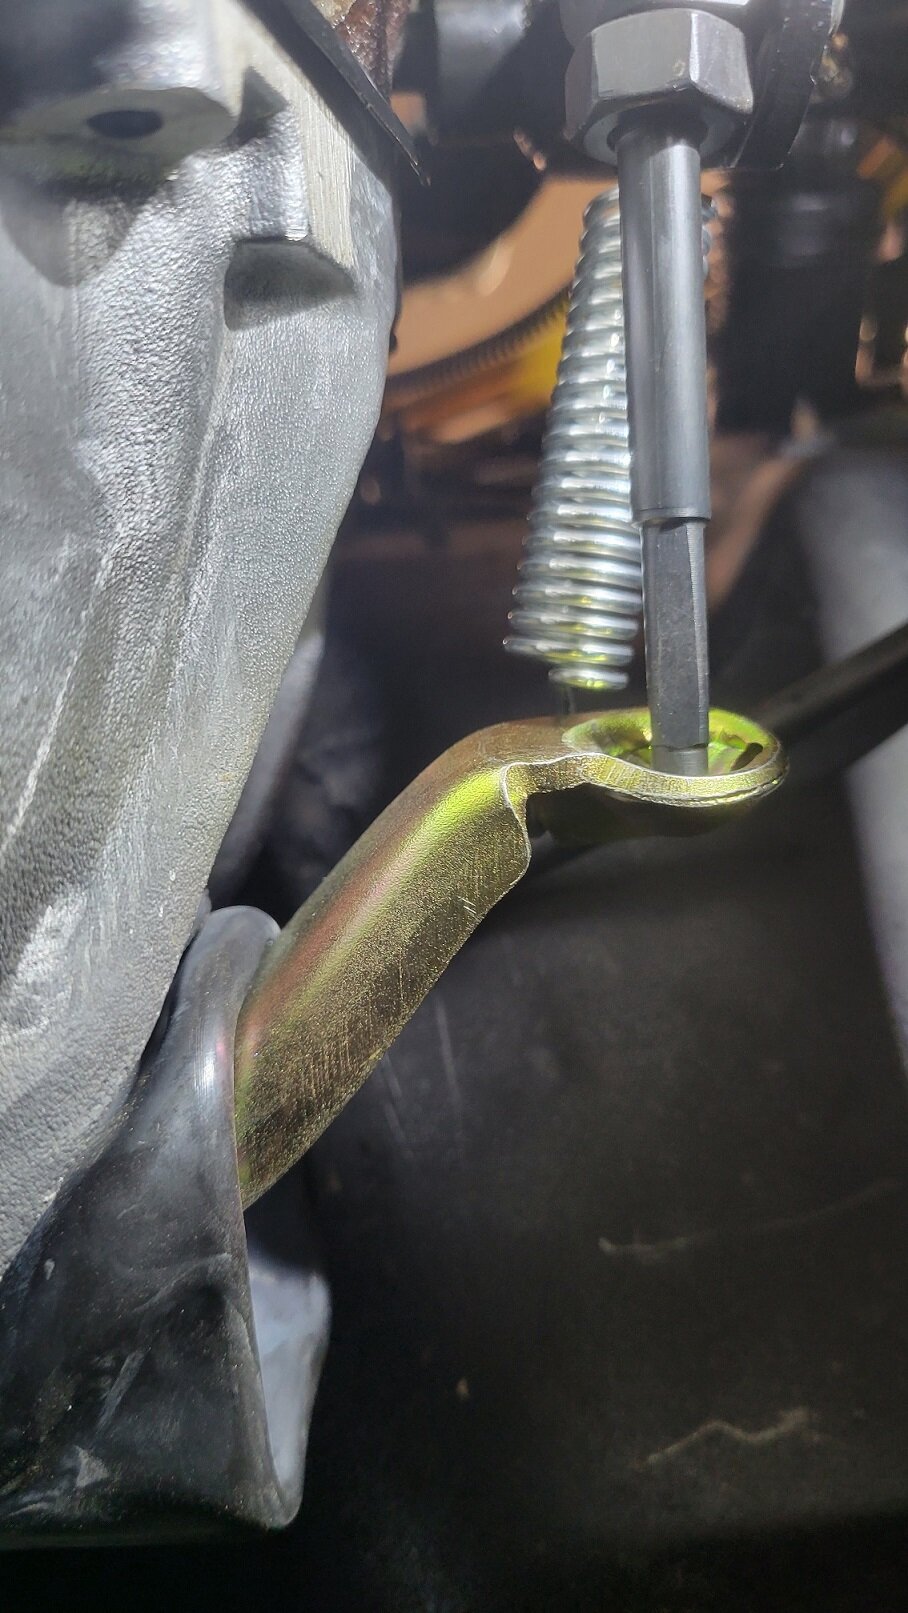
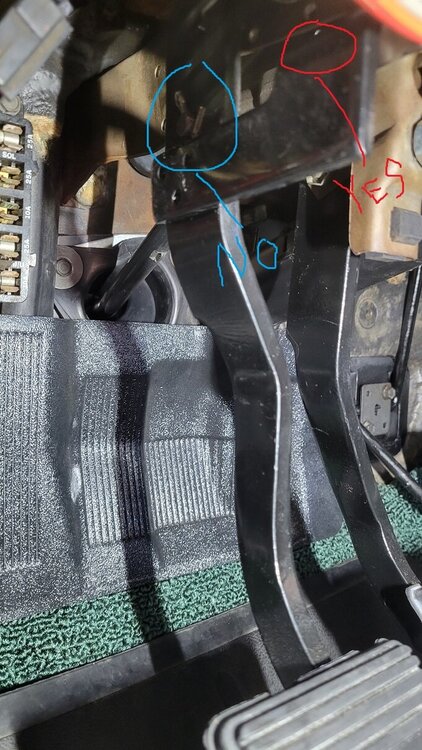
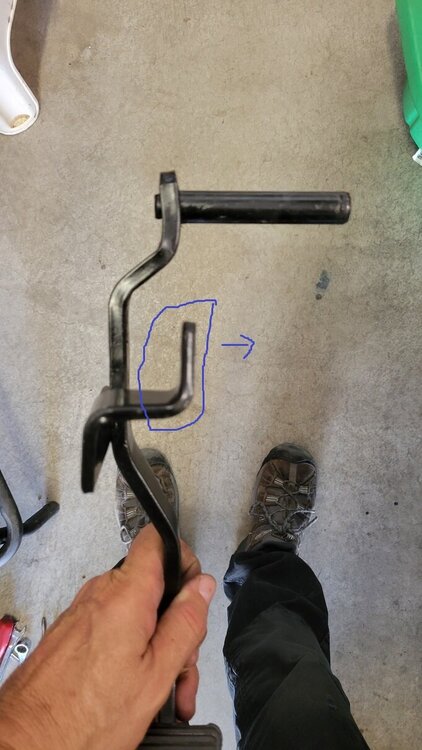
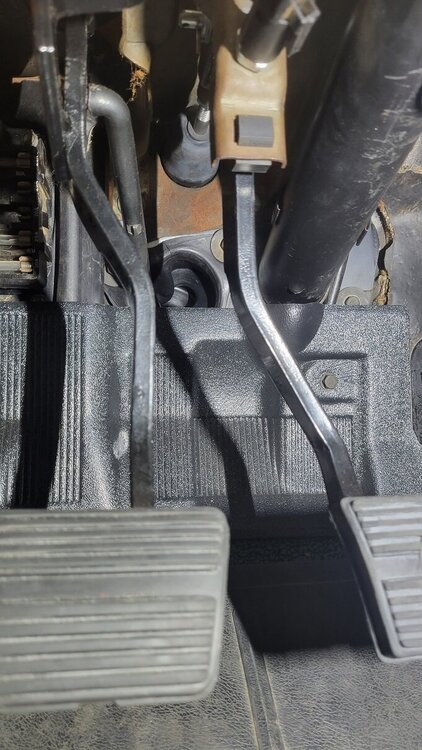
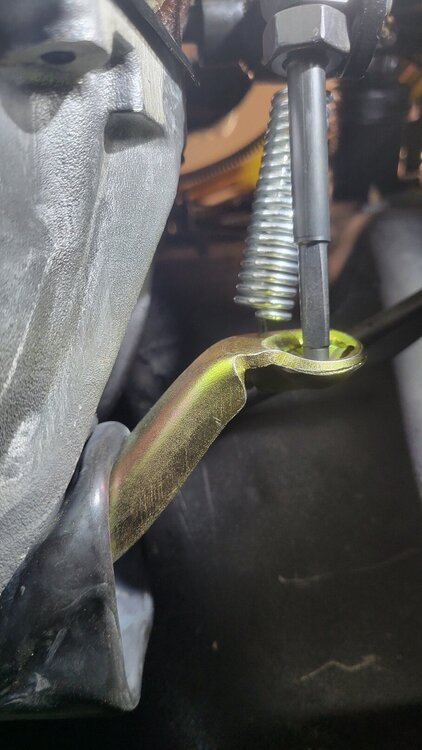
Thank you Assembly manual, and Service manual lol. I was ABSOLUTLEY sure there was a wrong part involved. nope...Dummy here put it in the wrong hole lol. Go ahead...I earned it, let the remarks fly ha See pics. The rod between the Z bar and clutch pedal was in a hole not even shown by the manuals. Presuming they are there ( I looked at several kits on line) for a return spring if you choose to do so ( I did, as once you install headers, the factory frame slot/hole is no longer an option). So, remove pedals (pain), put rod in correct hole, re-install. Note: pic two does not show the correct hole as its on the other side of the bracket - I approximated with paint for the pic. Then, the correct part on the pedal that the rod went to (at least on mine) was bent inward, and the cotter pin kept hanging up on the bracket. Remove, put in Vise, and used a large crescent wrench to bend outward (see pic) apprx 1/4" inch. The pic is after I bent it. Reinstall, reset correct free play and voila!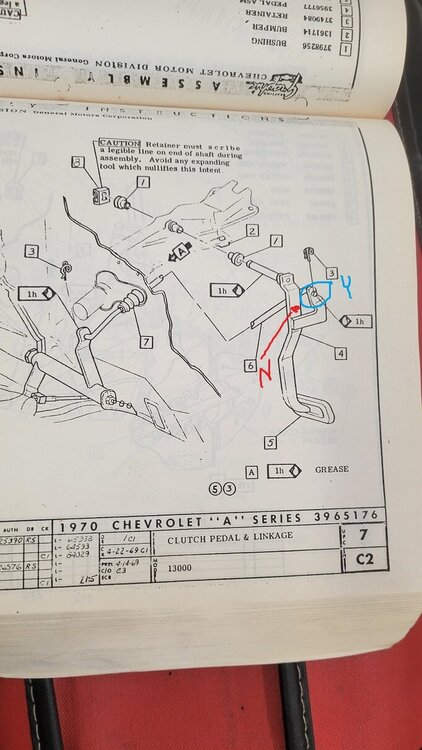
-
Clutch Linkage / 4 spds and Conversions
riverdogs00 replied to riverdogs00's topic in Drivetrain Tech
Appreciate the pics - I believe it was simply the angle of the camera at that moment. The springs I have may confuse some, but had to for the header clearance. I have a shorty that keeps the fork and adjuster lever together, and then I have a very long one from the clutch fork all the way under the motor mount. It was the straightest line. also have one under the dash, just to make sure my T/O is not riding on the clutch. Really interested to see someone elses pedal to z bar rod, and how it looks under the dash. TY -
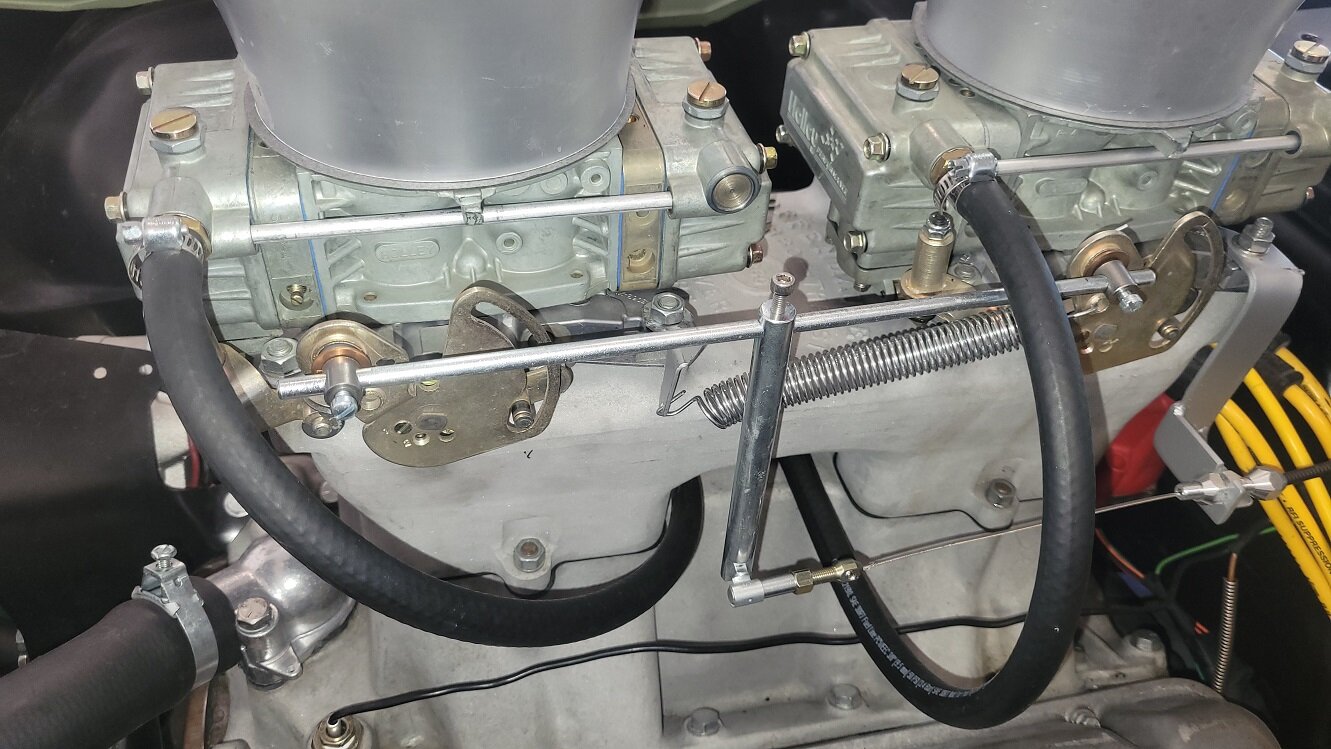
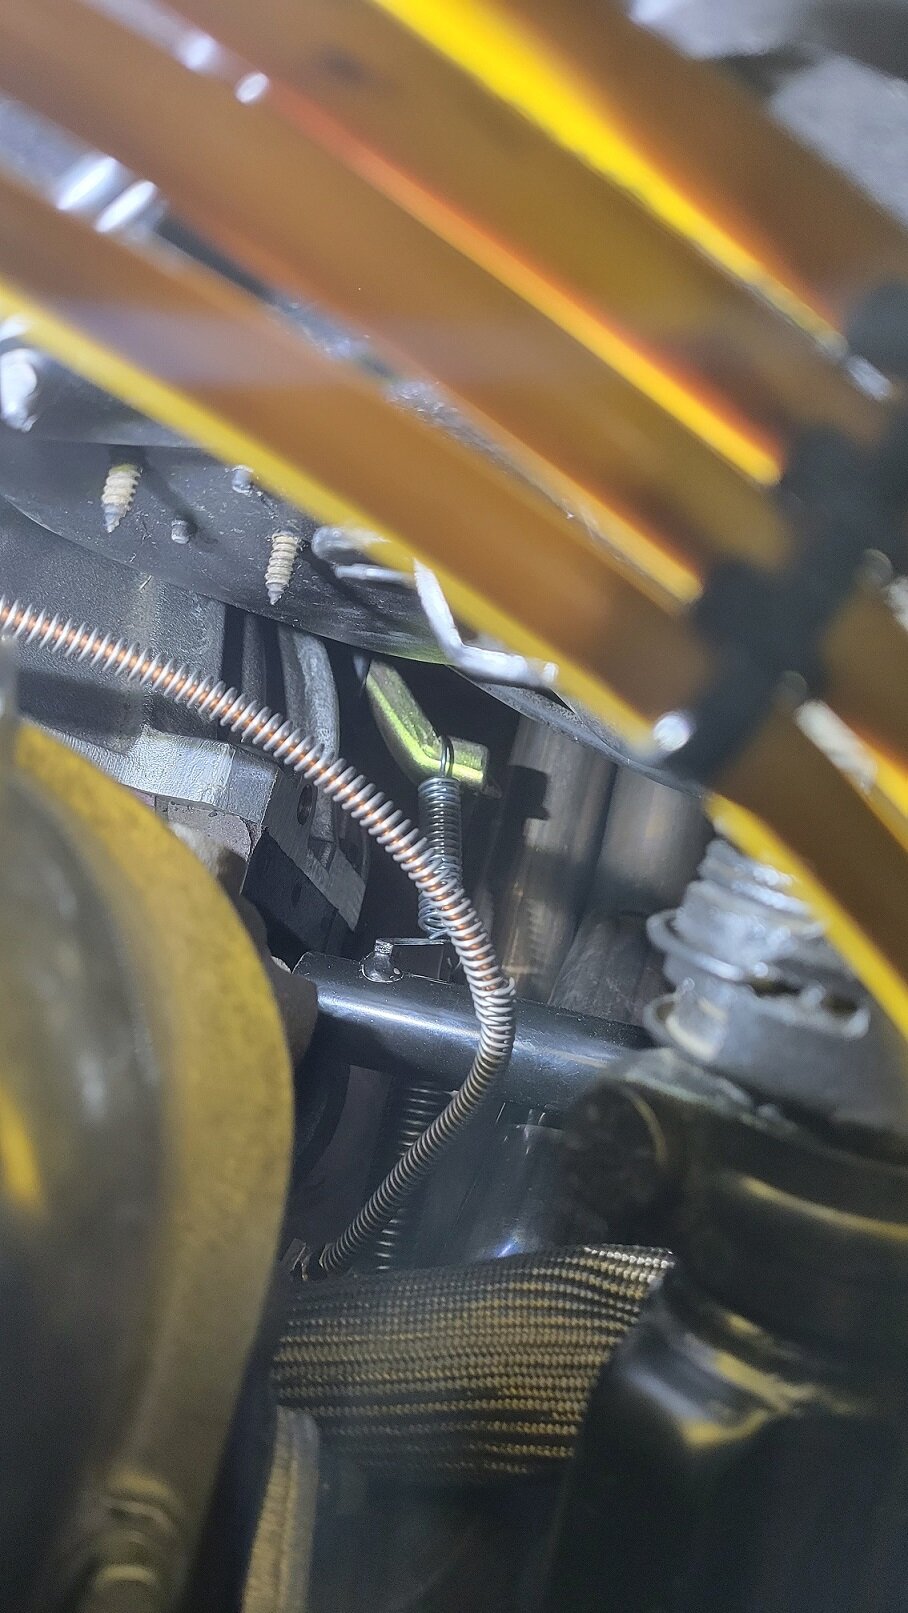
Group, Coming down the home stretch on my LS-7 / 4spd conversion and am finding that my clutch linkage is not behaving. Im questioning now whether I have all in correctly or if perhaps I got bit by another Chevelle part labeled for a monte like i did on the Zbar to frame bracket. The issue I'm having, is after running through the gears (its on jack stands as its not licensed yet) and bringing the engine up to temp (10-15 min) I find that I cannot get the clutch to release and allow me to shift gears. when its cold, no problem. If I lengthen the adjustment rod to gain more travel, I start smelling clutch after just 30 seconds or so, which I immediately shut down. If I adjust the threaded rod in, so that I have my 1 1/2 " of clutch pedal free play, then it wont allow me to shift. Before I pull the trans again, I was hoping those of you that have a factory 4 spd car could share a pic or two of the linkage and pedal set up. The rod that goes between the pedal and the Z bar looks correct at the Z bar, but seems like its on angle at the pedal. Enough that it has already worn through the protective boot. I'm now wondering if that bar is monte specific. Looking at the factory assembly manual, it appears its the same as the chevelle. When I depress the clutch pedal by hand, it appears that the rod travels fine until about half way, then it either deflects upward, or it looks like the pedal loses its forward travel. So---stumped.

-
Ty ! Now If I can get the coolant to stay in the radiator, then I will be almost home free. I did not buy a new, nor check the old SBC rad that came with the car (3 row/AT). It had a small leak which i fixed with JB weld, and was hoping to use it to get all sorted out before i drop $$$ on a nicer, more correct unit. I'm running straight water for now just to get dialed in. The water that purges out of the rad is dark. Blackish. I presume its just residual oil in it, so am trying to flush. what I dont get though, is that I fill it, run the car and can see the water circulating through the radiator. I left 3-4" of room in it, and as the temp comes up, the level simply overfills and out the neck. (I know it will expand, it just seems excessive). It will literally purge half the volume of the radiator. Was hoping to burp it, but need to keep the cap on to eliminate the resulting mess that comes after. I used a gallon jug as a temp catch can, and it will simply over fill that. continuing to try and work through it
-
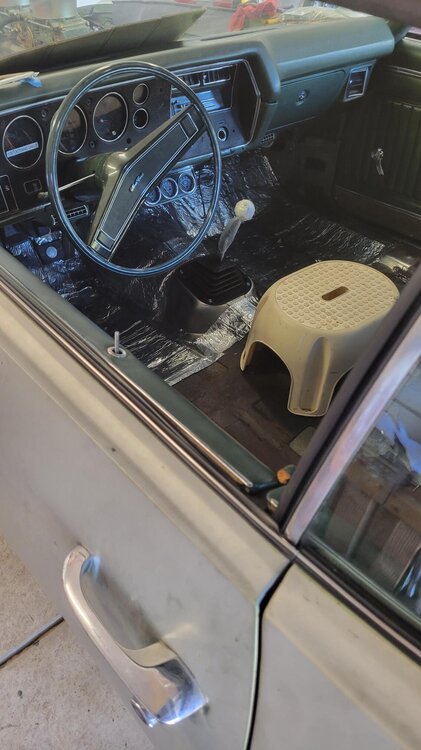
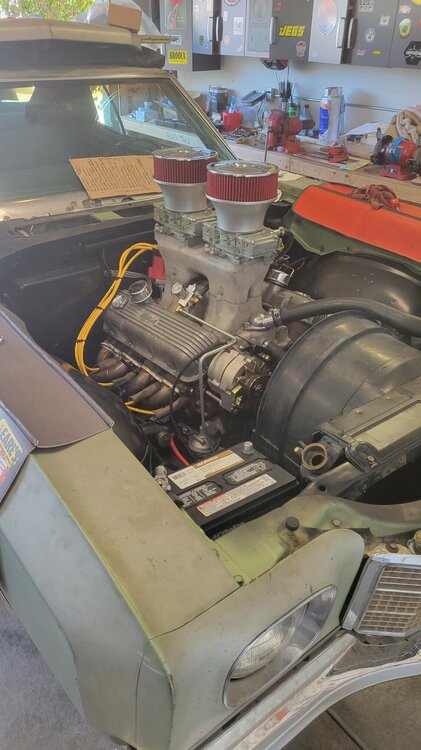
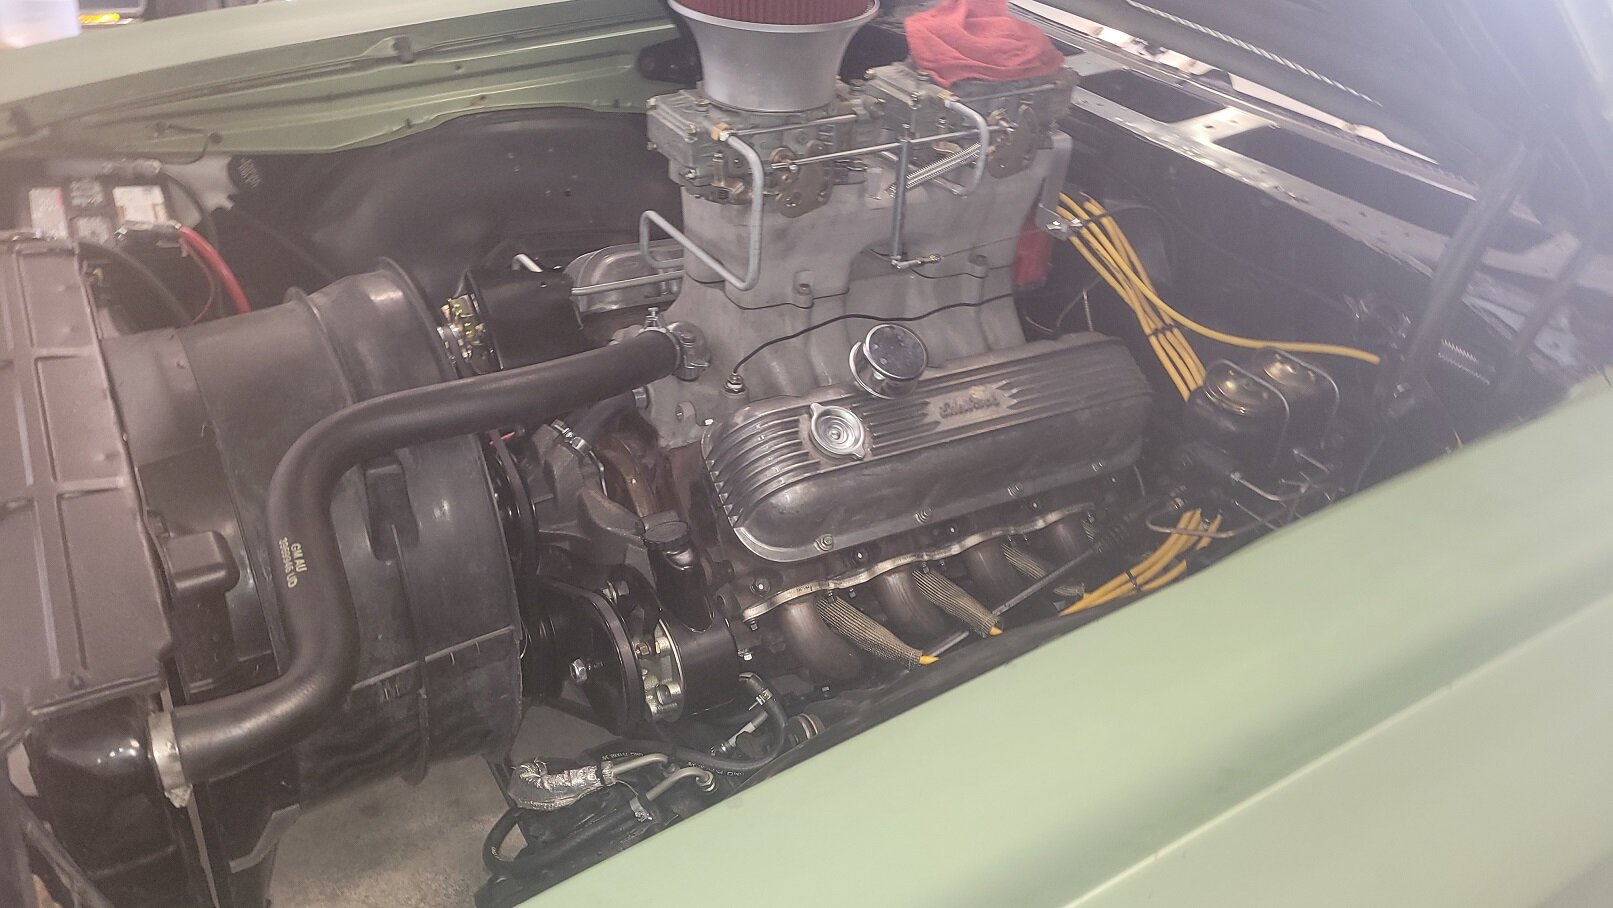
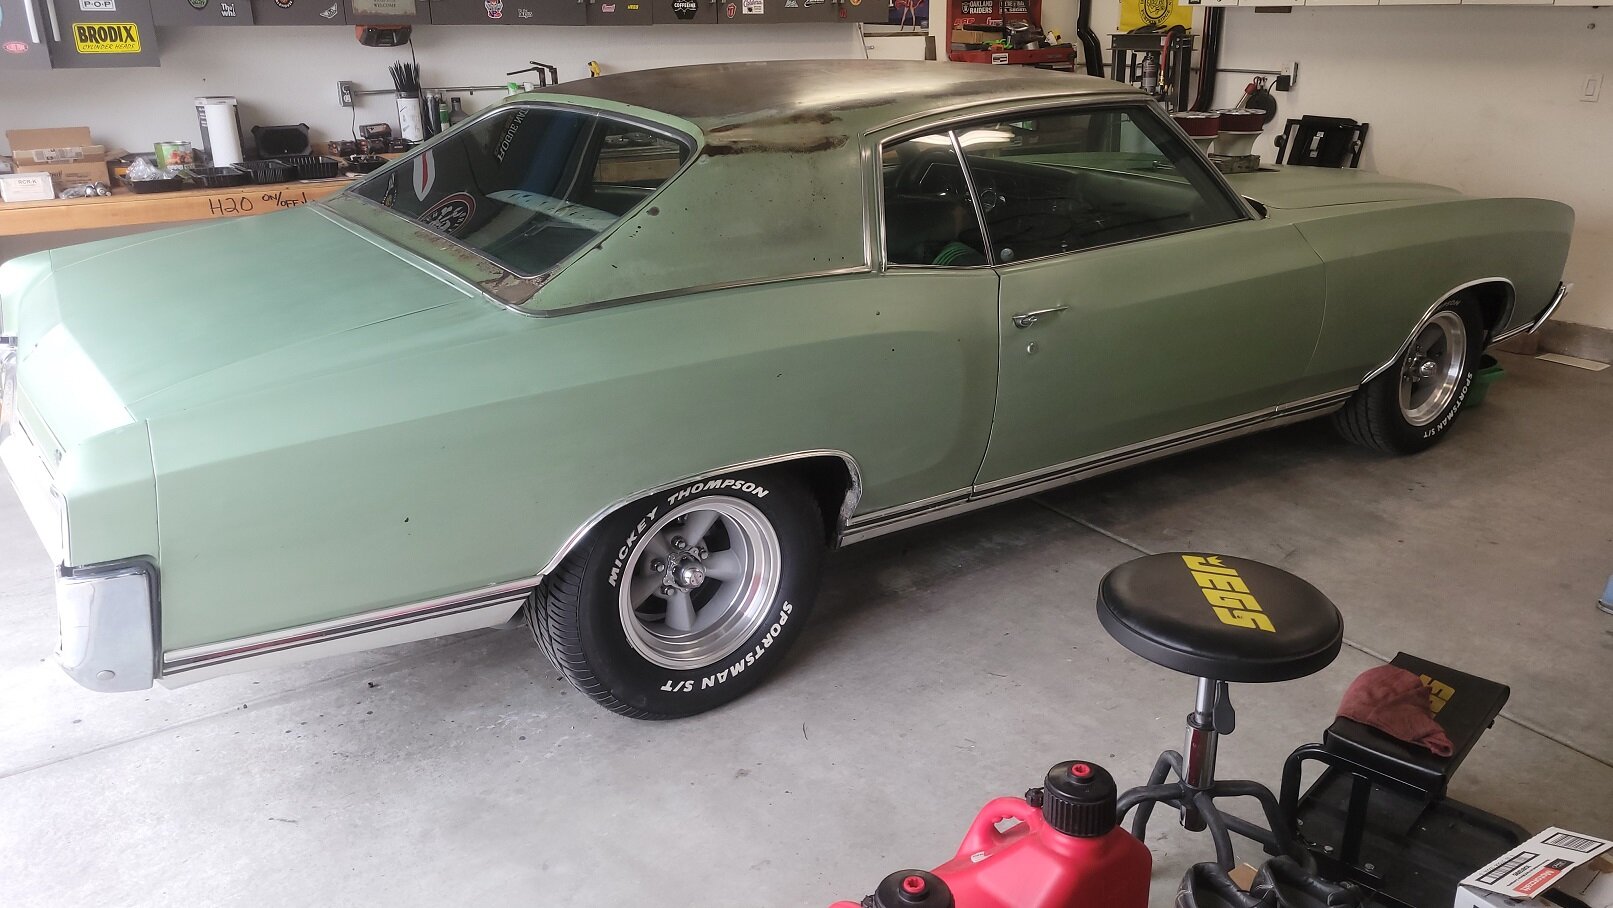
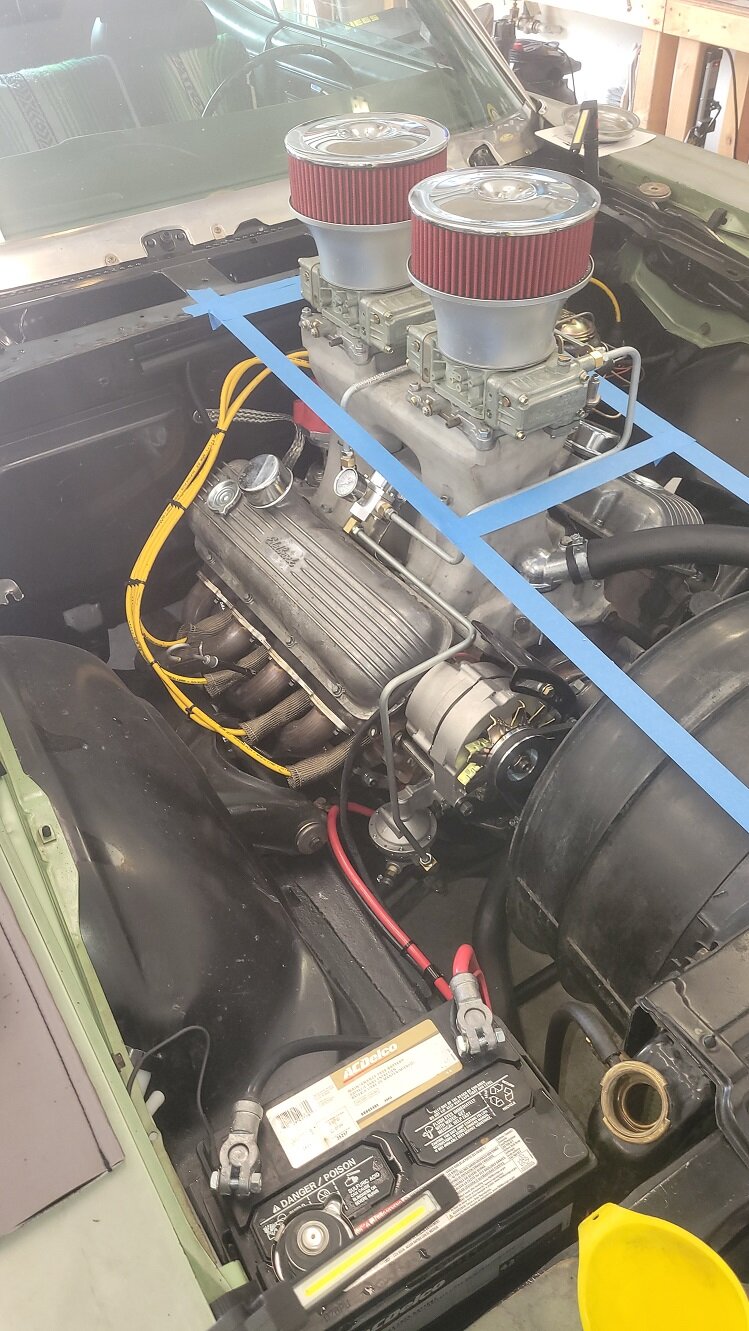
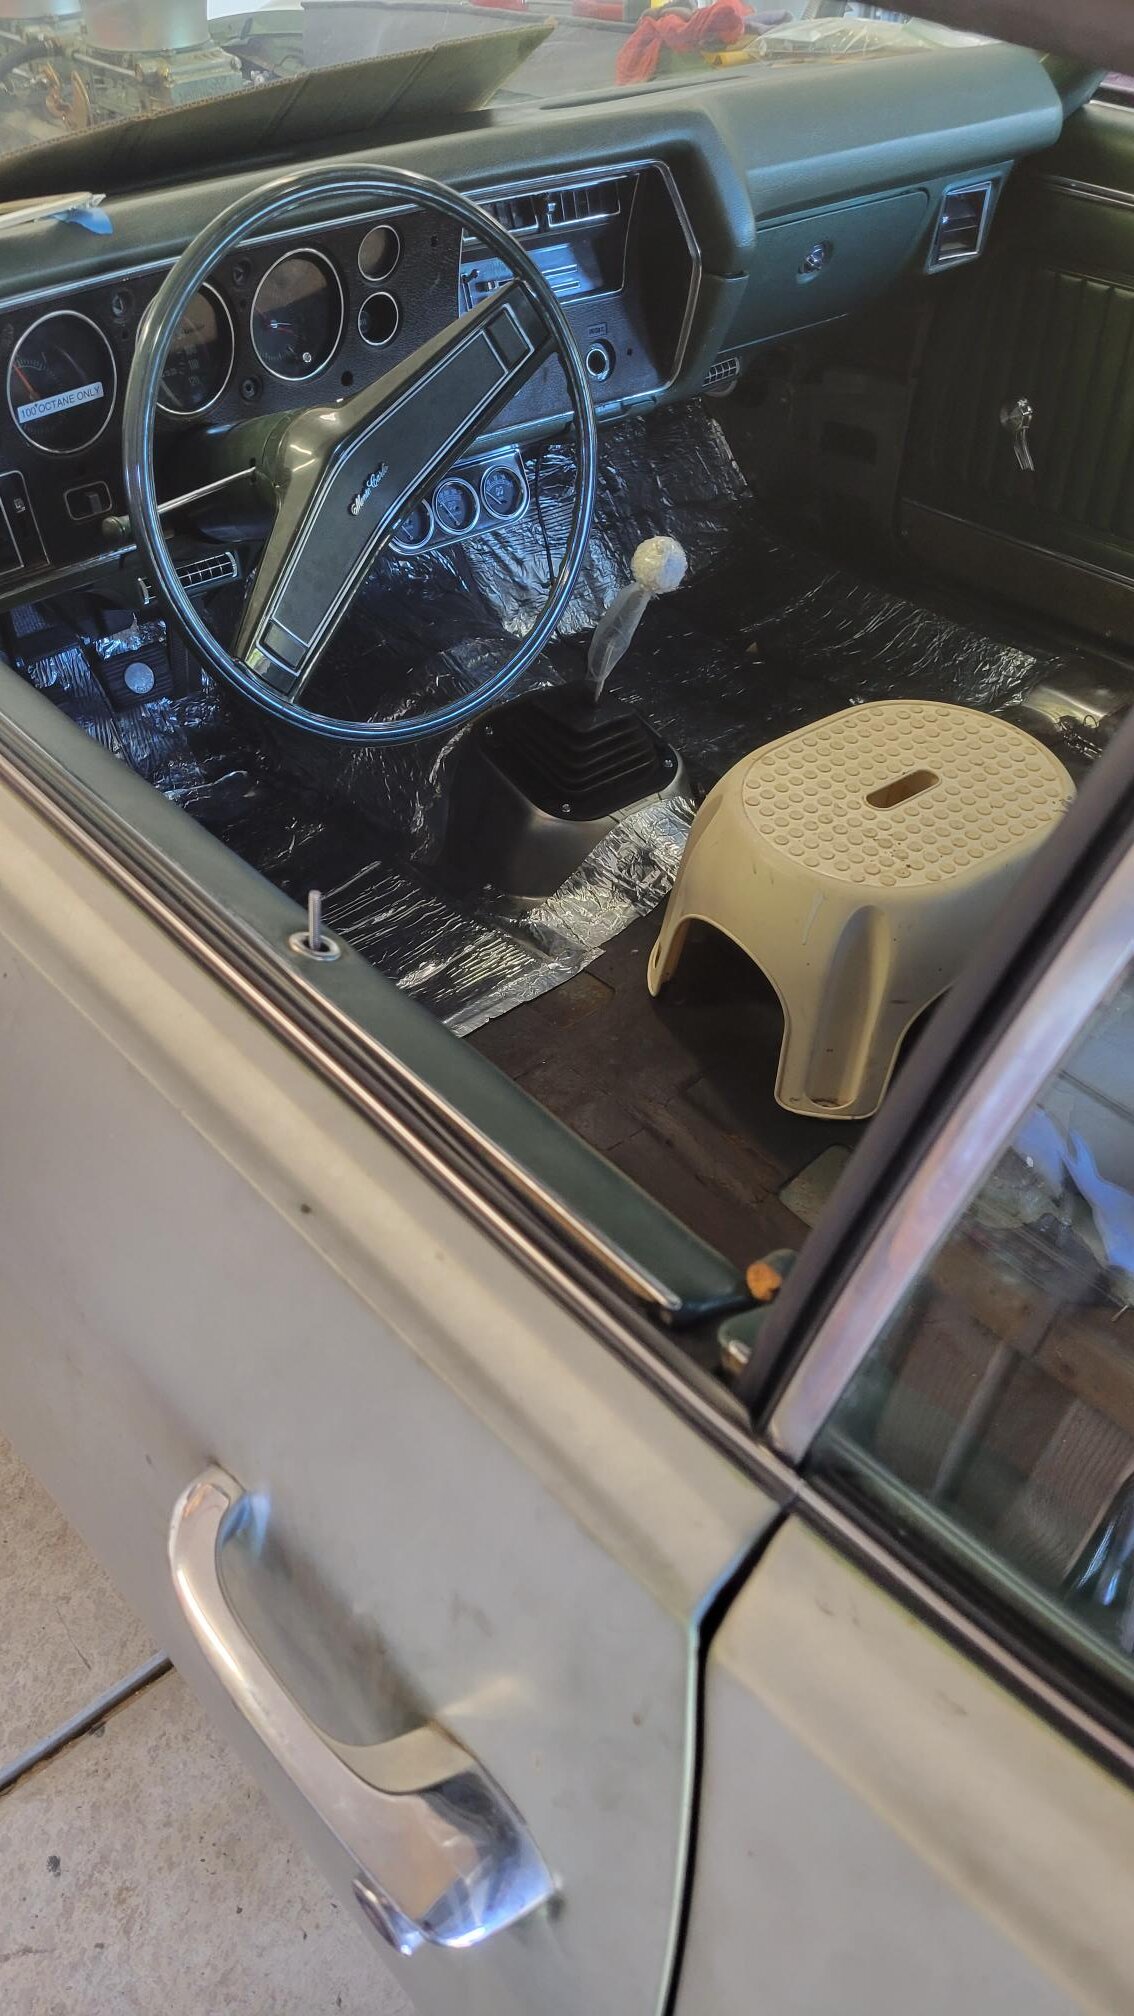
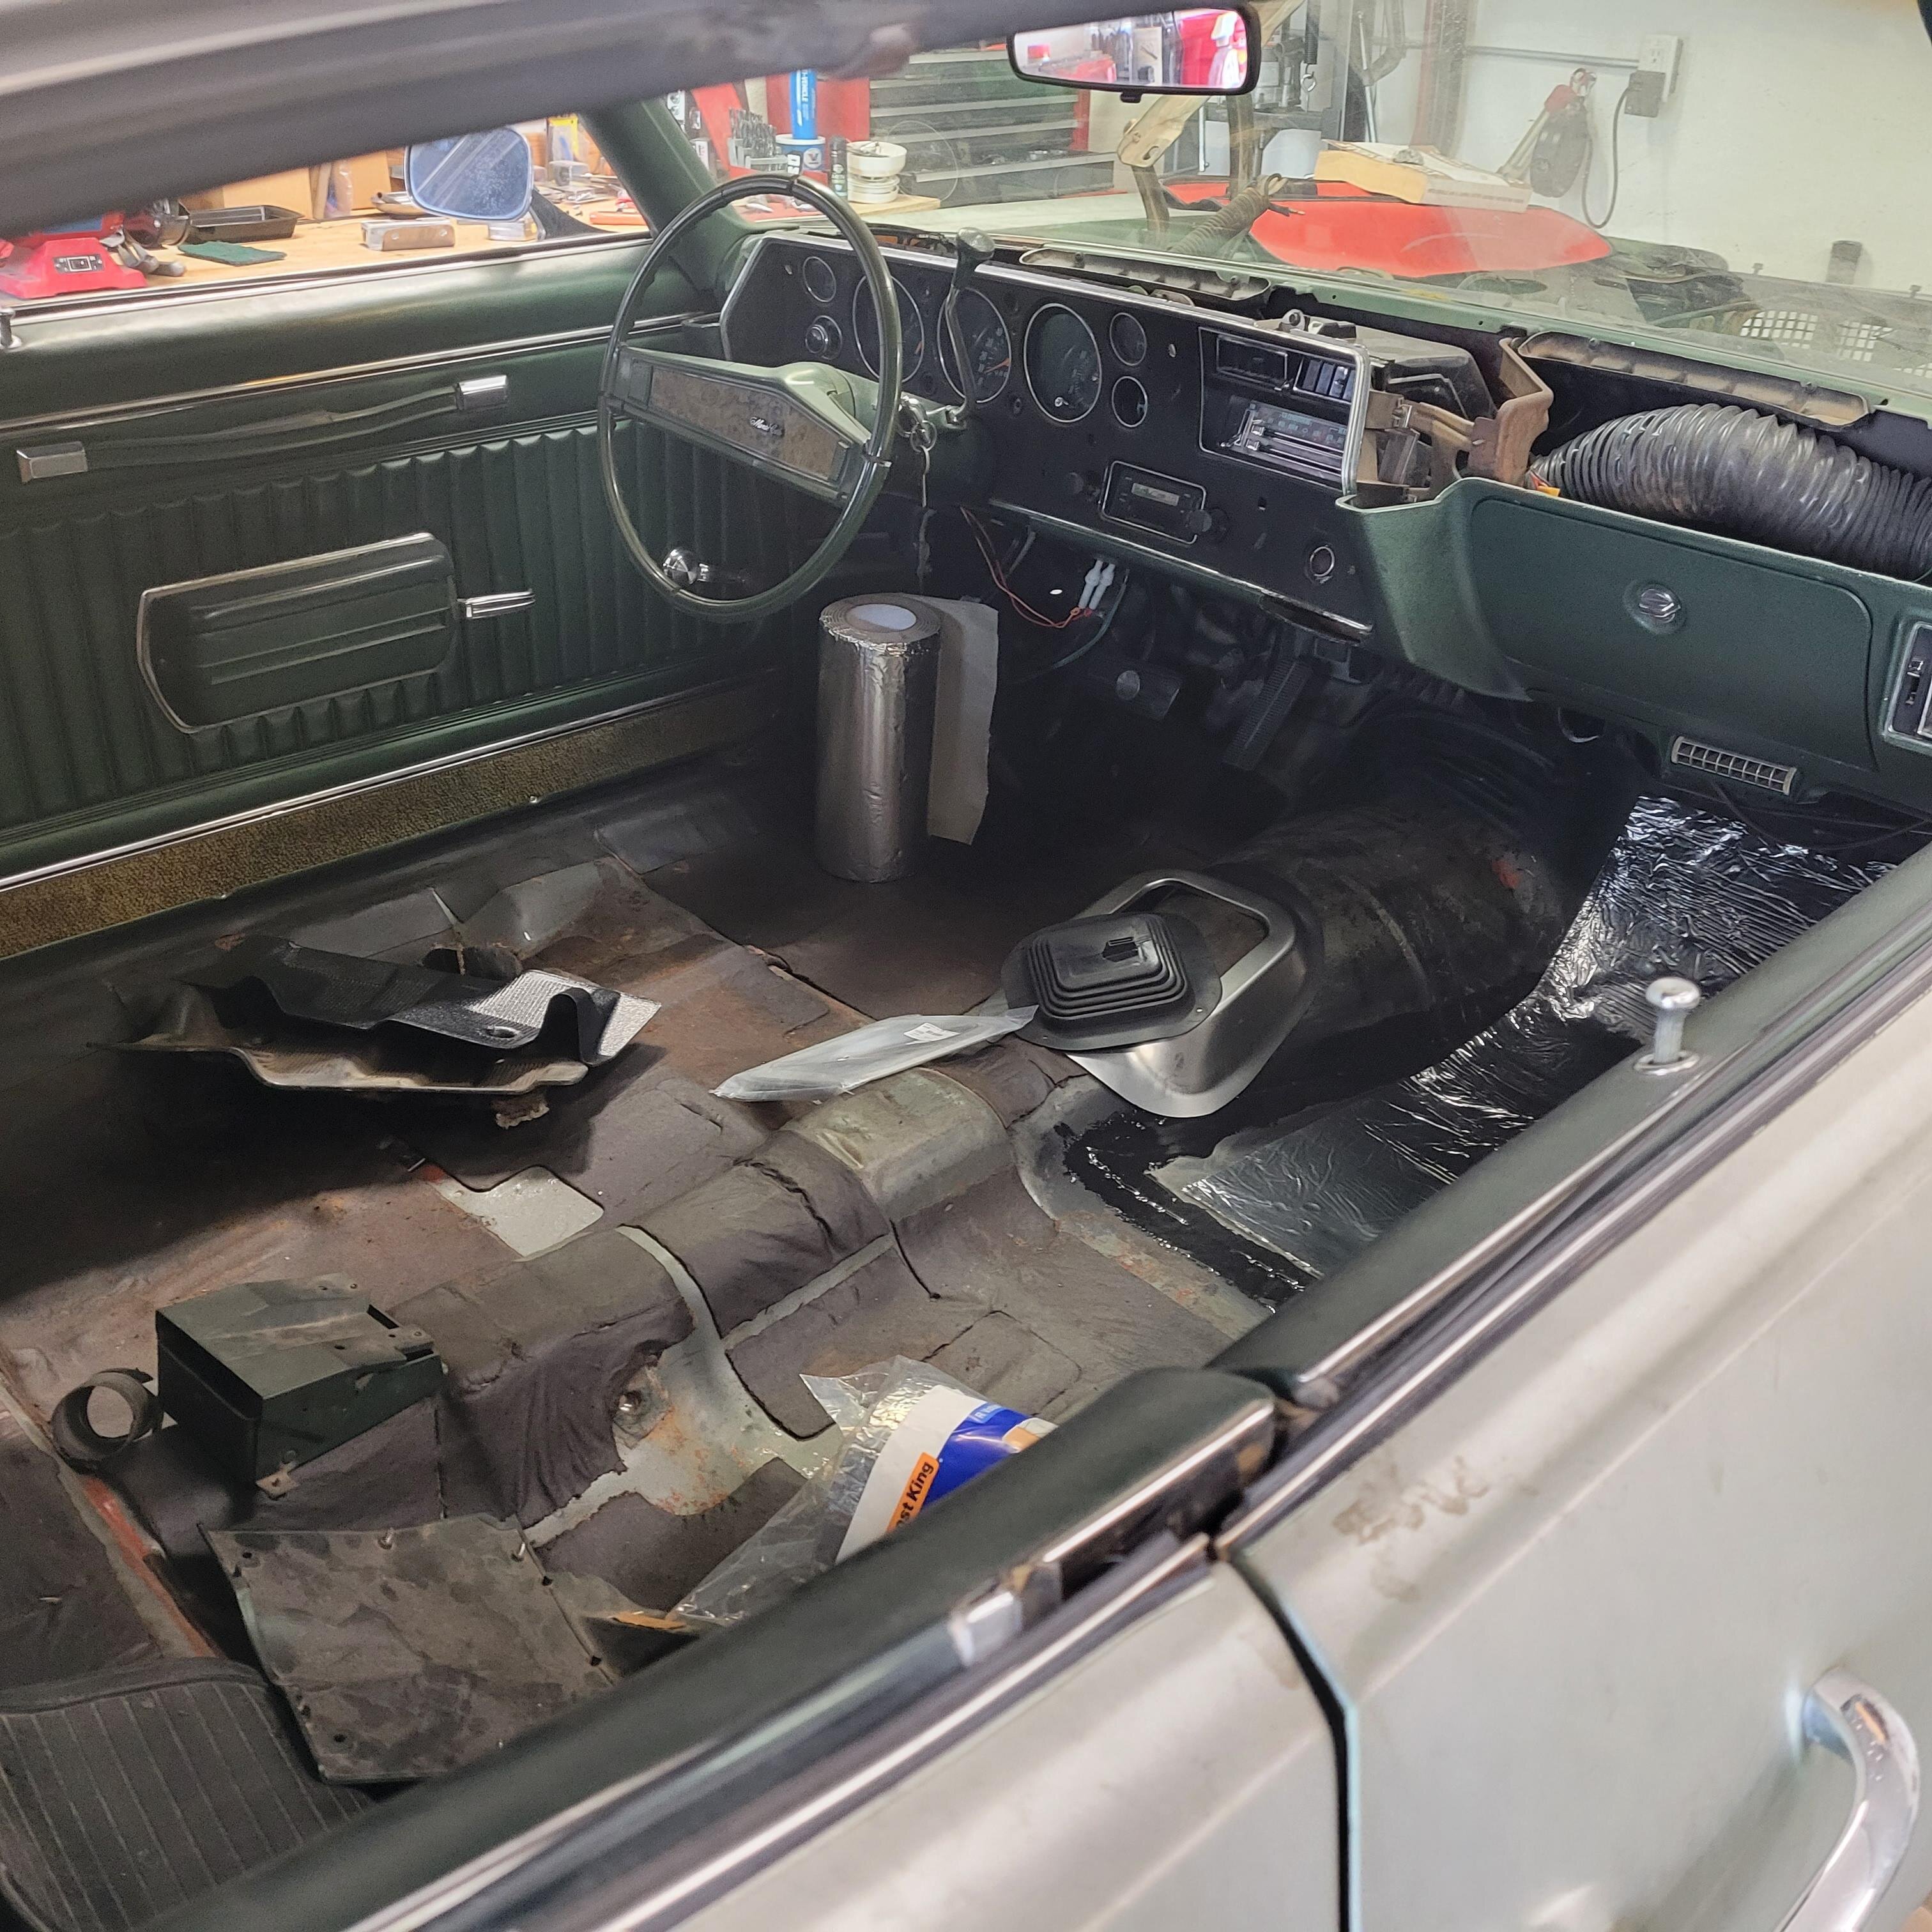
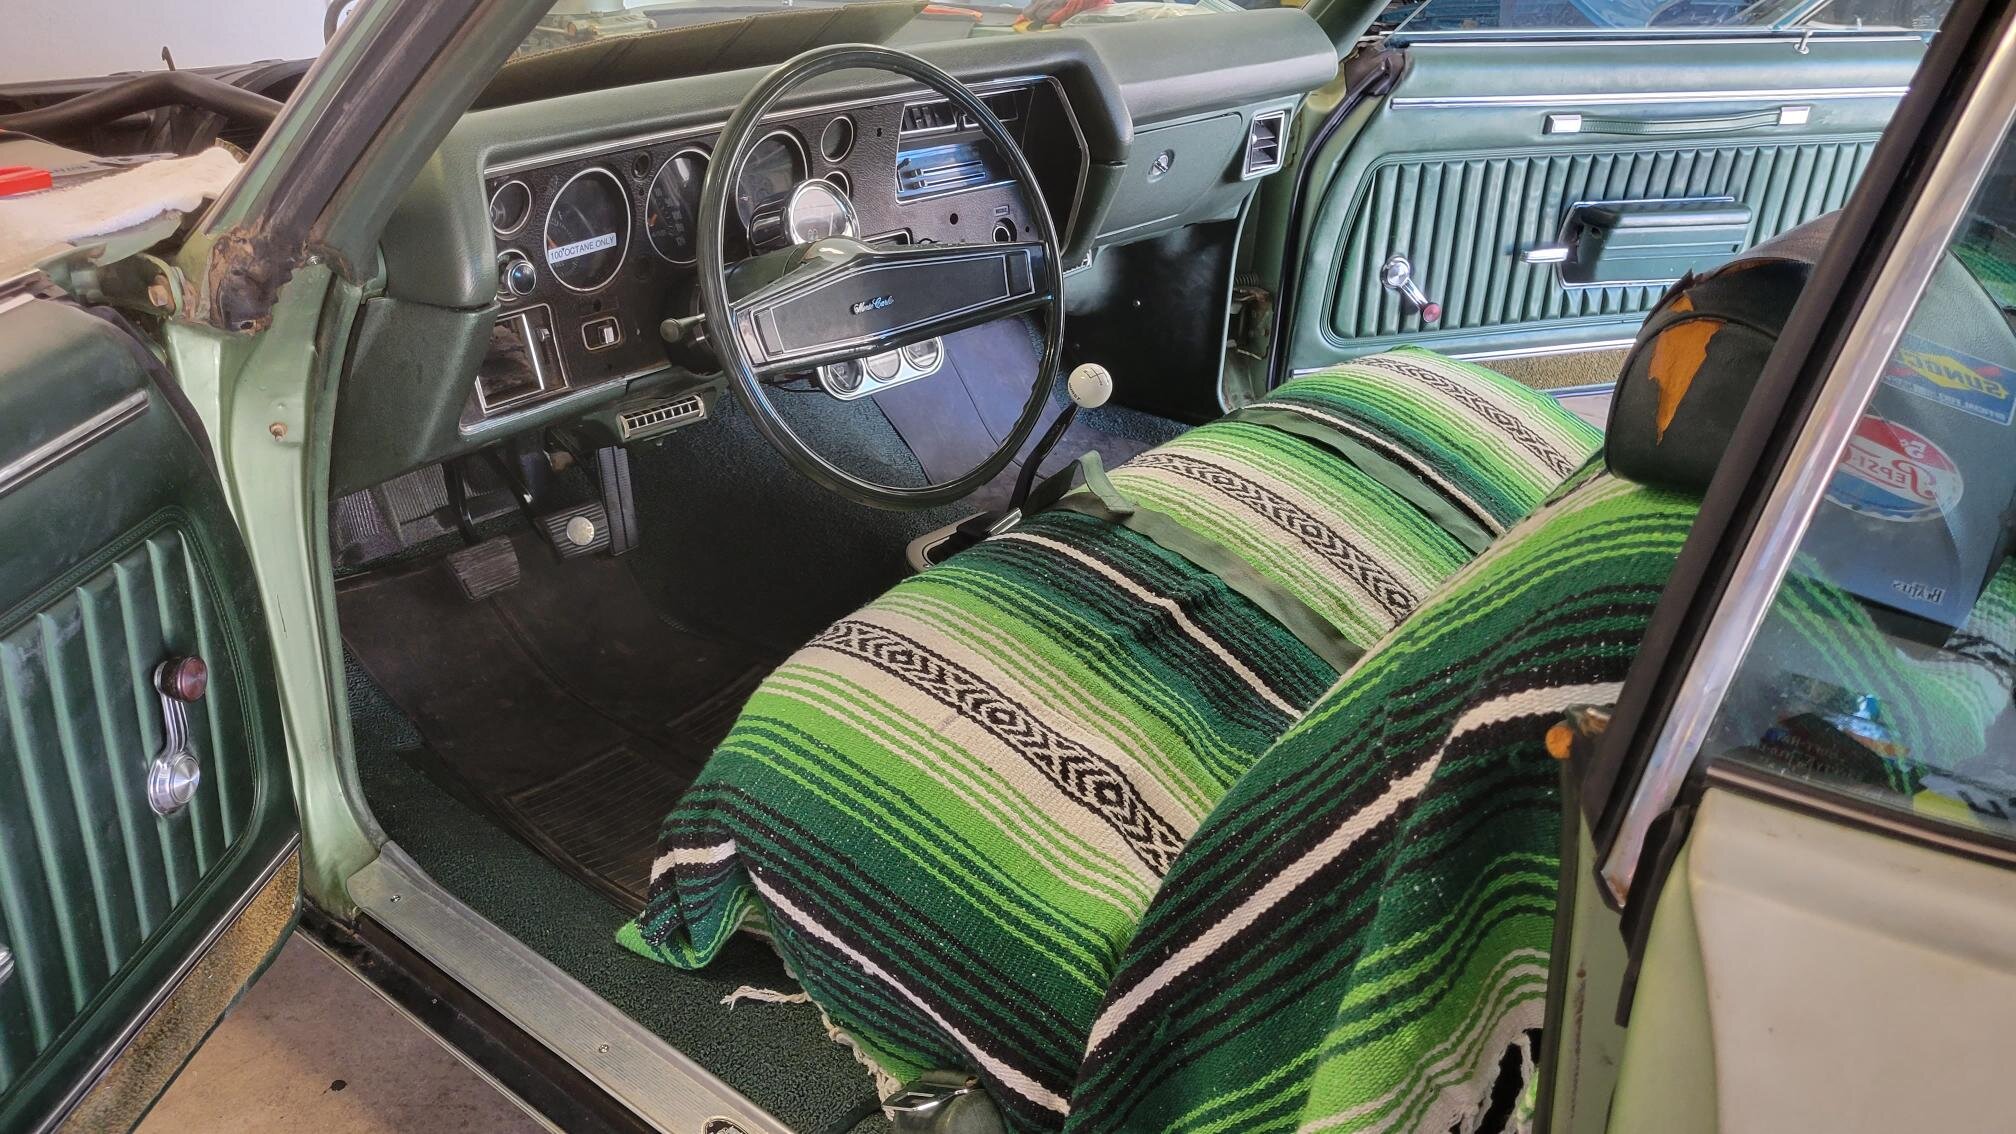
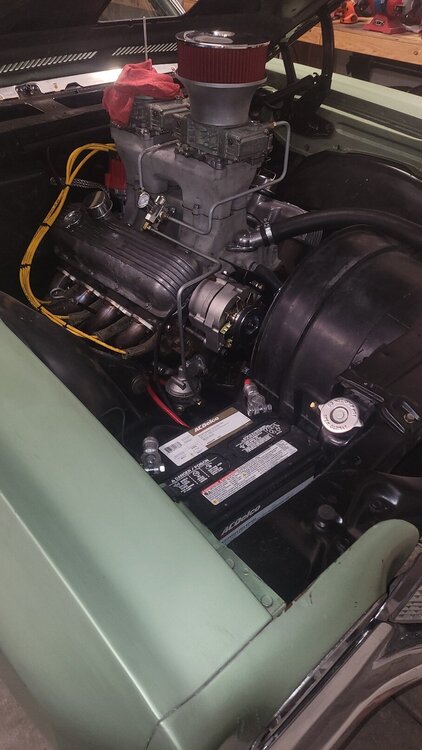
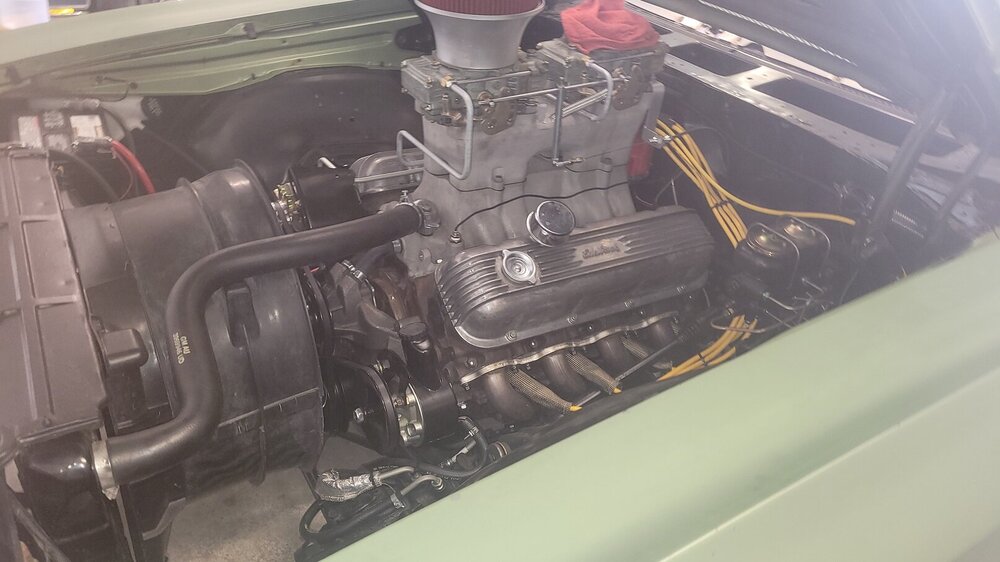
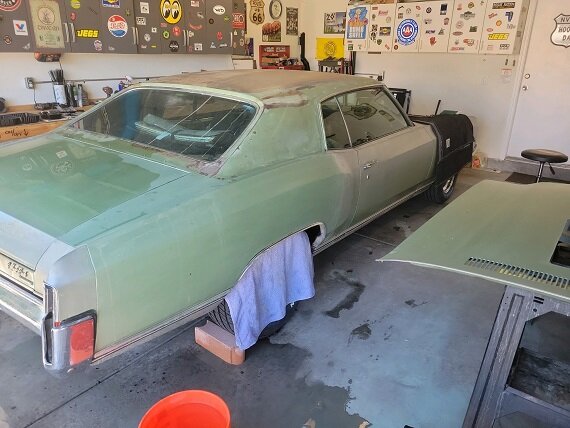
Engine is installed, 4 speed in, and now starts, runs , shifts (on jack stands ). The car has the original fabric bench which i want to keep. the front of course is trashed, hence the blanket. will just use that as I sort out the mechanicals as they come up.