Mike Brichta
-
Posts
529 -
Joined
-
Last visited
-
Days Won
14
Content Type
Profiles
Articles
Forums
Gallery
Events
Everything posted by Mike Brichta
-
Windshield Pillar Repair/Replace ....
Mike Brichta replied to Mike Brichta's topic in Auto Body Repair
Thanks guys!! My search continues... -
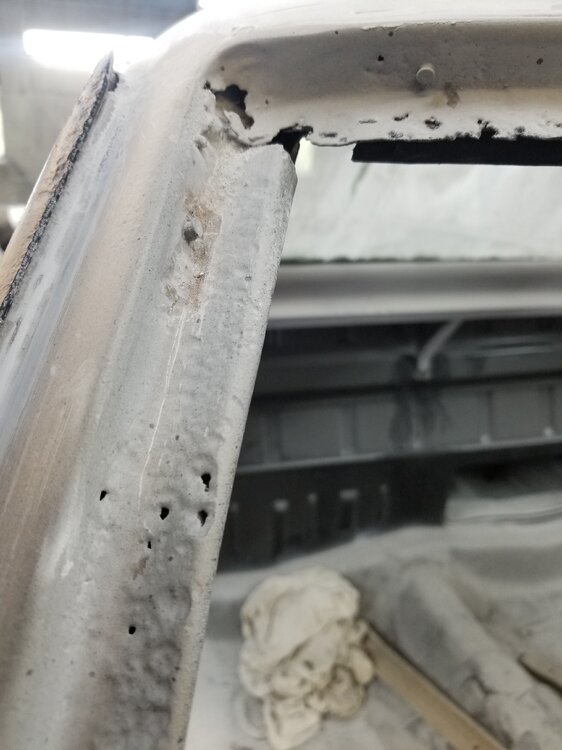
Well, after some sand blasting, I see that the windshield pillar on my 70 El Camino might need some repair. I believe the pillars are the same for El Caminos, Montes and Chevelles. Has anyone replaced theirs before? Is there someone out there that makes a replacement part for the pillars? Thanks!! Mike
-
Has anyone considered using a stock Monte hood and a Chevelle cowl induction hood and fabricating them into one hood? Maybe that is the best way to get what you want. Thanks!! Mike
-
help...replacing body mount bushings
Mike Brichta replied to Regmon's topic in Brakes and Suspension Tech
Sometimes when the body bushing collapses over time, you can start to see an impression on the truck floor of the point of the bolt pushing up against the trunk floor. It will look like a dimple. Which side are you having trouble with? Maybe I can get you a picture. -
help...replacing body mount bushings
Mike Brichta replied to Regmon's topic in Brakes and Suspension Tech
Yes. Same holds for the nuts under the floor pan. -
help...replacing body mount bushings
Mike Brichta replied to Regmon's topic in Brakes and Suspension Tech
I had to do the exact same thing on one of my cars. I made a cut on (3) sides of a square and just pealed the metal back to expose the spinning cage nut. Once the nut was extracted and replace, I bent the metal back down and used seam sealer to close it back up. I don't know of any other way to deal with this kind of thing. Also, be sure to put Anti-Sieze on the threads of the new cage nut and bolt in case you need to remove it again. Good luck!! Mike -
Where in PA are you located? I am in 18034 (Allentown/Bethlehem). Mike
-
Brake Booster questions ...
Mike Brichta replied to Mike Brichta's topic in Brakes and Suspension Tech
Thanks guys for all of your input. I am always impressed in how much your guys know about these little details. I learn something new every day. So I guess what I am hearing is all (3) of the 70 pieces (proportioning valve, residual pressure valve and rear pressure value) should all be used together and don't remove one without the others? And they are only on 70 models. 71-72 do not use these extra pressure valves. Does that sound about right? Thanks!! Mike -
Brake Booster questions ...
Mike Brichta replied to Mike Brichta's topic in Brakes and Suspension Tech
Based on what you said, I guess it wouldn't hurt to put it back on. Is there any way to test it to see if it is working correctly? Thanks!! -
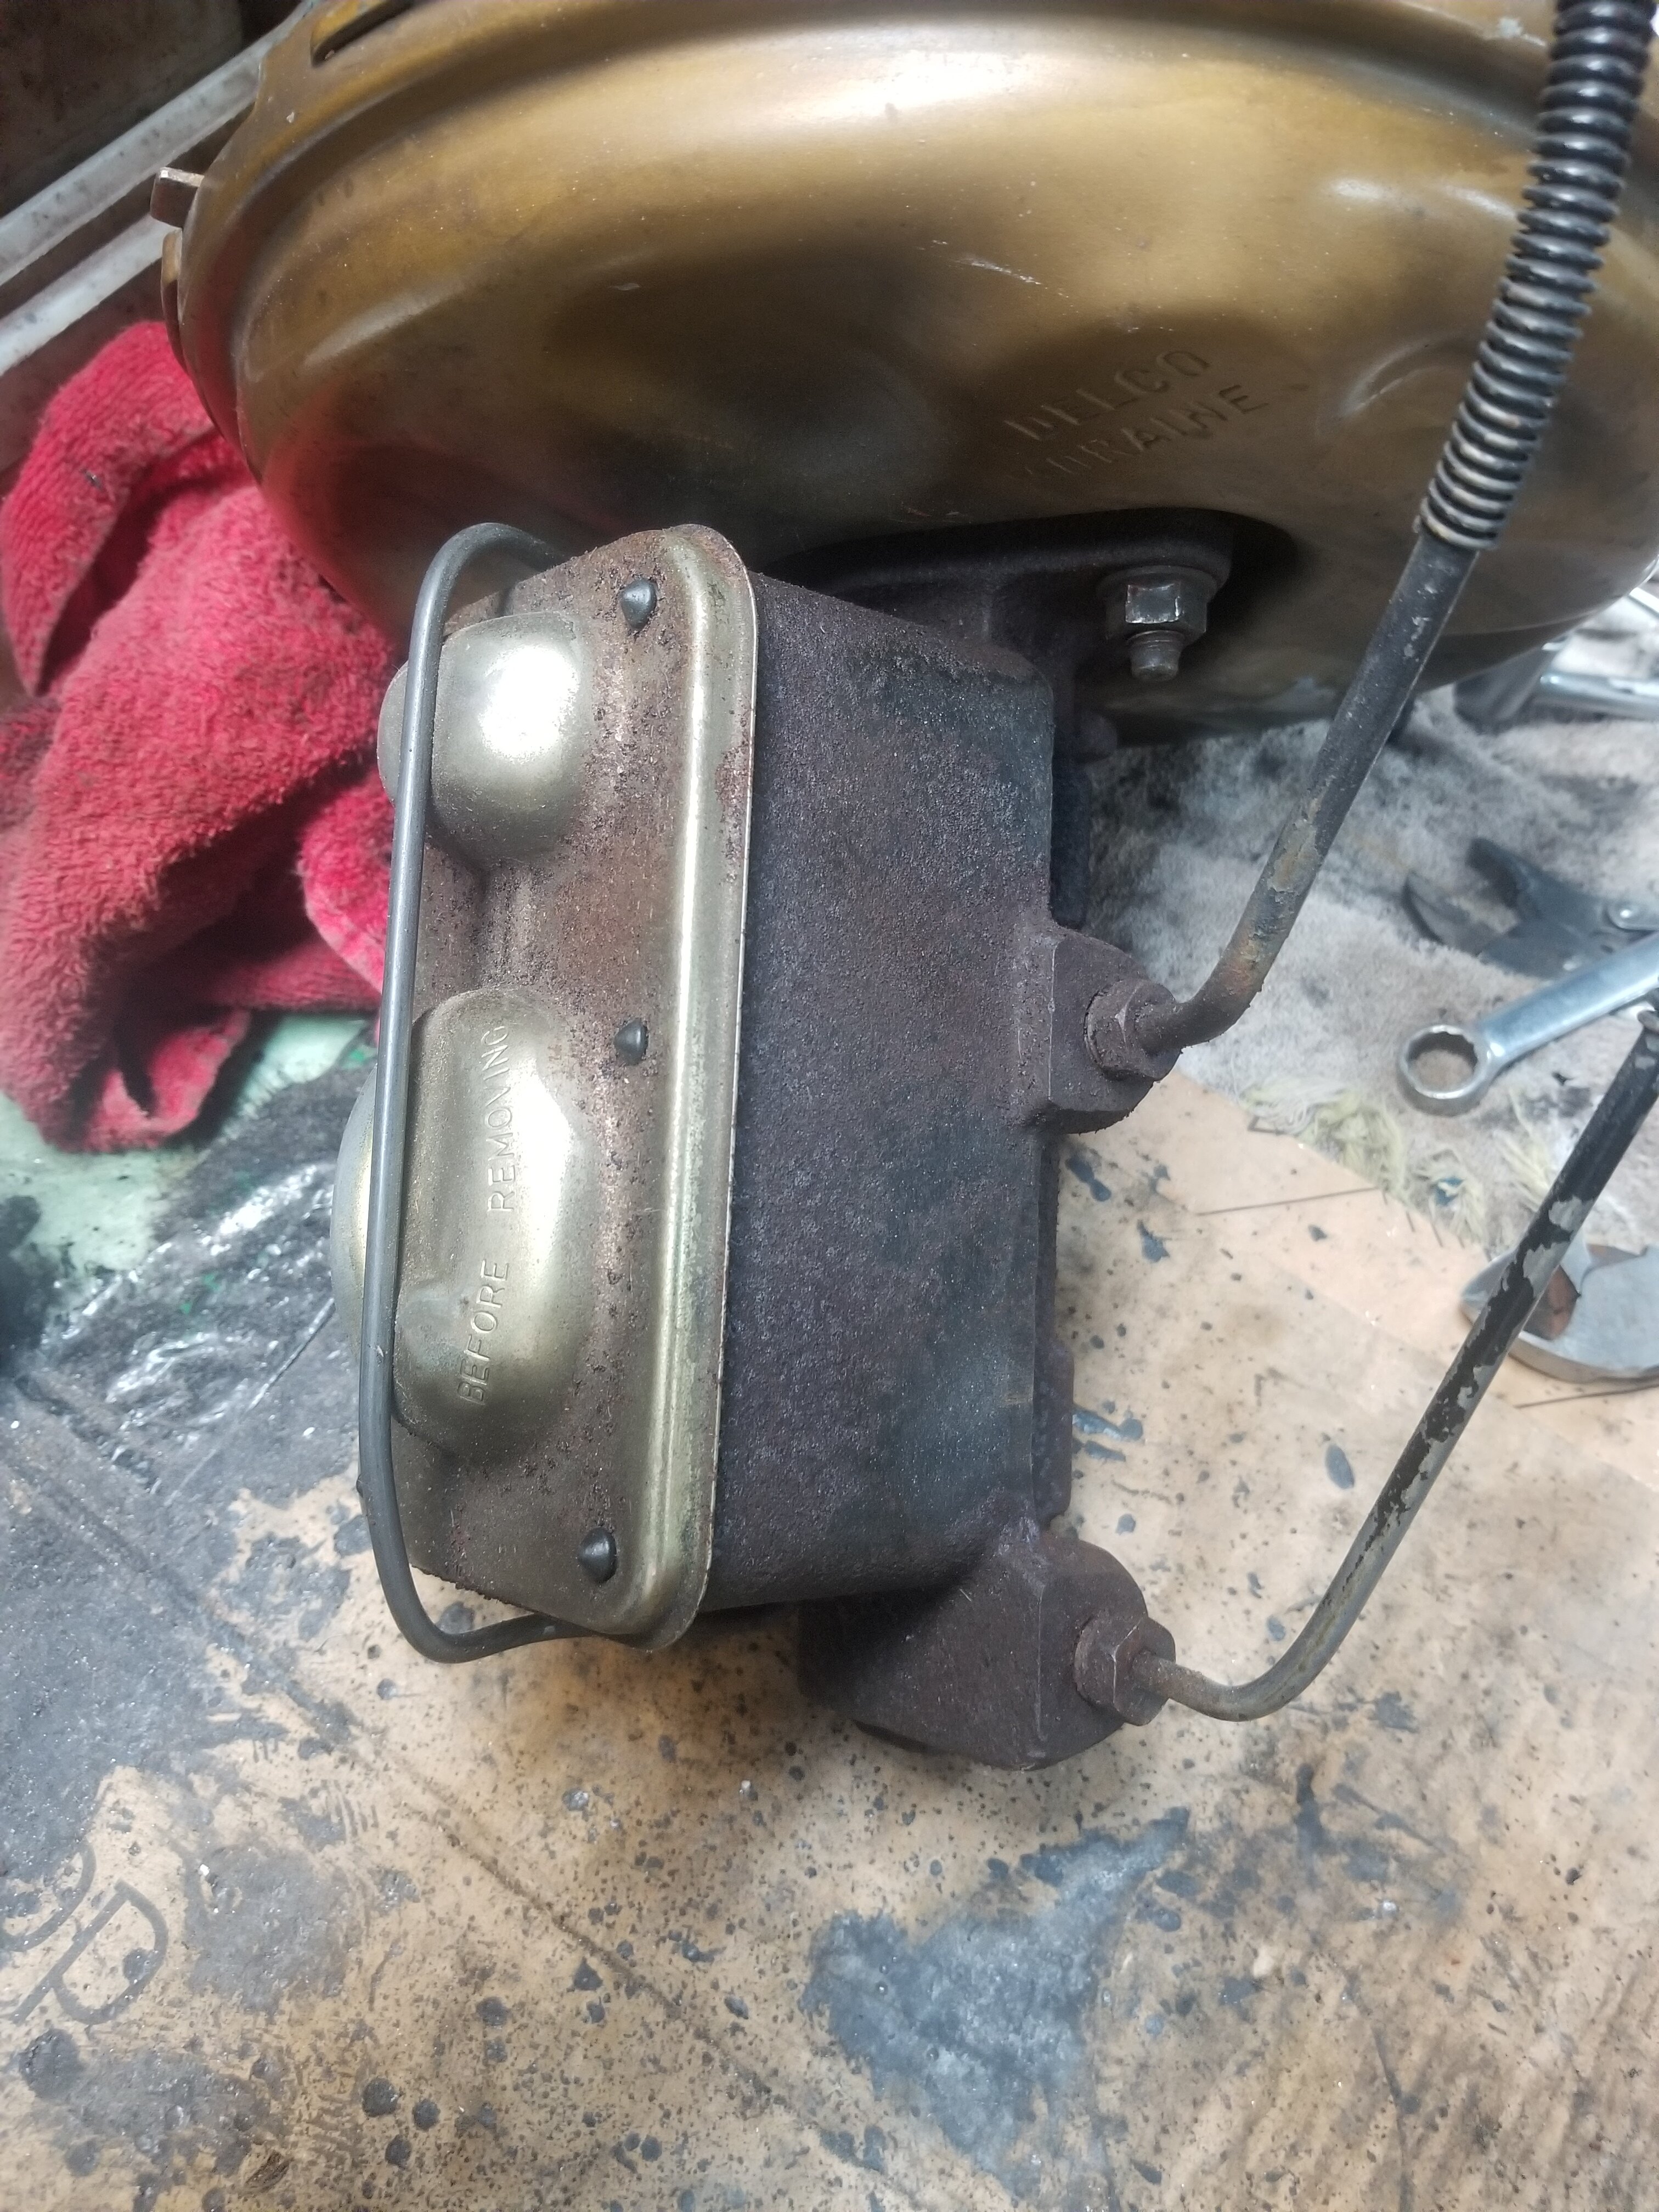
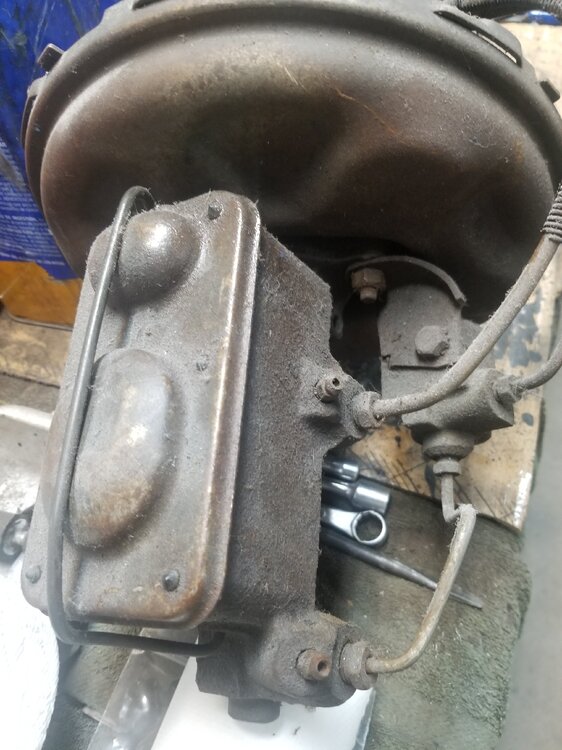
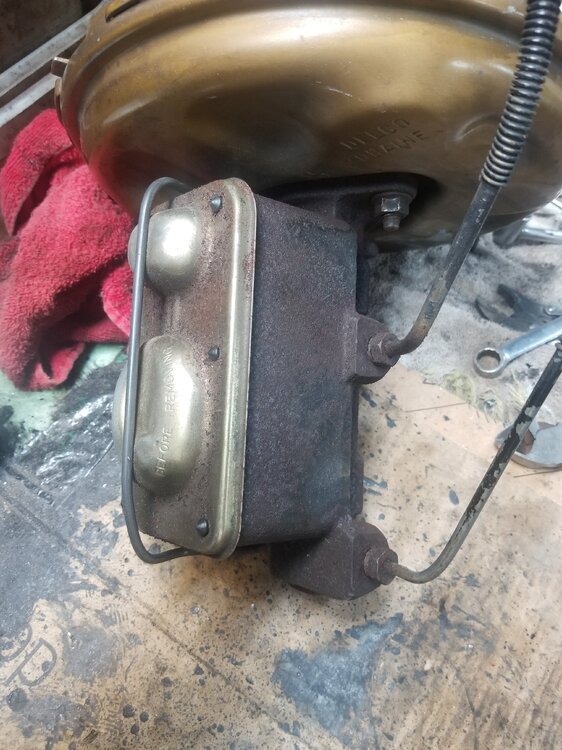
I would like to replace my Brake Booster and Master Cylinder on my 70 Monte. I notice that there is an additional component on a 70 Monte booster that my 72 Monte booster does not have. What is this extra device on a 70 Booster and what does it do? Do I need to keep it or can I chuck it? I only ask because my 72 Monte does not have one. See pics below. The first pic is from a 70 booster and the second from a 72 booster. Also I see that I can purchase a 9" booster instead of the normal 11" booster. Are there any pros and cons to going with the 9" one to gain some space? Thanks!! Mike
-
Hey Frank, Here are just some of my thoughts when I try to sell something or buy something. - Pictures always help and answer 1,000 questions. Post lots of pictures. - Include as much detail as possible. How long have you owned the car? Was the oil changed regularly? Does it need anything? Any leaks? - List in detail what is included in the sale. Carb, exhaust manifolds, flex plate, alternator, starter, ps pump, fan, fuel pump, plugs/wires, brackets, etc. All of these things will help come up with a fair price. I have owner a few 70s with that engine combo and it is a nice engine. It all comes down to what someone is looking for. Good luck!! Mike
-
Sorry about seeing this discussion so late. Is anyone still looking for a rear end? If so, PM me or reply to this posting and let me know. I'm not sure why I was not able to receive any emails. Thanks!! Mike
-
Hey Mike, I believe the flatter part of the molding matched the color of the top and the thinner edge was left unpainted. Mike
-
Also, there is an adjustment bolt and slot on the bottom, side of the horseshoe shifter handle.
-
Hey Dave, Do you have power at the starter solenoid terminal when you turn the key to crank the engine? If the solenoid doesn't get any power, it won't crank the engine. That same wire runs through the main engine wiring harness on the firewall behind the distributor. I've had several occasions myself where that old wire needs to be replaced with a newer, heavier gauge wire. Also, be careful around the harness firewall plug below the booster. If the plug or any of those wires come loose, that will also cause you problems. Did you happen to disconnect that plug while working on the dash cluster work? It is possible that when you put the plug back, one or more of the terminals inside the plug get pushed back away from the connection. You can see this by looking at the inside of the plug or closely looking at the outside of the plug for moved/different looking wires. Ask me how I know. Good luck!! Mike
-
Hey Tom, If I remember correctly, - the printed circuits are definitely different between idiot lights and gauges. - the wiring harness is different, however based on your wiring skills it can be converted to work. Some wires in the plug that goes into the printed circuit have to be moved around and some new wires have to be made to make the conversion work. There is lots of documentation on what I am referring to. If you have more questions, just ask. Many of us have done this sort of thing before. Thanks!! Mike
- 11 replies
-
- 2
-

-
- dash
- tachometer
- (and 1 more)
-
Here is his email address: dave.anhart1@gmail.com They were $20 + $7 for shipping. Mike
-
Hey Grant, There is a person who makes and sells the float. Try searching the forums for the info. Many of us have purchased them and they are great. Mike
-
Hey Tony, Maybe you could offer your painting services on the side. I would think lots of car guys could use an experienced painter. Mike
-
Hey Rick, You only need to paint the areas that will be exposed to direct sunlight. UV Ray's break down the paint. Mike
-
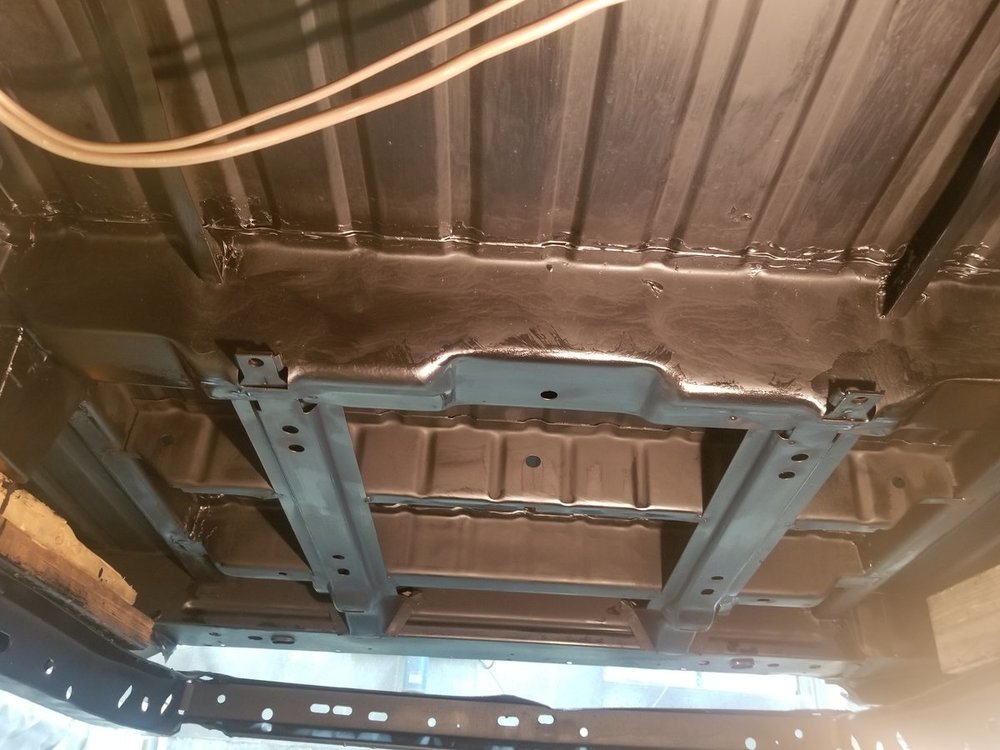
And here is a picture of the Eastwood Semi-Gloss Underhood paint applied directly over POR15 Semi-Gloss paint:
-
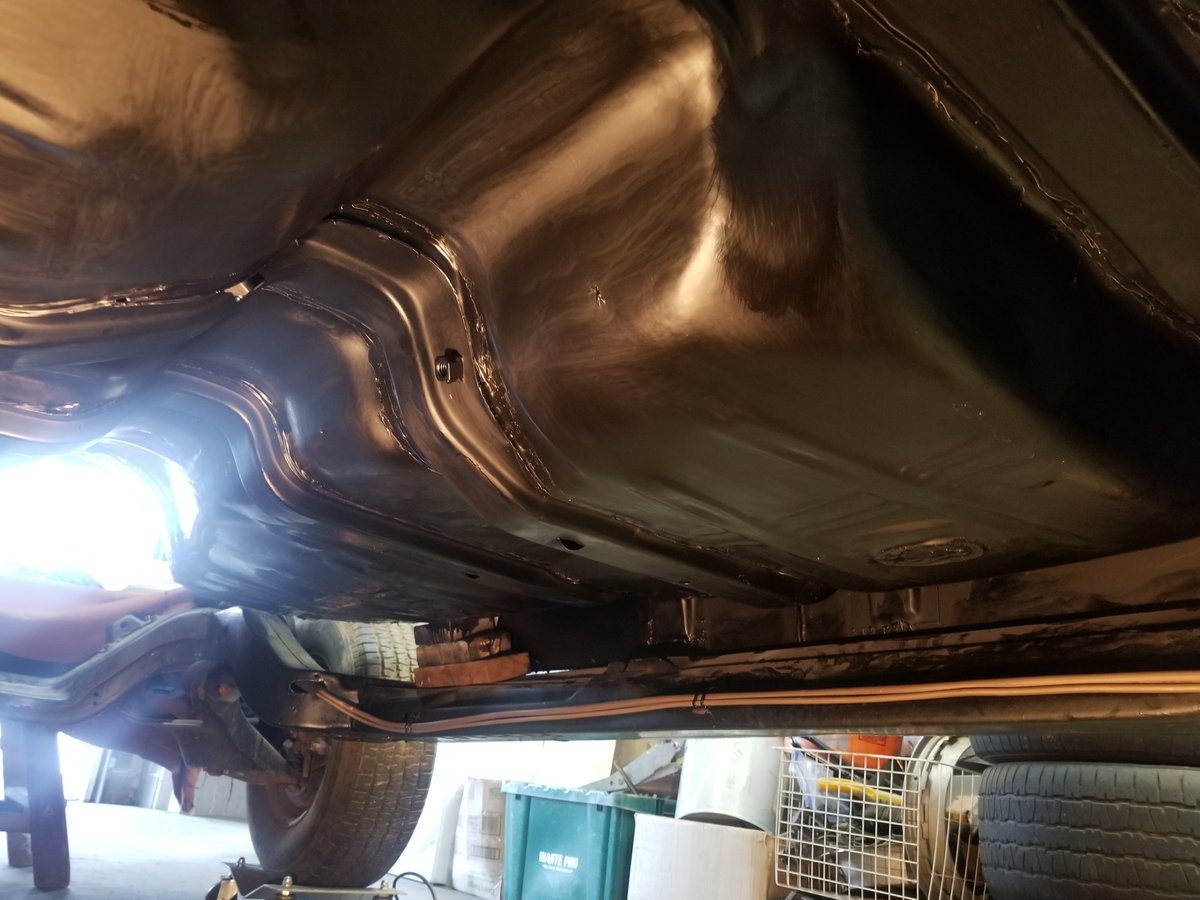
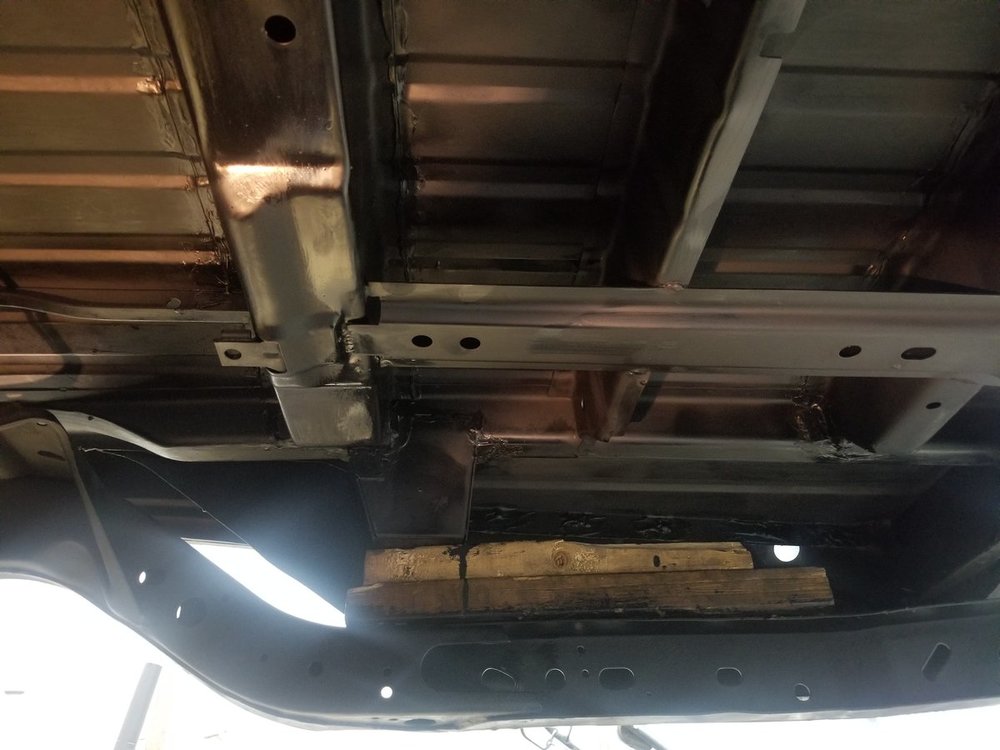
Thanks for all of the warnings. I've been using POR15 for many years now so I pretty much know how it is and how to work with it. Always cover up as much as possible, be careful if spraying because of the fumes, wipe down with thinner right after use and never (I MEAN NEVER) get it in your eyes. Don't ask how I know that. As nasty as it is to work work, it is still the toughest paint I know. I love it. Here are some pics of the undercarriage of my 70 SS El Camino project.

-
What really made it nice for me is that I already had my parts stripped and painted with Semigloss POR15 and I was able to paint right over it. Now I know it will last a long time. I also have my rear and undercarriage painted with POR15. That stuff is tuff paint and covers really well. Thanks again!! Mike
-
Hey Tom, I sprayed some of my parts using the Eastwood Underhood Semi-gloss tonight. It worked great and looks perfect. Thanks for sharing the tip!! Mike
-
I'll have some of what he is having. Clever posting, I must say.