Canuck Posted June 8, 2015 Author Share Posted June 8, 2015 Those radios are great if you want to put it in the stock location and have modern features. I hear complaints about some of those retro stereos that they are overpriced for the quality of sound. My simple Alpine stereo for 1/3 of the price of retro radios has better quality sound and features. In my case, it is clearly not as easy to use being hidden away and limited to the remote functions but it does what I need it to do while achieving the stock look. In my 72 I had installed a modern stereo in the glove box which worked well also. Might be an option if you still want to be able to see the face plate. Quote Link to comment Share on other sites More sharing options...
Bluemalibu Posted June 8, 2015 Share Posted June 8, 2015 I researched the available stereos pretty thoroughly before purchasing one for the '72. What held a lot of sway for me were all of the car enthusiasts on the different boards with multiple vehicles that had purchased each variety. The overwhelming consensus was that the very best available was the RetroSound Model 2. http://www.retrosound.com/product-p/1970-72-c51-m2.htm They were really brutal in their comments against the quality of Custom Autosound. So much so, that most purchased the RetroSound as a replacement even though they had just spent the money on the Custom unit. Personally, I can't testify that any other brand is inferior to the RetroSound, but I am delighted with the sound quality and build of the radio. In addition, you can order it to suit the style of interior that you are looking for... with any combination of black or chrome buttons and faceplate; and with a variety of dial printings. The '70-'72 radio can likewise be ordered with 12 different style knobs, including the factory correct ones. The faceplate can be mounted with the balance of the radio as normal, or the bulk of the unit can be detached from the face and mounted anywhere up to four feet away. All modern options are included... USB/ iPhone/iPod connections, remote, BlueTooth, RCA cables, Pre-Outs, etc. It's 25 watts RMS per channel. Aaron, looks like we posted at exactly the same time. LOL!!! Like you, I too initially bought an expensive Alpine to mount remotely and kept the stock radio in the dash... but the RetroSound unit simplified this so much, and it is everything that the Alpine unit offered as well. Doug + Quote Link to comment Share on other sites More sharing options...
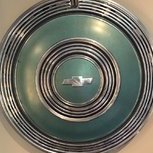
monte70car Posted June 8, 2015 Share Posted June 8, 2015 Glen and Bruce we have the Custom Autosound USA-6 in our 70 El Camino it came with the chrome knobs as picture, I brought the correct 70 knobs and they fit with no issue and keeps the stock look unless it's on. The first USA-6 we installed was in our Nomad and it has a no/off display light so it keeps the dial face. The 72 will get this Quote Link to comment Share on other sites More sharing options...
stangeba Posted June 8, 2015 Share Posted June 8, 2015 My 20+ year old Autosound radio is working fine, the sound quality isn't that good (speakers) and I don't care for the knobs but until is dies, I probably won't change anything. It has a 6 CD changer in the trunk and that's all we listen to anyway. I see the 71-72 black knobs on their site but so far not how to order them by themselves. Bruce Quote Link to comment Share on other sites More sharing options...
monte70car Posted June 8, 2015 Share Posted June 8, 2015 Bruce you don't need to but the knobs from Custom Autosound any of the parts vendor who sells the 71-72 knobs will fit the radio. Quote Link to comment Share on other sites More sharing options...
stangeba Posted June 8, 2015 Share Posted June 8, 2015 Robert, I found the paper work! I have a 19 year old Custom Autosound Kenwood 800 radio purchased 8/7/1996 for $399.00 My OEM knobs from my 71 will not fit. Bruce Quote Link to comment Share on other sites More sharing options...
monte70car Posted June 8, 2015 Share Posted June 8, 2015 Well I ordered a wiring kit thru Summit from American Autowire that will be going into the 72 https://scontent-iad3-1.xx.fbcdn.net/hphotos-xfa1/v/t1.0-9/11392986_983536961681277_7313443839502231935_n.jpg?oh=c65cfa202b8662d077e67809e620a5dd&oe=55EF1187 oh the joys of wiring. Quote Link to comment Share on other sites More sharing options...
Bluemalibu Posted June 9, 2015 Share Posted June 9, 2015 I can empathize with you, Robert. I wired up the A/C today in 94* heat... configuring it so that activating the A/C will trip the HVAC blower relay and the cooling fan relay through the trinary switch. That completes the entire car (minus the taillights) being re-wired from scratch. I relocated the battery to the trunk with 2/0 welding cable running through a heavy under-ground plastic conduit within the frame. The 2/0 is only hot after tripping a latching relay. The 2-spd Lincoln fan and stereo amplifiers put quite a draw on the system, so I've swapped out the CS130 alternator for a DR44 that puts out 120 amps at idle. Quote Link to comment Share on other sites More sharing options...
monte70car Posted June 11, 2015 Share Posted June 11, 2015 Got the hood polished along with the trunk lid, cleaned up the 45 year old top I'm sure a new top would look much better. Quote Link to comment Share on other sites More sharing options...
Rock Posted June 12, 2015 Share Posted June 12, 2015 I ordered 5 new 15x8 rims with 4 1/2" back spacing and 4 new beauty rings since the old tires will no longer fit in the wheel wells. I also had to order outer wheel housings for the rear quarter replacement. Both the old quarters are off and the old outers could not be saved. Quote Link to comment Share on other sites More sharing options...
7tonemonte Posted June 12, 2015 Share Posted June 12, 2015 Where did you order outer wheel wells from? Quote Link to comment Share on other sites More sharing options...
Rock Posted June 12, 2015 Share Posted June 12, 2015 Where did you order outer wheel wells from?tamaraz...they are the chevelles, they will need to be "messaged" into place. My new body guy says he has done it before. The Monte housings will be a month or so and 3x the price. Quote Link to comment Share on other sites More sharing options...
monte70car Posted June 12, 2015 Share Posted June 12, 2015 Last year I brought a power window setup for the 72 . The last two I've been busy getting the rear windows installed so the rear seat can go back in it took a long time to find the information in regards to installing the quarter windows but I was able to find the post. Final got the power regulators in and test them before buttoning everything and there is no binding, motor did go up and down slowly due to using the power probe to test them. While the rear seat was out I was able to pull the seat cover down further Quote Link to comment Share on other sites More sharing options...
Bluemalibu Posted June 13, 2015 Share Posted June 13, 2015 It got a might warm here today. 107* I put eight hours of work in on the '72, fabricating and routing new hydraulic lines for the steering and hydroboost, and installing a couple of theft-deterant sysems. I then wimped out and moved the operation indoors to take advantage of the Twenty-first Century climate control. I spent the evening resurrecting 12 year-old cast valve covers that are almost the size of SBC heads. They started out so badly oxidized that they looked like raw forgings. After hours of elbow grease and liberally applied Gord's polish, they might pass for chrome. Quote Link to comment Share on other sites More sharing options...
Rob Peters Posted June 13, 2015 Share Posted June 13, 2015 It got a might warm here today. 107* I put eight hours of work in on the '72, fabricating and routing new hydraulic lines for the steering and hydroboost, and installing a couple of theft-deterant sysems. I then wimped out and moved the operation indoors to take advantage of the Twenty-first Century climate control. I spent the evening resurrecting 12 year-old cast valve covers that are almost the size of SBC heads. They started out so badly oxidized that they looked like raw forgings. After hours of elbow grease and liberally applied Gord's polish, they might pass for chrome. What, no pretty pictures? rob Quote Link to comment Share on other sites More sharing options...
Leghome Posted June 13, 2015 Share Posted June 13, 2015 No before and after pic's didn't happen Quote Link to comment Share on other sites More sharing options...
7tonemonte Posted June 14, 2015 Share Posted June 14, 2015 Oil change, been dreading it due to the baffles inside my valve cover, basically I have to transfer 5 quarts of oil into a detailers compound bottle (basically a picnic ketchup bottle) and squeeze slowly into the opening, it's a long drawn out process! Looking like I've developed a rear main leak now, guess the 44 year old gasket combined with the lack of daily driving has taken its toll! Maybe I'll just look for a nice crate motor at Carlisle for it? 1 Quote Link to comment Share on other sites More sharing options...
black07ss Posted June 14, 2015 Share Posted June 14, 2015 Looking like I've developed a rear main leak now, guess the 44 year old gasket combined with the lack of daily driving has taken its toll! Maybe I'll just look for a nice crate motor at Carlisle for it? I will let Alli know which one is the best bang for the buck 1 Quote Link to comment Share on other sites More sharing options...
7tonemonte Posted June 14, 2015 Share Posted June 14, 2015 I will let Alli know which one is the best bang for the buck Thanks Bob, I knew I could count on you to help spend money! Quote Link to comment Share on other sites More sharing options...
Sam (Bones) Posted June 14, 2015 Share Posted June 14, 2015 rebuild what you have, seems like these new create engine have there own issues Quote Link to comment Share on other sites More sharing options...
Bluemalibu Posted June 16, 2015 Share Posted June 16, 2015 I finally got the rear discs ironed out... it took some car-crafting, but she's together. The C-clip eliminator and strange axles bumped the axle flange out 1 1/2 inches on each side, so no factory designed set-up would fit. I ended up selecting pieces from three different cars to make it work: PBR calipers from a '98 Camaro, NOS caliper mount for a 1LE '92 IROC Z-28, and rotors for a '93 Firebird. Quote Link to comment Share on other sites More sharing options...
Canuck Posted June 16, 2015 Author Share Posted June 16, 2015 I finally got around to changing the oil and work on the brakes. See photos below. Quote Link to comment Share on other sites More sharing options...
monte70car Posted June 16, 2015 Share Posted June 16, 2015 Sunday I got brave and cut a hole into the side of my brand new console for the 72 to house the power seat controls. Today I cut the matching hole in the passenger side of the console leaving me with running the wires over to the console. I also did a little more wiring to car and routed some wires to their location as there is nothing to hook them up to. Quote Link to comment Share on other sites More sharing options...
Bluemalibu Posted June 16, 2015 Share Posted June 16, 2015 Robert, are you happy with the quality of the console that you purchased? I have been searching for a base that is built well... and after only finding cheaply made units, I had pretty much resigned myself to waiting for a good original to come available. Quote Link to comment Share on other sites More sharing options...
monte70car Posted June 16, 2015 Share Posted June 16, 2015 Doug I'm happy with the console even at the price I paid for it. I received the shell, alum top plate that would be found in Chevelle's and El Camino's, the dial plate with the correct white face letters, console door and hinge (didn't come with the lock or retainer), and the rear panel with the light for $400. I just hated the thoughts of putting the holes in it for the switches but didn't have many options. Quote Link to comment Share on other sites More sharing options...

Recommended Posts
Join the conversation
You can post now and register later. If you have an account, sign in now to post with your account.