Dtret Posted July 24, 2020 Share Posted July 24, 2020 I order a new SS cluster from “sonny” and I had them add a volt gauge instead of amps. You guys are correct the instructions suck but now that I paid the bill I cannot get a return call. I know someone rewrote the information in normal people English if someone could tell me where that is posted I would appreciate it. Thanks in advance Dennis Quote Link to comment Share on other sites More sharing options...
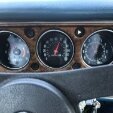
71MonteCarloMD Posted July 24, 2020 Share Posted July 24, 2020 Not sure if these would be helpful: Quote Link to comment Share on other sites More sharing options...
MCfan Posted July 25, 2020 Share Posted July 25, 2020 Dennis, I wrote a more detailed set of instructions for the Sonnie24 full gauge dash conversion but it is for a '70. I believe you are converting a '71 so I am not sure they are the same (I know a '72 is different). If you will PM me with your email address,, I will send you the Word file with the more detailed instructions and illustrations. Thanks. Quote Link to comment Share on other sites More sharing options...
Dtret Posted July 25, 2020 Author Share Posted July 25, 2020 (edited) So I repinned the harness connector to match instructions. 2 questions They sent me a 4 ft brown wire that I assume is for the tach? (Instructions say white). I have a leftover brown wire (alt) that doesn’t have a home. What do I do with that? Temp sensor had two wires ( green and green w/white stripe). I bought a gauge sensor for 1 wire but now after searching in the forum and reading about the tcs do I need both wires on the temp sensor and not put in the single wire sensor. Ok sorry 3 questions. Thanks as always Edited July 26, 2020 by Dtret New question same topic Quote Link to comment Share on other sites More sharing options...
Dtret Posted July 25, 2020 Author Share Posted July 25, 2020 Dennis I will pm you if needed but I think I’m close without bothering you thanks Quote Link to comment Share on other sites More sharing options...
MCfan Posted July 27, 2020 Share Posted July 27, 2020 On 7/25/2020 at 3:54 PM, Dtret said: Dennis I will pm you if needed but I think I’m close without bothering you thanks It's no bother to send you the Word file with detailed instructions, Dennis. My only concern is if the '71 dash is wired the same at the '70 dash for which my instructions are written. I just reviewed my instructions (glad I wrote that document while I did the conversion because there is no way I could have remembered all those detailed steps) to see if I could identify your left over brown wire. I believe it may be the brown generator wire that originally ran from the horn relay to position 3 in the wiring harness connector to the circuit panel. That wire is not used for the full gauge dash in a '70. My instructions say to remove its connector from position 3 and either cut it off or tape it off. Perhaps you removed the wire entirely and that is what you now have left over. In any case, I will be happy to send you the detailed instructions if you think you can use them. Quote Link to comment Share on other sites More sharing options...
Dtret Posted July 27, 2020 Author Share Posted July 27, 2020 That’s what I thought on the extra brown. The only things left are the extra brown wire that came with the kit (I am almost sure tach). And the original temp sensor was a two wire. 1 will be for gauge but the second for tcs where does it go Quote Link to comment Share on other sites More sharing options...
MCfan Posted July 27, 2020 Share Posted July 27, 2020 3 hours ago, Dtret said: That’s what I thought on the extra brown. The only things left are the extra brown wire that came with the kit (I am almost sure tach). And the original temp sensor was a two wire. 1 will be for gauge but the second for tcs where does it go Yes, the brown wire that came in your kit is undoubtedly for the tach, As you may already know, that wire must be routed through the firewall and connects to the negative terminal of your coil (or the tach port on an HEI). The other end of the brown wire plugs into position 9 of the wiring harness connector to the new PCB. From the instruction document: Connecting the brown (tachometer signal) wire to the coil: 1. A 3/8” hole should be drilled through the firewall (from the engine side) at the dimple about 1 inch below and slightly to the right of where the throttle cable comes through the firewall. 2. Insert the loose end of the brown wire through the hole in the firewall and insert the grommet in the hole to protect the wire from abrasion, 3. Connect the loose end of the brown wire to the negative (-) side of the coil or to the Tach Port of an HEI distributor. I am somewhat confused regarding your statement that there are/were two temperature wires but maybe this is what you are seeing: The dark green wire originally in position 9 of the wiring harness connector is the temperature sensor wire. The pink wire originally in position 5 is a fused power line for the fuel, temperature, brake and oil pressure lights. There was absolutely no mention of TCS in any instructions I have ever seen for this conversion and I did not connect any wires for a TCS system as mine was long since entirely removed from my '70. This conversion calls for the dark green wire to be re-plugged into position 10 and the pink wire into position 7. Again, from the instruction document: Rewire and add wires to the main instrument cluster plug: 1. Locate the main instrument cluster plug which is the one you unplugged from the back of the cluster housing before you removed it from the dash. 2. Refer to the lower diagram on the page above. Carefully inspect the plug and note the color of wire currently at each of the 12 available connector slots. NOTE: the slots are numbered at the bottom of the plug. 1-6 on one side and 7-12 on the other. Slots # 4 and #6 should be empty/available slots. 3. Wires located in slots 1, 2, 8 and 12 will NOT be moved so leave them alone. 4. Remove the brown (generator) wire in slot 3 by inserting a very tiny (eye glass) screwdriver between the flat side of the connector and the connector housing until the retaining barb unhooks and then pull the wire and connector out of the housing. This wire will NOT be used again so either tape that connector with electrical tape or cut it off or both. 5. The five remaining wires will be used but must be temporarily removed from the plug using the same technique as for the brown wire above. Be sure to reset the retaining barb on each removed connector by bending it out slightly so it will stay in place in its new slot. 6. Install the wire connectors into new slot positions in the plug as follows: a. Plug the light green (high beam) wire into slot #5 b. Plug the dark blue (oil pressure) wire into slot #6 c. Plug the pink (tach/temp/brake/oil: fused power) wire into slot #7 d. Plug the dark green (temperature) wire into slot #10 e. Plug the tan (fuel) wire into slot #11 7. Add new wires from the kit to the main cluster plug as follows: a. Plug the short black/white striped (ammeter) wire into slot #3 b. Plug the short black (ammeter) wire into slot #4 c. Plug the brown (tachometer signal) wire w/rubber grommet into slot #9 8. All 12 slots in the main cluster plug should now be filled and there should be three new (a short black/white striped wire, a short black wire and a longer brown wire) 9. Refer to the lower plug diagram below to check your work. Hope this helps. Quote Link to comment Share on other sites More sharing options...
Dtret Posted July 27, 2020 Author Share Posted July 27, 2020 Thanks for that response. I am not sure how 70 runs the tcs I think a separate sensor on pass side of engine. On my 71 the temp sensor itself has two wires on go to it dark green- that goes to the harness firewall connector and to the cluster. I know that one. The second green w/ white stripe goes behind the booster to the tcs relay( I believe). I replaced the temp sensor with a single wire gauge sensor and now I don’t have a home for the green w/ white stripe wire. Do you know if I need to run another sensor somewhere or put the two prong sensor back in the engine. If I put the two wire back in I don’t think the temp gauge will read properly because they are two different type of switches. Any ideas. Thanks as usual Quote Link to comment Share on other sites More sharing options...
Dtret Posted July 28, 2020 Author Share Posted July 28, 2020 Mike (sonny) called me and we got it all figured out. I can put my old sensor in pass head and and run tcs through that. Every thing else in your instructions are correct Thanks for the help. Again Dennis Quote Link to comment Share on other sites More sharing options...

Recommended Posts
Join the conversation
You can post now and register later. If you have an account, sign in now to post with your account.