
1Bad_Monte
-
Posts
40 -
Joined
-
Last visited
Content Type
Profiles
Articles
Forums
Gallery
Events
Everything posted by 1Bad_Monte
-

Swapping TH350 for TH400 (Need Tips)
1Bad_Monte replied to 1Bad_Monte's topic in General 70-72 Monte Carlo Forum
Well said. The shop I had my engine built closed about a month after I received it. Got little info besides the build sheet and a bill. Going through all this taught me so much, not not only about my engine, but also gave me a working knowledge of automatic transmissions (more than I ever thought I would). -Jr. -
Swapping TH350 for TH400 (Need Tips)
1Bad_Monte replied to 1Bad_Monte's topic in General 70-72 Monte Carlo Forum
Awesome info! Will take a look. -
Swapping TH350 for TH400 (Need Tips)
1Bad_Monte replied to 1Bad_Monte's topic in General 70-72 Monte Carlo Forum
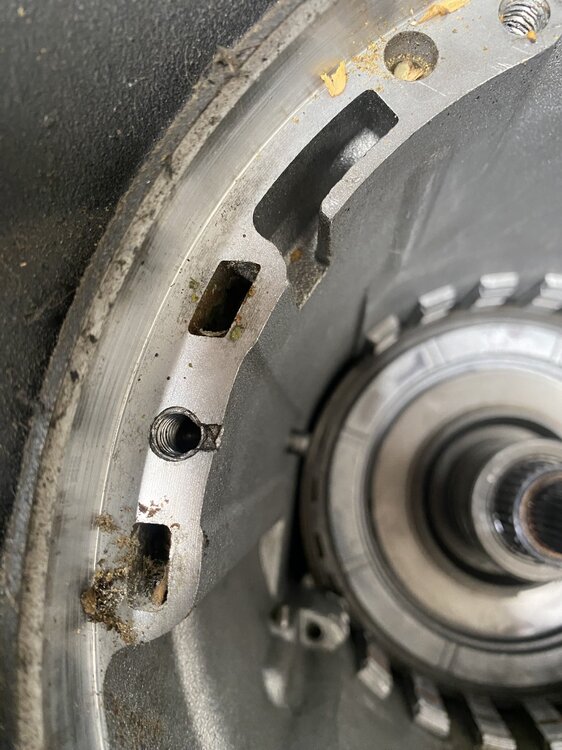
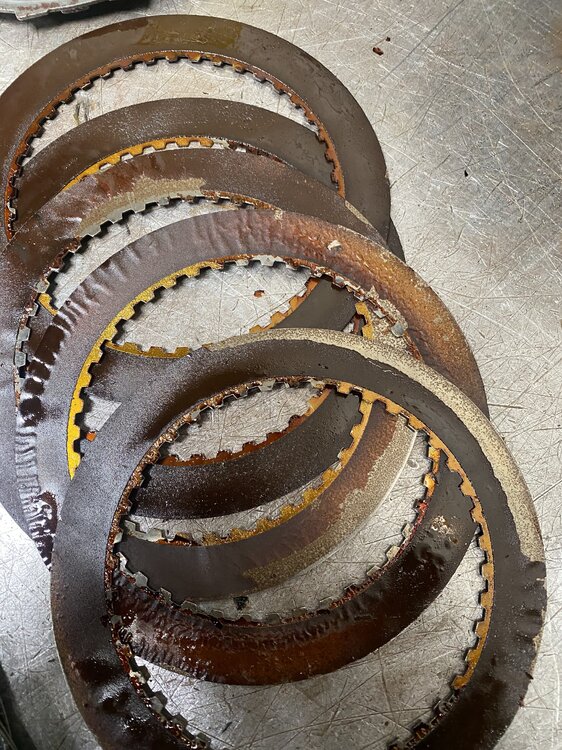
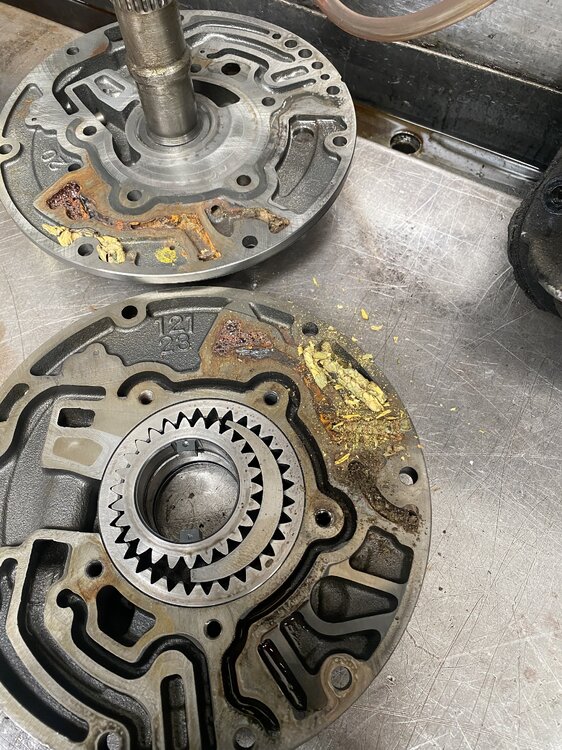
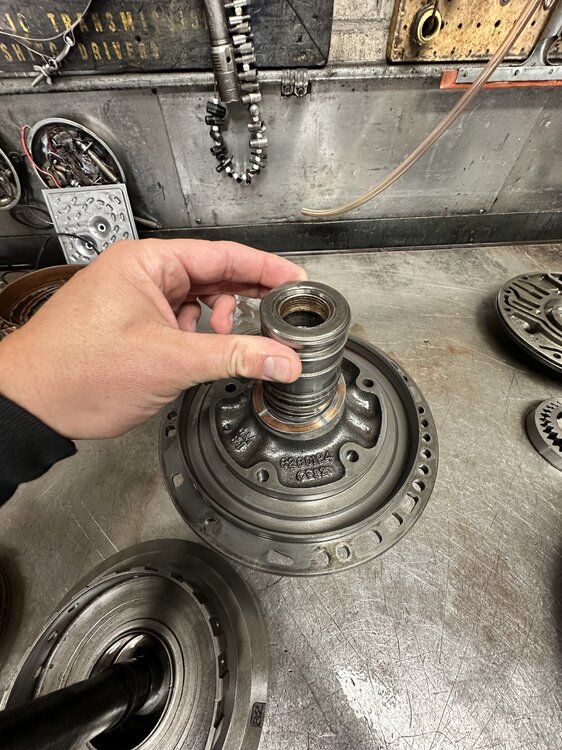
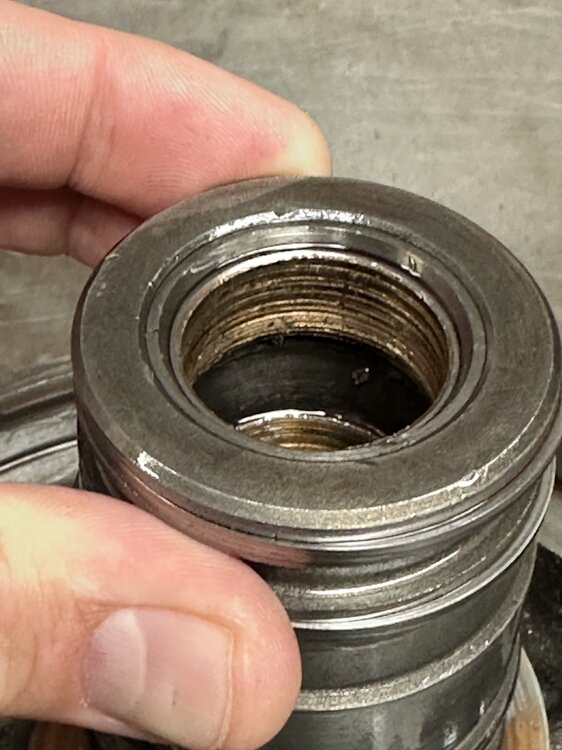
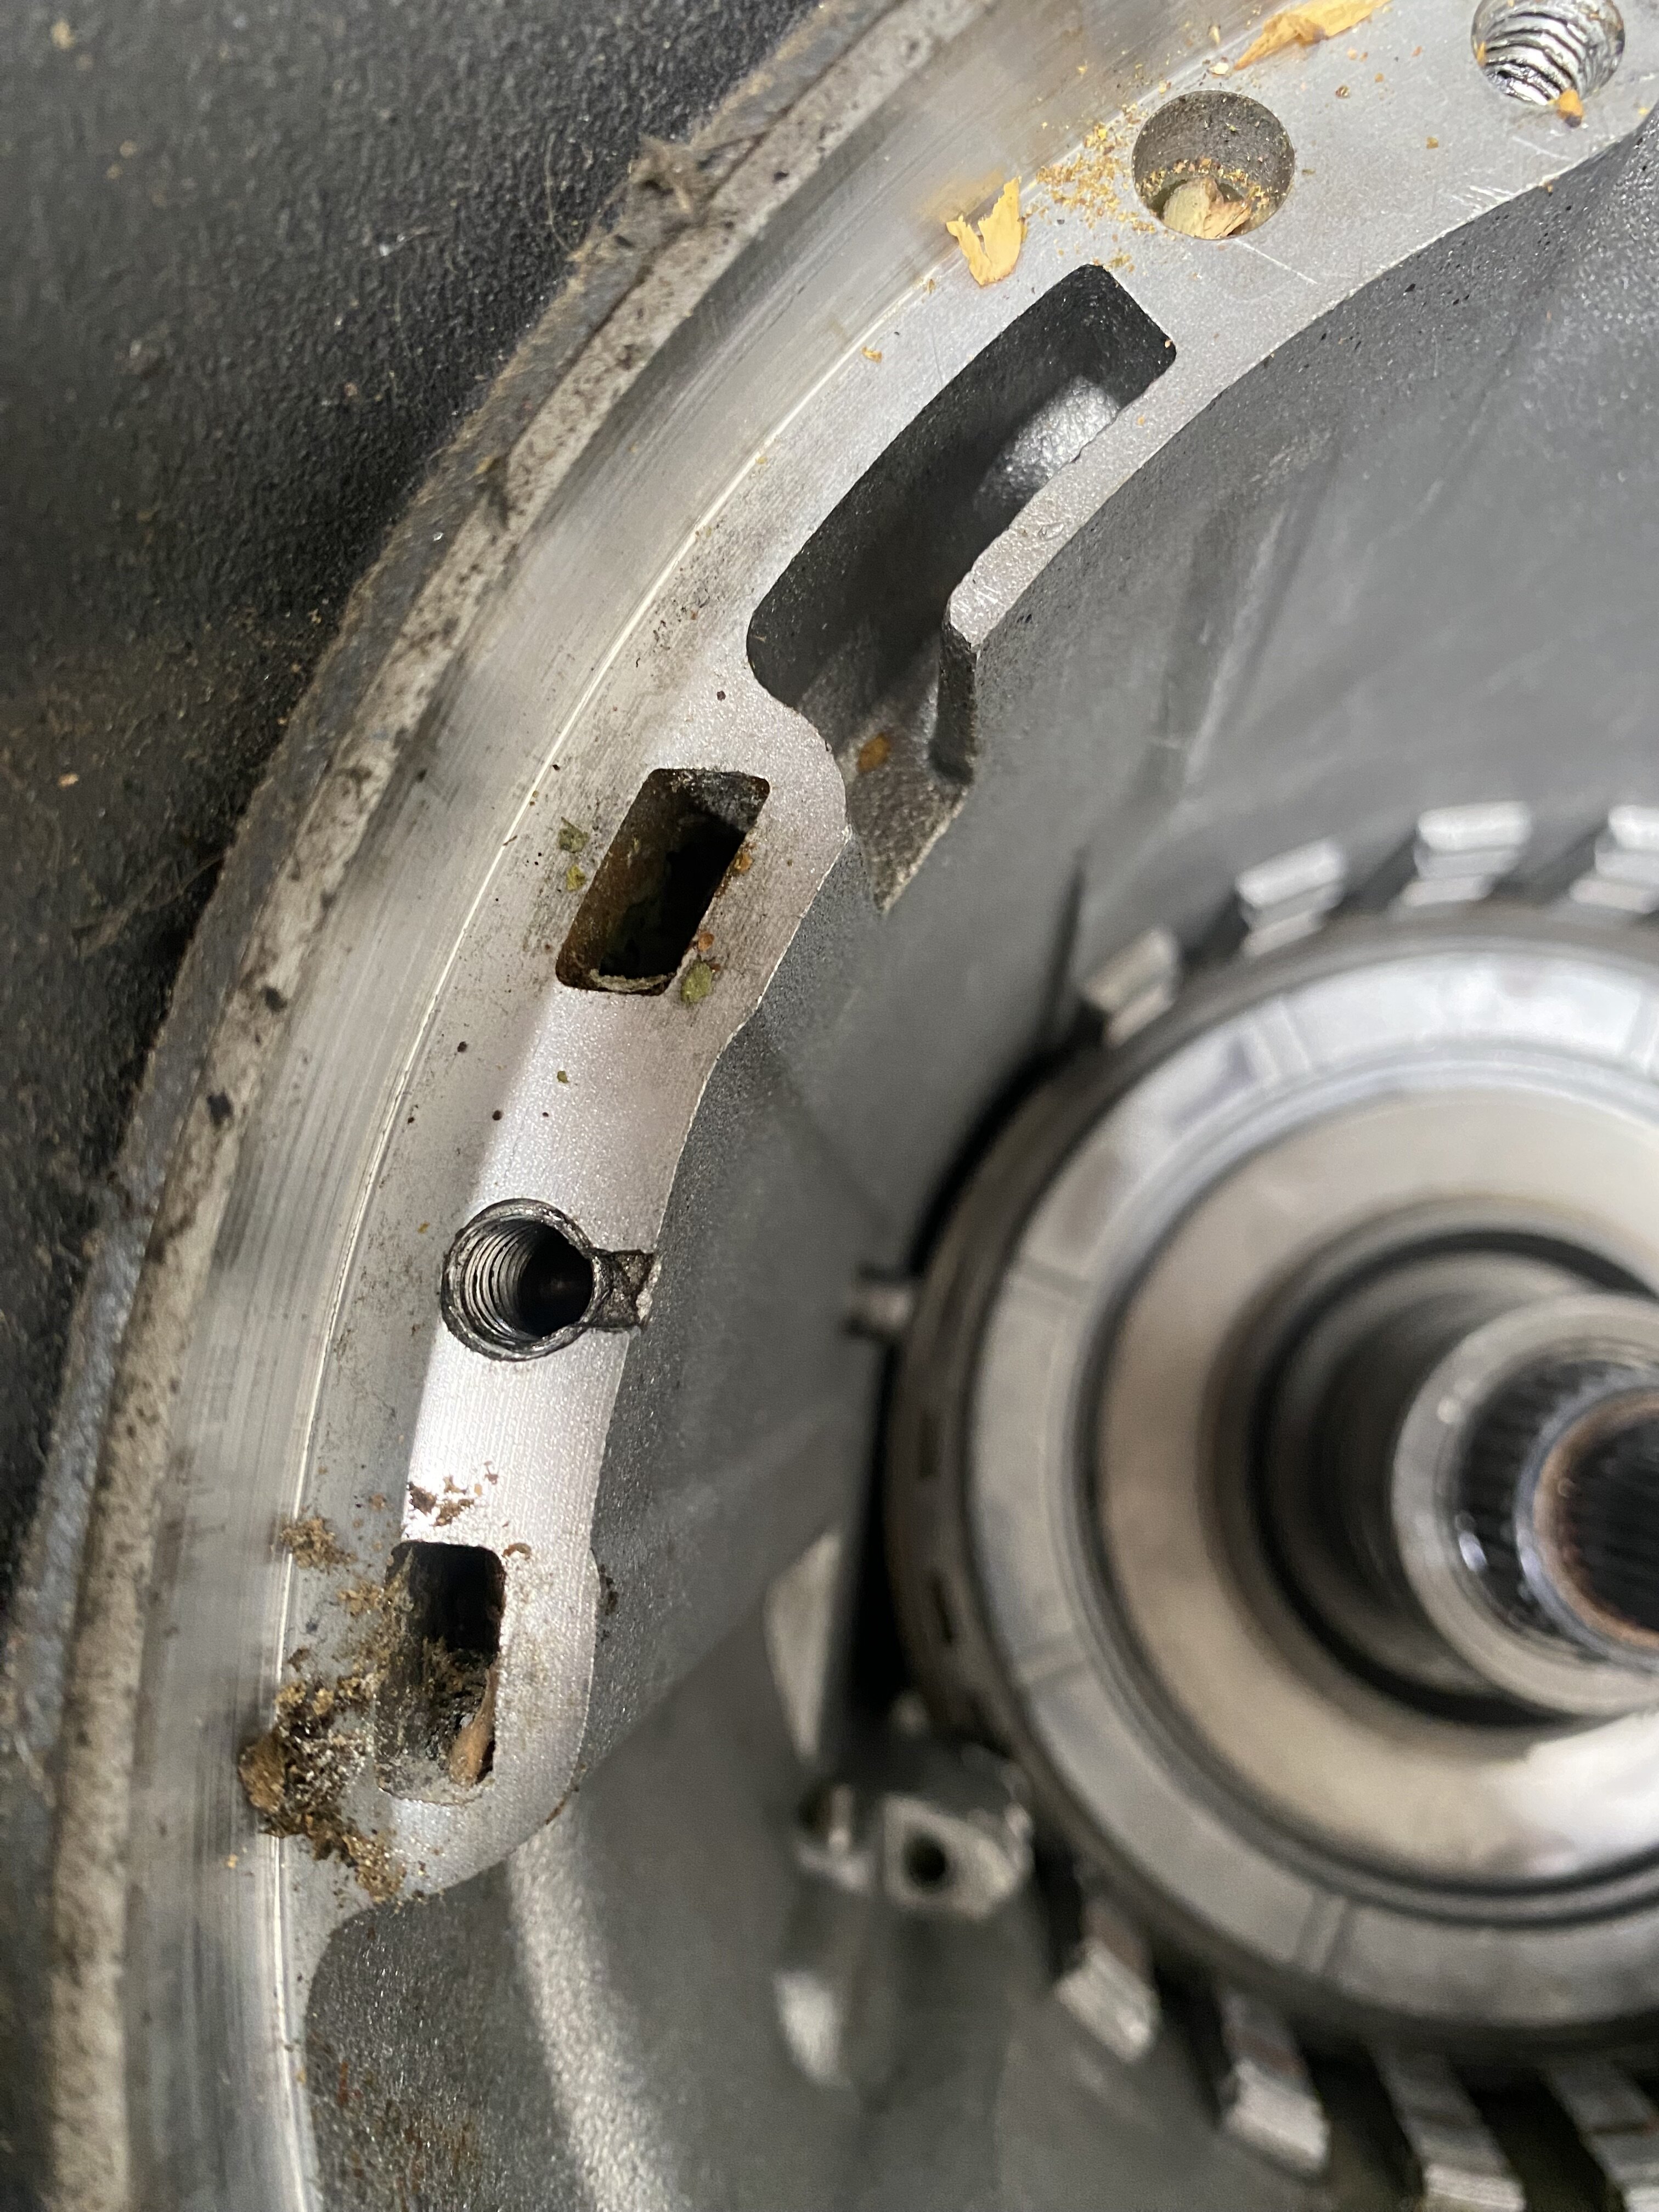
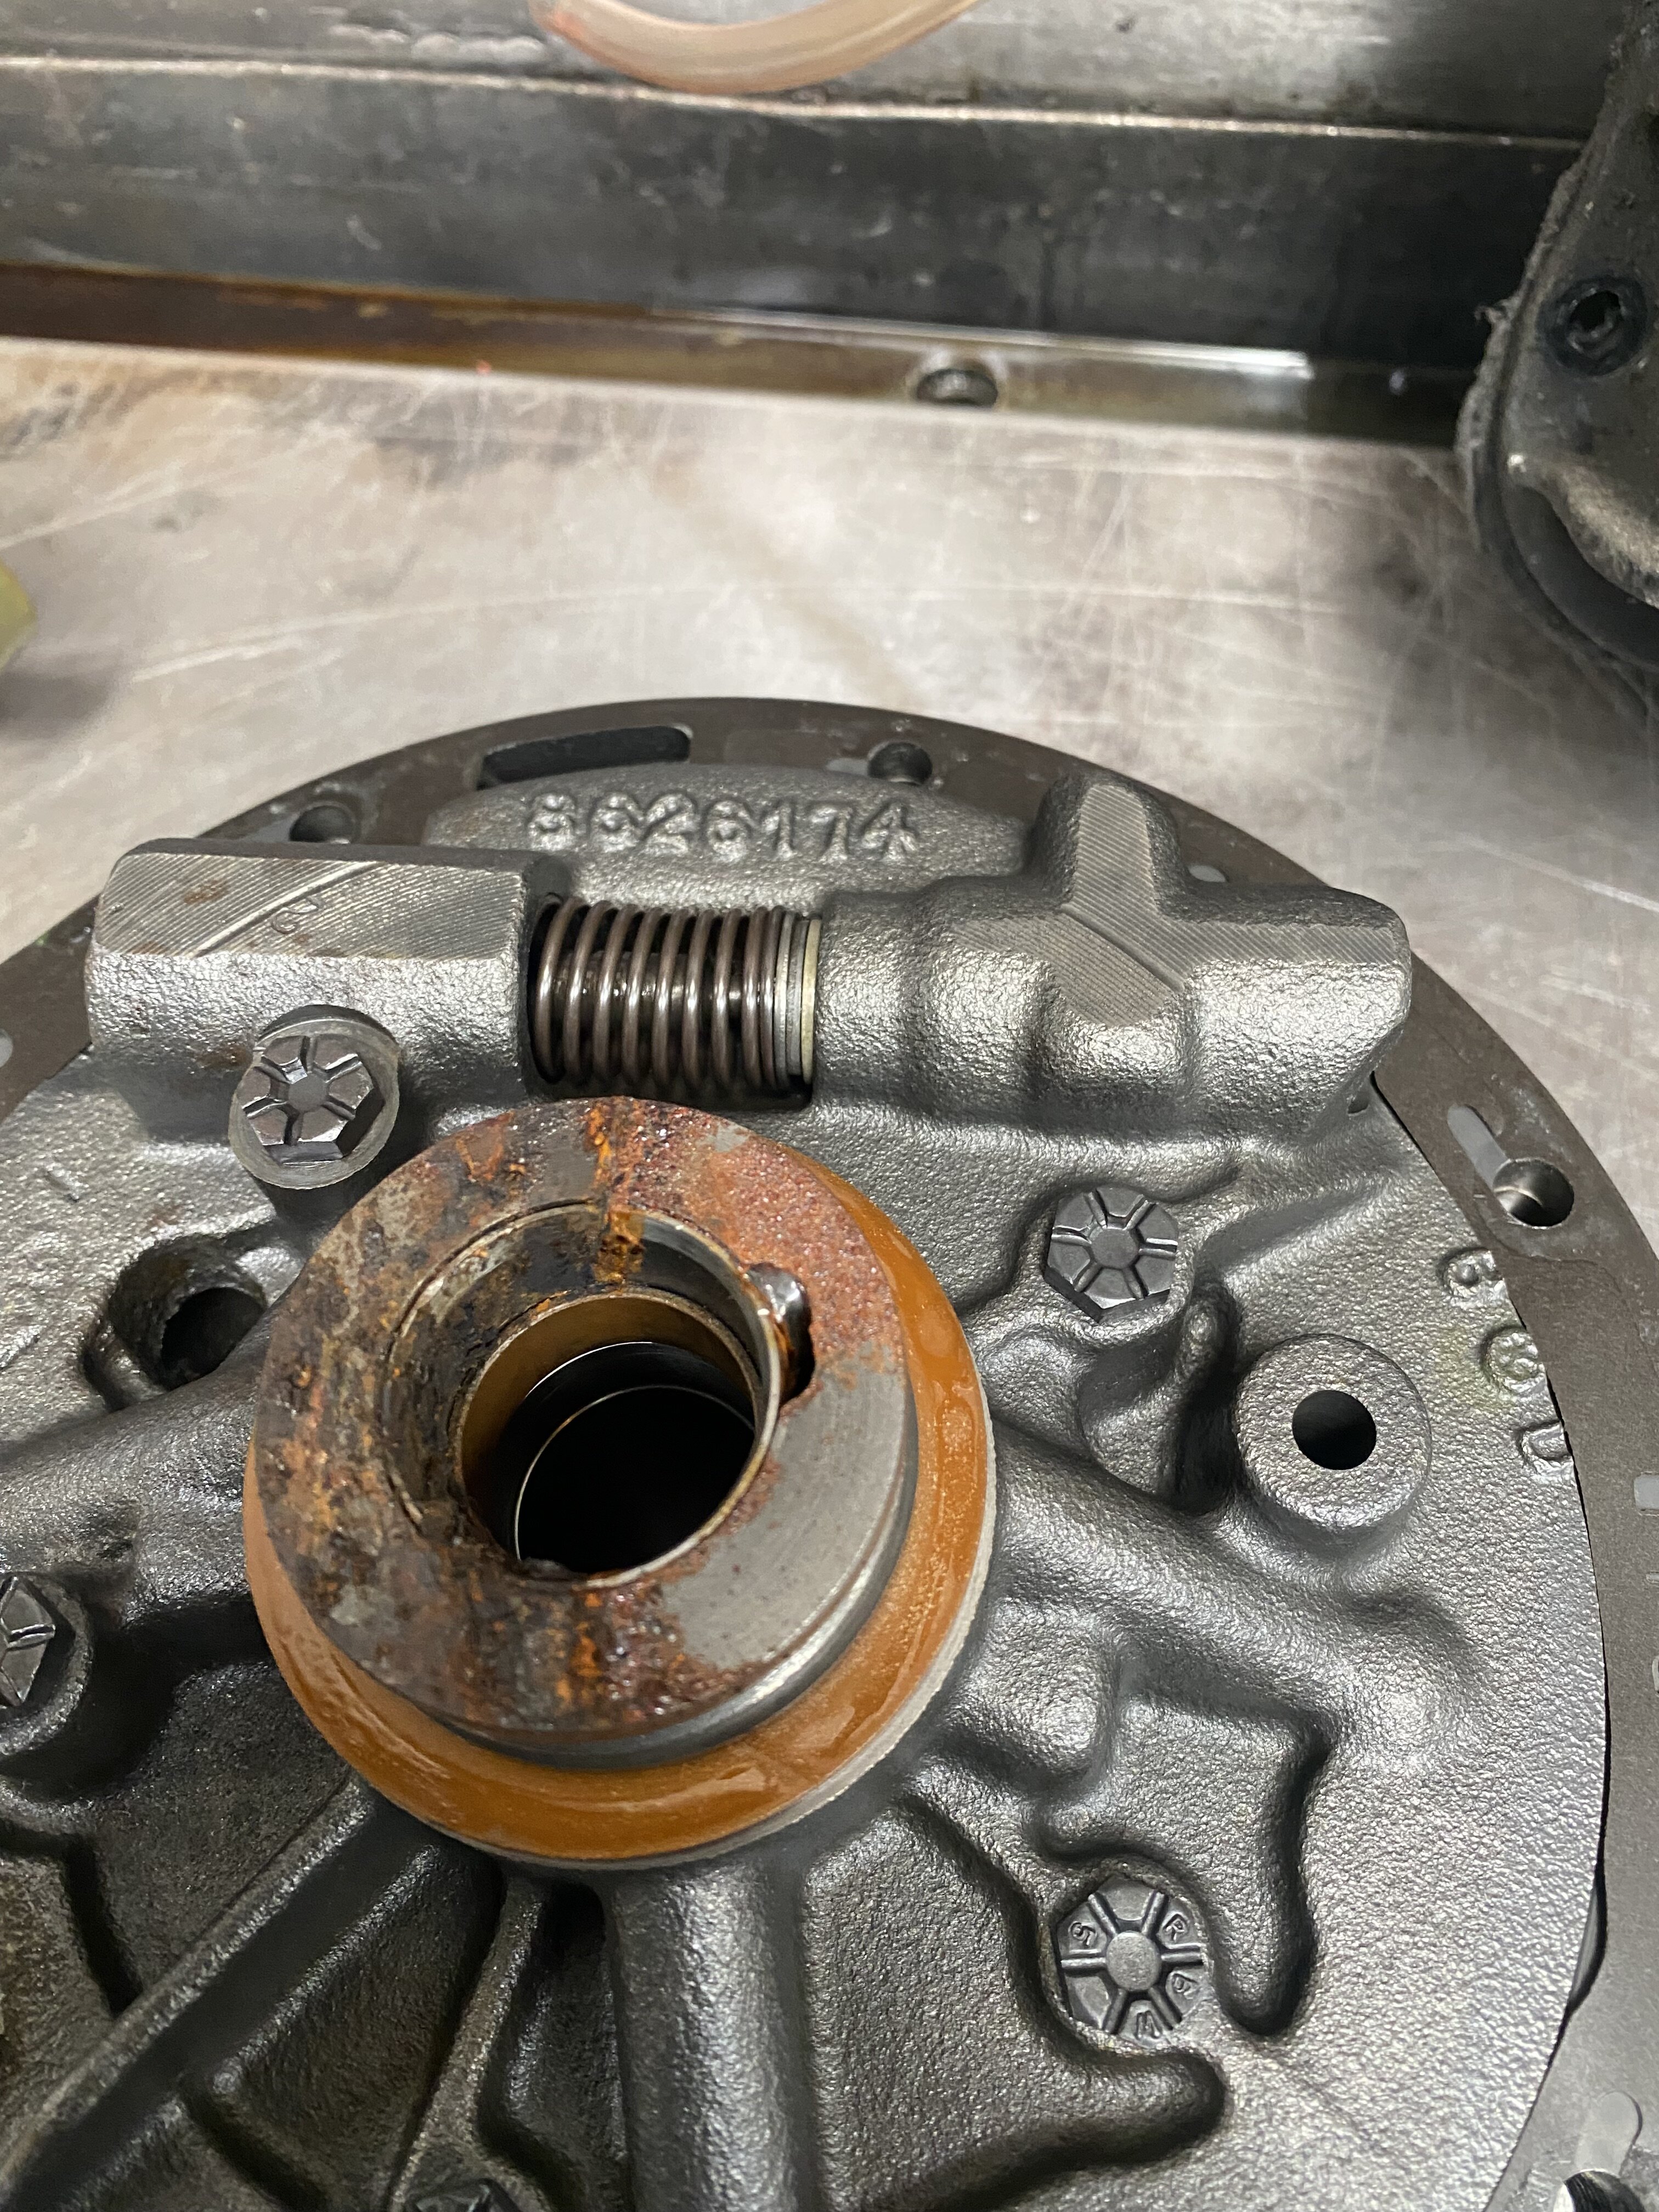
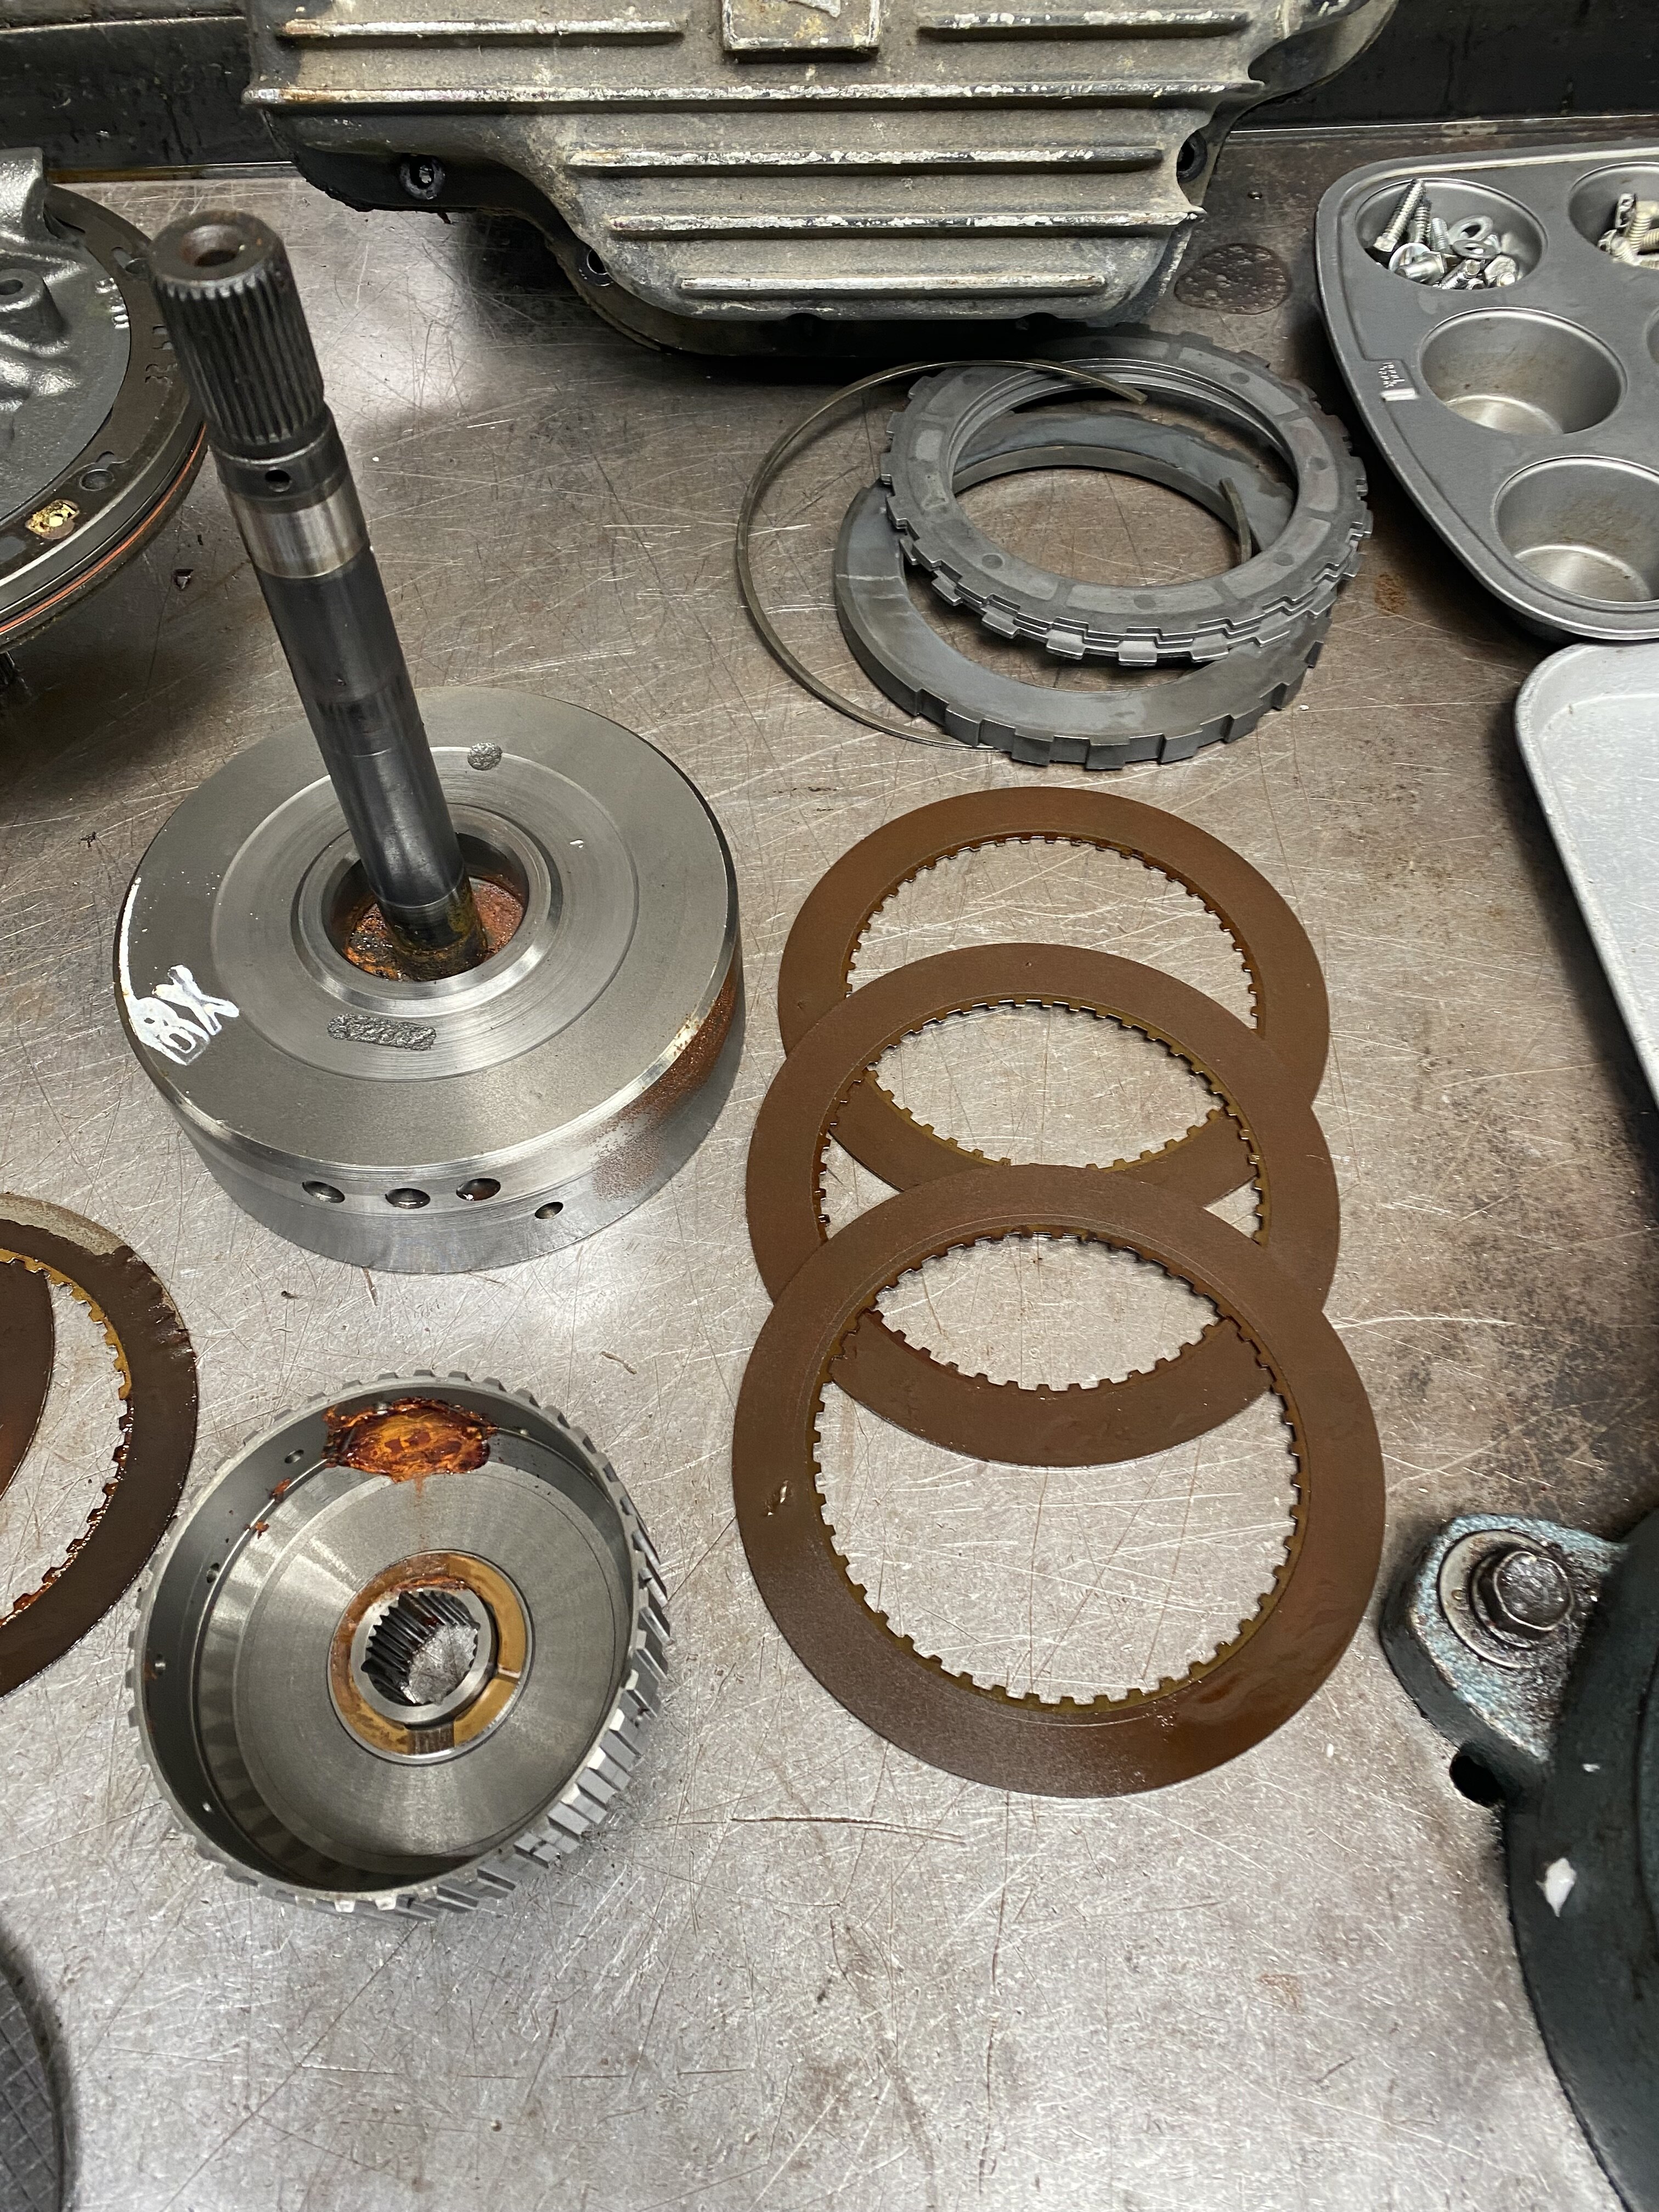
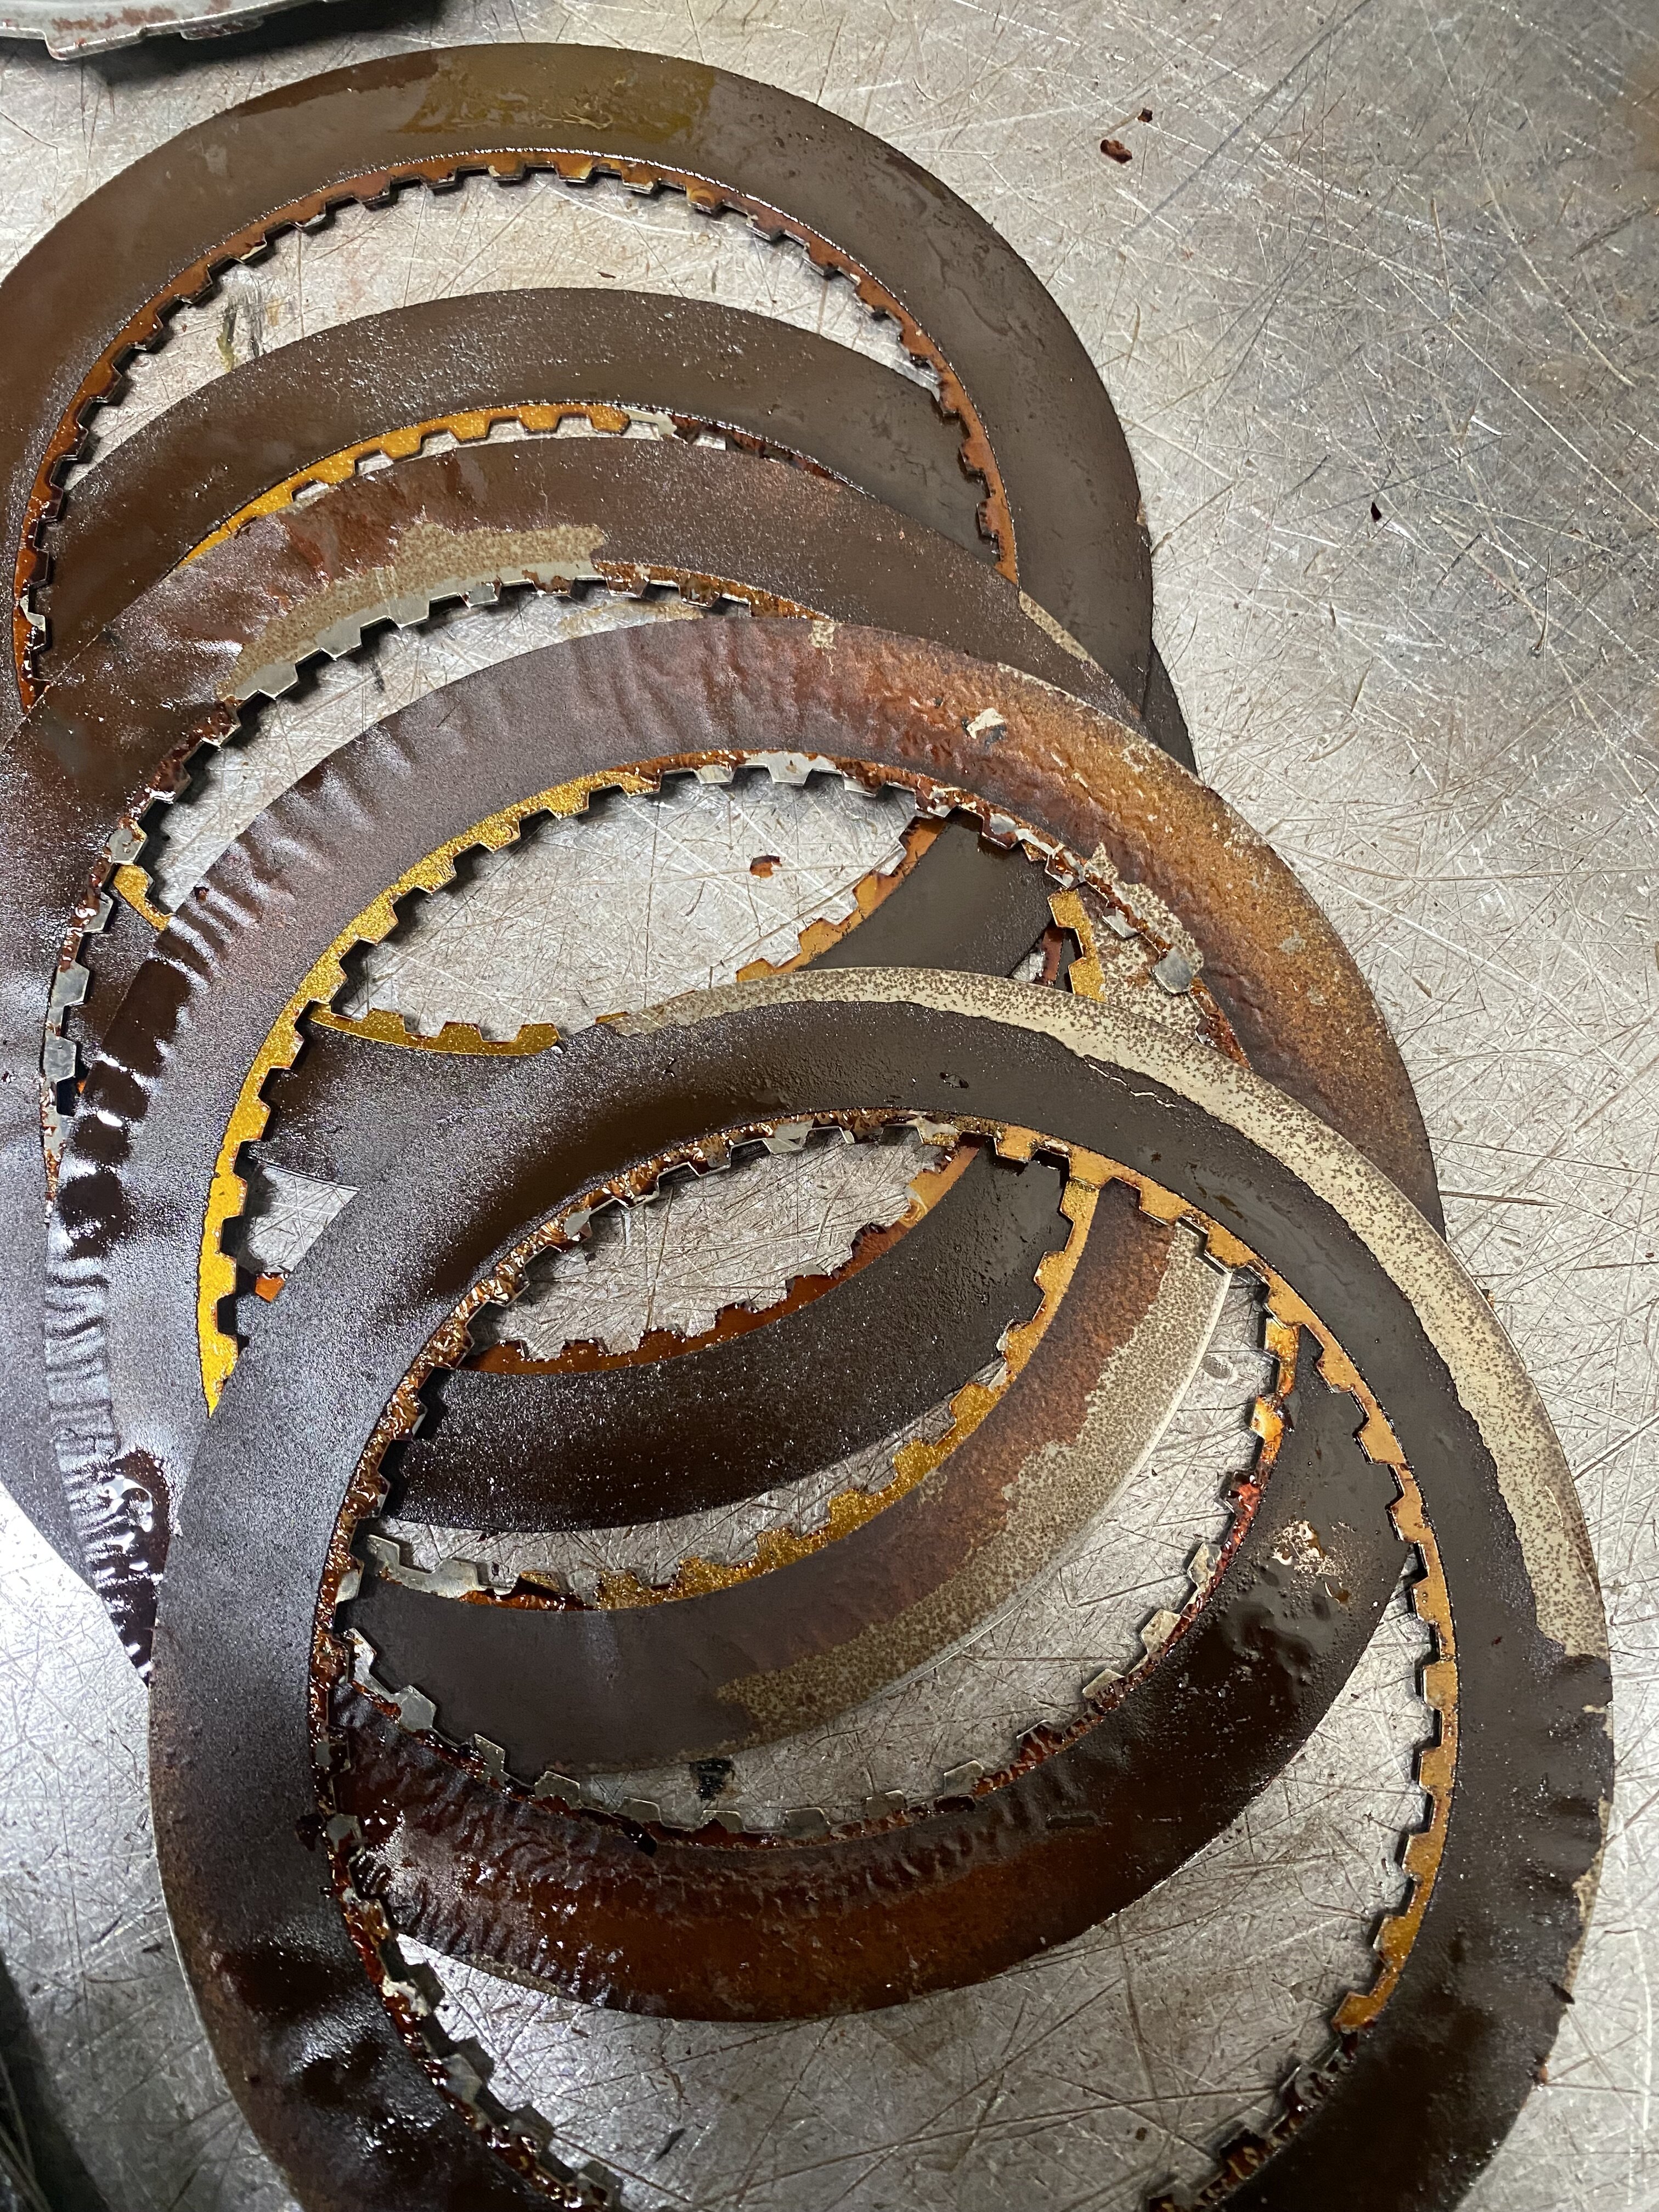
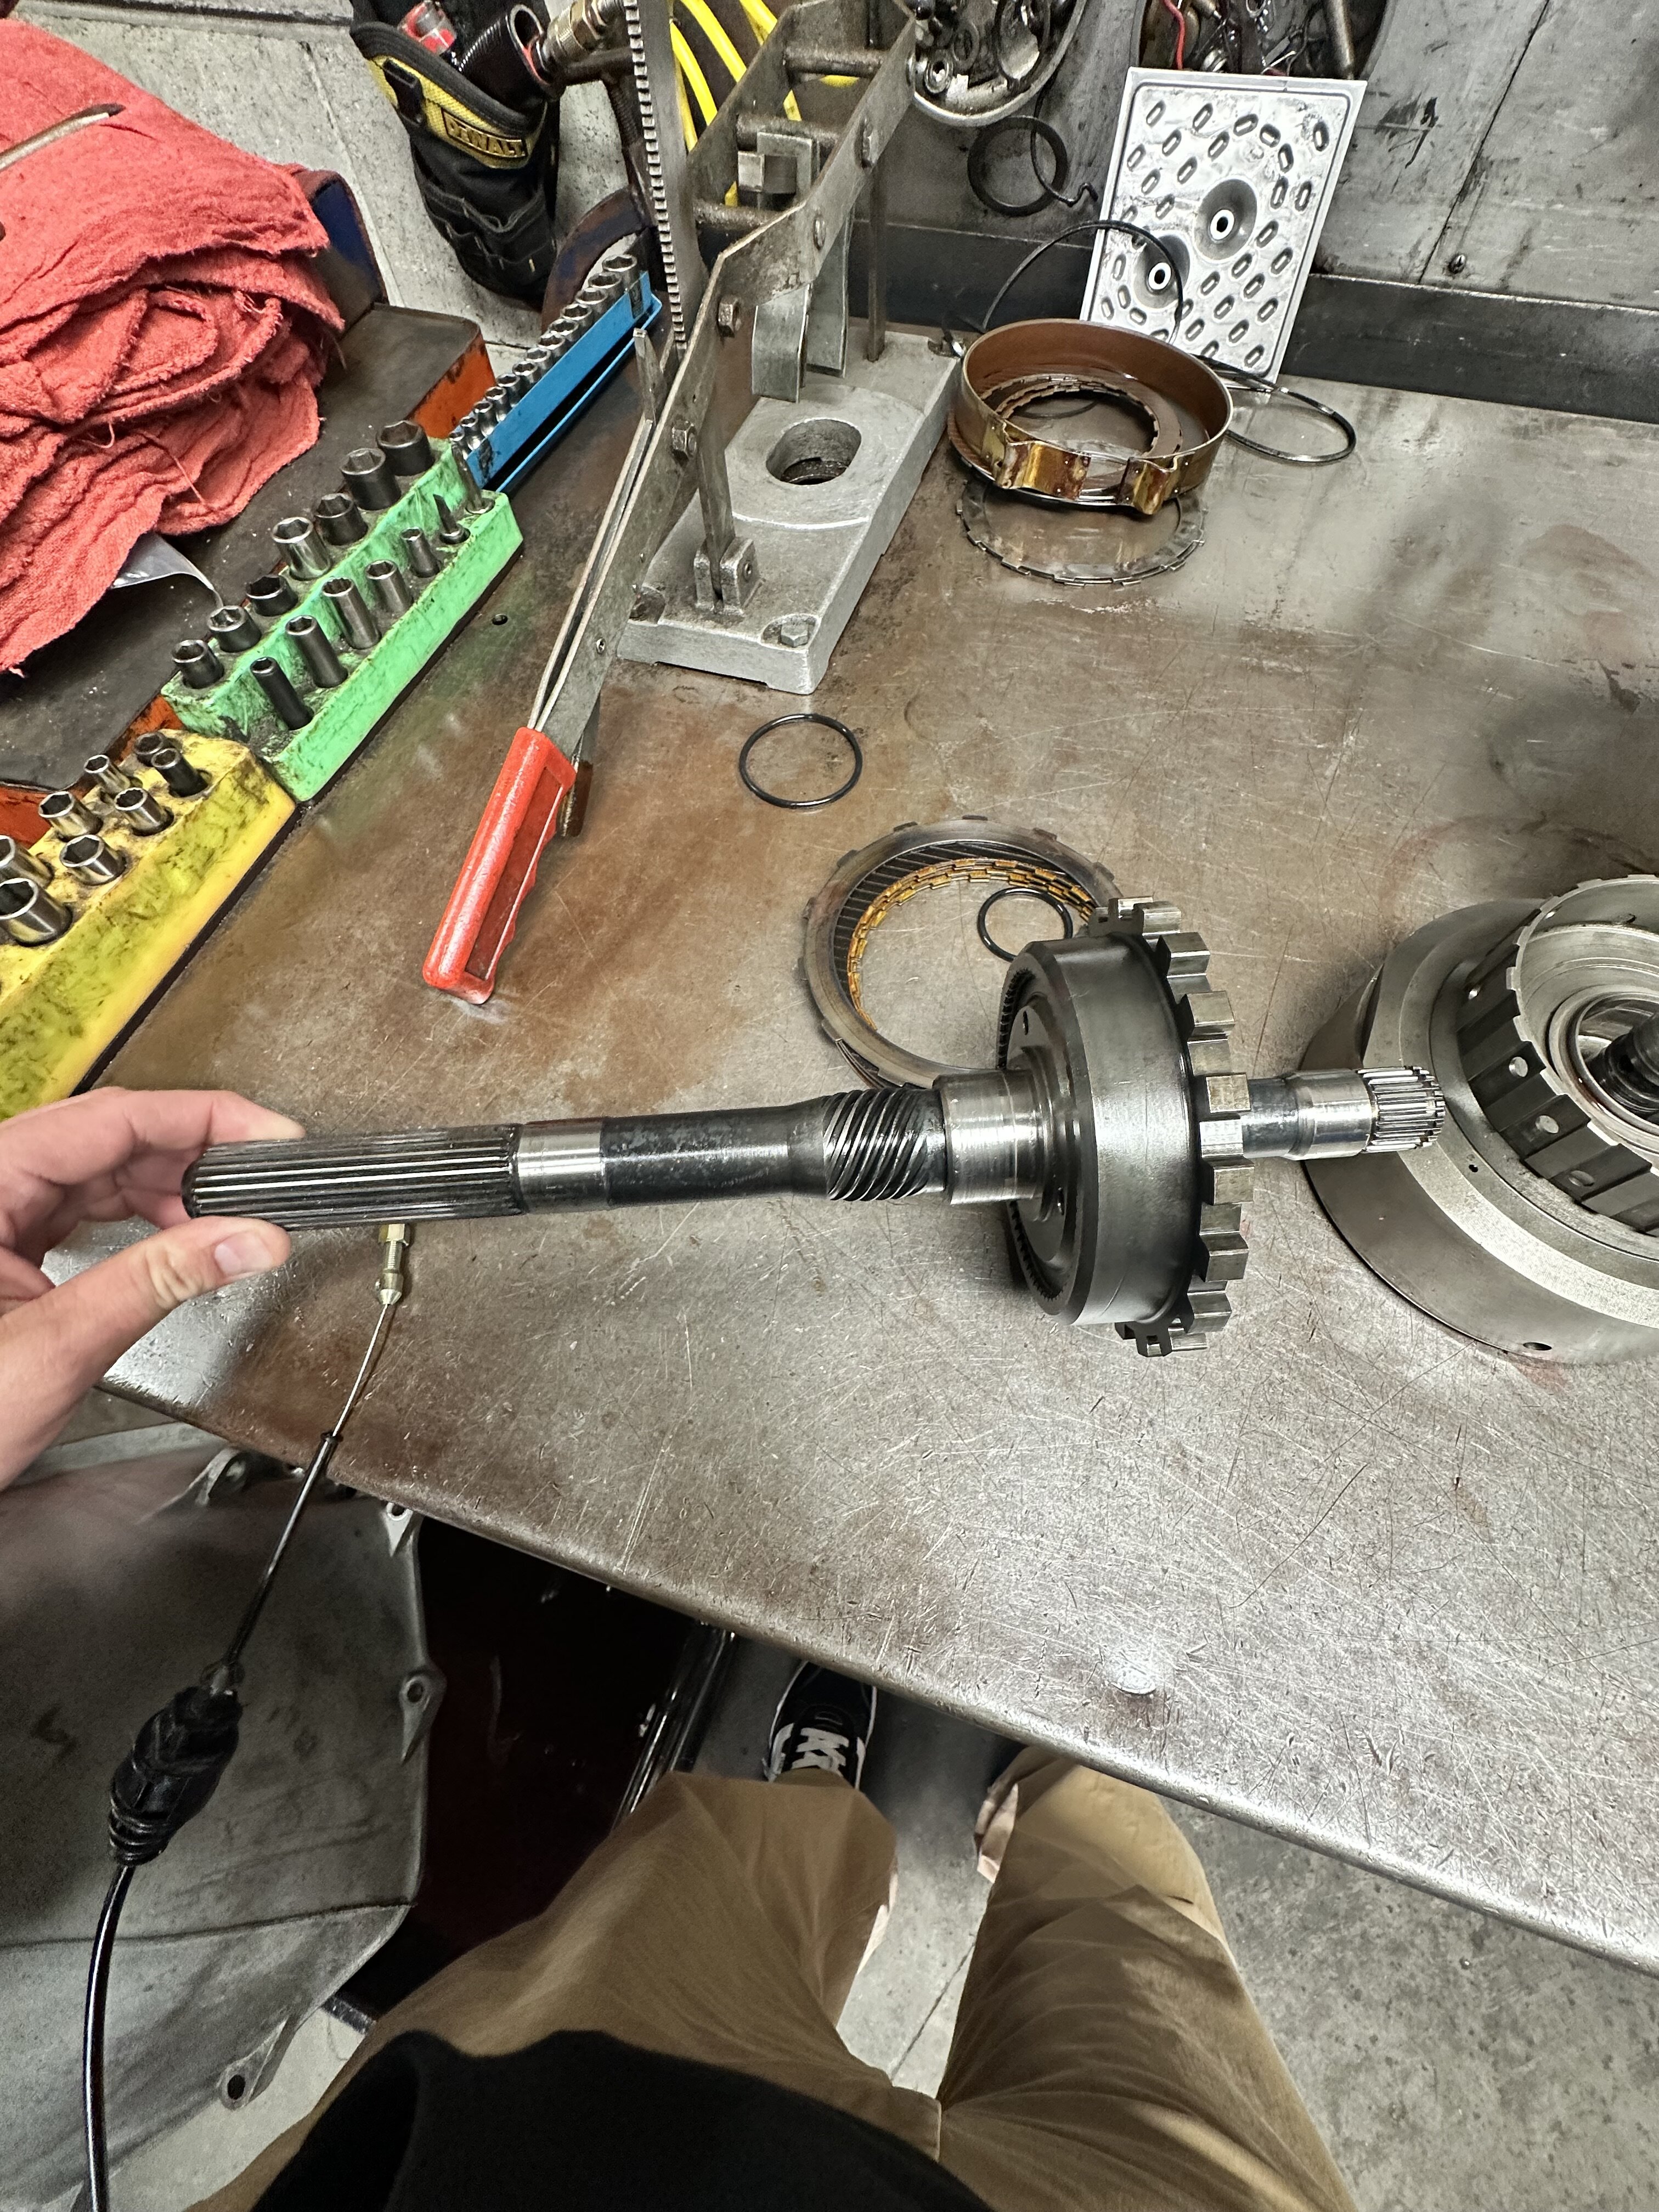
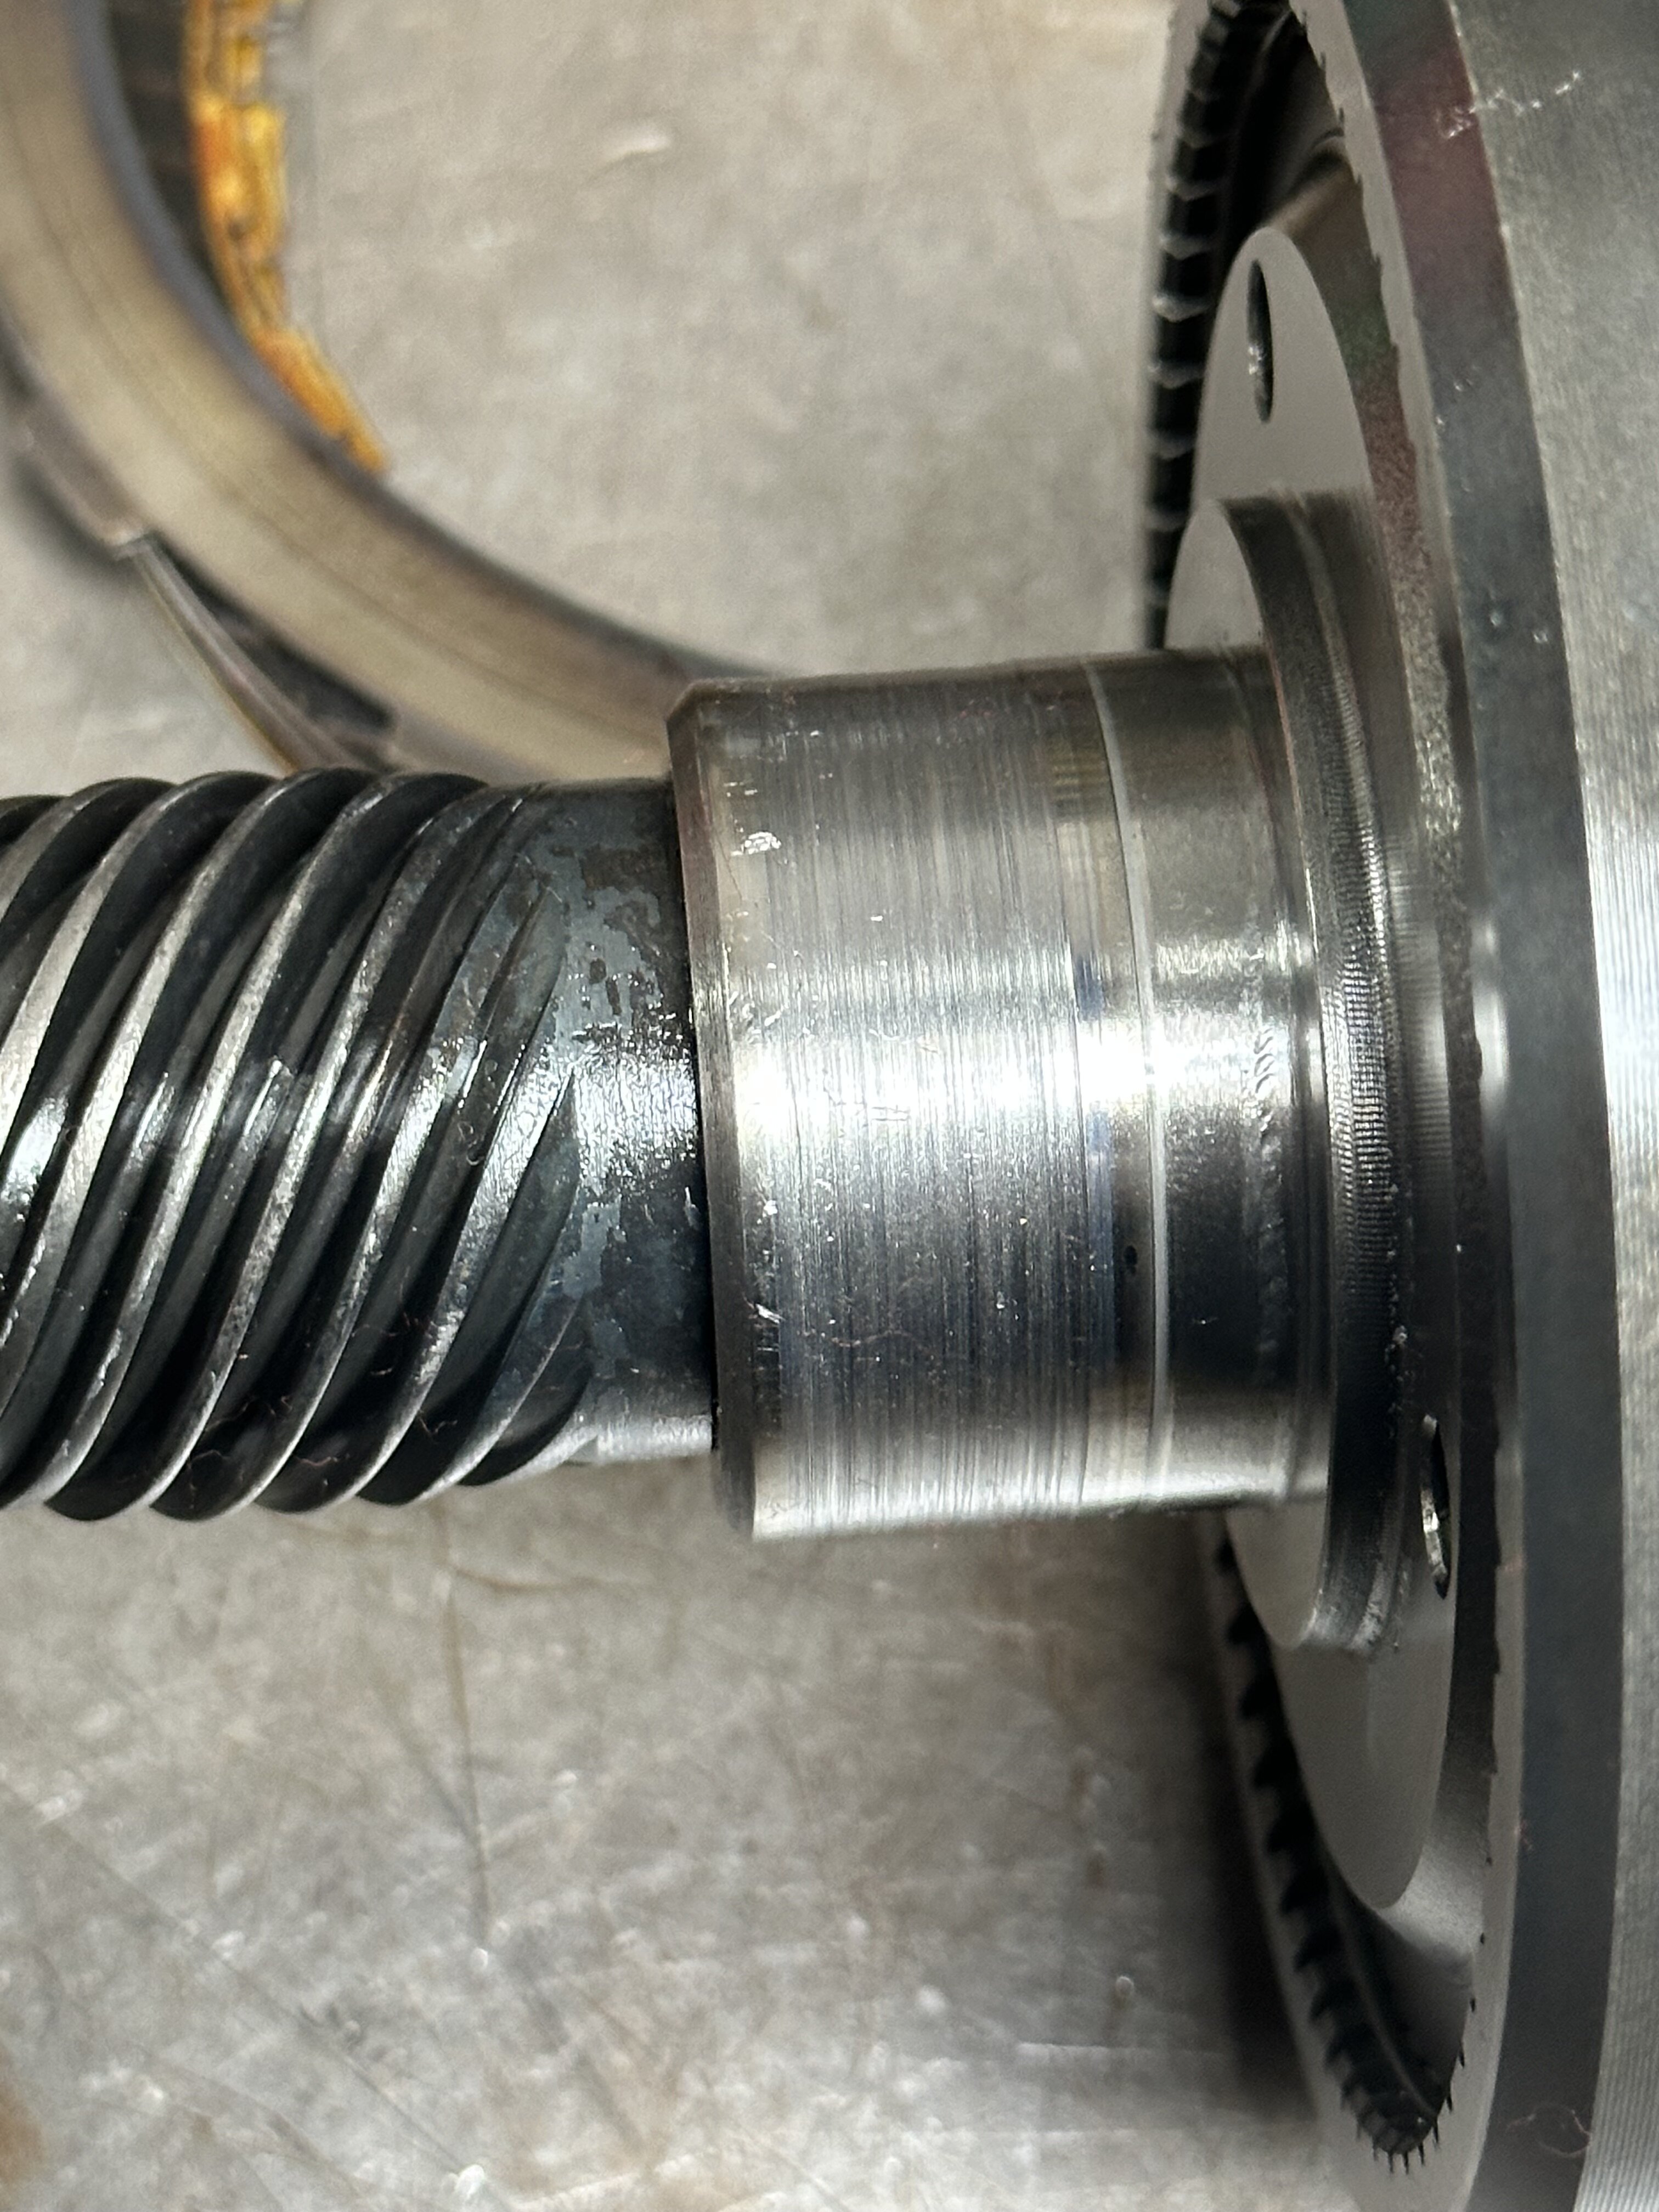
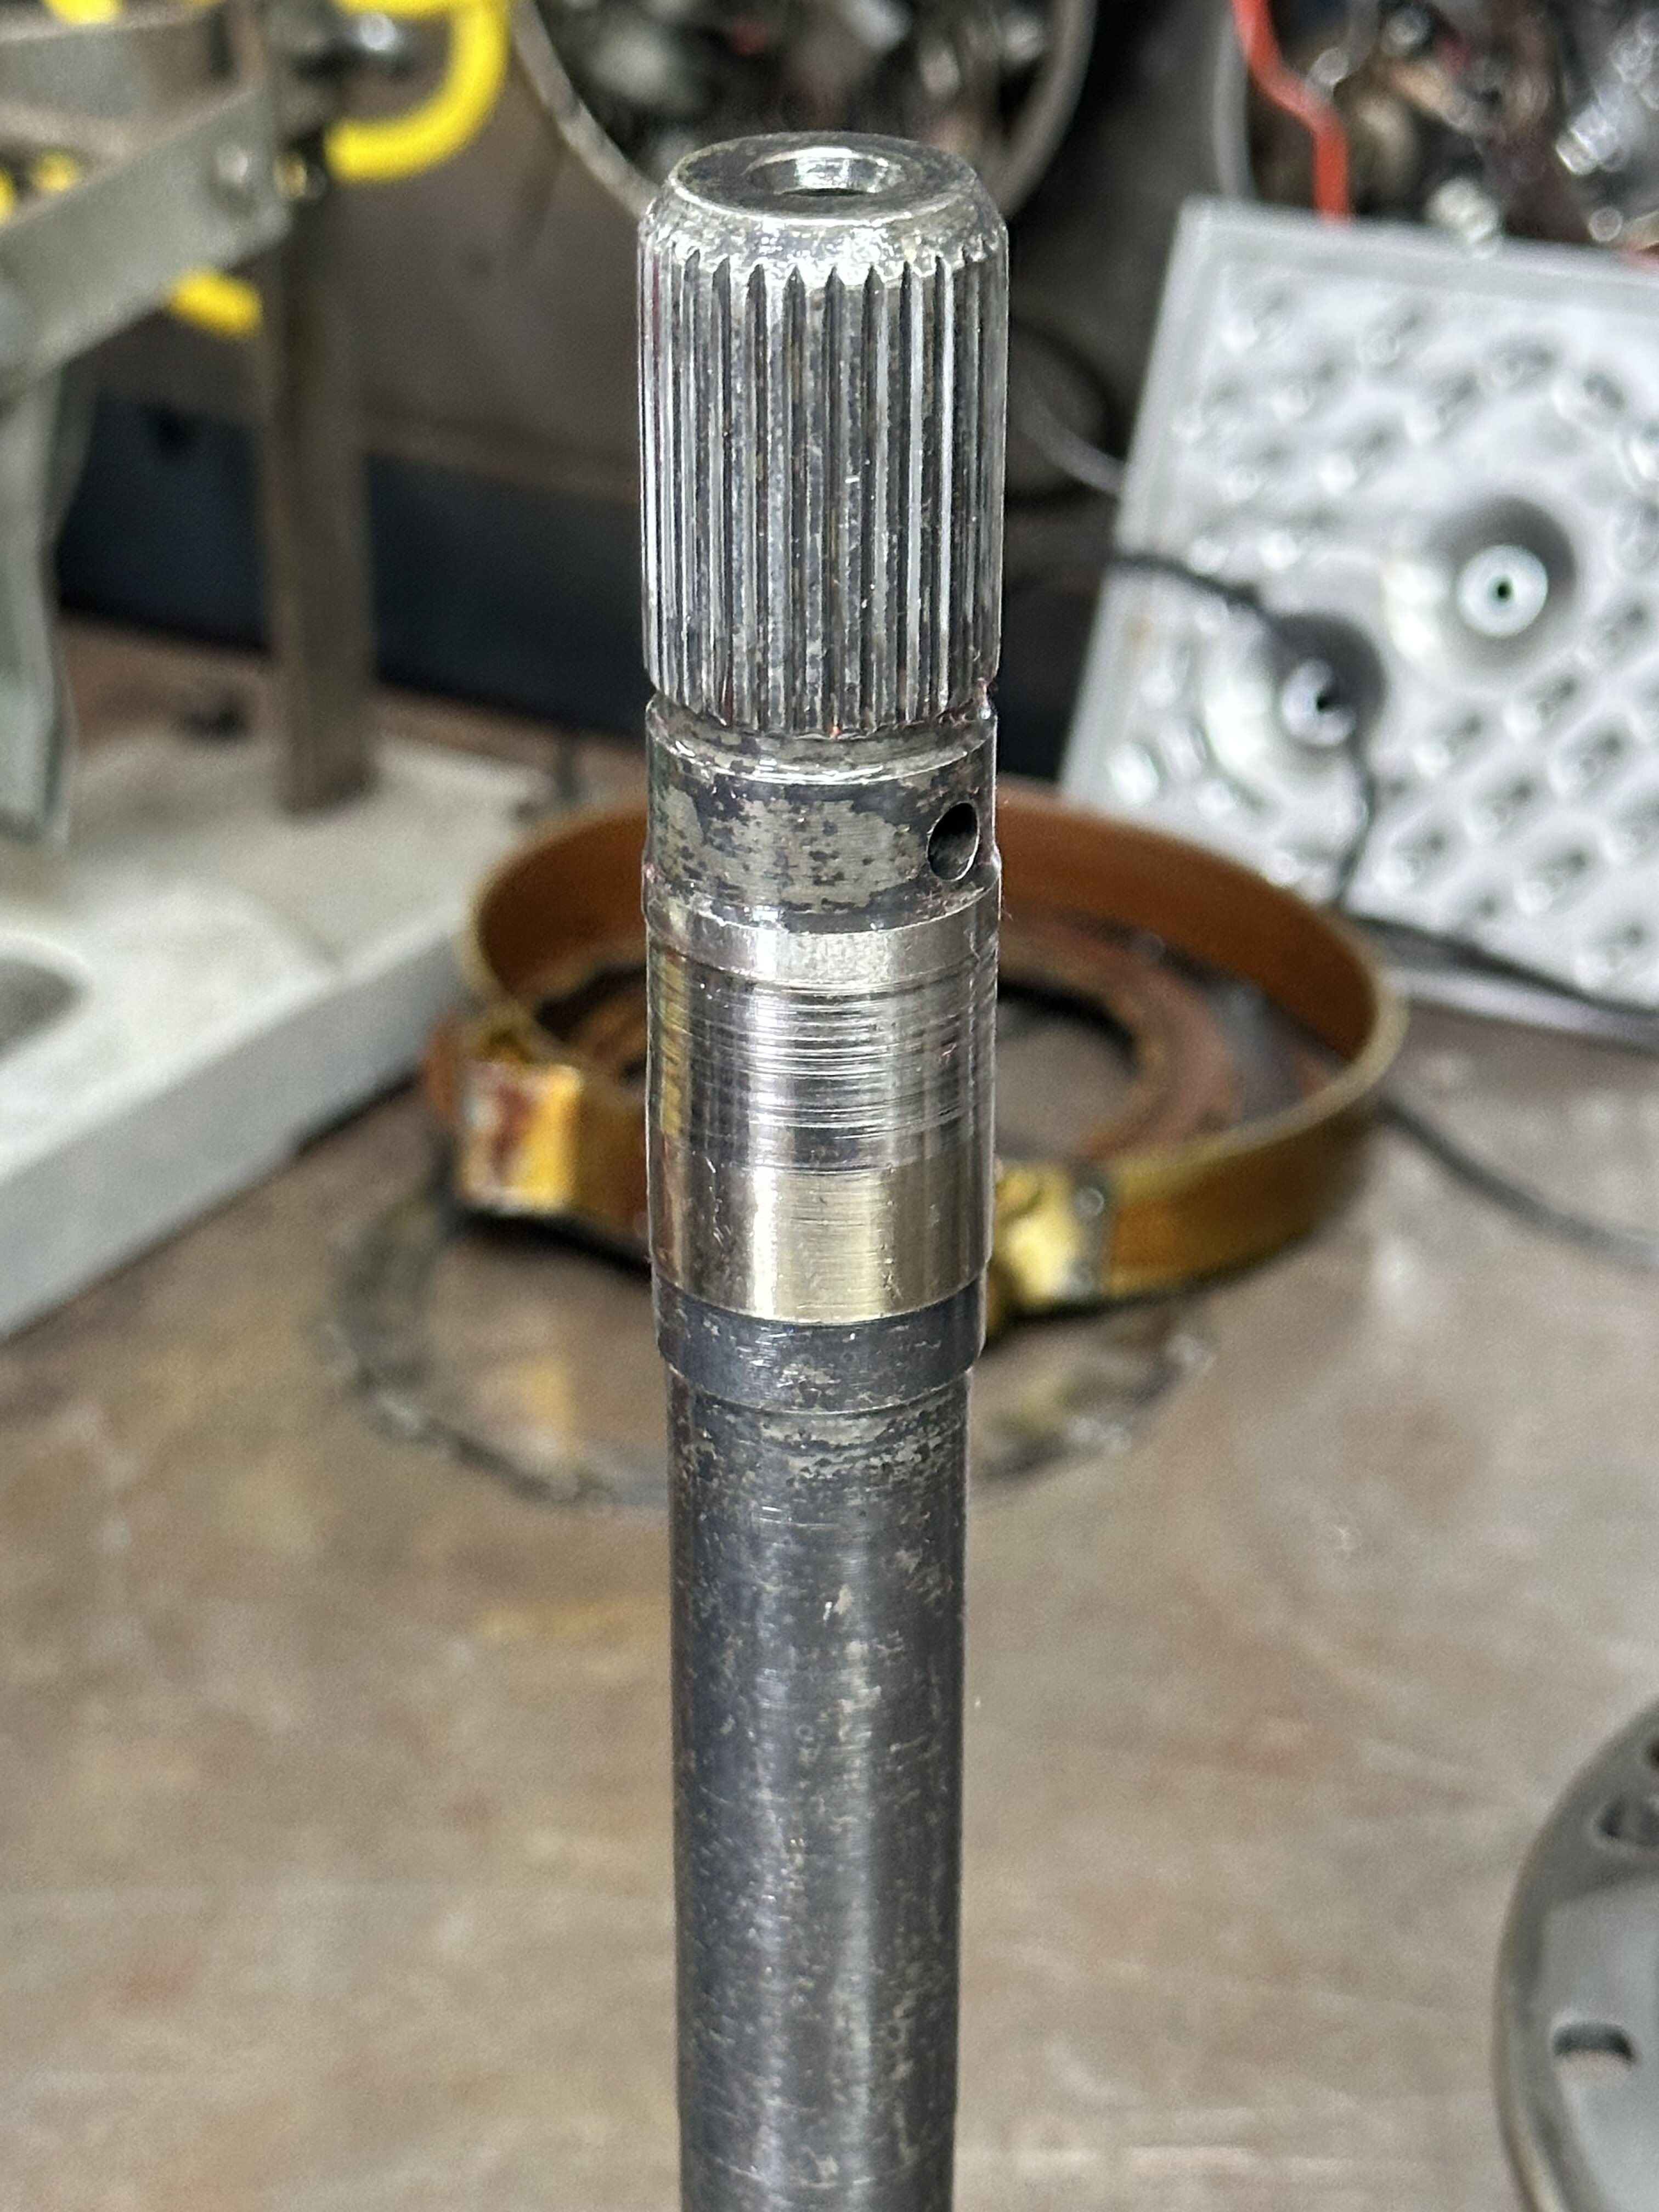
Update: A buddy of mine offered a TH400 that came off a 427 and said it ran strong when removed but had been sitting for a while in the barn. Took it to the trans shop to get checked out and though intact, water got in it…. Looked up the numbers and the case is from a 69 Chevy Truck so the better alloy. Debating a full rebuild vs FDI trans w/o torque converter (reverse gears with trans brake) is about the same price. -Jr.


-
Swapping TH350 for TH400 (Need Tips)
1Bad_Monte replied to 1Bad_Monte's topic in General 70-72 Monte Carlo Forum
Awesome! Thanks for all of the info. The e brake is something I have been needing to address due to boxing in the frame blocks the cable. On the list of items when upgrading to disk brakes. The cross member is another good point and luckily that same frame kit added an admissible trans crossmember that fits most trans. I found a relay that mounts to the throttle cable bracket so going to bypass the install at the pedal (appreciate the pics!). Running a Dakota Digital dash and going to abandon the Speedo cable for GPS. Few. Think I have most of the main things covered except the different shaft size. Now to find a good TH400. Anyone had luck with the TCI Super Street Fighter? Heard good reviews but also read a few questionable in the Summit Racing comments. Next step up seems to be a FDI Trans and it’s hard to not want to get it with a trans brake. Just don’t want to have reverse gears or have to use a race style shifter vs the horseshoe. Scott, Greg and Doug, you guys are awesome. I appreciate it.


-
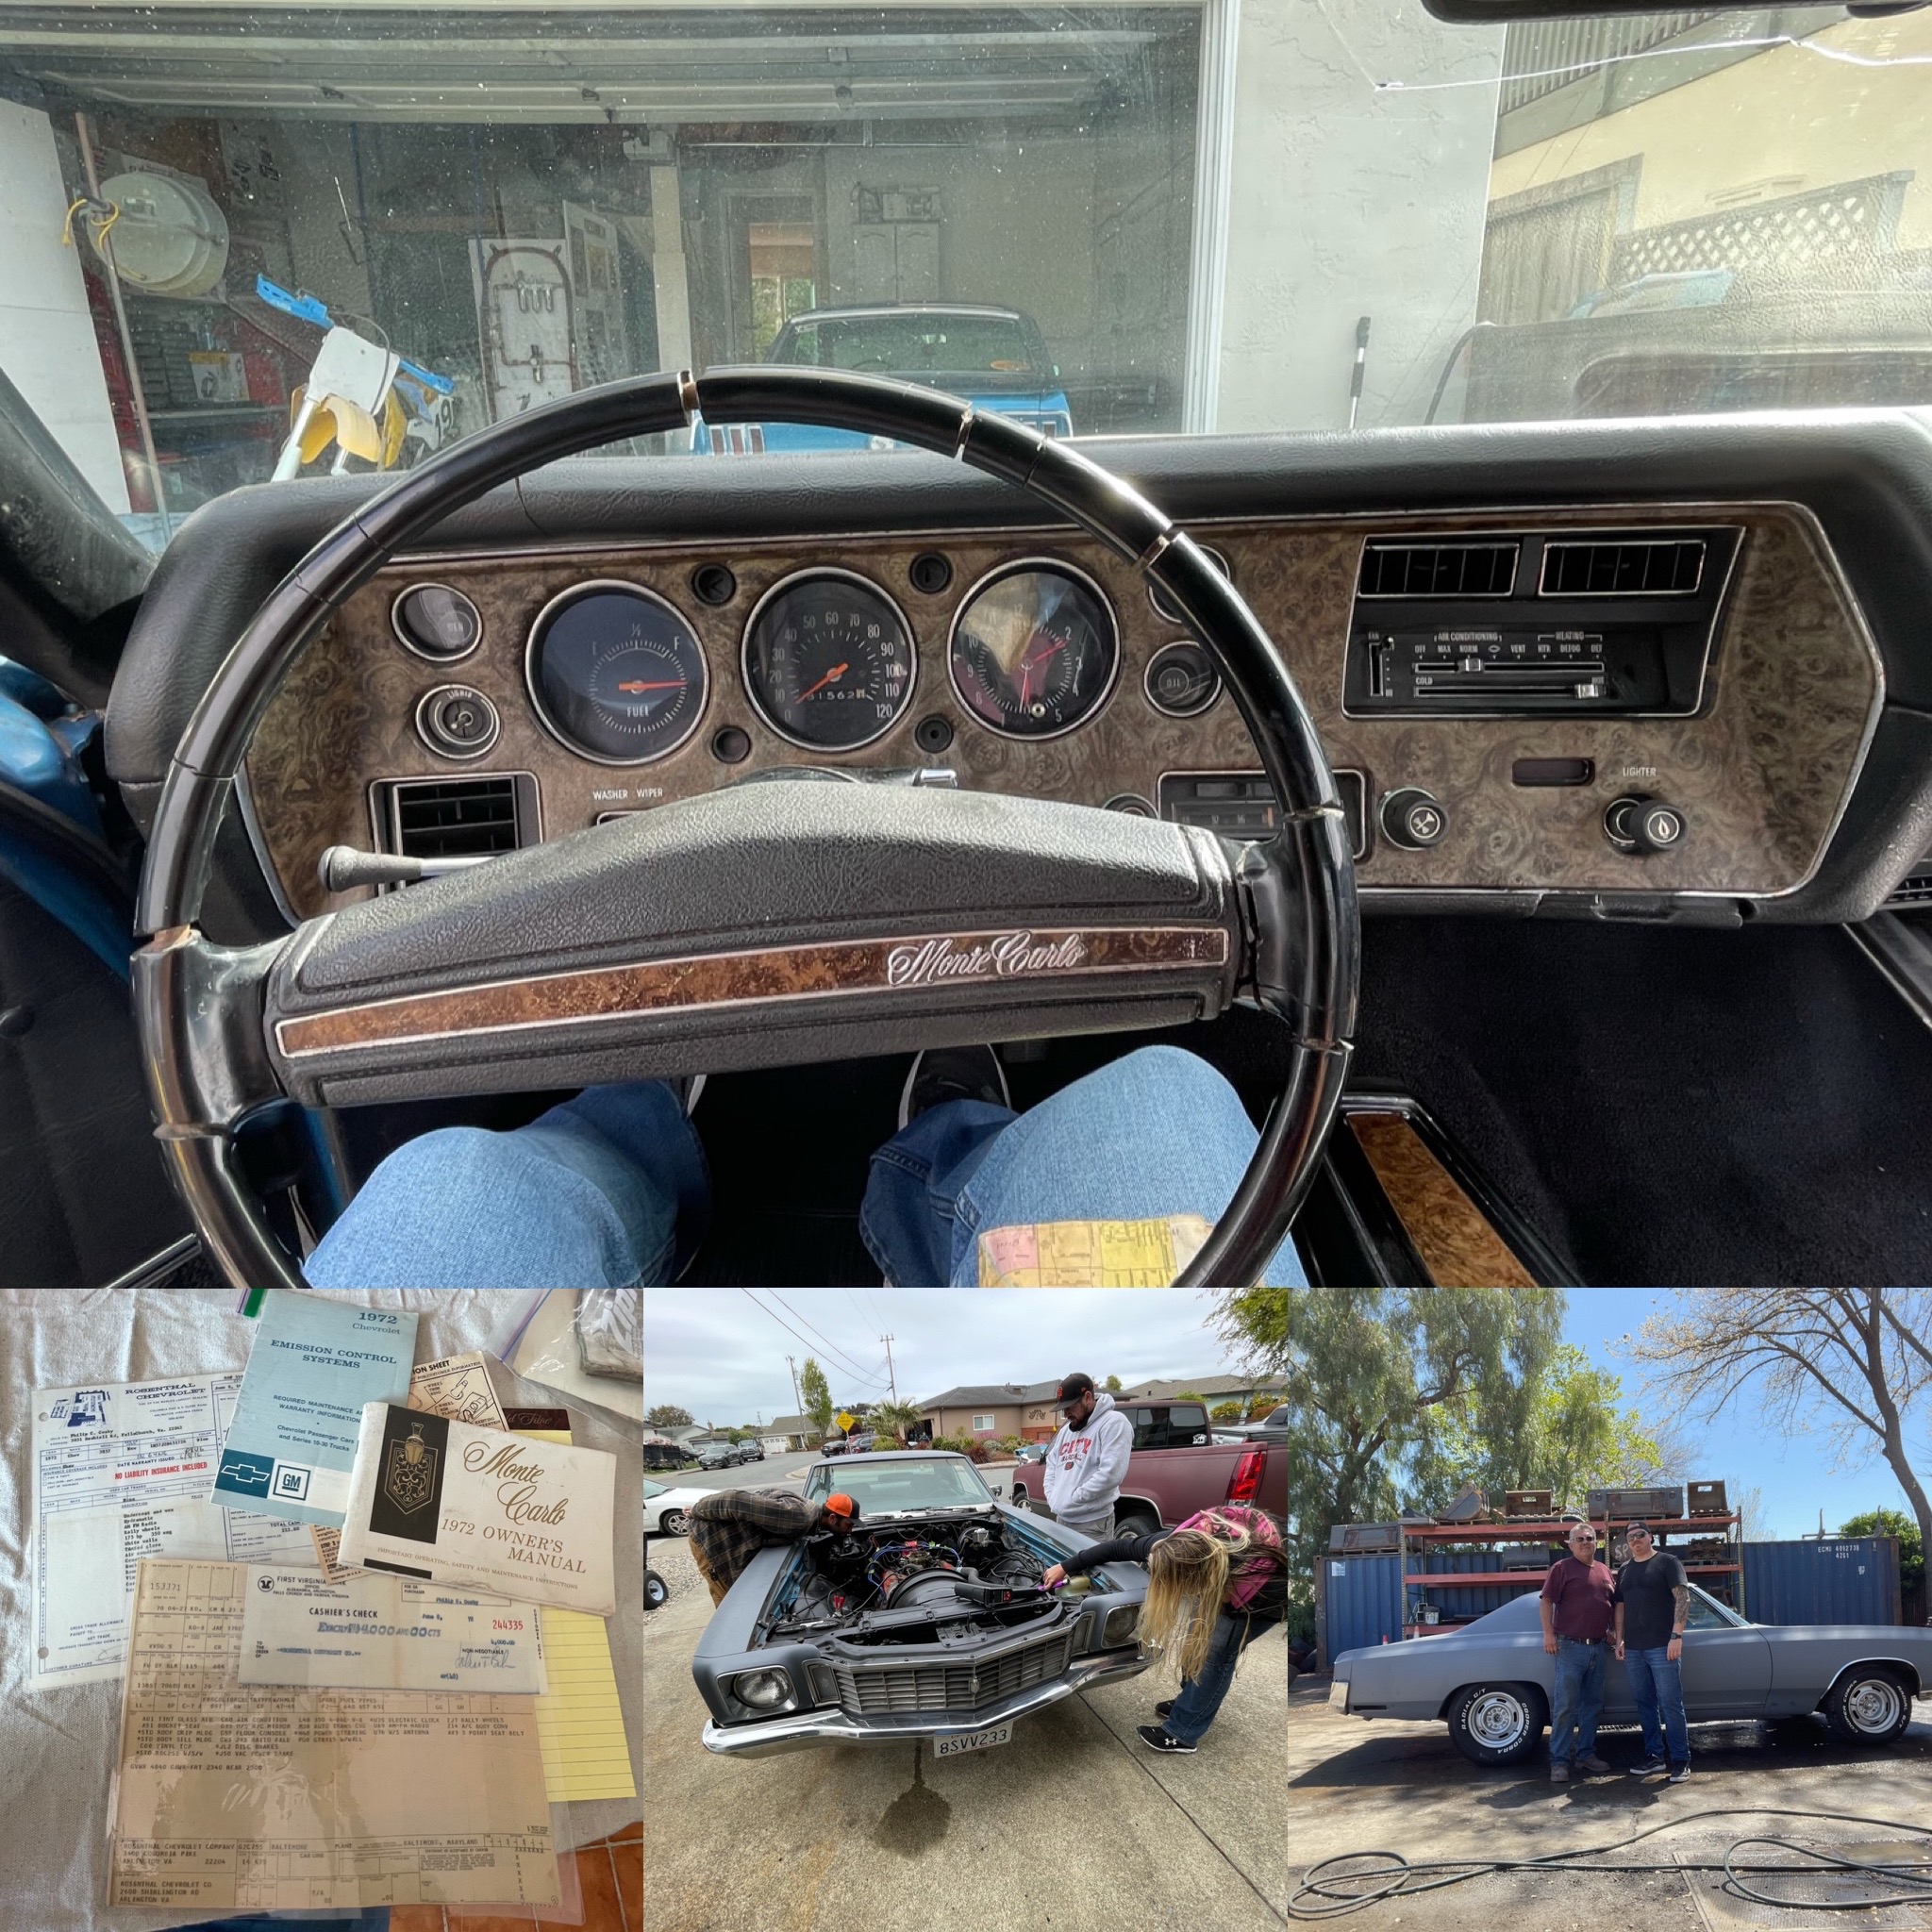
Replacing my original TH350 with a TH400. At the same time, changing to a tilt column. Ordered a relay for the kickdown that mounts to the throttle cable bracket on the intake so that’s easy. Anyone have any tips or pitfalls they can share? Still looking for a good TH400 and there are a lot out there. Seems like if you get the trans brake included, they are reverse pattern. Anyone do this with a horseshoe shifter? Posting pics of the freshly rebuilt TH350 that I cooked.. Thanks, -Jr.


-
This is exactly what I was as looking for. Can I ask, is there a difference in the turn signal switch as well? Appreciate you guys! -Jr.
-
What size line did you run? I ran AN6 and used the Holley#12-303 that spec’s 255LPH matching what they call for but I am having an issue where my engine runs lean at times. Thinking that might be my issue as well. Appreciate the info on this! -Jr.
-
Had the canister hooked up before I purchased the Vapor Trapper but wanted to make sure it had plenty of room to breath. When I took the stock tank vented cap and and tried sucking air though it(don’t ask), the new one for the stainless tank didn’t seem to allow as much air. Plus zero gas smell in the garage when the car sits and the anodized with polished brackets look just so cool. -Jr.
-
I am running the Holley EFI pump (single line) in my 72. Went above and beyond for the venting because I installed a new stainless tank and the cap is vented but doesn’t seem like the cap vents enough. I purchased a Vapor Trapper to help. Absolutely cleared up the smell of gas in my garage and feel like it helped performance. I am going to put a camera on my fuel pressure gauge and check the pressure just to make sure the Holley fuel pump is maintaining constant pressure. Will post here when I see the numbers. -Jr.


-
Converting a 402 to fuel injection
1Bad_Monte replied to Chris Bryant's topic in General 70-72 Monte Carlo Forum
Chris, I am running the Sniper 2 on my original 350 that’s now a monster 383. It ran horrible when I first installed it but there’s always a guy. Found Dr. EFI on most every Holley and EFI forum and scheduled an apt. Night and day difference after he logged on and tuned it. If you haven’t used the Sniper EFI software to dial in your tune, or are not planning on it, IMHO this is money well spent. -Jr. -
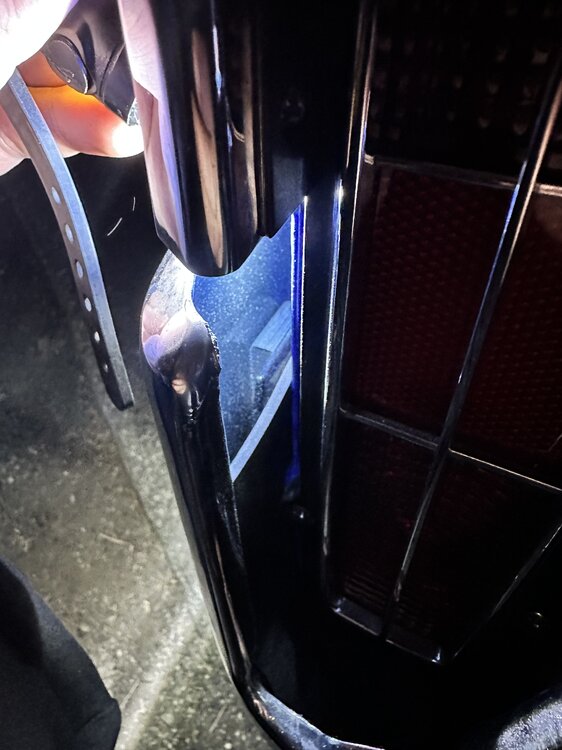
70 Rear Bumper Question
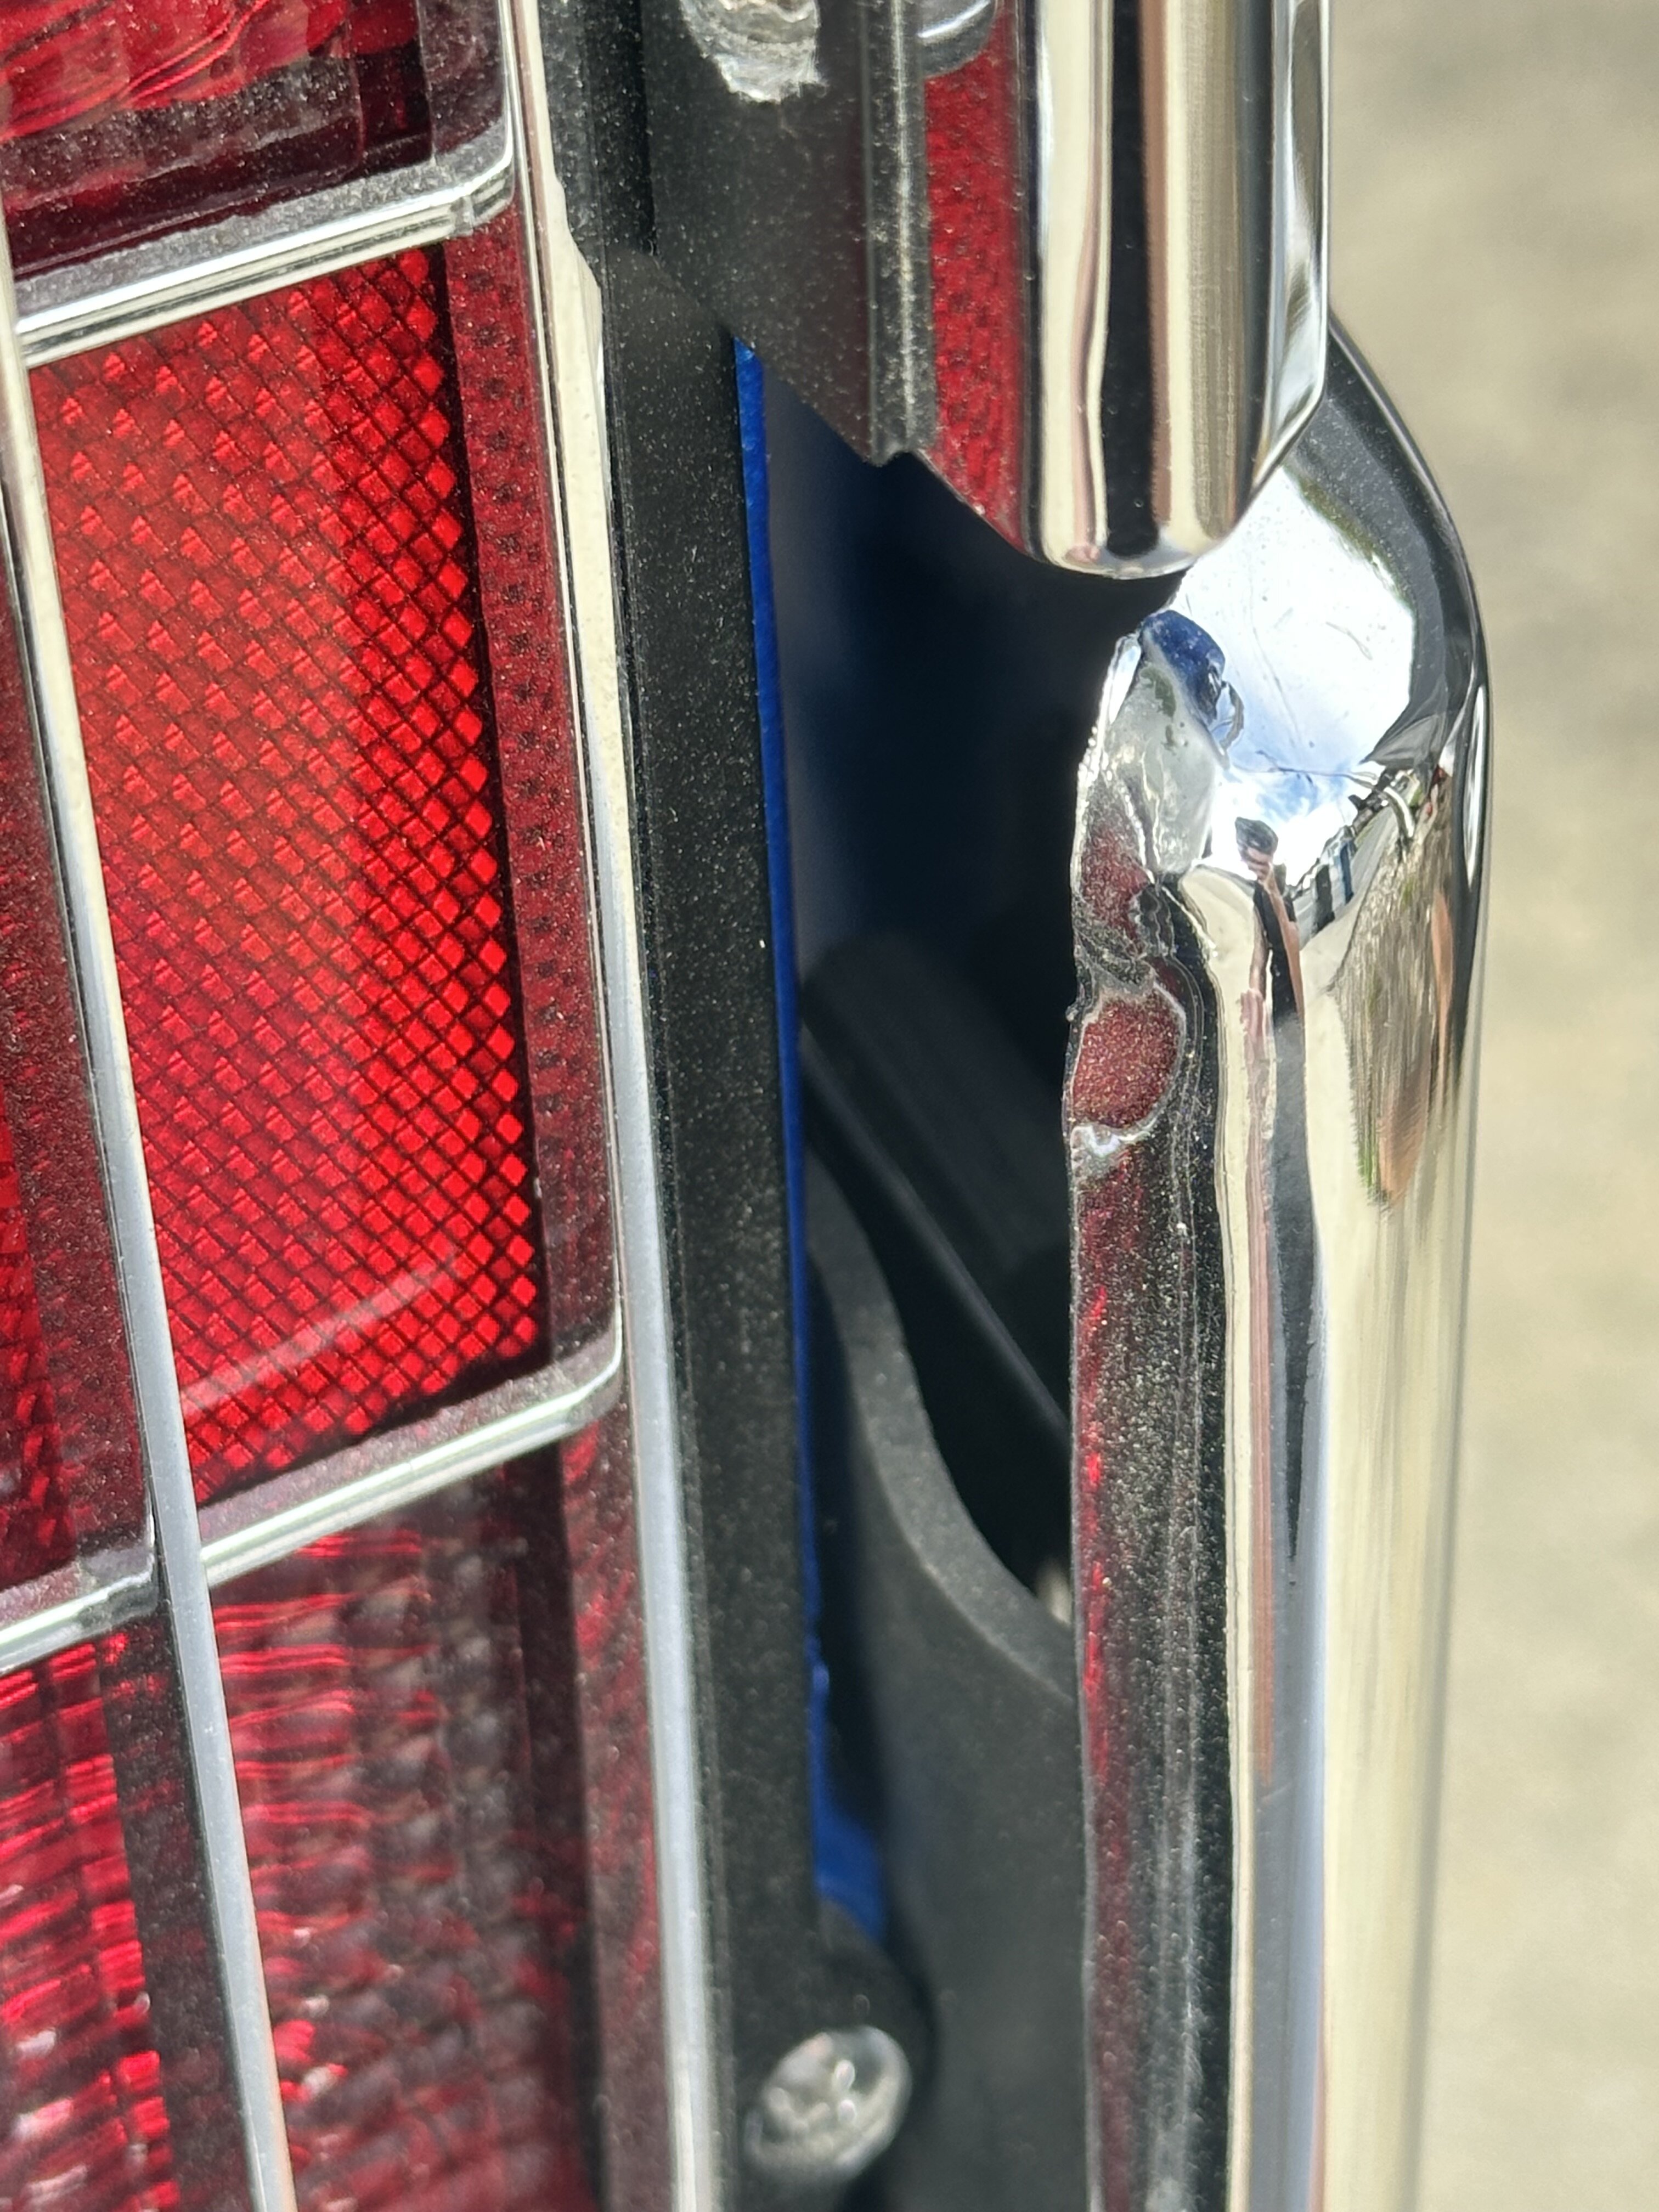
1Bad_Monte replied to GRAY 70 Monte Carlo's topic in General 70-72 Monte Carlo Forum
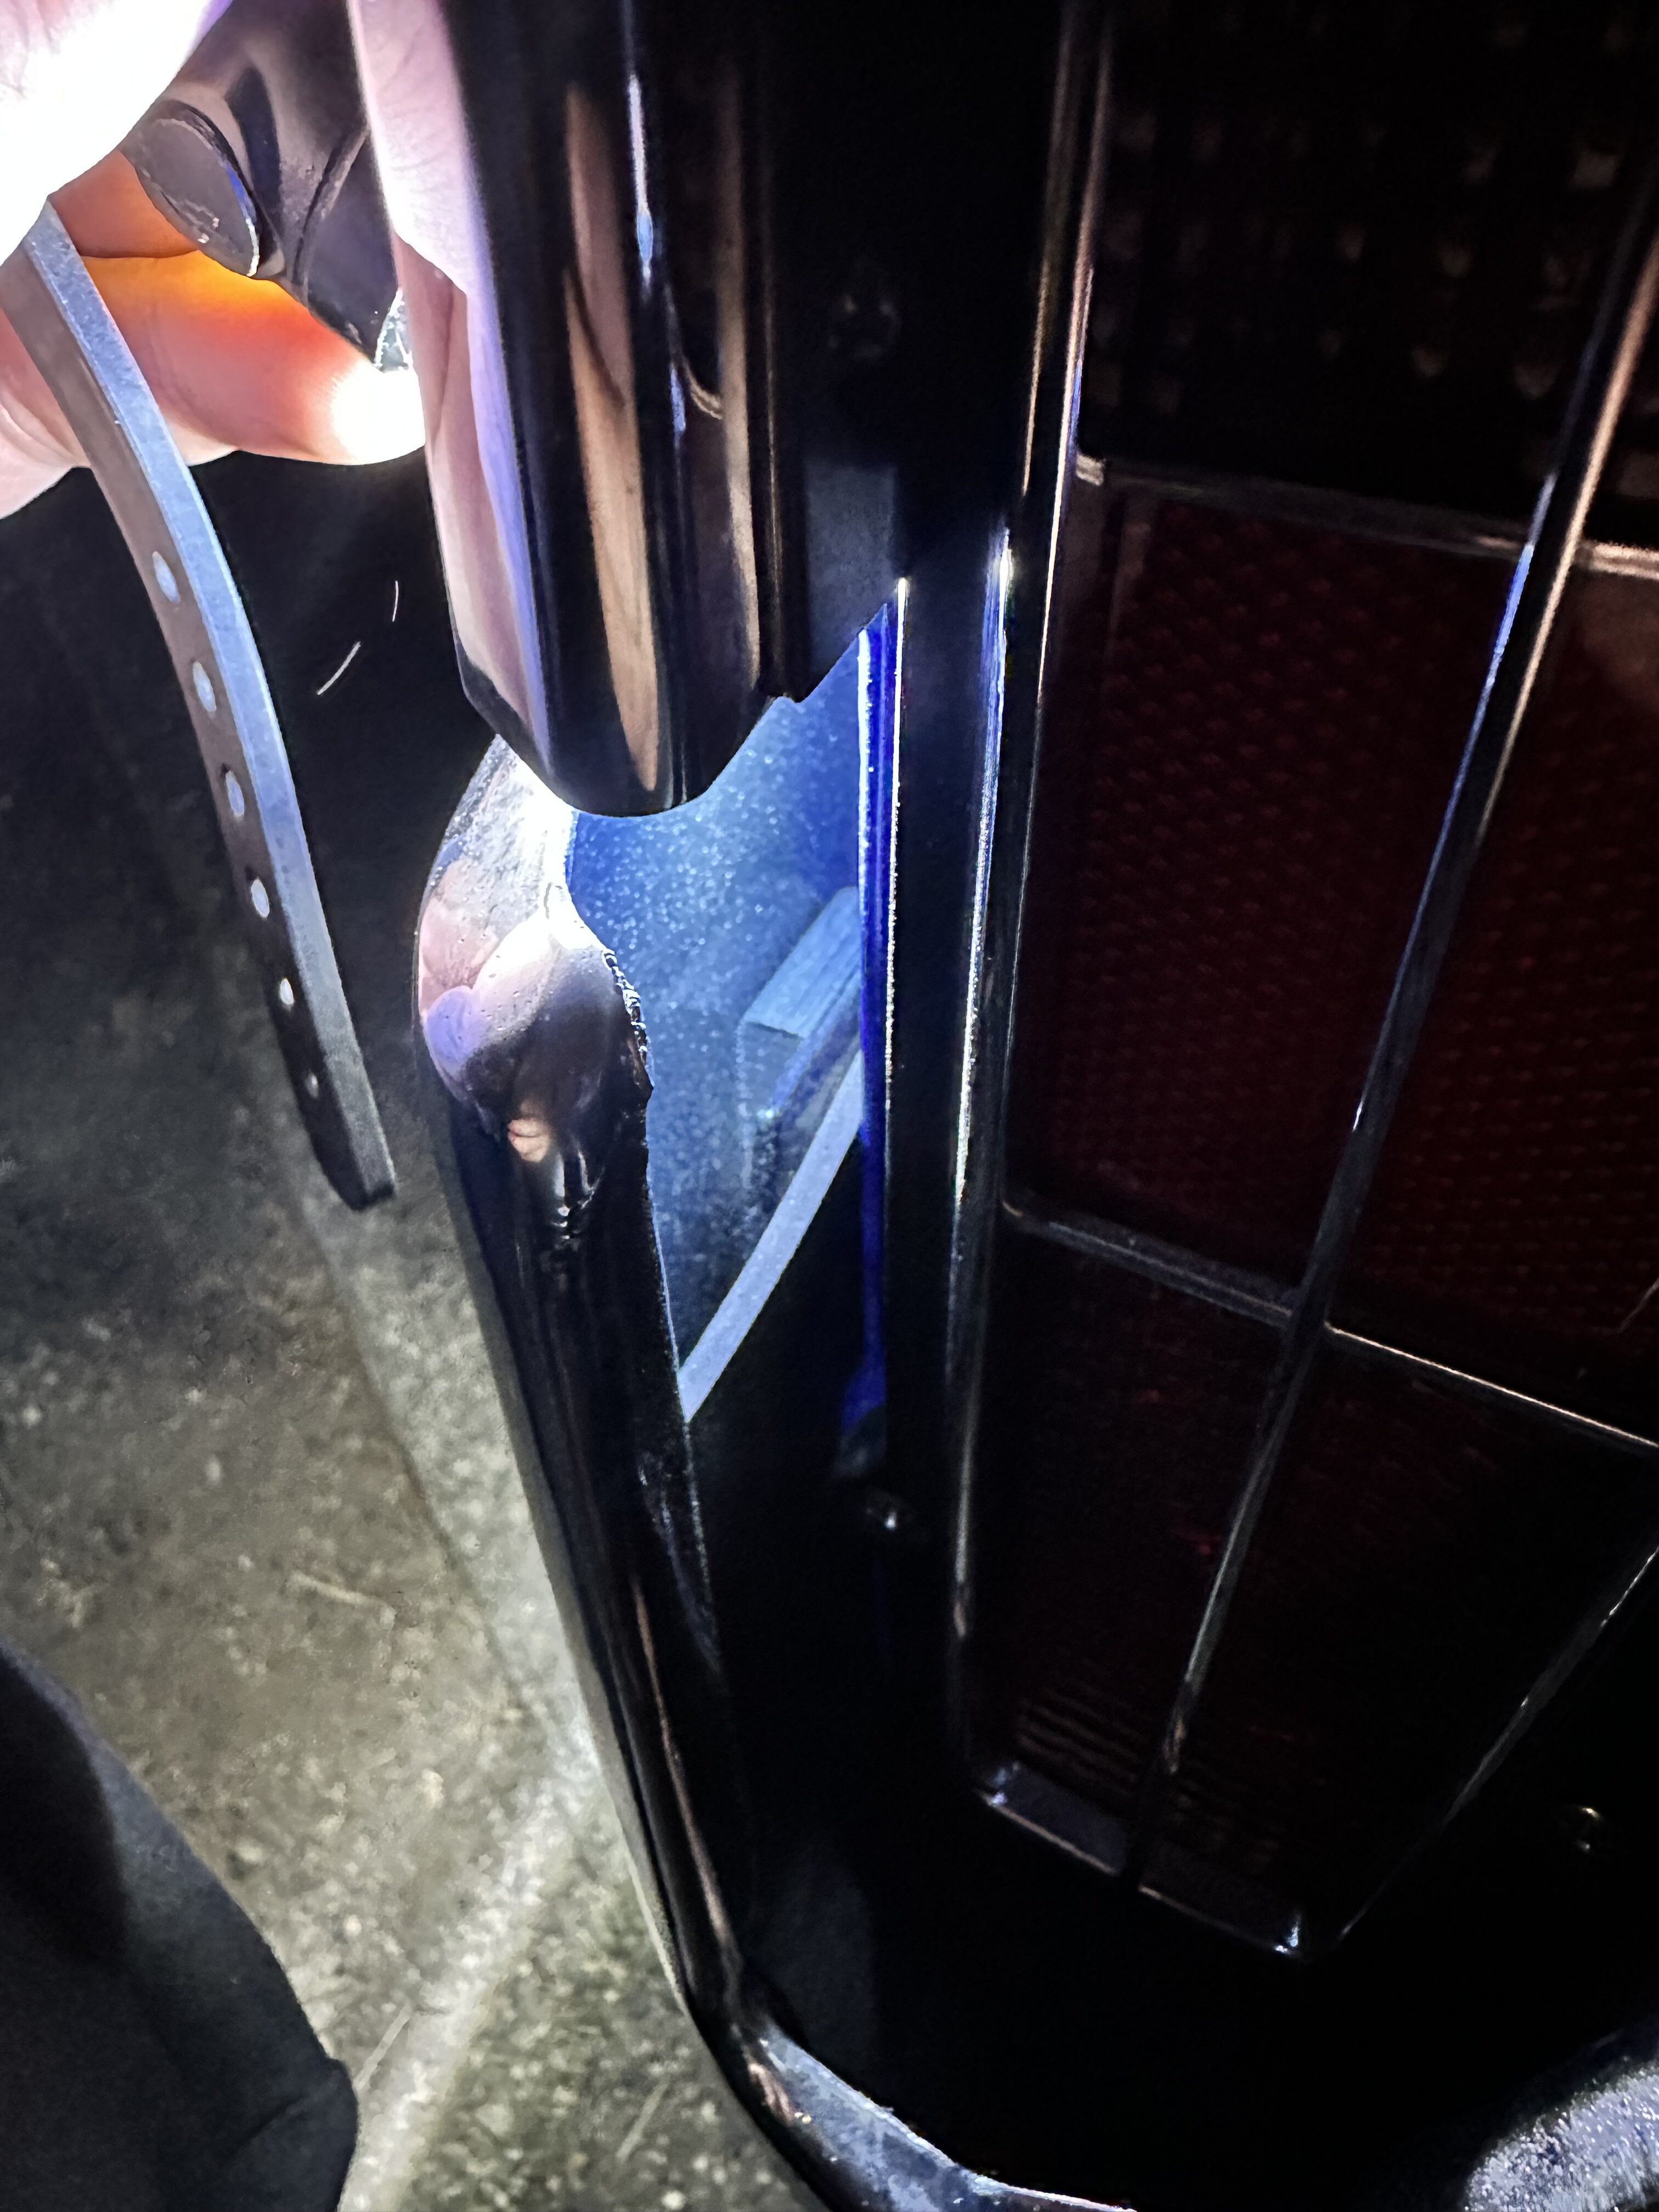
Mines between the bracket and the bumper. Know it’s hard to see in that earlier pic. Just walked outside and snapped a better one. -Jr.
-
WTB rear window headliner tack strip
1Bad_Monte replied to Rancid87's topic in Cars and Parts For Sale/Wanted
@Dtret, do you know if there are aftermarket tack strip sets anyone sells or, if any other vehicles are interchangeable? Been searching and not coming up with any specific for Monte Carlo. Somehow, during the restoration, my set fell behind our sealed storage boxes and the “coastal rot” (damp salty coastal air causing rust) absolutely ate them alive. Literally crumbled in my had when I untaped them. Thanks! -Jr. -
70 Rear Bumper Question
1Bad_Monte replied to GRAY 70 Monte Carlo's topic in General 70-72 Monte Carlo Forum
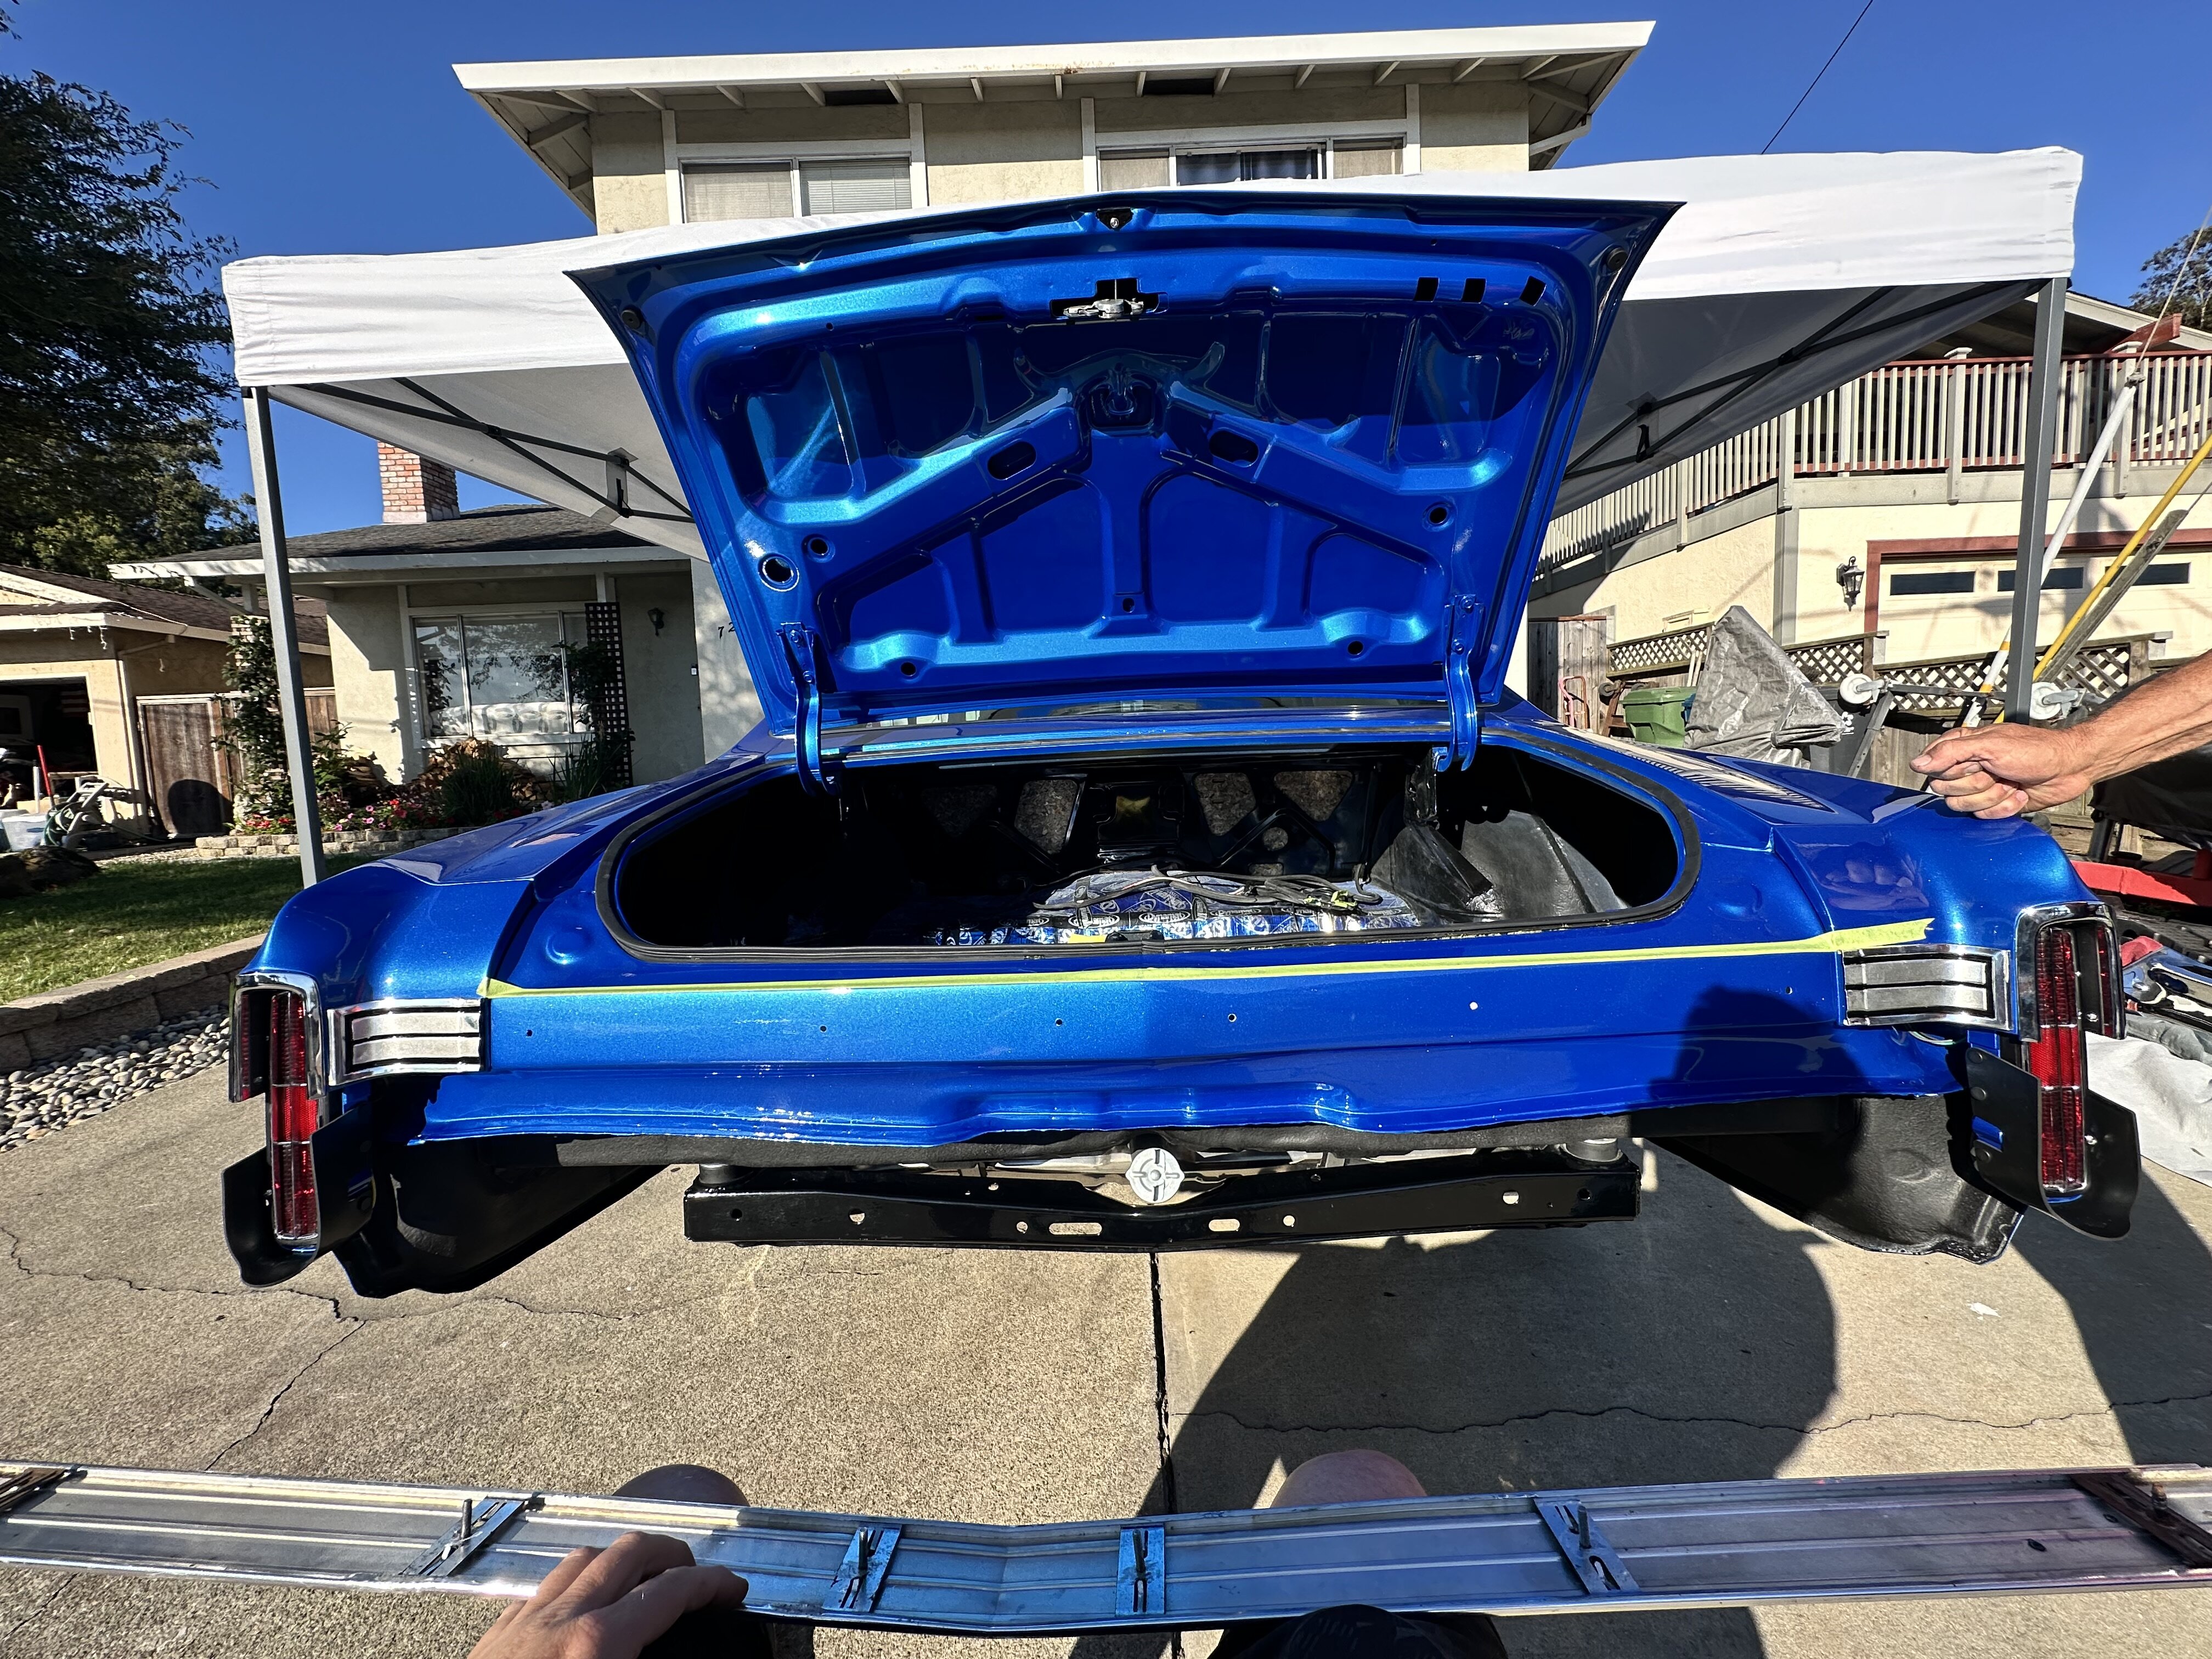
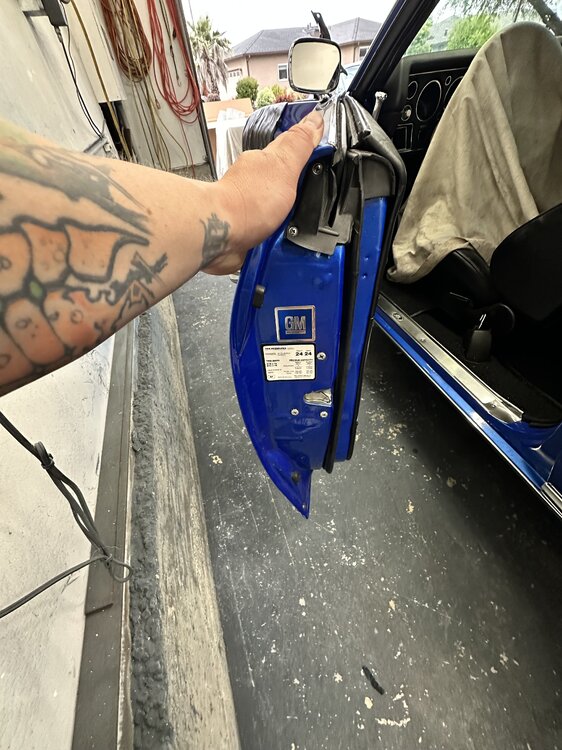
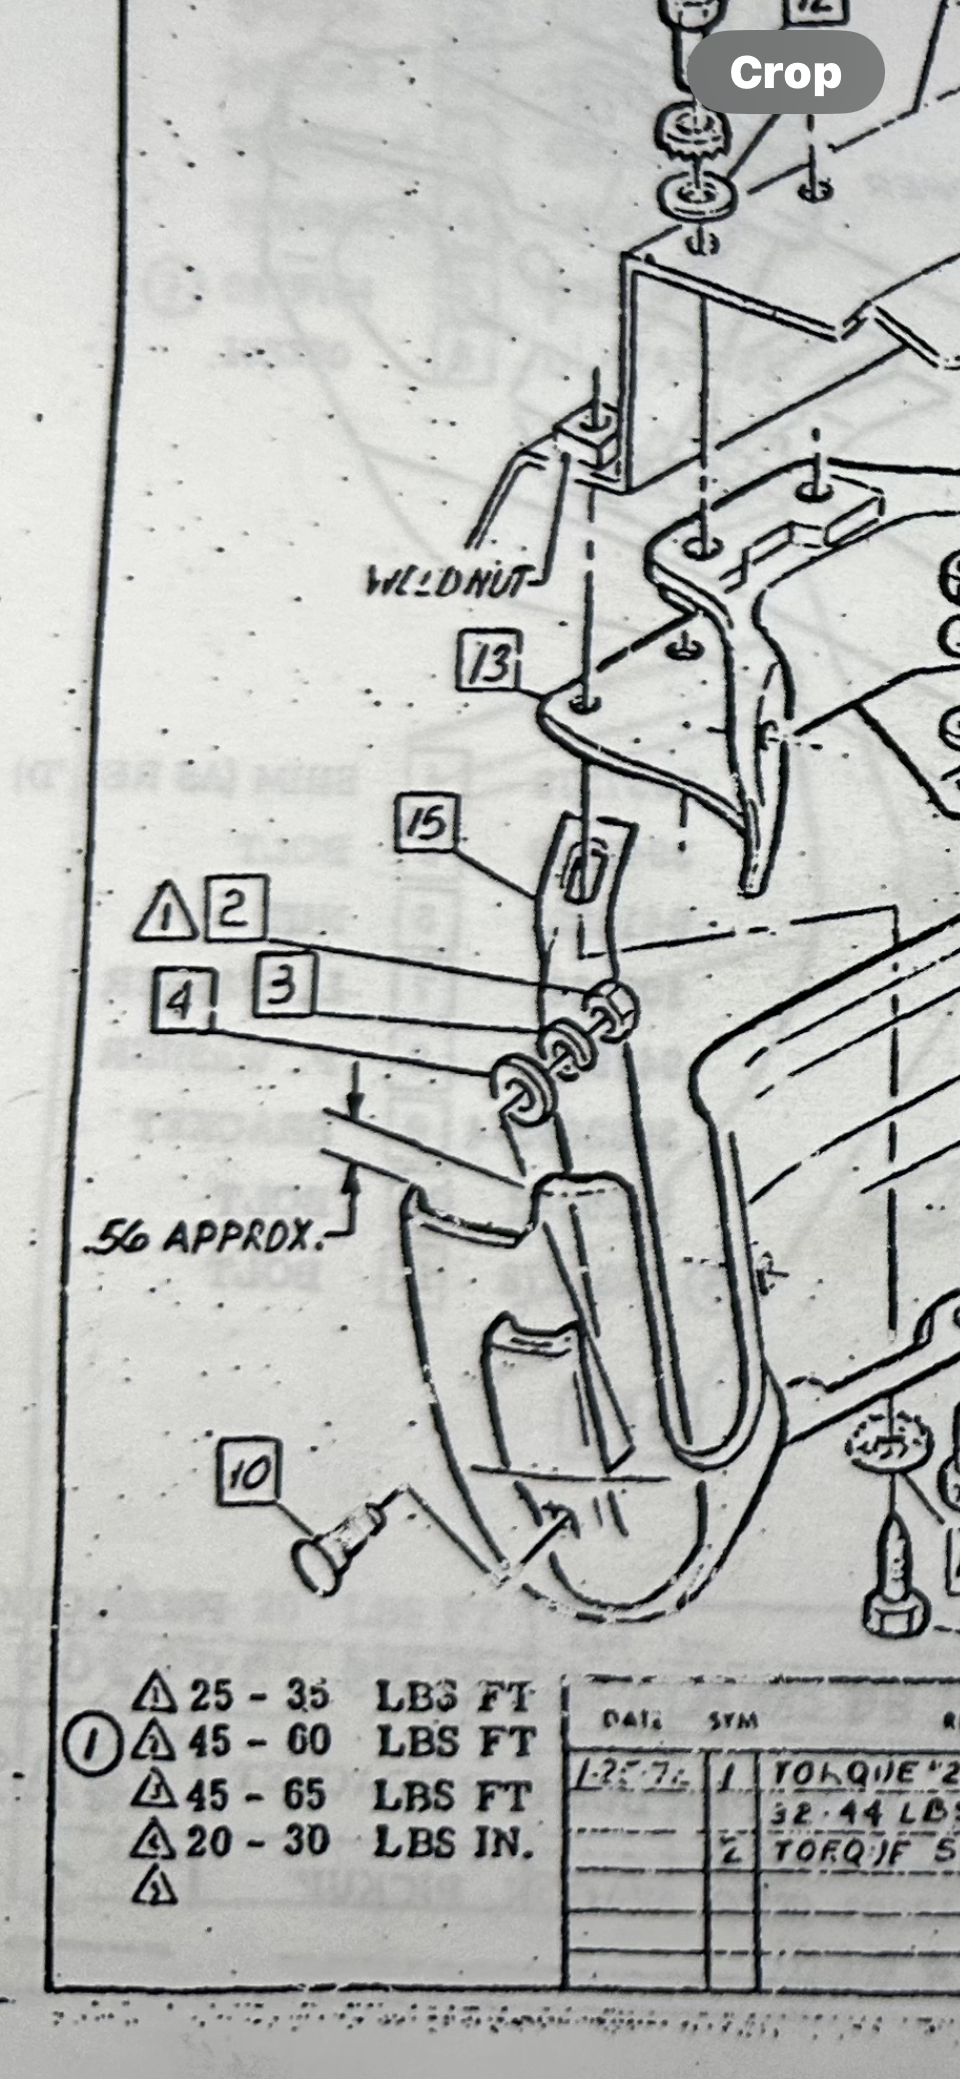
Just replaced the bumper on my 72. I have very similar rubbers that I got with a full body kit. Odd though, I checked the assembly manual and it doesn’t show them nor the vertical slit in the bracket. One note on reinstalling, there is a lot of adjustment so take your time when aligning the bumper brackets to get the spacing looking good. Grabbed my dad to check the spacing while I laid under the car and fine tuned the bracket alignment. Also, a towel or rag in between the bumper and the side body will help avoid accidentally scratch the paint while installing. Hope that helped some. And sorry for the dark pic but it was bugging me that I can’t find it for sale and the manual doesn’t show it when I know I bought it and it’s installed. -Jr.
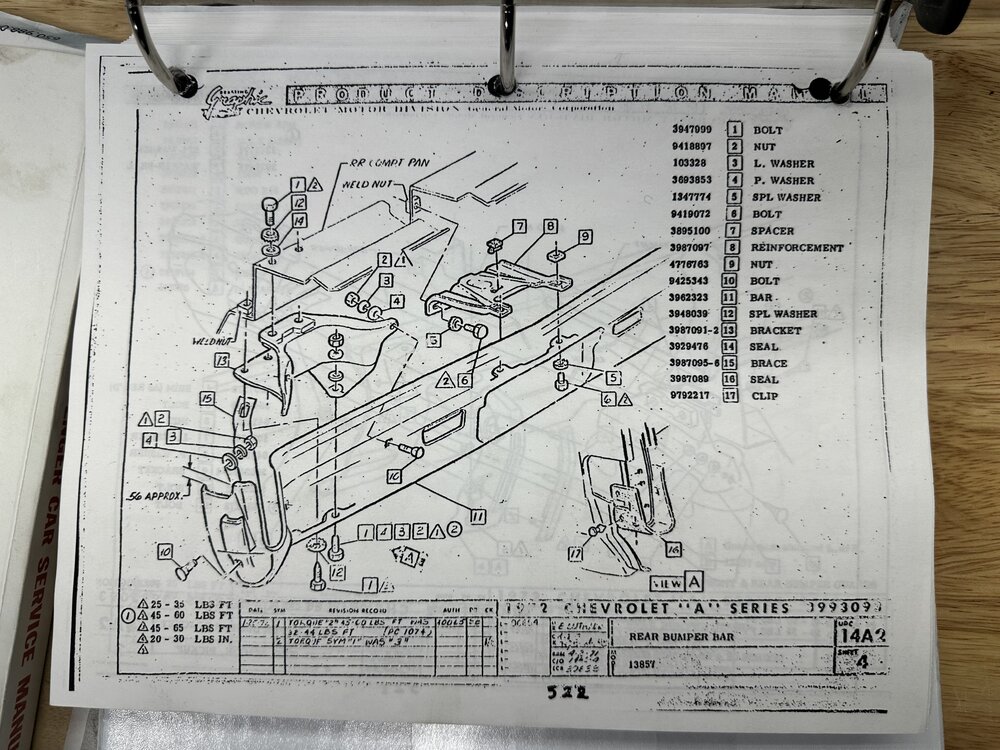
-
Oh, I guess I should have said what I used for adhesive. DAP Products Weldwood Landau Top & Trim HHR Solvent Type Spray Grade Contact Adhesive 1 Gal, Natural Got it on Amazon. https://a.co/d/6Tpodt1 The video posted above and the whole channel was super helpful. Got a 40$ spray gun and worked great. That gallon is enough to do 3-4 tops.

-
Just finished the trim last night!


-
Non pro tip, get the non fabric backed top. Extra 150$ but looks 1Mx better. Put one on and the trim didn’t fit, the look was off and it just didn’t look like it was meant for the car. Peeled all the glue, cleaned and installed the new one and so happy. PS, never done it before but couldn’t find anyone that does it near me so just went for it. Learned everything I know from Old School Auto Upholstey videos. -Jr.


-
@DragCat looking up sticker locations and saw your sticker. Check it out! Ordered these because they looked so cool and figured it would look awesome here. -Jr.
-
Thanks guys! Installing a vinyl top and was trying to figure out how to attach the Script Emblem. -Jr.
-
Re-chrome Grille (suggestions for chrome plating companies)
1Bad_Monte replied to TheBMan's topic in Restorers
Morning, Thanks for all the info on this topic. Purchased the plastic repop grill for something to fill the gap while mine is being rechromed. Looks great except it doesn't align as well as hoped but purchased one of the first ones OPGI had at 359$. See them for sale for 450-600$ now. Going to do the same with the masking and painting after I get it back (est. 1 month to get repaired and chromed). Not bad, 900$ for the rework and chroming. Cant wait to get the real grille back. Wish I never read it but some one mentioned doing a different color than grey for the grille...... Should just shoot it grey and call it a day but now I can't stop thinking about other options. -Jr. -
@Scott S. you rock! Thanks for that tip. -Jr
-
Evening, Just put one on my '72. Have the original fenders and the passenger side didn't align with the body. Tried and tried to get it to sit level but it wasn't until we put the original hood on and saw the issue with the 2" cowl hood. The inner support structure was welded to the top skin incorrectly. Had to drill out the spot welds then align the hood and clip it in place to weld it. Luckily had some good help but it was a good amount of work I was not expecting. Pics below you can see where the inner frame and top skin of the hood used to meet. You can also see where the dip is vs the original fender. The cowl does look awesome I just don't have a spot to put the "pissers" since they mounted in the original hoods vents. Beauty over functionality I guess...


.thumb.jpg.21c39d0c43e225d941cce49c4914c92d.jpg)

-
Thanks so much! Looking now for that guitar case. Appreciate the help.
-
Willie, Do you figure out if the jack for a ‘72 stored the same way? Trying to find out as well. Thanks, -Jr.
-
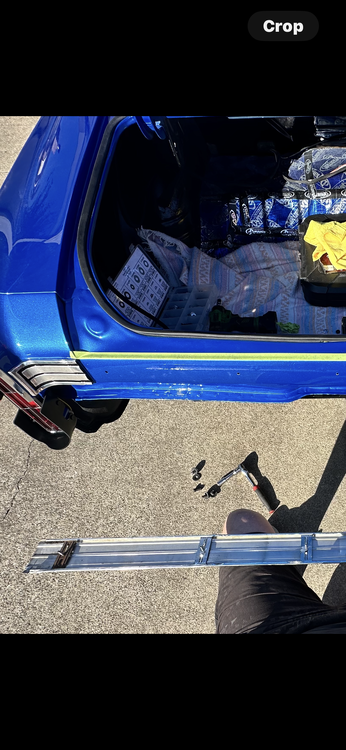
Ok, last post. Drilled out 4 more holes to add the clips. Here is how it came out. (The rear moldings are pretty hammered. We did what we could to clean, straighten and paint but the previous owner was fast and furious with the sander and apparently didn’t pull the molding off while he was working)


-
Larry, You read my mind. The rear center area was really weathered to we cut those tabs off and painted it. That what started my search for these clips. Adding 4 as well. Making the bends for the rest right now.


.jpg.7e71dee4250f17e46122f192b5e0508b.jpg)