


LS65Speed
-
Posts
132 -
Joined
-
Last visited
Content Type
Profiles
Articles
Forums
Gallery
Events
Posts posted by LS65Speed
-
-
Paul & Steve
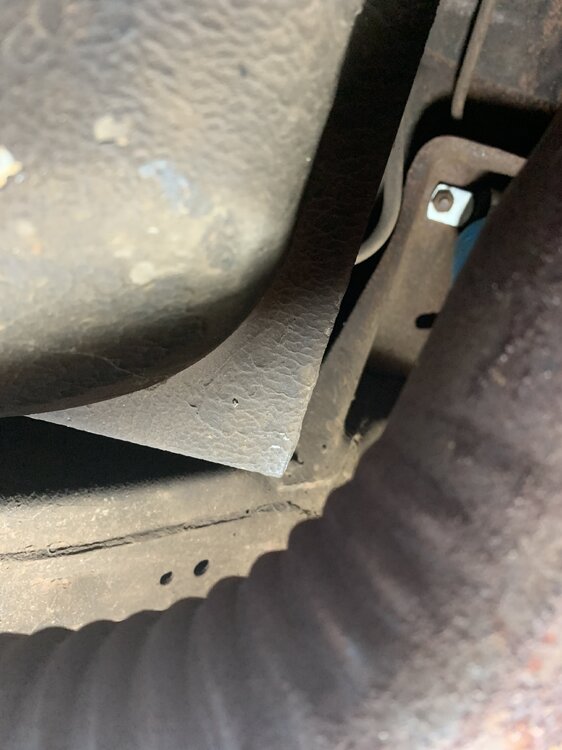
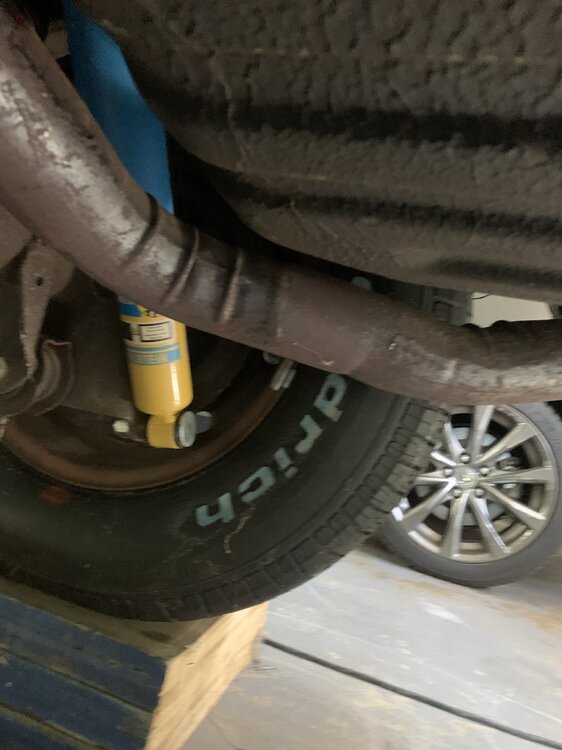
Here are a couple of pics I took today....I wanted to put them on a screen and be able to look more closely. They don't necessarily show what I am talking about above but they might give you guys a hint at what I am now thinking. 2nd Pic shows how that flange on the tank is located right above the pipe. First Pic shows what I think is a fair pic of what I am talking about in terms of my pipes not running as far towards the side of the car as Steves' do. I know it is had to see but try to compare my Pic to Steves. As I said before...more tomorrow.
Ray
-
Steve and Paul...
Steve thanks for crawling under there and taking the Pics. I appreciate your effort. Paul I was going to drop you a line, glad you picked up on the Thread.
Steves tailpipes appear to be somewhat different than what I have. Mine are Walker 44330 and 44331 and I an now thinking they are shaped differently in the area where they first curve around the tank. Two dimensional pics are tough to use in drawing conclusions but it APPEARS that the pipes under Steves car exit the muffler, head up over the axle tube then make a sharper turn toward the outside of the car than mine do. Said another way I think they kinda run parallel to the axle tube for a bit more distance than mine do. Those pipes Steve has seem to have a more sever angle where they turn to run to run along the frame than mine do. That angle would be necessitated by the pipe running further along parallel to the axle tube. I gotta take a couple of PICS tomorrow and get them to you guys. Its getting dark now and natural light is better than a drop light. Stand by for PICS tomorrow.
Thanks guys
Ray
Ray
-
 1
1
-
-
Steve can you please describe the way you removed it...clearly it can't drop straight down. I am thinking down at the tank front by the differential then slip the tank under the center section of the rear. Is your car a BB or SB? I think the BB cars had a larger dia tail pipe and it sure looks like I am gonna be in a tight spot getting the rear of the tank below the tailpipes. Did you have any issues getting the filler pipe at the rear of the tank thru that hole in the back crossmember ?
-
Have to replace fuel sender and wondering about issues in remoing the tank. I can't see a way to drop the tank with the tailpipes in place. The car has Walker tailpipes , no 3 inch stuff, just aftermarket Walker replacements for original (BB) system. Anyone had any experience with this?
-
?????? Was that response meant for my post? If so I don't understand what you are trying to convey.
-
Are you saying you want to keep the Sniper and the stock air cleaner and just add a higher manifold? Cannot help with that combo but FWIW I can say the following setups work. I ran a factory aluminum high rise intake with a 780 Holley and a drop base aircleaner..no issues. Currently there is a factory high rise 3x2 (Vette 1967) wth the factory Vette air cleaner on the car, again no issues.
I suggest the following...find a way to check the height of your Air cleaner / sniper combo and compare it to the height of a 780 Holley with a drop base air cleaner. If the sniper / factory air cleaner you have is the same as the 780 / drop base air cleaner combo you could be good to go with the GM factory manifold. I think the last digits of the 4 BBL manifold I had on the car were "193". If the sniper / closed element air cleaner combo ( assuming you want to keep those )are taller that the "193" / Holley / drop base combo you need to continue searching beyond what I have suggested. The Holley 780 / drop base air cleaner / "193" combo was pretty close to the hood with the A/C element I had. Don't know the height of the element I was running.

-
17 hours ago, sendo said:
will this pulley work with my car to do the a/c conversion?
That looks like the correct GM pulley again as mentioned above, with the exception of the snazzy chrome plating. I think there was only one pulley for the BBC cars back in that time frame. The two smaller groves should be the same diameter.
-
I have done it. Not really that big a deal. Better I show you PICs of what was done as opposed to trying to explain W/O pictures. Send me an E-mail at HPEXPATRIOT@yahoo.com and we can exchange info. I did it with a 72 MC with a BBC. People think this is an effort like raising the Titanic from the bottom of the Atlantic, it isn't.
There are a couple of key things you need to know and some fabrication skills required and then with those two things the job can be done WITHOUT welding. Existing holes in the firewall are all ya need along with a bit of cutting. After Turkey ( assuming I am not asleep) I can find my pictures. My photo cataloging skills are not as good as my A/C installation skills so the search might take some time.
I did it with the dash in place, the engine in place and with the hood attached. You gotta remove the pass side inner fender and get the pass side front tire off. Inside the car it is easier if you remove the pass side bucket seat. Dash pad has to come out also. All of these things are about access and working without twisting your back and neck into knots. Make no mistake this will take patience but it is in no way like "landing a man on the moon and returning his safely to the earth" as some people seem to think it is.
If you can get that complete system from the fellow who is swapping out an OEM system DO IT. Get every nut bolt back and watchamcallit. The air blending / mixing and defrost capability of the OEM unit is far superior to that of the aftermarket systems IMHO.
Ray
-
Consider a relay in the power wire that supplies power to the supplementary fuse box. MAKE SURE the relay can handle the total draw that might be experienced from the total number of circuits in the supplementary fuse panel. Power the relay from a switched source. Look for an industrial relay from an industrial supplier like Grainger. The stuff at the auto parts stores is IMHO marginal as far as longevity and quality.
The reason I suggest a high capacity / quality relay is because you want to be sure that whatever is wired into that supplementary panel will be available when you need it. Suppose you have an electric water pump or fuel pump hooked to that box and maybe electric fans. If the relay croaks you are dead in the water w/o fans or a water pump or a fuel pump or maybe all three!
-
Ok that is what I need...a potential sales location for the product!
I gotta tell ya, and I won't rant too long here, I HATE going to the auto parts stores. Maybe not all old geezers hate it but I know I do. The vacant look ya get back when you want almost anything and don't have a VIN number is exasperating. I don't wanna go back to the 60's for 1000's of reasons but I sure would like something other than a blank expression coming back at me when I ask for a part.
God help folks like me who have modified cars that don't fit the standard Y/M/M description. Long gone are the days when there was ANY technical savvy behind the counter. We now live in a world where the parts guys are younger than our cars, where mismatching cross pollinating parts between years (67 Vette 3x2 in a 72 Monte Carlo with a 5 speed...SAY WHAT???) is just unheard of.
Thx
Ray
-
Dale,
The expansion block receives power via its own 10 ga copper braided wire routed directly from a C-shaped power tap clamped between the positive battery side terminal and the main positive power cable (see photos).
Where did you get the C-Sshaped power tap? I have a lightly optioned car that has had a lot of things added. The method you worked out could be very helpful in cleaning up a bit of my wiring. Like you I have a fair amount of new circuits and while everything works as it is set up I think I could make it better after seeing what you did. Also it provides something for me to do, sorta think I am flunking retirement (aka not busy enough)
Ray
-
Andreas runs a single 2 speed Ford MK VIII fan and reported that it works fine. I have one installed but have not yet really tested it on the road. It is behind a 454 LS6 BBC. My research on this matter showed me that the aftermarket fans are all over the place as far as claims about power draw and air moving ability. Said another way marketing has taken precedence over engineering in selling those aftermarket. Also the racket made by the aftermarket fans was too much for me. I listened to a lot of them at shows and even tried a Derale fan on my car. The whine created by that thing was over the top for me and I junked it.
If you do put an electric fan on there be advised that a good fan will require an alternator upgrade. You cannot just tap juice off the battery to run one of the big fans. You need alternator that will be able to support the fans power draw at steady state run AND at fan startup while still supplying enough power for other electrical loads like the stereo and power seat or whatever may be running. You can't rely on whacking the battery for the extra power when the fan(s) turn on. The battery is there to support the starter not to act as a backup for an underproducing alternator. An alternator ( and supporting wiring ) that can handle about 130 AMPS is IMHO a requirement. I have installed a CS 130 that has been uprated to met the need when max load is applied to the electrical system.
-
How can I determine what bellhousing I have? How many different belhousings did they make?
There are side by side pictures of the various bells out there on the web. A guy with the screen name of DZAUTO did a great flywheel / bell housing / starter comparison. I would search of that.
-
The starters are the same it is the starter nose that determines what starter fits what application. Yes there are higher torque GM starters but you can swap the starter nose and move one starter motor around to different applications pretty easily.
I am currently running a starter that was from a 350 Ci / TH 350 on a 454 with an 11 inch clutch. The 621 Bellhousing requires a "unique" starter nose that is useable only on stick shift cars with 11 inch clutches. It will work wherever it is paired with the correct 168 tooth flywheel and the 621 bell.
-
Sounds like you will have one great looking Monte!
I was also going to add A/C to my NON-A/C 71 Monte and even have all the OEM used parts till i learned the fire wall is different for a 71 A/C or NO A/C vehicle. I have no idea if any aftermarket kits required the vehicle originally had A/C or not, perhaps ask.
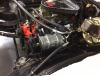
See attached pictures, I have of the two different firewalls.
Bruce
Revised, I found the pictures
Yes they are different firewalls but it is not a big deal to change over to FACTORY air and come out with a better system. I have done both, converted to Factory Air and installed Vintage Air. Honestly the effort required is not much different and the end result is much better with the factory air unit. Yes you need all the parts to do a factory air install and it can be time consuming to find them but with all the folks pulling out factory systems ( I will never ever understand that decision) parts are out there if you want to look.
-
"Thanks for sharing your experience and sound rationale for using factory exhaust manifolds - I love it when objective facts and practical experience stand up to "conventional wisdom"!
My '70 402 4-speed came to me with a set of long-tube headers (brand unknown) that had been heavily massaged to fit and manifested all of the problems (except loose bolts) that you mentioned. If I had read your post before I replaced them with a set of mid-length headers last spring, I might have gone back to the factory manifolds. It was quite a job to hook up a new exhaust system to the new "shorty" headers, but at least it solved the starter "heat soak" issue and gave me better plug-changing and ground clearance. There are at least a half dozen choices of full length headers for BBC Montes with automatic (not manual) transmissions but I am no longer tempted to find a pair for my otherwise bone-stock '70 SS.
I'm sure there are many factory exhaust manifolds that would limit performance improvements with other mods but you have to believe a manufacturer would not ship a high-performance engine from their factory with a crappy set of exhaust manifolds."
Here are some other thoughts on what you mention above....
Thanks for the kind words again. Sound rationale usually goes with being an engineer but I must confess to messing up on decisions a least a few times during my life. I have worked with other engineers who will have "The truth is in the numbers" on their gravestones. They are very rational disciplined people.
That header issue was a big turnaround for me as far as hot rodding and hot rod parts. I just will nor screw around with anything that has to be persuaded to fit. Guys buy headers and they have to dent this tube or that tube, remove the engine to load the headers in then reinstall the engine, buy mini starters and God knows what else. If it is Ok with them to go thru that grief...more power to them. Not me...once "burned" was enough. I stay as close to GM parts as I can as far as fit.
Also if your car has A/C and is a BB I would suspect a NIGHTMARE as far as getting the passenger side header on. I can hardly get the plug next to the evaporator housing out on my BB. Its not impossible but it is a PIA. Also if the car has A?C you are putting more surface area near the evaporator housing with headers. That is adding more work for the A/C system because that Evaporator housing is just an uninsulated fiberglass shell. More heat under the hood will warm the area enclosed by the evaporator housing and that will to some degree (no I have no idea to what degree) effect the cooling process of the A/C system. .
I digress a bit now......That rear passenger side plug is a PIA in part because the my car has the AIR smog system on it. I lived in CT. and they would not even look at the car for emissions inspection if the car did not have the "factory" smog pump and hoses in place. The AIR hadda have a belt but there was no test for functionality!!!! My buddy owned a shop that had the same sniffer that the DMV used. I "made" my required numbers with the 3x2 and the LS6 solid lifter cam and NO PUMP but they refused to even put the car in line before the pump and hoses and whatever were installed. Stupid DMV. I thought the idea was to meet to emission specification as opposed to meeting the "bill of material" specification for smog parts that were on the car from the factory. Once the pump was on the car they never even mentioned the ticking lifters. rough idle or the 3x2...the pump was in place the sniffer numbers were good: "pass" sticker on the window and off to the next car. It was insane.
-
I LOVE what you have done with your car! That thing must be a blast to drive.
Curious why you went with stock exhaust manifolds on such a modified car. Super cool ride..........
Thanks for the kind words about the car. Like so many of these cars there is a lot of work in it and a lot of satisfaction seeing it done. Only issue is I can't leave the tools alone, always thinking about the next project!!!!!
The following goes in the "Don't get me started on ________" but here is the answer to your question.
I absolutely will never have anything but stock exh. manifolds on any of my cars. Headers are nothing but trouble IMHO. I had a 67 GTO with Doug's Headers. They were on the car when I got it. Changing the starter was almost as much work as removing the engine, the starter would heat soak in warm weather making it a "iffy" start when the engine was warm and the weather was hot. Heat inside the car was outrageous in the summer because those damn things were right near the floor. Did I mention noise and the constantly loose bolts at the header / head mating surface. Last straw was a fire as I pulled into my driveway....smoke and FLAMES down by the starter when the positive battery cable grounded after the insulation melted off. It was a matter of seconds as far as saving the car. If I was anywhere but pulling into my driveway the car would have been toast.
I suppose there are now better headers and I suppose there were better headers than the Doug headers back then but for this guy "once burned" (pun intended) was enough.
I redid the car without the headers and ALL that aggravation went away. It was cooler & quieter inside, the starter was a drop out more or less, it fired up first time every time on the hottest days and the positive battery cable never ever had issues again. I would also add that there was no noticeable difference in street performance. The correct factory manifold for the Ram Air GTO engines was a 4 into one unit that was more or less what the Sanderson Shorties of today look like.
-
I think it's all about the buyer with these cars. You could put a price on it you could live with and always come down on it too. It's in Atlanta with lots of high horsepower rides there. Finding the right person to buy it is the tough part. Might find one around the dragstrips in your area or at a car show or cruise-in. E-bay it and you could set a reserve on it. You've also have to let them drive it (tough) ,or to understand the horsepower to weight ratio. That motor should make 425-450HP with a lot of torque with 3:31's in it. Nice ride, I'd like something like that ,but I'm still after my '65 chevelle build and that's my ticket for my Horsepower ride.
The Richmond has a 3.27 first so the overall gearing in low gear is more or less the same as a 2.20 Muncie with 4.88's. No issue with getting the thing moving. On the highway the Richmond is 1 to 1 in 5th so the car rolls down the highway same as any Chevelle / M.C. with a Muncie or TH 300 / 400 running 3.31 rear gears.
-
I know its off topic, but how do you like those wheel dollies? I have been considering getting them but wasn't sure how well they work, whether you can lock them, etc.
No need to stray too far, just tell me if you recommend them or not. Thanks
Nice looking Monte by the way. I think north of 20K isn't unreasonable. I may even start at 30K and be willing to work with the right buyer.
Dollies are GREAT. My garage is deep and 2+ cars wide. I can "stash" the MC crosswise along the front of the garage by myself with ease allowing 3 cars to be inside the garage. I also have spun the car 180 degrees within the garage...no sweat. Word of caution: buy quality dollies...the rollers are the key. If the rollers are not up to the job it all becomes a big PIA. Those dollies I have are one piece stamped steel and they are pretty thick. The stamped steel bolt together things won't get the job done in my opinion. As they say "Ya get what ya pay for"
-
"It may appeal primarily to performance muscle car enthusiasts - probably even more than just first gen Monte lovers (many of which don't need or want to pay for the extensive performance mods. Now, if you can find a first gen Monte lover that values performance modifications over originality, you just might get a reasonable price. "
Its not about recovering what was spent...been in the hobby long enough to know that idea is a non starter. It is more a matter of finding a number that is reasonable considering all the work and parts. I can pull they 3x2 off and sell it alone for $3000 all day, any day. Likely could take the Richmond out and score another $1500 to $1800 but to me those parts are part of the "ambiance" that I built in because I am a performance guy at heart after all.
Also the car had almost no options when it was ordered new so the idea of keeping it stock had no urgency for me. There hadda be thousands of SBC powered Plain Jane cars and the fact that this one lacked air was a big negative for me within a few years of actually buying the car. I have been a mid year Vette owner and the whole "chasing the numbers" deal drove me to sell the car. It totally put me off looking for things like correct date coded ignition wires and other silliness. I had fun building the M.C. and now it might be time to build another car.
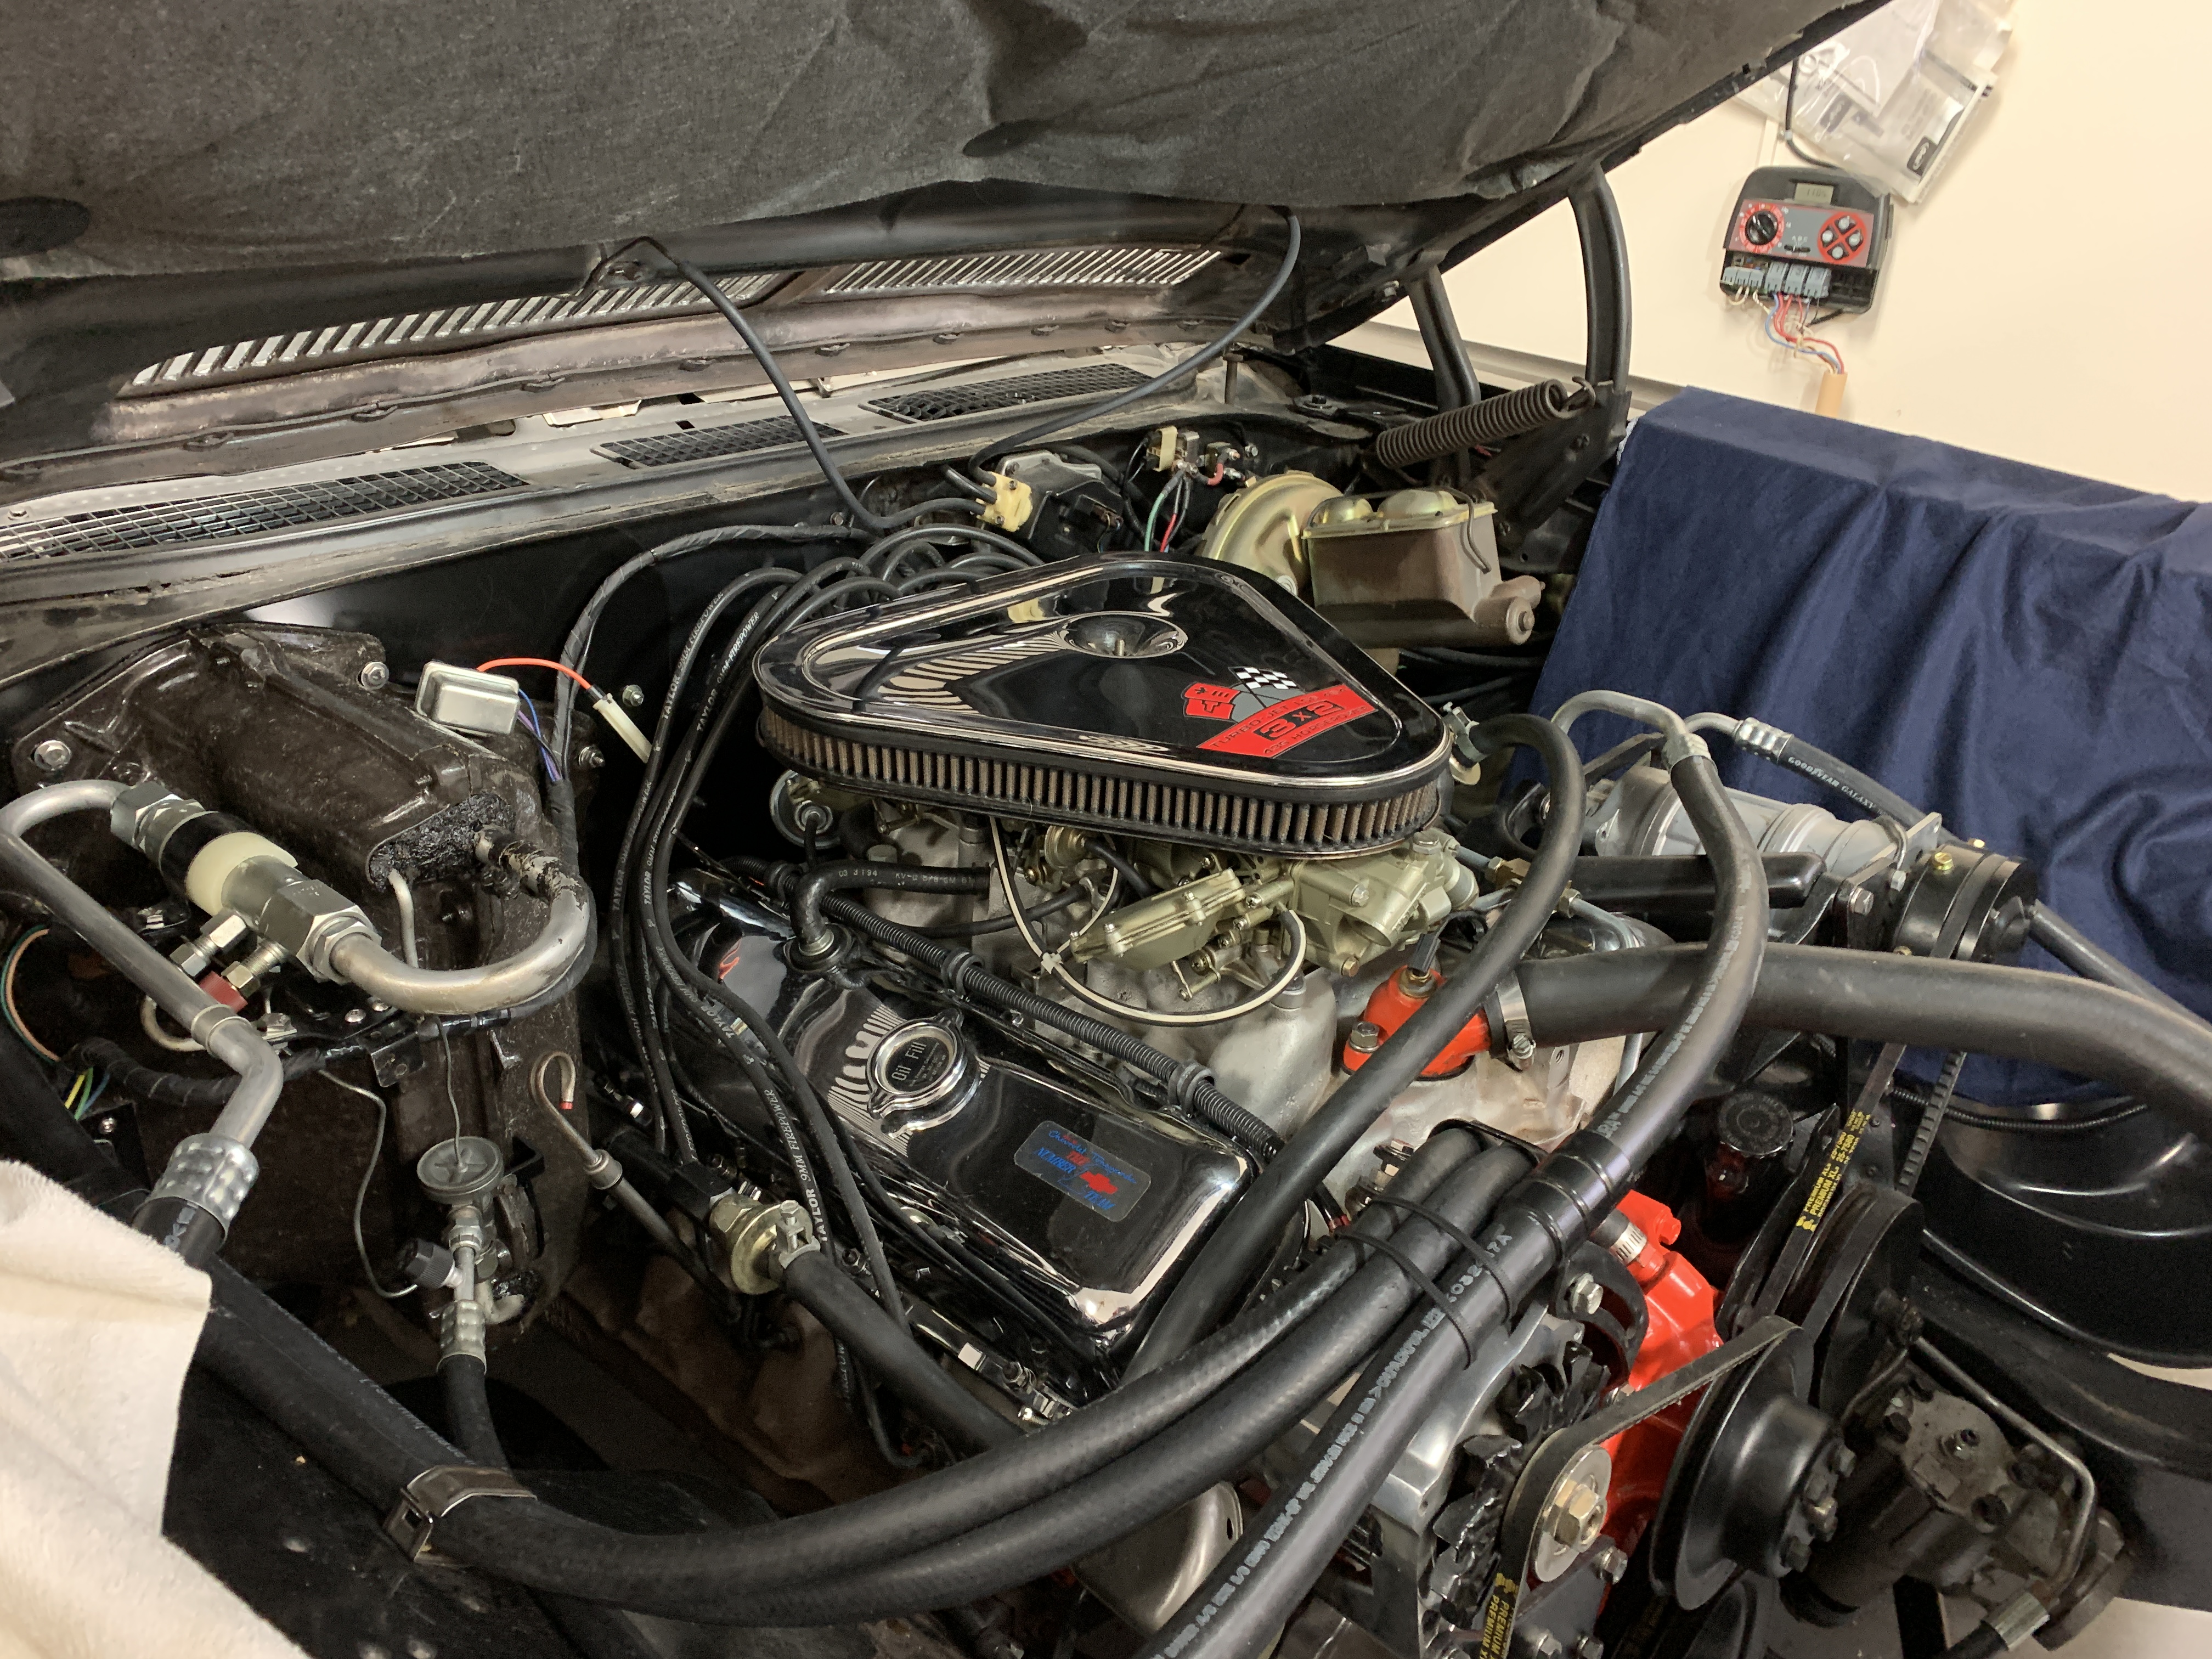
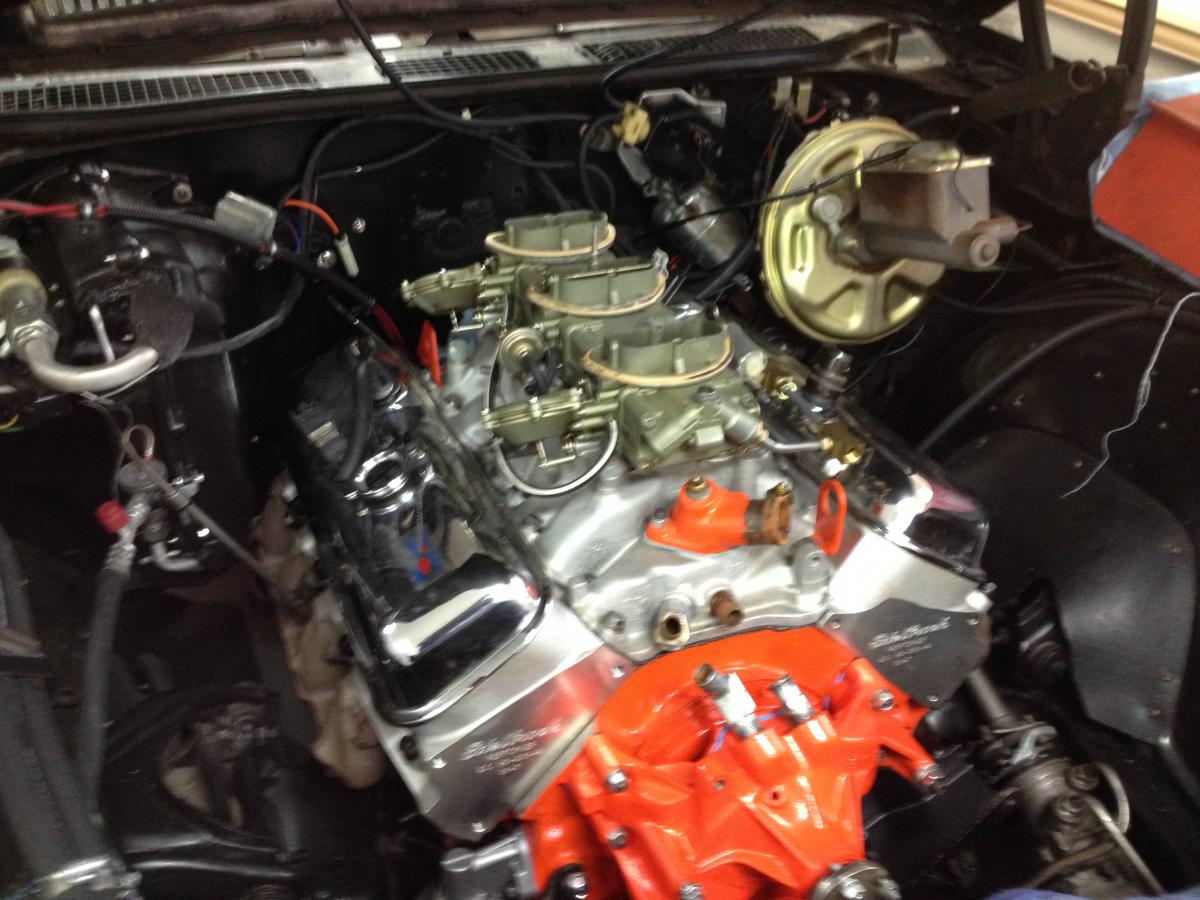
Going to tack on a few more pics.....

-
I have a 1972 and started kicking around the idea of selling it. No idea what it might be worth. Not sure yet what I might do. Wanted to ask for some ideas from folks who are closer to the market for these cars than I am. I am the second owner, purchased in 1973. .NEVER been outside in the snow when I lived up North.
This car is not stock by any means lots of things have been changed. It appears almost stock from the outside but mechanically lots of things have been modified. Originally a 350 CI TH 350 non air car.
Triple Black (exterior striped to bare metal ) Base coat clear coat
All original metal...no patches or "cheese" filler except for skin coats before / during block sanding
Redone cloth bucket seat interior. No console.
LS6 Crate Motor: 1971 Vette 9.1 Spec Engine ( GM flat tappet solid lifter cam)
Edelbrock Oval port heads (110 CC). Calculated C/R with heads 9.6 / 9.7
Richmond 5 Speed, Hurst shifter
67 Vette 3x2 intake system
3.31 12 bolt
Factory AM FM mono radio. Converted to Stereo / USB & RCA input by Turnswitch in Minn.
Kick panel front speakers
Factory air ( converted from non air car ) R134 with parallel flow condenser and aluminum compressor
78 Corvette 3 spoke leather steering wheel ( re-wrap with hew leather )
Center Force clutch & PP
Rally wheels
New BFG T/A's
New Bilstein Shocks
Fast raito GM steering box (rebuilt by Lee Mfg.)
Custom dash...white face gauges in original factory housing behind factory plastic lense
Ford Mark ( ? ) 2 Speed fan, with controller
MSD Distrib. and 6 AL box
New Battery
New Ignition wires
The more I work on the list the more I think it is worth and the more I have trouble deciding what to do about selling.
Any opinions appreciated.
Thx
-
This is tricky when I change pinion seals I punch mark the pinion flange and the pinion shaft and the nut in a line and reassemble so marks line up. S
I did the same thing on a 12 bolt that was in my 1967 GTO. Only thing I did differently is when retightening I tightened just slightly past the point where the punch marks were. By just slightly I mean maybe the diameter of the punch mark...maybe even less. By the time I did the seal replacement the car was a 100% daily driver and the rear remained silent for years and many miles before I sold it to a friend. I might add that the car was standing with the tires on the floor of a garage that had the old style pit as opposed to having a lift. Park break was on. Pretty easy job but I must say that I was worried about messing up the gears. Fortunately I got it right!
-
Honestly Jim you are looking at almost $3000 for that VA system. For that kind of money you can put your GM system in Tip Top shape, have some money left over AND have a better overall system than the VA System. NO aftermarket A/C system on the market has the air handling / air mixing capability of your stock system, If it were me I would get the system converted to R134 with a compressor that can handle the new refrigerant, get a R134 condenser and lines installed and don't look back.
There are R134 compressors out there now that look almost exactly like the GM A-6 log compressor and are more efficient, They use all stock GM brackets. You MUST recalibrate the POA for R134 (about $50 +/- at Classic Auto Air in Tampa and you MUST get the R134 condenser that is recommended for the conversion. Classic has a BOLT IN ready to go condenser that again uses all stock brackets. You also need a new dryer (you gonna need that anyway you go) and R134 compatible hoses (you are gonna need new hoses with VA also. The R134 hoss are available ready made from Classic Auto Air. They are made of a different rubber compound . materials to contain the smaller R-134 molecules. The R134 condenser is a MUST if you want nice low temps.
There is no way I would go with an aftermarket system if I have a factory system. After all the smoke clears you will spend a ton of money and not have the overall performance of the stock GM. This is partiualrly true in the mix air mode / defrost mode. The aftermarket under dash units just do no measure up on this feature / functionality IMHO
-
You would be much happier with a distributor that has a vacuum advance. The vacuum can adjusts your timing depending on the load the engine is seeing. Right now, without the vacuum can, your distributor only adjusts the timing dependent on the engine speed.
With a mechanical advance it should be "all in" or fully advanced by 2500-3000 rpm. For timing, it adjusts just like any other distributor; check the timing at idle then bring up the engine speed to 3000 and check for the total advance.
The mechanical advance distributor is really a race item, and doesn't work well on the street. With mechanical advance on a race car the main concern is idle and full throttle. There really isn't any need for anything in between. A street car spends most of its time in that in-between range, where the vacuum advance can bring in more timing at cruise and part throttle than the mechanical-only dist can. It makes for a cooler running engine and better mileage, and generally makes the engine much happier, and throttle response is much better. The vacuum advance can also back off the timing as engine load increases preventing pinging or detonation.
Imagine you have a cruise control and it's set at 60mph. Everything is working fine, and you start to climb a hill. With a vacuum advance, the vacuum will start to dial back the timing as the engine load increases. The mechanical advance doesn't do anything because the engine is still going 60mph and it doesn't even know you are trying to go up a hill. We all know that to keep a steady speed when you encounter a hill it requires more throttle... and that tells the carburetor to put out a richer fuel mixture. The vacuum distributor is on top of all these changes and adjusts accordingly, while the mechanical distributor does nothing because the speed in our example has remained constant. Because of the non-response from the mechanical distributor, it often takes even more throttle to overcome the sluggish performance to get over the hill.
Set your timing and it will be as good as it gets, but think about changing to a distributor that has vacuum advance.
Just my $.02 here.................read on
Agreed....distribs. w/o vac advance on the street are just racer wanna be stuff.
Nothing but trouble tuning then to get livable street performance and "manners' out of engines running those things. I have friend with a 375 HP 396 Chevelle that is all rigged up for racing, it was very successful on the track, the car is just a HUGE PIA whenever he drives it on the street. Runs like crazy at full throttle but try crusing at steady speed, even at highway speeds with his racing gears in the rear, the thing just makes you want to scream it is so temperamental.


FUEL TANK REMOVAL
in Auto Body Repair
Posted
Did not realize there was 8 inches to play with. That might be enough. I guess that is why we talk on boards like this. You are saying...remove the straps, slide tank rearward then drop the forward end of the tank down and slide the front end of the tank under the rear end.
I have been stuck thinking that once the front of the tank had been lowered it was gonna be impossible to get the neck of the tank thru that last frame cross member w/o bending, manhandling, the neck. that option was just not on the table for me, didn't want to go there. Bending the neck was just not something I wanted to sign up for but if that is not required maybe I see a path forward w/o removing the pipes. Are ya sure the 8 inch rearward movement can be accomplised and that the neck can clear that crossmember after the front end of the tank is dropped to go under the rear end?
I know I have been over thinking this but I really am gunshy of fooling with the tank having never removed one. The more I dig into this the more I see options and I gotta thank everyone, especially those who have taken time to explain the "How its done" involved in this.
More later. Thx again.
Ray