The Archivist
-
Posts
53 -
Joined
-
Last visited
-
Days Won
1
Content Type
Profiles
Articles
Forums
Gallery
Events
Everything posted by The Archivist
-
Hey Ron, looks great. Was your trim molded plastic/chrome plated? Mine is and it keeps coming off along with whatever junk adhesive glue. Was that original to the 70 models? And for the record no bullet caps were used on the 70 model?
-
Great looking Monte! Yeah the pieces fit fine (molding) wise, they just come off in warm weather, and the sticky glue residue is a PITA. Thanks
-
I bought two repro Bucket seats for my 70 monte. The side trim and lower bottom, trim comes off in hotter weather, the glue used softens is a mess. Its chrome plated molded plastic trim. No bullet end caps. Was this correct for a 70? If so what is best adhesive to get these trim pieces to say put? Thanks
-
 No idea. It was fine then suddenly outta sync. Happy New year!
 -
Mark, thank you big time that was it! There was an adjustment bolt on the driver side was very loose and it had about 1" of play in it allow for the shifter to slip anywhere in between the slot on the chrome plated shifter structure. I put it in the park position and tightened that bolt (pretty easy to access from top wit the top plate off as you guys pointed out) to very firm and now its lining up on both the console markings and the speedo indicator. Thanks all!
-
Im also wondering if that is the issue. It just seems odd that that they would go splitting that fast. The top biscuits look normal and not cracked I'm wondering if I could just remove and replace the bottom ones that look crushed. I hope the new bolts would come out easy and not spin a j-nut. I think I recall blasting PB blaster up in the open holes after we had the bolts out so it would stay lubed up in there for the new bolts.
-
It was from OPGI, this kit iirc https://www.opgi.com/chassis-suspension/bushings-mounts/1964-72-complete-body-bushing-kits1/bushing-kit-body-1968-72-chevcut-cpeel-cam-26-bushings-whardware-sb516k.html. The top biscuits look normal not split but some of the bottoms around the passenger driver areas are starting to split some as you can see in the pictures. Not sure what to think. I'm wondering if anyone else has run into this.
-
Copy that and thank you! I'll look and see if can find the right adjustment from above and try and tighten? I'll report back in the AM.
-
I replaced all my 70 Monte body busing 2yrs ago. Including the 2 real wheel area extra "SS" or Wagon/Camino bushing cakes. I went with the rubber kit from OPGI. Is it normal for a garaged car (a Sunday driver and in only good weather) for the rubber on the lowers on some spots to already be cracking? I'm very surprised. Makes me wonder if I should have gone poly or if the remnants of the copious amounts of PB blaster we sprayed (and let set for 24hrs on the old bolts) has caused rubber rot? See examples https://photos.app.goo.gl/CeWkgaQddLBdRTBWA
-
Copy that, I will check there. Is there an adjustment for the shifter once you open the access plate?
-
Thanks guys! I got the Monte on the rack. I could not find anything loose or a missing cotter pin on the tranny body cable area etc. It all was tight but I'm no expert by any means. Also the nut on the column rods that are under steering by the outside firewall area were tight as well. No idea what's going on. The shifter basically seems like it slipping. e.g. on the way back from getting it on the lift the console floor shifter landed correctly in drive and park. So it really varies but no matter what the console shifter displays as long as the speedometer indicator says drive your in drive or reverse and so on That's what I use to tell what gear I'm in, I just ignore what the console indicator says as it keep changing Should I be looking into the console access plate area now?
-
Hope you folks had a good Christmas. So its a new rebuilt tranny install and cable so I hope it hasn't stretched and worn that quick. About 1000 miles on it max. I joined back in 2016, I didn't realize dues paying options had come into play. I'll look into it. In the meantime I'm getting the monte on the rack tomorrow and will try and figure this out and will report my finings directly. Thanks!
-
So it sounds like I'm needing to inspect from under the car on the driver side of the tranny. Ill look for any loose or a missing clips. I assume there should not be any play at this location? This clip at 7min in. This is the adjustment area you are speaking of? Thank you big time for the help and advice. I'm going to have another crack at in the AM.
-
Would this adjustment be from the top inside the car console plate removal to access? Now with grounds I have grounds from engine to the frame. But I don't recall a ground on this center console shifter. Or a frame to body ground when we put 14 rubber new body bushings in for the frame. Are you saying to make sure this console shifter and the transmission itself have a ground wire to the frame somewhere?
-
Thank you MCI, so to be clear the "adjustment nut on the trans selector bracket" is that adjustment on and right off the transmission itself? There is the other adjustment on the other side of the firewall under the pedals were a metal arms goes into an adjustment style bolt. To be clear the speedometer indicator is correct when it says its in park its in park but the stock style console shifter are landing on any number of positions Drive, Reverse before you get a speedometer indicator reading of Park. It seems like the console shifter is slipping? If I'm understanding correctly there are two adjustment you can access from inside the car once the console shifter plate is removed and then there is another adjustment under the car on the transmission itself? I'm no expert on this obviously so thank you all for your patience with my questions.
-
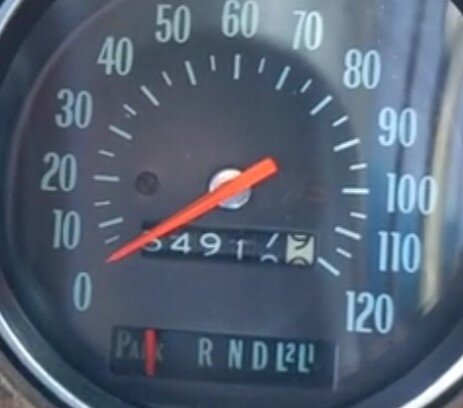
I have a 70 Monte Carlo with a stock center console stock style shifter. It was converted from a column shift so the speedometer shifter indicator window was kept. The console shifter started to not align suddenly. Drive could be park, Reverse could be Low1 etc. It changes. The only way I can tell outside of the feel what gear its in is to use the speedometer indicator window which stays correct. So if it says park it is park on the speedometer indicator window but the console shifter could say Drive or Reverse, low 2 etc. What could cause this sudden change and what adjustment should be done? I recall an nut bar adjustment on the firewall (under the brake pedal area but there was IIRC an adjustment on the tranny. In my case its a new rebuilt r4700 with beefed up internals. Thanks for any help!
-
AC evaporator coil replacement for 1970 model
The Archivist replied to The Archivist's topic in General Tech
It sucks bc the AC was basically all redone, new compressor, hoses, R coolant etc. When we pulled the engine and repainted the bay I should have replaced this coil then but I assumed it had already been replaced (the exposed coil lines all looked new) as the AC was perfect before the engine swap. Makes me wonder if I should replace the heater coil while were at it??? -
AC evaporator coil replacement for 1970 model
The Archivist replied to The Archivist's topic in General Tech
Glen, I had the same exact thing. I noticed on the frame around the new upper bushing a milky colored substance pooling right after we stopped driving just like your pic. My friend who installed the new motor and rebuilt tranny was there with me and said AC evap had died. And its a pita job. I also noticed it stopped cooling right before we saw the fluid on the frame. -
AC evaporator coil replacement for 1970 model
The Archivist replied to The Archivist's topic in General Tech
Thank you. This helps. -
AC evaporator coil replacement for 1970 model
The Archivist replied to The Archivist's topic in General Tech
Copy that. Thank you for the tips. -
AC evaporator coil replacement for 1970 model
The Archivist replied to The Archivist's topic in General Tech
Can you do it without that well removal? The tire is no biggie but the wheel well housing will be a pita. Its a new wheel well housing so not dried out plastic and less likely to crack if I have to go that way. -
I had my AC evaporator coil go bad(leaking out fluid) in the suitcase next to the engine which is tight space with our new ZZ502 motor installed. Any tips on how to get into the suitcase to replace the coil? We got a new coil from the parts place. The AC was working fine before with a new compressor and hoses. Thanks for any tips!
-
HEI distributor conversion and wire identification.
The Archivist replied to The Archivist's topic in Electrical Tech
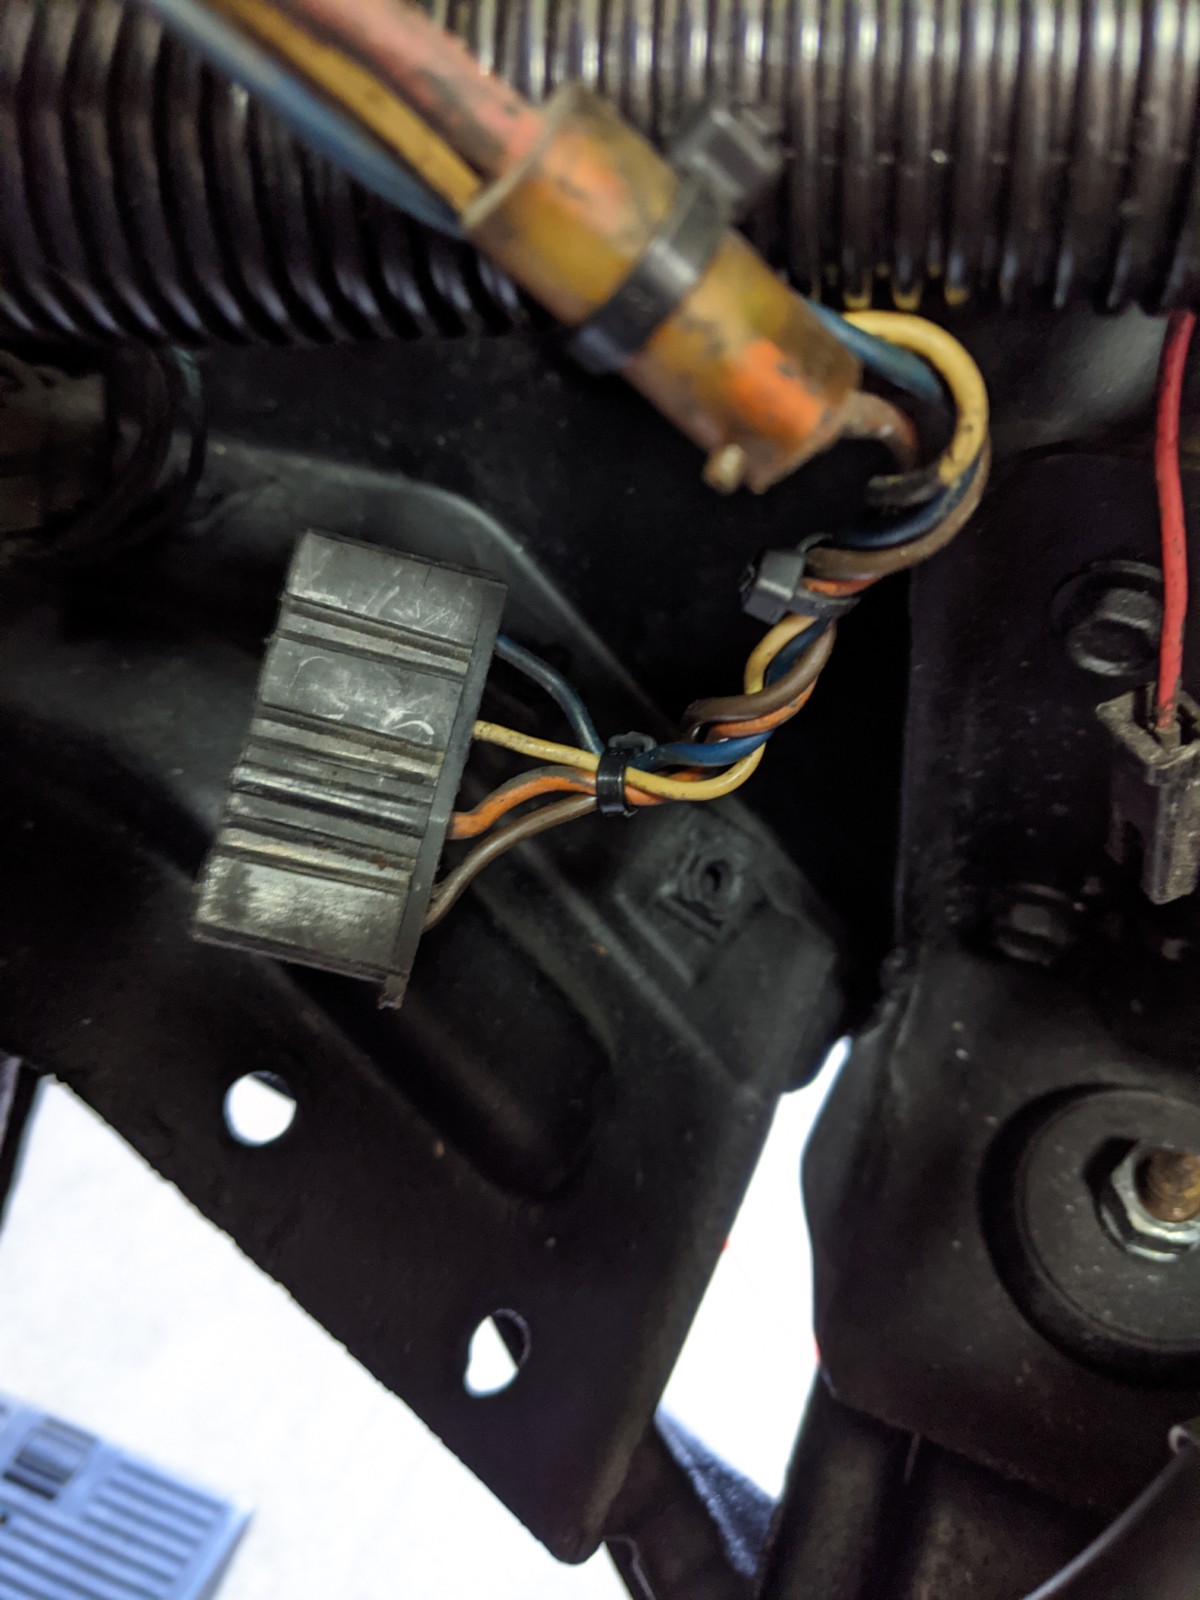
Also these two wires brown and red brown (in the center) went to the tach and the red to the Holley carb. Im adding a connector the brown for the tach on HEI dist and I assume the red goes on the new Holley 870CFM in the crate engine.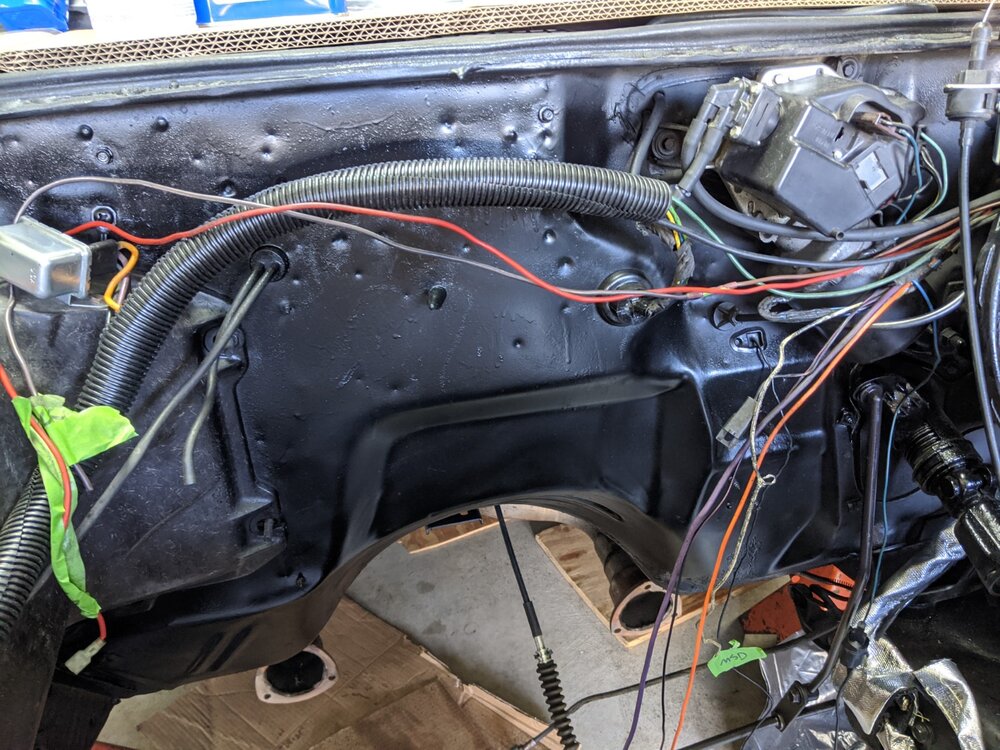
-
HEI distributor conversion and wire identification.
The Archivist replied to The Archivist's topic in Electrical Tech
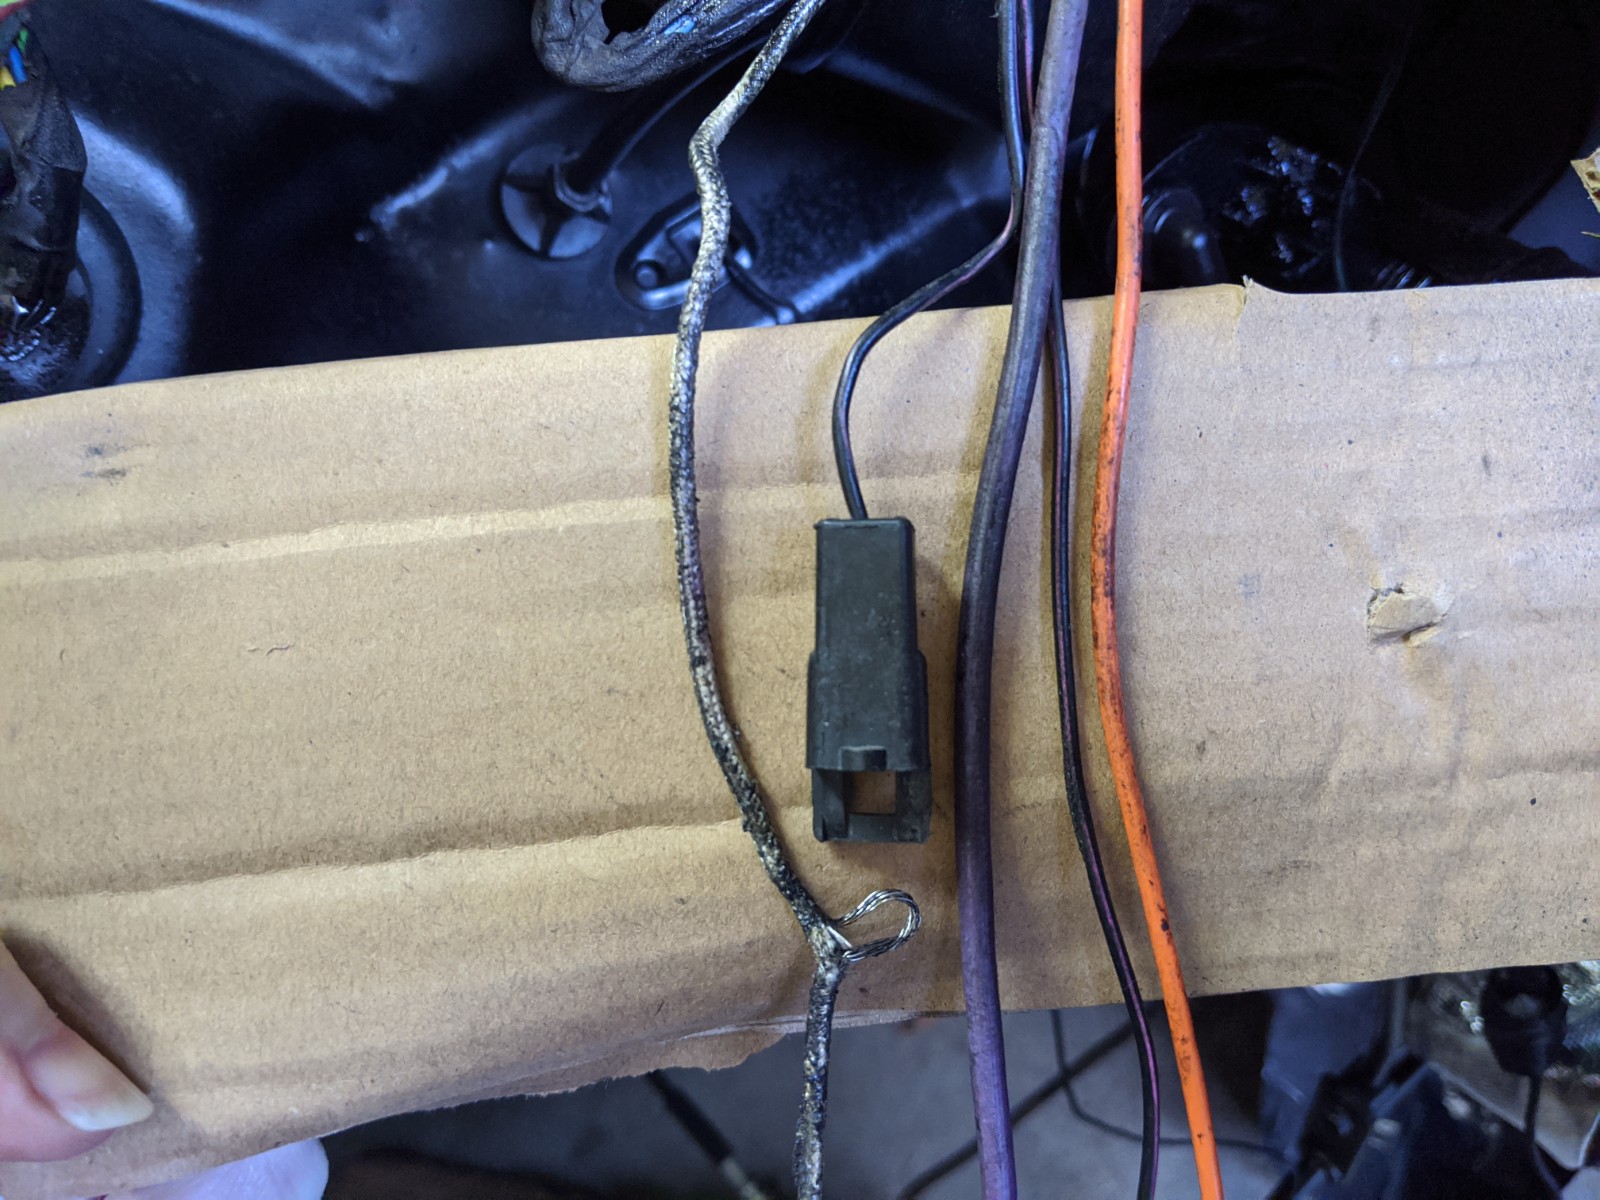
Thank you guys this helps. So this just leaves the white nylon like cloth wire to identify which was tied into the MSD 6A box. The large purple we know goes to starter now. Im hoping this last odd white wire is the 12v that goes to the new HEI on the crate ZZ502.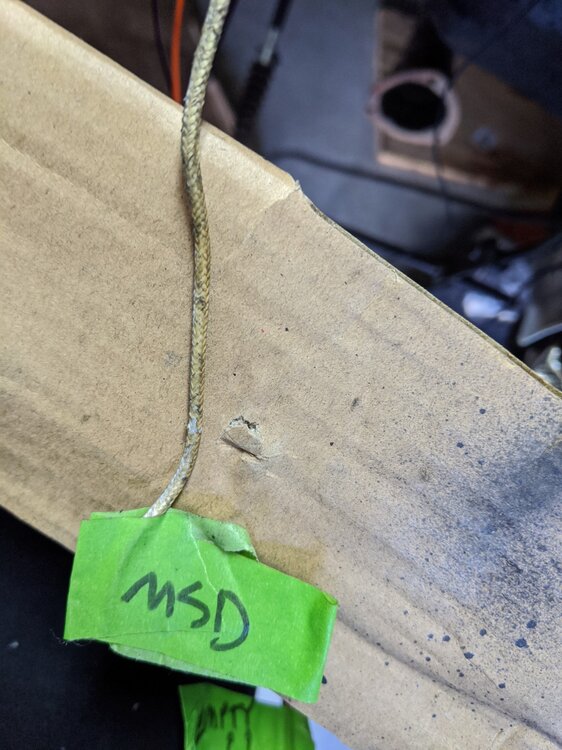

-
HEI distributor conversion and wire identification.
The Archivist replied to The Archivist's topic in Electrical Tech
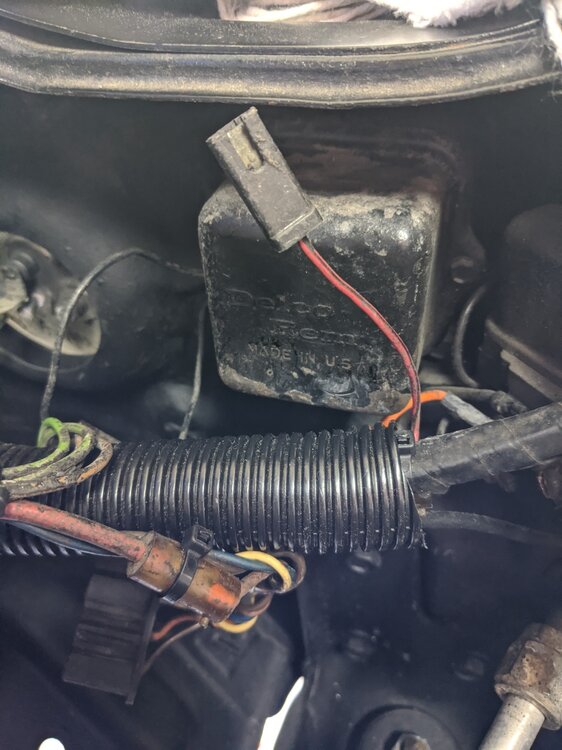
Part 2: Were also trying to understand what this one red connector went to (see pic) and why the voltage regulator (AC Delco box) had the large 4 wire connector removed. The car operated fine without these two plugs engaged.