

Mike C
-
Posts
49 -
Joined
-
Last visited
-
Days Won
3
Content Type
Profiles
Articles
Forums
Gallery
Events
Posts posted by Mike C
-
-
 On 1/17/2023 at 2:56 PM, Mike C said:
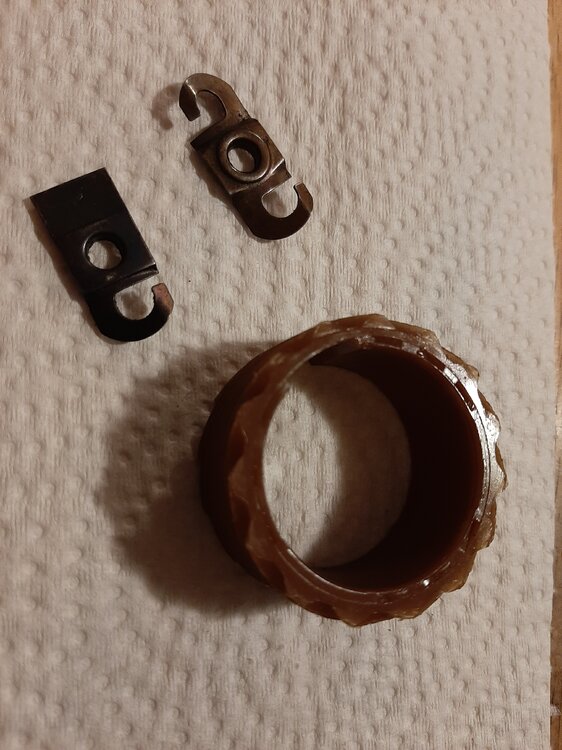
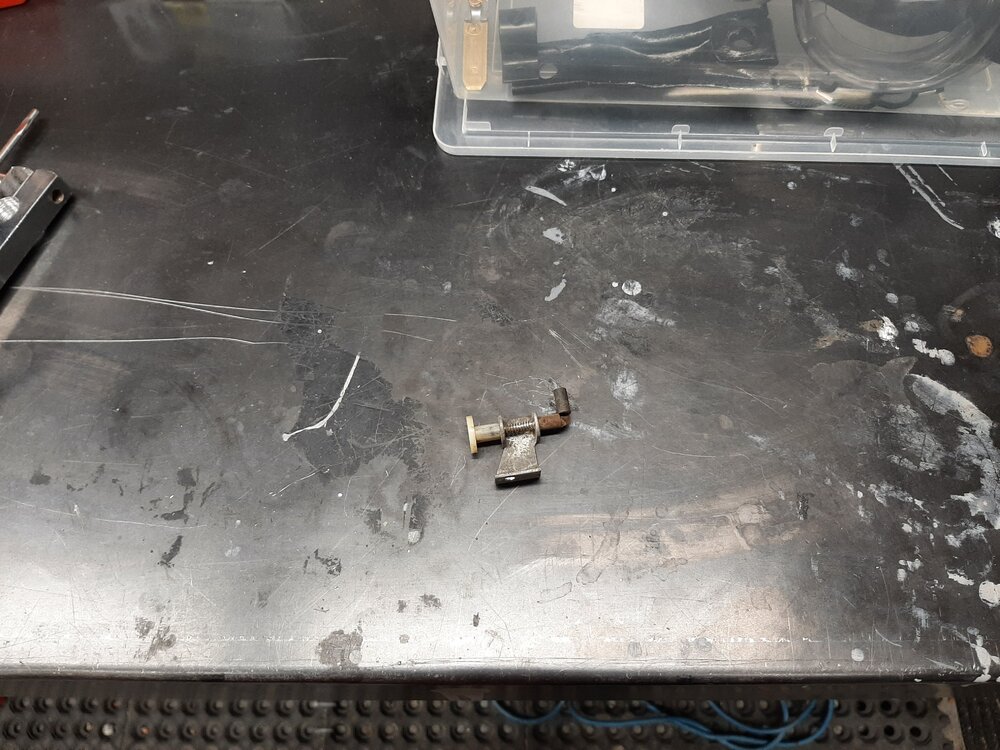
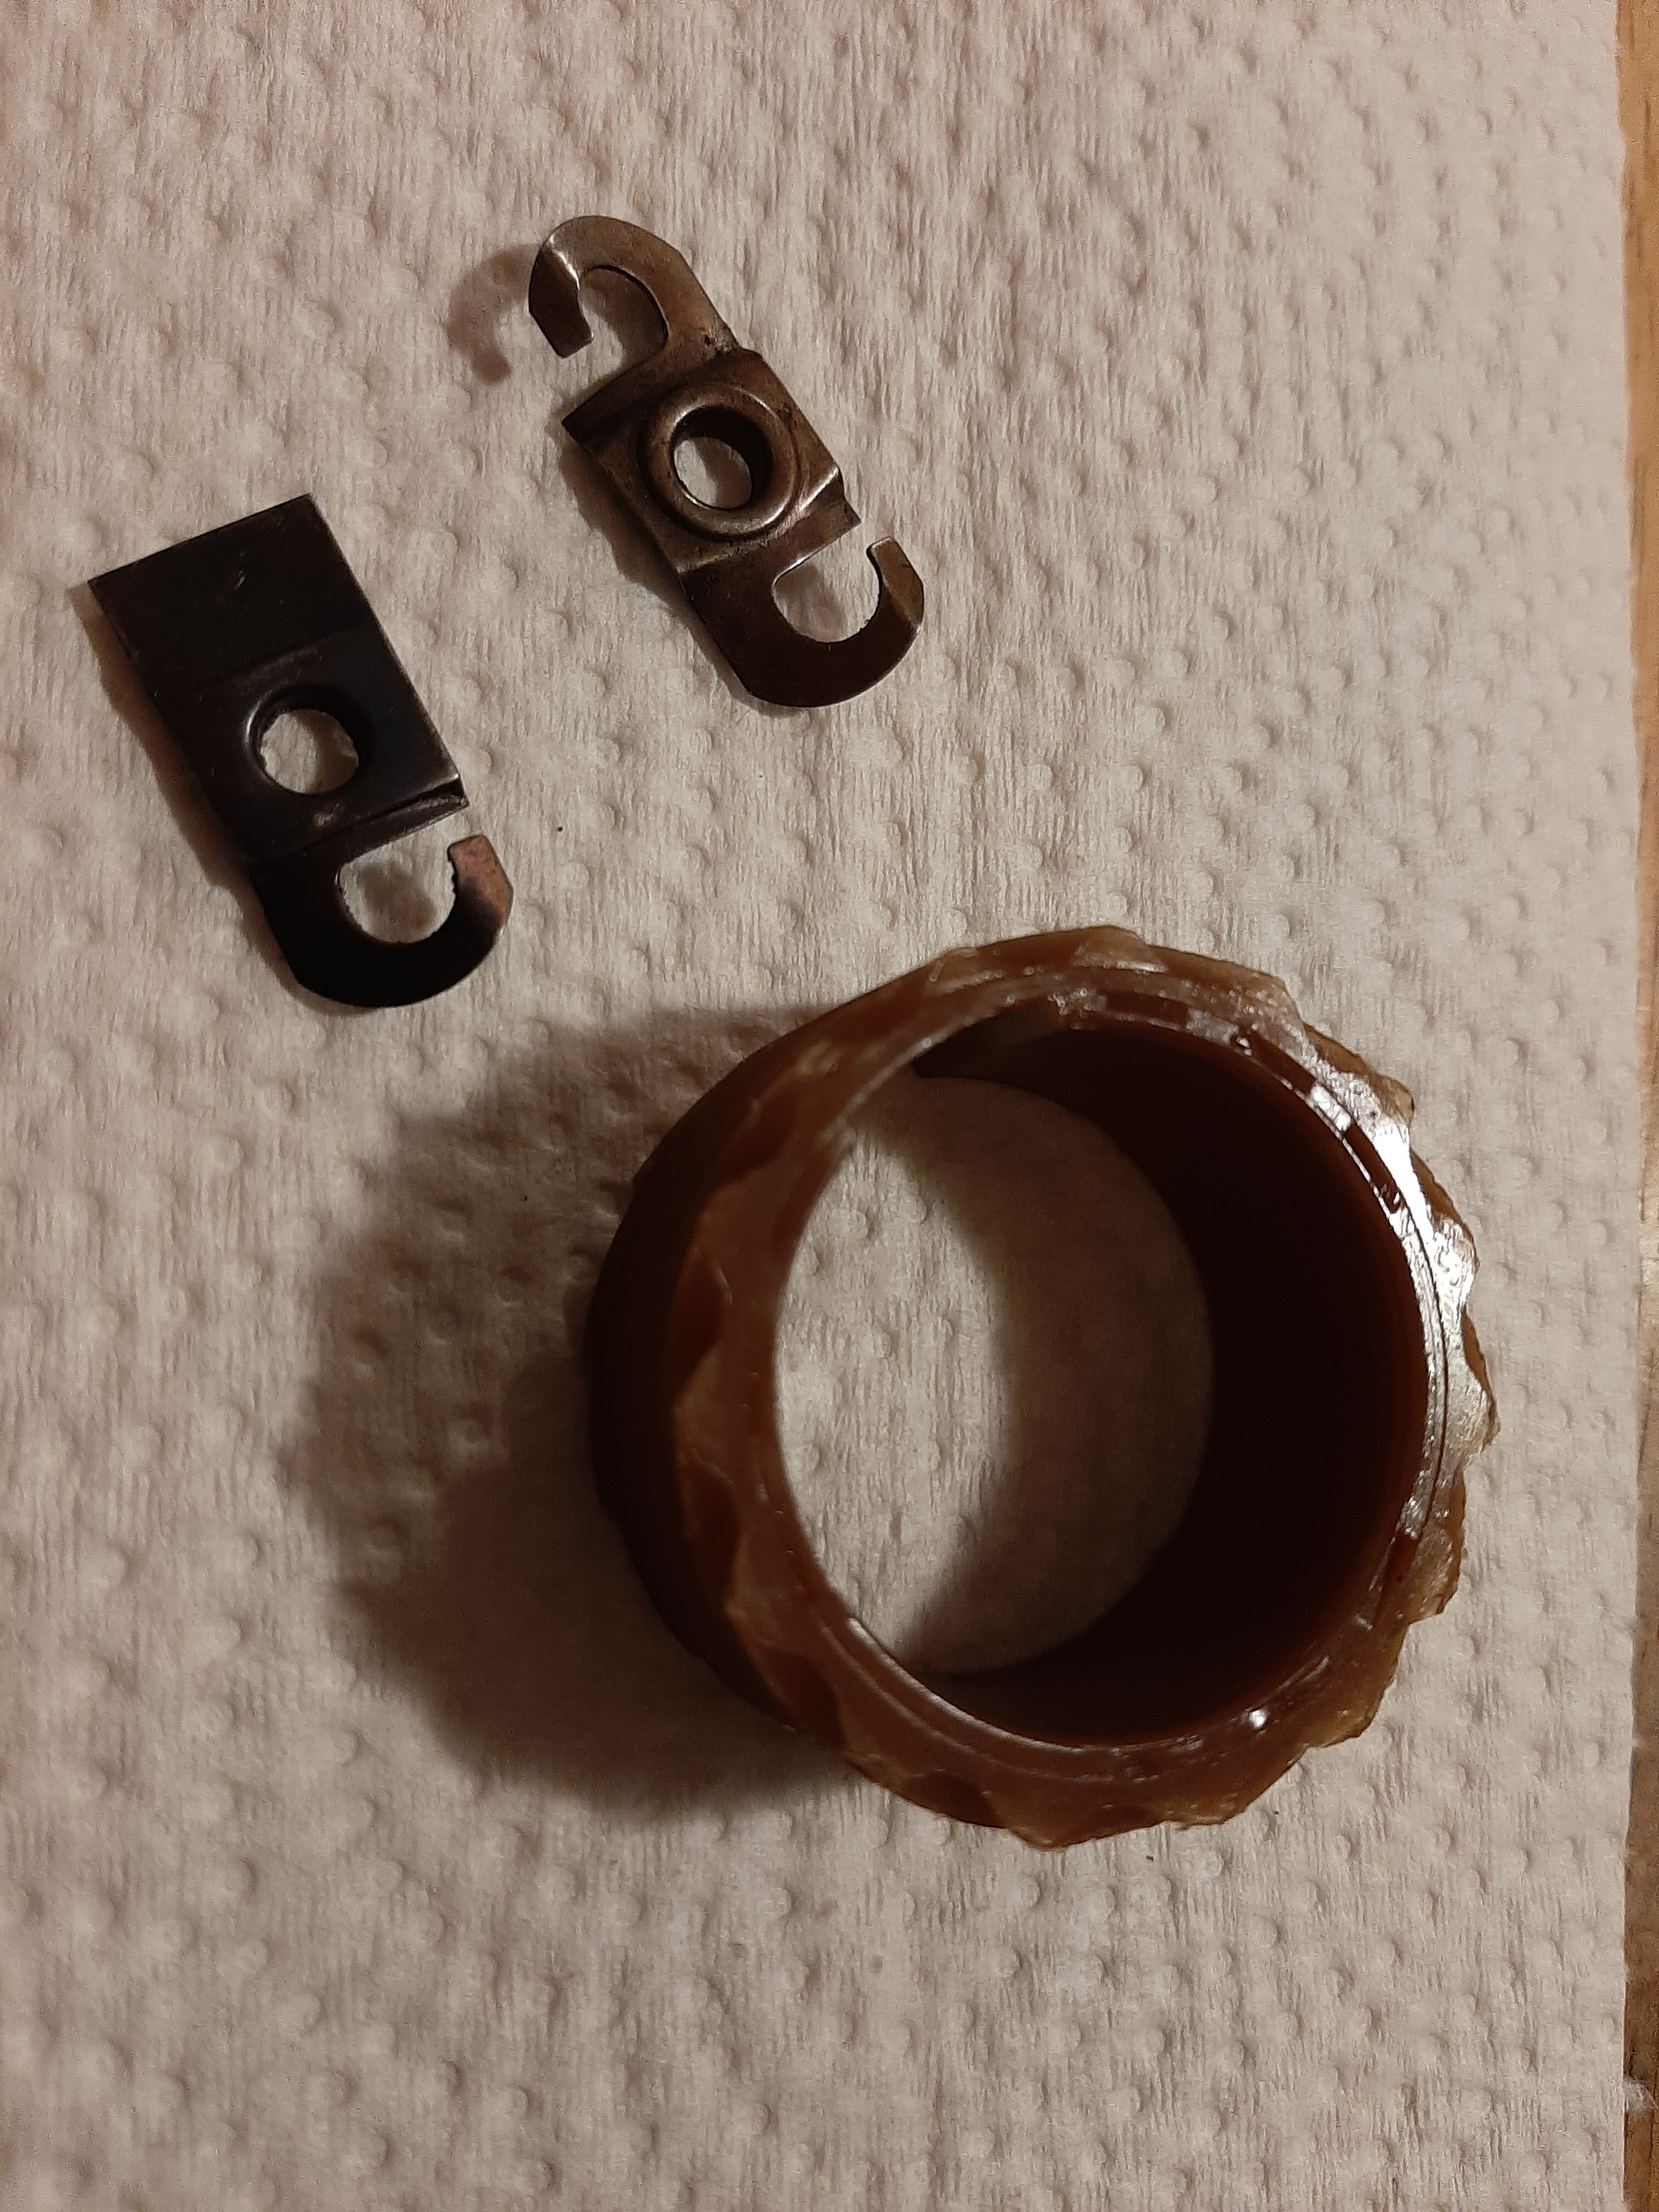
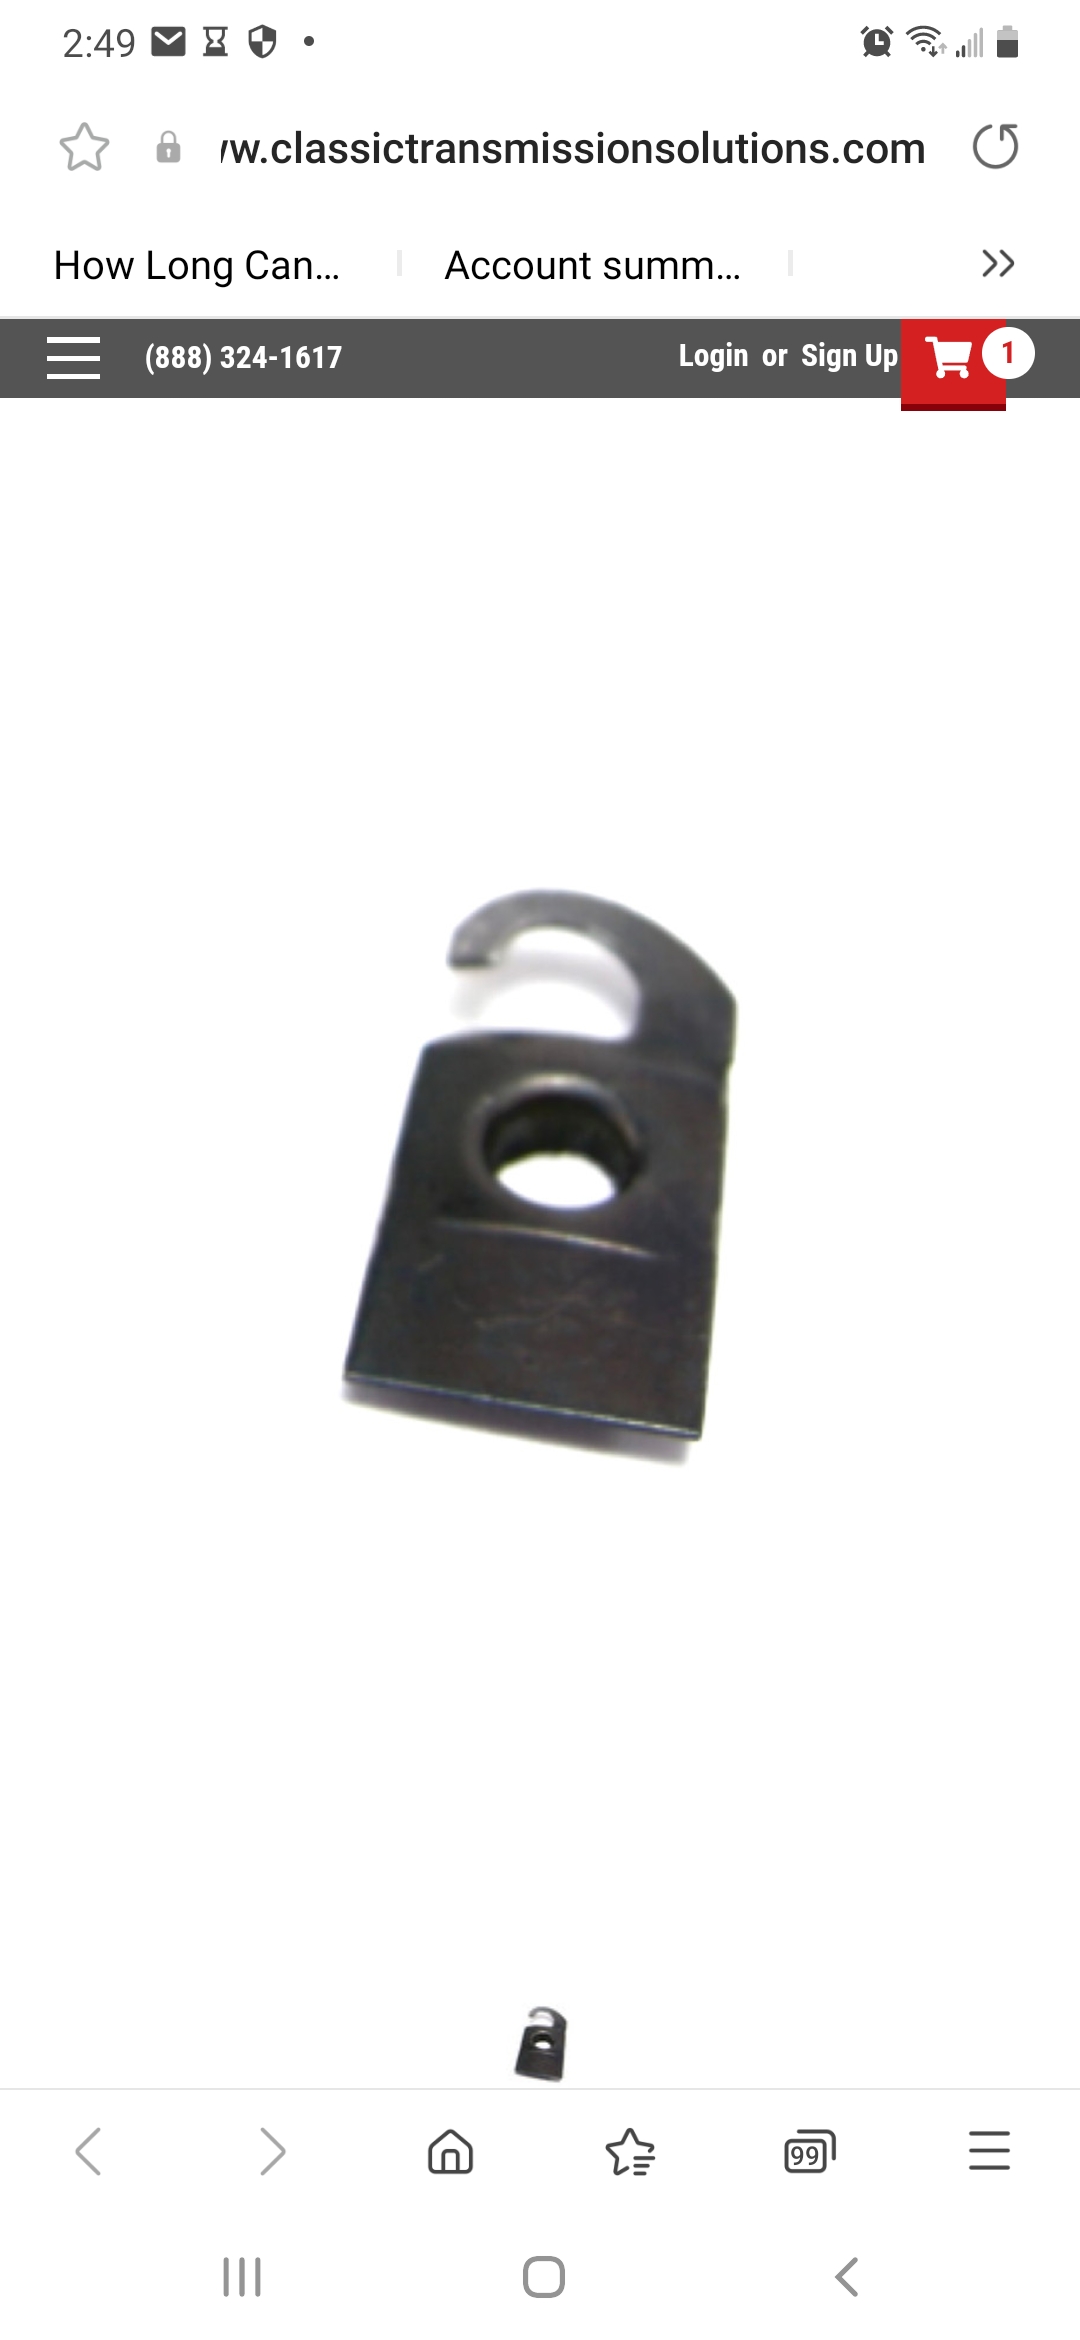
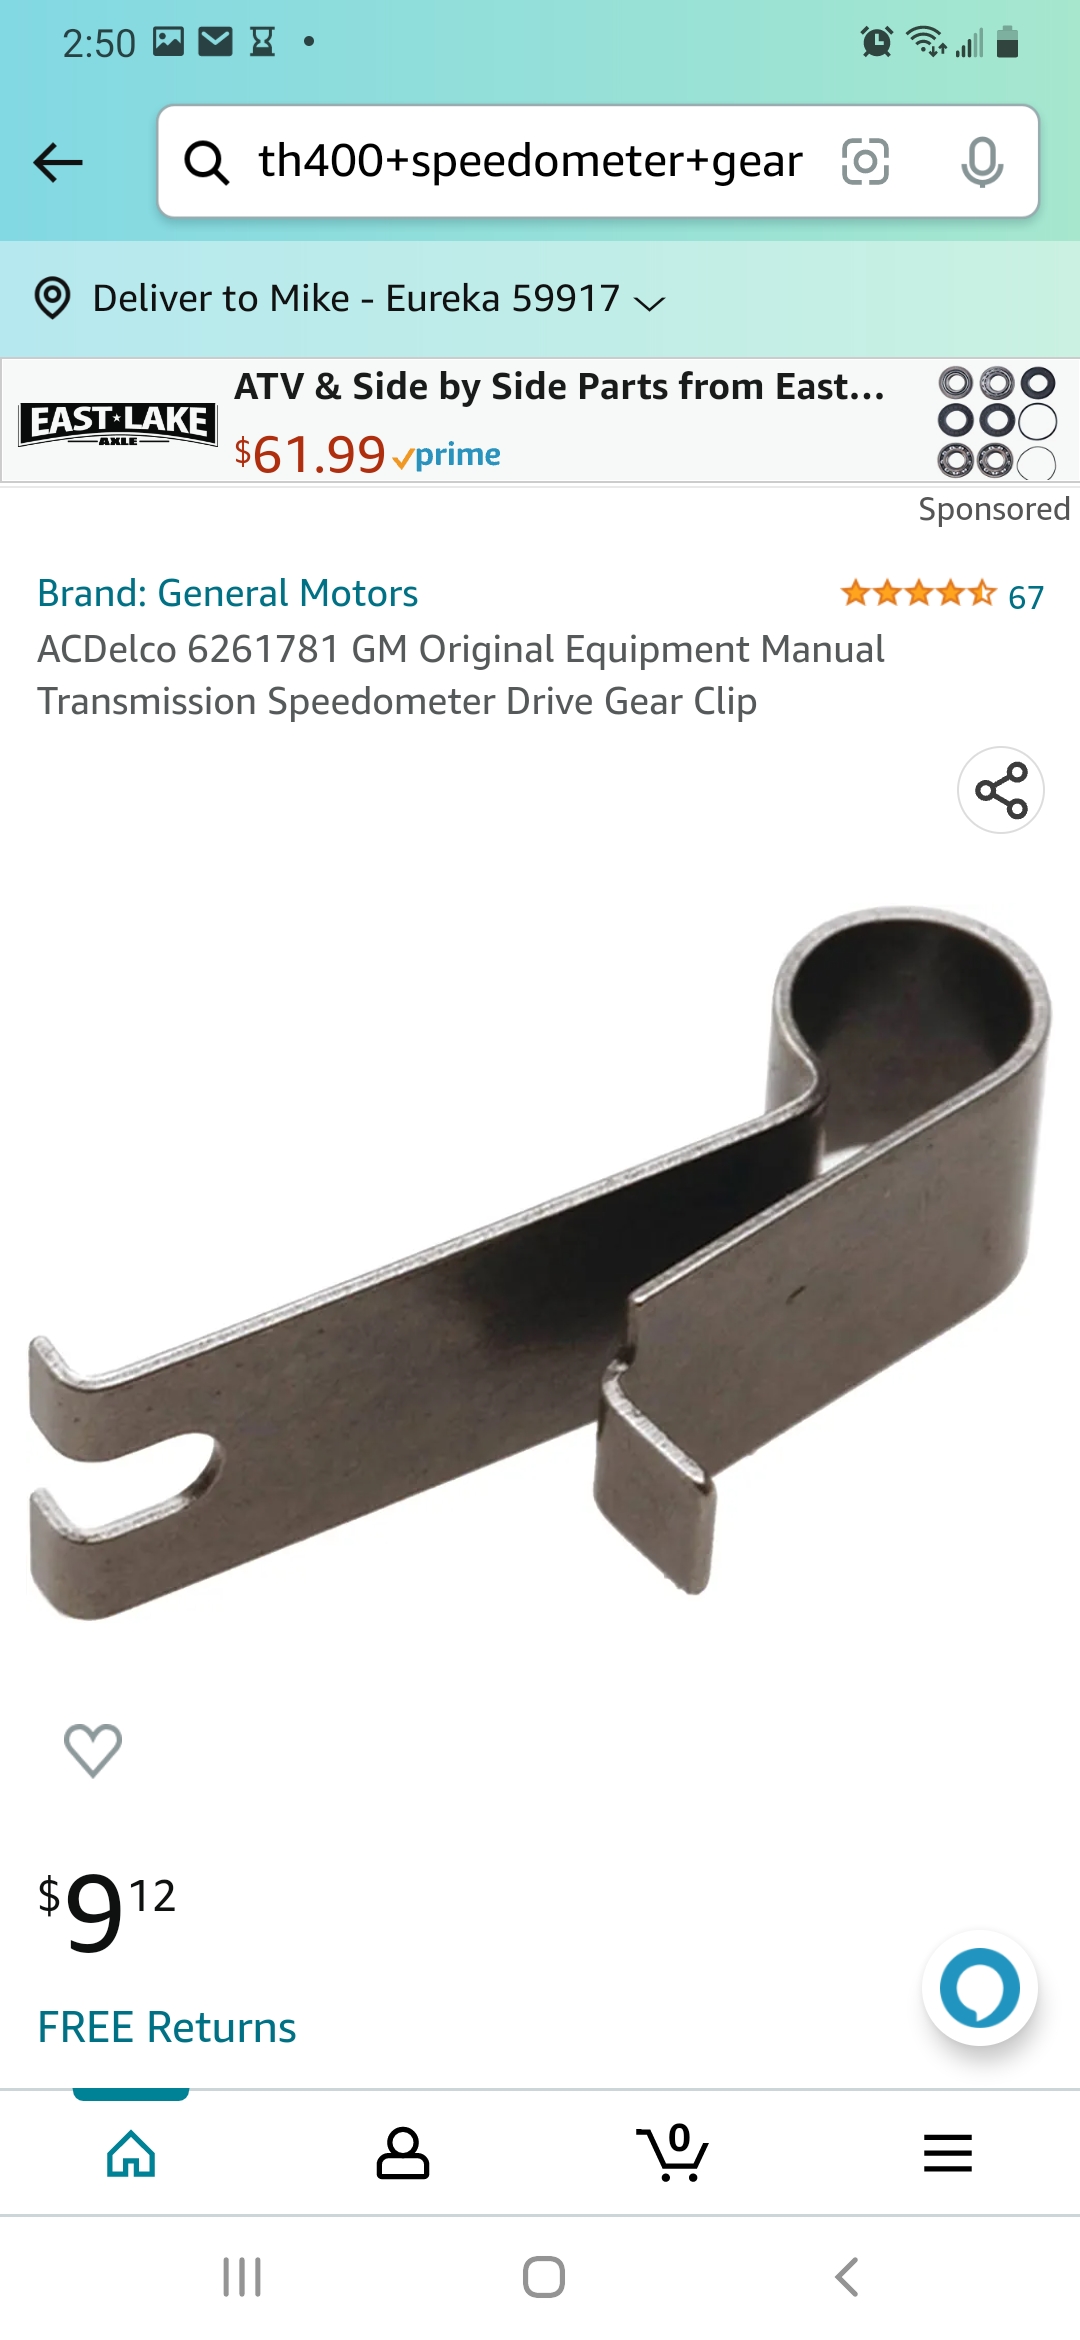
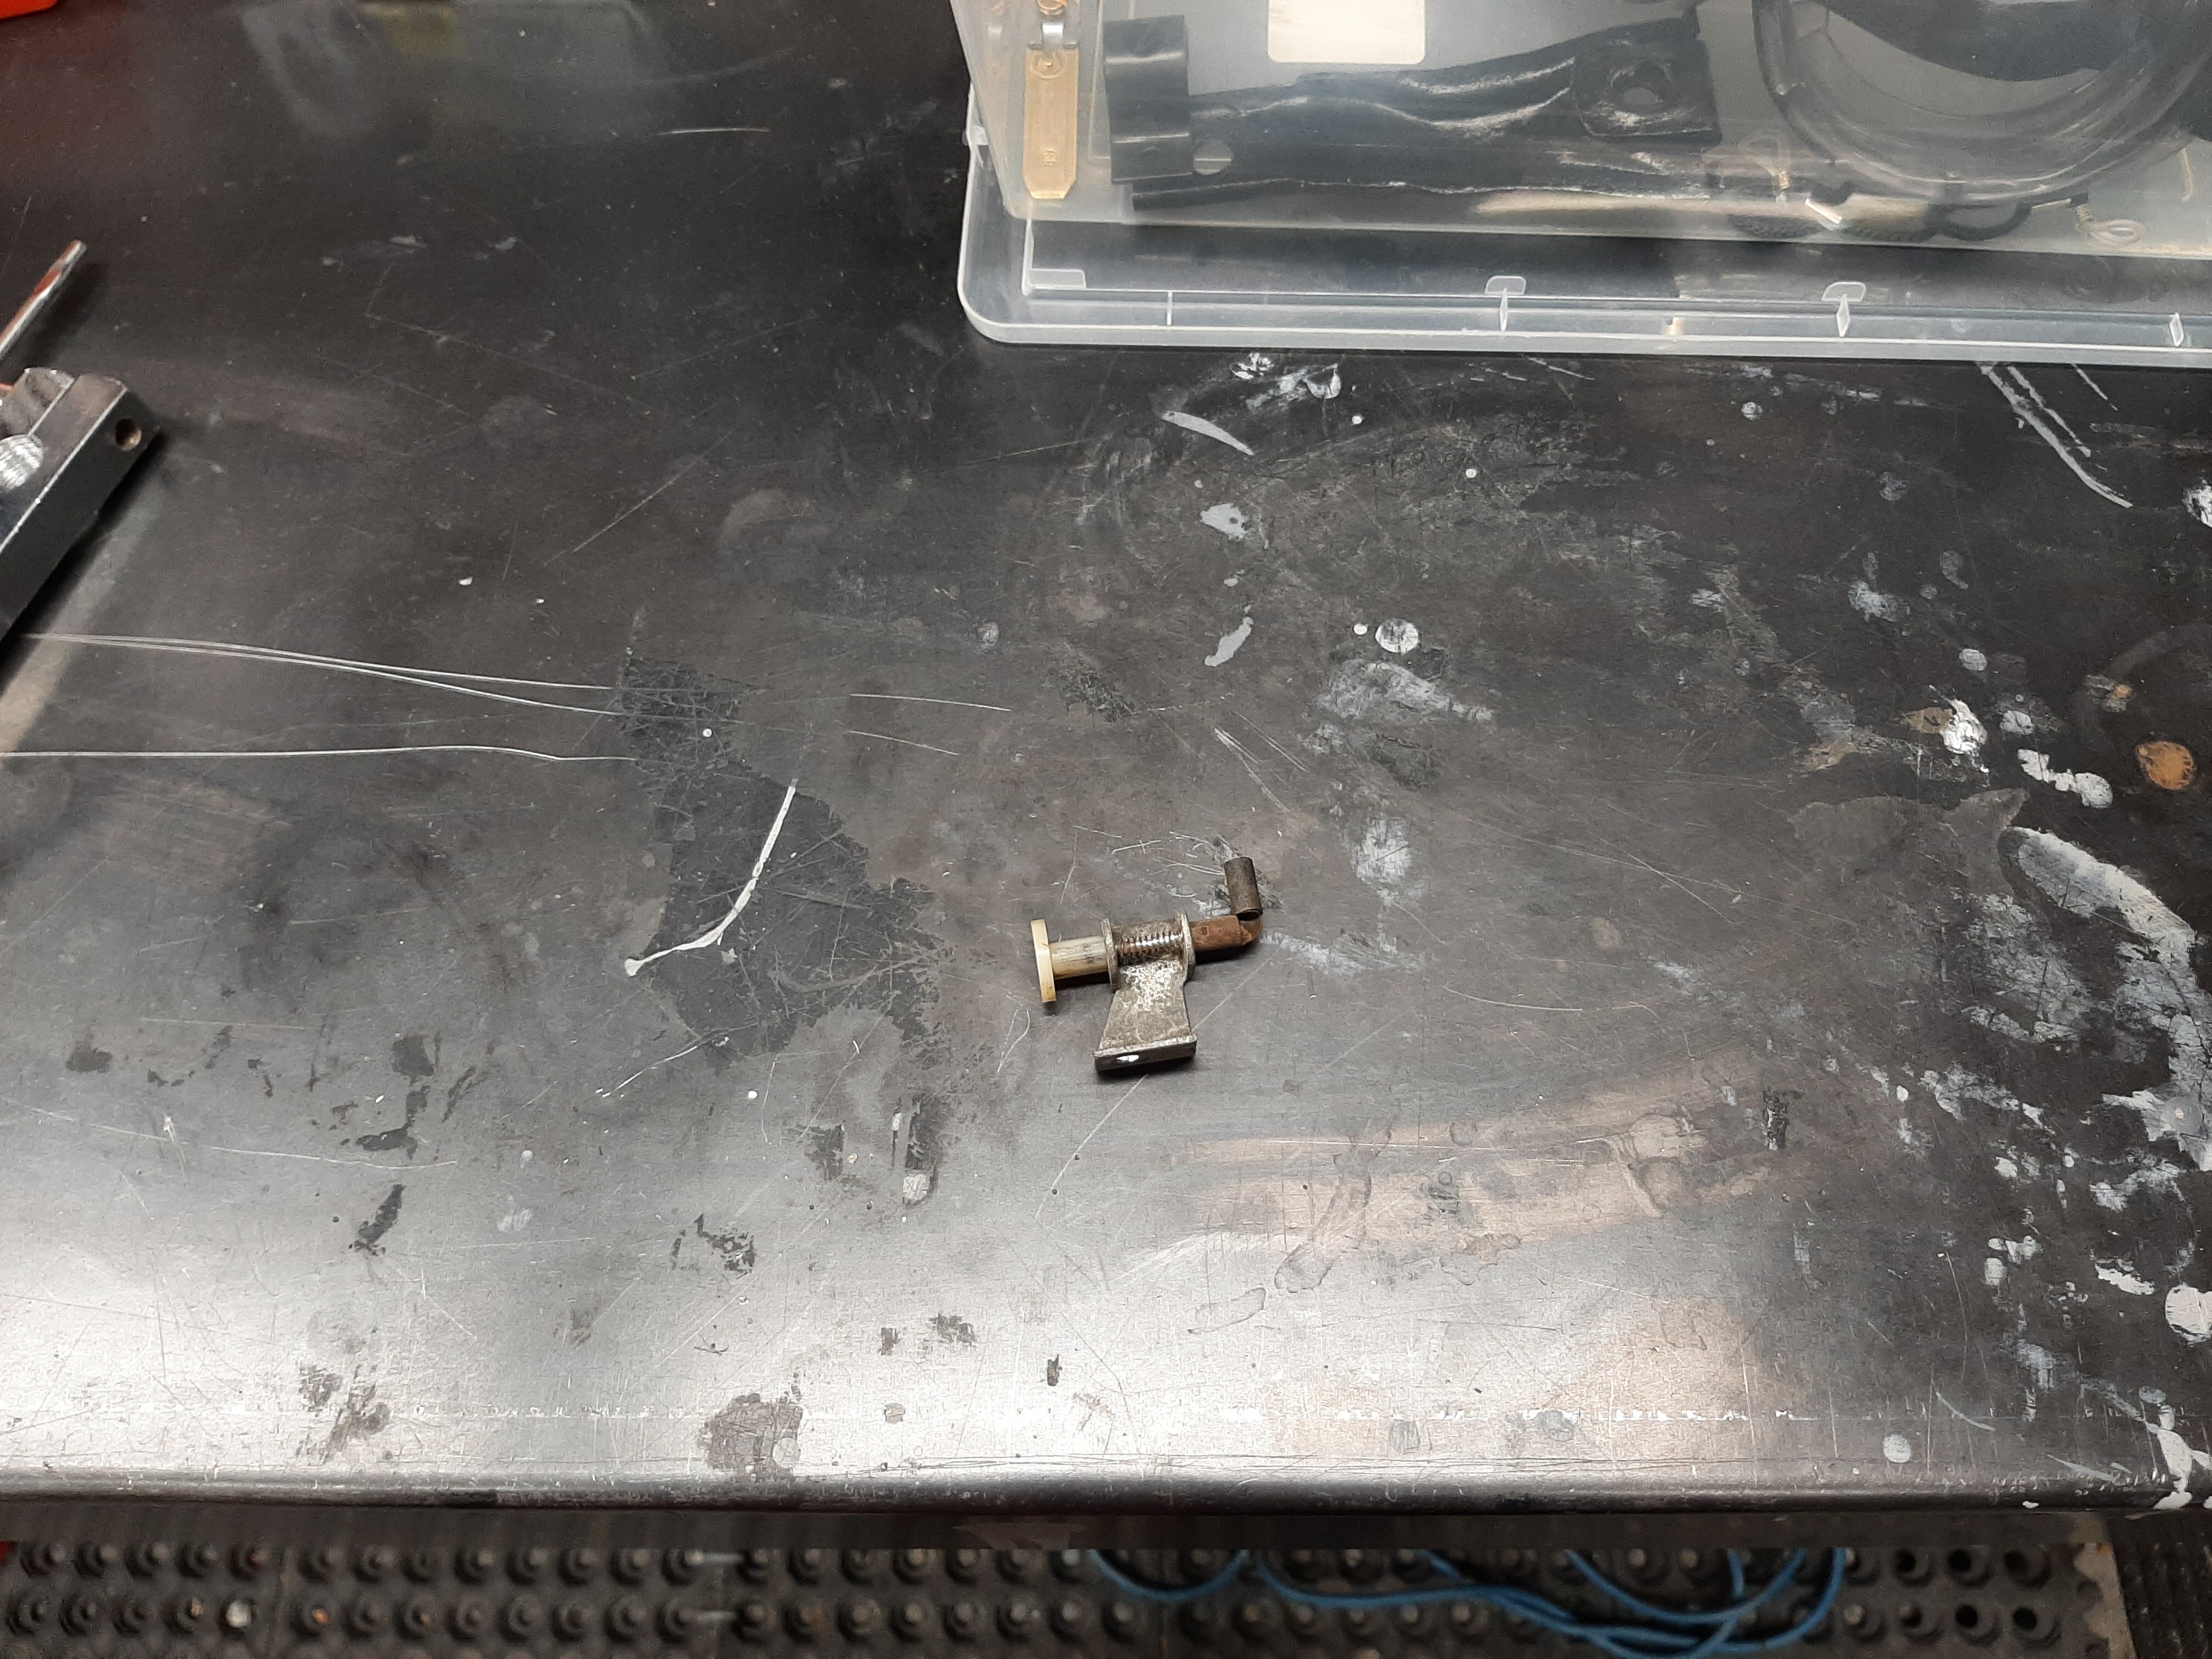
Thanks for the info. The clip for a TH400 is a little bit different than the one for a TH350 transmission. The mounting slot in the drive gear itself is also different. I'm waiting for a call back from the local transmission repair shop in case they have one.


Found the clip. Talked to a guy that knew a guy that knew a guy.
Turns out he builds high performance engines/transmissions.
Thanks everyone ☺
-
 2
2
-
-
Thanks for the info. The clip for a TH400 is a little bit different than the one for a TH350 transmission. The mounting slot in the drive gear itself is also different. I'm waiting for a call back from the local transmission repair shop in case they have one.
-
Thanks guys took me a while to get to the job. Missing the clip that keeps the gear from sliding along the shaft. Now the search begins to find one. It's for a TH400.
-
2
-
-
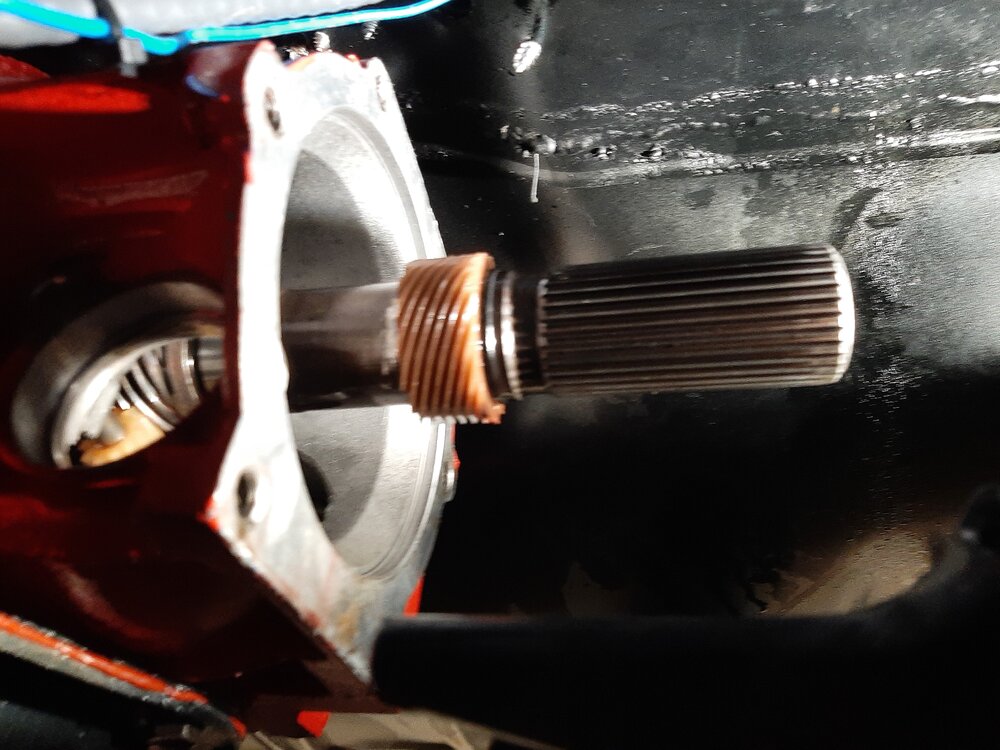
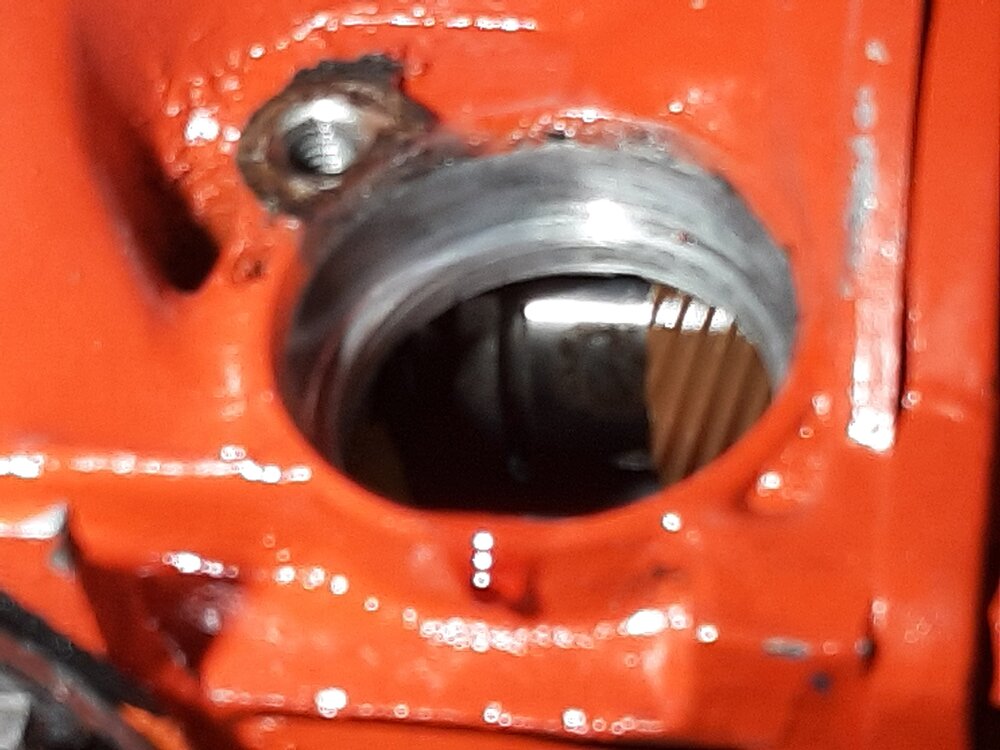
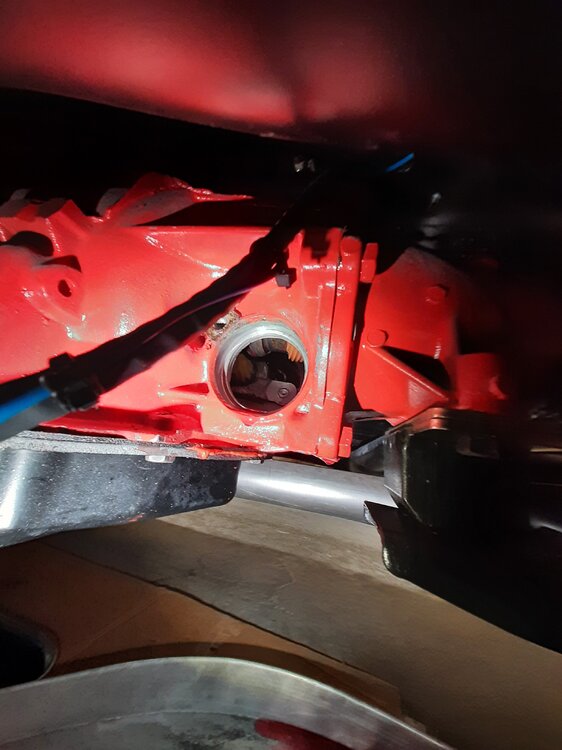
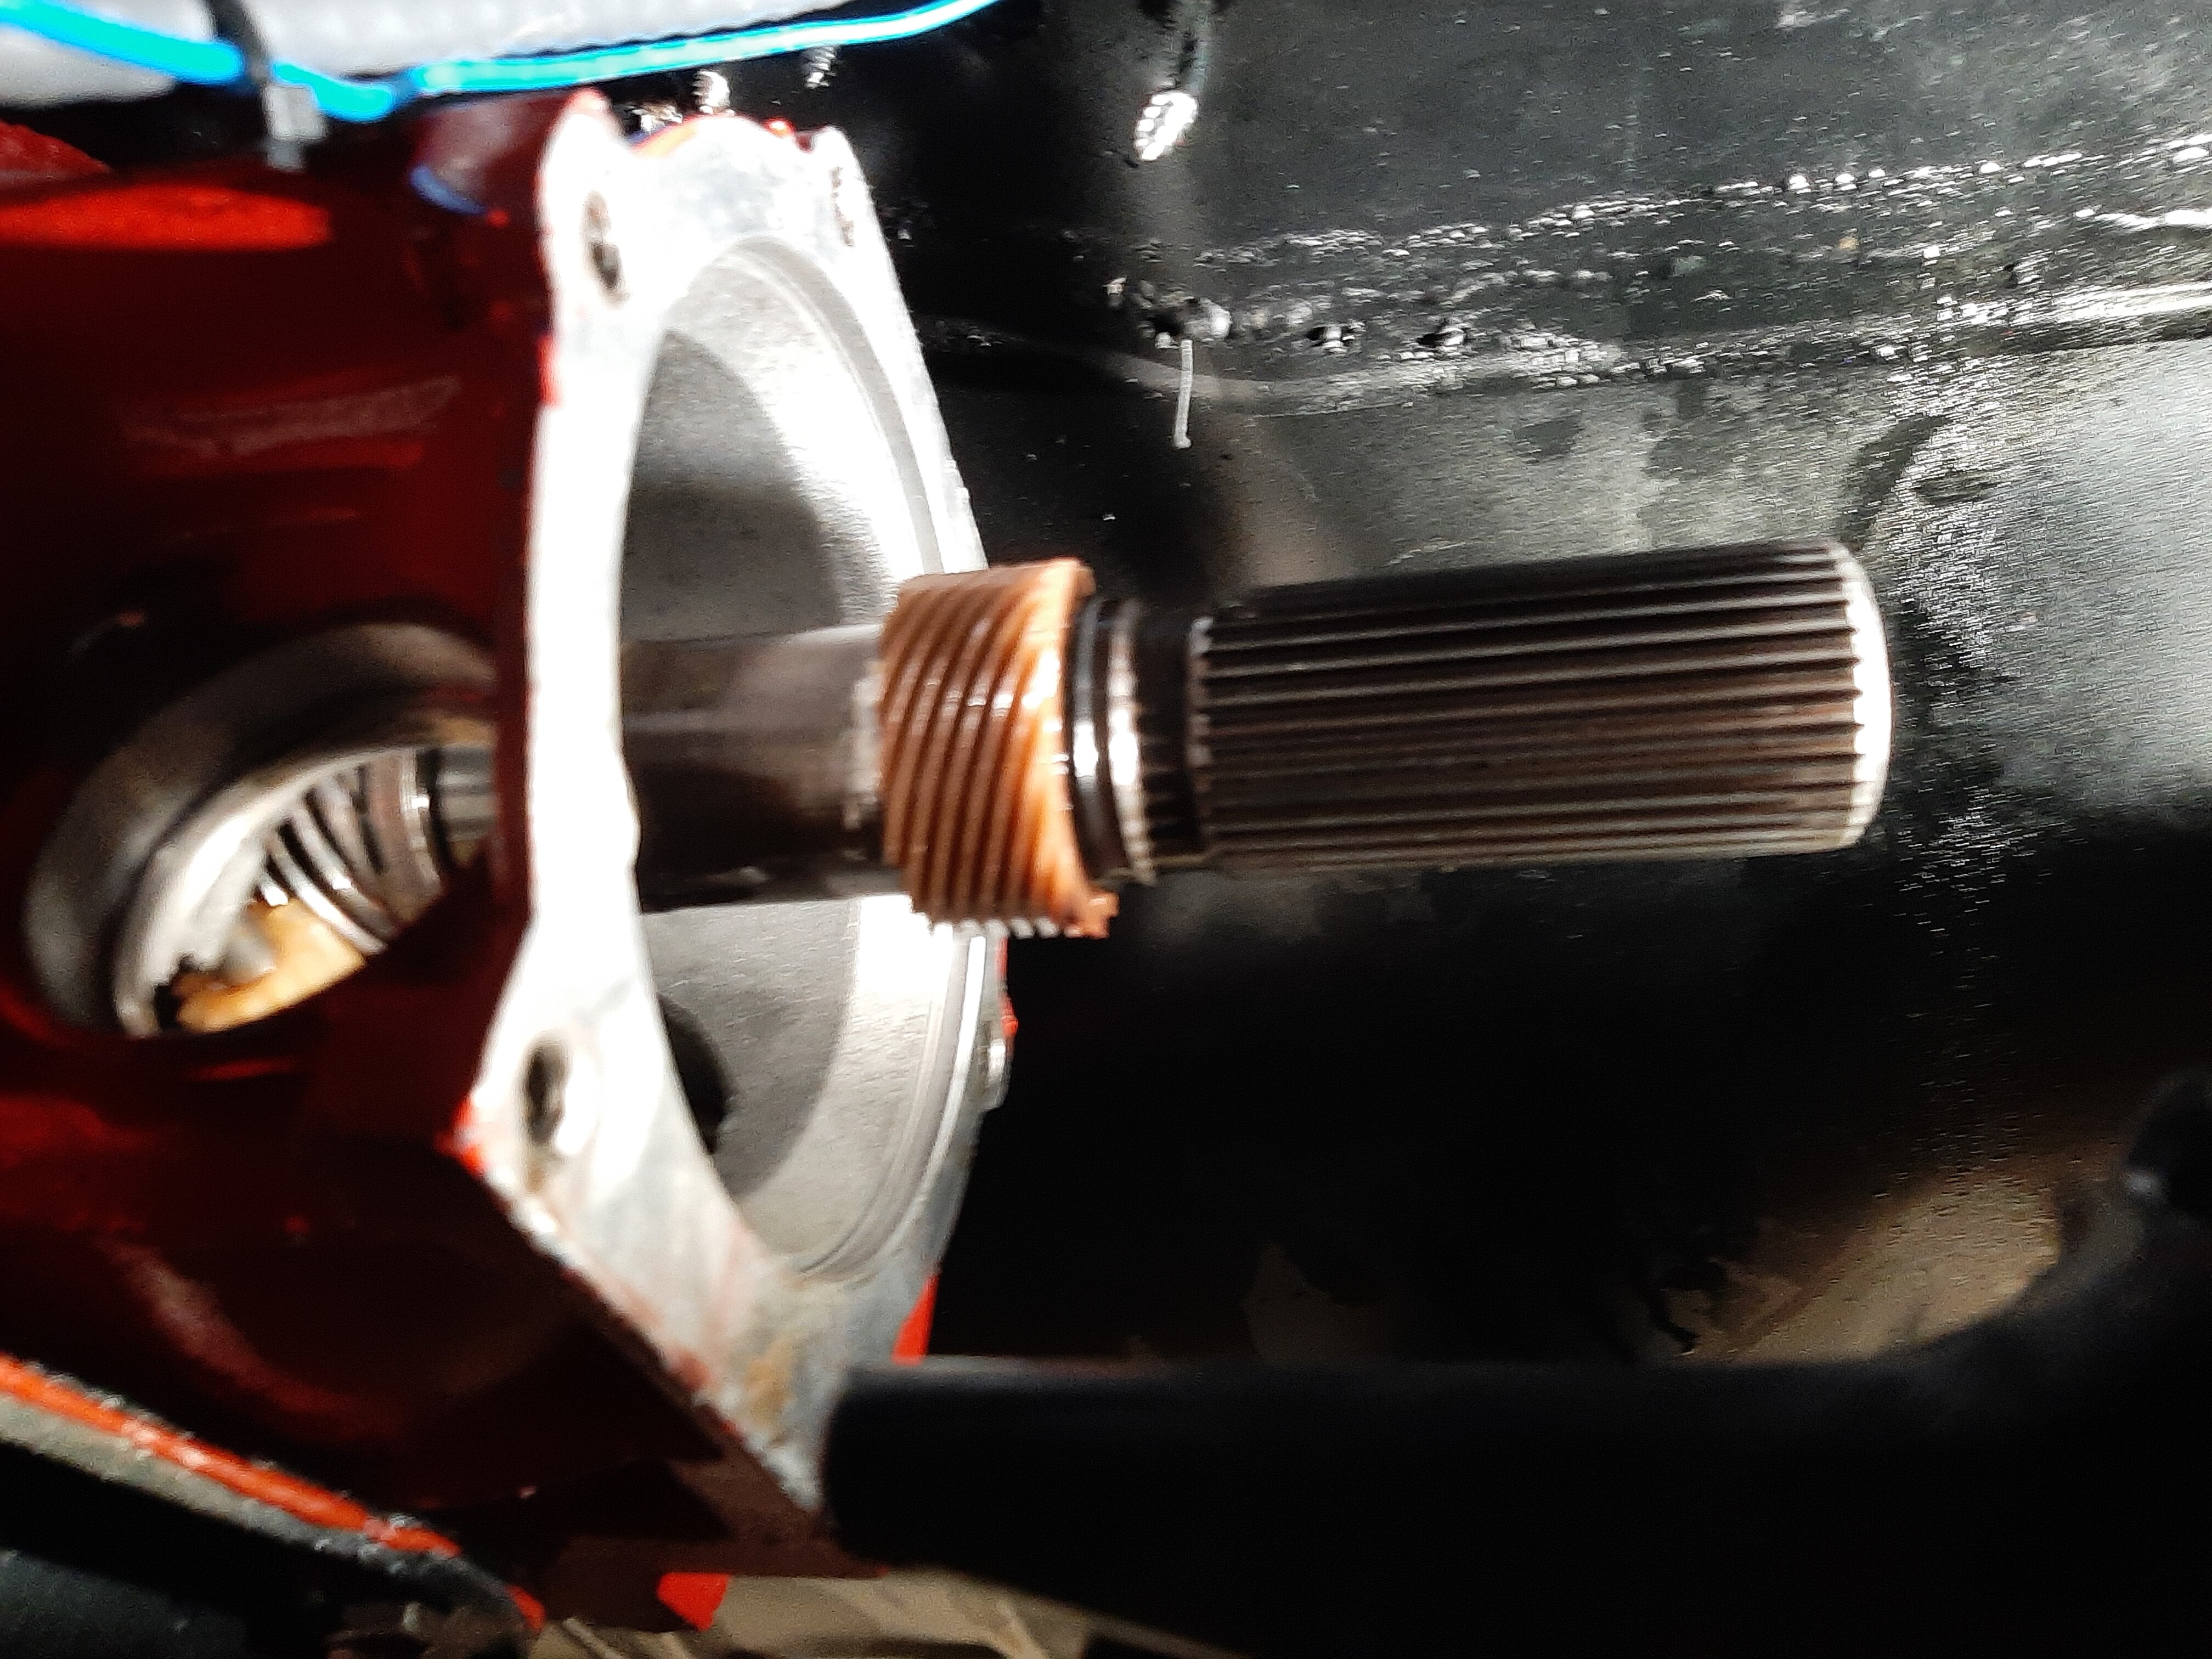
Speedometer dosen't work. Put a drill on the transmission end. Speedometer had movement, indicating that the cable was ok. Checked the Speedometer end of cable with the wheels moving. Cable was not spinning indicating problem in the transmission. Removed the cover and the worm gear on the shaft appeared not to be centered , I was able to move it a bit with my finger but did not want to force it..
Question is should the worm gear be in the cente of the hole?
😊 Thanks in advance for any help.

-
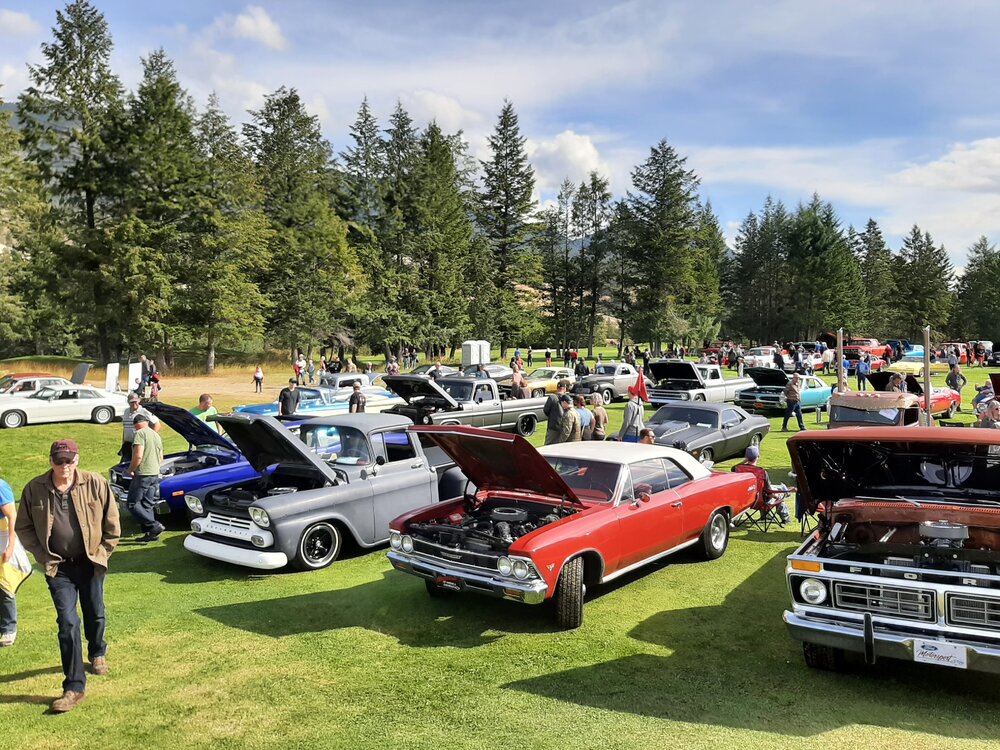
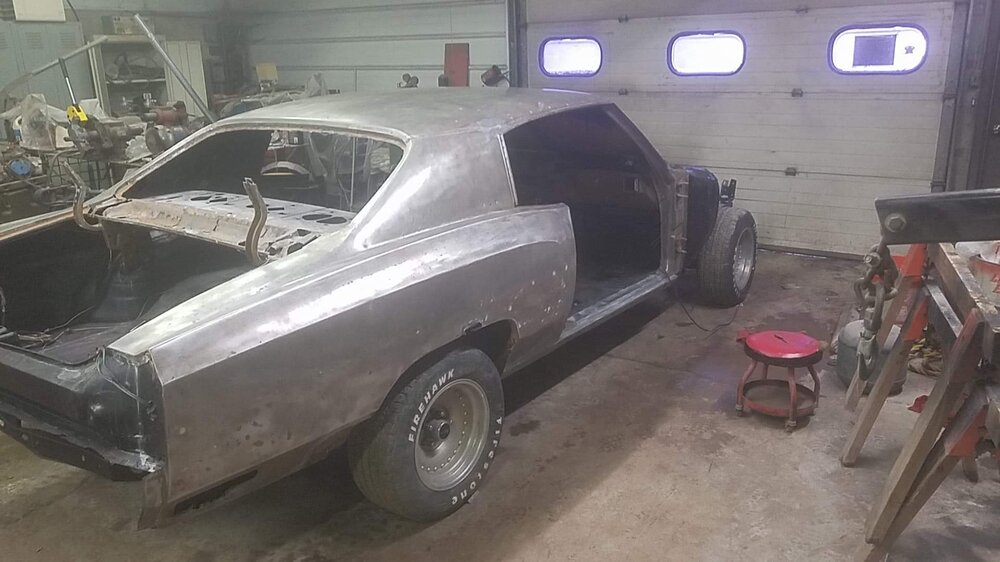
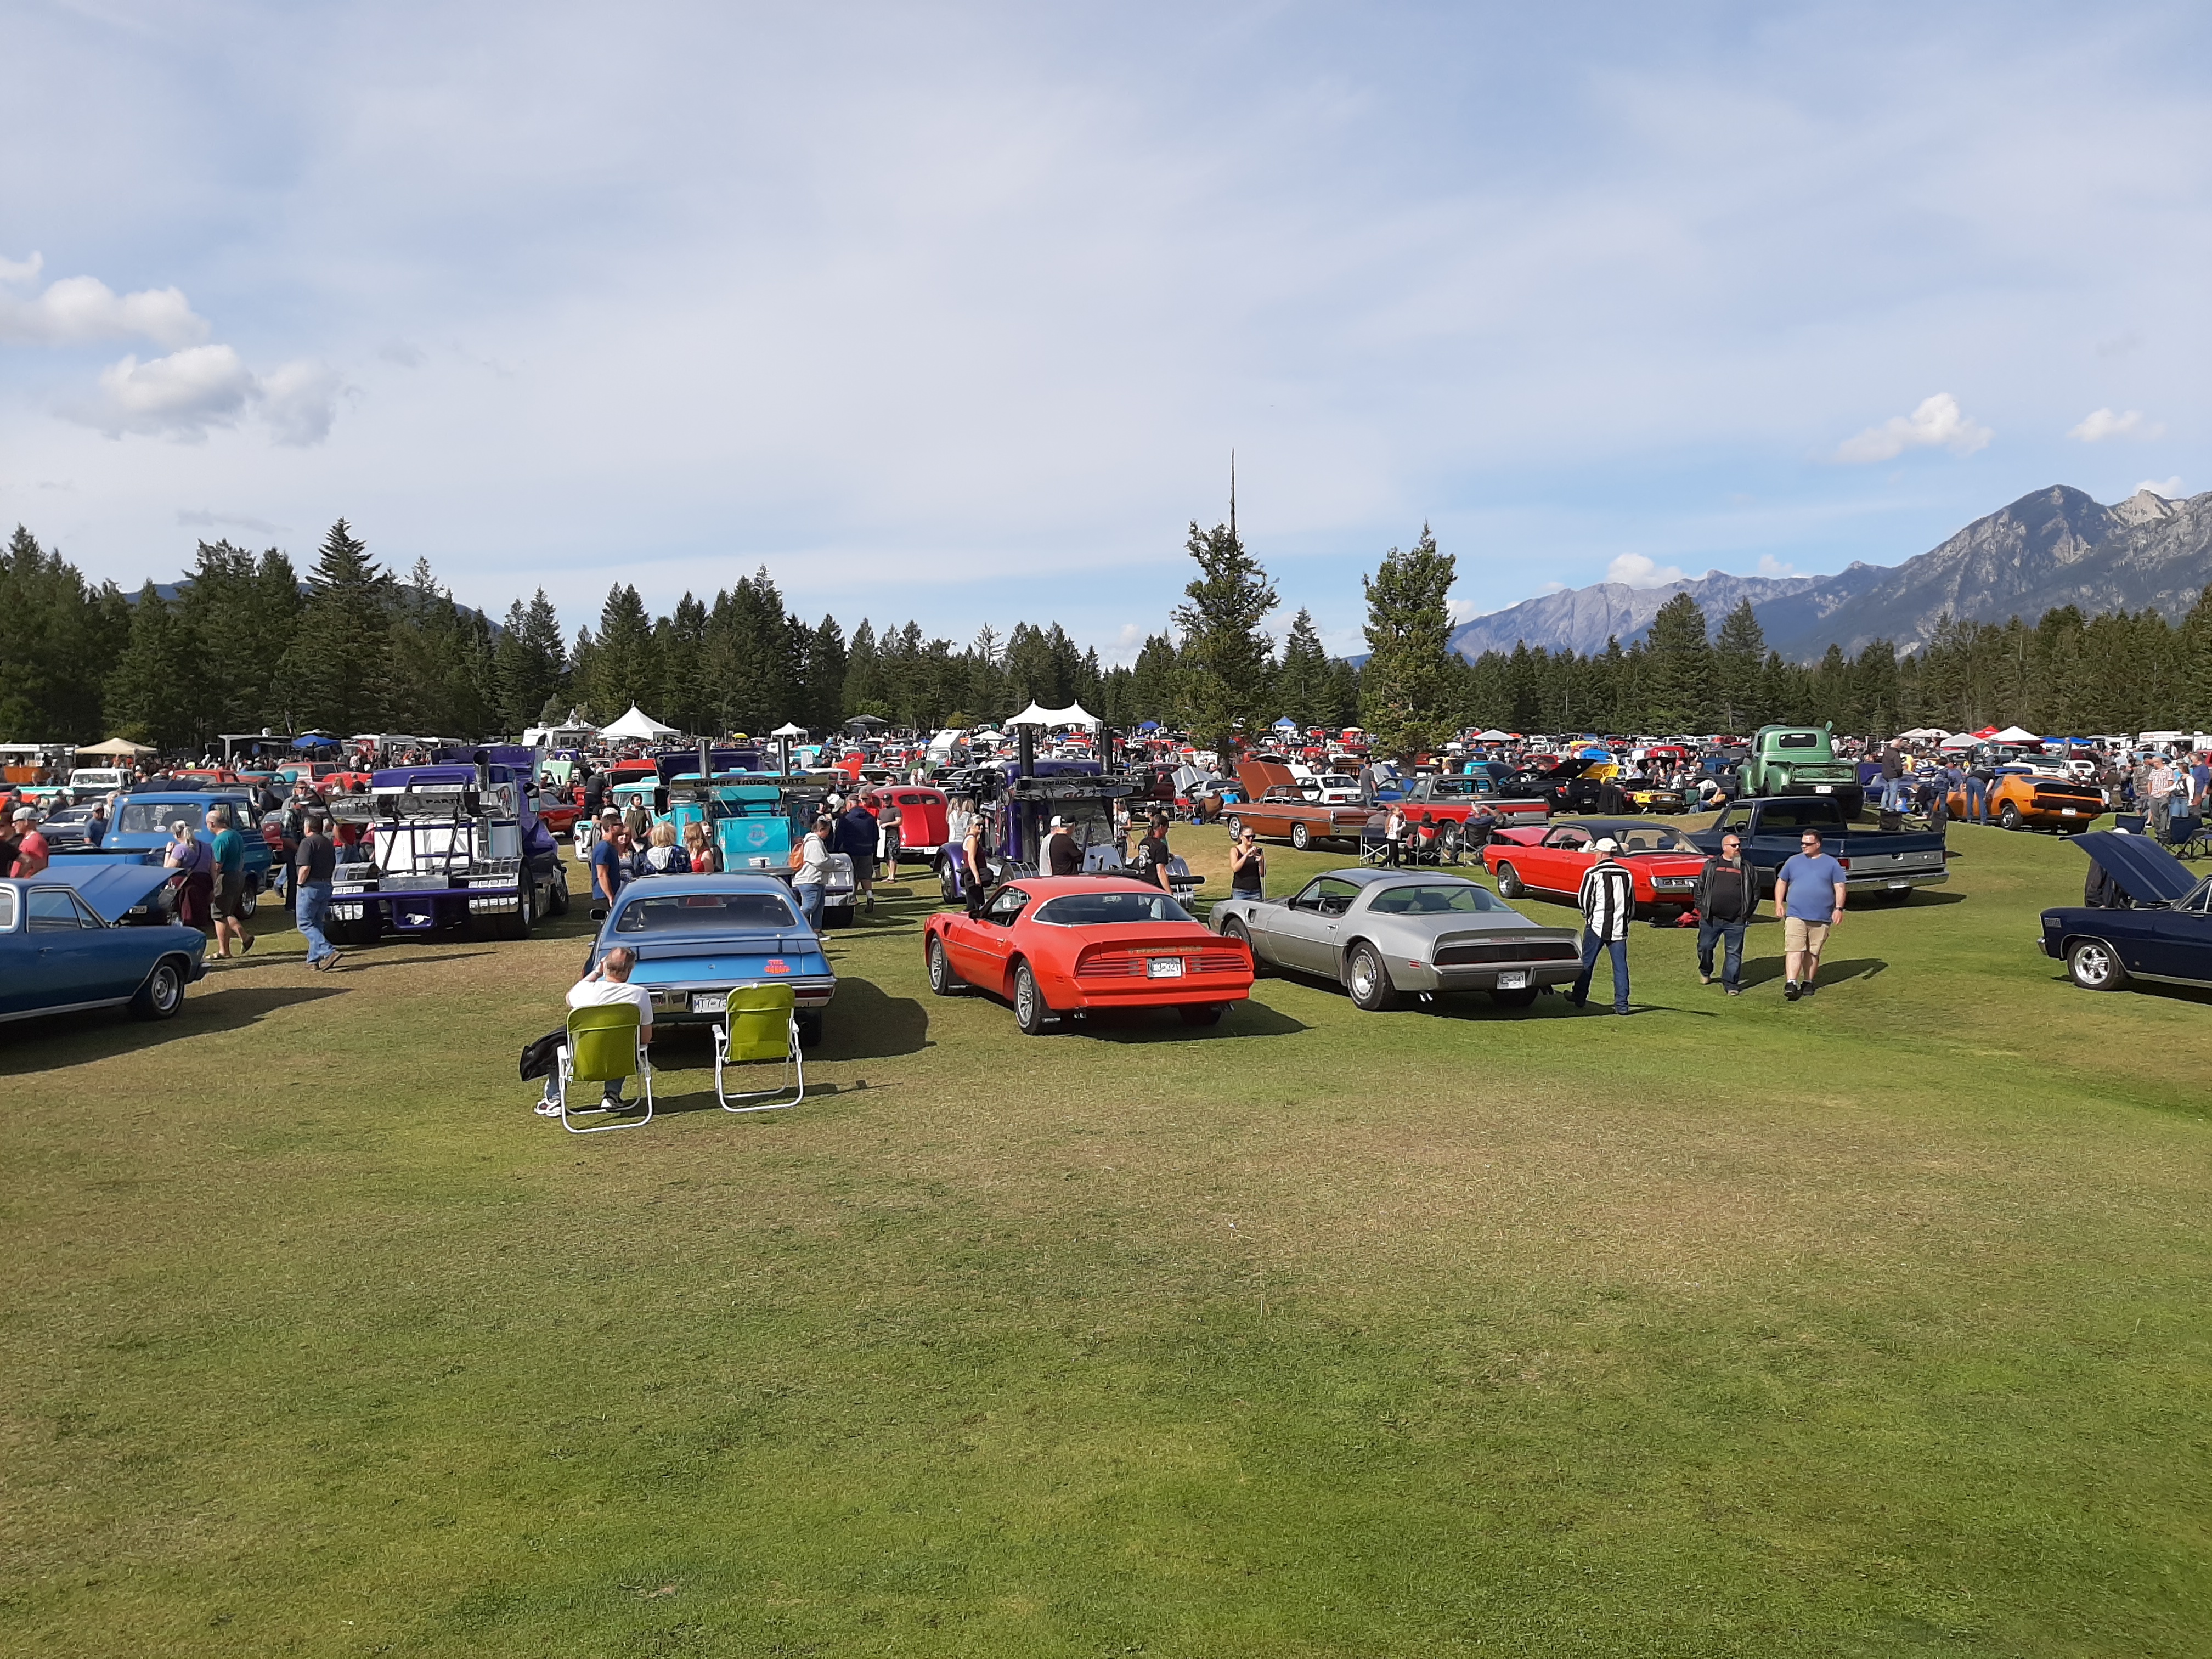
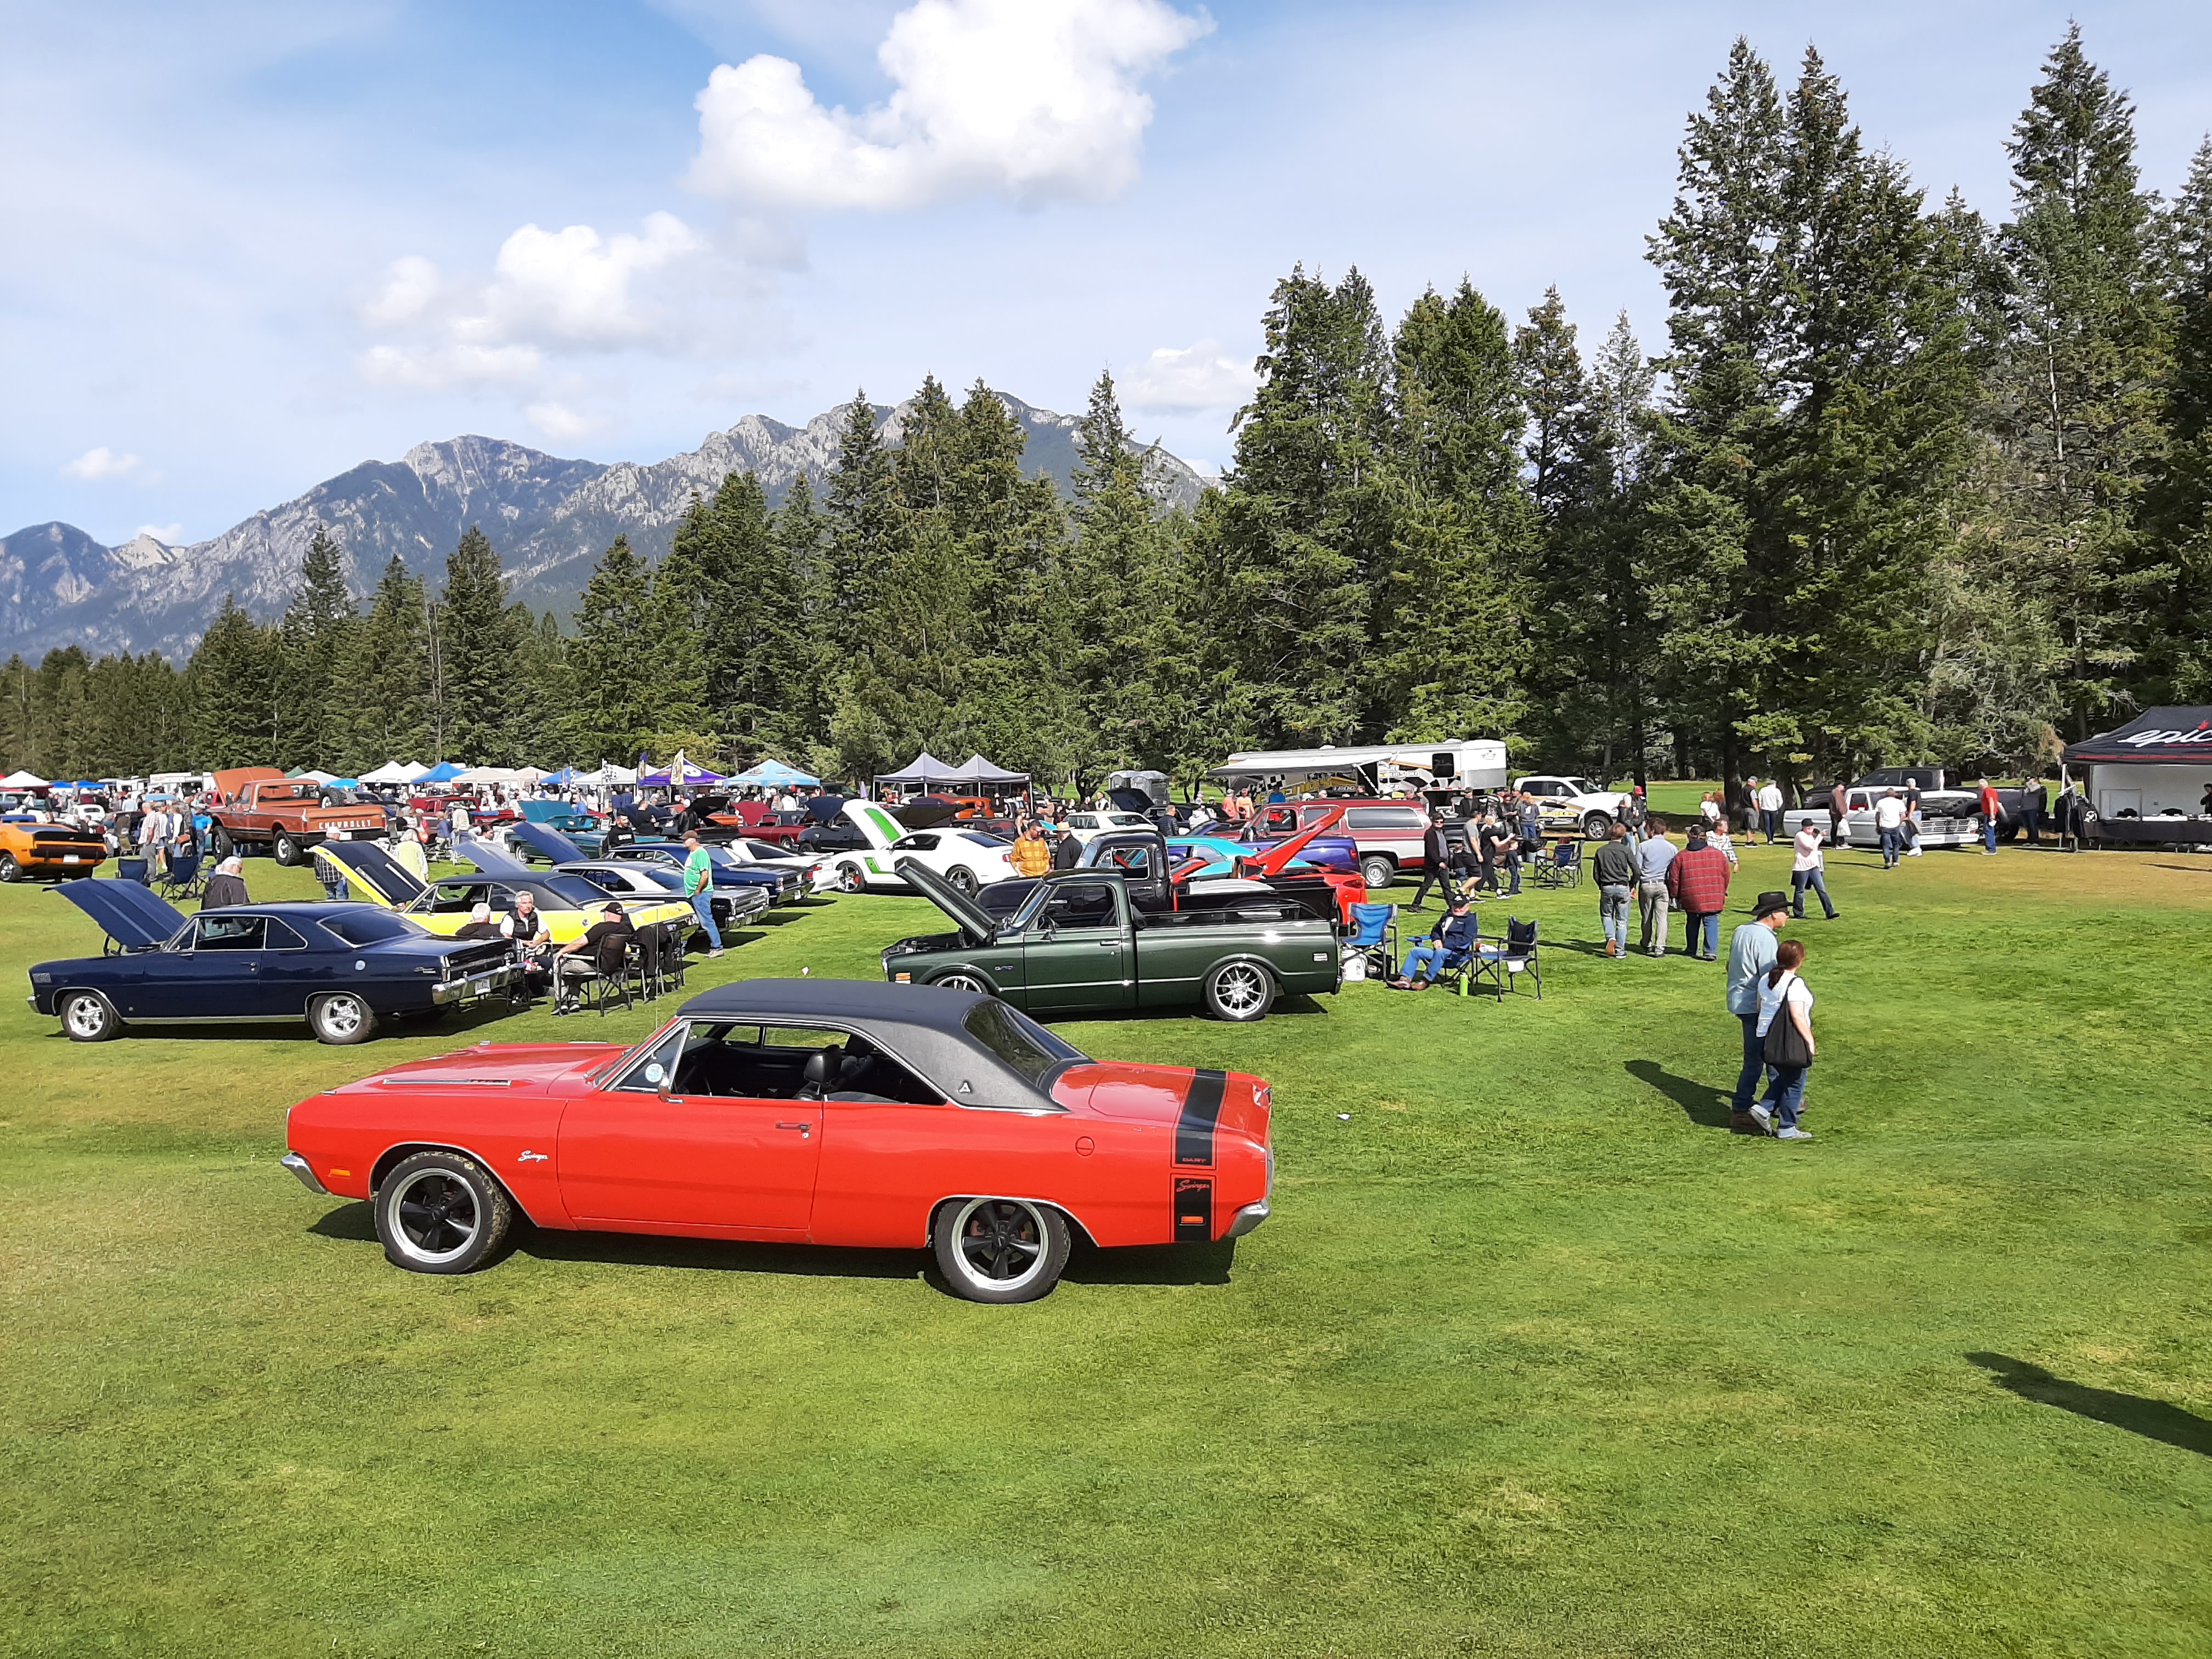
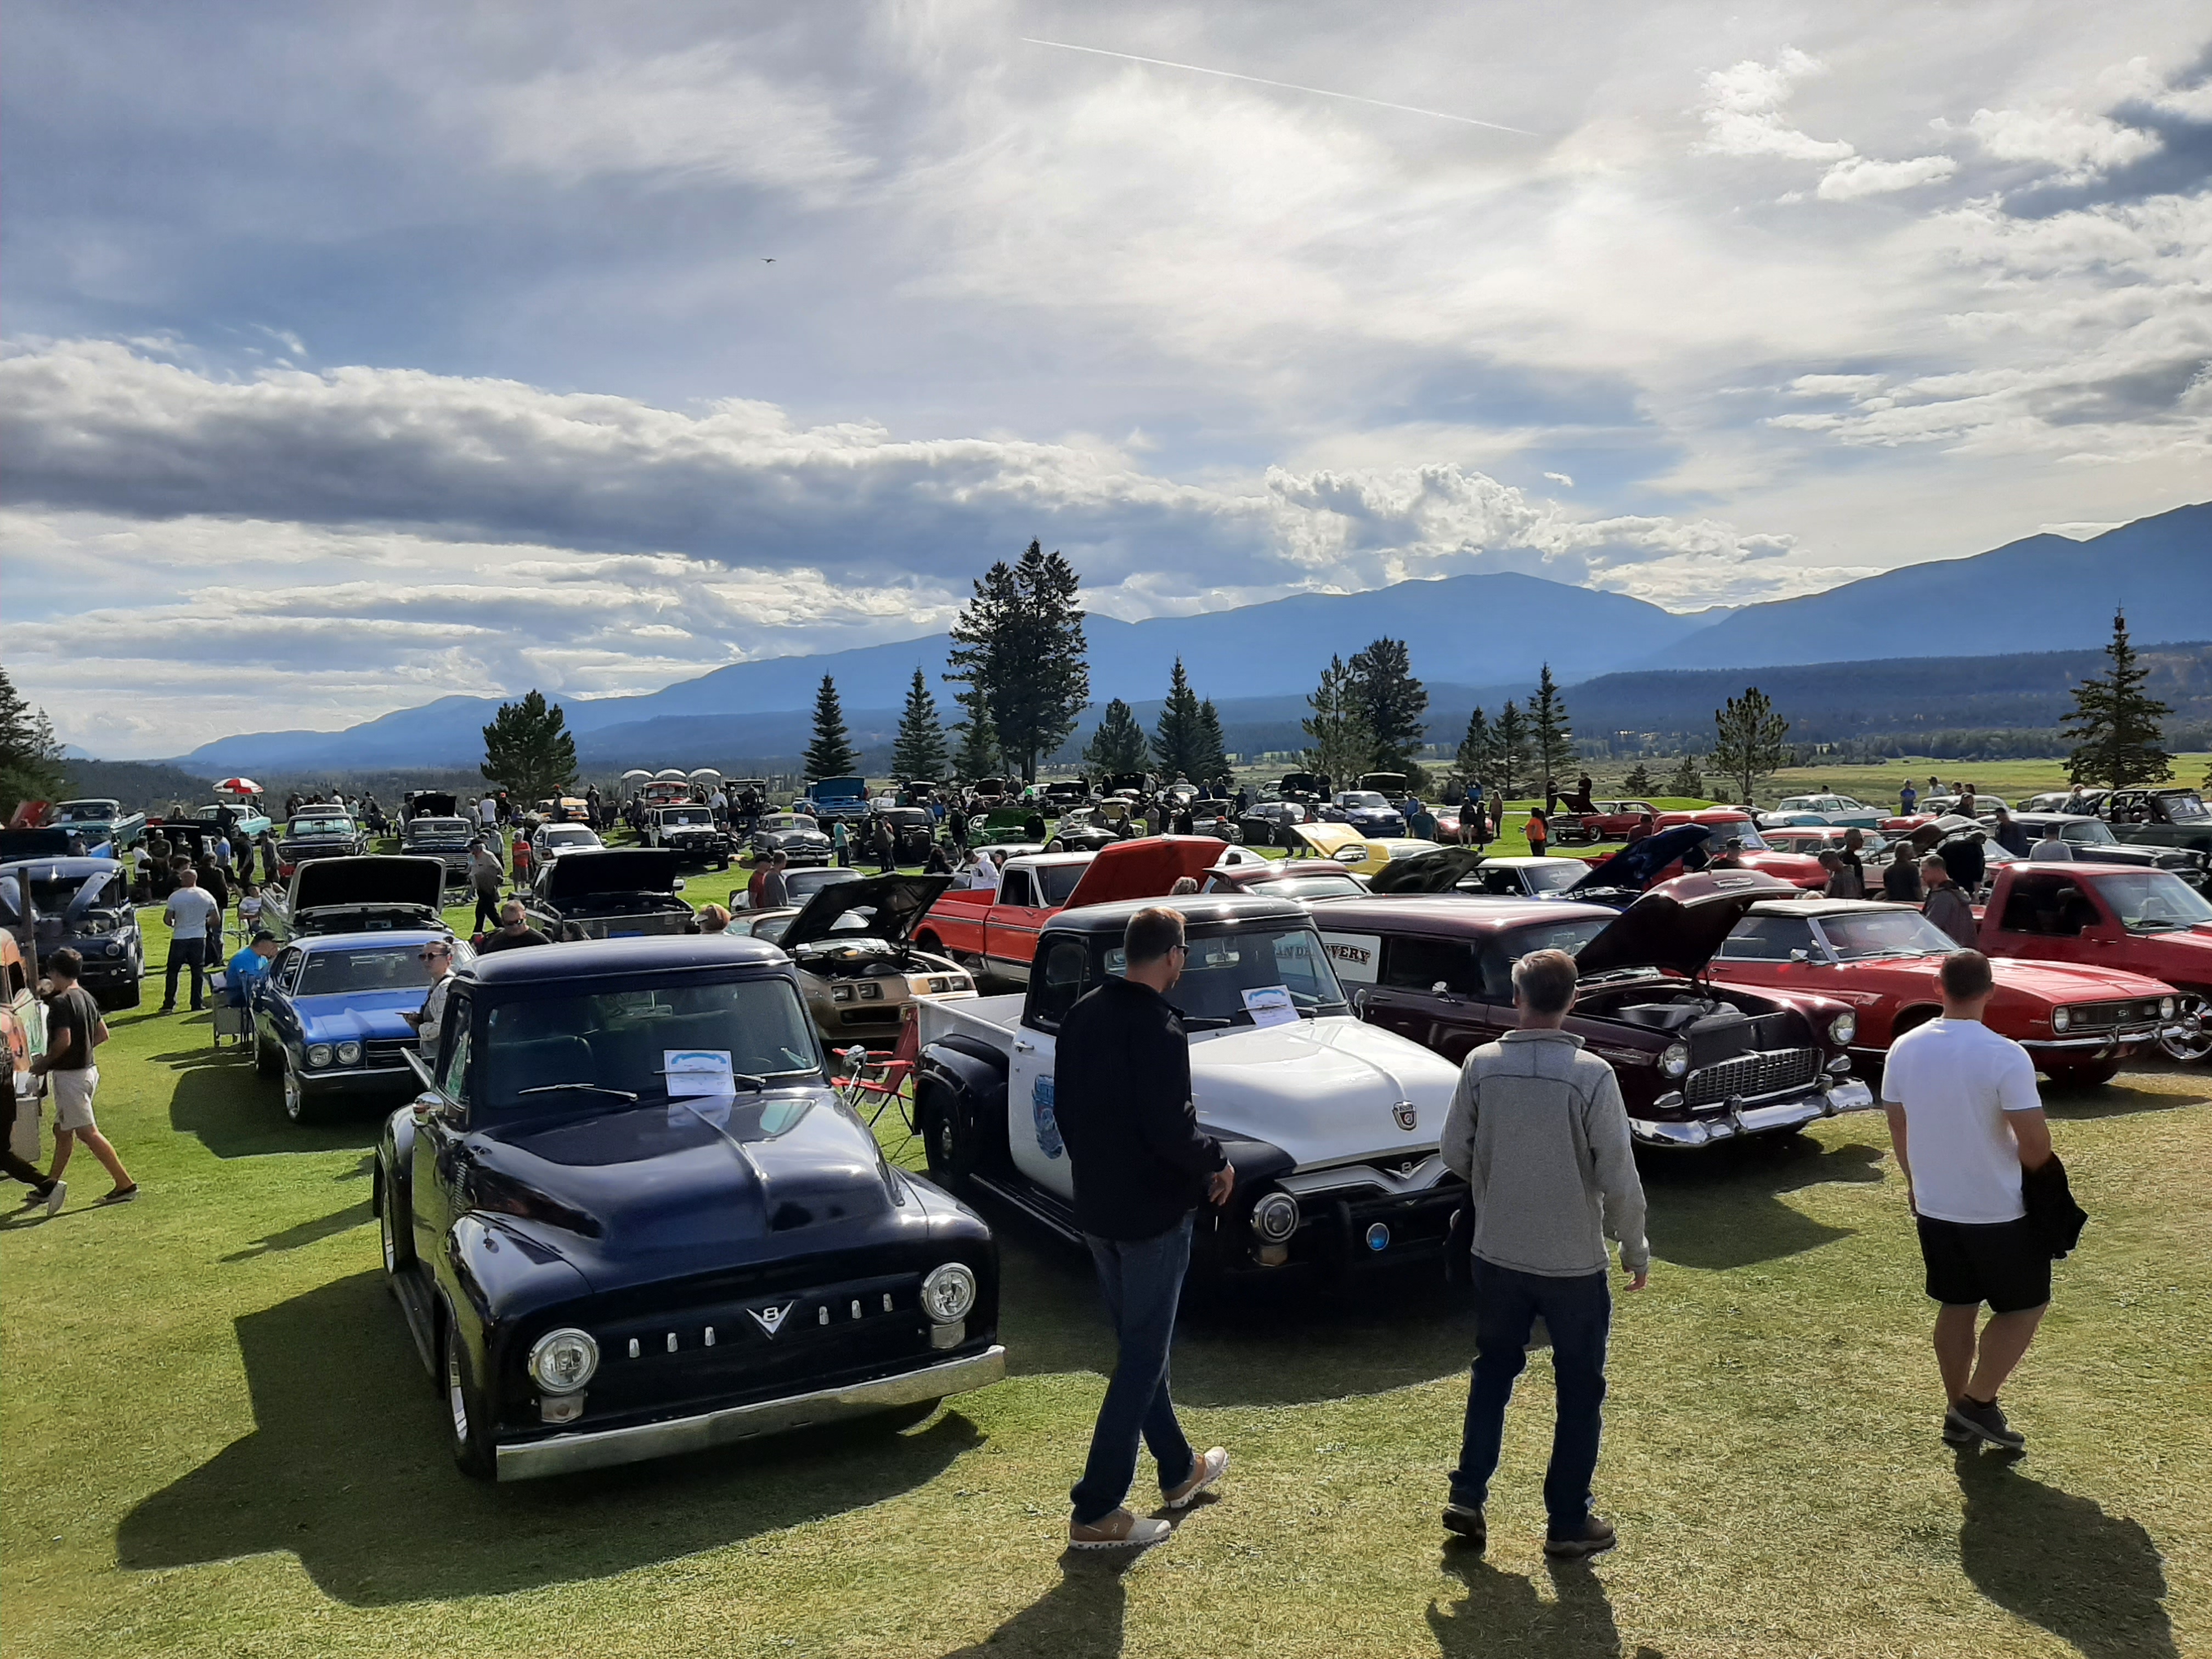
Took my MC for a run up to Radium to partake in the event. Met up with some other 1st Gen guys by coincidence.
Jason, Paul and Jeff.


-
7
-
-
Oh man, I wish I could been there. Getting so close to finnishing.

-
6
-
-
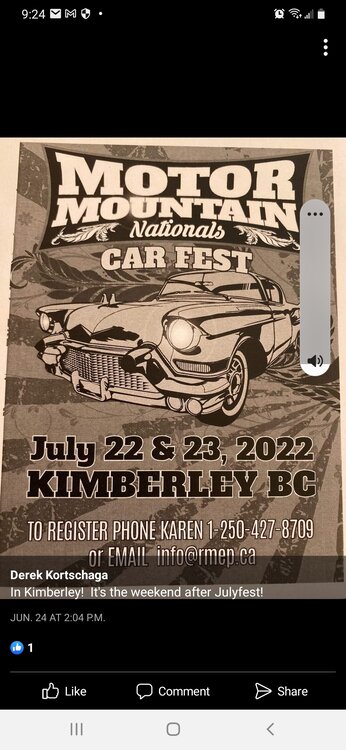
July 22-23 Local car show in our little town. Hopefully I'll be finnished my rebuild by then. Event is only about 1.5 miles from where I live so even if I'm still in reassembly mode but otherwise drivable . I'll be going.
Last car show (2019) there were 2 first gen. One was from Crowsnest Pass, don't know where the other one was from.
Mike
-
2
-
-
On 6/26/2022 at 1:28 PM, 420ponies said:
Wow! I can't believe I missed this build. Awesome job, all in your backyard. Looks great, love the wheels, old school . can't wait to see you driving it. What was done to the 350? Going to be one sweet '70 Monte!
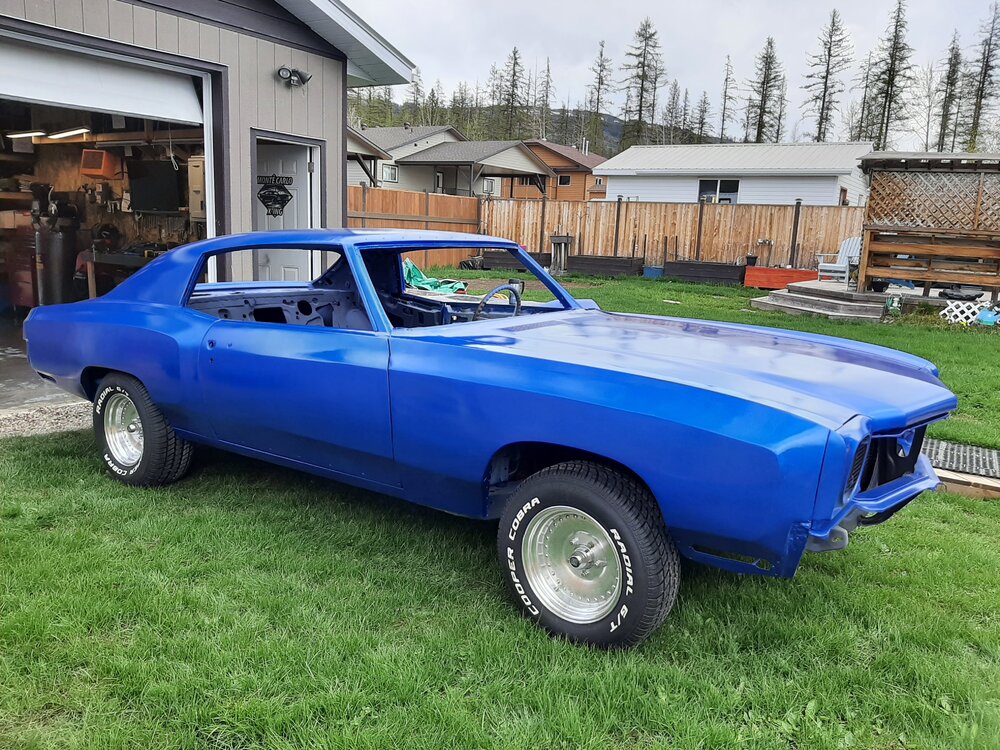
Hey 420 Ponies. Complete disassembly of the engine. NAPA, washed the block and checked for cracks. Head valve seats were modified for unleaded gas cylinders were already oversized so they just cleaned them up. Rebuilt with a baby rattler cam for that rough idle and aggressive throttle response. Carb' ed it with a Summit Racing 4 barrel and manifold. Summit headers with American Thunder Flow Masters. Topped it off with a Summit dress up kit.
Mike
-
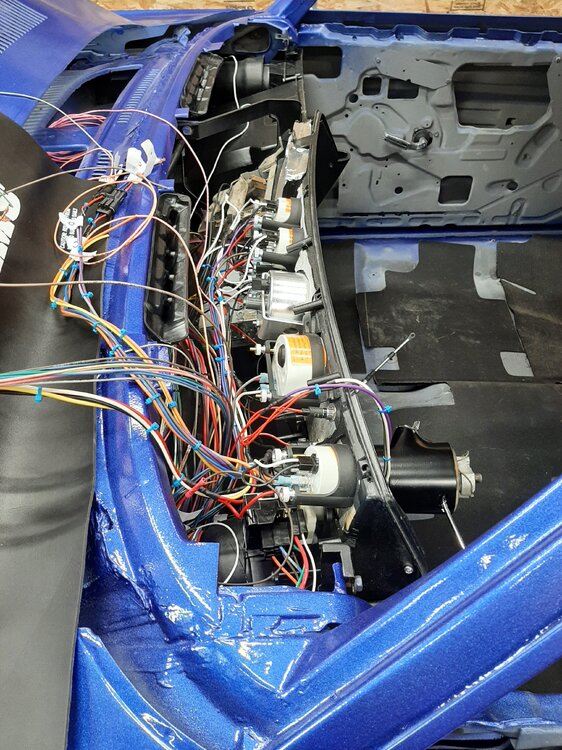
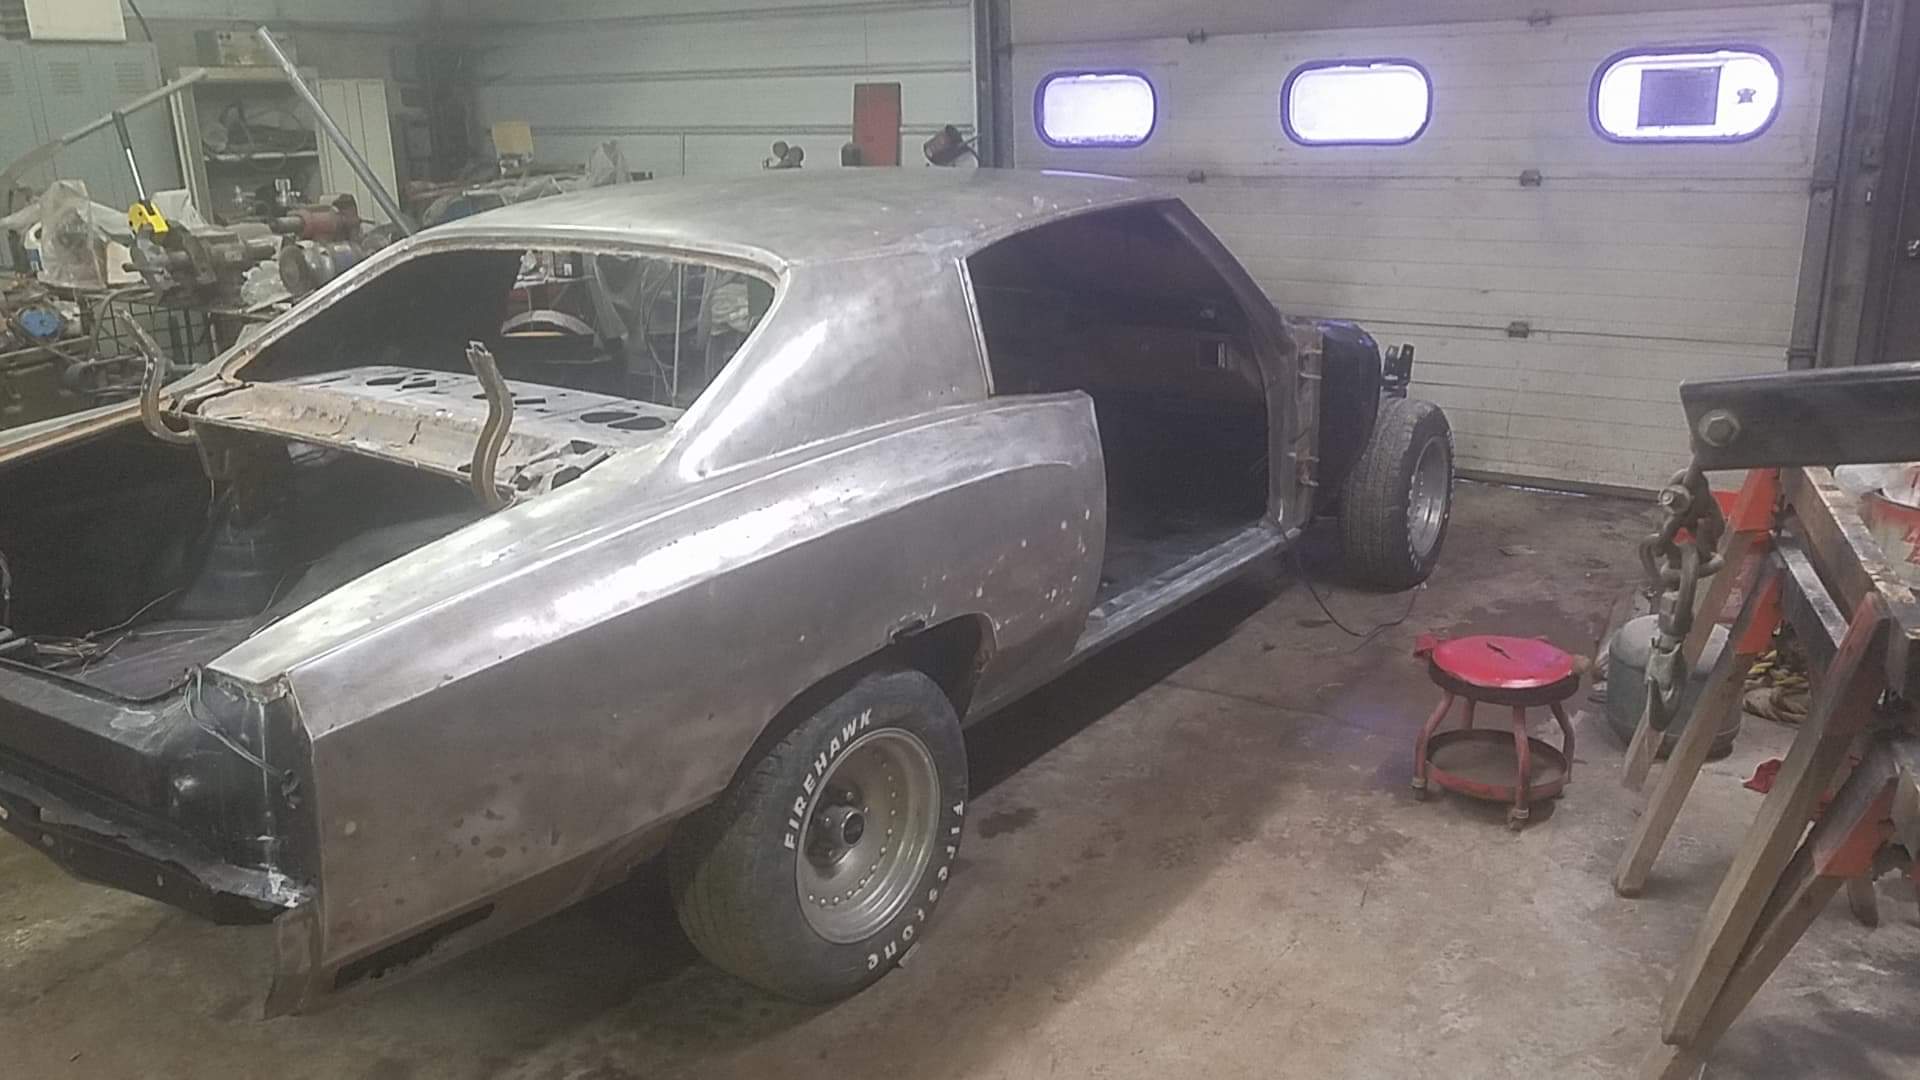
Thanks everyone. Only issue we had with the wiring was the windshield wiper switch. I had crossed the wires between the pump and high speed side. Thanks to internet problem was resolved. My son has started the cutting and buffing/polishing the paint Holly s---, what a difference.
-
1
-
-
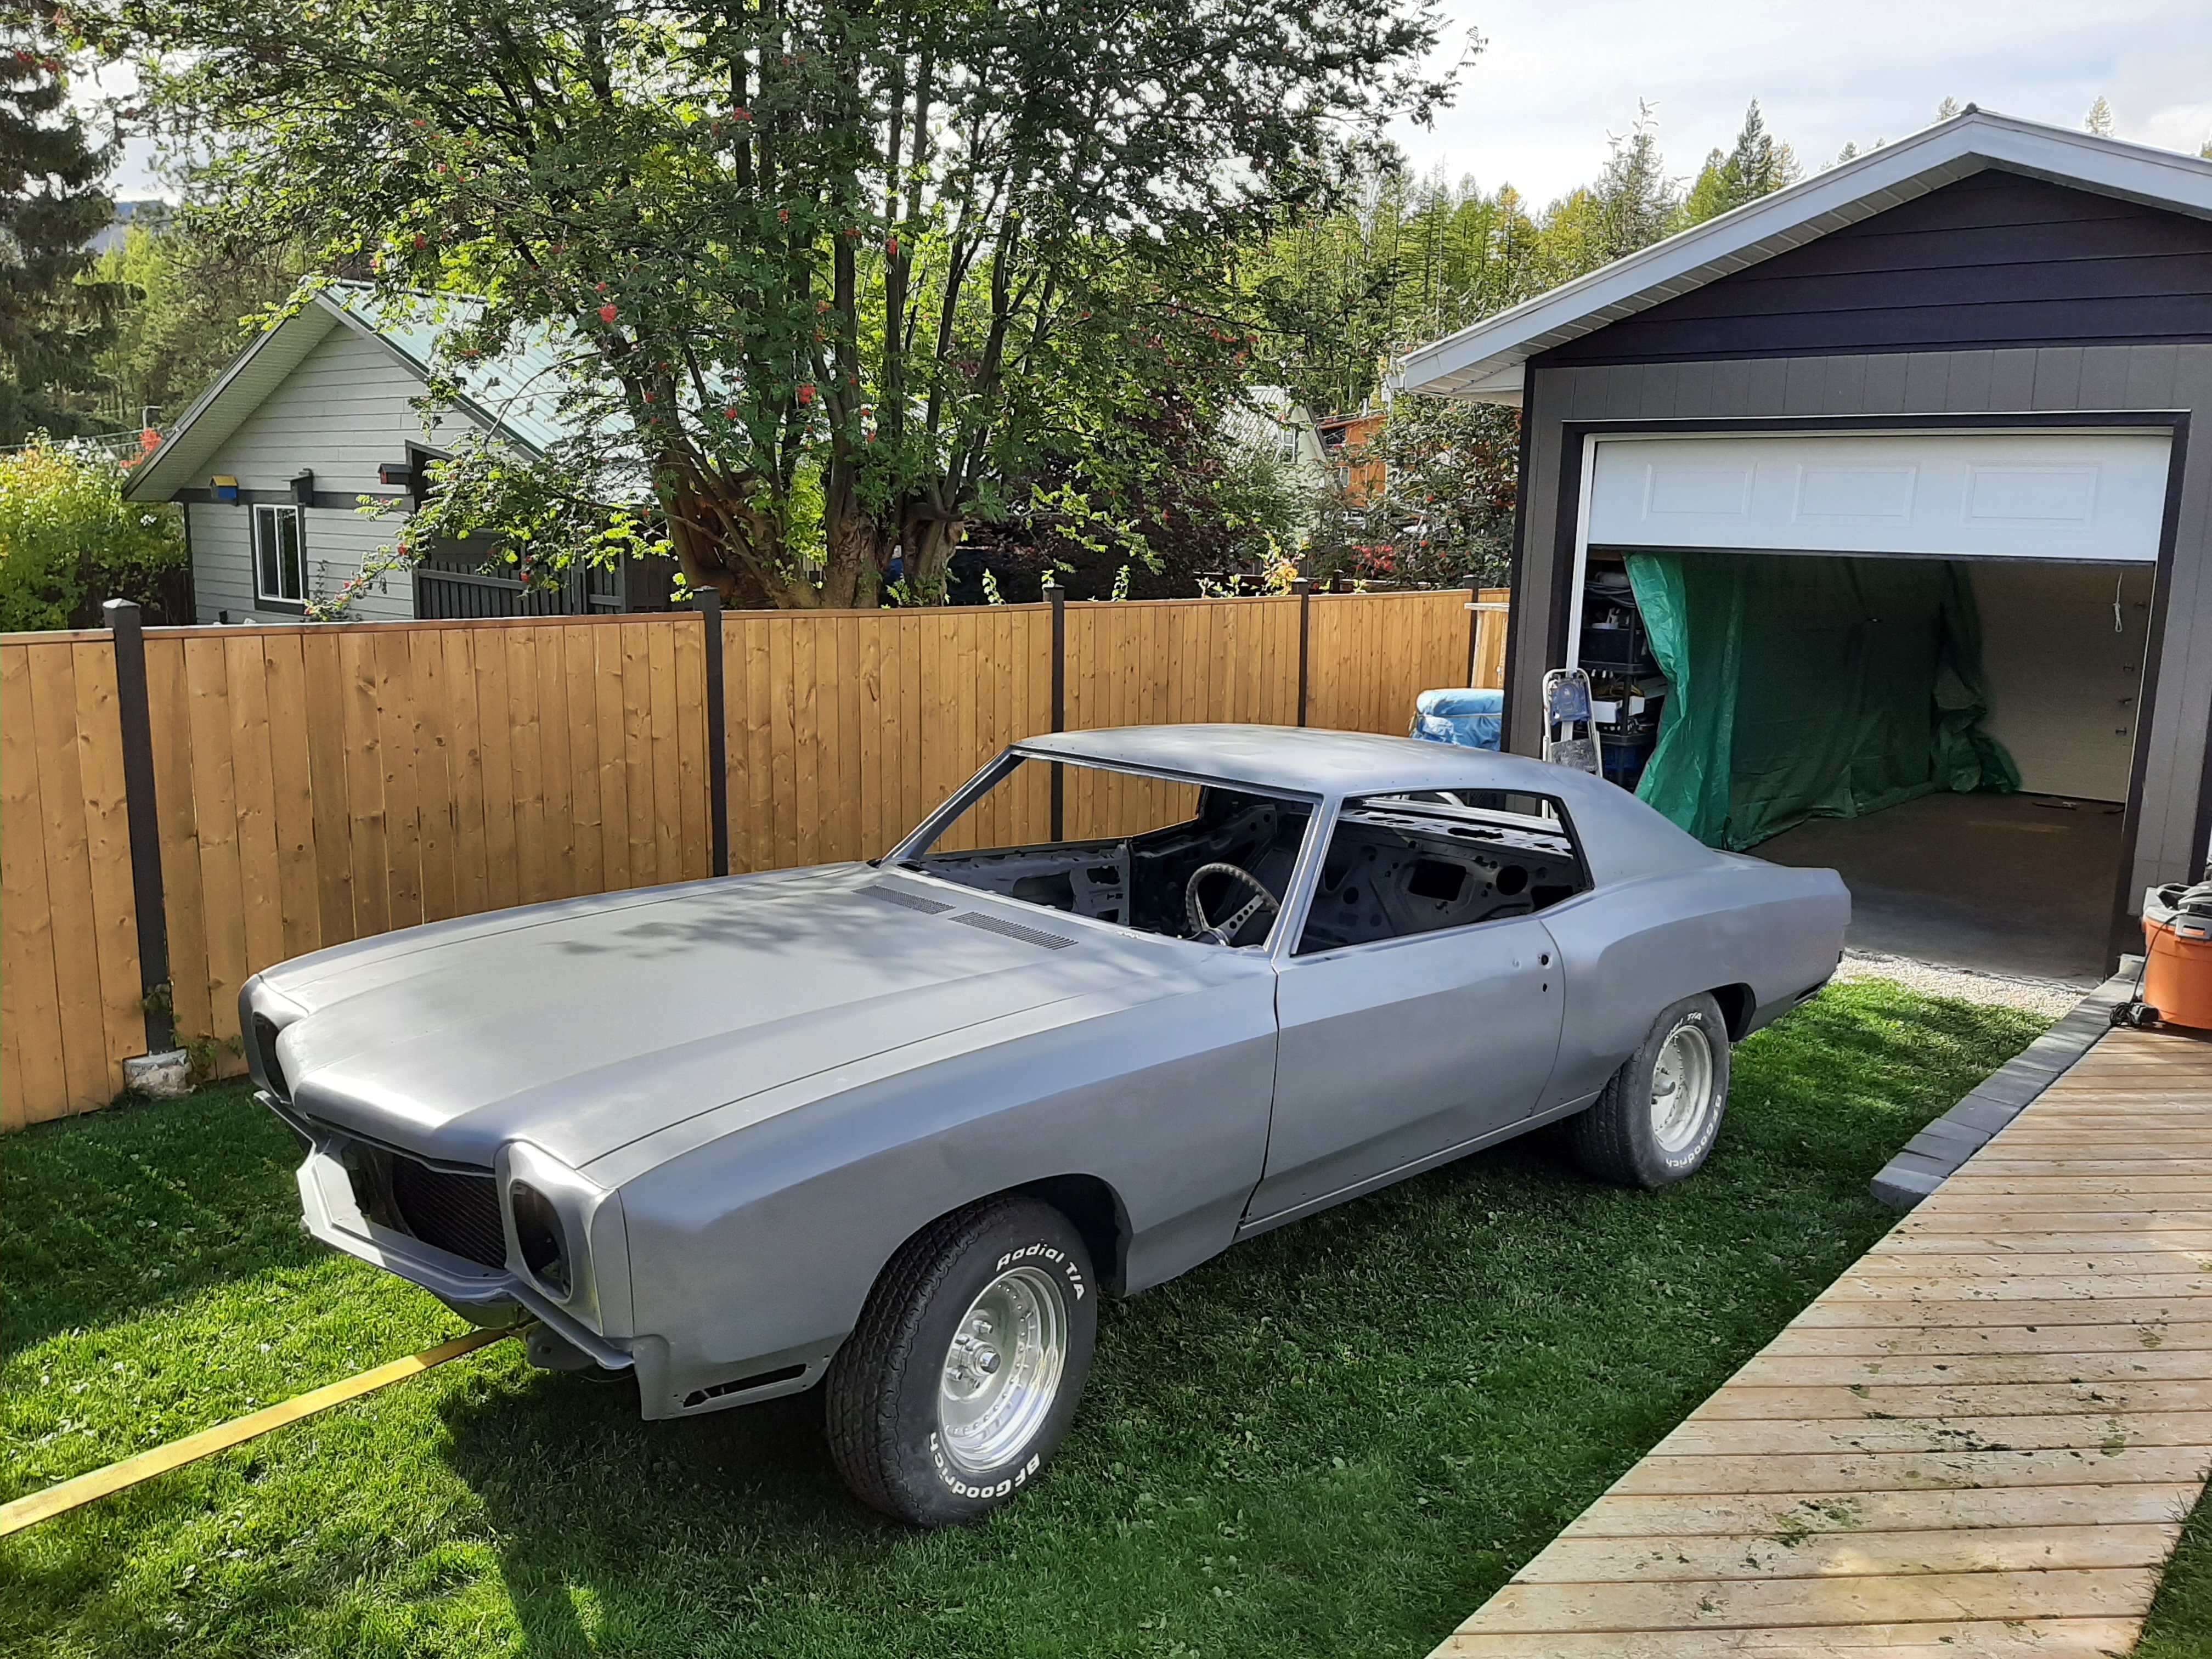
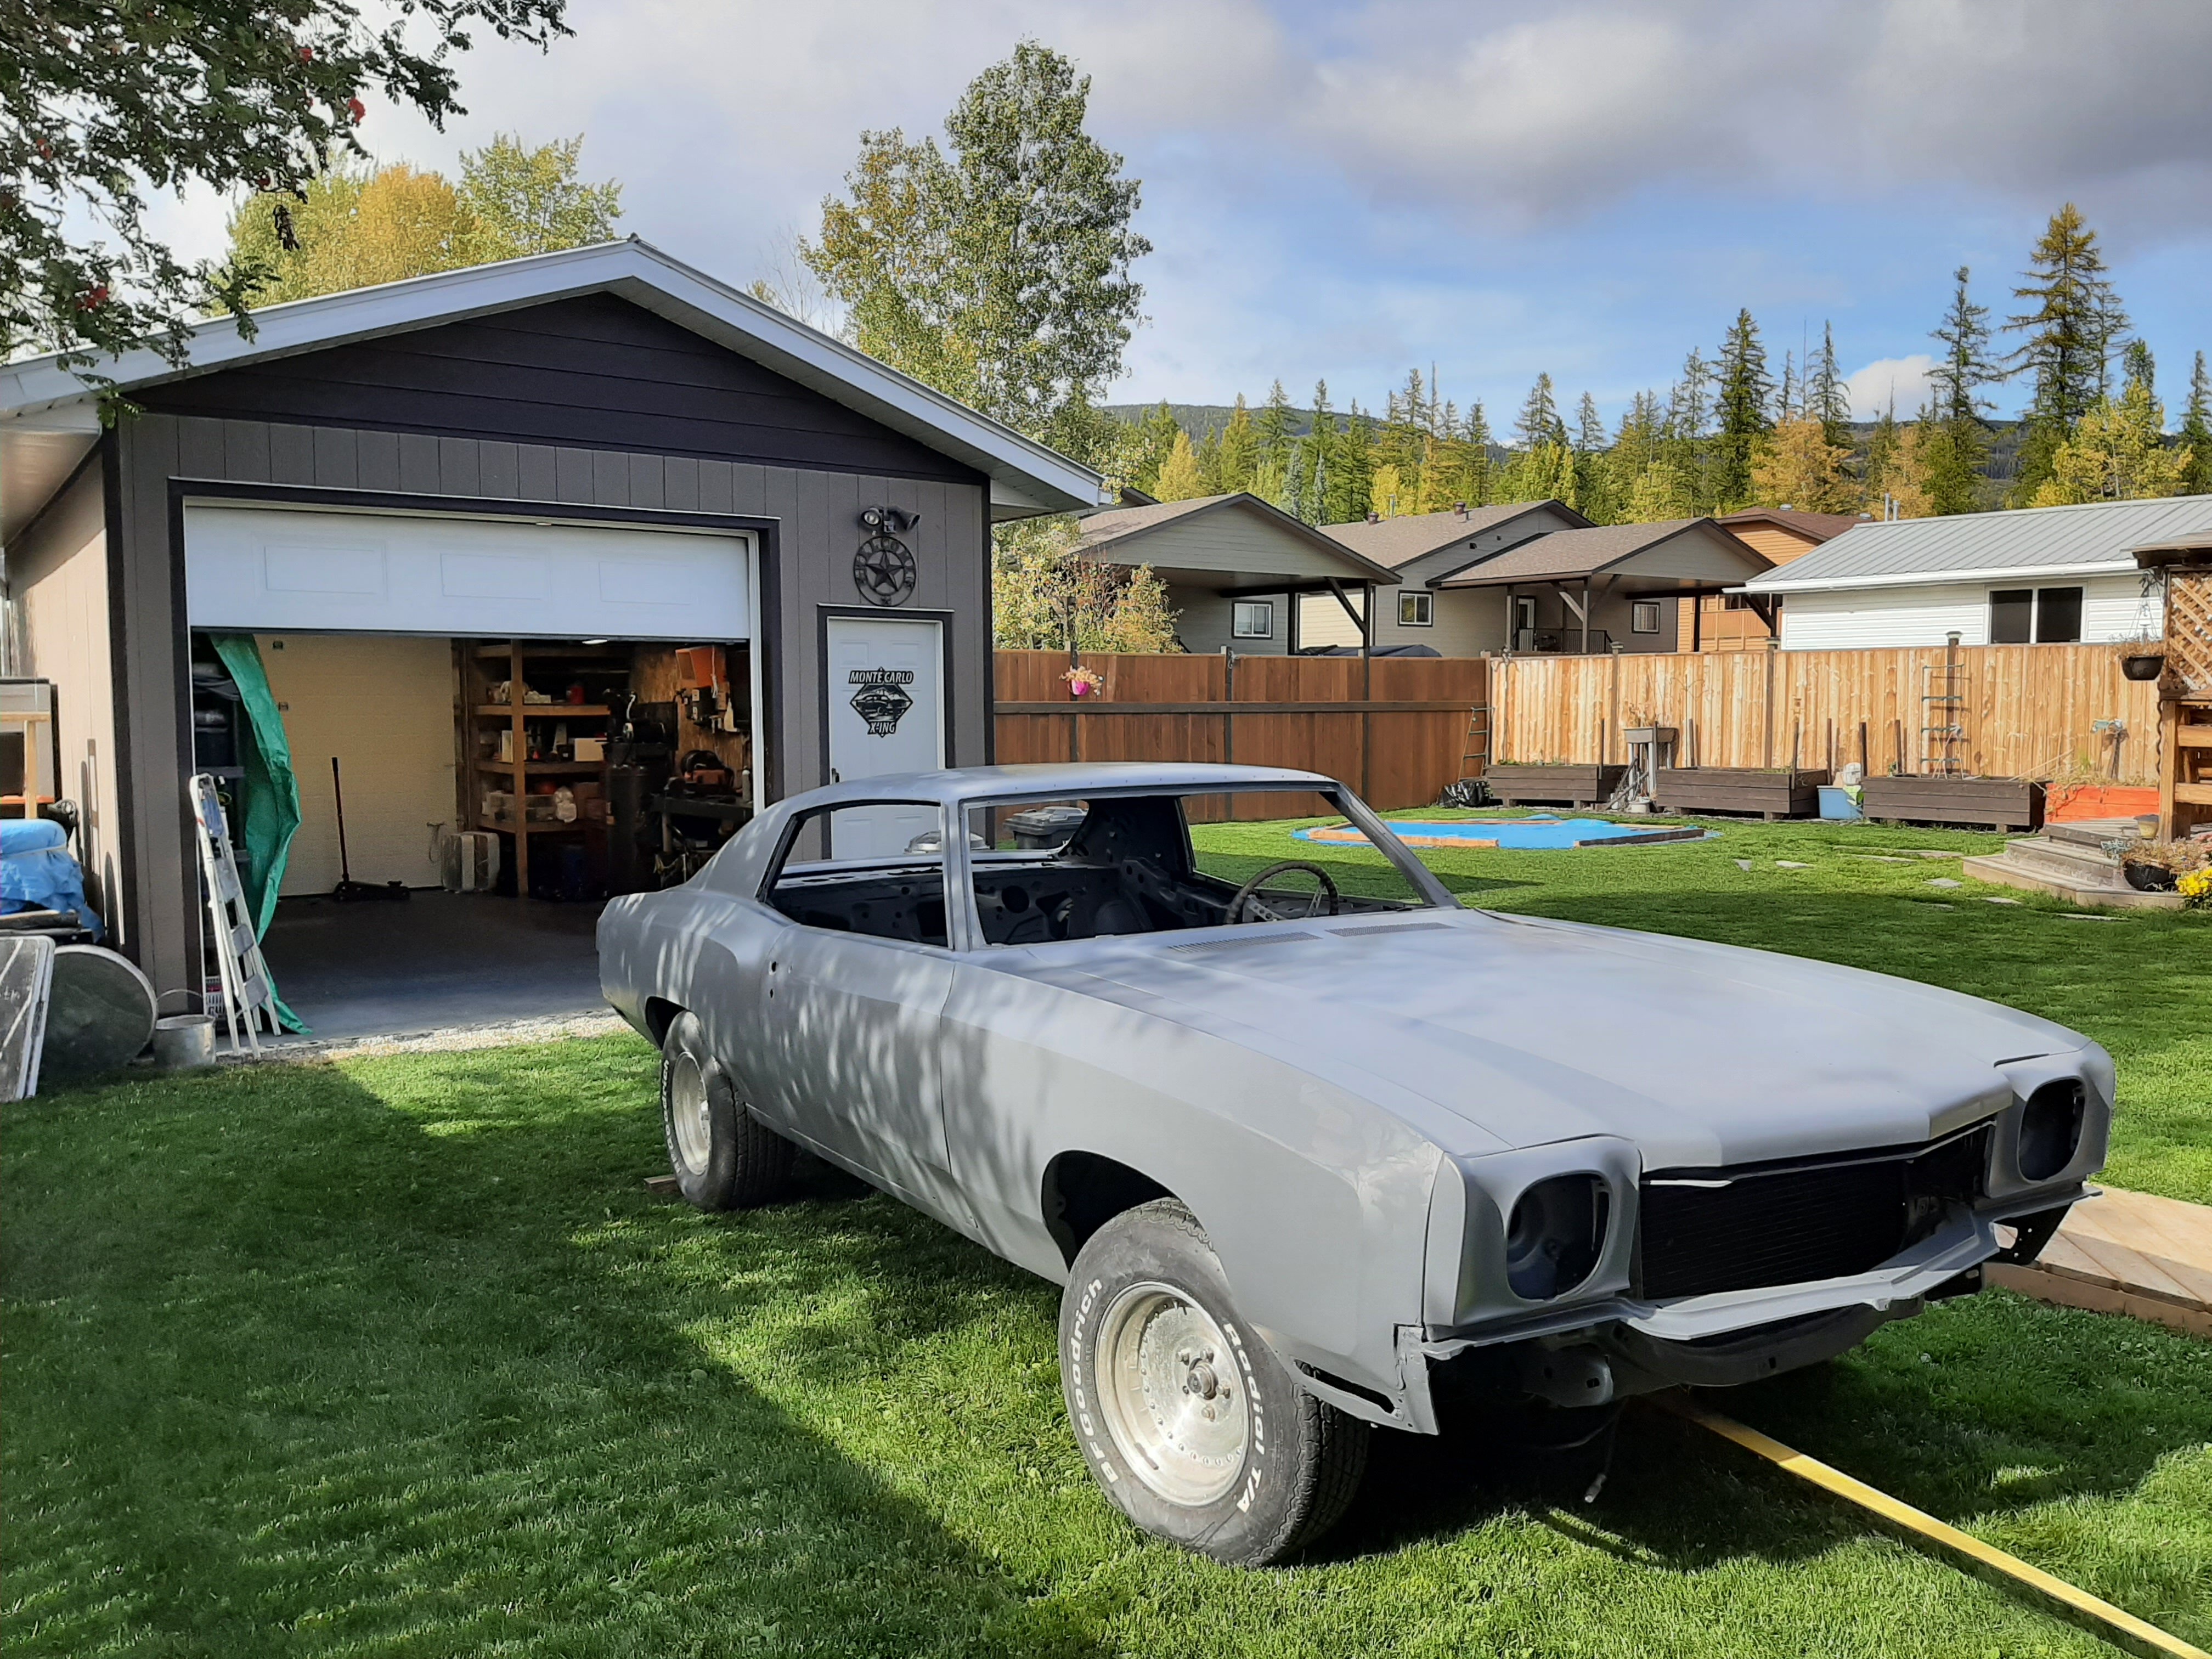
Moving along with reassembly. Bought a wiring harness kit from Painless Performance, also upgrading to 3 point retractable seat belts. Got inner fenderwells from OPGI . Driver side needed a slight cut/modification, passenger side was ok. Installed a vacuum pump for the power brake booster. After testing the wiring, we'll start reinstalling the glass so that we can proceed with sanding/buffing and polishing the paint.
I've tried uploading photos but I keep getting an error/failure message. has anyone else been having this problem lately?
Mike
-
2
-
-
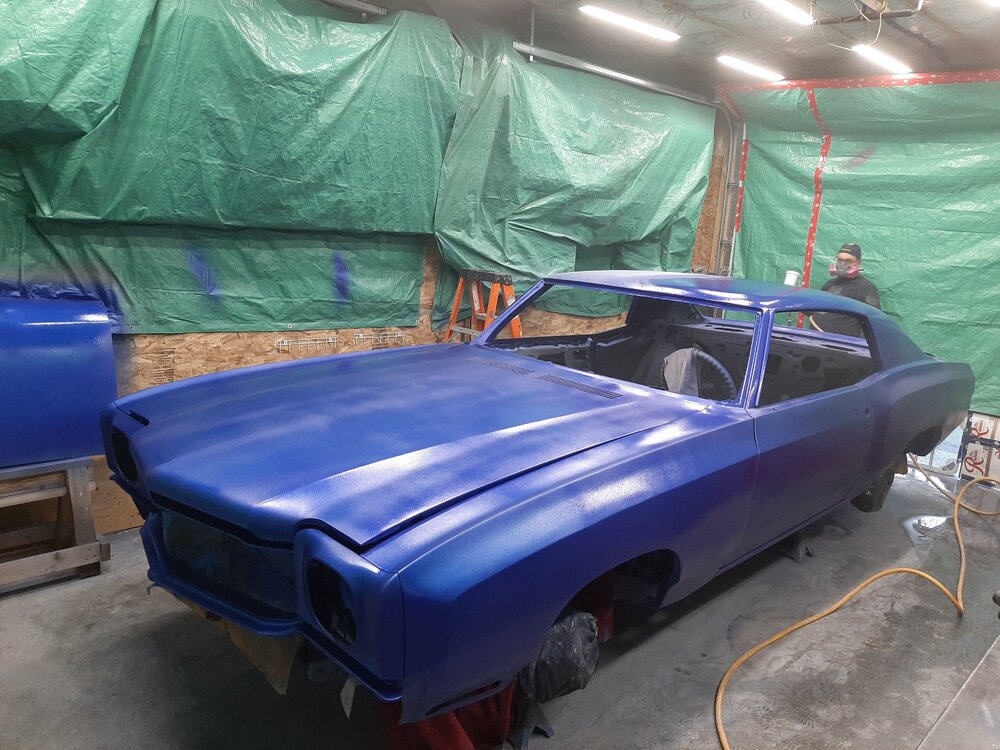
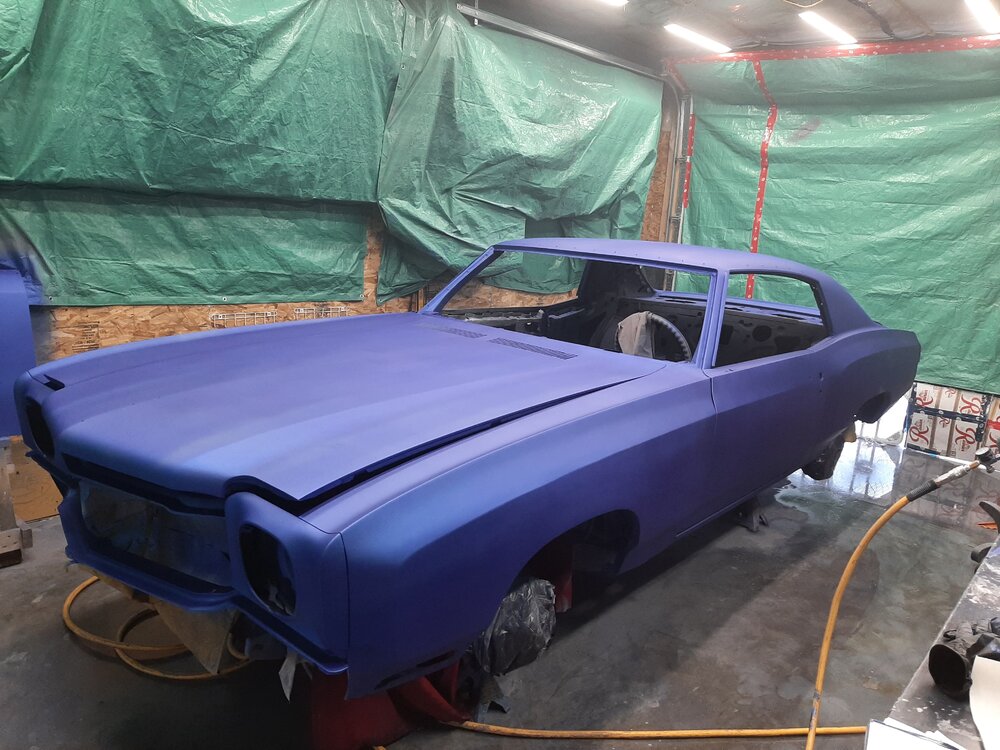
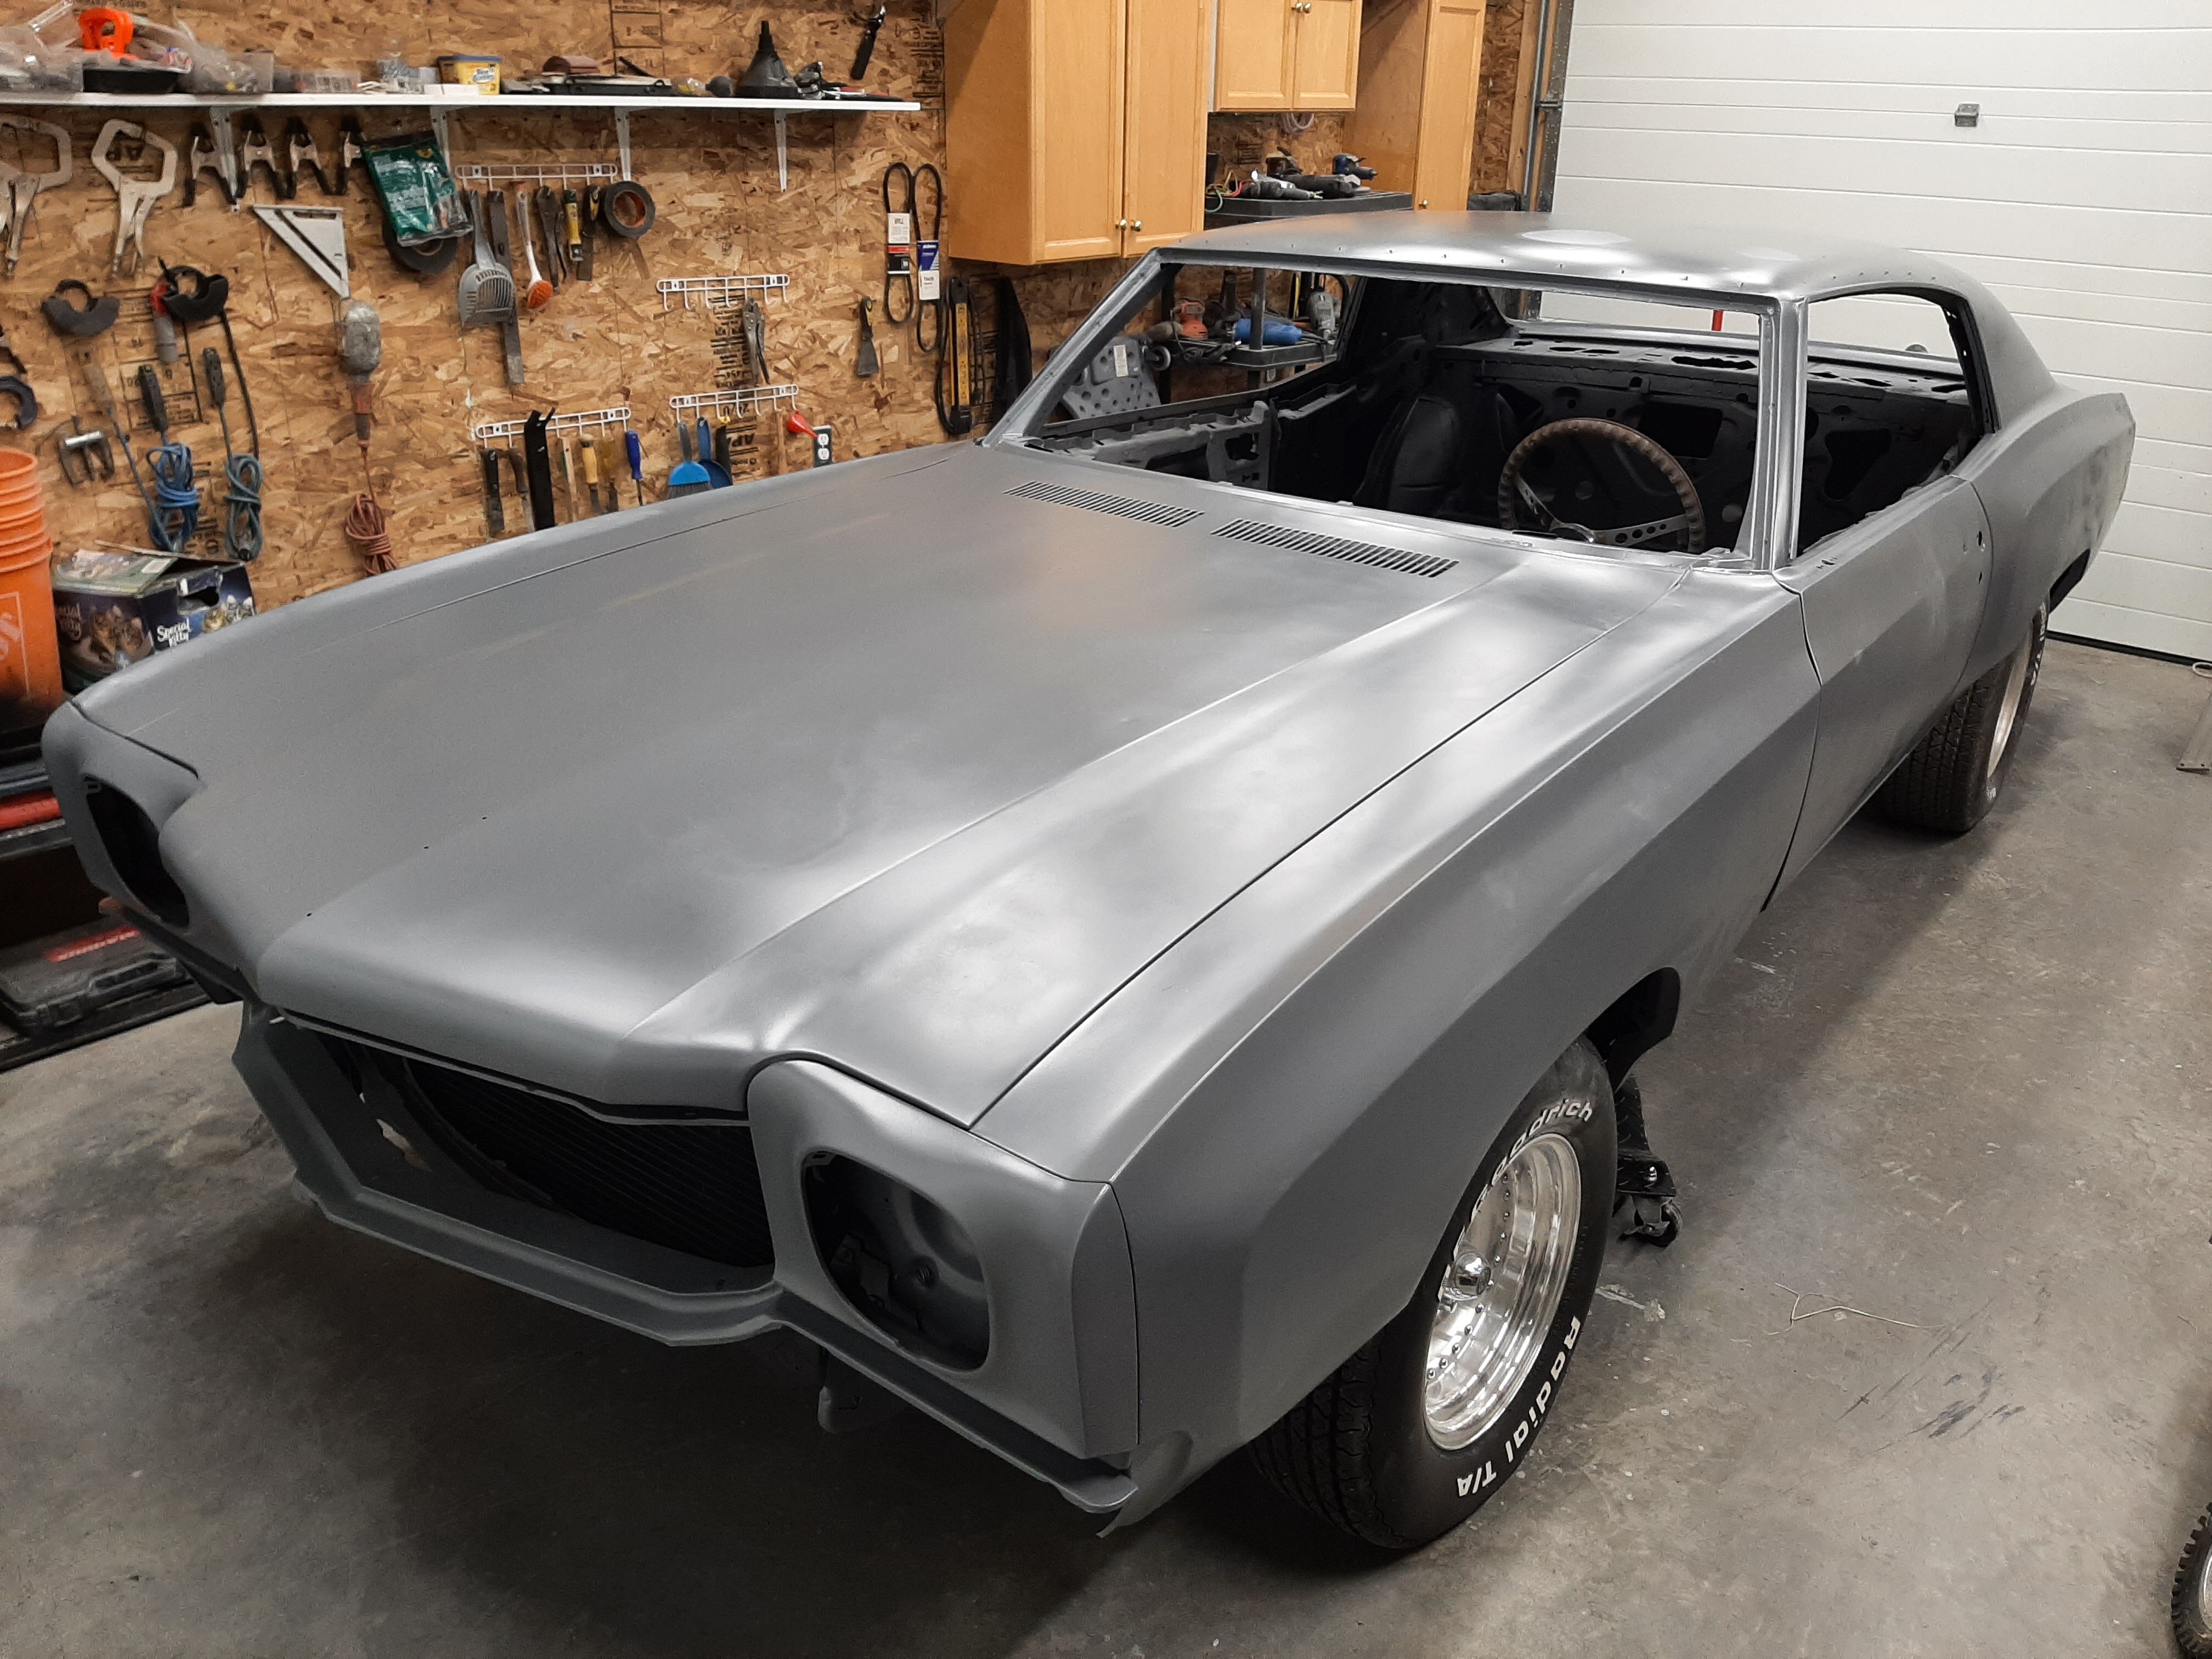
Finally some temperatures where we can maintain above 65 in the shop and get some painting done.


-
6
-
-
Hey everyone thanks for the input. First thing I'll have to do when I get home is to test the vacuum and see what the starting point is.
-
Learning as we go. During the engine rebuild we replaced the stock cam with a more aggressive "Baby Rattler" cam.
Only to discover later that it appears as though there's not enough vacuum to operate the brake booster properly.
So we've started researching options to increase the vacuum.
Anyone out there have tips/tricks or suggestions on what they have done?
Ie: auxiliary vacuum pump, type model etc.
From reading up on them price and quality are all over the place. Operating noise seems to be the biggest thing to focus on.
Thanks in advance.
Mike.
-
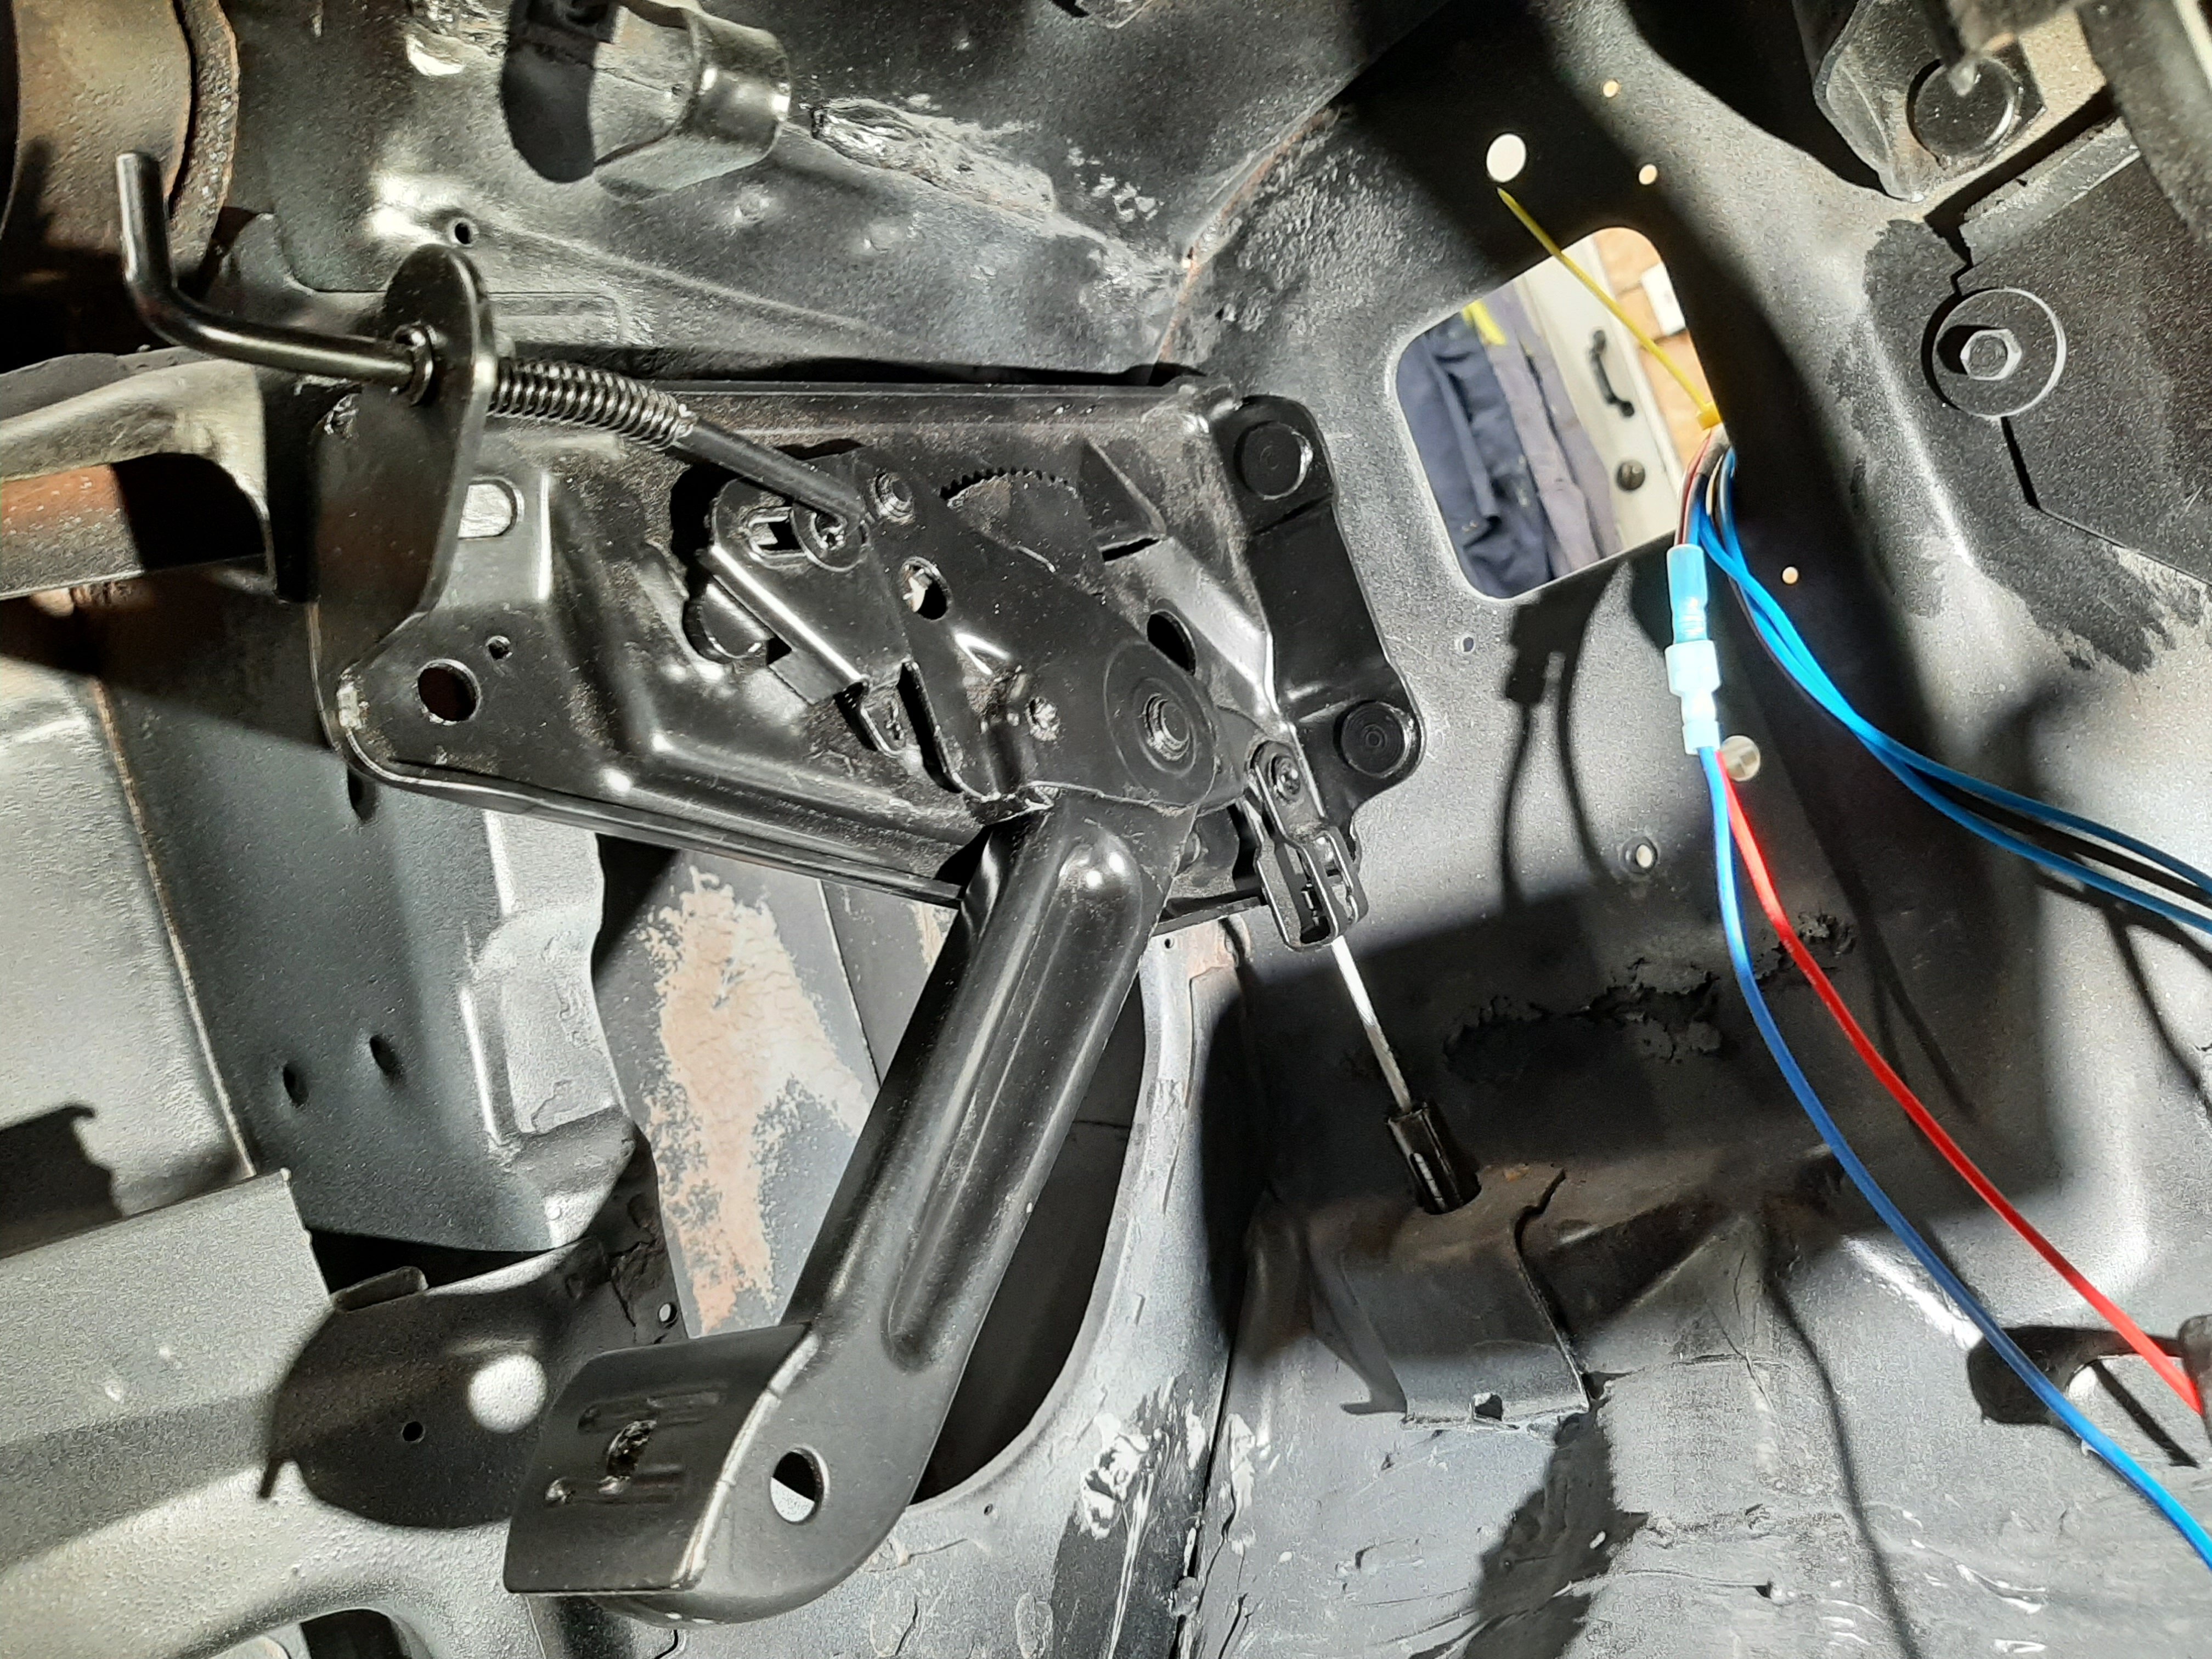
Thanks JFT69Z. Picture and links were very helpfull. I didn't notice the holes by the ratcheting assembly. Did a complete search of everywhere in the shop (I hadn't throw anything away during disassembly) and found the original switch.
Many thanks to all for the help.
-
2
-
-
Thanks for the PN.
-
1
-
-
Thanks Scott. I agree with you on the assembly. It was on the car when I got it. Everything in that area where it was mounted had a lot of rust and rot, whereas the assembly was in really great shape. So yeah it was most likely replaced at some point. It shouldn't be to hard to make an L shaped bracket to mount it.
-
1
-
-
Thanks Rob, the picture helps. My setup is a little different so I'll have to MacGyver a bracket to mount the switch.

-
Ok I'm at the end if my rope. Anyone out in Monte Carlo land have a picture of where the parking brake switch on a 1970 MC is located/mounted. I've gone thru all the pictures taken during dismantling and can't find out where or how the switch is mounted. Any help will get me back on track.
Thanks 😊 Mike.
-
Thanks I think I'll try repairing the damaged/cracked areas with some proforma urethane sealer adhesive.
-
1
-
-
Waited all summer (2021) for the border to open. Fenders and hood had been on BO since Dec 2020. Still waiting for them. Lost a complete summer on the project. So we decided to use the old fenders and try repairing them as best we could. Sand blocked the body after, the results were pretty good. Then I ordered Eastwood Gray Epoxy Direct to Metal primer sealer along with about 4.5k USD in trim, interior and other parts to be shipped to Eureka Montana. Then waited for the US to open its land border for non-essential crossing. The stuff would be there and ready for pickup. Well after they announced another extension to September 21. I couldn't wait anymore, it was starting to be to cold to paint. So I gave it a try, Border Services Officer was understanding of my plight and let me in to get my parts. We managed to get 2 coats of primer on to protect the metal until next spring.


-
5
-
-
Has anyone been able to find a supplier of these? Left and right PN is 3975835 and 3975836.
-
On 2/28/2021 at 5:34 PM, 72RustBucket said:
Hey guys! Good news! Tax returns are in and I'm ready to go broke! I'm looking to finish up metal work by doing my quarters. I've done research, but having a 2nd,3rd, and even a 4th opinion is never a bad thing!
I know my drivers side is a total loss and will need a full quarter. The passenger side however, may be able to get away with a skin/patch.
I would love to hear what you think.
Thanks for your time!
Hey, I'm a little late in submitting this but. We did both full quarters, didn't encounter any fitment issues. Just used a lot of screw before doing any of the spot welding, If you have a plasma cutter it makes removal a lot easier. We also ended up replacing the rear inner/outer wheel wells and both sides inner trunk filler panels.
-
1
-
-
21 hours ago, Canuck said:
Very nice!
Be careful with the new fenders. First of all they still aren't shipping those fenders and I suspect it will be a long time before that happens. Secondly it has been noted that the quality of fenders for other cars by that manufacturer is not very good and require a lot of work to get them to fit correctly. Some say fixing an original one would likely cost less than making the reproductions fit.
Yeah it's a step by step process for sure. We'll be taking our time with it. I've kept some of the old sheet metal , ( trunk lid, hood ) for us to test our blocking, preping and painting techniques.
-
22 hours ago, cny first gen 71 said:
I did mine myself in my garage at home came out ok. I'm no body guy or painter but it's a out as 15 footer. Good luck with it, just take your time and you'll be fine. Maybe a couple extra coats of clear so you can wet sand the mistakes out but not all at once (that causes runs) ask me how I know lol.
Hey, thanks for the helpful info.


Non Functional Speedometer
in Drivetrain Tech
Posted
There's always gonna be a "a guy".