


71 MONTE 4 YA
-
Posts
462 -
Joined
-
Last visited
-
Days Won
10
Content Type
Profiles
Articles
Forums
Gallery
Events
Posts posted by 71 MONTE 4 YA
-
-
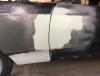
Just stopping by to say hello! My Monte is still in pieces since my last post. My cousin had it at his shop close to ten years. Well he lost his shop last year and now the Monte is in my garage in worse shape than when I drove it to his shop. I'm thinking of selling it and all of the things associated with it. I need my garage😞
-
 3
3
-
-
Hey Dan I bought one of your original ones. Is there much difference between the two of them? I haven't installed it because my Monte is still in project mode.
-
My cowl area had holes in it from leaves and debris just sitting in there over time. Thought it was the windshield but there was no rust in the channel. My Monte is still in project mode and my floors would be wet when left outside. I used POR- 15 and fiberglass strands to repair the holes. Still haven't had the Monte back outside to see if it worked
-
Maybe he's talking about the piece that fits between the front and quarter glass.
-
Sorry to hear this Rob. May God bless and carry you through this difficult time.
-
Rest in peace Dave


-
Started the Monte and did a huge burnout. Tried to do it again to record it and it wasn't happening. I think the tires got hot and sticky.
-
 1
1
-
-
Well stopped by the shop to see my Monte and my Cousin was working on her. Does the gap look right? He said he's got it where he wants it to be. It will be coming back off when it's time for paint.
-
Steve my parts are off of my 71 Monte with 60k miles. They were not pitted badly but need restored because of lack of luster. Here's a link to the company. Talk to Wally and tell him Rodney Speed recommended you.Rodney - what shape were those parts in when you sent them to be plated, was there pitting? Can you say where you took them, the wife's family is in Cleveland and we go there frequently.
-
1
-
-
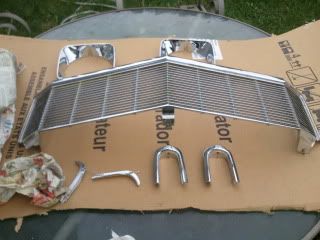
I got everything in this picture redone for $400 locally!
-
What did you use to help you fill othe hole besides body filler?
The filler went in the hole as well Jared.
-
Rodney, that looks great, you did a fantastic job. Can't wait to see the finished car
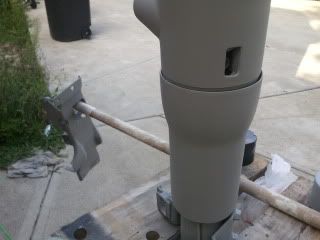
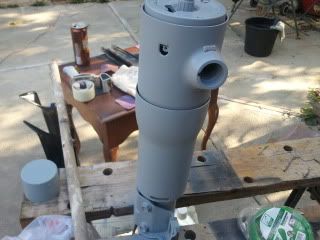
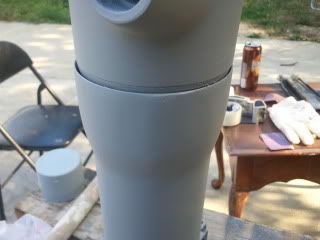
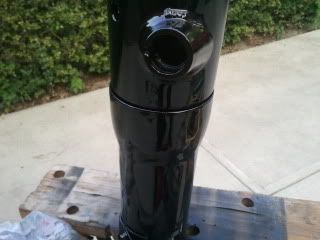
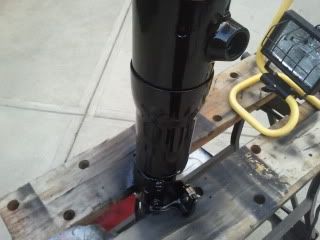
Thanks guys. I think I need to redo it with less gloss blackReally GREAT job on that Column Rodney.
 Your gonna start getting requests if you keep that up!
Doug
-
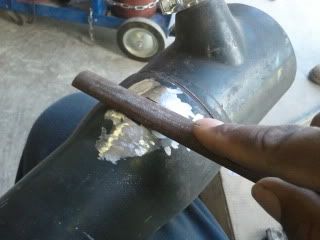
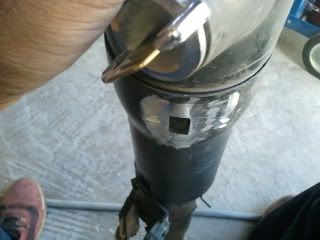
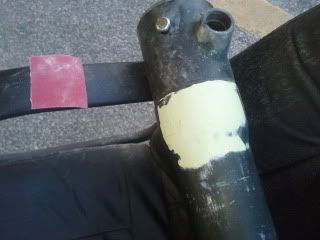
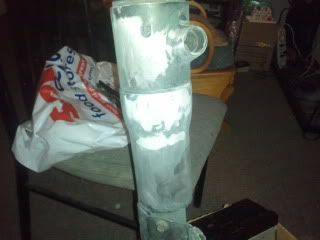
I had my original alternator chromed and and then had it rebuilt for more amperage. I think it's now 90+. I had to change my voltage regulator to the solid state kind. Don't know how well it works(car still in project mode) but it sure is pretty!
-
Thank you. Now if I can only get my Monte back from my cousin's shop. Then maybe I could install it.Wow that looks really good.
-
NOTHING!! I CANT EVEN SEE MY MONTE WHENEVER I WANT TO! YES I AM SCREAMING! LOL!
-
I have seen some people take a die grinder and grind the nub off and then patch it with a piece of metal and JB weld and then bondo it. If I remember correctly a couple of members here have done something similar.
I did an extra column that I bought. Haven't installed it yet.

-
Wow that turned out really nice!
-
I originally had a bench car, and ended up buying the cheap inner bracket set. I anchored the seat into the rear outside point with the brackets on the seat, and welded them into place with the seat tracks parallel to each other and the rocker. Because the front corner ends up raised, keeping you from being able to just run a bolt into the floor, I made brackets out of steel and carriage bolts using a 66 Chevelle for a template. I may be able to draw a template that you can use, I made it using tin snips/grinder, a file, bench vise, and a battery-powered drill. However, if I didn't already have the cheap brackets I would have bought the reproduction tracks from the vendors.
This is the bracket welded into the floor:

That looks good Cody!
-
That's the shifter itself
-
Hope this helps... on my 70 parts car,both outer front mounts were bolts, the rest were studs...make sure that the spacing on your seat tracks are roughly 15 inches give or take front to back...I know other gm cars had a shorter distance roughly 12 inches....My 72 Custom has a different stud/ bolt hole arrangement than the 70. I'm not too sure about the 71's...What i did on my first 72 which was a bench car,used the original outer mounts and drilled where it should sit and bolted right through into nuts with washers....I didnt get any pics of that though..... Anyone else that can chime in to help?
Thanks for the pictures!
-
On my factory bucket seat car the rear track bolts down into a floor brace.
Yes Rob. I'm aware that at the rear I'll be able to use the original outer bolt holes in the floor. My concern is the front outer mounting points. Some say that I will have to relocate the stud from the original bench seat location.
-
Quick question. Can I just somehow move the studs that's on the floor already from the bench location? Anyone got pictures of both buckets and bench seat floorboards? Thanks.....Rodney
-
Dan I already have. He didn't find it feasible for the work he would have to do to remove them. He's four hours away from meRodney, check with scrappydo. He has a thread in the for sale forum. He's parting out a bucket seat car now.
Dan
-
These are actual factory brackets removed from a donor car. These are not aftermarket. I think I'm going to need the two front pieces with the studs for the sides towards the door.Sounds like you bought the two piece kit. I suggest you sell those and get the 4 piece kit. The 4 piece kits are the way it was done from the factory. If you use the 2 piece kit your seats will sit crooked. They will also rub your seat belt retractors. They are not worth installing. They are not correct. Do yourself a favor and do it right the first time. You will be happy you did.


496 Stroker engine
in Cars and Parts For Sale/Wanted
Posted
496 eagle stroker kit Edelbrock aluminum heads, stroker cam, billet aluminum serpentine set up with all accessories. Rated for up to 700hp. 73 block. He has all of the documentation such as cam specs. He has over 10k in this engine. The only reason he's selling it is because he can't keep a transmission that will hold up to it. Plus the premium fuel that's needed. He's asking 7k