


Blackhawk
-
Posts
249 -
Joined
-
Last visited
-
Days Won
4
Content Type
Profiles
Articles
Forums
Gallery
Events
Posts posted by Blackhawk
-
-
I would use some acetone, but you probably don't need to strip it fully. SEM's surface adhesion promoter is mostly a mix of naphtha, toluene, and acetone. Too much of it may soften and remove the texture, so be careful.
-
GM used adhesive to hold the panel in place, I believe the usual term is dum-dum putty.
There's a chance that your panel has been removed and more putty was applied than necessary. My dash had five or six small areas with the putty, but they were very thin.
-
I agree with Rob on not adjusting the door if it fits the quarter. Always adjust the door to the quarter panel, then the fender to the door.
How are your hinges, do they need rebuilding? A tight gap between the door and fender paired with worn out hinges can certainly cause issues, as well as a loose or rusted lower fender. Make sure that the bottom of the fender doesn't move in and out if you put some pressure on it, as well as making sure that it doesn't stick out farther than the rocker panel.
-
 1
1
-
-
After looking at the costs to do what I wanted with what I had, I'm now on the tail end of an LS swap with an overdrive transmission.
-
1
-
-
I would recommend not sacrificing the cam specs in order to fit the head or trying to stay on the hairy edge of detonation.
When I was still researching for a SBC, I did quite a bit of looking into the ProMaxx 9183 aluminum head. They're almost obscenely cheap for an aluminum head, and can handle higher compression. However, there may be some consideration in the intake choice, I believe it has taller/higher intake ports than many other heads.
My brother and I have both looked into Vortec heads in the past. Junkyard heads aren't the way to go (if you're considering that route); by the time you get them magnafluxed, cleaned, and machined, you will have nearly the cost of a new assembled set from GM. That's if the heads aren't cracked, which is a good chance if you don't find a low-mileage set.
-
1
-
-
Looks to be 20%.
Looks to be good! Thanks for posting it.
The current 20% listed on their site is their Thanksgiving sale, it ends the day before the 25% sale begins.
Thanks for the information, I'm close to ready to pull the trigger on the interior, this may force my hand. Did you order straight from Legendary or from one of their distributors?
-
1
-
-
Perfect, thanks guys! Somebody local has a set of inner fenders from a 1969 that look decent, we'll see what it has for rust at the battery tray mount.
-
How is the battery location/fitment with the Chevelle inner fenders, does it line the tray up to the radiator support like stock or does it sit farther back?
-
Well, I'm not sure that the stock harness is complete.
Also, using the drive by wire plus my TH350 is giving me headache!
Which year engine did you buy? Depending on the year of the computer you may be able to swap to a cable throttle body. Otherwise, you'll need to attach a bracket to the drive by wire pedal to actuate the kickdown. Here's some information on mating the engine and transmission together:
https://ls1tech.com/forums/conversions-hybrids/1255185-what-all-required-mate-th350-5-3-a.html
The LT1Swap site has wiring diagrams, that will let you know if your harness is complete.
-
POR15 will work if it's all rusty, or if you use their metal prep on the non-rusty metal. I replaced all of the floors, so I cleaned up the rest of the interior and sprayed Rustoleum rusty metal primer and satin black.
-
Little update.
Since my last post, things didn't move as expected.
Engine is still in my garage, and the garage is a real P*** (clay floor...).
We were looking to buy a house but things where a bit complicated.
Engine blocks is waiting for paint, new pistons, new camshaft, new lifters and trunion upgrade.
I'm a bit stuck with wiring harness and I'm considering buying a new standalone harness to get things done.
What are you stuck with on the harness? I've been using www.lt1swap.com for information on what to pull and what to keep.
-
I used a oil pan from a Cadillac CTV, LSXmotor mounts from E-bay
Did you use forward mounts or mounts to line the bellhousing surfaces up? How is your ground clearance?
-
After doing months of research, measuring, and hunting down broken image links and dead build threads, I decided to take the plunge and order the mounting accessories for my LM7 swap. Most of the A body information out there assumed that all cars on that platform shared the same frame, including the Monte Carlo. Because the engine mounts at the rear of the crossmember, you can fit more oil pan in the rear than a Chevelle. On a Chevelle, you would need to do some cutting to fit the LS1 oil pan with forward mounts (the front of the LS is in the same position as the SBC was), here's the fitment on a Monte Carlo:

I used Trans-Dapt 4572 plates with Summit polyurethane engine and transmission mounts. The transmission fits with the tall mount and preload plate in place, no preload plates used on the motor mounts. No ideas on the angle yet, but it should be well within the acceptable range as a Chevelle build using basically the same components achieved 1* down.
The Holley mounting kit, while nice for the Chevelle, is not feasible for the Monte Carlo. Since the Monte's frame mounts are flipped around Chevelle mounts, the Holley kit would either place the engine into the firewall or need supports mounted behind the crossmember to place the engine correctly.
I'll make a more complete summary, along with some of the information from my intro thread, in a more appropriate section. Here are a few more photos from the swap.


-
1
-
-
Are you looking at these?
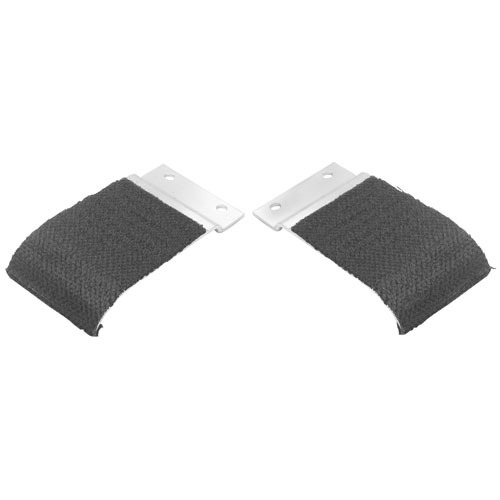
I'll try to get a photo of my doors tonight, or at the least a scan of the assembly manual. If you're doing anything more than just driving the car, the 1971 Chevelle/Monte Carlo factory assembly manual is the best $30 you'll ever spend on it.
-
It looks like the rubber does get installed into the chrome:
https://www.opgi.com/monte-carlo/1971/gaskets-seals/weatherstrip-seals/AMS0849/
-
I would like to replace the rubber seal that runs horizontally at the end of the quarter window. It seals the front window from the back quarter window. It has a chrome trim that is rolled over at the top and is open at the bottom. To remove the whole unit, you tap it out with a piece of wood again the chrome edge. The question is due you have to buy both the chrome trim and the rubber as one piece or can you just buy the rubber insert and pry the old one out and insert the new rubber? OPG sells the unit, however they are $80 per unit plus shipping. That's close to two $200 for both windows. Any ideas??
Are you looking for the window felt that connects to the door on either side of the glass, or the rubber strip that runs vertically between the quarter window and door glass?
If your car has just the chrome bead, I don't believe you can buy the rubber separate. If you had the wide molding then you would have to.
OPGI seems to almost always be the most expensive vendor. The Parts Place has them (WS2446M for repop, WS2447M for OEM) for less than OPGI, Dixie Restoration Depot does as well.
-
You can also use a set from a S10/Blazer, around the 1998+ models. Here's some information from the Chevelle forum:
-
As far as I know, all first gen Monte Carlos had semi-gloss paint under the trim other than factory black cars. It makes the trim blend in as one piece rather than multiple pieces. Of course, sometimes what is considered correct at one factory may not be the same at another. Someone with a factory assembly or body manual may know, I'm not able to get to mine for a few weeks.
-
Cbolt:
Thank you for the reply and the encouragement. I'm a little hesitant because I'm a total rookie when it comes to welding.
Ive decided to go for it, and attempt this project myself. I have an air compressor and going to purchase a metal nibbler attachment to help with the removal of the rusty floor pans. Metal grinder, check.
Here is where I need help....
What kind of welder do I need?!? I'm assuming I will be using a MIG welder, but what kind and how powerful???
My garage is wired for a 220 v but no outlet has been installed. Should I go that route and get a 220 welder or is that overkill for this project? It will be relatively simple to get the outlet put in.
Any advice will be greatly appreciated.
A MIG welder will probably be the best for repairing panels in the car. Make sure it can run gas, the cheap welders are flux core and can't always be converted. Flux core welding wire isn't going to be ideal for sheetmetal replacement.
A 220V welder may be a bit large for panel replacement, but it makes sense if the price isn't too much higher. I use a 30 year old 120V Miller Sidekick, it's good for everything but thick steel. Most of what you'll likely be doing is tacking, short beads, and plug/rosette welds, so you don't need anything too heavy duty unless you're planning on doing anything else with it (building jigs to support anything heavy, farm-type repairs, etc).
-
I originally had a bench car, and ended up buying the cheap inner bracket set. I anchored the seat into the rear outside point with the brackets on the seat, and welded them into place with the seat tracks parallel to each other and the rocker. Because the front corner ends up raised, keeping you from being able to just run a bolt into the floor, I made brackets out of steel and carriage bolts using a 66 Chevelle for a template. I may be able to draw a template that you can use, I made it using tin snips/grinder, a file, bench vise, and a battery-powered drill. However, if I didn't already have the cheap brackets I would have bought the reproduction tracks from the vendors.
This is the bracket welded into the floor:

-
Do you need a new tank or is your existing tank fine? If you need a new tank, I've heard good things about the kits from Tanks, Inc.

Rear Bumper!
in Restorers - Archive
Posted
Is your chrome flaking off, or is the bumper damaged? If the bumper is mostly straight and dent-free, rechroming may be an option as well.