NWmonte71
-
Posts
100 -
Joined
-
Last visited
-
Days Won
4
Content Type
Profiles
Articles
Forums
Gallery
Events
Everything posted by NWmonte71
-
Thought I'd bump this topic back up............ Where is everyone buying their replacement sending units? I see tons of new ones on Ebay, but not sure if they are just cheap junk?
-
Not long ago I discovered a cup holder online called the "Plug-N-Chug". It is a custom made cup holder that takes the place of your OEM ash tray. The cup holder holds 2 cups and can be ordered in any OEM interior color. They are around $50 or so. Specifically they are marketed for the 70-72 Chevelle SS guys. That being said, I assume these cup holders will fit a 70-72 Monte Carlo? I was wondering if anyone on here has one to show off?
-
That is what I am afraid of...........or worse, a bearing that seizes while the engine is running. I'm just going to disconnect the A/C belt.
-
Me and my wife would like to eventually drive the car on longer road trips into warmer country. Right now we are just attending local events in 60-70 degree weather. I rather just save my money up and buy a new modern 134a system for the car. Having working A/C on the car is not a priority project on the Monte at this point. I just want to get rid of the annoying rattle sound from the pulley right now.
-
The clutch pulley on my air conditioning compressor is now rattling when the engine is idling. I was wondering if this indicates the clutch is worn out or something else. I have not tried turning on the A/C. I was wondering if it is safe to disconnect the belt from the engine that turns the compressor? I don't want to hear the noise and using the A/C is something I just don't use (windows always down). Removing the belt would definitely take an unnecessary load off the engine (one less pulley to turn). Would I lose defrost and other heater functions? The system is the original R-12 Harrison unit. I rather save my money and install a R-134a conversion kit on the car someday than source out more R-12.
-
I actually just went by my local O'Reilly Auto Parts and found a set of plastic air cleaner spacers. I am going to see if this does the trick. I think I will still be far away from the hood bottom, considering clearances.
-
This is going to be my next step. Hoping clearances will be ok.
-
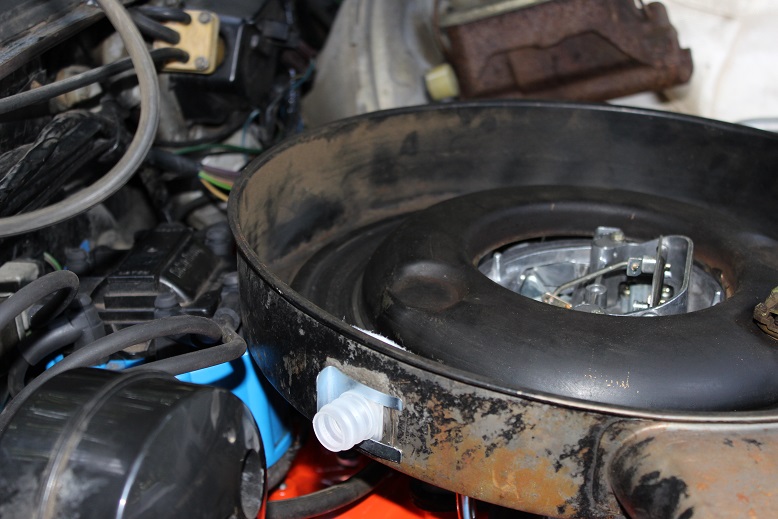
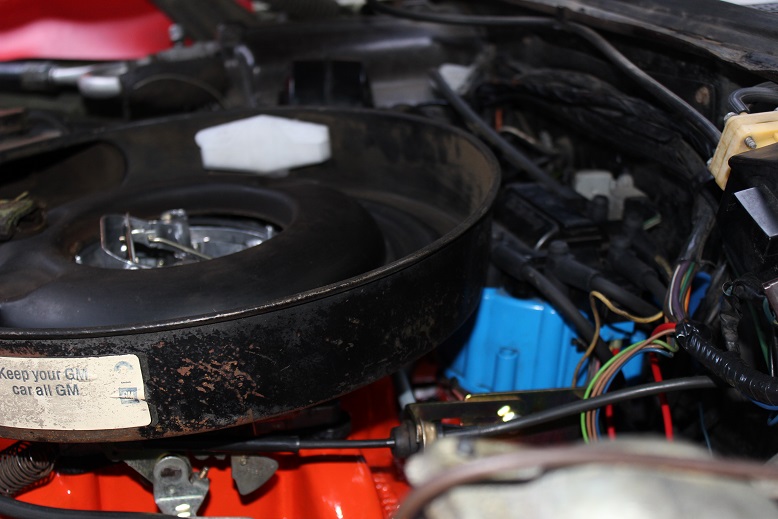
Hey everyone! I recently added an HEI distributor and edelbrock carburetor to my otherwise stock 350cid 270hp engine. The problem now is my stock air cleaner will not clear the distributor cap and also hits the fuel inlet casting on the carburetor. I really do not want to modify the stock air cleaner or throw on a traditional chrome open element air cleaner. Is it possible that mid 70's Chevrolet air cleaners had an offset base for the HEI distributors or a large cut-out in the rear for it? If so, I would like to connect with someone who has one lying around. I want to retain a stock appearing look, including the lid with 350 270 hp decal. Any ideas or suggestions?

-
HEI distributor conversion.......how to wire?
NWmonte71 replied to NWmonte71's topic in Electrical Tech
For those who are curious to know............. I did some additional research and learned that you must combine the yellow starter solenoid wire with the new 12 gauge wire to power up the HEI distributor. The car started first time without any issues by wiring it this way. The hardest part is combining the two wires into one connector. -
FINAL UPDATE: I finally got my monte running! Long story short............ I decided to go the route I am comfortable with and broke my own rule of keeping the car all stock. I ended up ditching the quadra-jet and cast iron intake manifold. I installed an Edelbrock performer package (600 cfm carb w/performer intake). I also decided to eliminate the Pertronix Ignitor and install a spare HEI I had in the shop. It seems now that many 100% original purists would cringe at the changes I made and wonder why I ditched the legendary quadra-jet. To be completely honest, I have owned many GM vehicles with them and never had any luck tuning them. I do not have a go to mechanic who can help me. Tuning carburetors is a dying trade and to find someone who truely knows what thier doing is uncommon. Edelbrock AFB's are always my go-to carburetors when I need reliability. I literally bolted it on and cranked twice........... started with ease and idled great! Some people hate them and claim they get bad mileage and do not offer performance for heavily modified engines. My 71 now starts and runs super smooth, I couldn't be happier! As for the old parts I took off........I boxed them up and saved them since they were the original pieces to the car. In the end it was more important for me to have a running car to enjoy, than continue suffering on how to maintain my stock equipment and become proficient at intricate tuning.
-
HEI distributor conversion.......how to wire?
NWmonte71 replied to NWmonte71's topic in Electrical Tech
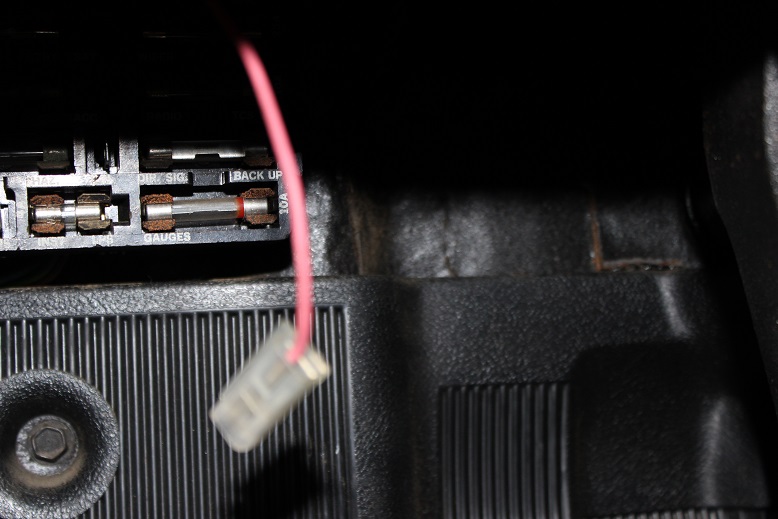
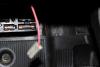
I did some more research online and decided to do some wiring harness surgery. I carefully cut open the black plastic harness tape and manually removed the pink resistance wire from the engine side of the fuse block. I replaced the wire using a new red 12 gauge wire with correct delphi-packard 56 male connector. Do I need to retain the yellow "R" terminal coming from my starter solenoid? -
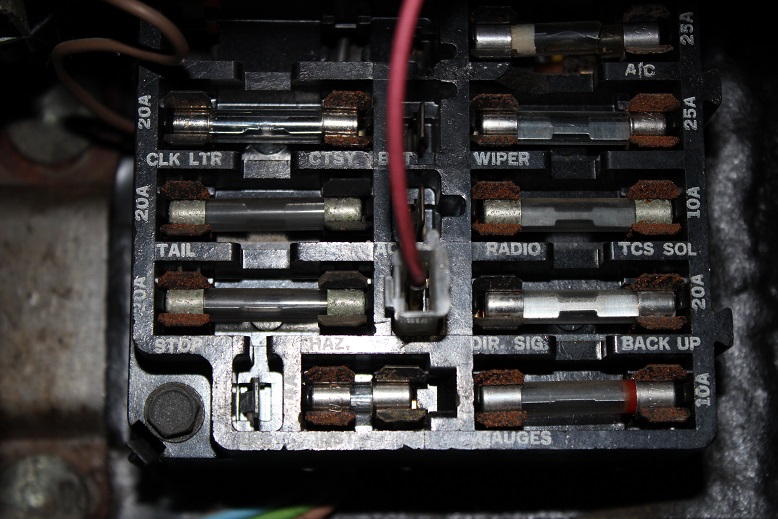
So I am converting my stock Delco-Remy points style distributor to a stock Delco-Remy HEI distributor. My question is: Where can I pull 12 volts to power up my HEI distributor? Normally I would just run a 12 gauge wire from the ignition fuse block spade, but there is already a pink wire using it! This pink wire at the fuse block I assume is for the original ignition wiring circuit? Do I need it or can I unplug it and just run my 12 gauge wire up to the dizzy? I would like to not cut/modify my wiring harness if possible, since the car is so original. I am no longer using the carburetor throttle solenoid...... can I pull the 12 volts I need from that? I just want to make putting an HEI distributor on my engine straight forward and not complicated for the wiring hook-ups.
-
I did take out the distributor to install the new Pertronix unit. Instead of rolling the engine over to TDC #1, I marked the rotor direction on the firewall and made a mark on the valve cover for which way the vacuum canister was pointing from the distributor. My idea was to just slip it back in and fire it up. I did get it back in with a little wiggling and was able to match up to my marks made. I guess it could be possible I was off a tooth? If so, would that keep the car from even starting? My plan now is to absolutely verify TDC #1 and make sure the rotor is pointing to the #1 plug wire contact.
-
I checked for spark tonight on the spark plugs. I do get a solid spark, however it is an orange/yellow spark........not blue. Not sure if this is an issue. The spark is strong and consistent when cranking. I am getting a solid 9.6 Volts when cranking. Like I mentioned earlier, the accelerator pump seems to not be squirting any fuel when the throttle linkage is manually actuated and looking down the primaries. I decided to take the top half of the carburetor back off and inspect. The fuel bowl was filled up and the float level. I noticed the rubber skirt on the accelerator pump was peeled off and stuck in the pump spring! I decided to change out the whole accelerator pump assembly for a new one. The new one seemed to seal better and I manually pumped it to verify fuel was squirting from the orifices. Before I put the carb top back on I noticed the power piston retainer bushing is loose and not allowing the spring loaded power piston to stay seated. This is a real challenge trying to install the gasket and carefully install the carb top without damaging metering rods and well tubes, not to mention fish the butterfly linkage through. I stopped and ordered some new power piston retainer bushings on EBAY. If its not one thing, its another.
-
UPDATE: Attempted to start the car......... the car will crank over just fine, but will not fire. I pulled the coil plug wire from the coil and cranked, got a huge blue spark to come out of the center coil socket. Next, I disconnected the pink/yellow wire from the coil and took a voltage reading to a good ground. While cranking I registered 9.6 volts on my meter. Seems good. Whenever I attempt to start the engine and then stop, the carburetor always spits out a mist of fuel from the top. No flooding or anything. I had my wife crank the engine while I looked into the primaries with a flashlight, I could see just a little trickle of fuel coming out of the venturi's while cranking. I figured much more fuel would be coming out? Another thing I noticed, while I actuate the throttle linkage manually, I see absolutely no fuel squirting out of the venturi's. I'm not a carb expert by any means, but my other classic car has a 1400 series AFB Edelbrock that sprays fuel when you manually actuate the throttle linkage. Something doesn't seem right. I am really torn......... my 71 monte is all stock with original engine setup and I would like to keep it stock appearing. Another part of me wants to pull the quadrajet and cast iron intake manifold and go straight to a brand new Edelbrock Performer package and call it a done deal. I have already missed 3 car shows this year due to this issue not being resolved. I am afraid that I will be fighting this for a while and continue to miss more events. I have no one local to help me out either, Youtube and Online Forums are my only help at this point. What would you guys do or suggest?
-
I am interested in starting off with a clean/fresh tank for the cleanest fuel delivery possible. Where are most people buying their OEM replacement tanks & sending units? I know Original Parts Group sells them........anyone else you suggest? I want to replace the tank, sending unit, steel lines, and rubber hose connections all at once.
-
Wallaby, Thanks for the ignition insight on wiring. I called Pertronix yesterday and talked with one of their tech guys. I explained that I am using all stock OEM wiring, including the delco-remy OEM coil. He said it should not be a problem to hook everything up as originally designed to work. If the engine will not start, he said to check available voltage at the coil positive + and make sure it is not getting below 9 volts. If resistance is high and the voltage is below 9V, he suggested to cut back the pink resistance from the firewall and soldier in a 12 gauge wire to increase the voltage. An alternative method also suggested was to run a dedicated 12 gauge wire from the fuse block or use Pertronix ignition relay kit they sell. Tonight, I am going to test it as is and see if I can get it to start & run.
-
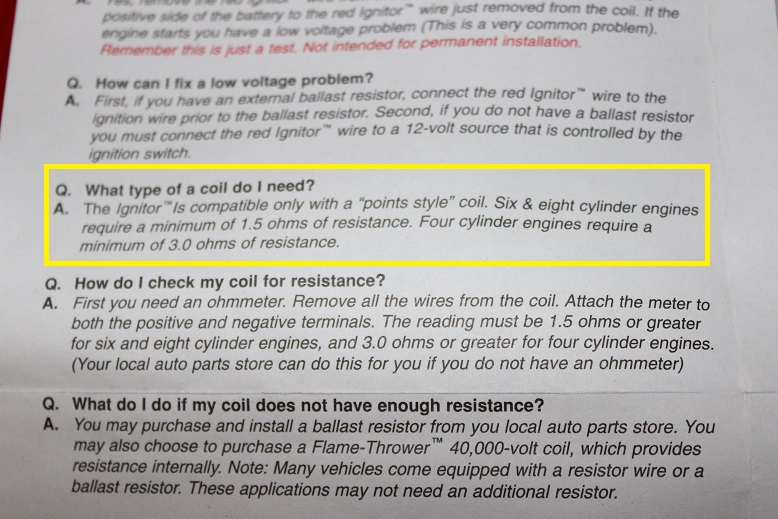
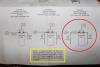
UPDATE: I installed my new Pertronix Ignitor 1 into a newly reman'd Delco Remy points-style distrbutor. I was able to drop in the distributor and start to tackle the wiring. I ran into some unanswered questions when reading the installation instructions. The Pertronix unit I am using is their original Ignitor 1. The instructions say you can use any points style coil as long as the coil has a minimum of 1.5 ohms of resistance. My original Delco Remy coil measured near 2.0 ohms, so I decided to use it. The directions also say that the original ballast resister should not be changed in any way. My question is.........I have read so many conflicting comments on how to wire up these units. Some folks say to run a separate 12V power wire from the ignition fuse block and eliminate/by-pass all the existing ballast wiring. Pertronix does not mention any of that in their directions. Some folks also say that an OEM coil will not work or will damage your new Ignitor electronic ignition and that you must use a "Flamethrower" unit from Pertronix. For the positive side of the coil, I have 3 factory wires............ (pink ballast/resistance wire, yellow goes to "R" terminal on starter solenoid, and black wire coming from a capacitor located outside of the coil holding bracket). Do I just reconnect all these wires as they were before or eliminate just the yellow and black wire? Pertronix does not specifically cover any of these wires in their instructions. I really do not want to damage my new Pertronix unit and or make starting difficult for me. Perhaps someone can guide me through what I need to do.
-
Bruce, thank you so much! The pictures help me a lot actually. My existing fuel line has a lot more extra twists and bends in it than the one you have pictured. Your fuel line in the pictures look much more simple and clean. The bends also look basic and gradual. With my tools, I'm confident I can get this. Again, I appreciate the photos! -Chris
-
I received my new metal fuel line from OPG (Fine Lines) in the mail today. What a joke. The fuel line is not even close to fitting without major bend modifications. The fuel line was specifically marketed for the 350cid 270hp, which I have. I decided to get out my Eastwood tool for bending fuel/brake lines and very carefully tweaking the line to make it route properly. One of the OEM bends above the fuel pump require (2) 90 degree bends within just a couple of inches. Making multiple tight bends with 3/8 metal line is just about impossible with a hand-held tool. I ended up deforming a bend so bad it put a kink into it. My new OPG $26.00, "Made in the USA" 350cid 270hp fuel line is now scrap metal. It is true what many people said on "pre-made" reviews.......Don't bother, make your own so you are the quality control. Tomorrow I will be heading down to my local auto parts store for a stick of 3/8 fuel line and build my own. I have the tools and have built a complete brake line system for another classic in the past. Just frustrating how items are not bolt on and go right out of the box.
-
Rod, I was starting to think that no one carried OEM style points distributors anymore. I went to Rockauto and found 3 different choices. Thanks for the suggestion!
-
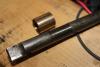
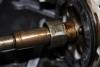
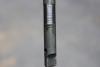
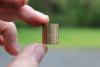
UPDATE: Back at it again and started to install the new Pertronix Ignitor I system into my original points distributor. During the install, I noticed my main distributor shaft had a decent amount of up & down play. Reading the Pertronix instructions, I ended up having to use both distributor gear shims, just to reach the max air gap of 0.060". I tried re-installing the distributor into the engine and just could not get the gears to mesh and the rotor to point at the mark I previously made before. Another bit of information, the distributor was hard to pull out, it needed a lot of rocking and jiggling to get it out. Frustrated, I ended up pulling the distributor out and tried spinning the gear teeth by hand. Spinning the distributor gear by hand seemed rough and had a lot of friction. I decided to take the shaft out and found some interesting things............ A "homemade" looking brass pipe cut crooked was at the bottom region of the shaft and the steel distributor shaft was grooved and worn down. The upper brass bushing near the rotor was seized onto the steel shaft and was grooved on the outside (spinning inside the distributor aluminum housing?) Too many things looked unacceptable and out of place. I do not have a spare points style distributor to compare it to. At this point, I want to get a complete replacement and know all components are true and in correct working order. Anyone have suggestions on where to buy one? I still plan to install the Pertronix Ignitor kit. Honestly, it would be great to find a member who replaced their good working points distributor for a modern HEI distributor. I'd happily work a deal. Any help or suggestions on what direction I should go is greatly appreciated.

-
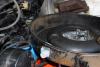
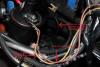
Bruce, my engine compartment looks very similar to yours and has the same cable attachment to the alternator bracket w/small ground wire also going to the right fender. I replaced the battery negative cable due to green corrosion. I also replaced the small ground wire going to the fender (same green corrosion). My 350 is 270hp model with factory A/C.
-
Thanks for the reply, Wallaby. My monte is very original, but many items were in question due to age and condition. I found spark plug wires with cuts into the braiding, corroded rotor under distributor cap, corroded negative battery cable, and other small things that make a big difference in starting. The car has really done more sitting than driving in recent years. Are there specific places where grounding straps are located on these cars? If so, I would like to find them on my car and make sure they are firmly attached and clean.
-
I stopped by NAPA Auto Parts tonight and picked up a Pertronix 1181 Ignitor electronic ignition kit. Looking forward to installing it this weekend. Thanks everyone for suggestions on QJet idle adjustments. At least now I have an idea where the screws should approximately be.