


NewTimer
-
Posts
153 -
Joined
-
Last visited
Never
Content Type
Profiles
Articles
Forums
Gallery
Events
Posts posted by NewTimer
-
-
Do you have an actual Volt gauge that tells you your out put? When I switched to one wire I had to leave one wire connected to the the plug on the alternator to prevent my dummy light from staying on
-
I do see the headlight switch and it is grounded and I didnt do the LED bulbs
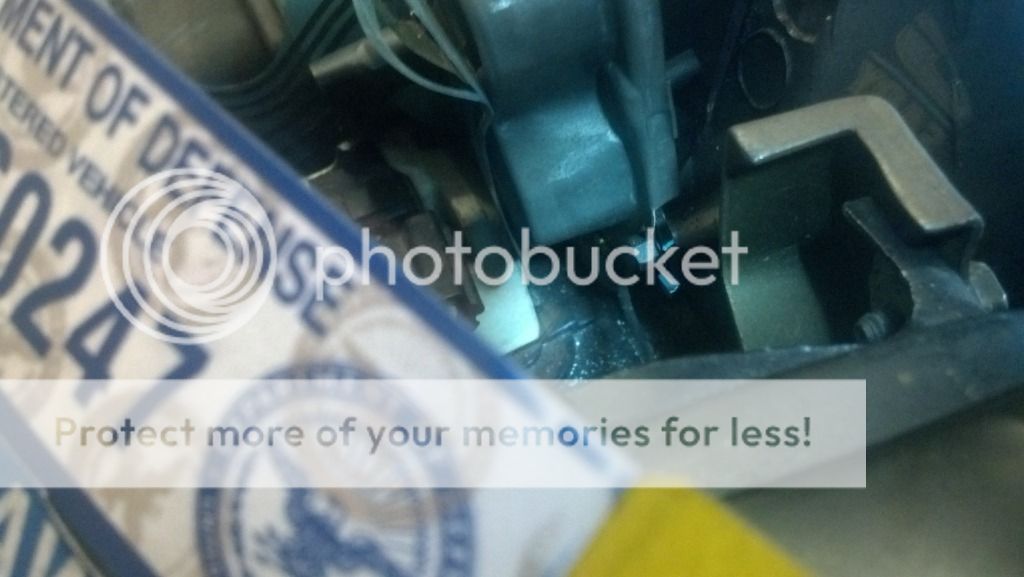
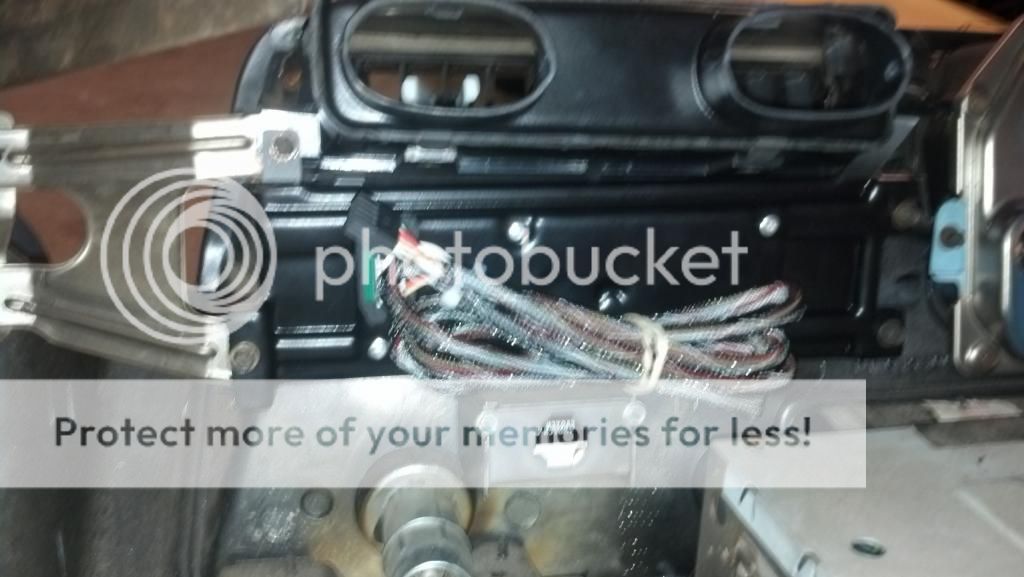
Which is why I asked if there was ground wire else where. This is the ground wire in question

-
So I took the dash out for my car and now my dash panel lights are not working when I put it back in.
whats working:
Gen light and oil light are working
Turn signal is working(left light does not flash but right light does)
Brights does come on and off.
fuel gauge does work, and has power to it
headlight switch turns on headlights and park lights come on
what i tried:
turned headlight switch dimmer both left and right.
headlight switch ground is connected
My question:
is there a ground that comes directly out of circuit board plug? and where should it be connected? I found what appears to be a ground wire and pressed it against a ground point, and it smoked and now the oil light doesn't come on anymore.
-
Does anyone know how far the ac charge ports can be from the ac compressor? I know traditionally they are on the fitting but I would like to make it less visible/less clutter near the engine. would use a splice like this to move charge ports ( linky )
-
Well they have an option to use the stock panel, but mine wasn't in all that great condition and I am replacing the entire dash panel anyways. So for me it wasn't s big deal. Either way pretty stoked I get to enjoy ac on command this summer!
-
Installed the evaporator, kind of been slacking and need to clean up wires behind the dash and then re-installed it.
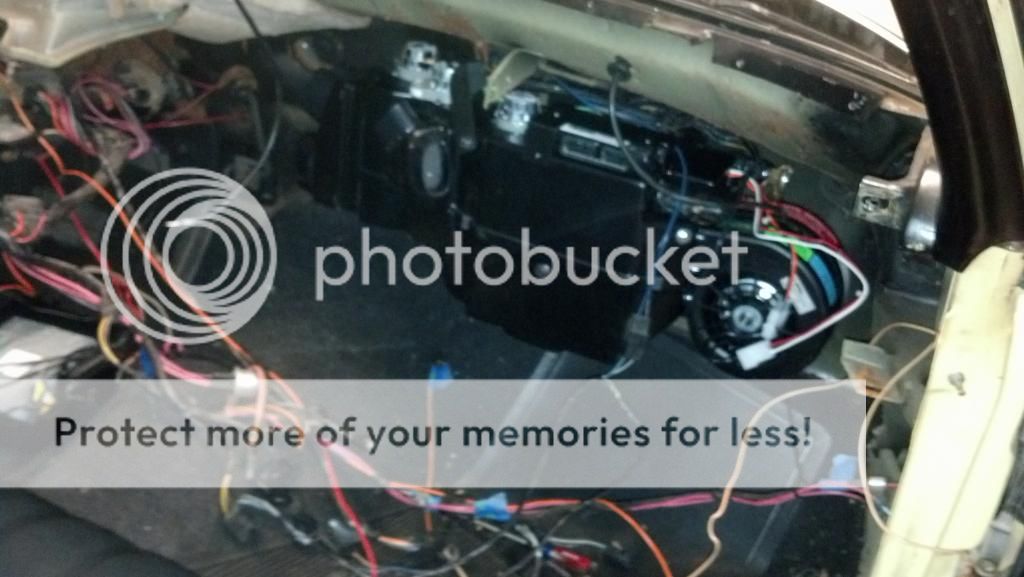


Had to cut a portion off to get the panel to sit flush


-
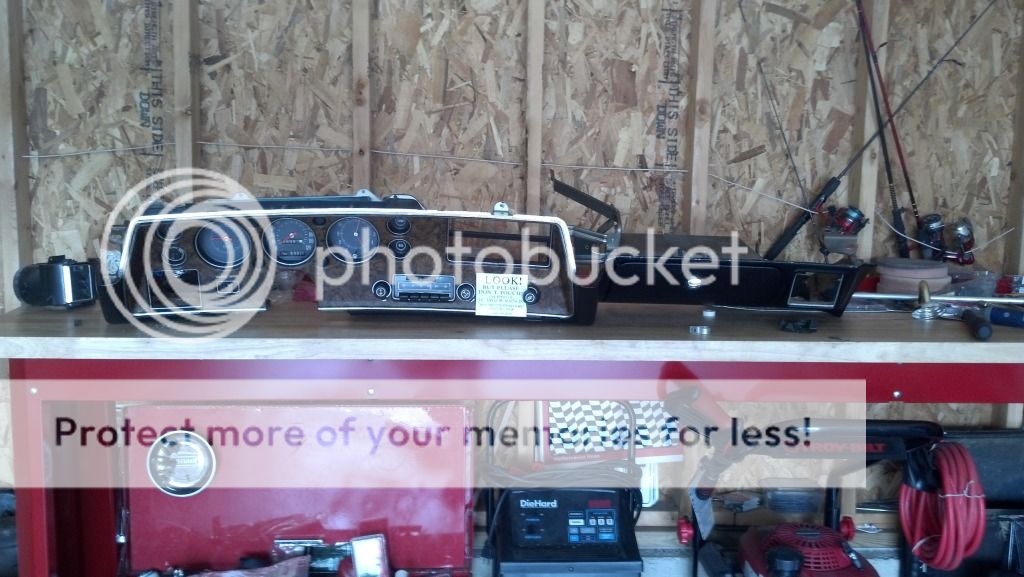
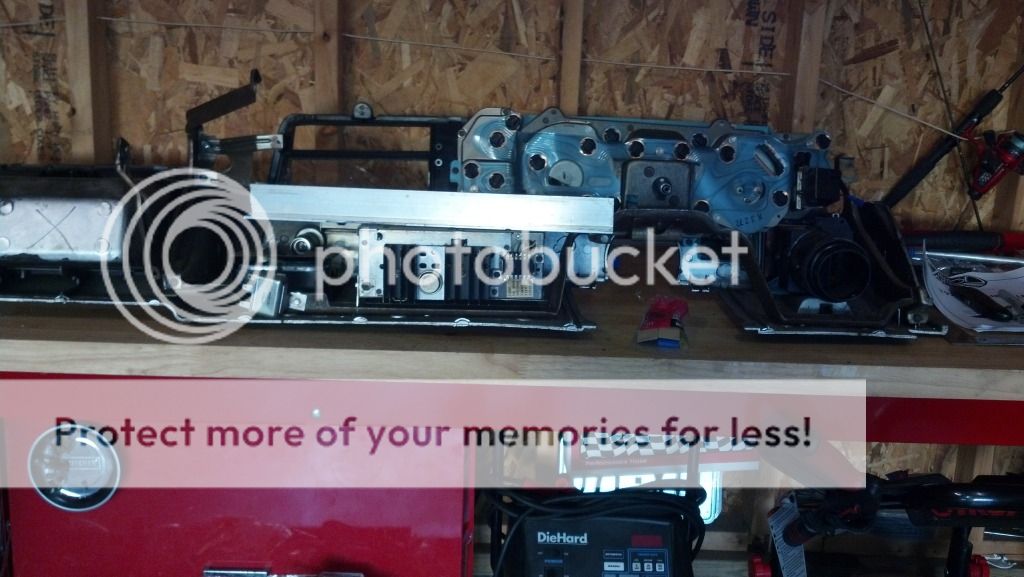
Blurry but you guys get the point dash is out! I highly advise using two people before you unbolt the last two bulkhead bolts.
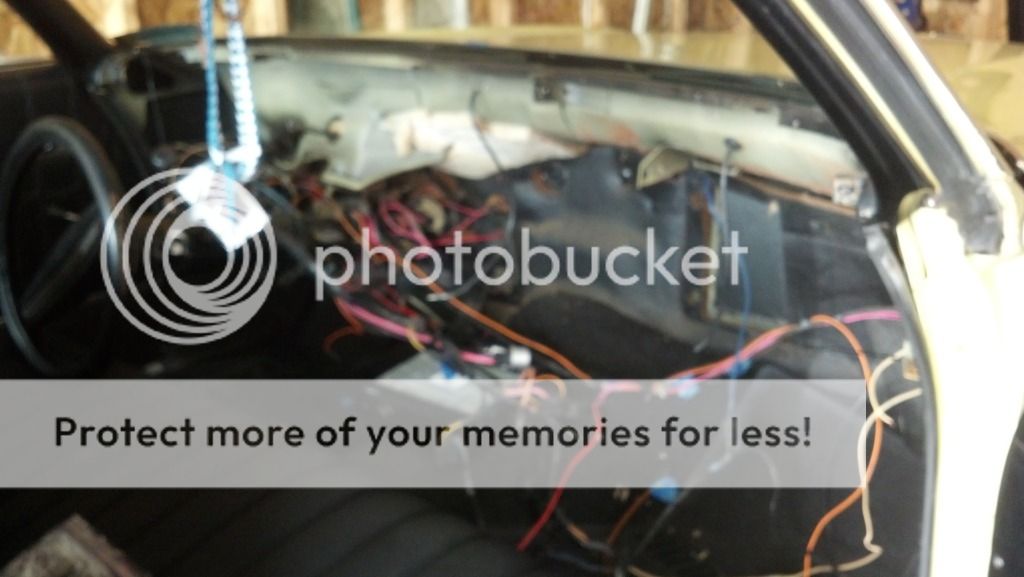
Safely on the workbench
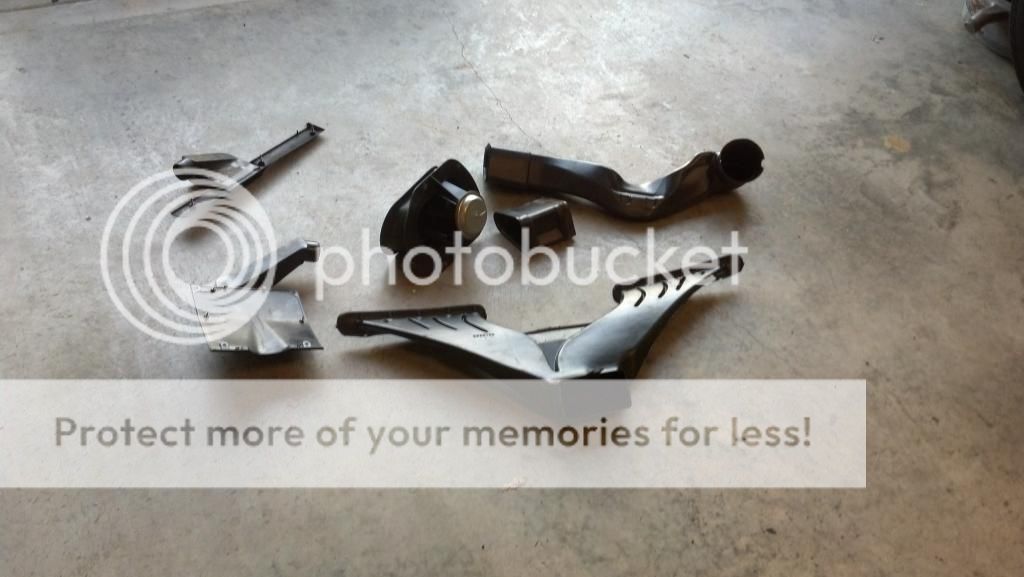
How much you will need to cut off of the glovebox, comes with a new back plate with s clips to hold it on. the clips have tabs that dig into the plastic, that prevents it from coming back off

center vent cut for Vintage Air

Adapters for driver and passenger vents

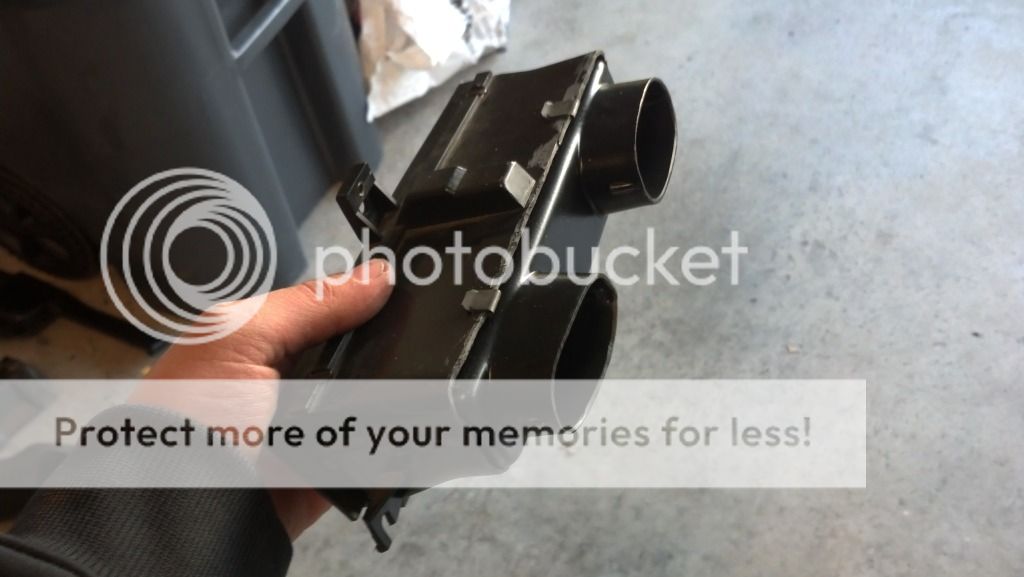
Parts I won't be needing, may put them up for sale if any interest you can PM me
Fresh Air vents and ducts
-
I thank you for doing all the hard stuff(research actual install) prior to me getting there. looking forward to see this LS swap !
-
Installed the condenser yesterday. The old one is far bigger then the new unit. For those considering Vintage air not you will have to enlarge the the holes which your condenser hard-line routed through the core support to 1-1/4".
Looking forward to taking off the dash Wednesday to mount the evaporator unit
-
Oh and correct me if I am wrong but you will need to remove your dash completely if you don't have a chevelle or aftermarket dash. Your glove box should be(my orginial 72 dash is) moulded in the dash. And with the VA you need to cut 2 inches off the glove box.
-
I actually just ordered my kit. Its sitting in the living waiting to be installed over spring break next week. I had my compressor already so I just order the evap kit and condenser kit seperatly. I moved my compressor to the passenger side so I order a special hard line VA sells to do that. I also didn't order any hose because I am going to route them so they stay under the fender.
-
You put in challenger seats? Got any pictures? My dad has a srt8 392 and love the seats
-
I actually used por15 engine enamel paint on the engine and intake. By far the best thing I've used. Haven't cracked, chipped anything. The last time I used vht engine paint and had the same problem. The intake doesn't yellow from fuel or coolant. I do recommend like everything prep is key. I personally stripped all old remaining paint with a wire wheel and scuffed the parts I missed with sand paper. I then sprayed everything with Eastwood fast etch. It preps your metal, in this case block to be painted. You will know it working because it will turn it a darker grey. After you leave it moist with fast etch for 20mins I completely wiped it down with Eastwood Pre which removes any chemicals or waxes left on your surface. I then painted with por15 with a first coat and waited until it got tacky and the second coat made it perfect. That was done about a year ago and even with overheating problems not one chip to be found

-
On the 86 SS it came with a CCC Carb(computer controlled). Well the plan is to get rid of the computer with all the emissions controls and install a regular carb. I live outside of city limits and do not need to pass emissions anyways.
To do the conversion I know I will need a vacuum advance dis, maybe a new intake, and a lock up kit for the 200r4.
I was planning on using the stock Qjet from the 72. Debating whether I should rebuild it or not. SO my real question is, is there anything I should be aware of when rebuilding the stock Qjet? Carb was completely functional and working perfect prior to removing it.
-
Changed the Power steering pump out on the 86 SS. That thing was puking out fluid! Also changed out all belts that were cracked. I have a feeling it was sitting for years! Plugs and wires tomorrow.
-
I have had petronix for over 5 years, not a single problem.
-
You should be able to find them at your local parts store. There usually by all the energy suspension poly mounts.
-
Cost a lot more but have you seen what Quarterbotty did with his headlights? Here is the link
-
Couple gauges came in


-
What size are your bigger gauges Andreas? 3 3/8?
-
If you go efi, I personally like the msd atomic efi. Comes with fuel pump and everything needed. It is also a lot cleaner set up IMO. Good luck!
-
The LED bulbs or LED gauges?
-
What about the dimmer on the factory head lamp switch? Has anyone been able to re use it with aftermarket gauges? I know autometer has their own dimmer switch but if I could re use the factory switch that would be great!
-
 yeah I know I am no metal shaper. Maybe if I had a welder I would attempt it but I'm better at cutting holes.
Andreas- that's real close to what I will be doing I was thinking of putting my single din where all your switches are and replacing factory switches with a Vintage air black anodized contol but it does look good!


Dash Lights
in Electrical Tech
Posted
I understand that but the problem is where. As in should it be grounded on the circuit board(where on the board) That wire is the on I held it to a ground and it smoked and oil light doesn't come on when I turn ACC on :facepalm: