


riverdogs00
-
Posts
102 -
Joined
-
Last visited
-
Days Won
2
Content Type
Profiles
Articles
Forums
Gallery
Events
Posts posted by riverdogs00
-
-
21 hours ago, MC1of80 said:
Here is a pic of when we removed the body from our 71 402 4speed with hooker comp headers. No massaging on these.

That pic helps a lot. It looks like the frame end of the spring is really long.
-
 1
1
-
-
3 hours ago, Montemedic said:
Old school tunnel ram. I love it !!!
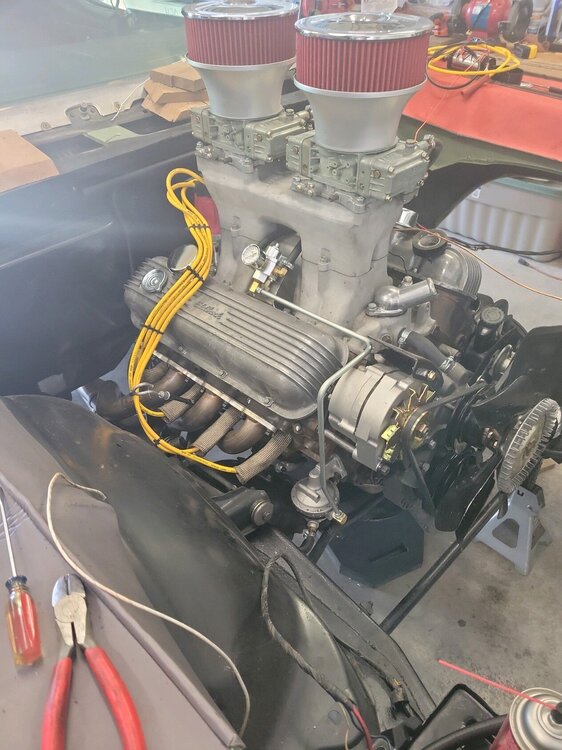
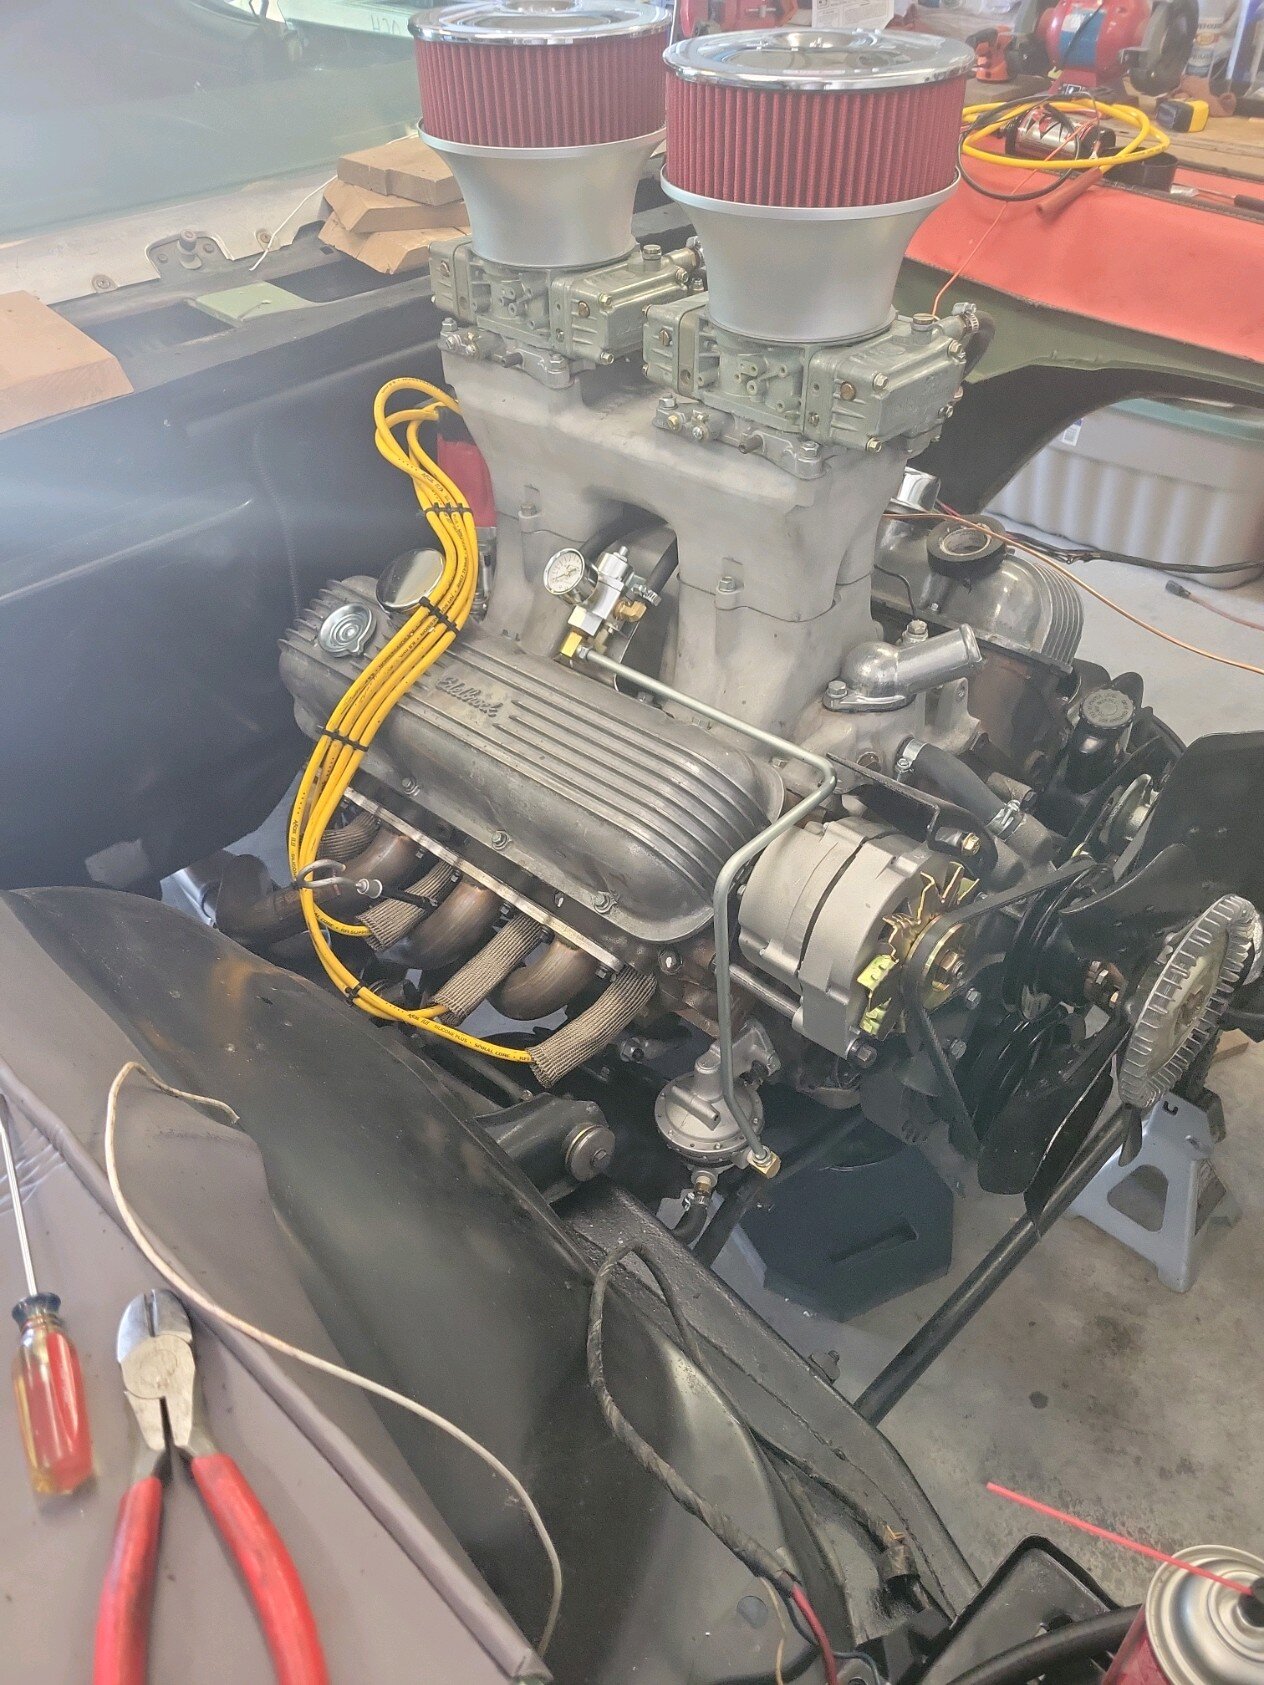
Yup, its an Offenhauser from back in the day ( I actually have 2 of them), and a couple of NOS 660 center squirters I found. Both the engine builder, and Steve Brule were impressed with the throttle response.
-
2
-
-
6 hours ago, MCfan said:
Hey, Mike,
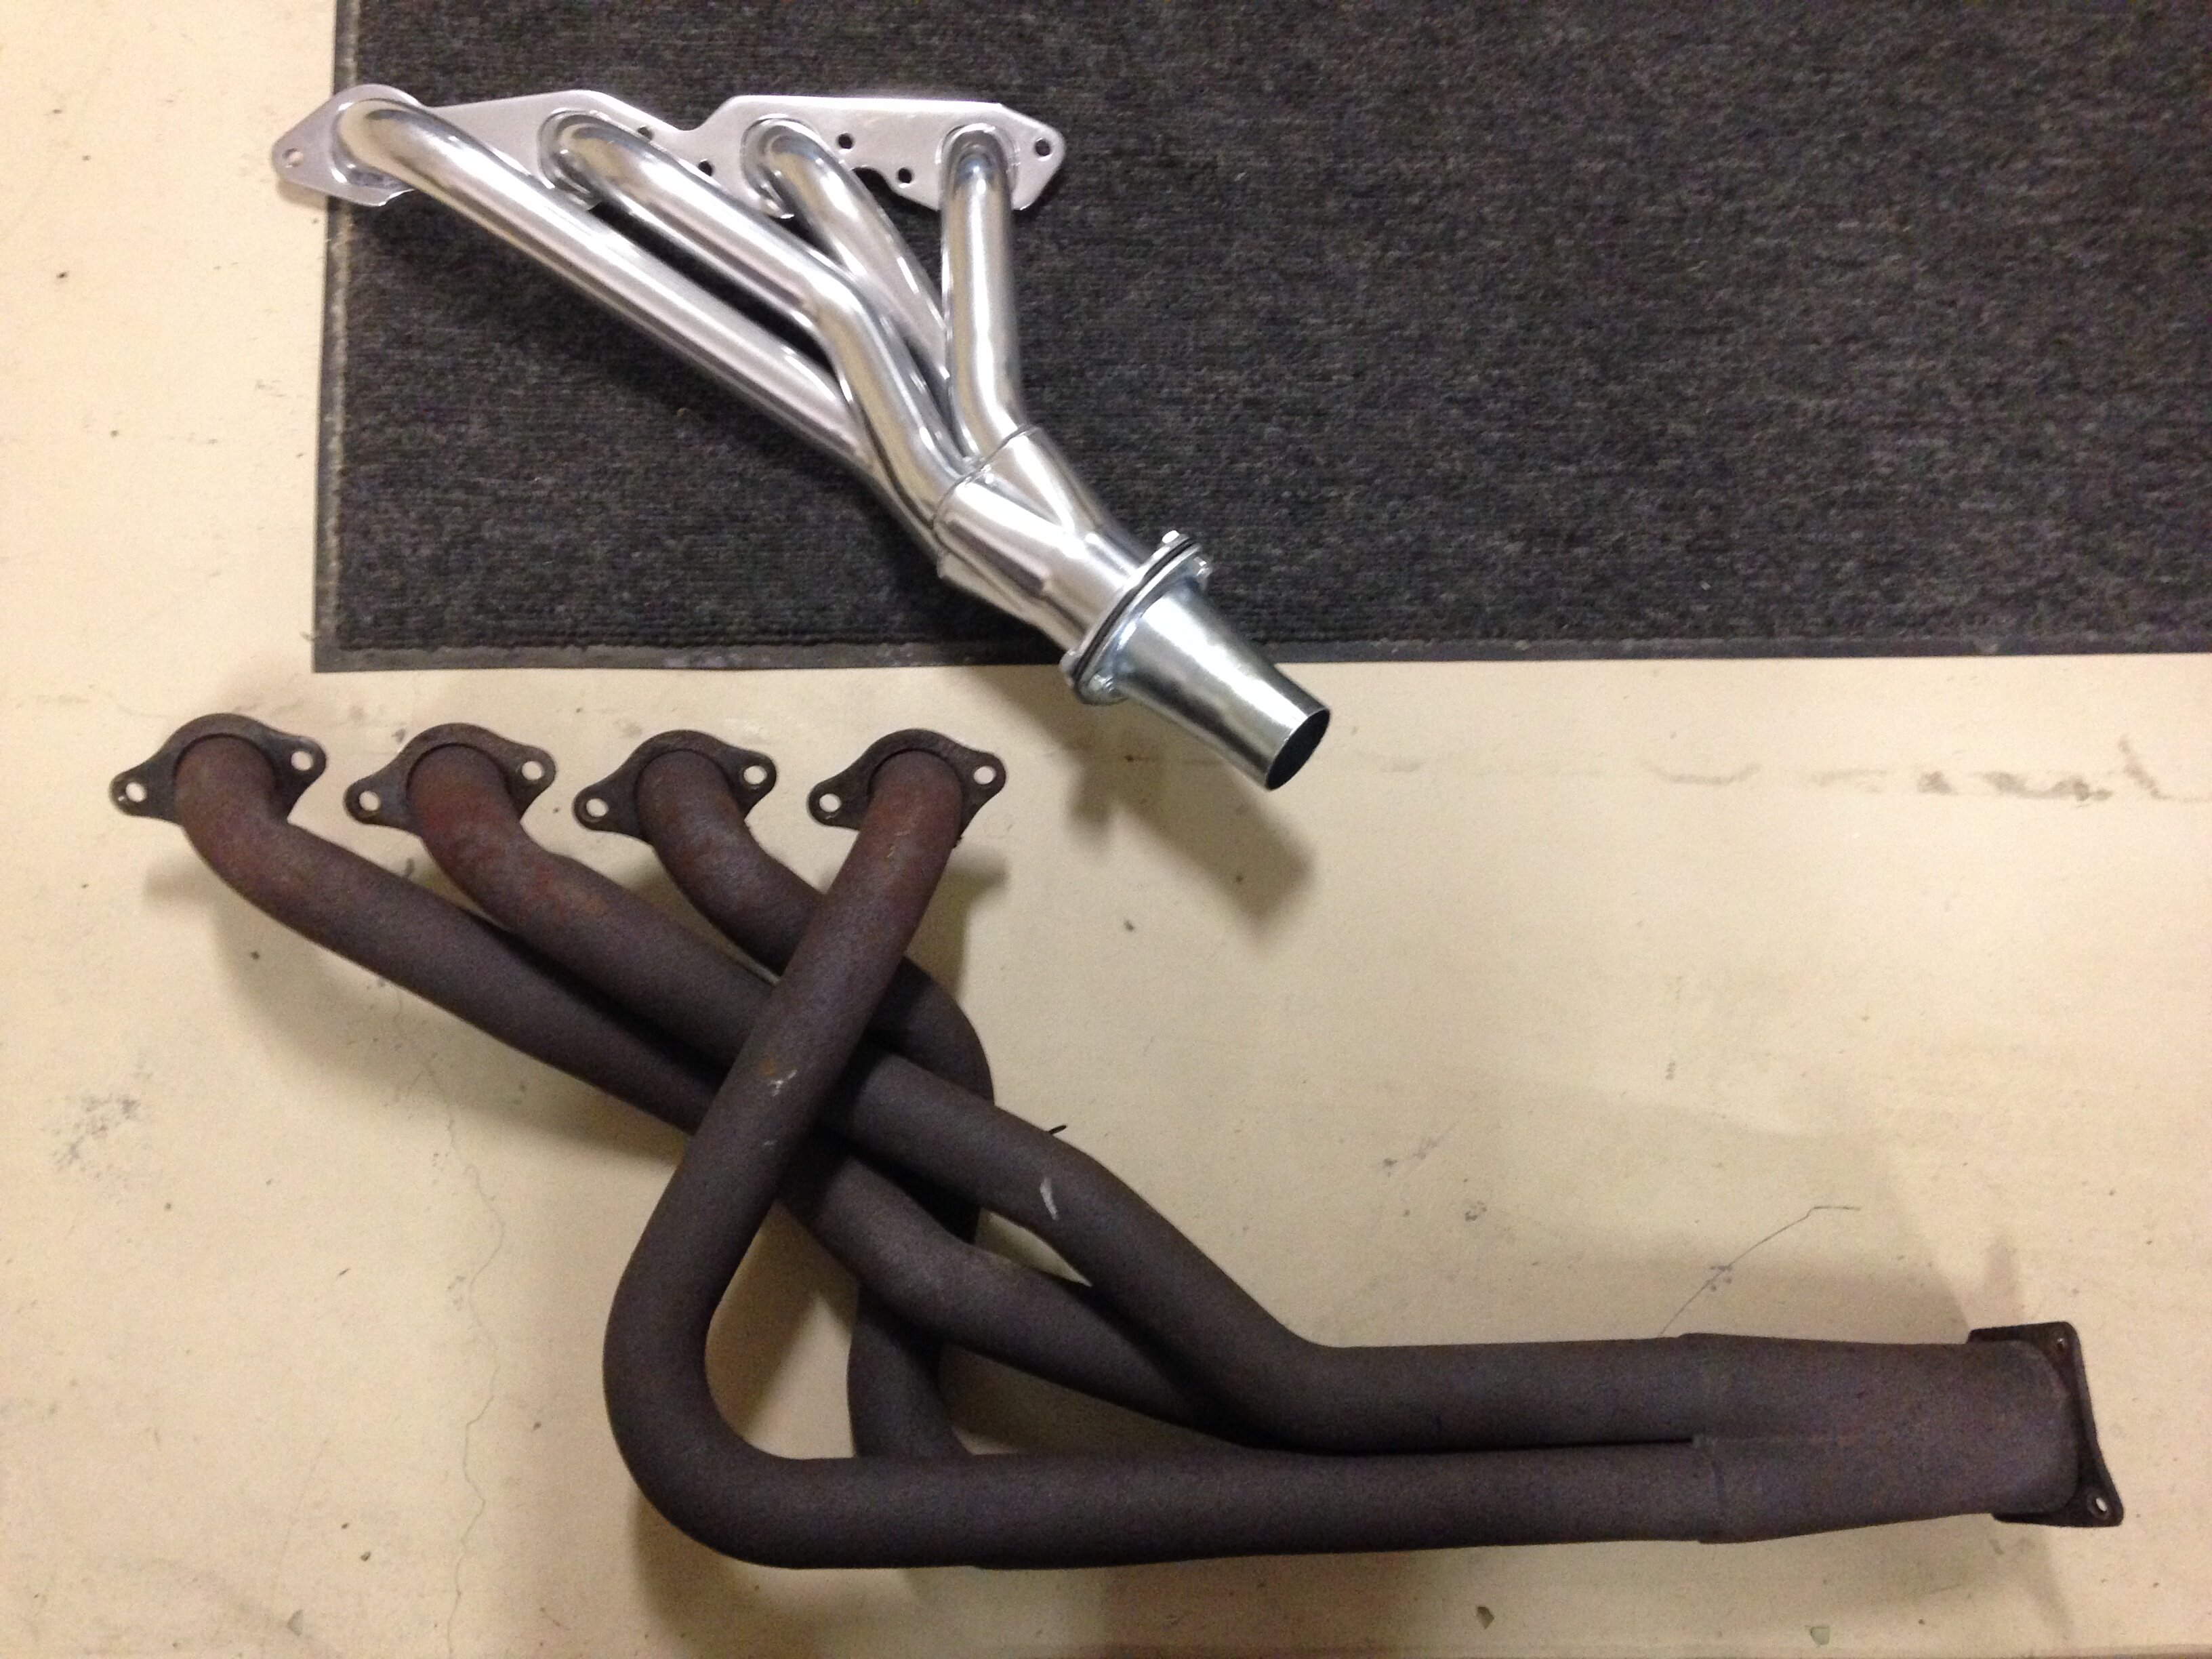
When I replaced my old rusty full-length headers (that had been severely massaged to fit years ago) I was unable to find any direct replacement for a big block first gen Monte with a manual transmission. There are numerous full-length headers for big block Montes with automatics but their #7 tube sweeps back into the space where the clutch Z bar operates. Consequently, I chose to go with the Patriot "shorty" header that comes down and exits at a 45 degree angle.
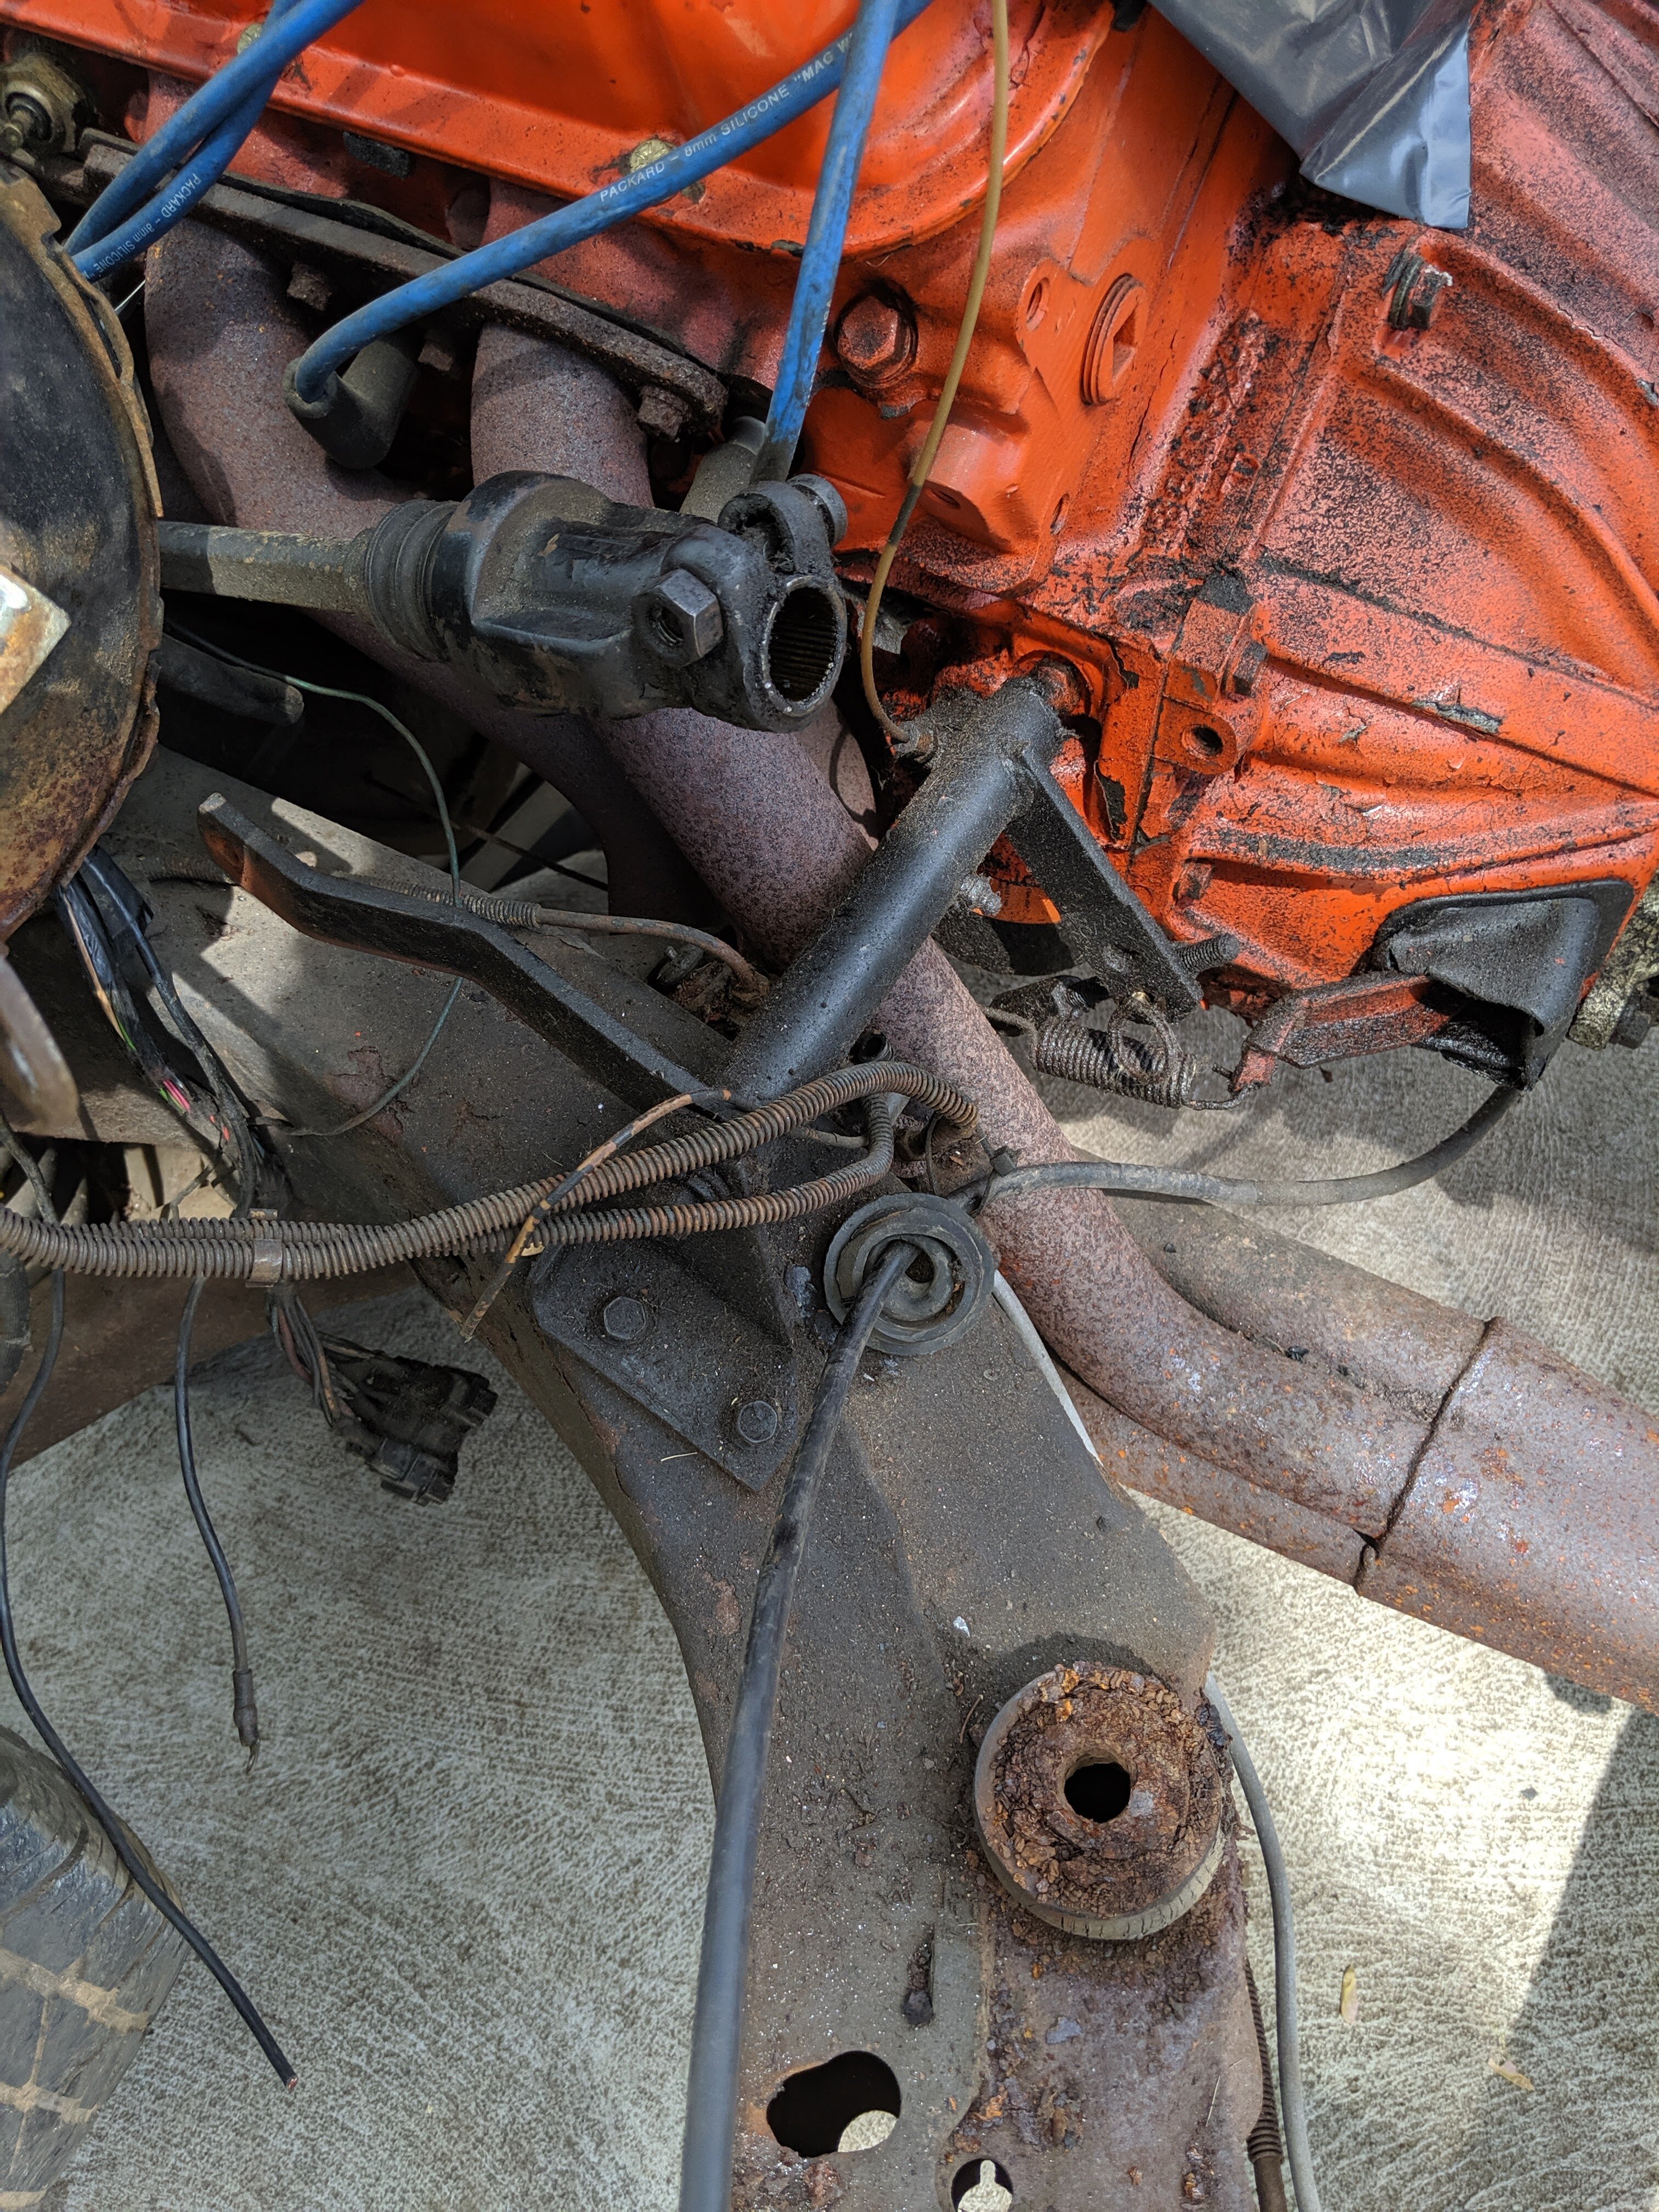
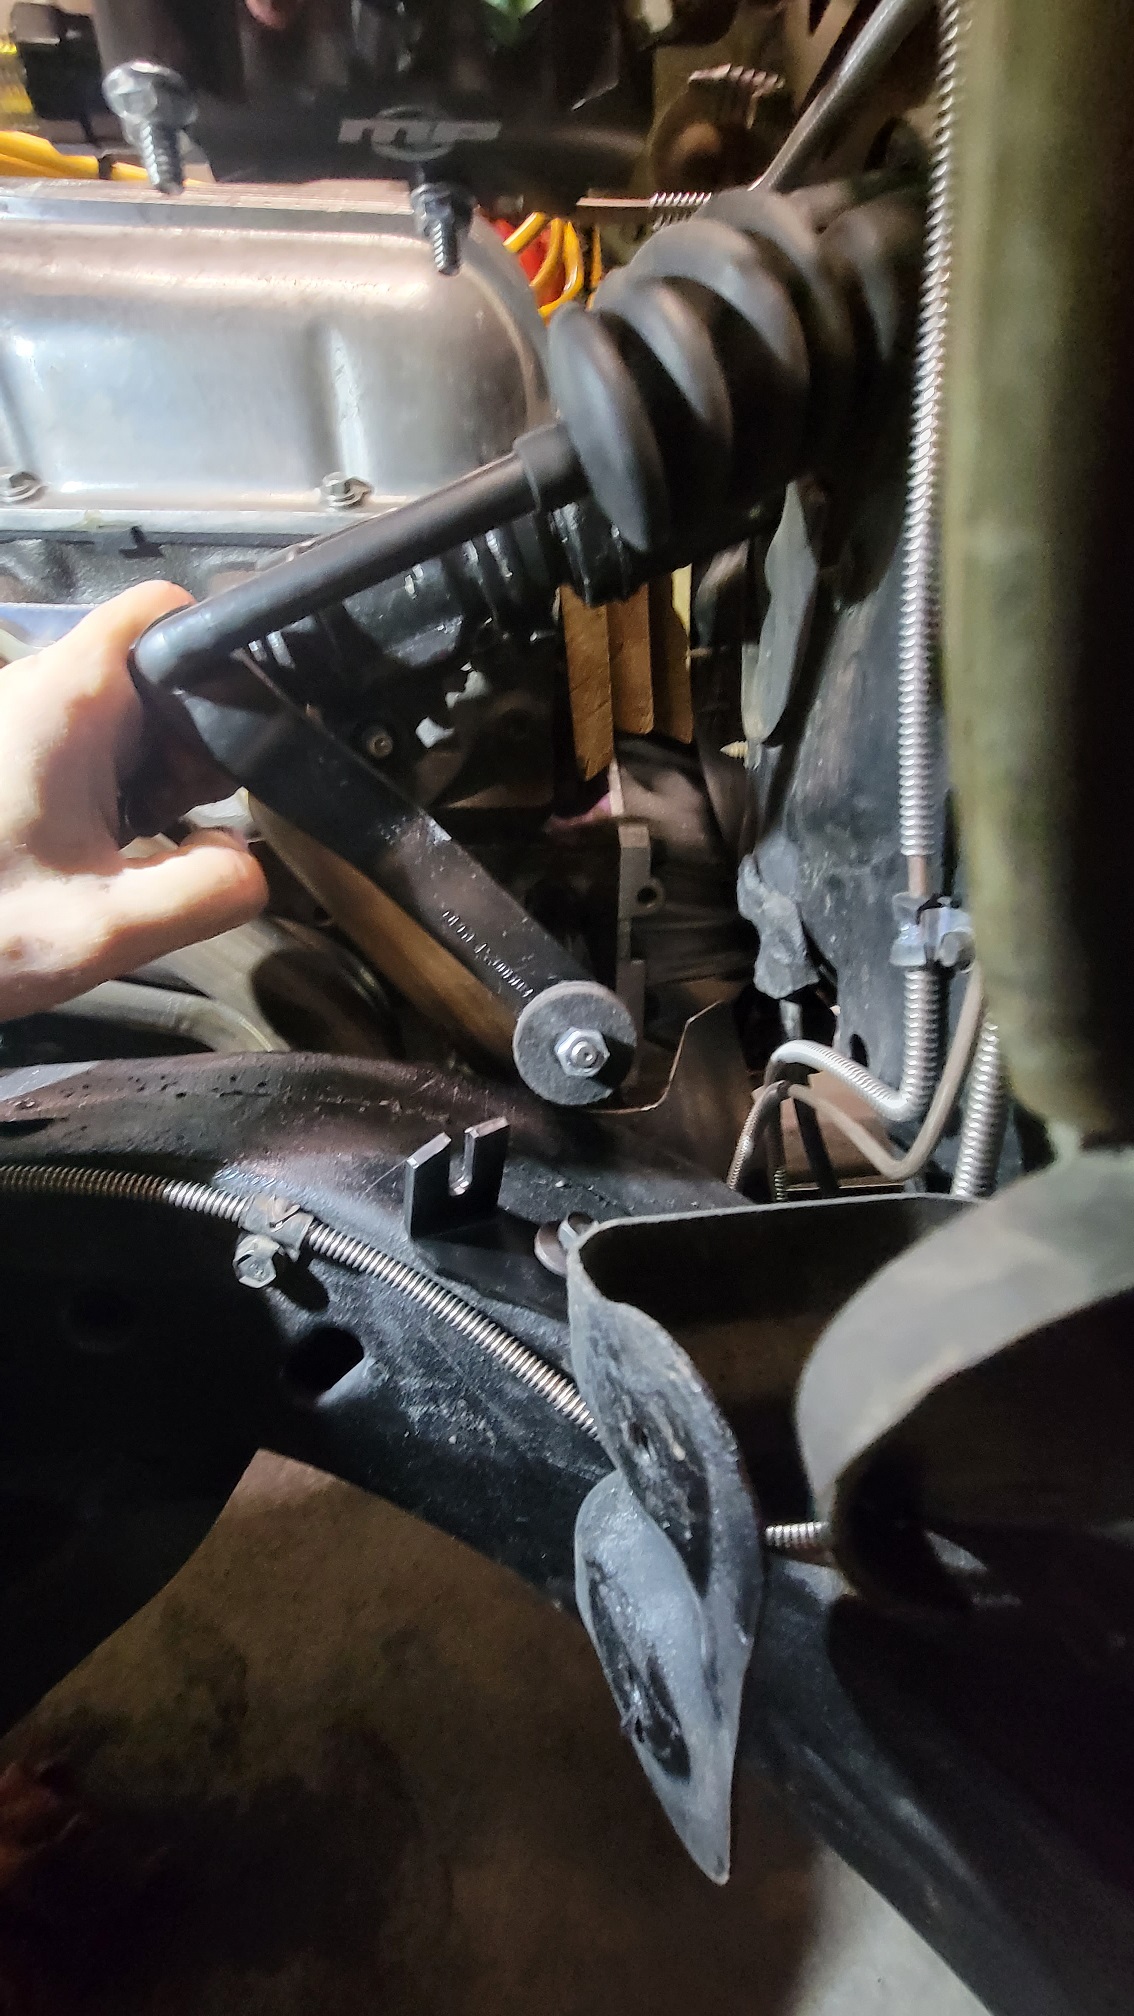
I am not where I can look at my car right now but I am certain there was no interference with the new headers and the clutch arm return spring. I checked my project photos and only show that spring hanging down during the installation of the new headers (see below).
Since that spring was formerly connected to a washer welded to the old full-length headers (rather than the hole in the frame), I am wondering if you might have to do something similar with your new headers? You may even have to substitute a completely different length and power of spring in order to connect it to an alternate location that will work. Good luck.

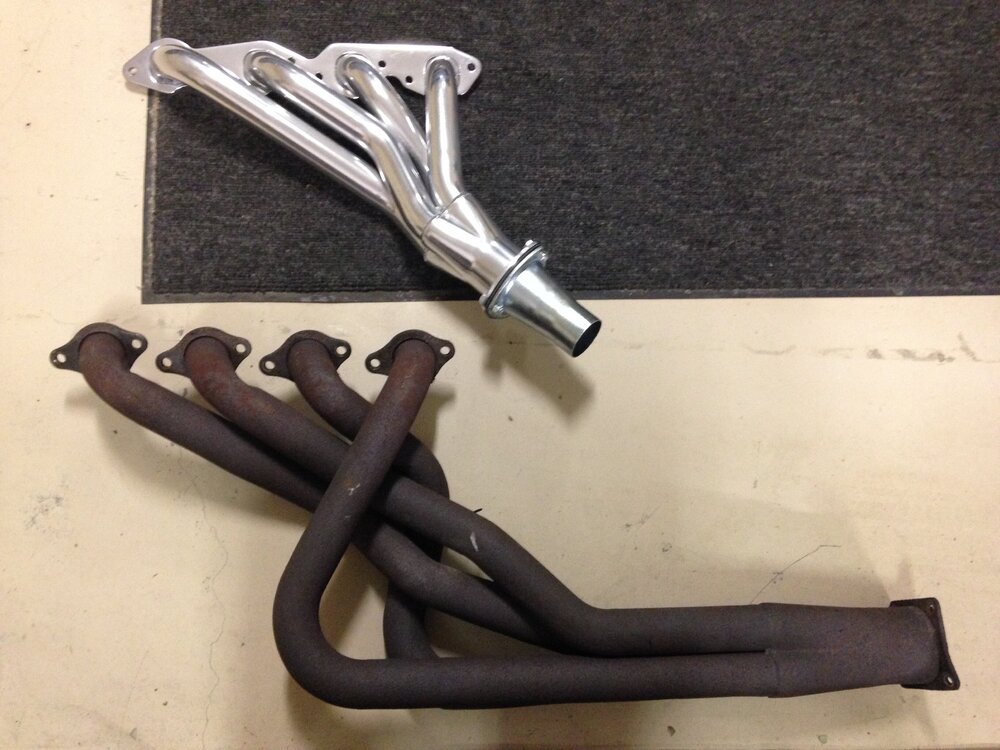
Hi Dennis, thanks for the reply. I have the american racing headers, and do not as of yet have the proper spring and bracket. The clutch itself does most of the return pressure, and I guess I just need a decent spring for the fork/linkage to stay in contact. The springs that I have I believe are Chevelle springs and way too long. Will see what the parts place delivers and how they differ - will provide pics if they are.
-
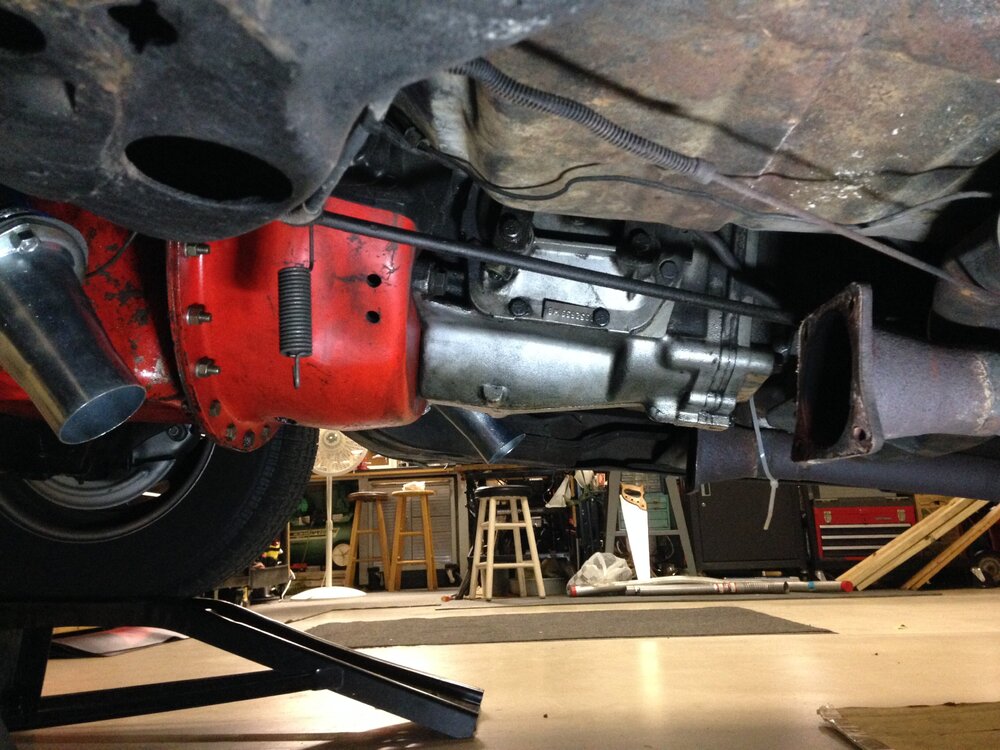
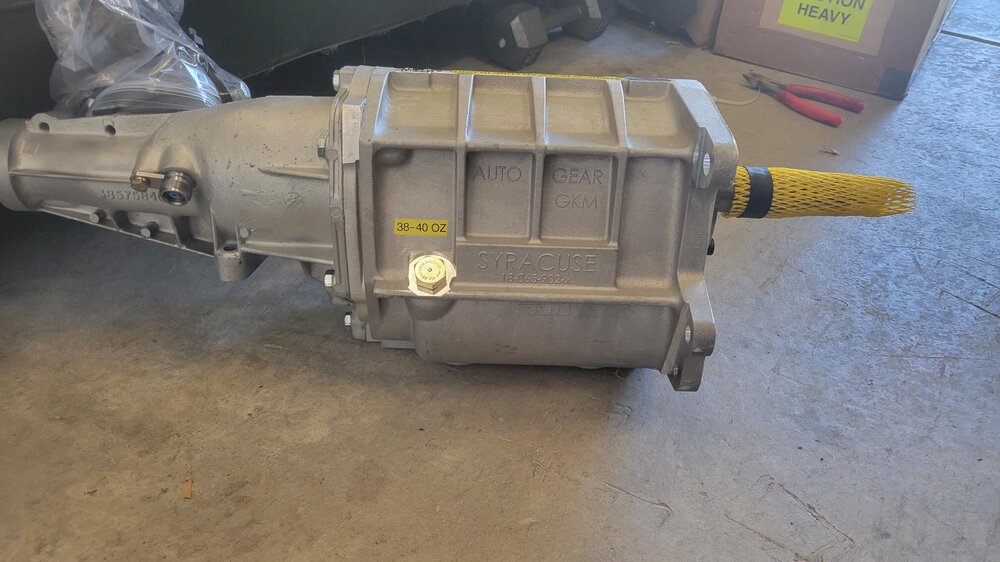
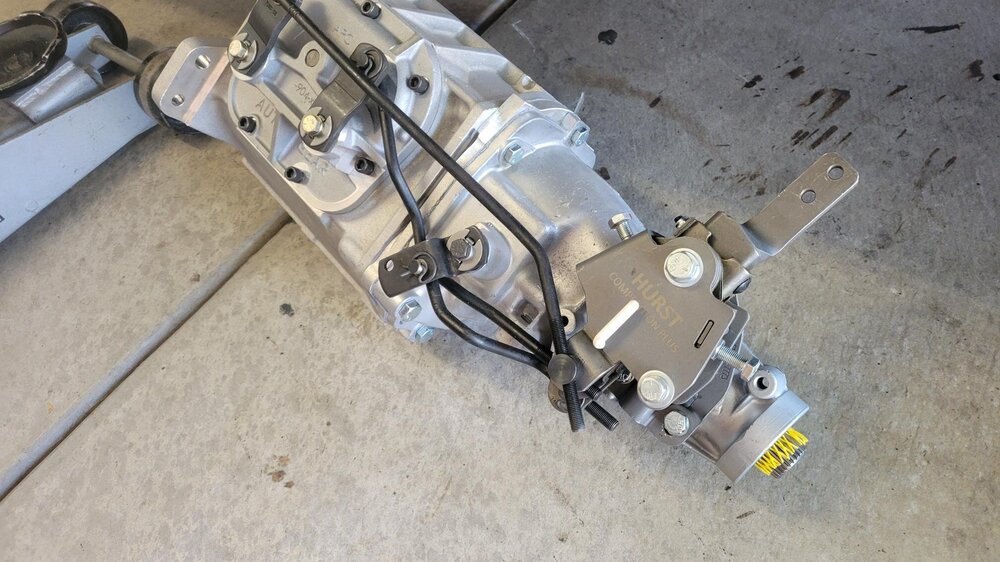
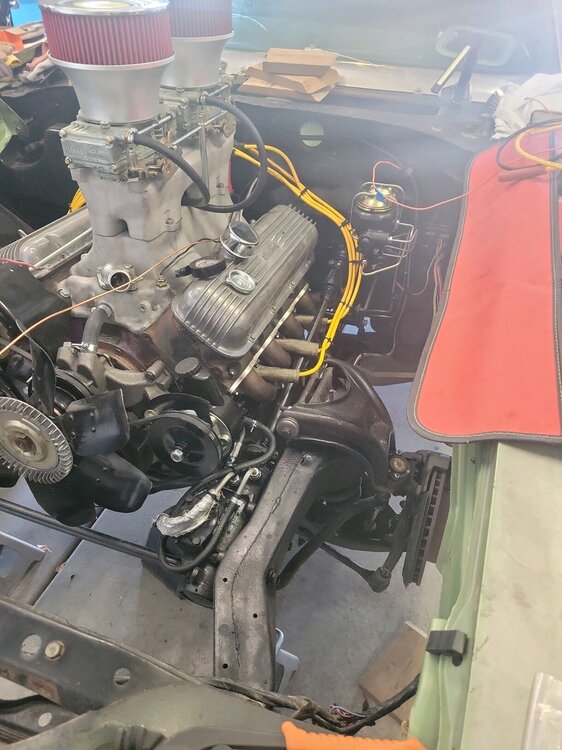
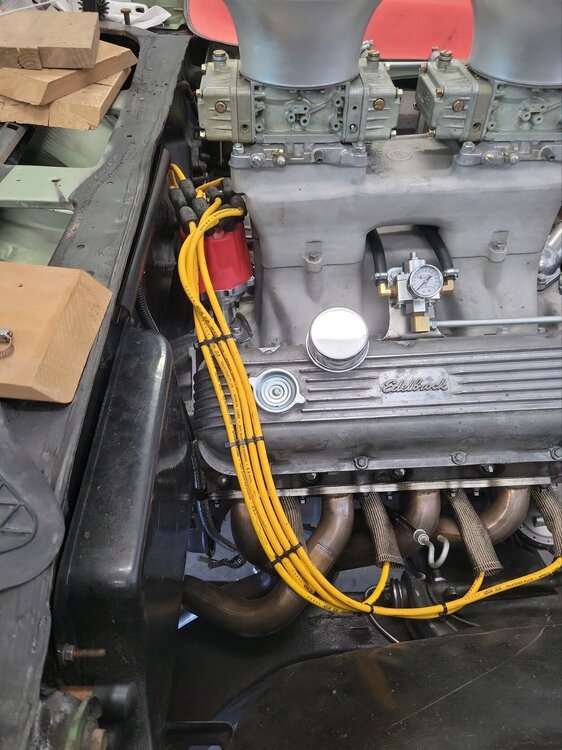
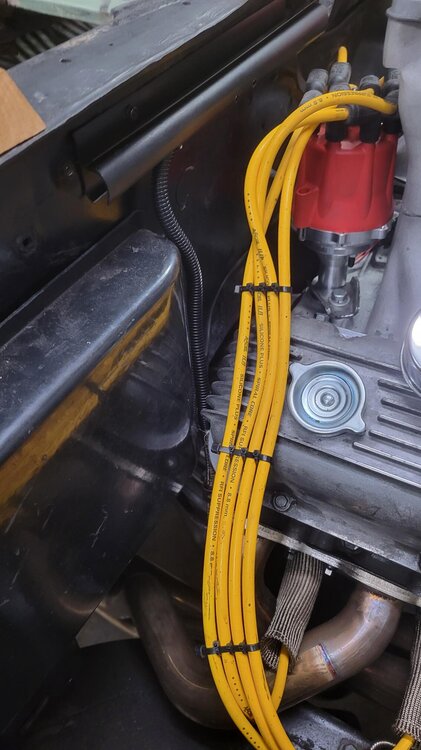
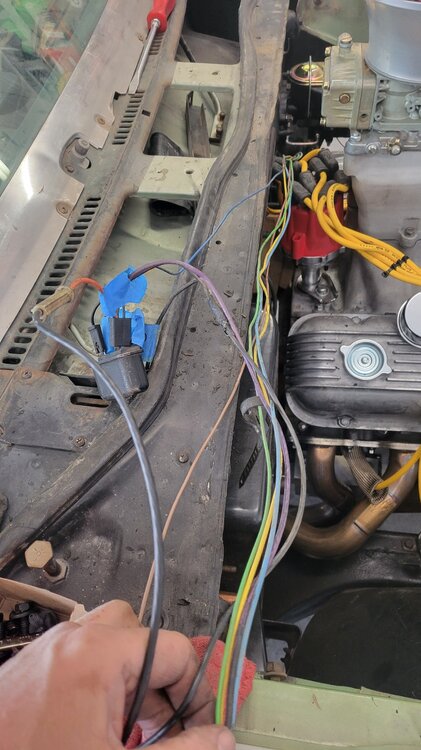
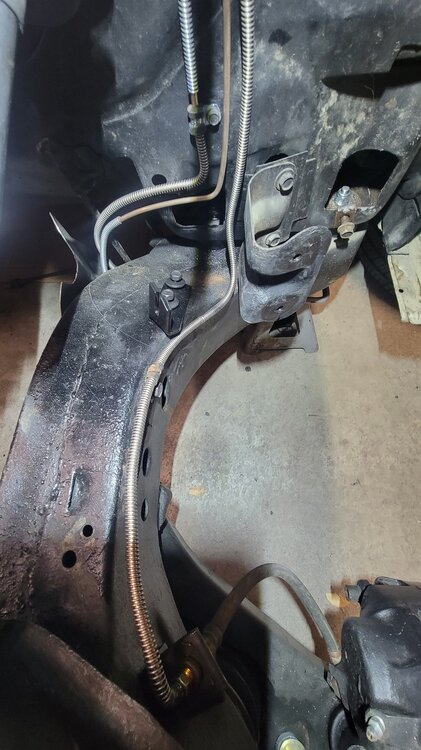
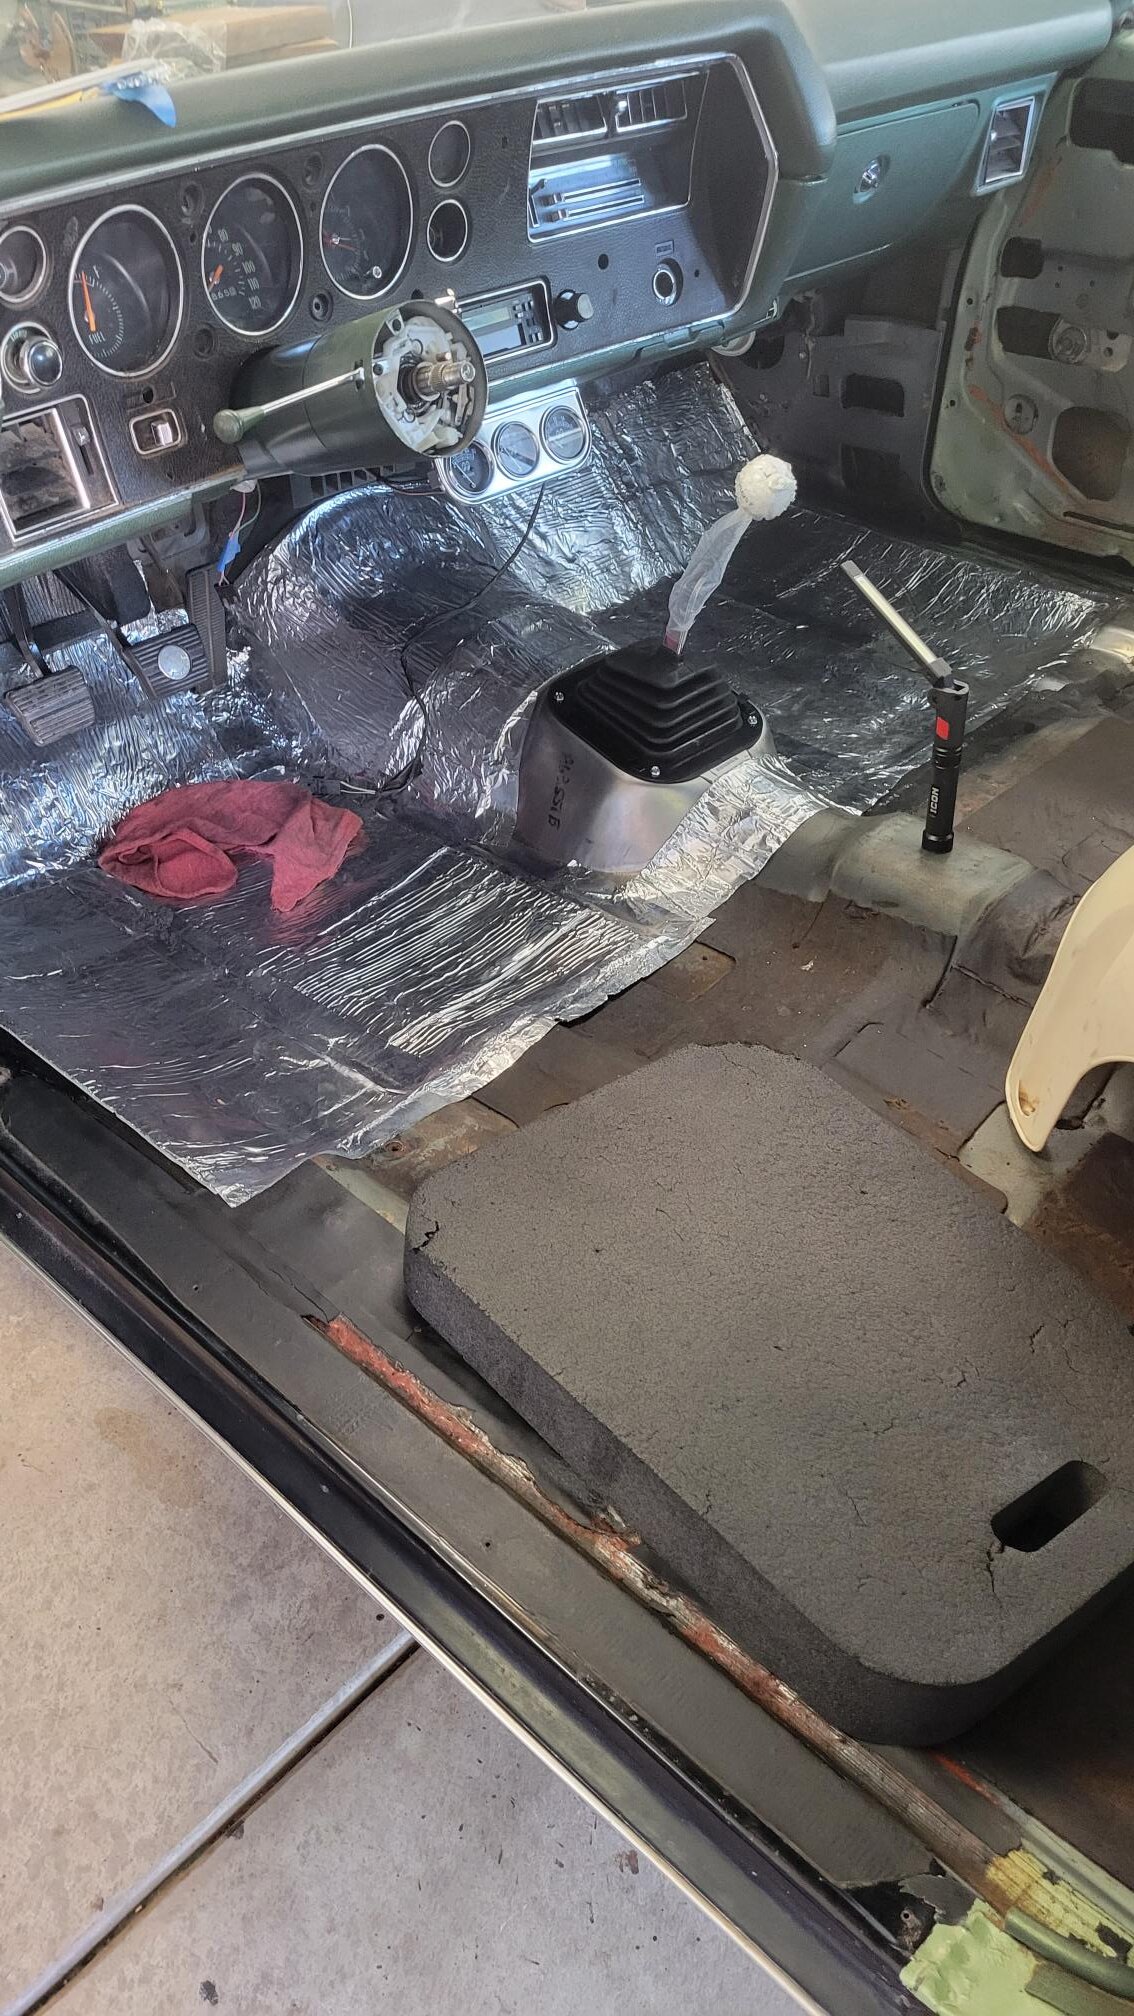
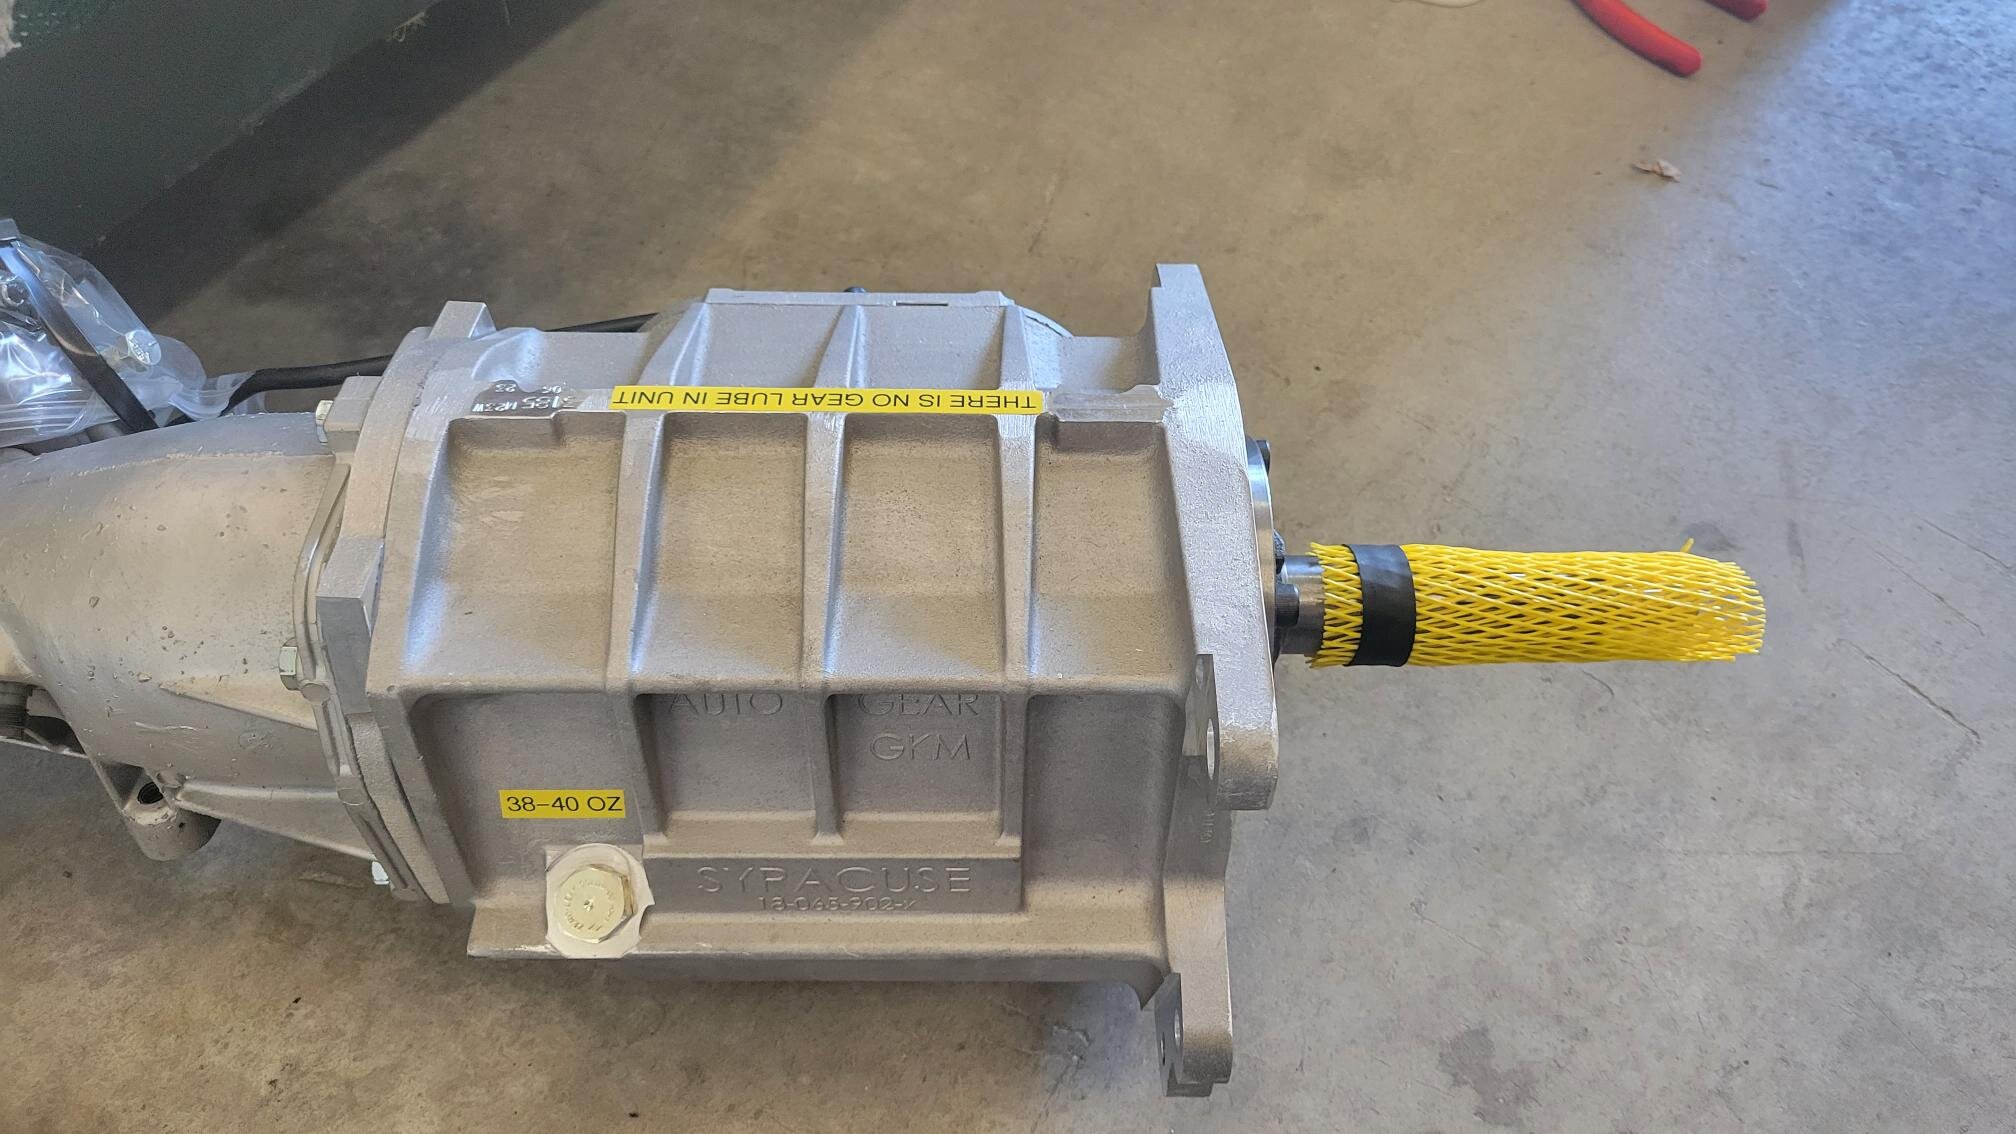
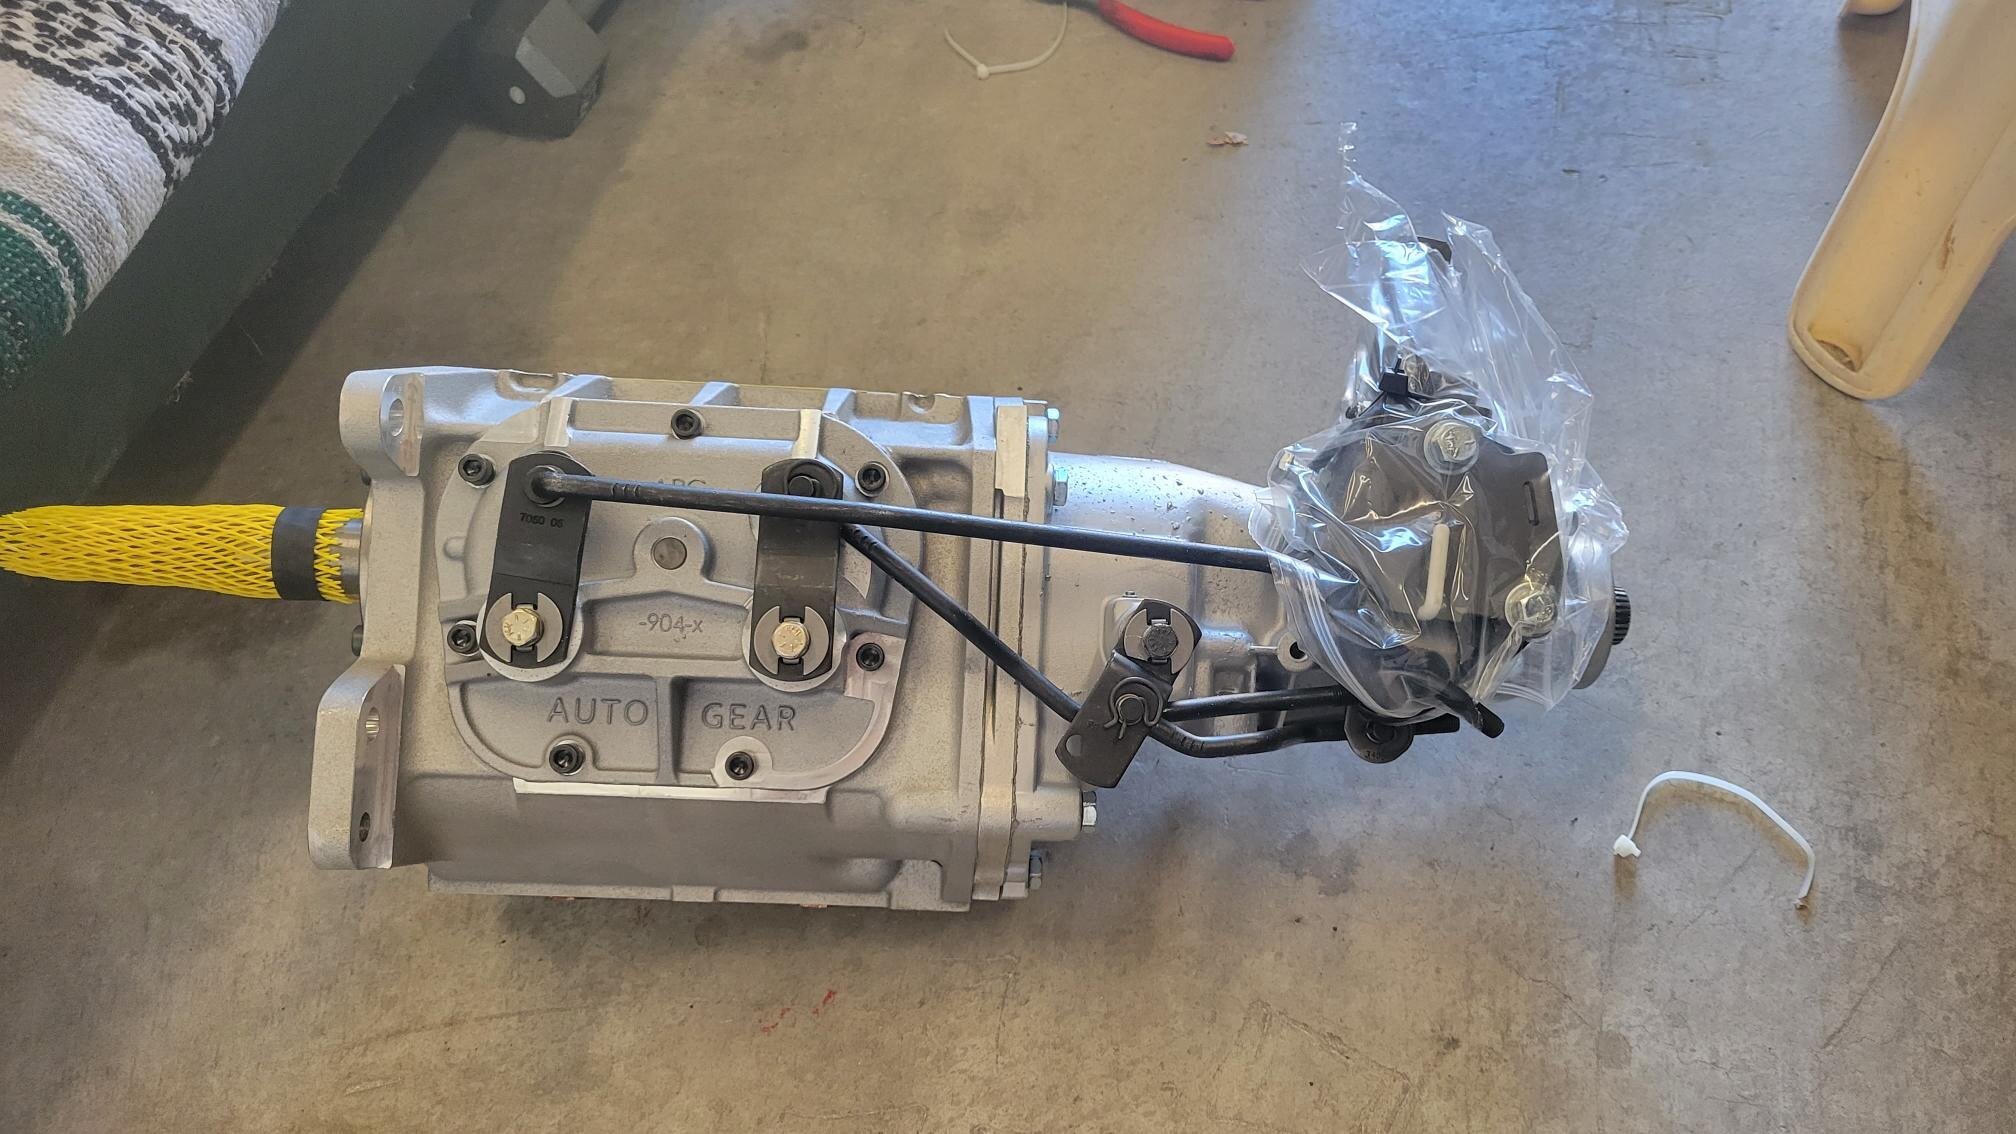
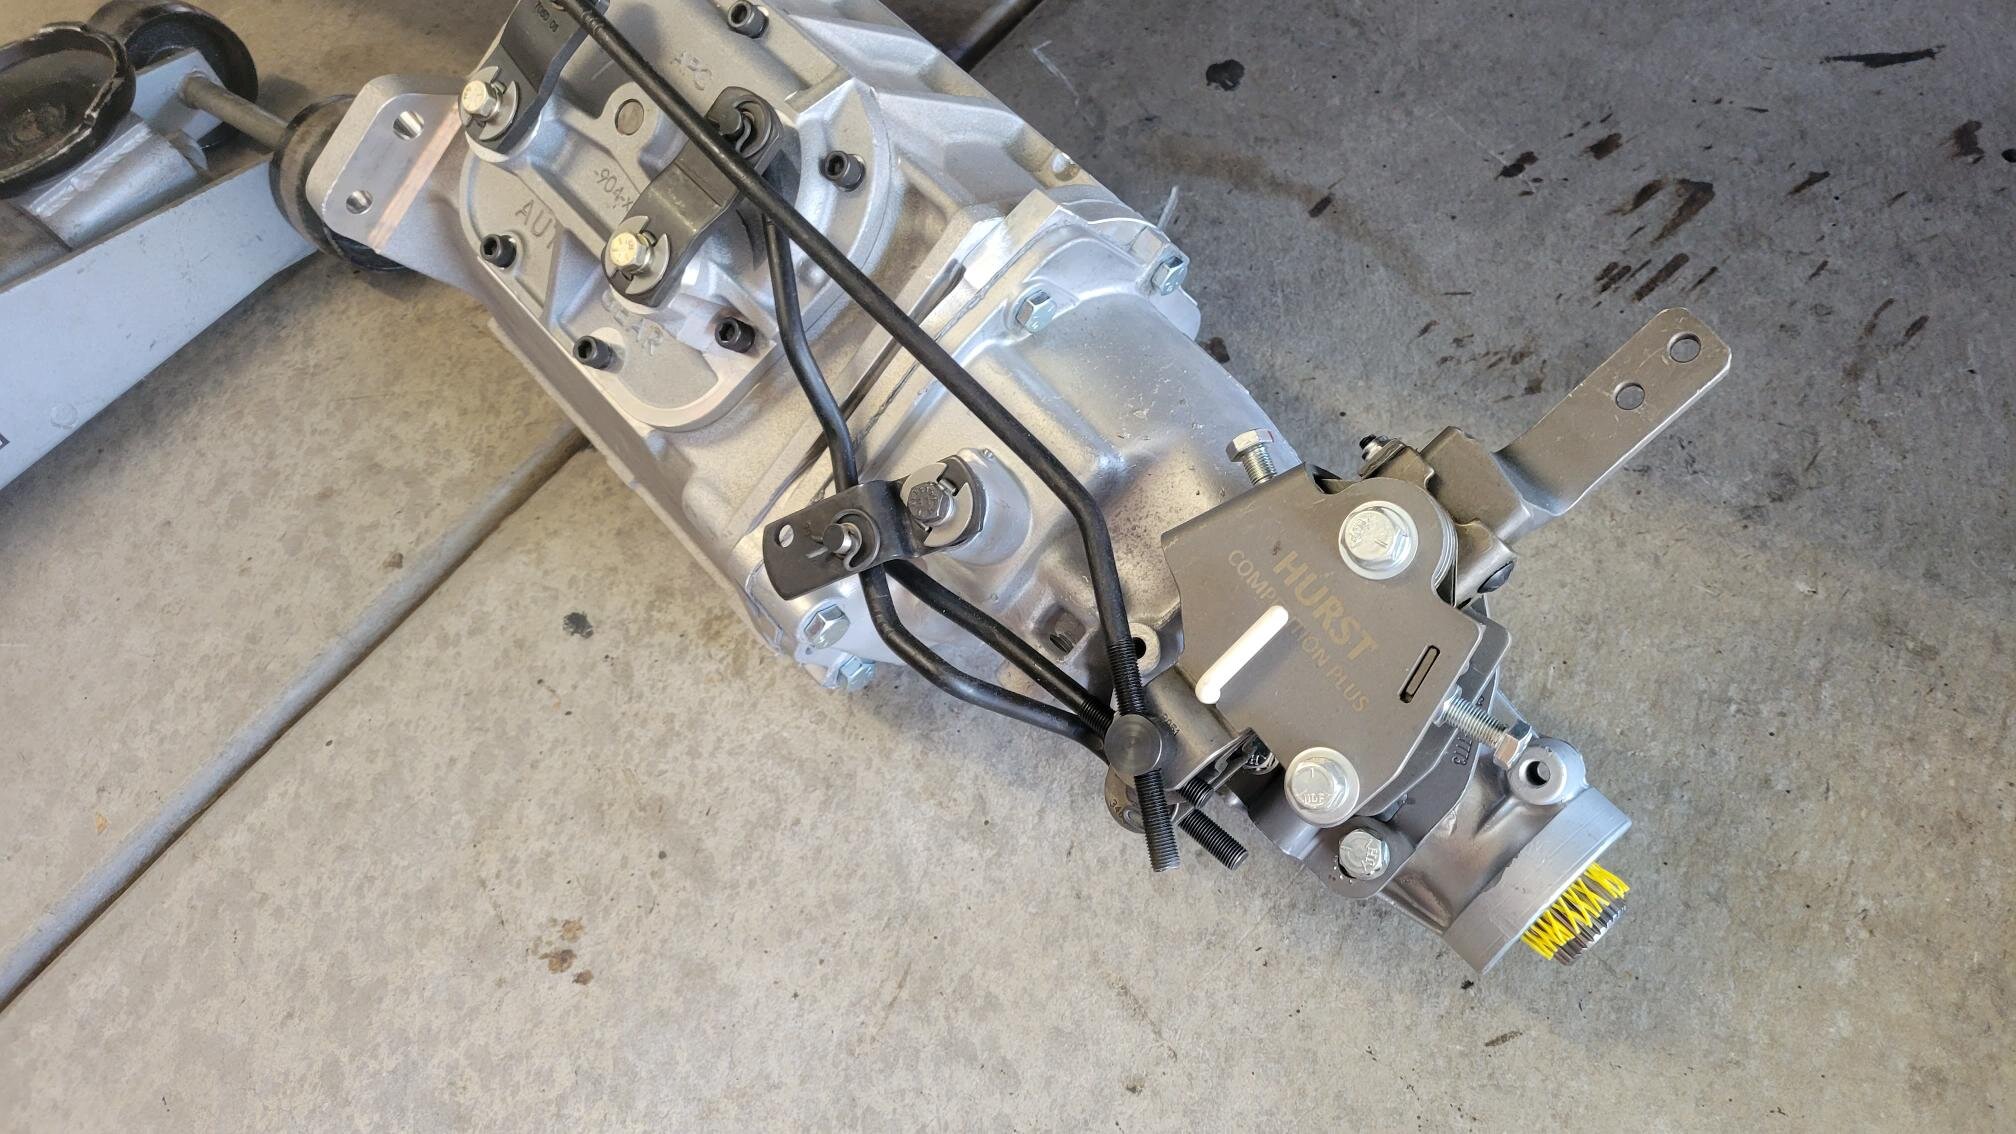
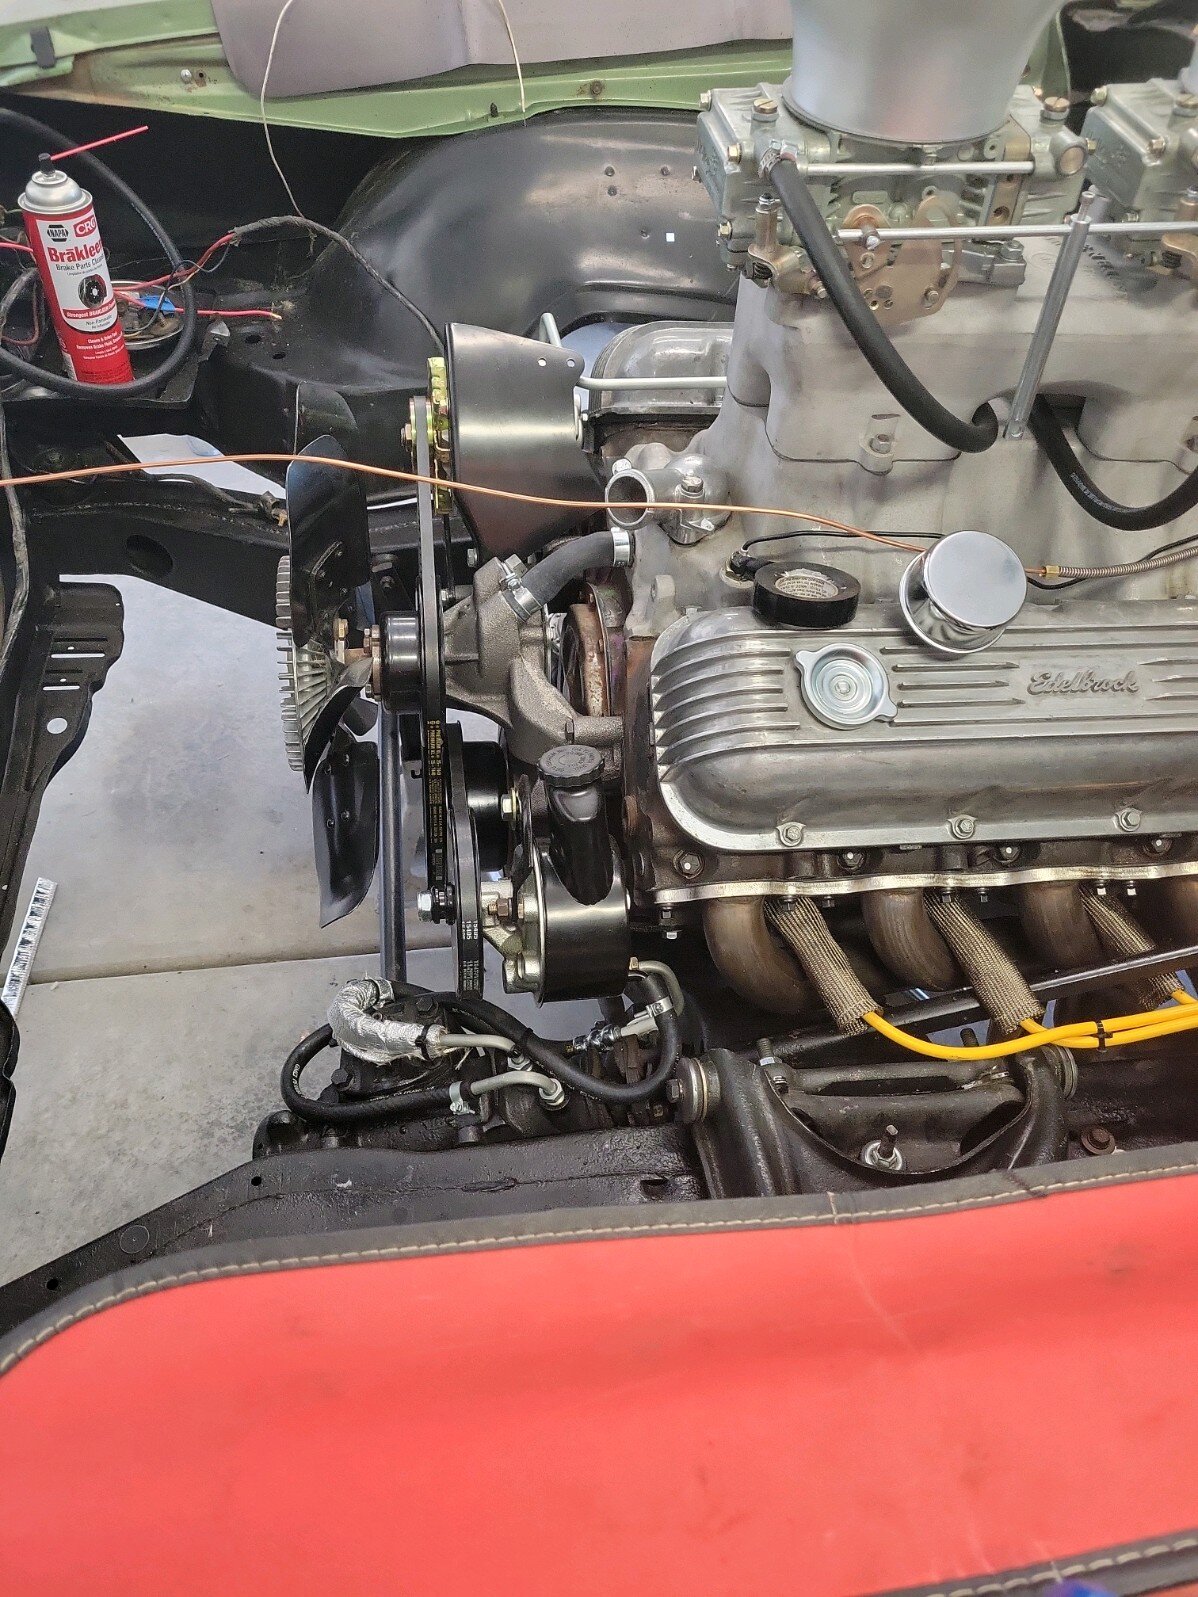
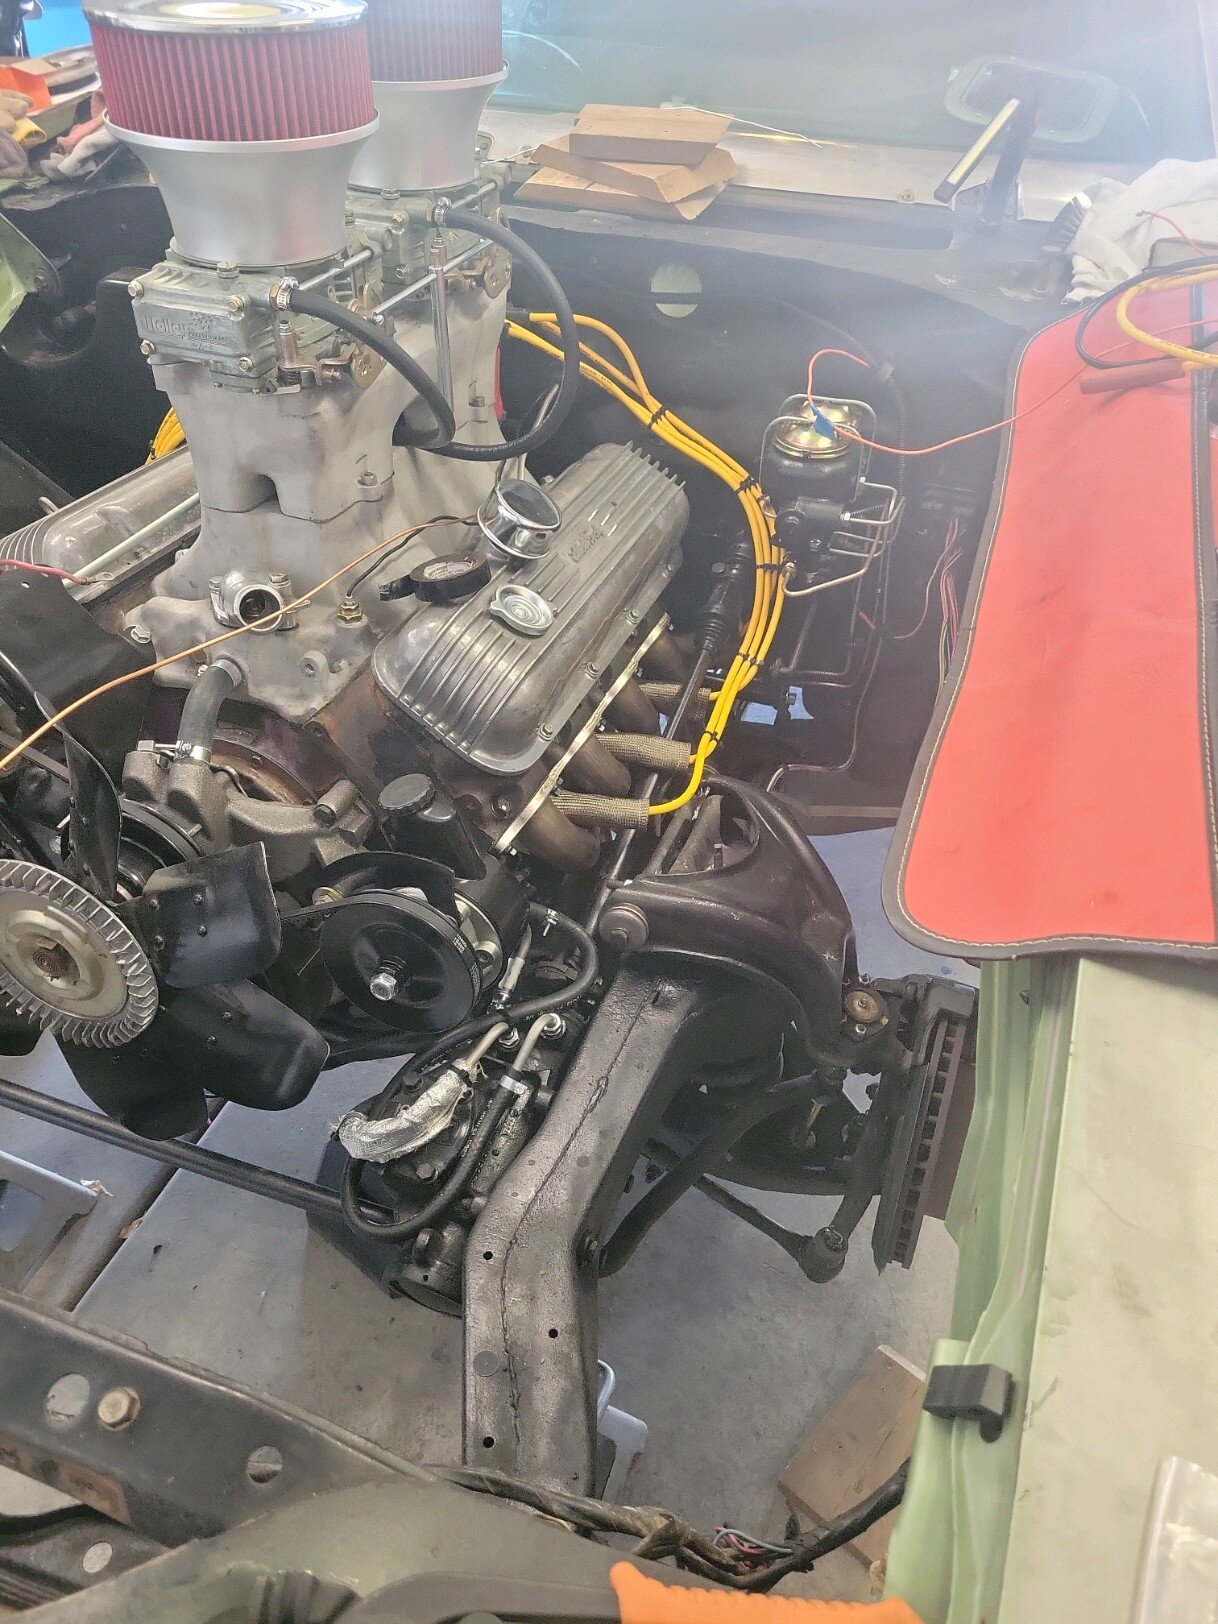
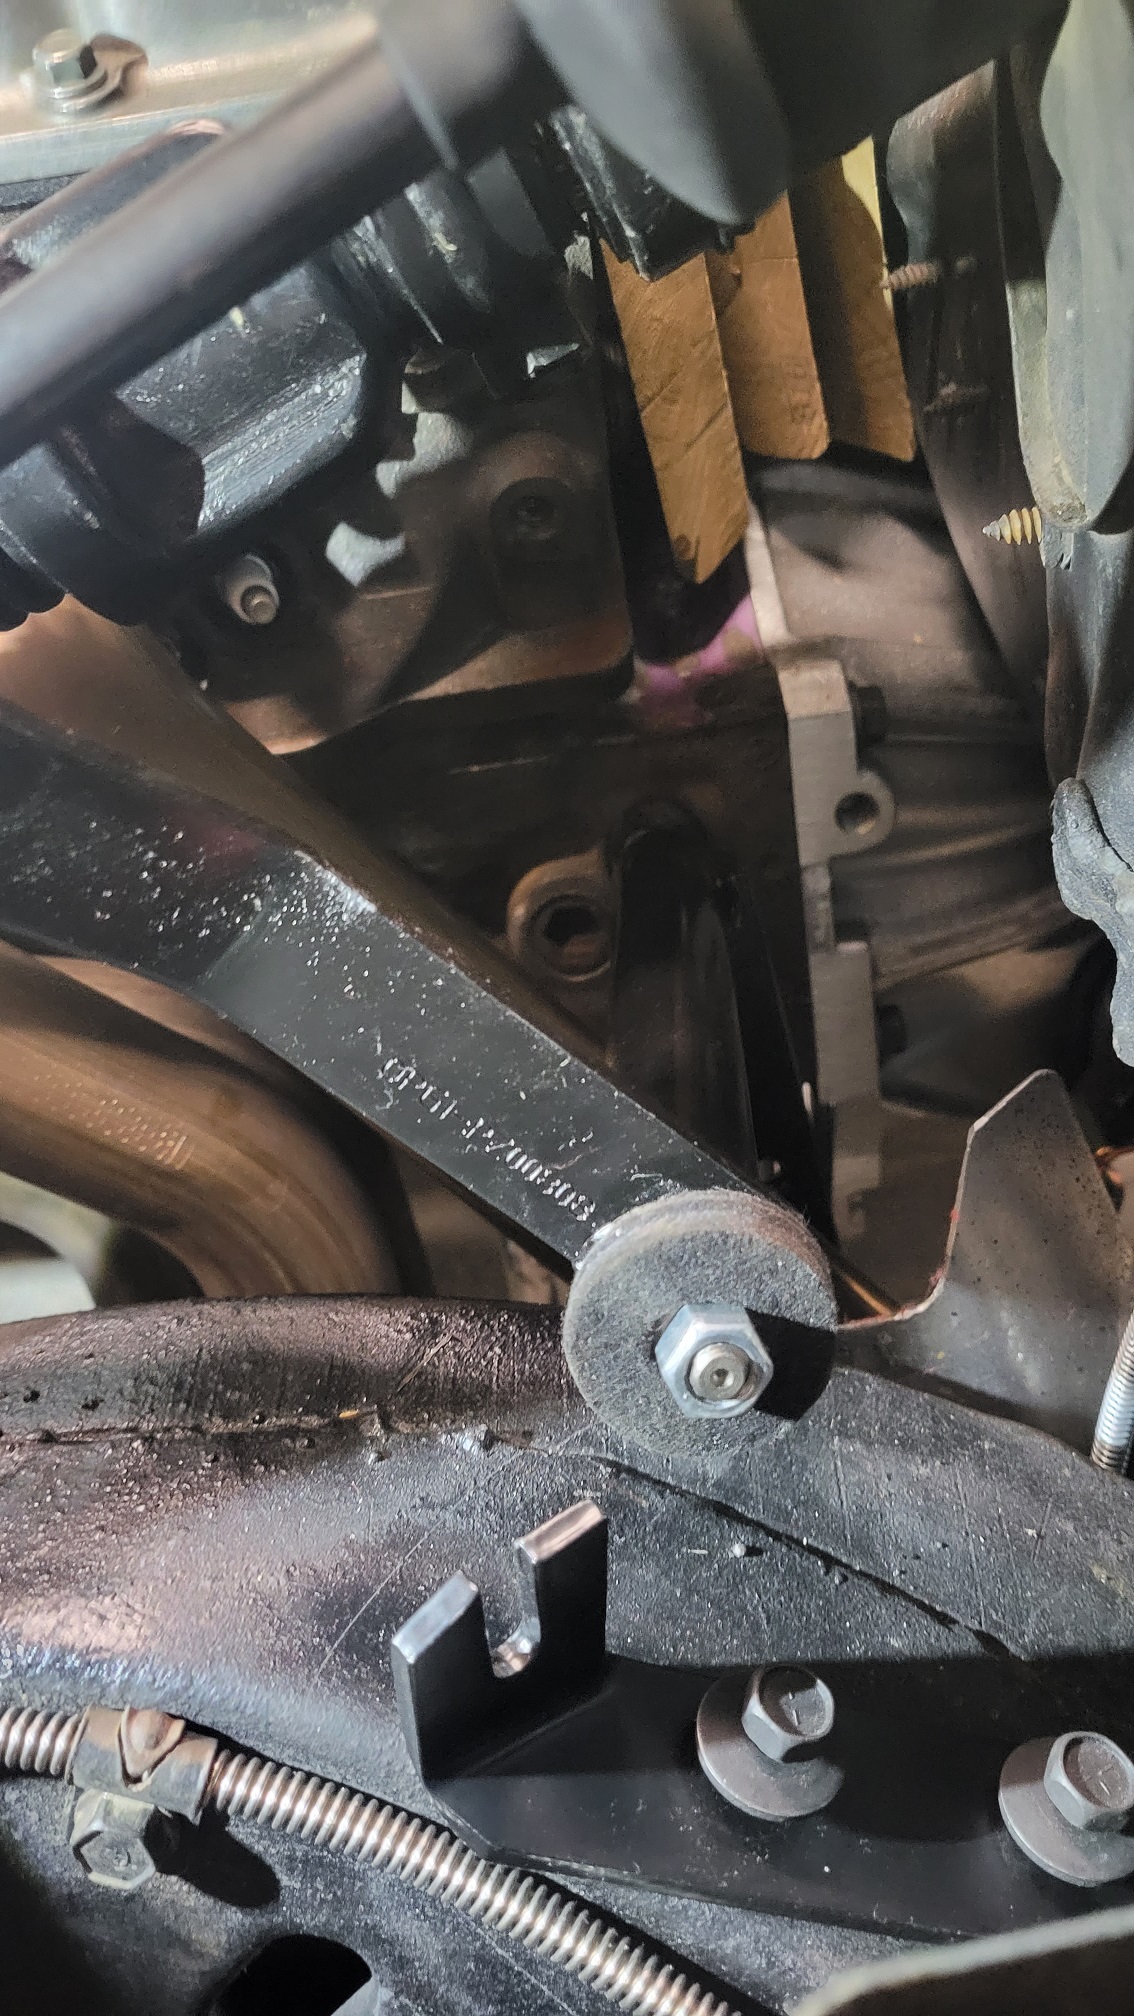
A few pictures of the 4 speed conversion - really more of a before and after and a few of some progress as it seems I'm doing noting but little projects within the larger ones ha. Oil pressure sending unit plumbed, starter solenoid wire routed, clamped and heat shielded, Zbar in place, trans crossmember installed. Need to finish up with the correct return spring and linkage, Acquire and run the battery cables, decide where to mount the coil, decide which ground straps and where it install, then reinstall the wheel liner, and shroud/rad etc. Its a lot more fun when you dont have to drive it to work on monday ha


-
5
-
-
On 10/4/2017 at 6:35 AM, MCfan said:
Mike,
I have a 12 bolt 3.31 posi behind my M20 (2.52 first gear) which gives an overall ratio of 8.34 at launch. Since your M21 has a 2.20 first gear, your 3.45 rear will give a 7.59 overall drive ratio at launch. Our rear tire size also figures into the initial launch ratio - I am running a 28" tall 275/60 -15. Our Montes are heavy cars so getting them moving is matter of initial drive ratio and torque.
I have a Hayes clutch and pressure plate in a Lakewood housing so I am not sure how that compares to the stock counterparts. I do know that my clutch pedal requires significant pressure to disengage so I think a great deal of the pedal return feel is also affected by that. I believe the return spring is stock but it was hooked to a washer welded to the long tube headers on the car when I bought it. When I upgraded the entire exhaust system last spring, I moved the spring over to the slot in the frame where the assembly manual shows it. I didn't notice any change in the feel of the clutch pedal as a result.
Good morning, does the spring ride against the headers with the bracket in place? Do you have a picture of yours? I just got my M23 installed, and ordered the return spring bracket, adjuster, and spring from the parts place. The conversion kit I received was for a chevelle and a few of the parts did not work. I have the Americans bolted to my LS-7, but am not seeing a unimpeded line to the frame for the spring.
-
Gear Ratio
in SS 454
I installed 3.31's and a tru trac on 70 SS that had the same 2.56 open. I find that its happiest in the 25-65mph range. Mine is more of an intown cruiser rather than the highway. It will certainly run at 70+, but I dont like to buzz it that high for mile after mile. If you intend to run it at highway speeds (55-80) a lot, Id consider staying with what you have or the 3.08's. I have 235-60-15's, so it a short tire. when its time for new tires, I plan to go taller. My other 454/4sp 70' has 275/60/15's, but its not on the road yet. It took me a few tries and different speedo gears to find the right one after I changed gears.
-
4
-
-
Group,
The motor trend article came out for this engine. I wish they would have contacted me first, as I found 2 errors, but the meat of it is there. There was not 6 qts of oil put in it, and GM never rated it at 522 HP. It was factory rated at 465.
https://www.motortrend.com/how-to/original-454-ls7-big-block-chevy-crate-engine-dyno-westech/
-
3
-
-
1 hour ago, MC1of80 said:
Glad you received the correct part! Now on to the next project. Lol
Yup, still trying to get it wired. Not my strong suit
-
1
-
-
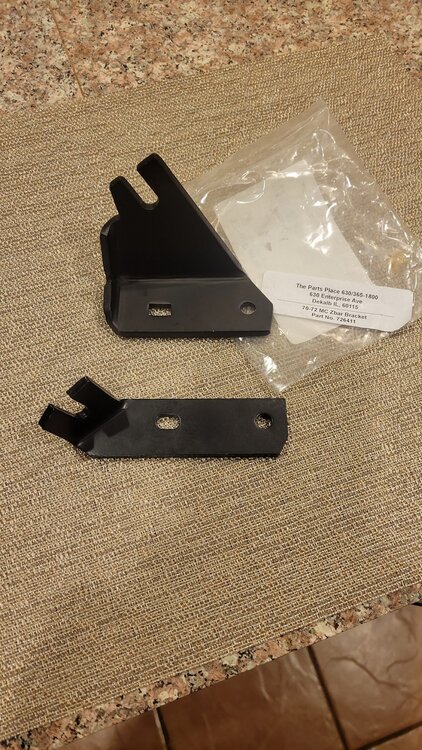
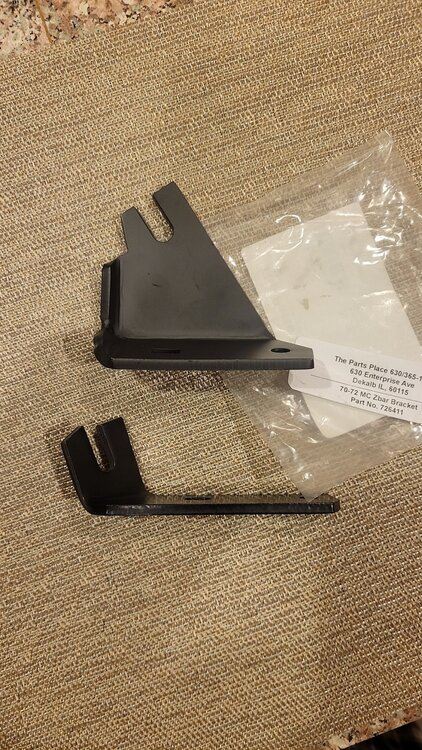
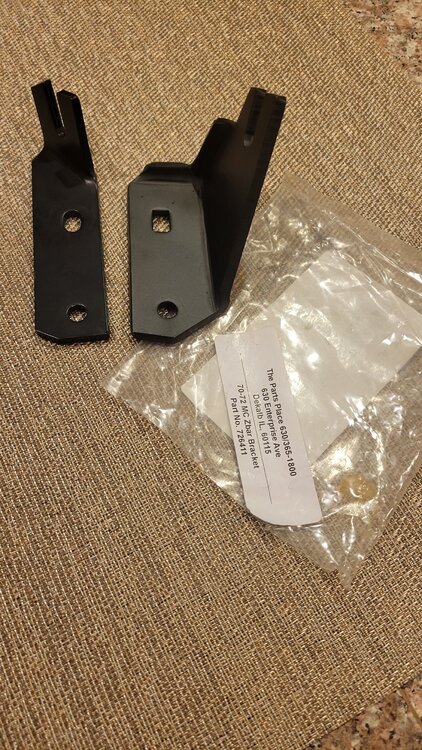
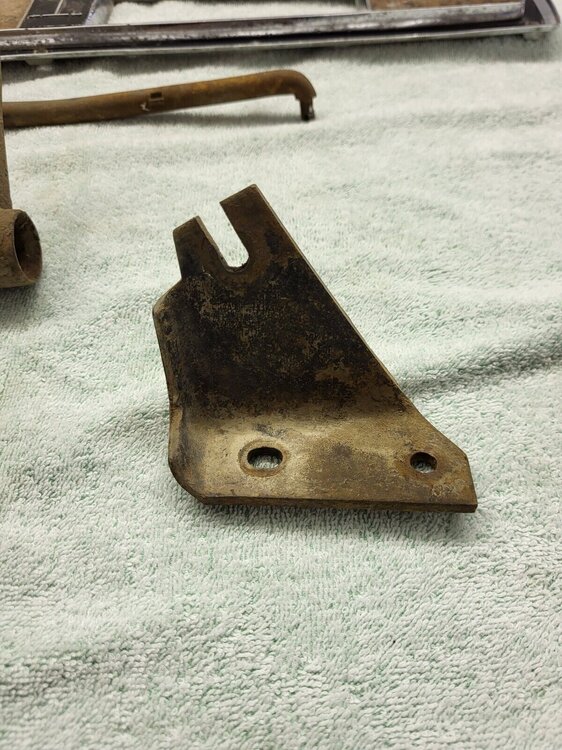
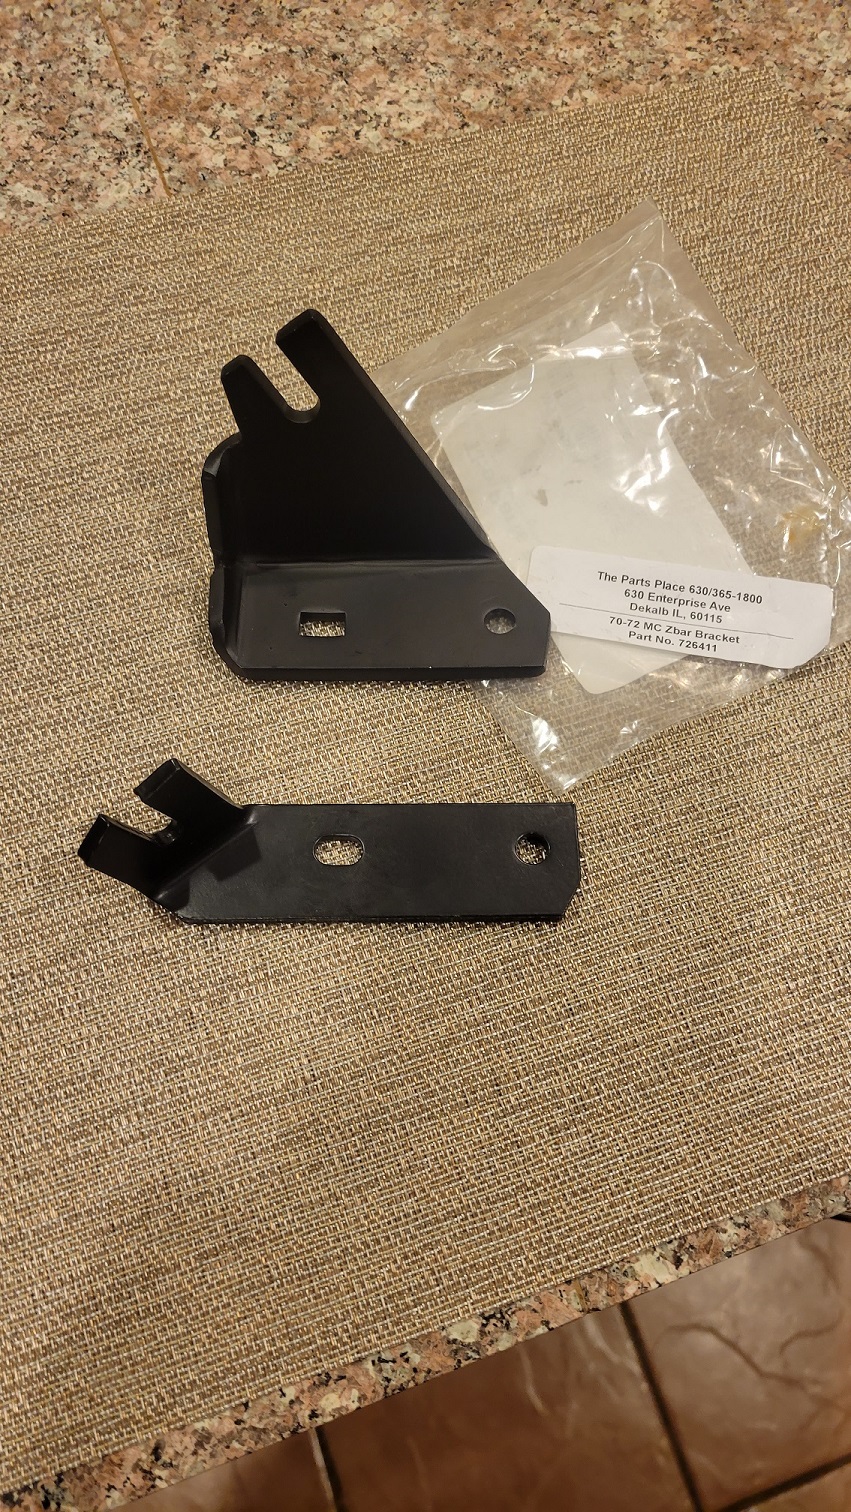
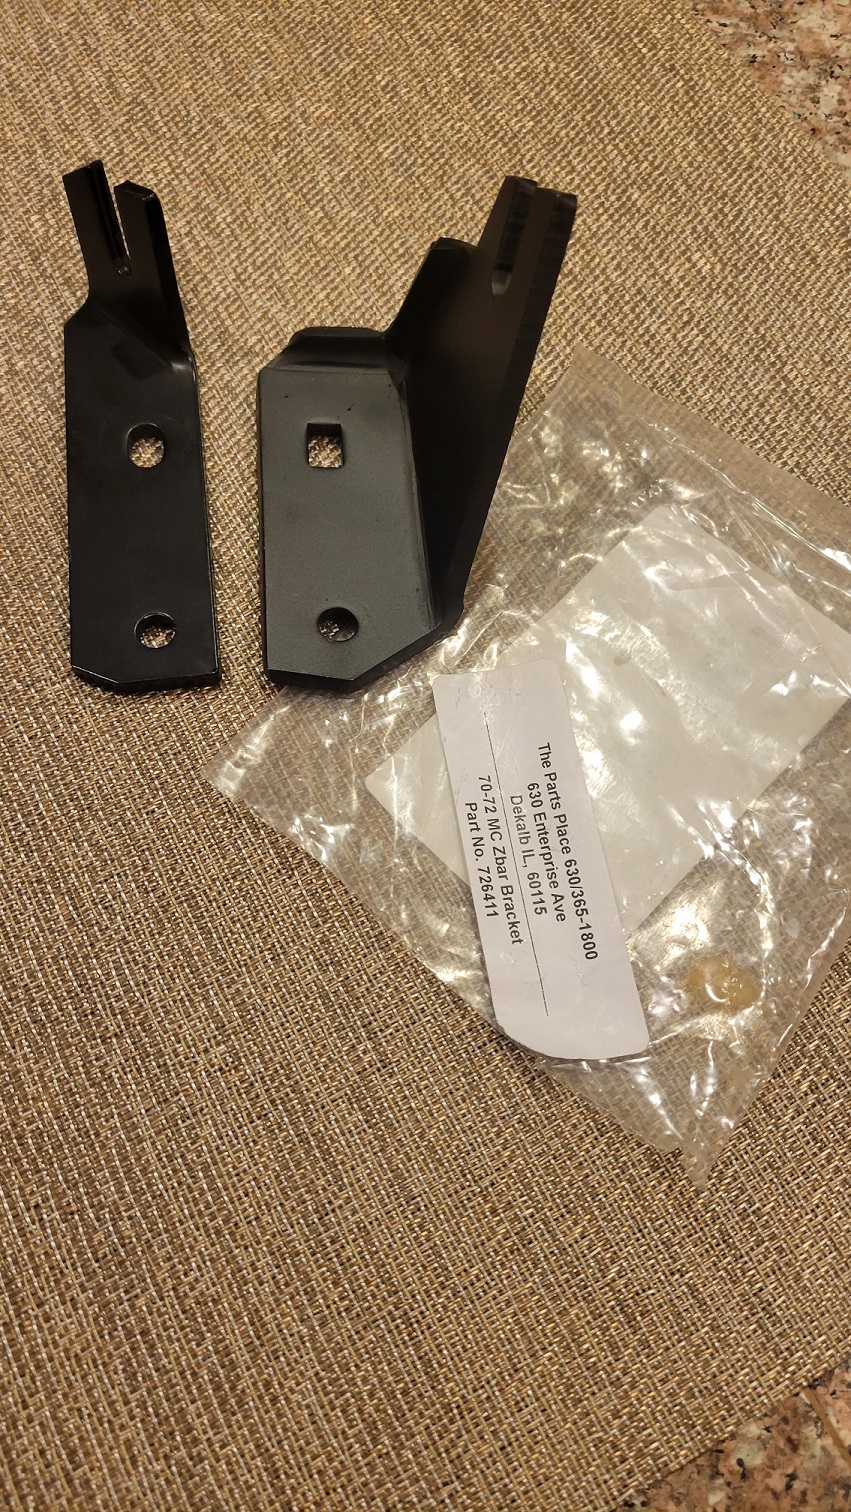
New bracket arrived from the parts place - looks correct. Posting a few pics of it, with their contact info and part number, and side by side with the traditional GM a body part. Thx to Montemedic for the tip. It was $14 vs $65 for the used item.
-
3
-
-
53 minutes ago, LS65Speed said:
The A/C harness is a SEPARATE harness that was added to the car if the A/C option was selected by a given buyer. The harness plugs into the car harness at one male / female connection point inside the car cabin near the center of the dash. There is also a ground wire near the blower motor that has to come off also.
Pulling the harness into the cabin or out to the engine bay is, I believe, gonna require removal of a couple of A/C ducts under the dash. Start by removing the plastic duct that is right above the transmission hump in the floor. Two bolts there, self tapping easy to get out. Put some lube on the bolts when you reinstall them because they can strip the plastic / fiberglass material they thread into. Next step is likely gonna be removal of the "Y" duct for the defroster. That activity requires removal of the dash pad. At this point you should be able to pull the harness in either direction, into the cabin or into the engine bay. If you decide to pull the harness into the cabin you are gonna have to remove the relay and hardware that is on the evap case.
perfect. I have access to both of those items
-
3 hours ago, Montemedic said:
I would also think twice about keeping the wiring and wiper motor intact too. Most states require it to pass a DMV inspection. Unless your making a track or total show car out of it, or not drive it on the street I would leave them intact.
I wondered about that. Its intact, just removed. will need to dig into our DMV a bit. I know after the initial VIN inspection on my SS, nothing further is needed other than a trip to renew tags with no further visual inspections. I've never even had the wipers on my SS on (do they work?? lol) in the 6 years Ive owned it.
-
1 minute ago, jft69z said:
I've replaced the A/C harness before. Pretty sure you can remove all of it, but you would need to get some connectors off the HVAC control switch, plus a couple other spots. Not impossible to do, but removing the dash pad may make it a lot easier.
You could also tape it all off and push it back thru under the dash, but you said you're trying to clean things up.
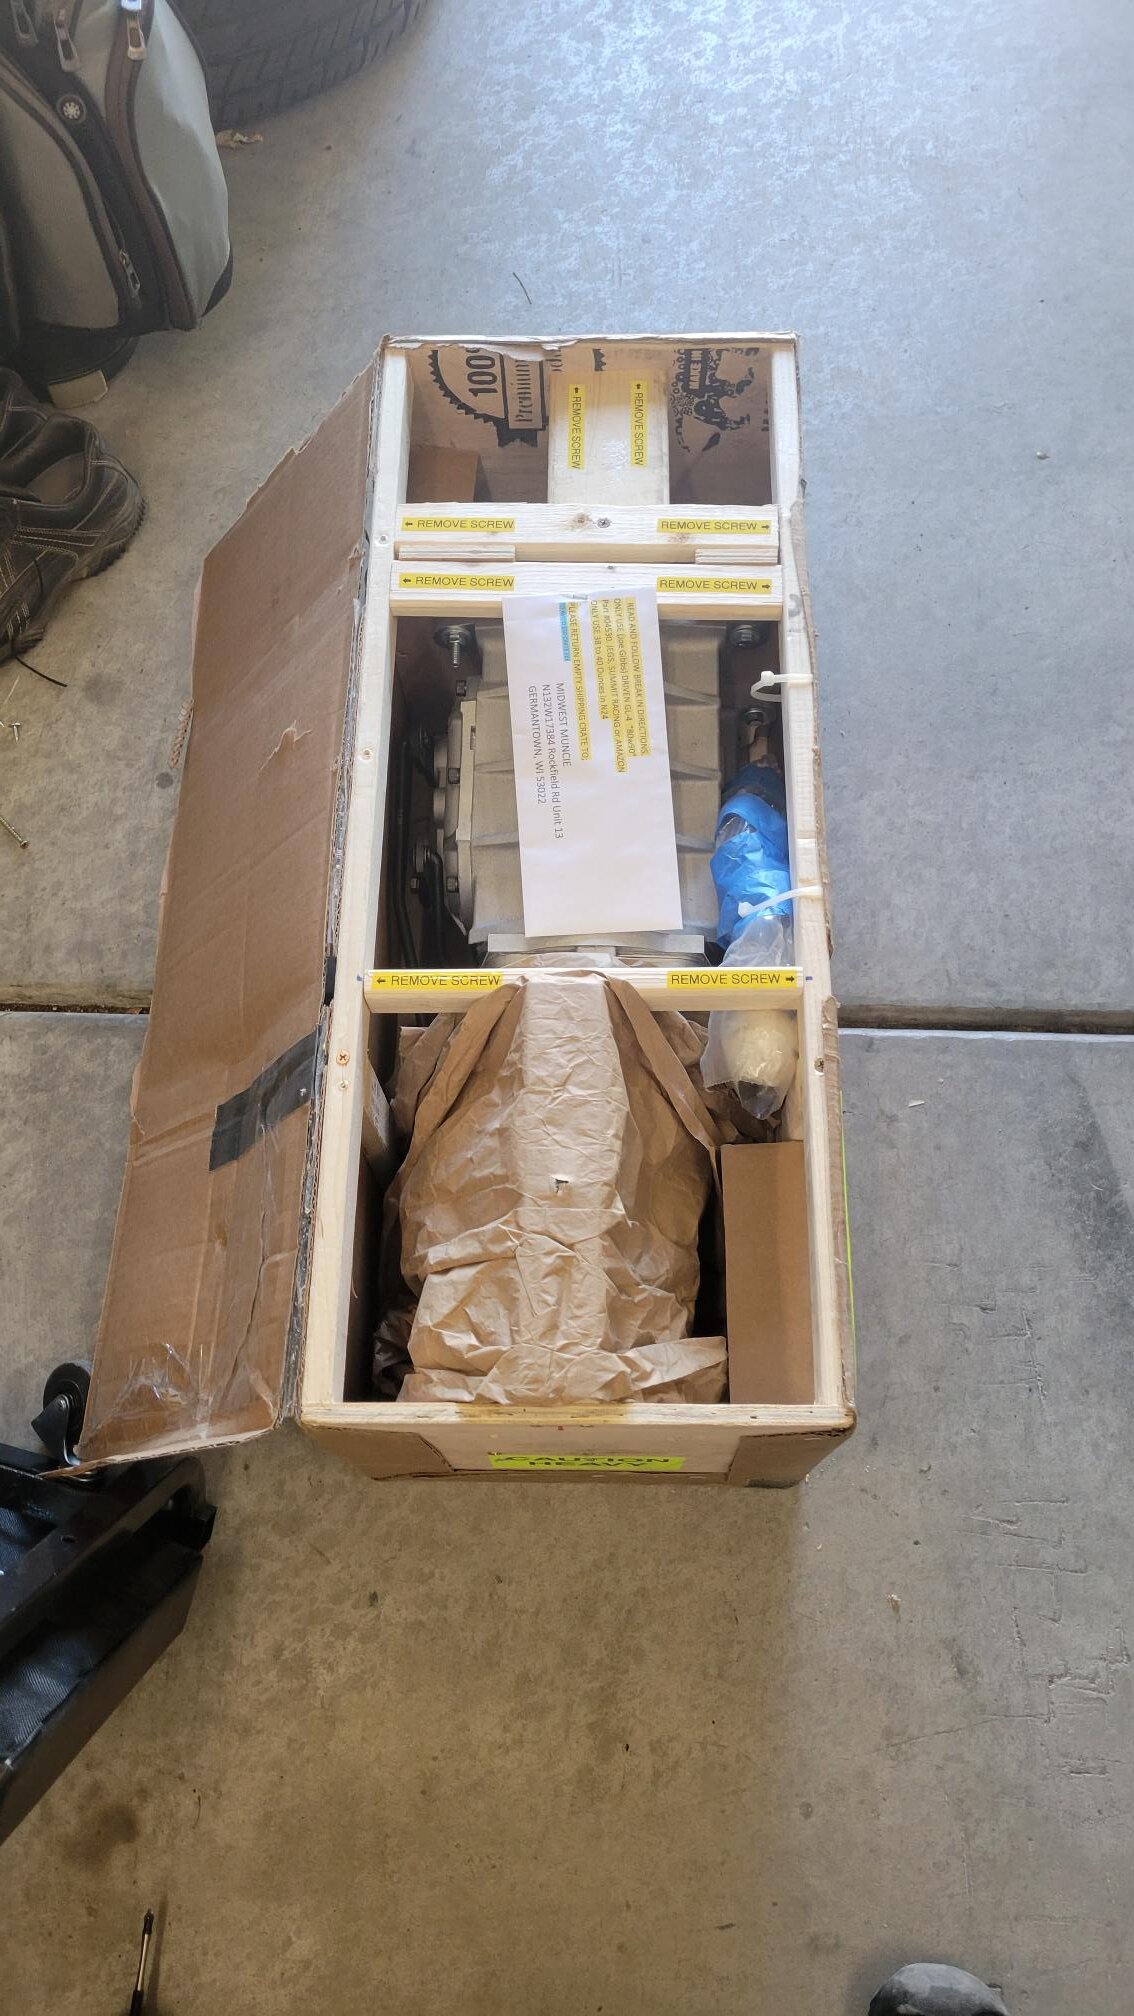
I also have special wood blocks to keep the engine in place without the trans for my Monte & Z/28. Even labeled them so I don't use them as a scrap for something else 😁
I could easily push the wires back through, tape up and put the grommet back in place. Would need to remove the relay and such. Id think I could just leave the under dash items still connected. This actually would be the best option. Will just need to label and make sure all are insulated/capped. That wood the right size can be hard to come by - especially right at the moment when you realize you need it.
-
1
-
-
3 hours ago, 1970mcss said:
I've never built a hot rod or modified but I don't think I could or would cut out any harness. Like you said if you ever sold the car what would the next guy do. Just my opinion but it's your car. Good luck with the project.
Yup, agreed. That's why I'm asking. This car simply wont be driven in inclement weather. I'm looking for options
-
1 hour ago, MC1of80 said:
It probably will be a "to do" but look to see if you can access the a/c harness plug/connector and remove the wiring. I have not done this but have a harness to install into my brother's 71 SS along with a few other new harnesses.
I did look under the dash to see if I could simply pull the whole harness back through, coil up, tag and secure but that whole dash has to come out to do it.
-
 1
1
-
-
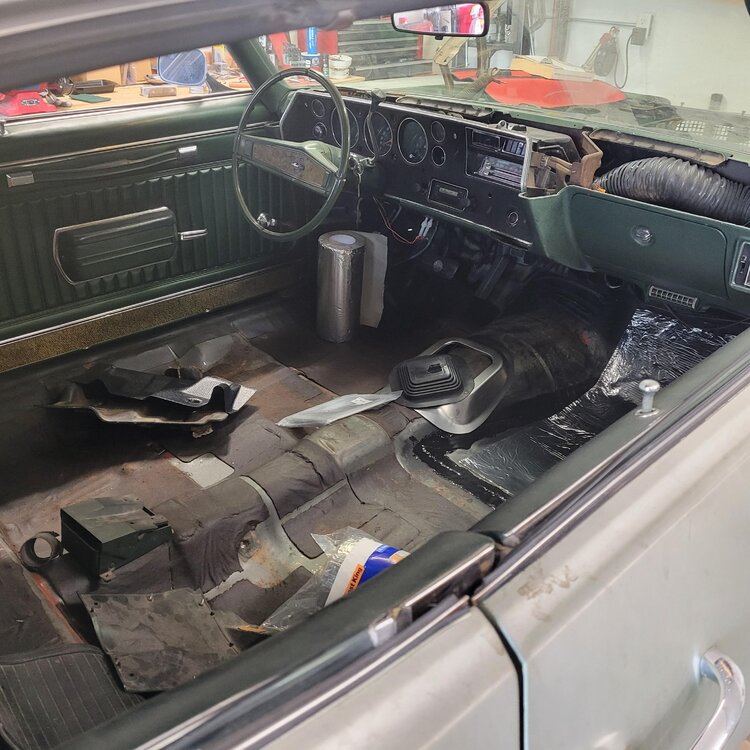
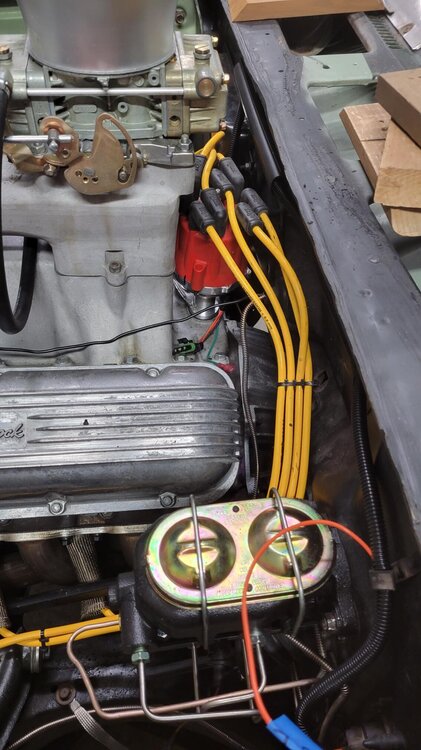
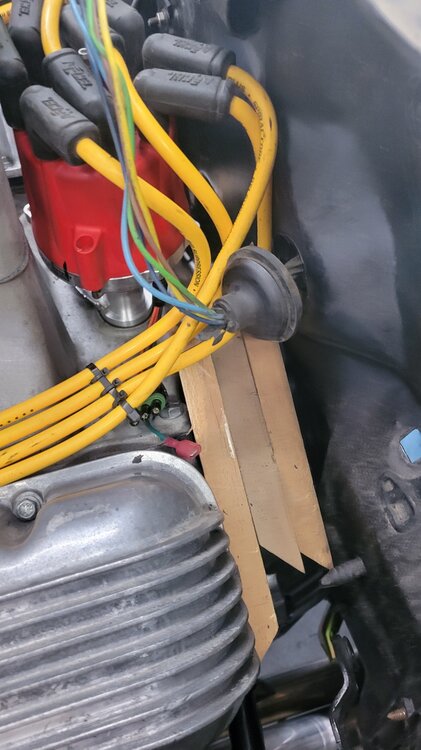
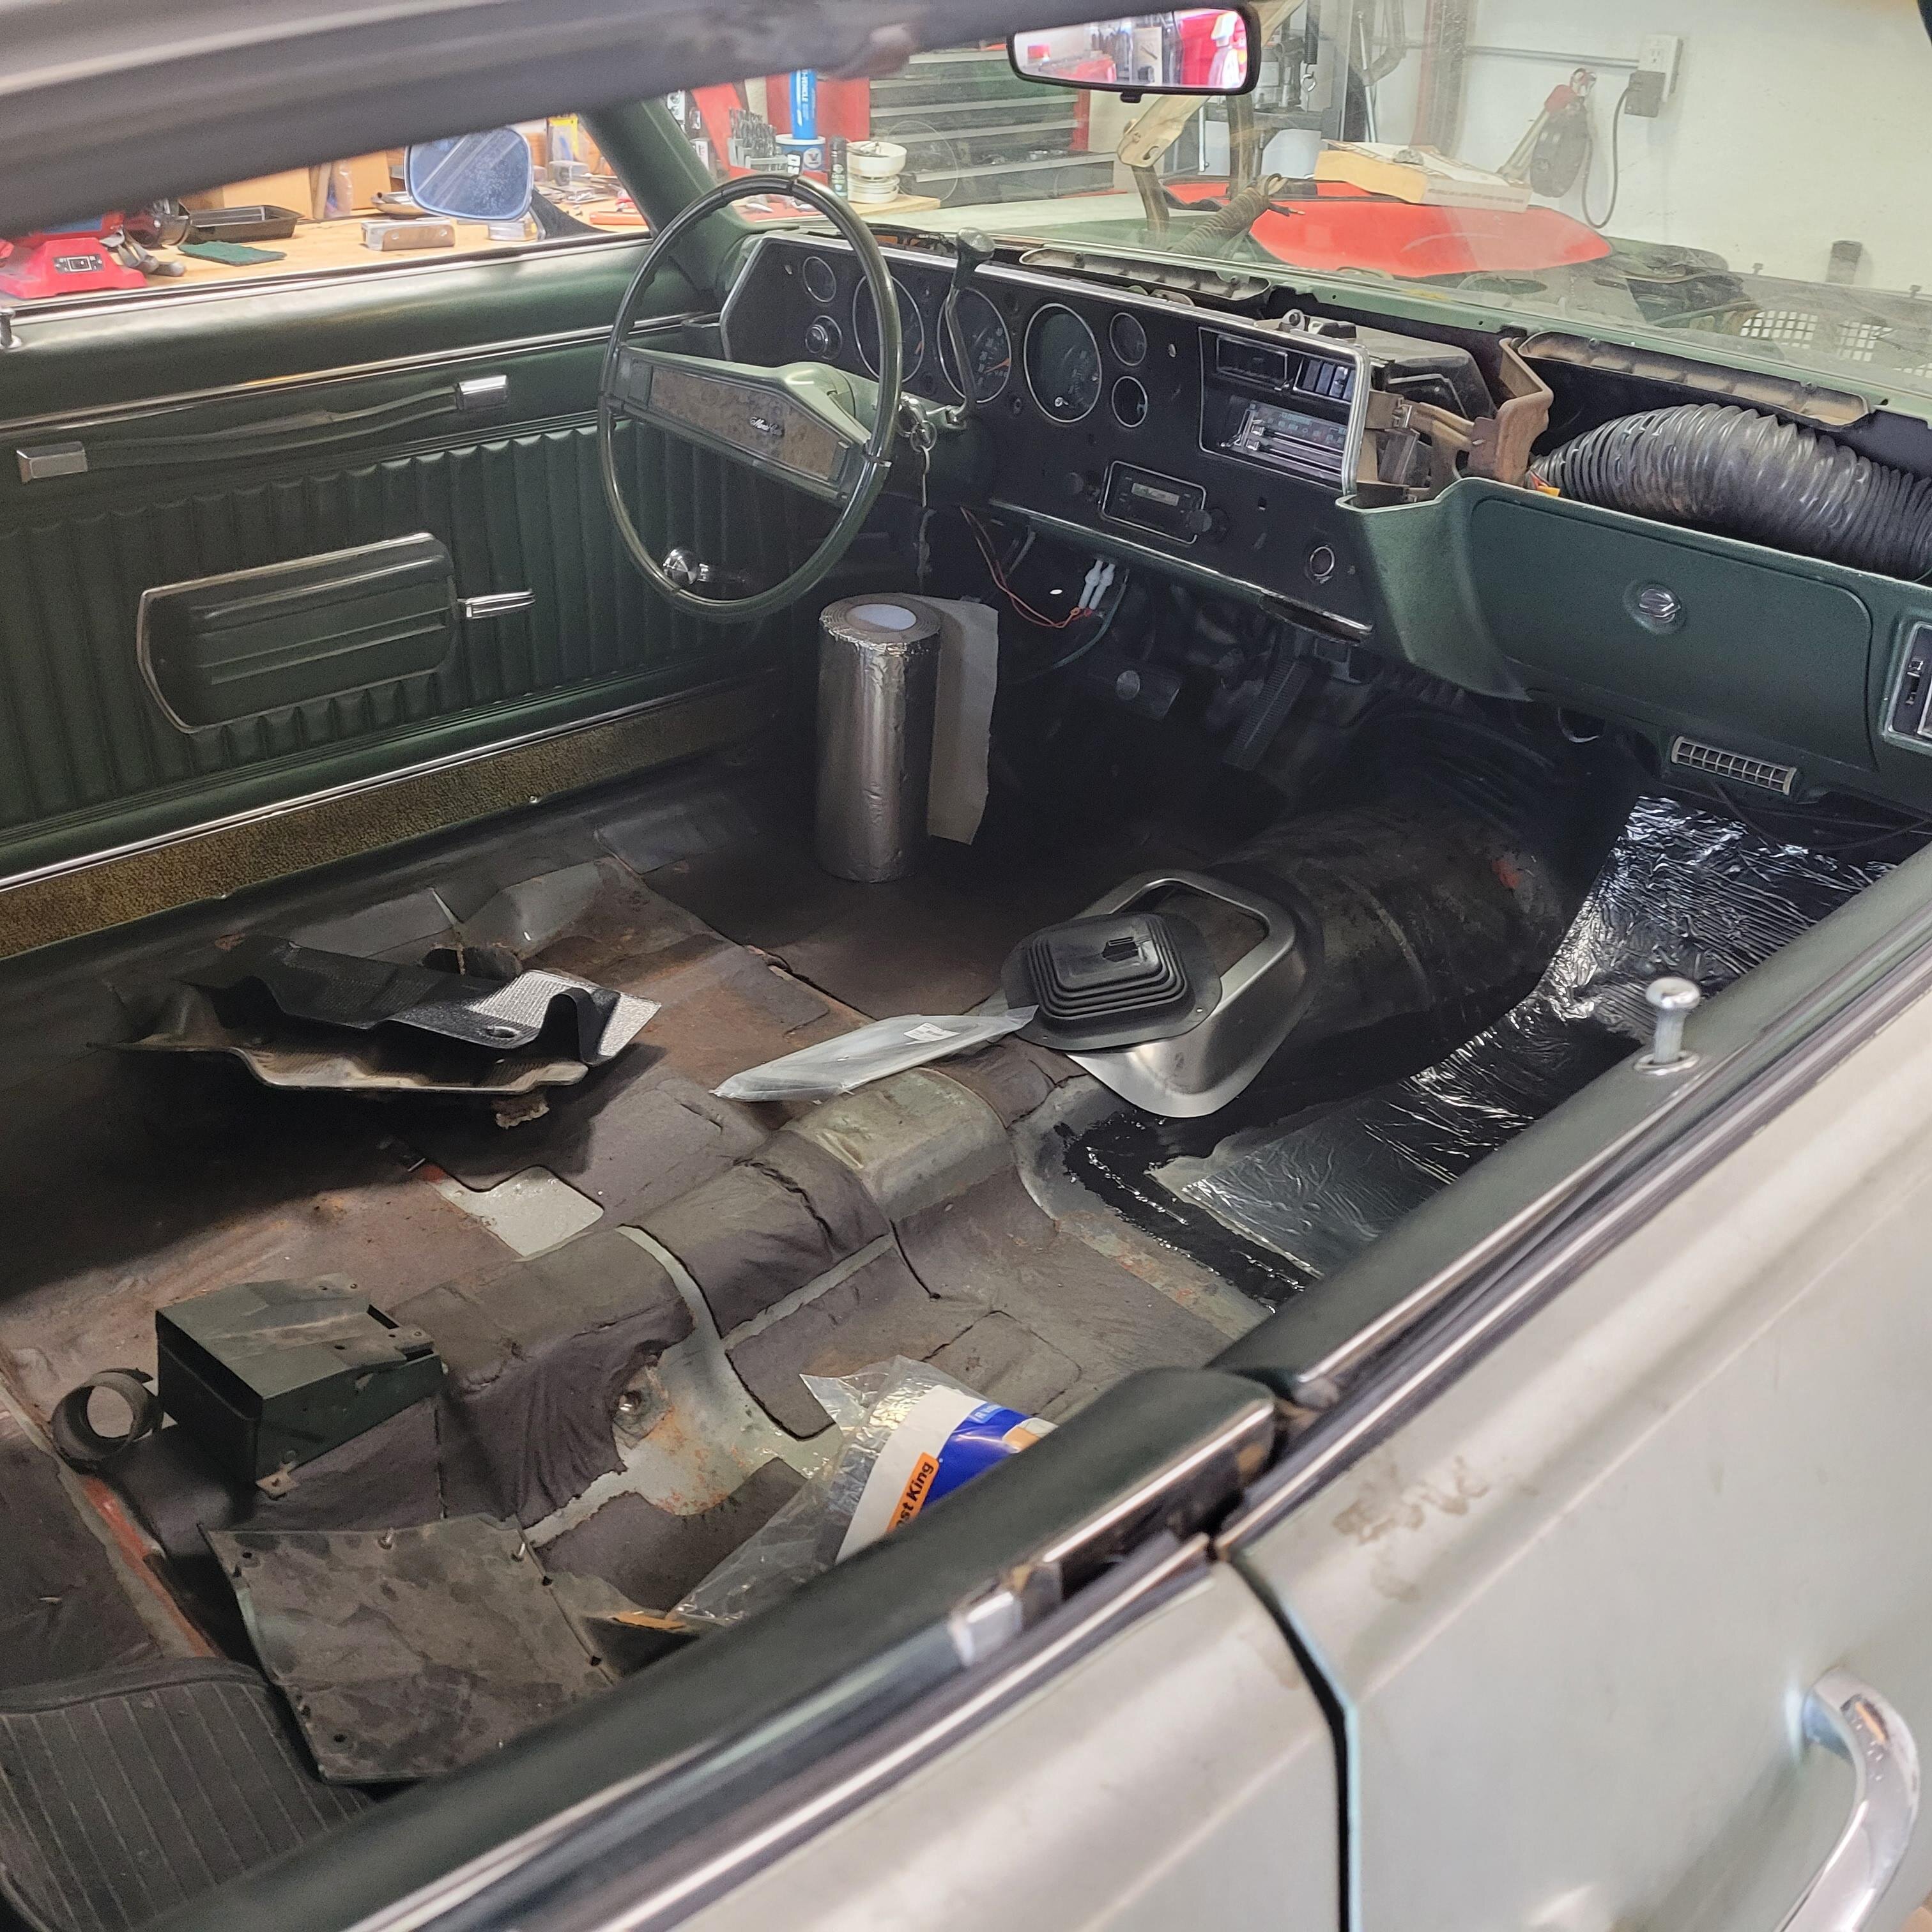
Group, on my 70' that I've converted from a 350/350 to 454/4spd, I'm trying to eliminate as much clutter as I can. Part of that entails the AC. Everything under the hood has been removed and now am cleaning up wiring. I won't be using the wipers, blower motor etc on this car. My question is two fold. There is a grommet at the firewall where all of the wiring goes through ( see pic). Had I realized when I had rhe whole dash out I would have tackled then, but the dash is all back in (changed heater core before I realized I won't be running heater hoses to the engine). I can simply cut the wires and push them through the grommet, but wondered if there was a better way. I don't anticipate ever needing the ac, but if I ever sold it, it would be nice if that option existed. The other question, is whether or not eliminating the TCS relay, and associated items would cause any issue. I doubt it, but wanted to ask. Btw, the wood is holding the engine in place until my Trans arrives
-
Group, These pics are only for reference for future searches of this topic. Shown is the incorrect bracket for the GM A body that is too short for our cars, as well as a clear picture of the correct bracket. Hopefully it will help others in the future. I will let you know if the $14.00 bracket from the parts place is the correct one when it arrives today. If not, then its the $65.00 used bracket on Ebay.


-
1
-
-
On 3/1/2023 at 10:02 AM, Montemedic said:
Check with The Parts Place. I think they have it.
Thats the one I ordered a couple of days ago. No pic on the website however. We will see
-
5 hours ago, jft69z said:
SS396 has this one, says 'picture may be different than actual part'., doubtful it's the correct one though. Looks like the same one offered in the entire kit.
https://www.ss396.com/monte-carlo/FB-566.html?Category_Code=monte-carlo-clutchzbar
This place has one, at least it appears to have the correct GM part number for 70-72 Monte, 3972641, as referenced in the 4-speed conversion website.
https://www.classicmuscle.com/p-1968-1977-monte-carlo-frame-bracket-3972641
This old thread addresses it as well:
https://www.firstgenmc.com/forums/index.php?/topic/5703-clutch-pedal-interchanges/#comment-67397
Another option, if you're not too concerned about appearances would be a hydraulic conversion. I just put one in my Camaro, so far I'm really pleased with it. Eliminates all the linkages, slop, hard pedal, etc. I hid the small fluid reservoir behind the power brake booster, barely noticeable.
The bracket shown on the 396 site is what I have already received and its incorrect. The second site has the correct bracket, it appears but the store is closed ha. Just my luck
-
1
-
-
17 hours ago, riverdogs00 said:
I looked online, and of course they do not have a picture of the frame bracket. when I looked at their conversion kit https://www.thepartsplaceinc.com/product/1970/1970-chevrolet-monte-carlo-4-speed-conversion-kit-kit-includes-brake-and-clutch-pedals-z-bar-clutch-pedal-pushrod-pedal-pushrod-boot-retainer-clutch-fork-boot-clutch-fork-adjustable-clutch-fork-pushrod-clutch-fork-ball-clutch-return-spring-s-z-bar-frame-bracket-z-bar-hardware-kit-containing-an-engine-ball-stud-frame-side-ball-stud-1-retainer-1-felt-washer-2-nylon-bushings/35626 It shows the same incorrect bracket I already have. not sure ha
I called the parts place this am. They assured me that the part, while not pictured, is the correct one for our cars. I ordered...we will see
-
2
-
-
5 hours ago, Montemedic said:
Check with The Parts Place. I think they have it.
I looked online, and of course they do not have a picture of the frame bracket. when I looked at their conversion kit https://www.thepartsplaceinc.com/product/1970/1970-chevrolet-monte-carlo-4-speed-conversion-kit-kit-includes-brake-and-clutch-pedals-z-bar-clutch-pedal-pushrod-pedal-pushrod-boot-retainer-clutch-fork-boot-clutch-fork-adjustable-clutch-fork-pushrod-clutch-fork-ball-clutch-return-spring-s-z-bar-frame-bracket-z-bar-hardware-kit-containing-an-engine-ball-stud-frame-side-ball-stud-1-retainer-1-felt-washer-2-nylon-bushings/35626 It shows the same incorrect bracket I already have. not sure ha
-
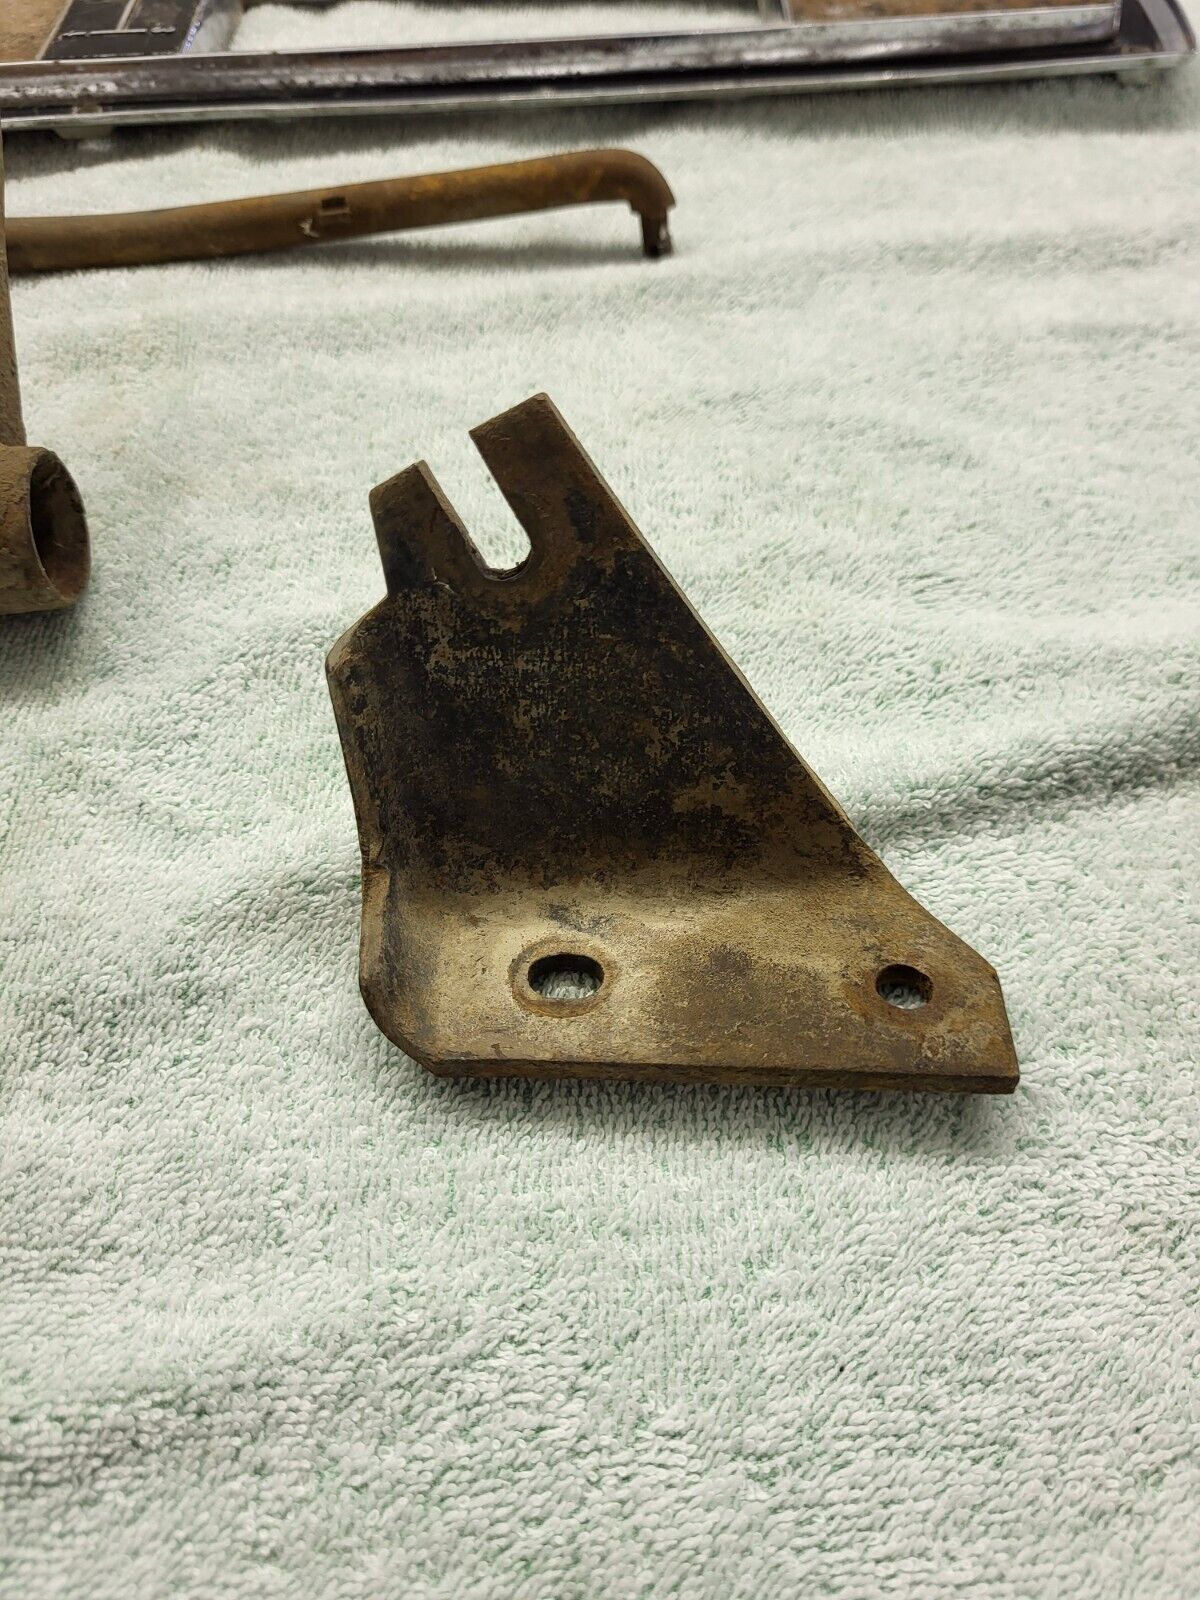
I found this company that reproduces it, but its sold out. At least I have a clear picture of it. https://4speedconversions-com.3dcartstores.com/3972641_r1.html
-
2
-
-
Thx guys, yup the one I have that came with the kit is off angle and too low. thank you
-
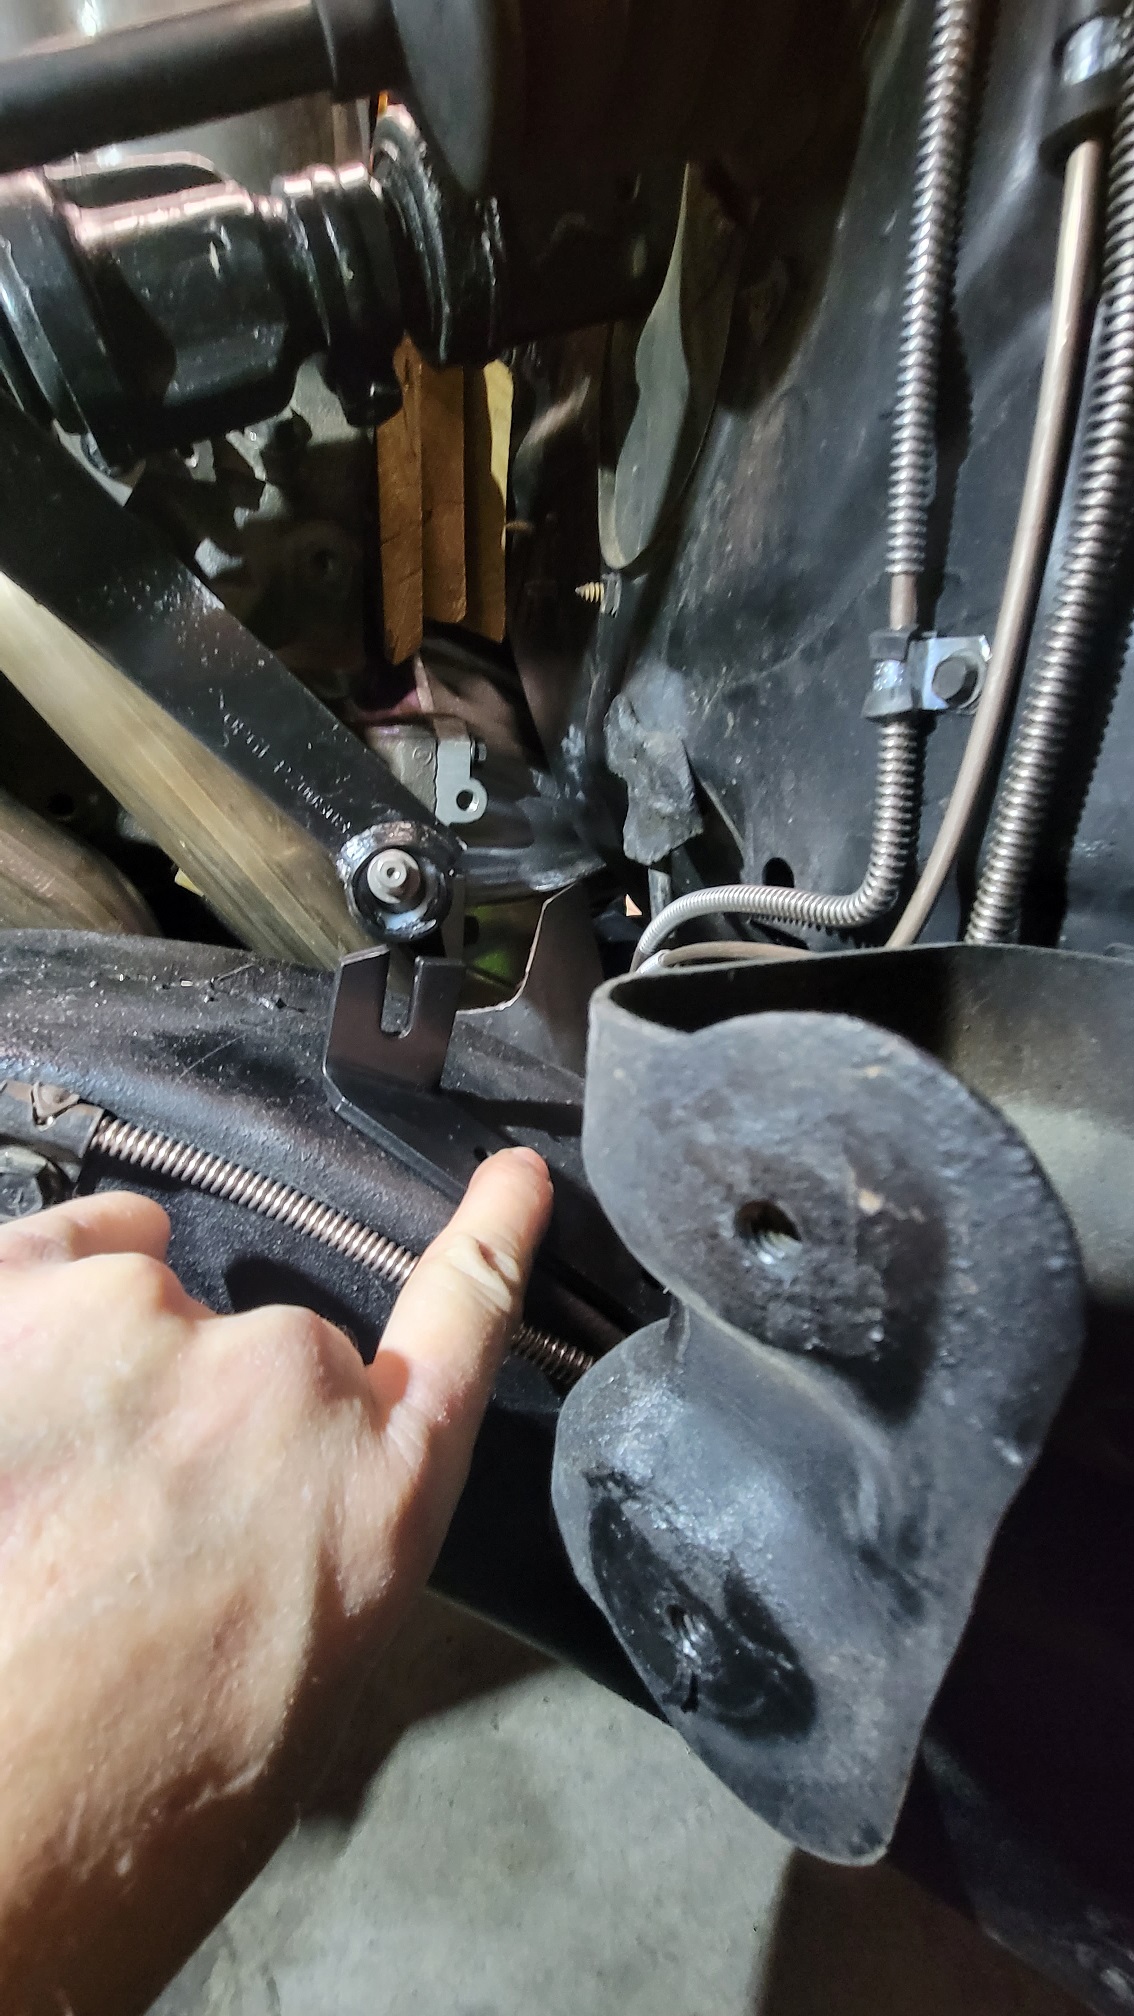
Group,
Doing a 4 speed conversion on a 70', and I wondered if anyone had a
Clear picture of their Z-bar frame bracket. The conversion kit I bought was pretty complete, but its obvious the frame bracket is wrong. I just wanted to see if it makes sense to modify the one I have, or try to make one. I could potentially remove the forward bolt, and swing into place and redrill, but am wondering about the height of the notch. Seems like a pic I saw from ss454-71 showed a bracket that was taller.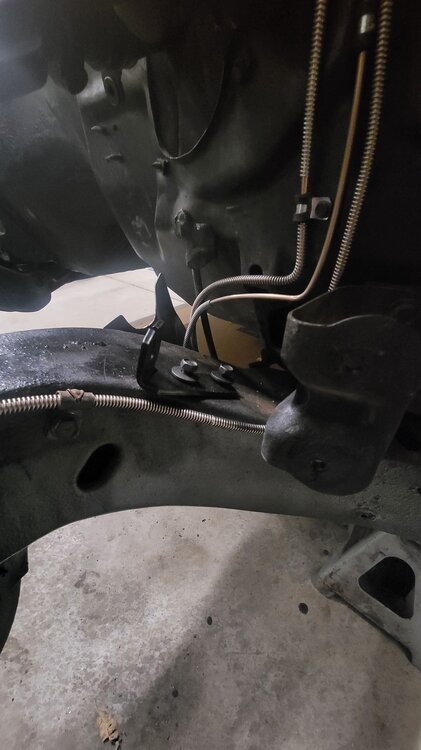
-
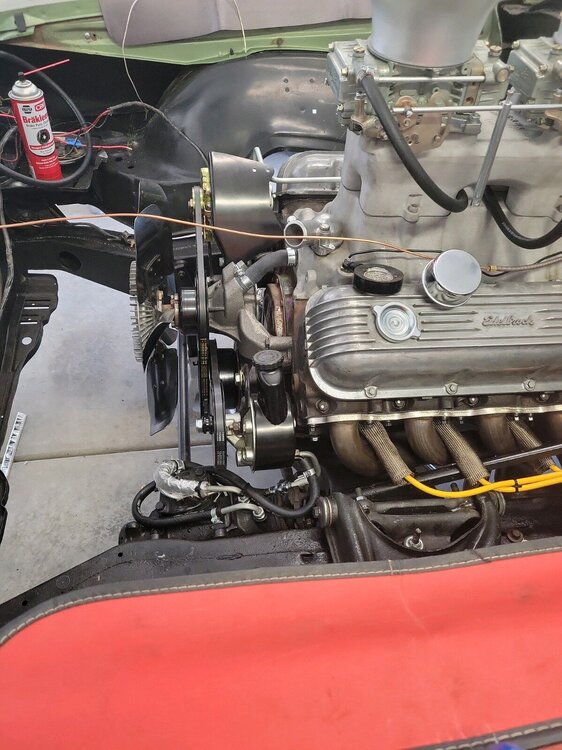
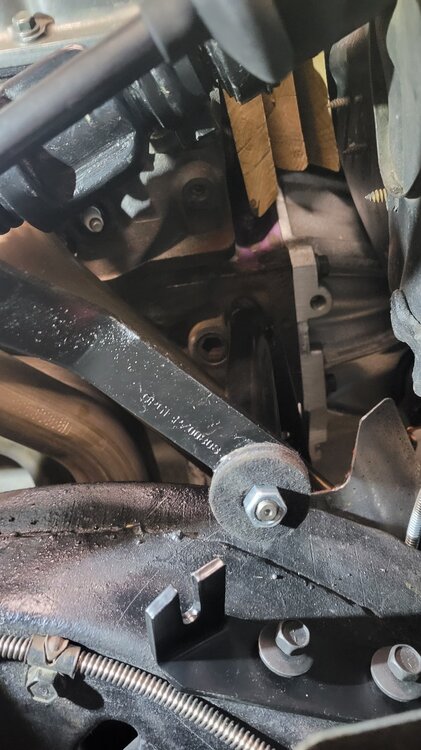
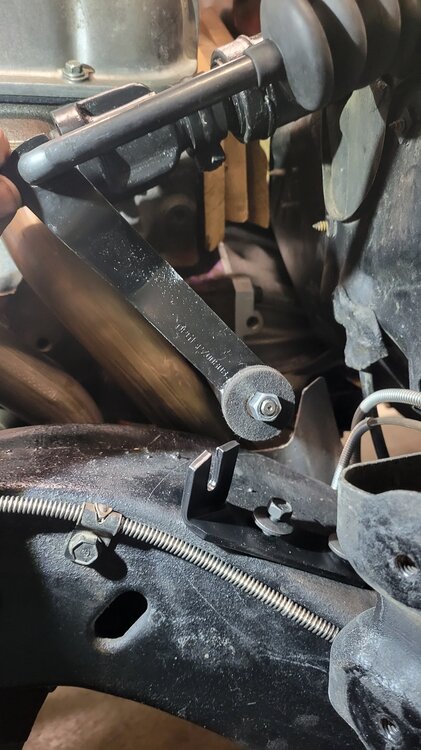
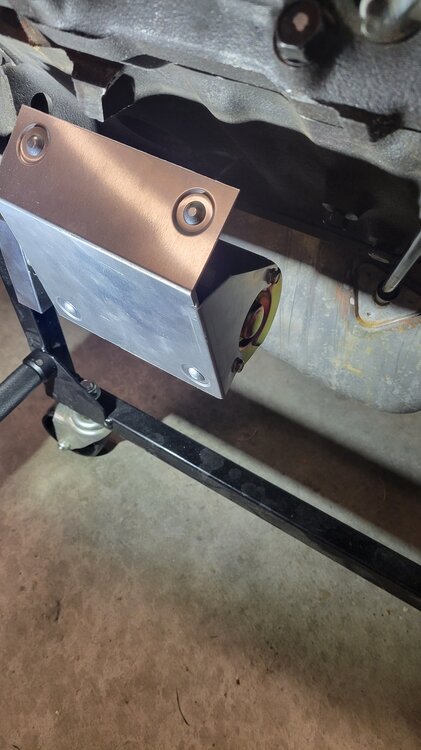
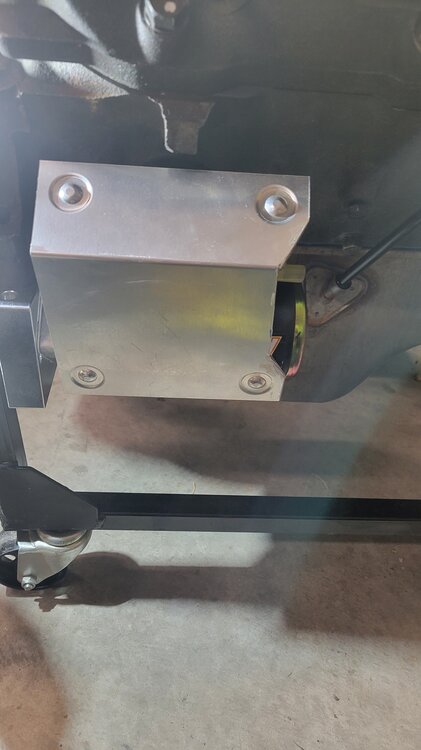
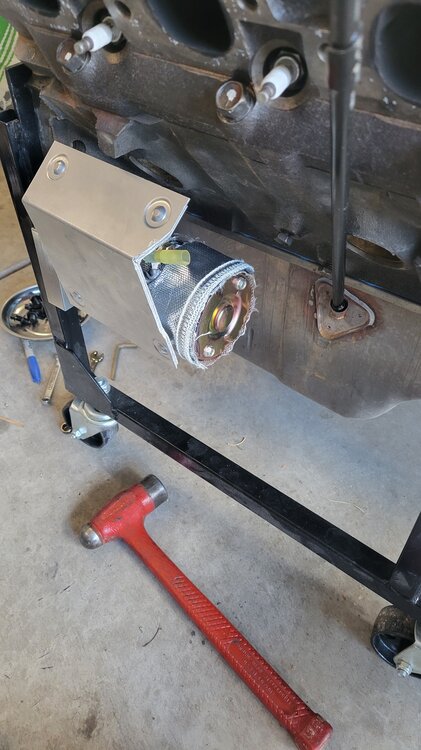
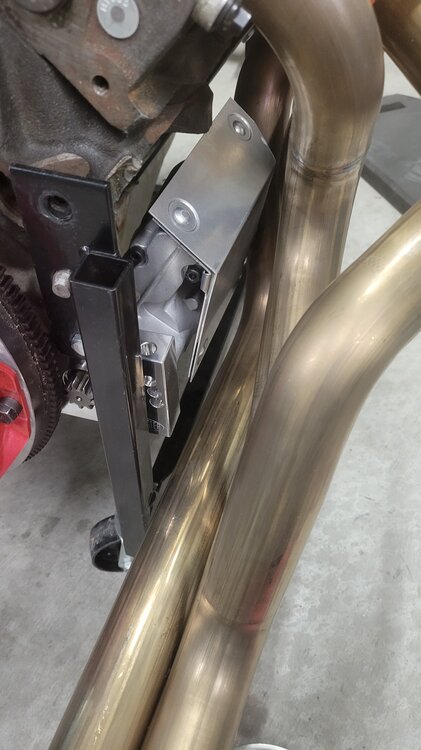
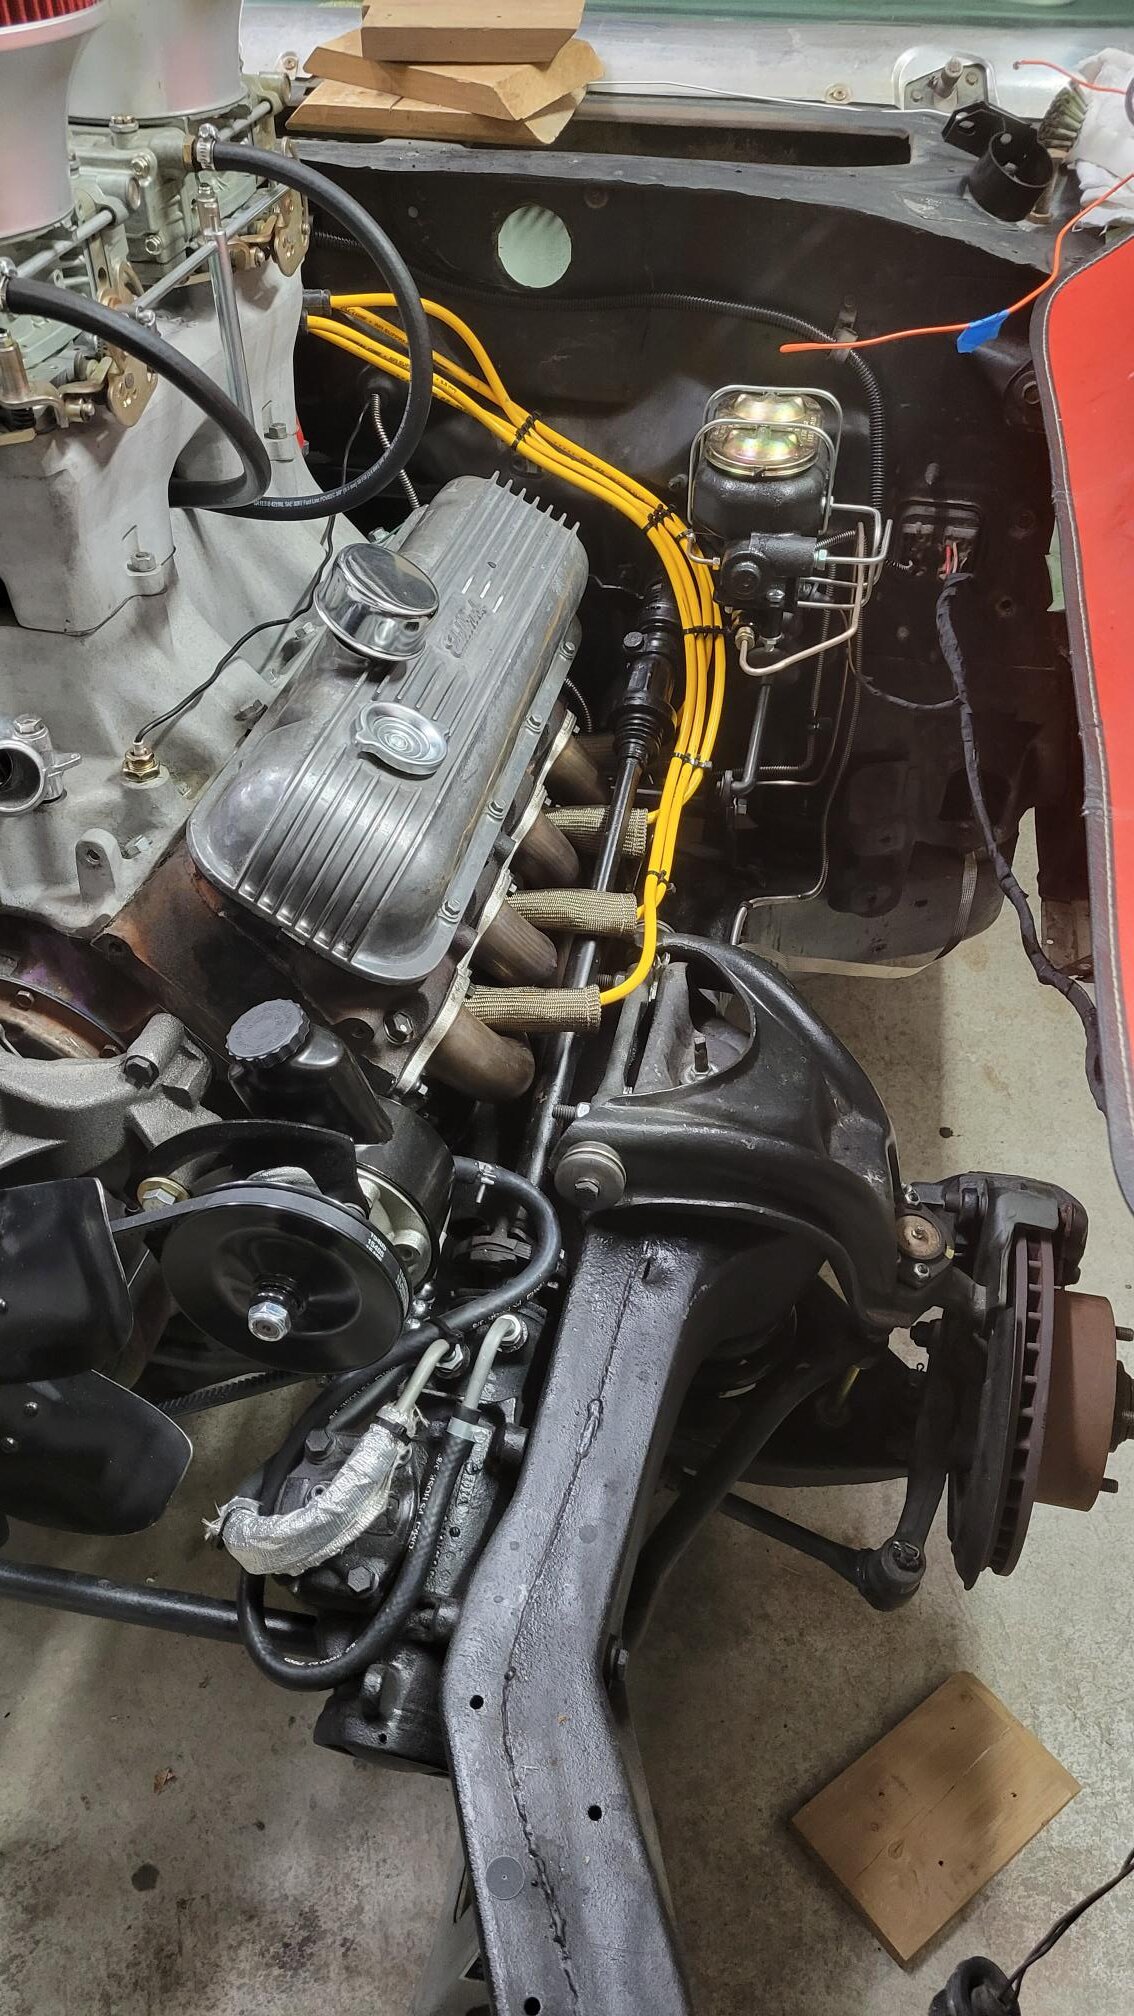
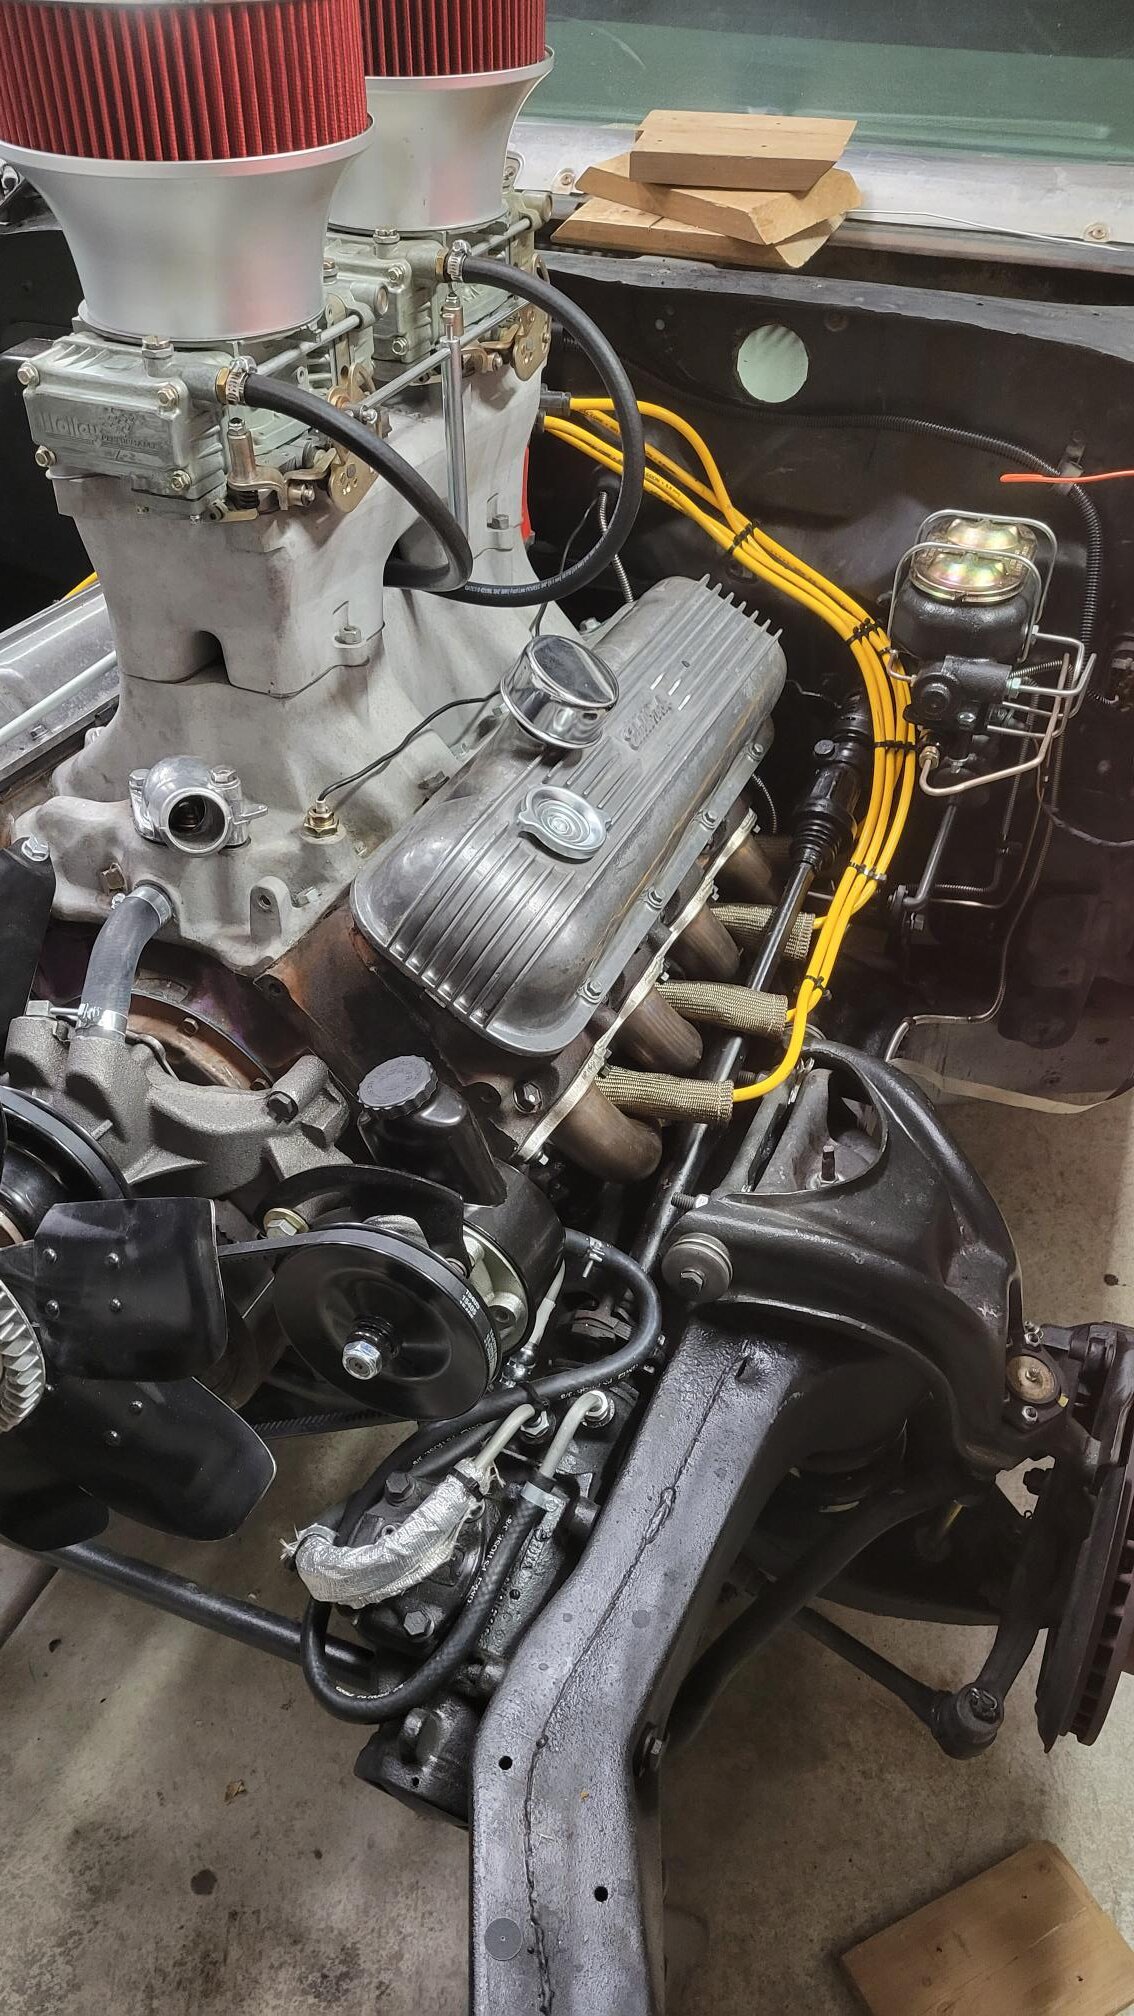
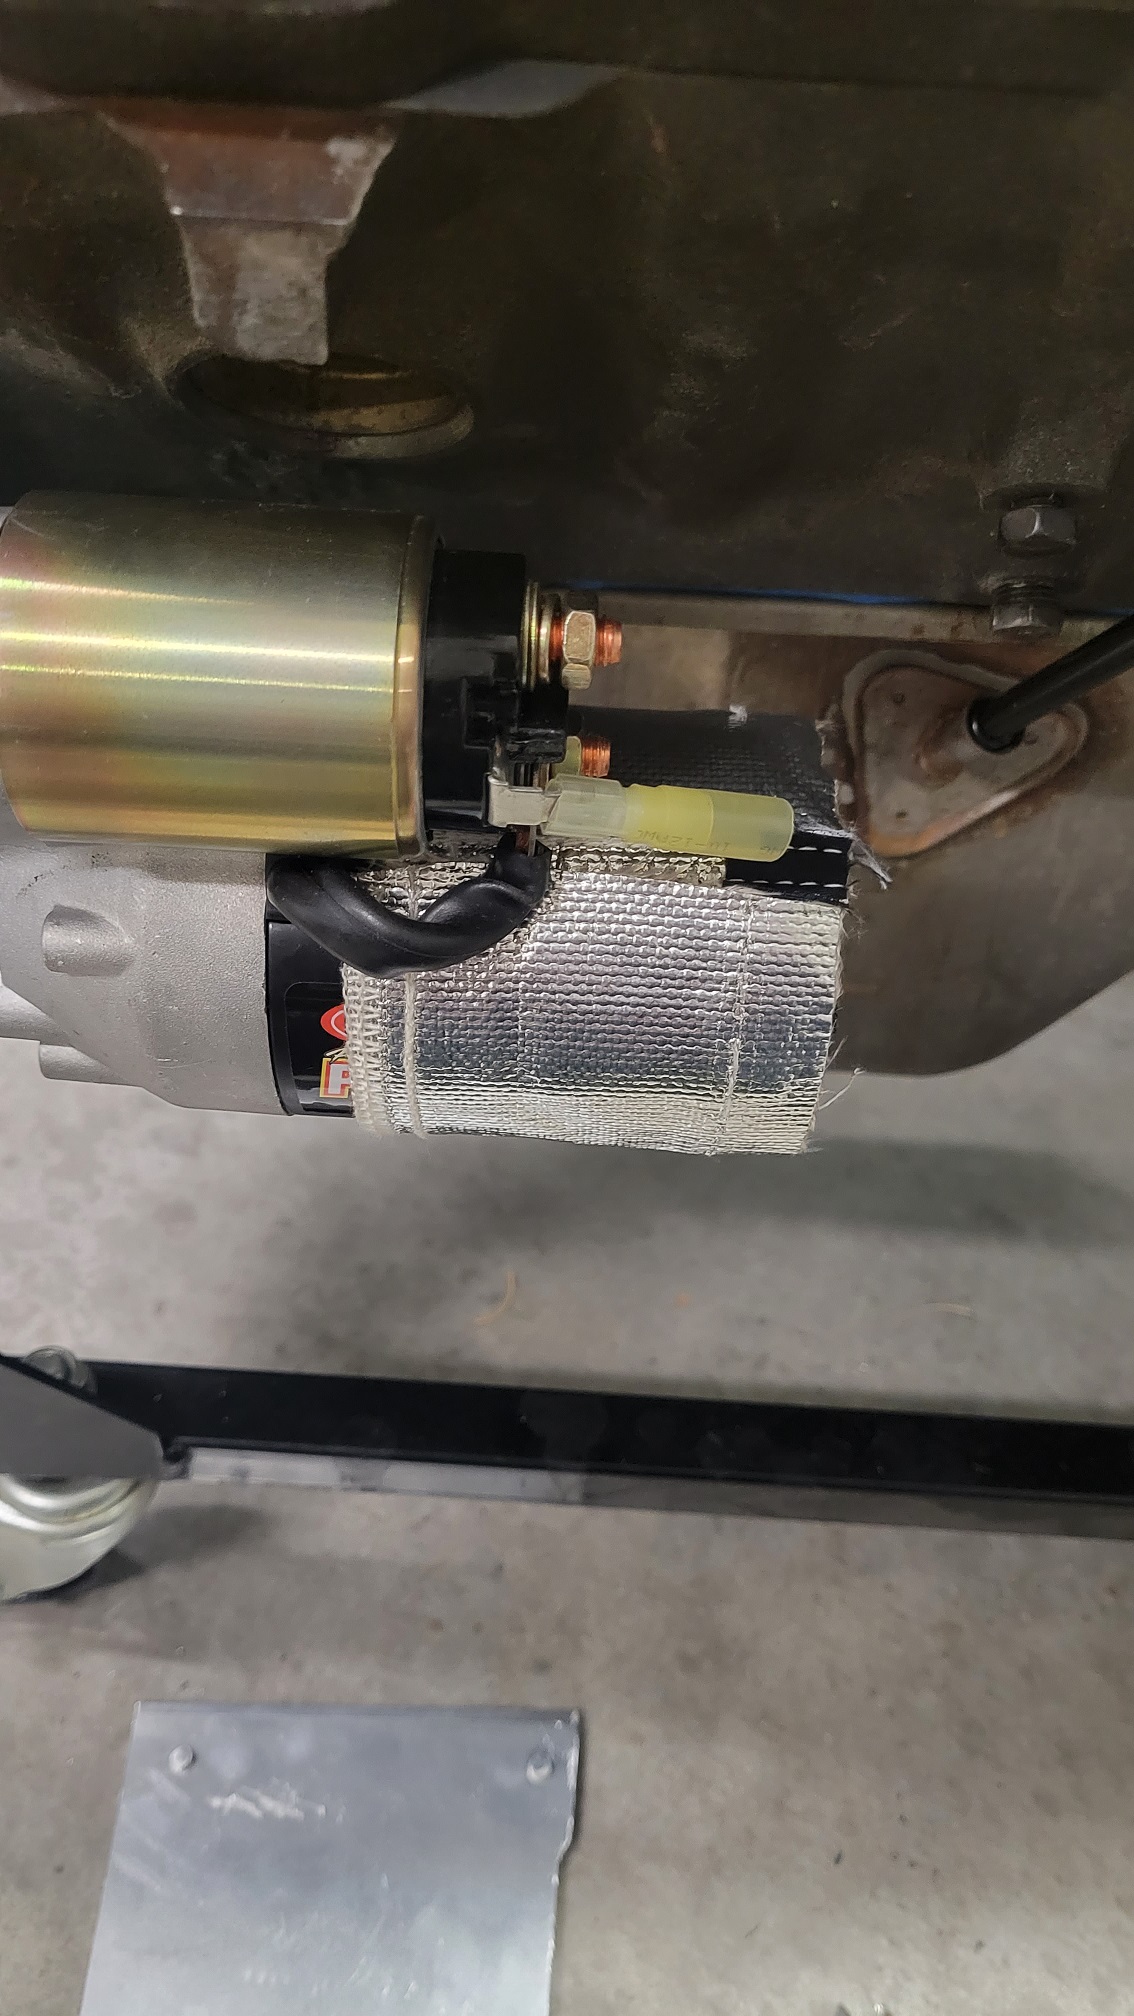
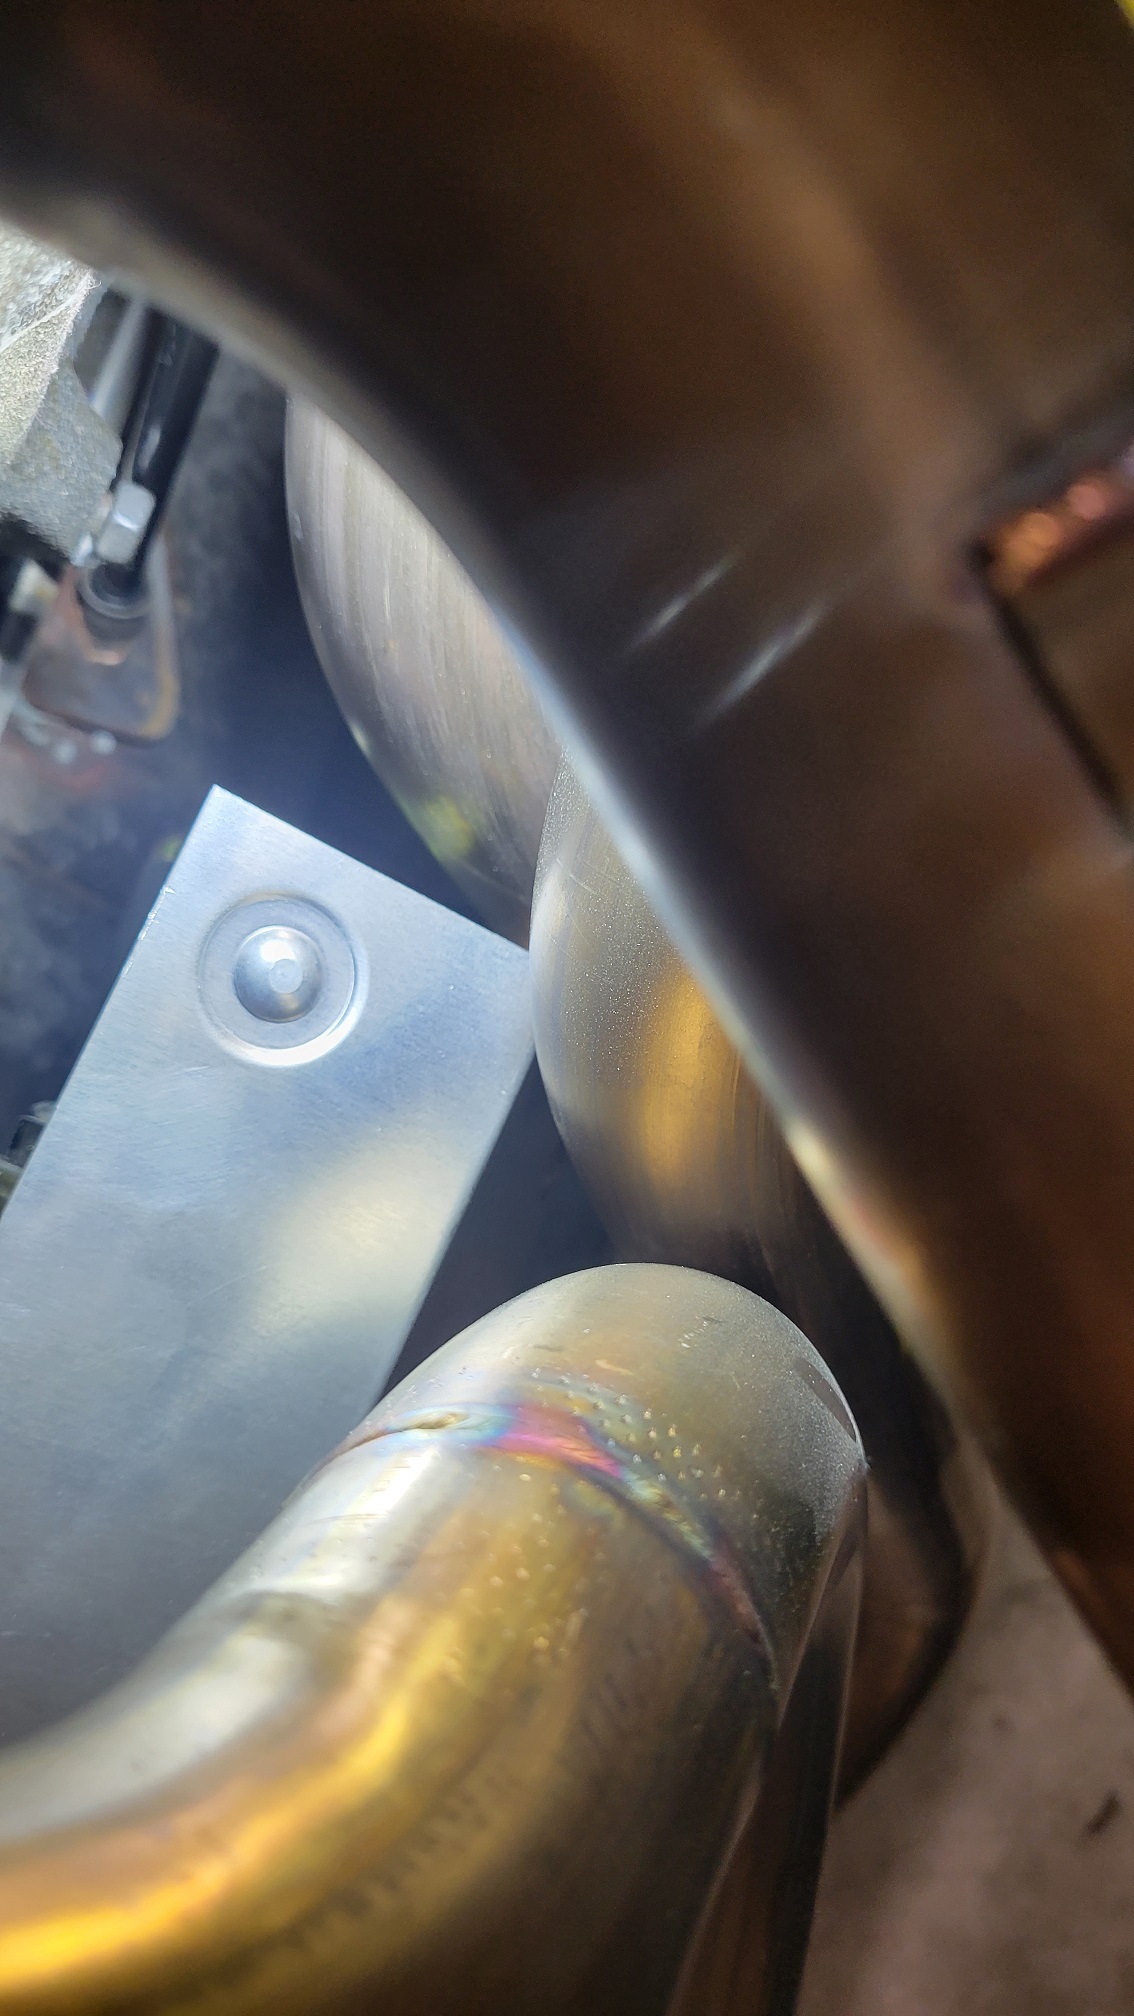
Group, the powermaster starter i bought and used was this one https://www.summitracing.com/parts/pwm-9000 a high torque mini starter. I ran into interference with cylinder #2. I've clearenced the tube (big hammer) and was able to get about3/16" or from the corner of the starter motor. I bought a Moroso starter shield and it fit great, until the headers went back on. see attached pics. I ended up at the end, wrapping the rear portion of the starter motor with heat shield, and then modifying the aluminum sandwiched Moroso shield. It primarily will take care of the solenoid, and the front 3/4's of the starter motor. The wrap I hope is enough for the rear portion.
.thumb.jpg.e12f6c61c6900641259daa9d0a01900c.jpg)


-
3
-


.jpg.1dfe68accd979685d192d370e08fe16a.jpg)


Over Heating issue
in General 70-72 Monte Carlo Forum
Posted
Bryan, where did you order from? I'm in that phase now as well. Got the LS=7 fired up, and am buttoning all the little details up. Installed the wrong 3 row that came with the car, but used a BB shroud to get it on the road before I bit the bullet on a nicer 4 row M/T rad, but of course it leaked while filling today......