


72-CLASSIC_RIDE
-
Posts
1,172 -
Joined
-
Last visited
-
Days Won
33
Content Type
Profiles
Articles
Forums
Gallery
Events
Posts posted by 72-CLASSIC_RIDE
-
-
If going to a Factory Tach and all gauges put in factory location, you will need a New Tach Circuit Board Ribbon as it is designed to operate those gauges in those factory locations. Am sure others will advise on your other queries that I can't answer to. Good luck with your Snow Ball. Thought I had finished mine a few years ago but nope, I was wrong......................

Doug
-
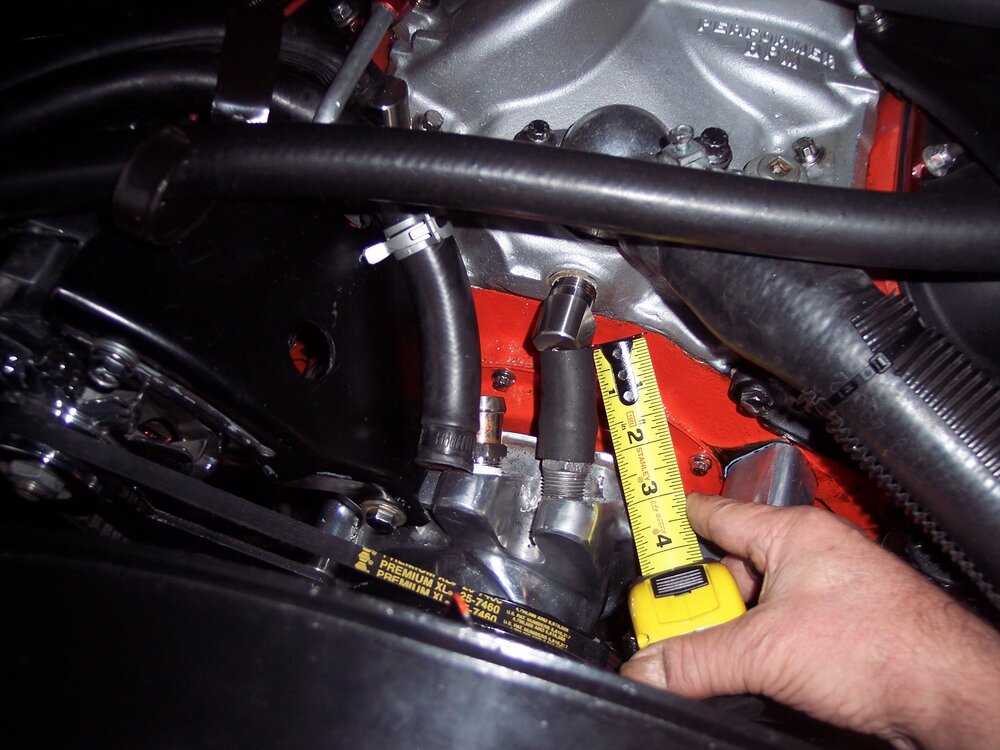
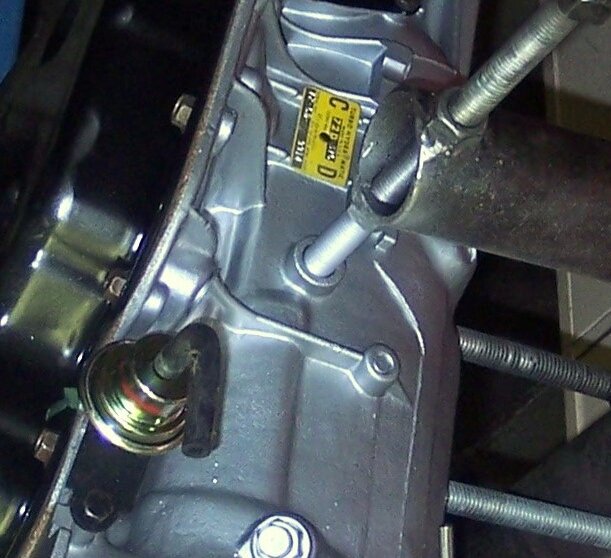
Been trying to change Water Pump out and have decided I didn't like those GM supplied Hose Nipples and purchased Stainless Steel Hose Nipples. Figured those would not corrode and build up all that ugly around base of Nipples. But those Stainless ones are a bit longer in length (1/4") and prevents me from installing the By Pass Hose onto Nipples as distance is not enough and angle to steep to prevent Hose from collapsing when installed (see pic 1). Pic 2 shows both the Stainless longer Hose Nipples
 shows both Stainless Fittings
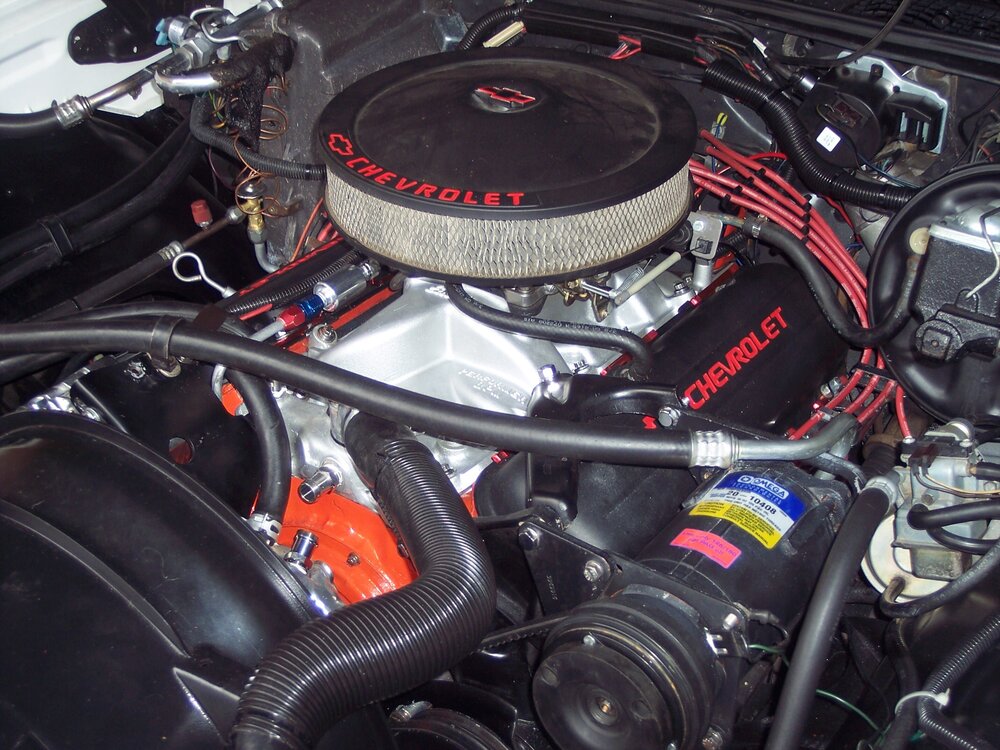
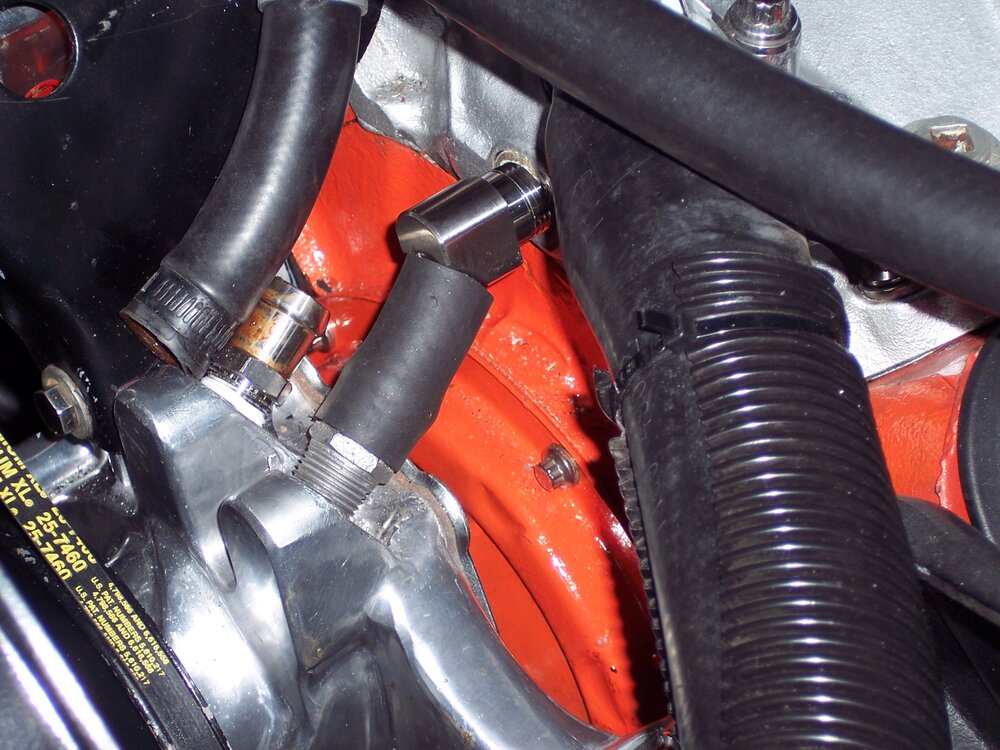
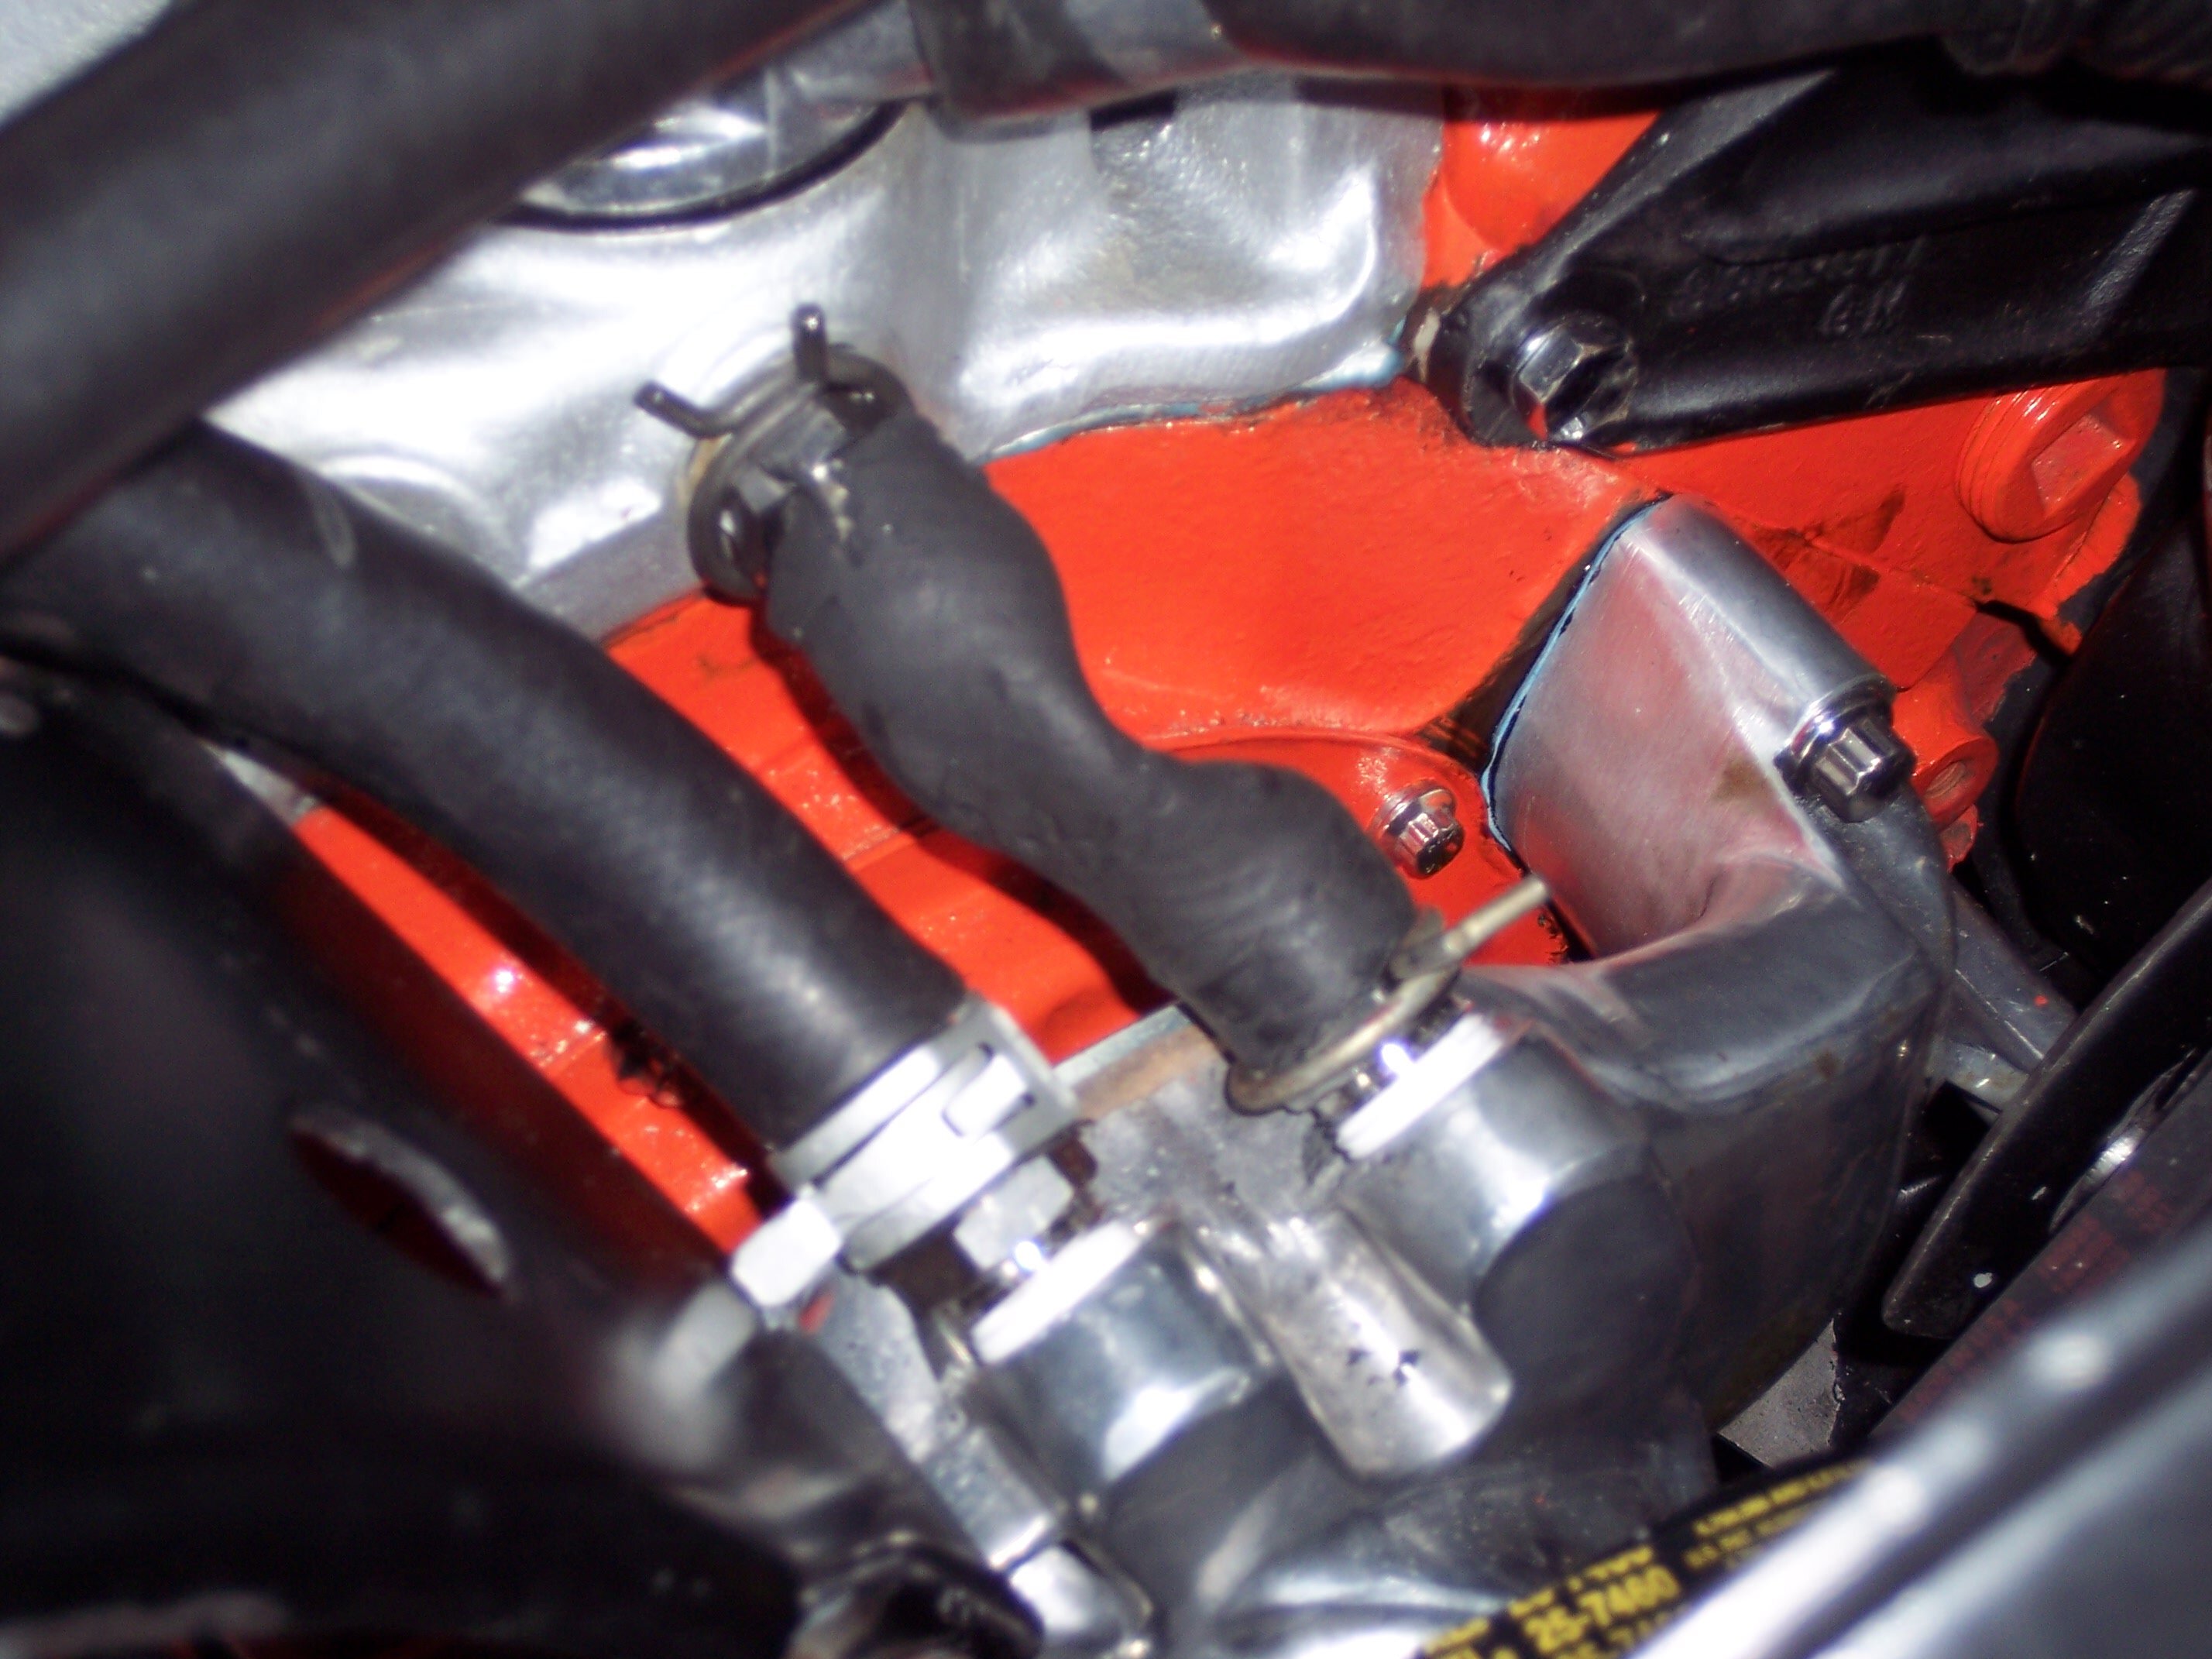
So after much tool throwing (for distance) I decided maybe a 45 degree angle fitting would work. My brother had one so I borrowed it and seems to work but, the Fitting isn't 3/4" inside dia., but 5/8" dia. that may change with the larger dia. Fitting installed. I was able to install Hose (see pic) with Pump Side Original Nipple not screwed into Water Pump but in place. I haven't attempted trying to screw in Fitting yet to see if it will thread properly as there is pressure pushing back against the Fitting, but believe it will work. So going to see if I can get that Stainless Steel 45 degree angle Fitting and try it again along with Original Hose Nipple on Water Pump end as I need that additional 1/4" clearance I think!. The GM original Fittings were each only 1 1/2" long and while difficult to secure By Pass Hose, would work, I just don't want those ugly Fittings back on there but probably will need original on Water Pump end. Been messing with it for a couple months now! Some of that time was used cleaning up for a Refresh of Engine paint, primarily on the engine front and refresh Intake Manifold. Even the hose clamps I selected are suspect and will have to test them once all together for any leakage. I tried Spring Clamps, Wire Spring Clamps and will stay with Wire if all works when together. Gettin close but no Cigar as yet. Anyway, just sharing and once I get this issue resolved, I can finish and see if she's still drivable after all my wrenching. I guess when you change from OEM parts, you should anticipate Nothing else lining up unless you have given it some consideration prior to expecting everything to work the same.
Well, at least the Motor and Intake look way better than they were.  ps; Happy Easter everyone
Doug
-
6 hours ago, Michael Boyte said:
I am always impressed with the number of cars and the planned activities that Aaron manages to coordinate for the Western Meet.
We as a club are so fortunate to have such great leaders.
As always, hats off to Aaron and Rob and everyone else who is involved in making our meets such as success .
Ditto that statement! Both are a Testament to what this Club represents and embodies. We are truly blessed that both are Leaders in our Organization and too those that contribute to it's success. It can Never be said Enuff, THANK YOU ALL......................
 , oops, kinda went bananas here
Doug
-
 4
4
-
-
Maybe Bowl has just enuff water/fuel in it making it take longer to measure out. Just a thought............
Doug
-
4 hours ago, sbarnette said:
On Sunday I drove my 71 for the first time since my surgery in December. As soon as I started her up, the gas gage went to 3:00 o’clock. I guess I’m chasing the same gremlin!
This had been a problem for me when I purchased my 72, but did not understand why at times did work while other times didn't. Not my daily driver so after sitting awhile, gauge would start acting up and finally realized there was corrosion on Fuel Sender Unit causing Fuel Sender to stop moving. I would take car out and slosh fuel in tank by revving motor, rocking car back and forth until gauge reacted and over time, no more problems. Since I have used the fuel stabilizer to help keep moisture out. Might be worth a shot checking before pulling tank. I believe if vehicle sits for a period of time, this issue is probably somewhat common for older cars and has been over 13 years since that issue surfaced.
Doug
-
2
-
-
6 hours ago, Canuck said:
The Medford Cruise registration is open! Be sure to fill out the car club name on the form.
https://medfordcruise.orgIf we get 25 cars registered the club will receive $250 toward the costs of the meet.
The event is also looking into featuring a 70-72 Monte Carlo in their artwork and I am working with them on this.
You have mine Registered, only 24 more to go..................
Doug
-
1 hour ago, drdave69 said:
I got all of that figured out. It is the small rectangular bracket that is included in the kit that I don't know where it goes. I got the kit from Ground Up (ss396.com) and it is item number AKK-301.
That bracket may be for attachment back side of Alternator and reinforces the mounting strength. If I remember right and that's what you have, that bracket attached to back side of Alternator and then into the engine block and I believe was only with the factory Alternator look. My aftermarket Alternator shown did not have the ability to fasten with bracket. Again, not positive that is your issue but might lead you there.
Good Luck.......
")
Doug

-
1
-
-
Almost time to renew my Hagerty Insurance for another year and looking to update my 72 Monte value. From what I read, an average 1972 Monte today is worth $24000.00 and mine is Agreed value at $17000.00. What values AVERAGE have any others experienced and if this Guesstimate is ballpark for this year? Just curious what others have learned. If true, explains a lot on those $7000.00 and up that need in many cases major dollars required to bring back to life. Thinkin I'm falling behind here....................
Doug
-
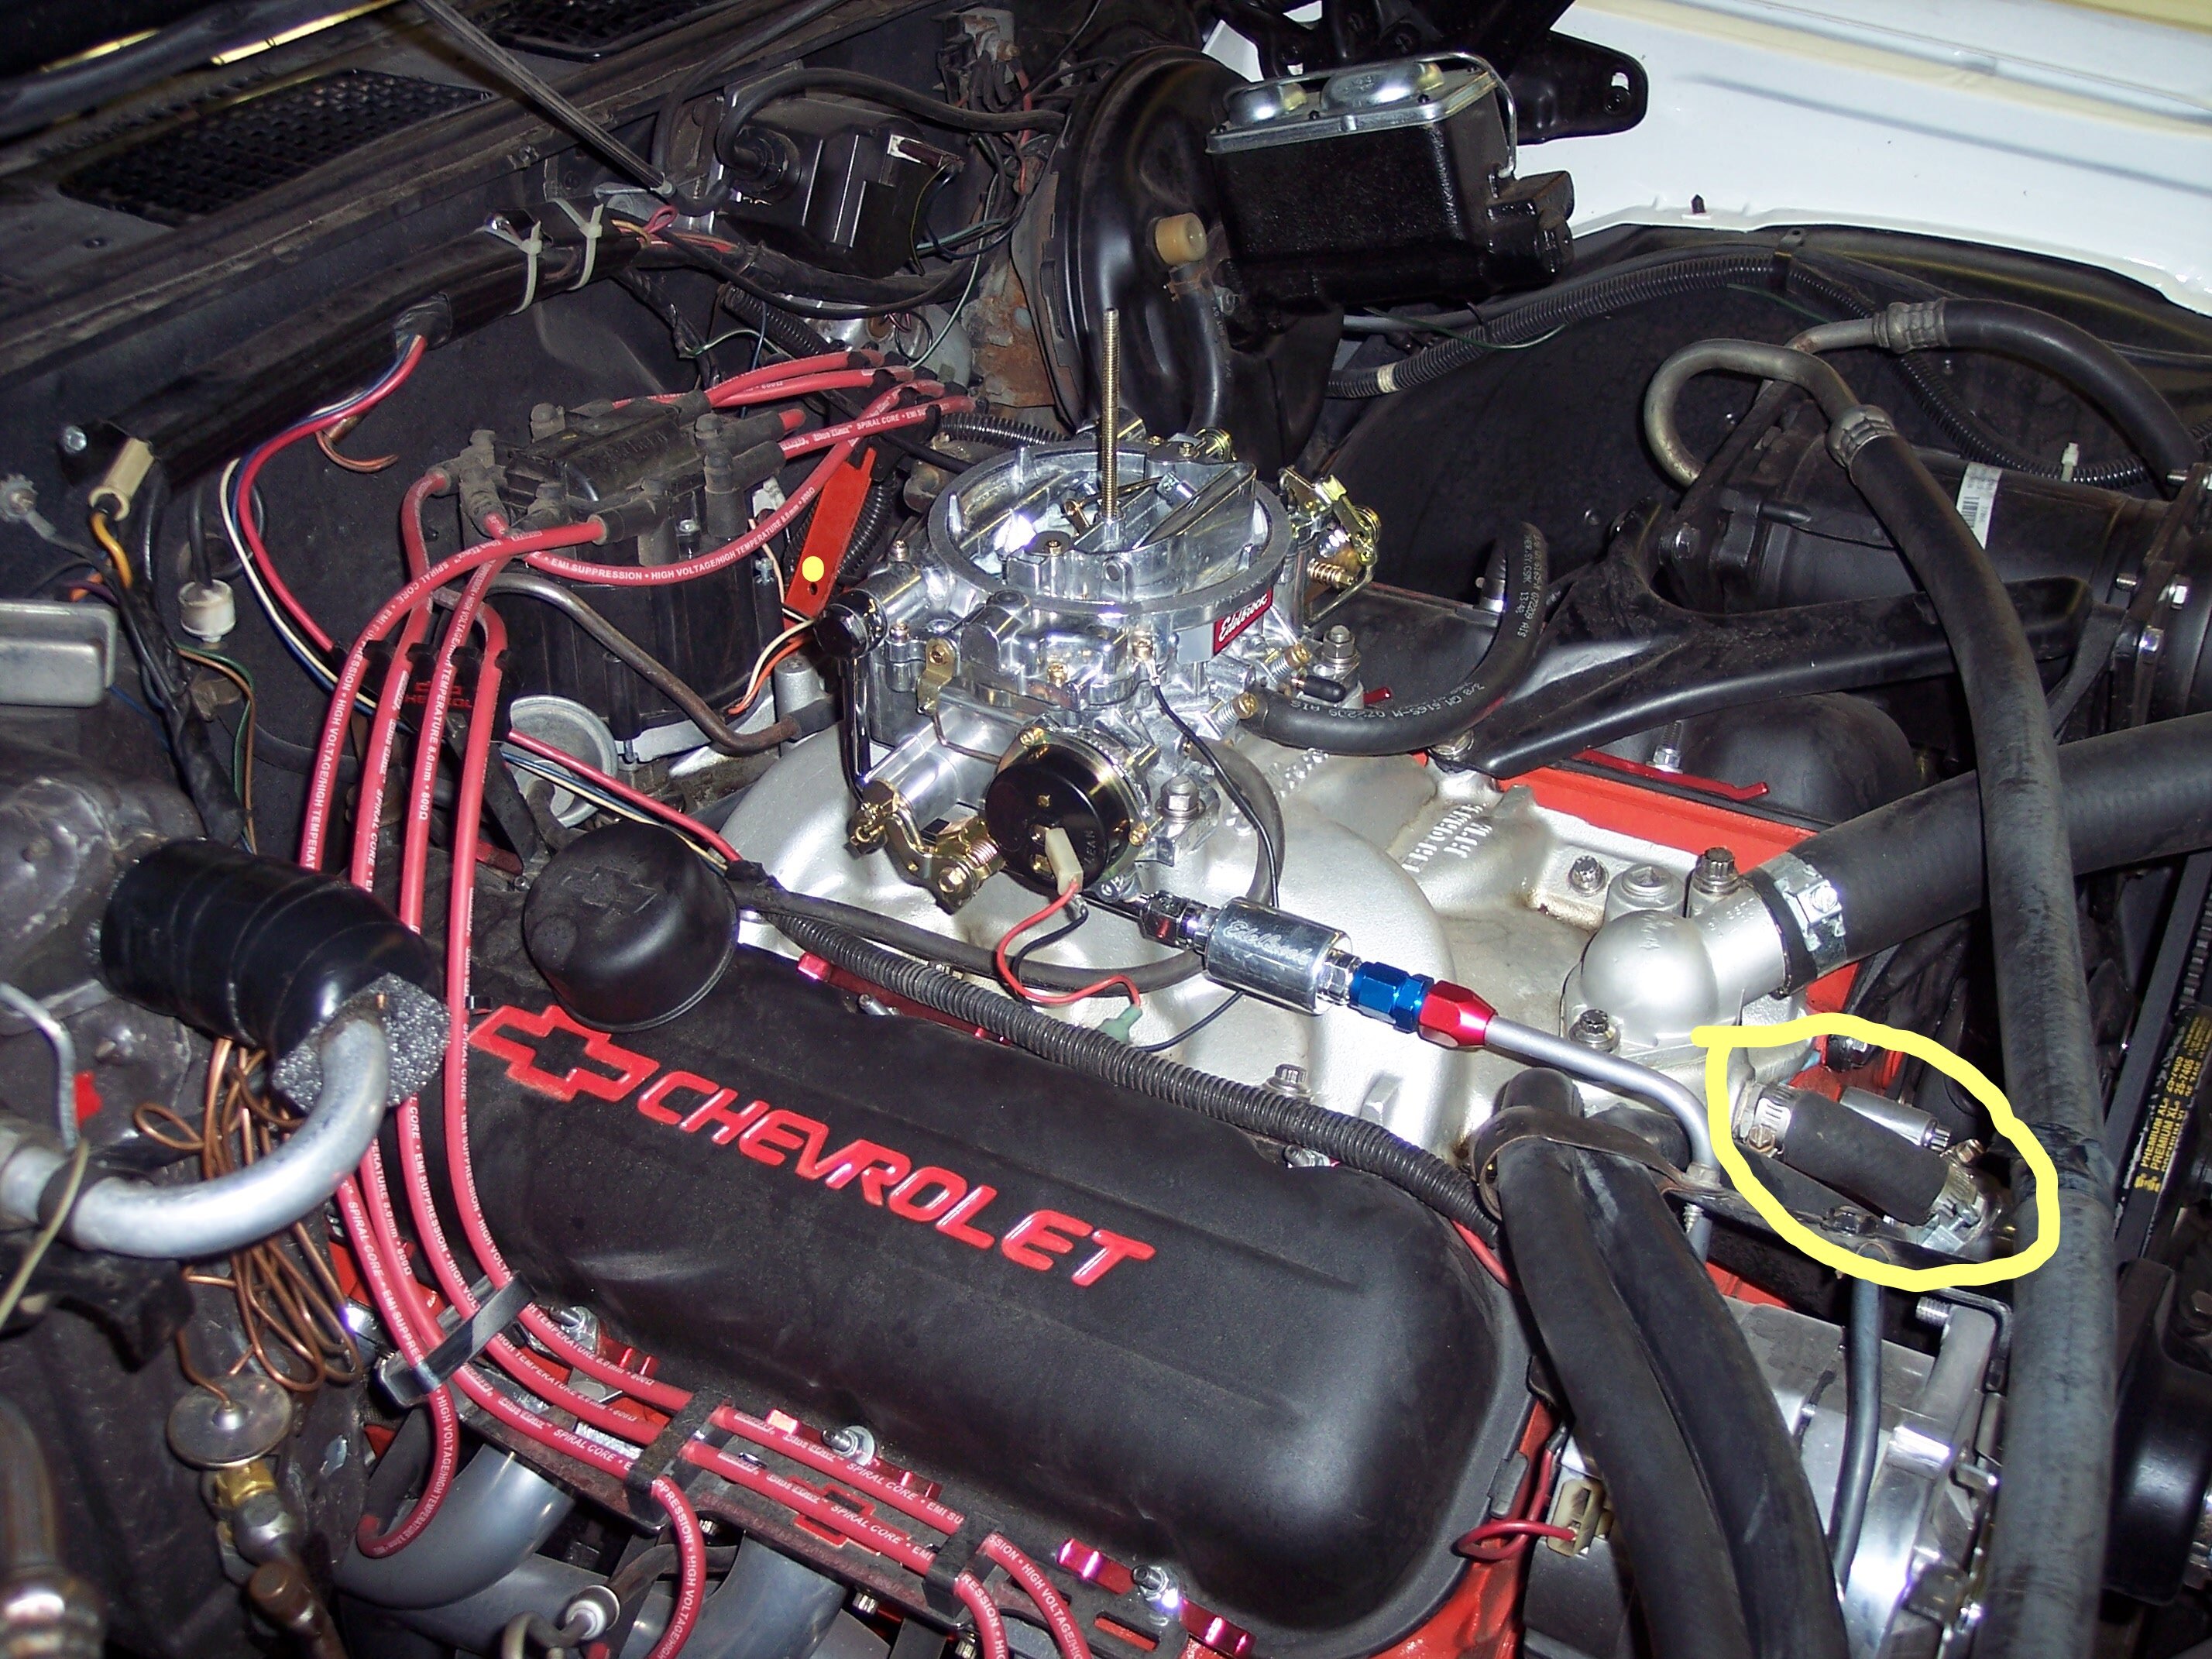
I don't believe you will find that particular Hose & will have to make one, as I did originally. That Hose was cut to 4" length, .750 I.D. and at minimum 1" O.D. That is the Hose seen in my photo above. It will be just a matter of forming/fitting a replacement. Summits shipping my new water pump and stainless pipe nipples as I type, so will hopefully have everything together by then.
Appreciate all this information Guys,
Doug
-
Another question. Has anyone bought a replacement Water Pump Bypass Hose? Looking around, I haven't seen any made specifically for the BB engine. I remember making my own originally and tore it up attempting to remove it and can make another but was interested if one could be had. Rethinking the Heat Shrink system also. I bought Stainless Steel Nipples to replace those cast ones and got from suggestions made in another Post and thanx for that. Currently rounding up those pieces I need to put New Water Pump on and in meantime, cleaning those places and touching up with paint where needed while I can still get to them.
Again, thanx for all the info. Should eliminate mostly my trial and error approach...................
Doug

-
Thanx for the suggestions guys. I'm considering those spring clamps that you squeeze 2 tabs together to open and releasing tightens them around Hose(s). Not sure they are strong enough to prevent leaking but smaller, only need pair of pliers and less obtrusive. If that isn't the solution, will look at both above but those original clamps can be a pain to remove while any leak from the heat on clamps would require additional work if stranded away from repair shop, but considering.
Doug
-
Hi all, looking to replace my heater hose clamps with hopefully the spring style clamp but not sure if will prevent leaking. Has anyone used a similar type to eliminate those ugly looking screw type clamps? Replacing Water Pump and looking to clean up look with a cleaner look when back together. Any guidance helpful.................... Also replacing factory hose nipples for bypass and heater hoses with stainless as I expect it will not build up the sludge around nipples............
Doug

-
When I exchanged my 350 CI to a 402 CI, I used the same factory discharge hose without any fitment issues. Can't say it is the right hose but it was like plug & play on the conversion. This is a 1972 Monte by the way....................
Doug
-
1
-
-
As mine is a 72 and has Park Wipers, how will this system work with them? I wouldn't want wipers to return to park after each wiper swipe when in intermittent mode. Thanx.......
Doug
-
I also would have an interest in this upgrade. Let us know when you are Ramped up to make them.
Doug
-
1
-
-
On 8/22/2021 at 11:31 AM, Canuck said:
Mine wasn't near as nice but still miss it to this day.....................
-
2
-
-
On 12/12/2021 at 8:52 PM, Canuck said:
Here's what I have so far:
https://www.firstgenmc.com/forums/index.php?/resources/decodingth400/I'd like to see a TH400 tag for a 402 car for all three years to verify my codes are correct. I'd also like to see a 1972 tag for a 454 car.
Thank you!
Aaron, here is my Tranny Tag of a TH400 matched to a 402 BB. Hard to read and might be able to get a better one if needed.
Doug
-
2
-
-
I ended up using fiberglass Resin. I used a hypodermic syringe filled with resin and injected into each of the (4) problematic stripped holes in Dash Pad until slightly overflowing. Once dried, leveled filled holes and installed Pad. Screws tightened up securely and Pad has stayed in secure position last few weeks, so am very happy with result. Then I decided as long as was out, I would repaint Pad as well and repaired my Glove Box chrome Knob from falling of again by crimping around collar. It appears this Knob had been previously messed with and didn't really repair anything. To do this, had to remove cylinder from housing. Only other remaining issue(s) is A/C! I've had a New (NOS) Compressor Pump installed as rebuilt one previously installed leaked oil around front of housing. Recharged A/C, runs for the season and during winter, discharges. Guess I have not found the right Tech to get this loss of propellant resolved for me. 134A propellant compliant, so don't see that as a problem. Will also take her in and have front end suspension checked for needs and aligning steering wheel also. Was going to adjust tie rod ends myself but wanted suspension looked at and steering wheel turns almost 2 full turns to the right but only a turn when left. Then a mild cleaning and under the Car Cover until Nice weather again.
Doug
-
1
-
-
Another Update headed your way but don't go
(sorry, Got the Willie virus). But before I Post it, I had made some minor changes to better describe those that are Confirmed and are Most Likely vs. those that are suspicious and require more or all documentation.
I have identified (60) with (57) Confirmed & (3) yet to be confirmed. The remaining possible's have not been replied to or answered back and are primarily from Facebook Market Place. They will remain here until a Confirmation can be determined with VIN# and other identifiers. Their contact info via Facebook messaging has been separated to a different media until I receive permission(s) from them to Post.
Still believe less than 100 anywhere and in time, hope we can find that Sweet Spot with everyone's help.
Stay Safe All..........................
Doug
-
38 minutes ago, 1970mcss said:
Is the knob falling off the cylinder or is the entire cylinder falling out?
Just the Knob falls off. Everything else secure.
Doug
-
Ongoing problem that I have not been able to make permanent fix. Intermittently, my glove box door chrome knob keeps falling off. Thought I had fixed but fell of again the other day opening glove box. So, I am considering buying the assembly/body without the tumblers in it so I can use tumblers from removed body, retaining original Key to open glove box after replacement.
Has anyone made this alteration before? And if so, what was required. Been looking at U-Tube but haven't been able to see if/how those tumblers are removed and required to replace in new lock body. Can probably take to lock shop but seems like something I should be able to handle and had body out at one time but never dealt with the tumblers. That chrome knob looks to have been crimped on but no no longer holds knob securely in place. Pic is of the cylinder in question.
Any help greatly appreciated.

-
4 hours ago, 1970mcss said:
I used a little JBWeld, filled the holes, let it dry and replaced the screws
That was my first thought as I already had it available but balked as I couldn't determine what was inside those Dash Pad cavities where screws secured thru. Was concerned JB wouldn't fill out voids trapping air in them, again because unknown what's involved. Gonna start with Dry Wall Plug suggestion and if decide otherwise, I have everything needed to use Fiberglass Resin to fill those voids if it's fluid enuff or the JB Weld. The whole issue arose when I noticed one of my turn signal dash lites was not signaling and bulb needed replaced. Realized my initial repair was not sufficient when I tried reinstalling Dash Cap after bulb replacements. While using tooth picks held it down initially, the threads relaxed and was noticeable where Dash Cap and Dash structure meet particularly along the left hand side you can see with driver door open. Got the Dash Cap sitting across the Hood in garage and going over shortly to examine a little thoroughly. 😁
-
1
-
-
I like all of those ideas! I had considered a variation of Johns early on and believe it being the most permanent repair but also the most involved. The Dry Wall Plugs I had not considered and will look into this one. What was involved in the Dry Wall Plug's? Did you have to open the holes wider for Plugs to fit? I'm leaning on this approach for now.
Appreciate your thoughts and will likely use your suggestion(s).
Regards,
Doug
-
The (4) screws holding my Dash Pad secured over instrumentation are stripped, not holding Dash Pad flush to Dash Structure. Tried the tooth pick thing and worked briefly until those wooden screw threads relaxed.
So, looking as an alternative to use fiberglass resin filling those (4) locations, drying and cutting new threads. What I don't know is, has anyone seen what is inside those pockets and/or how much void? I used a small dental style Pic with a 45 degree tip and felt around but still without any idea what I may expect when filling. Thinking about including tooth picks as a filler should I decide I need it.
Anyway, I do remember reading awhile back on the Forum and where I got the tooth pick idea but couldn't locate it again. Any experience, idea's greatly appreciated especially if you had already done a similar successful repair.
Thanx all...........
Doug


1972 MC Custom Numbers?
in SS 454
Posted · Edited by 72-CLASSIC_RIDE
Here is the latest update on the Customs. Not a lot of new vehicles added but there are a couple. Many shown on Facebook when I search it for 1972 Monte Carlo Customs which I had documented into a Section lower down from what I classify as those Confirmed. Most haven't responded to my queries for their information but I do at least have some available info on them. Hopefully, those that want theirs Documented will loosen up over time.
Any questions, please advise. Please review your info and if incorrect, incomplete, please advise. Every now and then I am finding a error I had made when publishing that info but believe I have made necessary corrections. Just because I have quite a few listed doesn't mean if one is seen, that it has been documented. So if unsure, gather the info or forward it to me for addition or correction. Having the VIN goes a long way in ensuring I don't duplicate...................
Will update again once I have gathered enuff new info. Thanx for the Help...................... 😁
Doug
1972 MONTE CRLO CUSTOM NUMBERS REV. 20.0 JPG.xls