TheBMan
-
Posts
488 -
Joined
-
Last visited
-
Days Won
4
Content Type
Profiles
Articles
Forums
Gallery
Events
Everything posted by TheBMan
-
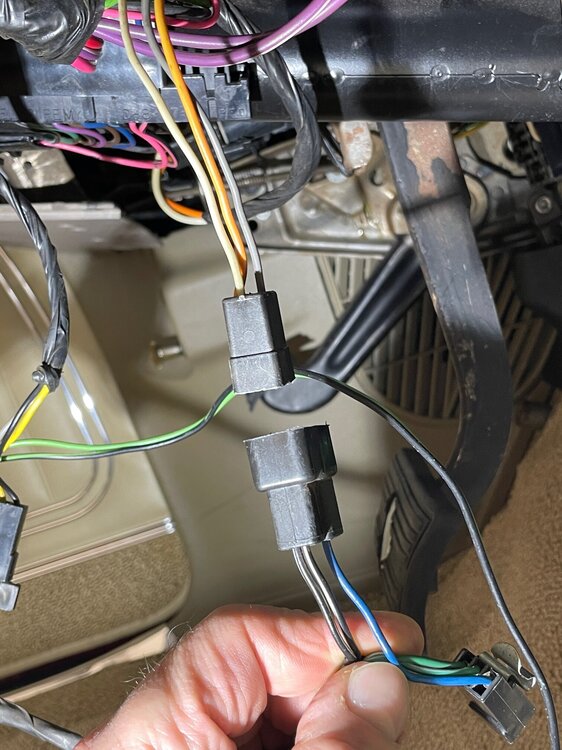
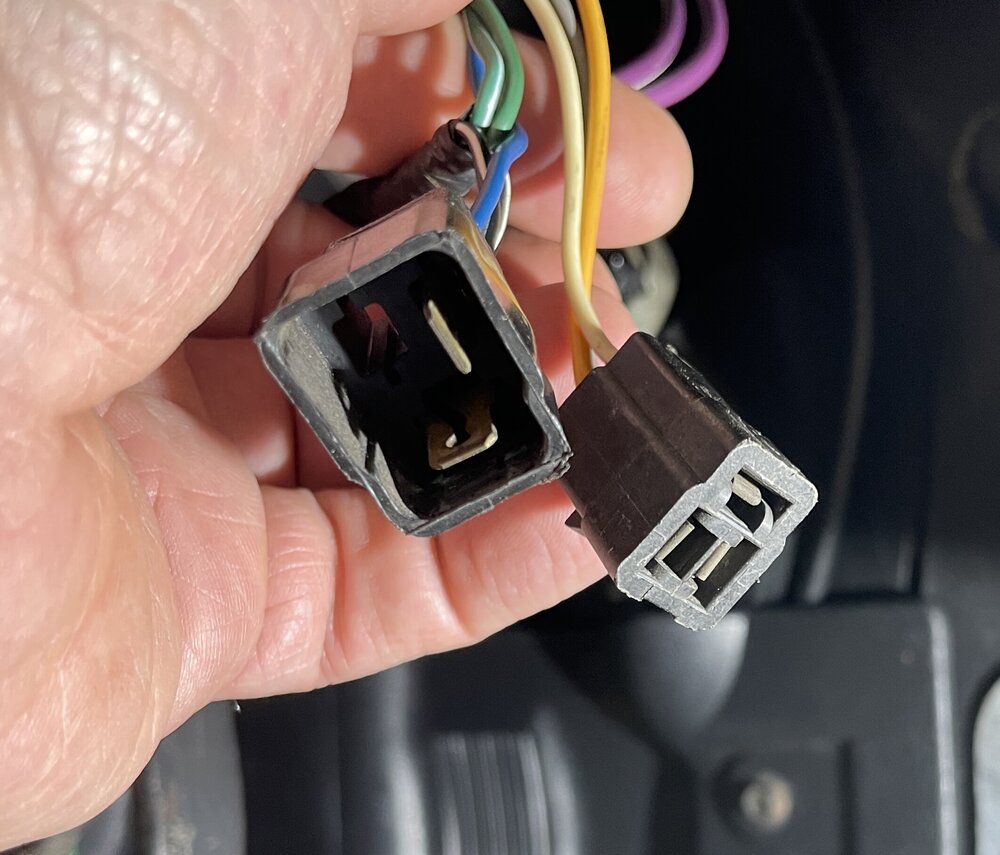
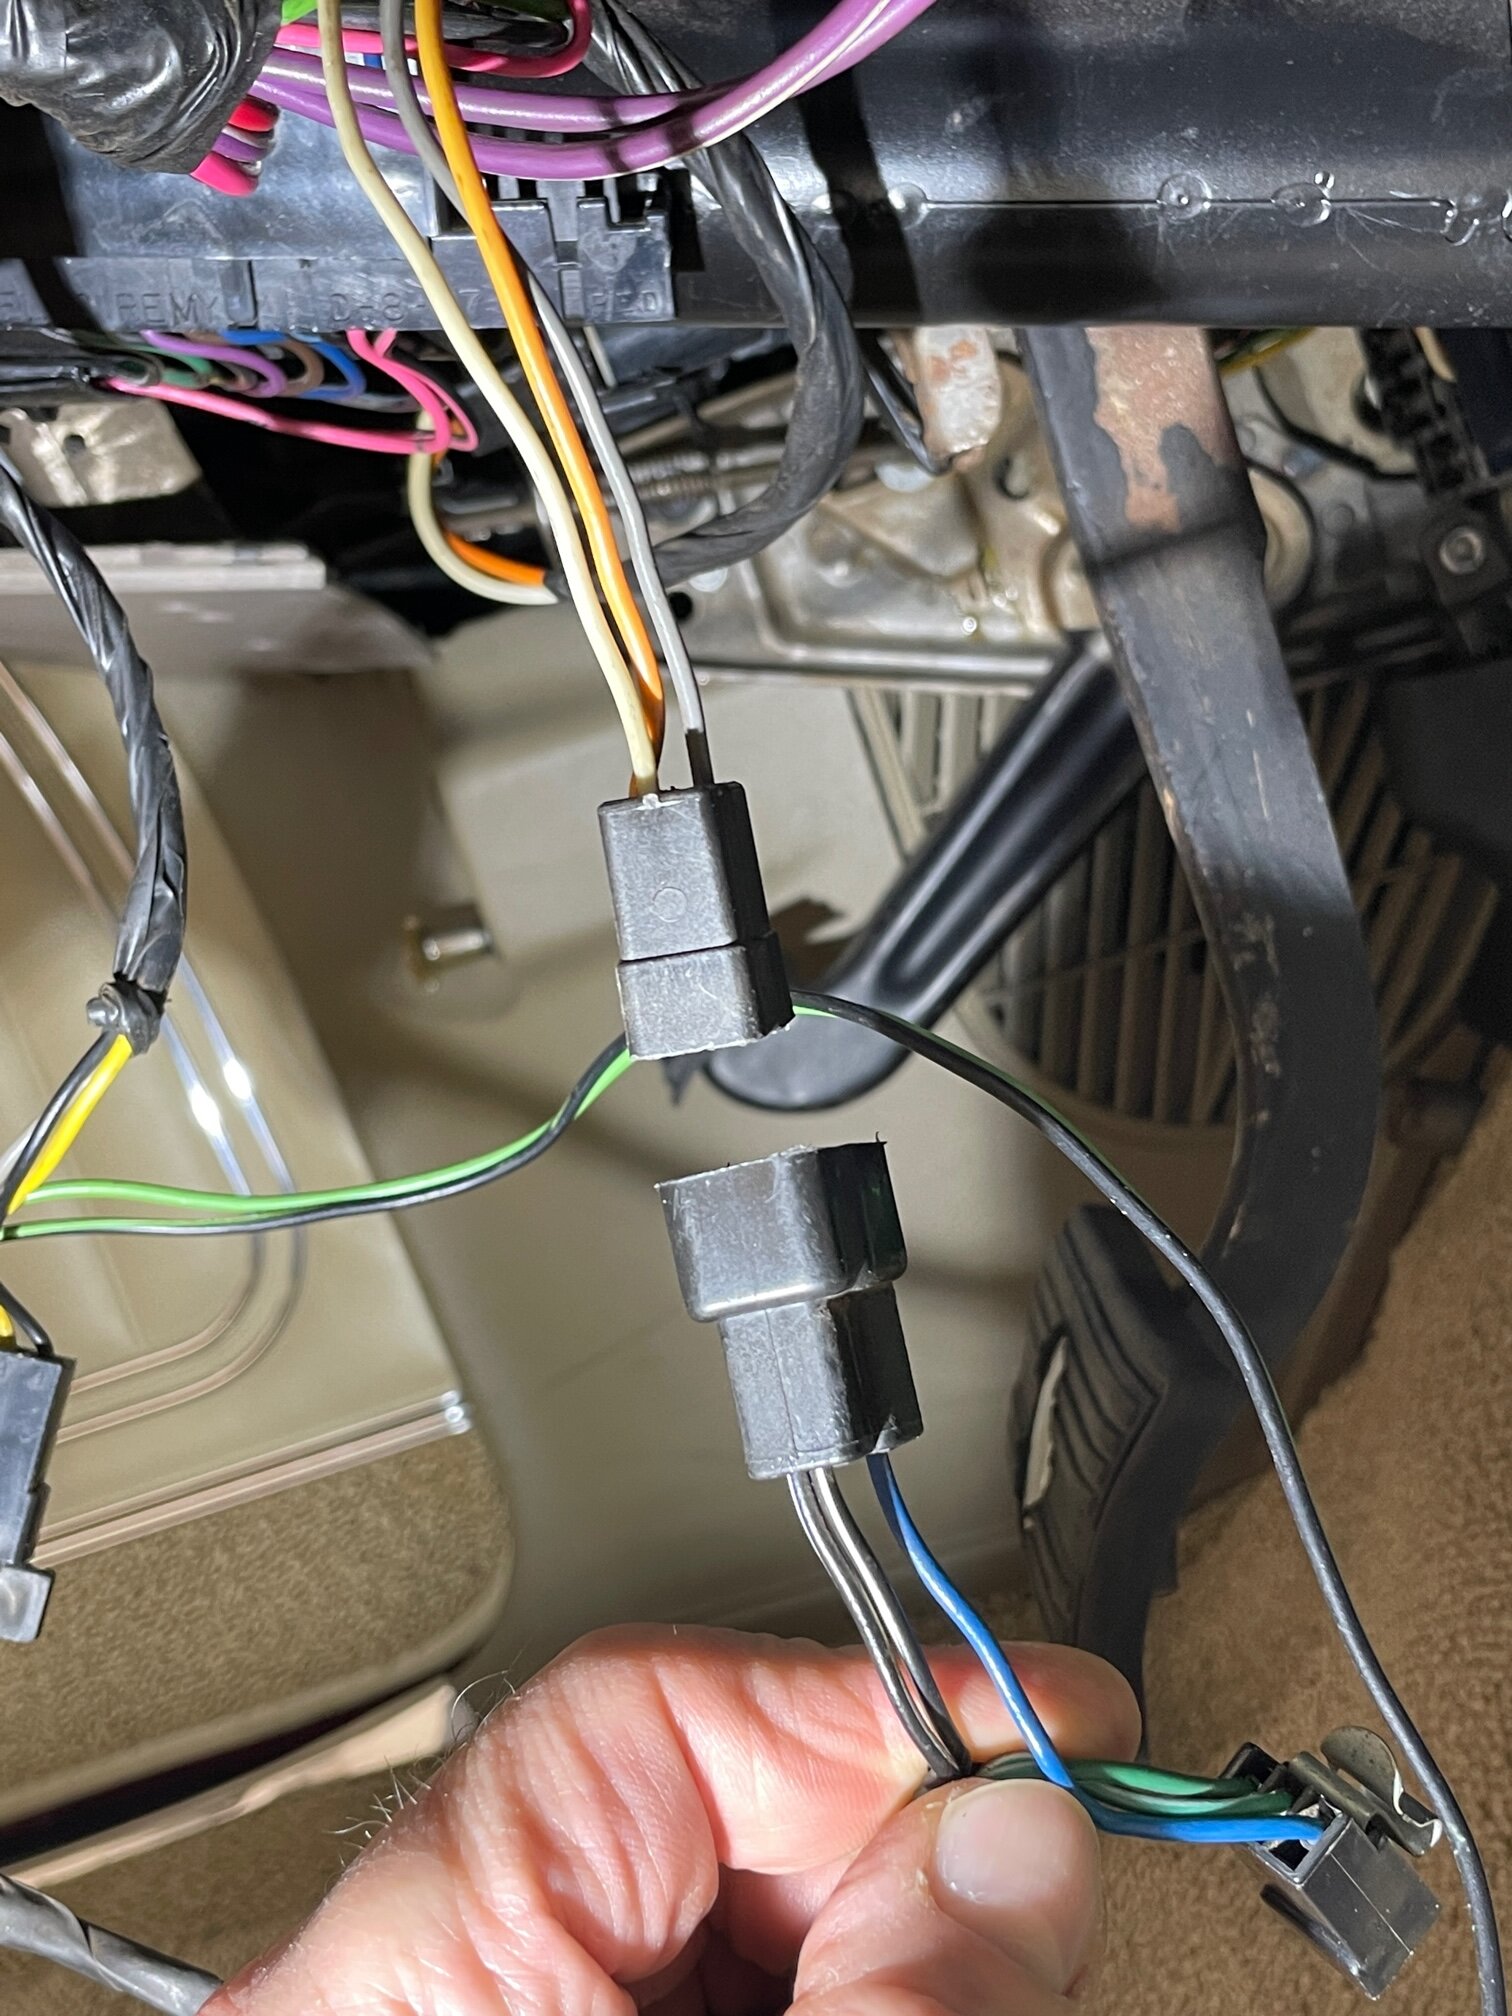
Guys- I restored my dash in my 1970 non-A/C Monte Carlo and it turned out beautiful. While wiring everything back up, it went smooth until these last two connectors. I don't remember disconnecting them and I can't find these colors/color grouping in the wiring diagrams of the factory manual. Both are three-wire plugs and technically they can go together, but the wire colors are different and the one with two black/white tracers has the three wires in two connectors while the other connector is one wire per connector (see photos). Coming out of the main dash harness, the colors for the plug are light gray, yellow, white (maybe tan). The other connector is black/white tracer (2 of them on the same connector) and blue. The connector with the two black wires and blue wire is part of the short radio harness but my radio and speaker have the correct connections. As I mentioned and as you can see in the second picture, the plugs match up but one is three wires on two connectors and the other is three wires on three connectors. Any ideas?
-
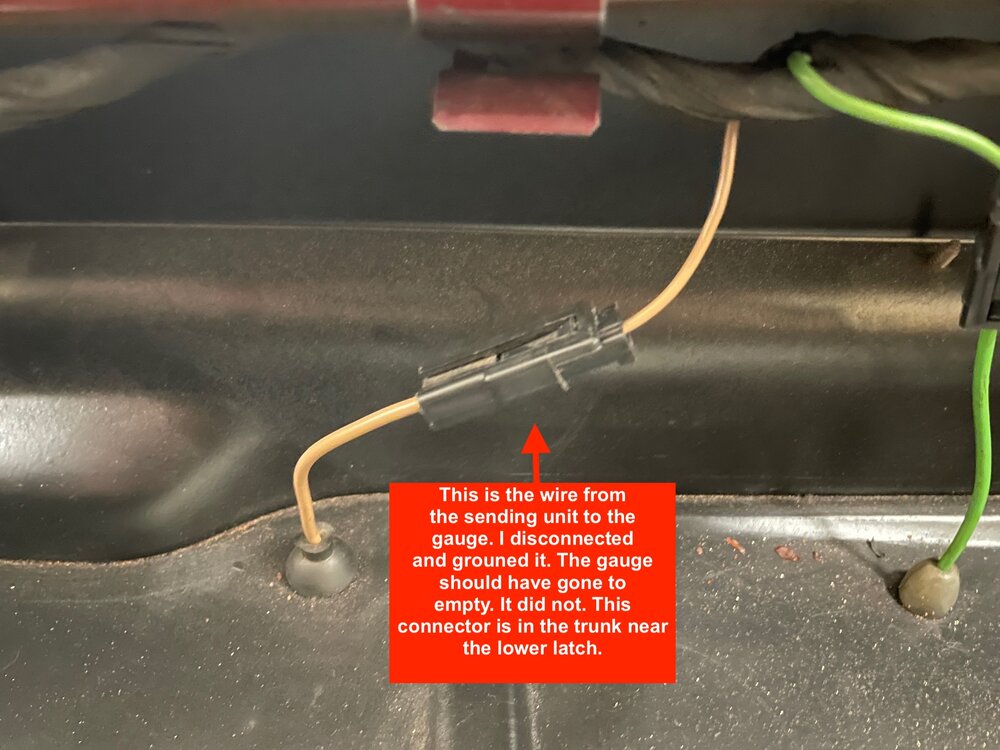
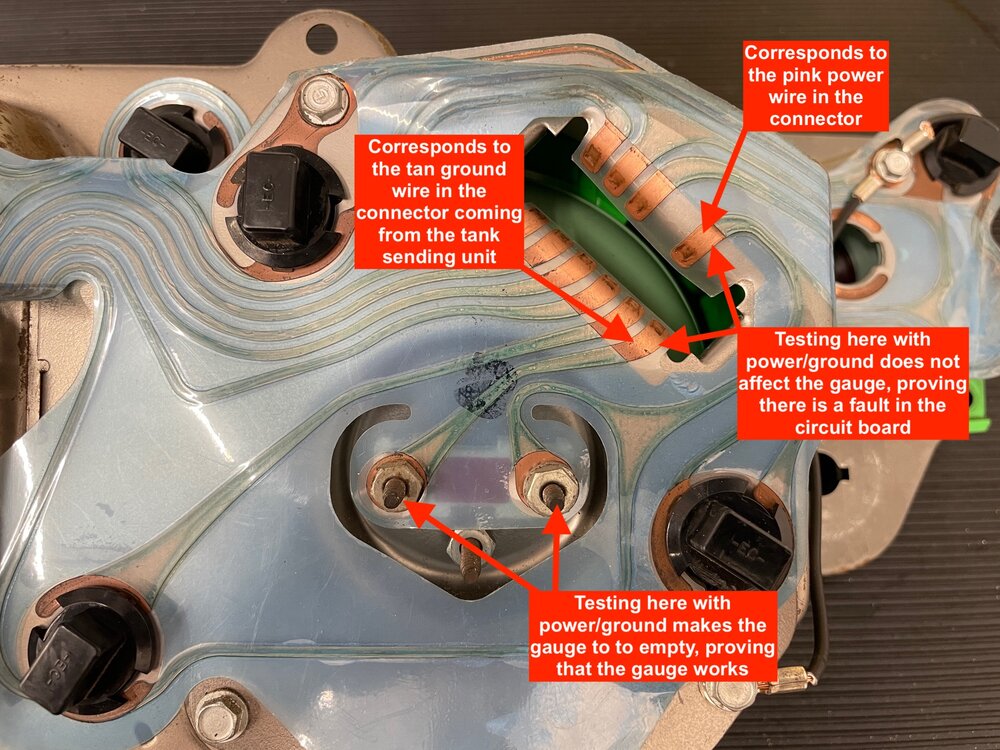
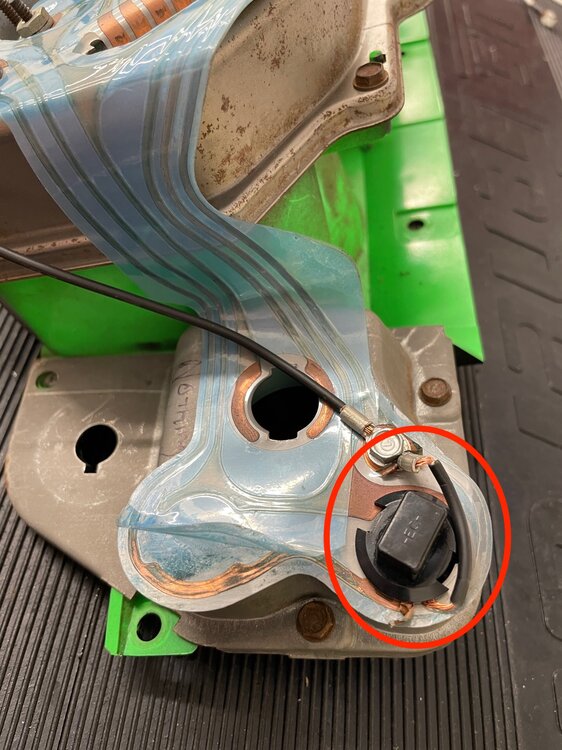
I thought I would post the steps I took to troubleshoot and diagnose the issue with my inoperative fuel gauge (stuck on 1/2 tank). Using the factory service manual and wiring diagrams along with a couple of YouTube videos I found, I was able to run some tests to diagnose and confirm the issue. Hopefully this will help someone else down the line. I disconnected the sending unit ground wire that sends a variable signal to the gauge. Grounding this wire should have made the gauge go to empty. It did not. I removed the dash pad and I was able to test that I had power to the cluster (pink wire per the wiring diagram) and a weak ground signal via the tan wire from the sending unit (weak because it's varied by the up and down arm on the float/sending unit in the tank). It tested this at the connector directly going into the cluster. I removed the instrument cluster and tested the gauge directly at the posts on the back of the gauge. Power and ground caused it to go to empty proving that the gauge works. Next I followed the circuit board pathways and connected alligator clips at the end of the circuit board for power and ground. The gauge did not move. This proved that there is a break in the circuit board. *Note that someone has attempted some sort of shoddy repair on one of the bulb connectors. 🥲 I'm replacing the housing, circuit board, and lens. While I have it out, I'll replace the clock, which also didn't work.
-
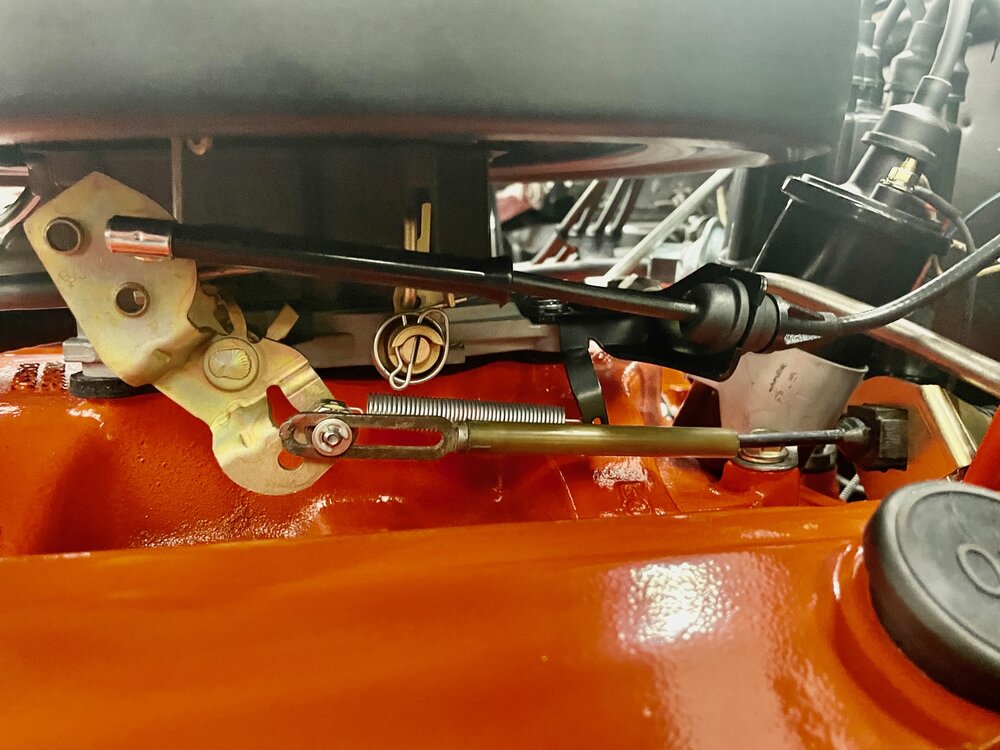
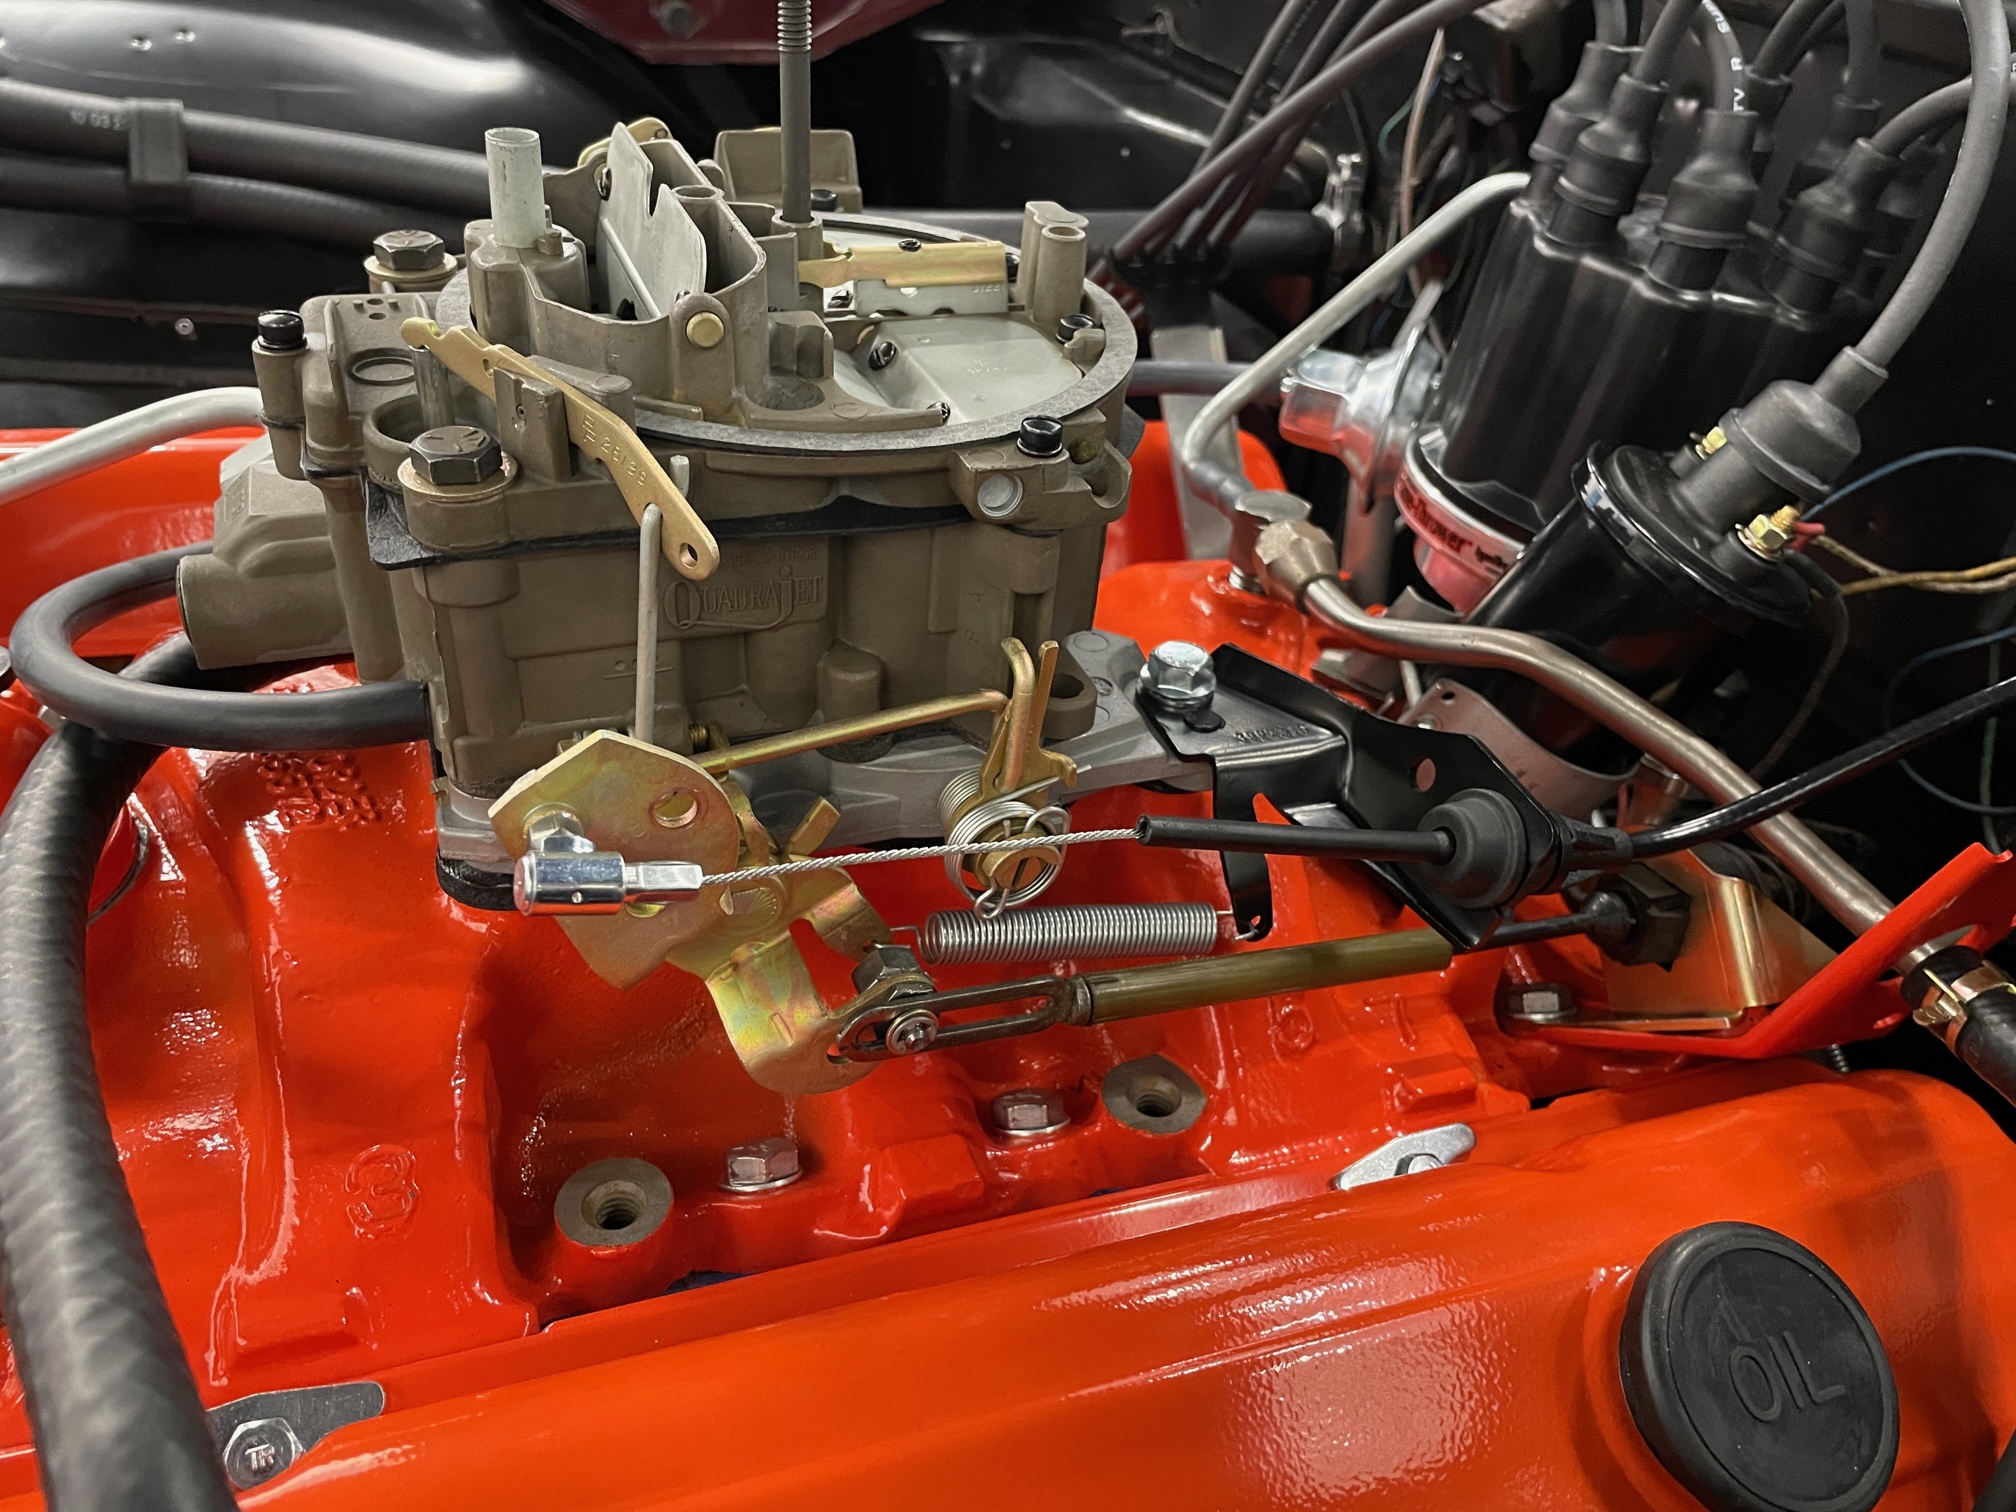
Turns out the kickdown cable wasn't allowing wide-open-throttle. I wasn't aware that there is a built-in adjustment on the cable where it attaches to the mount. I got that adjusted properly, installed a new throttle cable and viola!
-
Thanks @willie, appreciate the tips!
-
One more update on this... I used a 3" mini orbital polisher to clean and polish the plastic. I'm pretty happy with the outcome so I think I'll leave it alone rather than do the Cerakote.
-
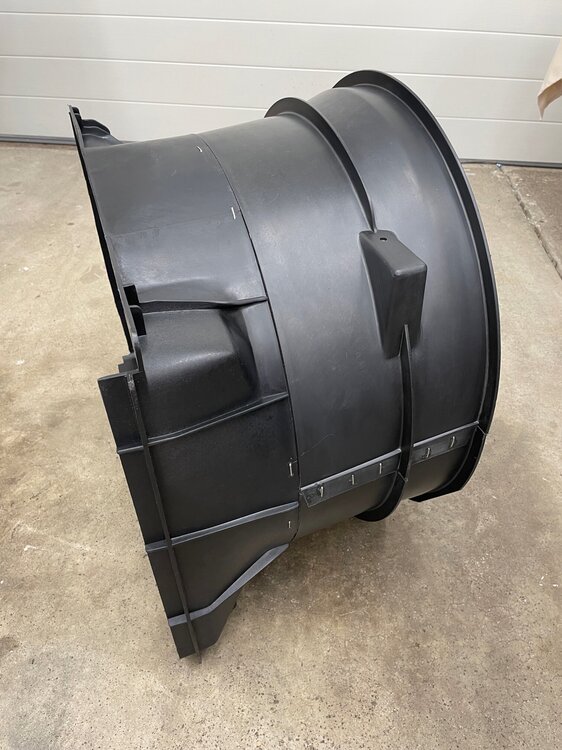
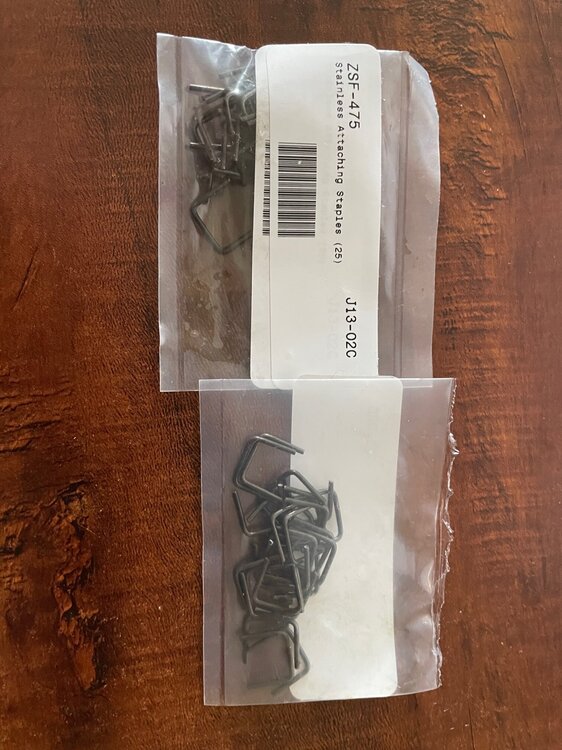
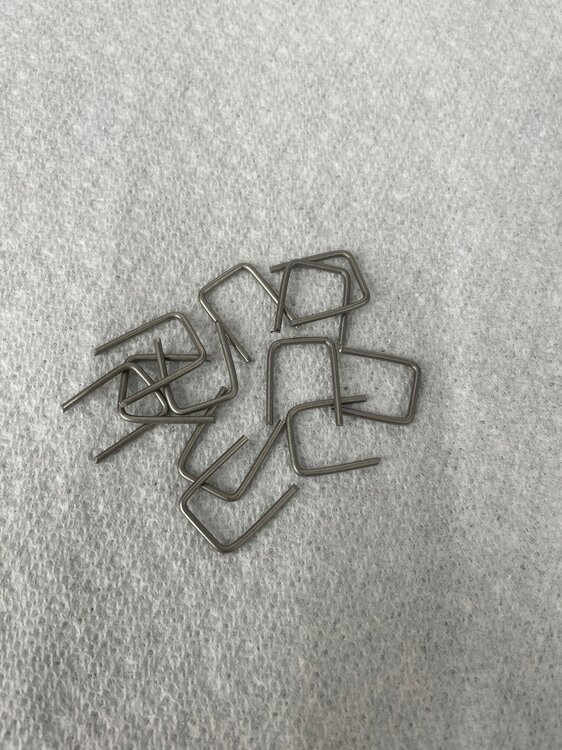
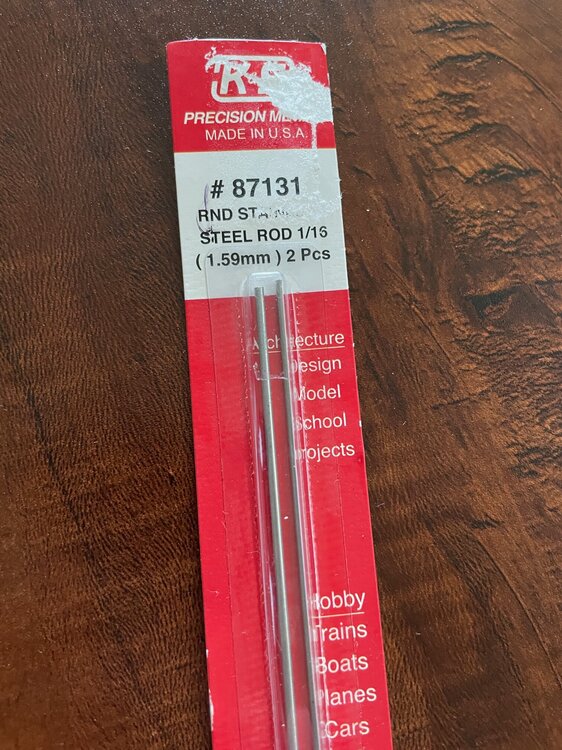
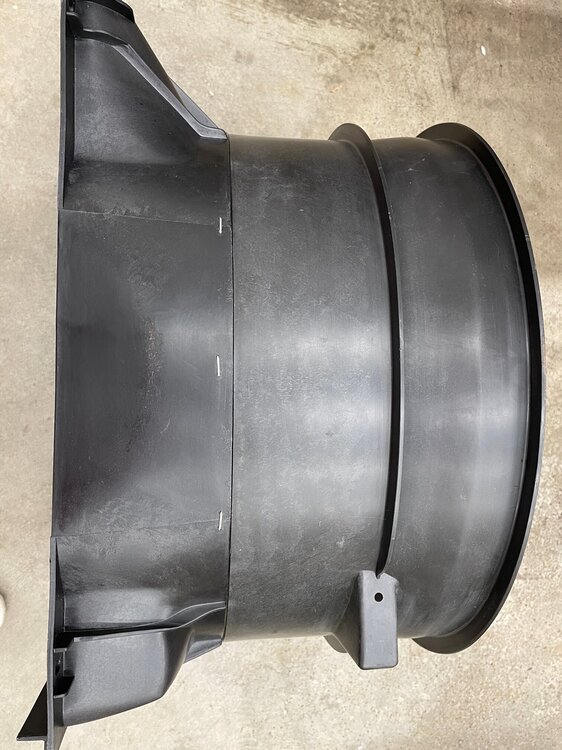
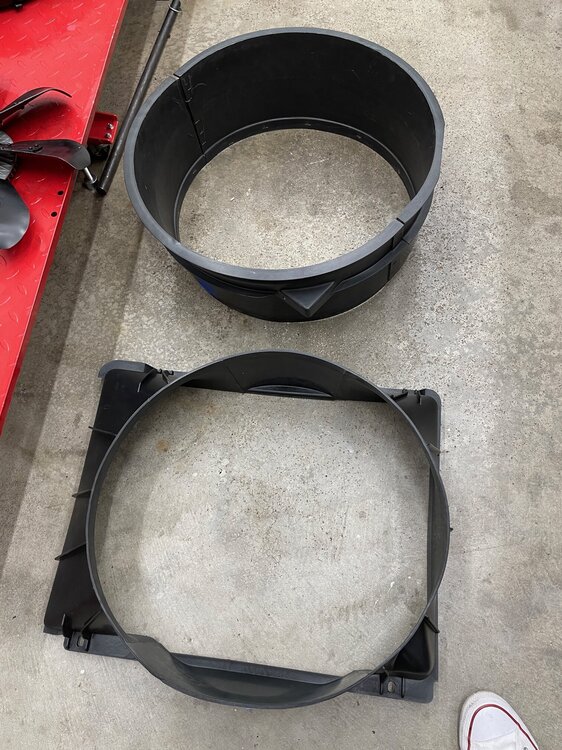
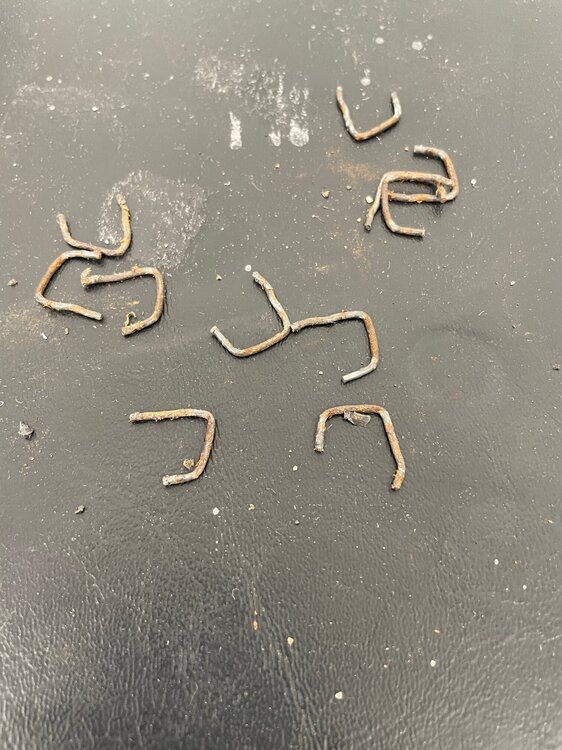
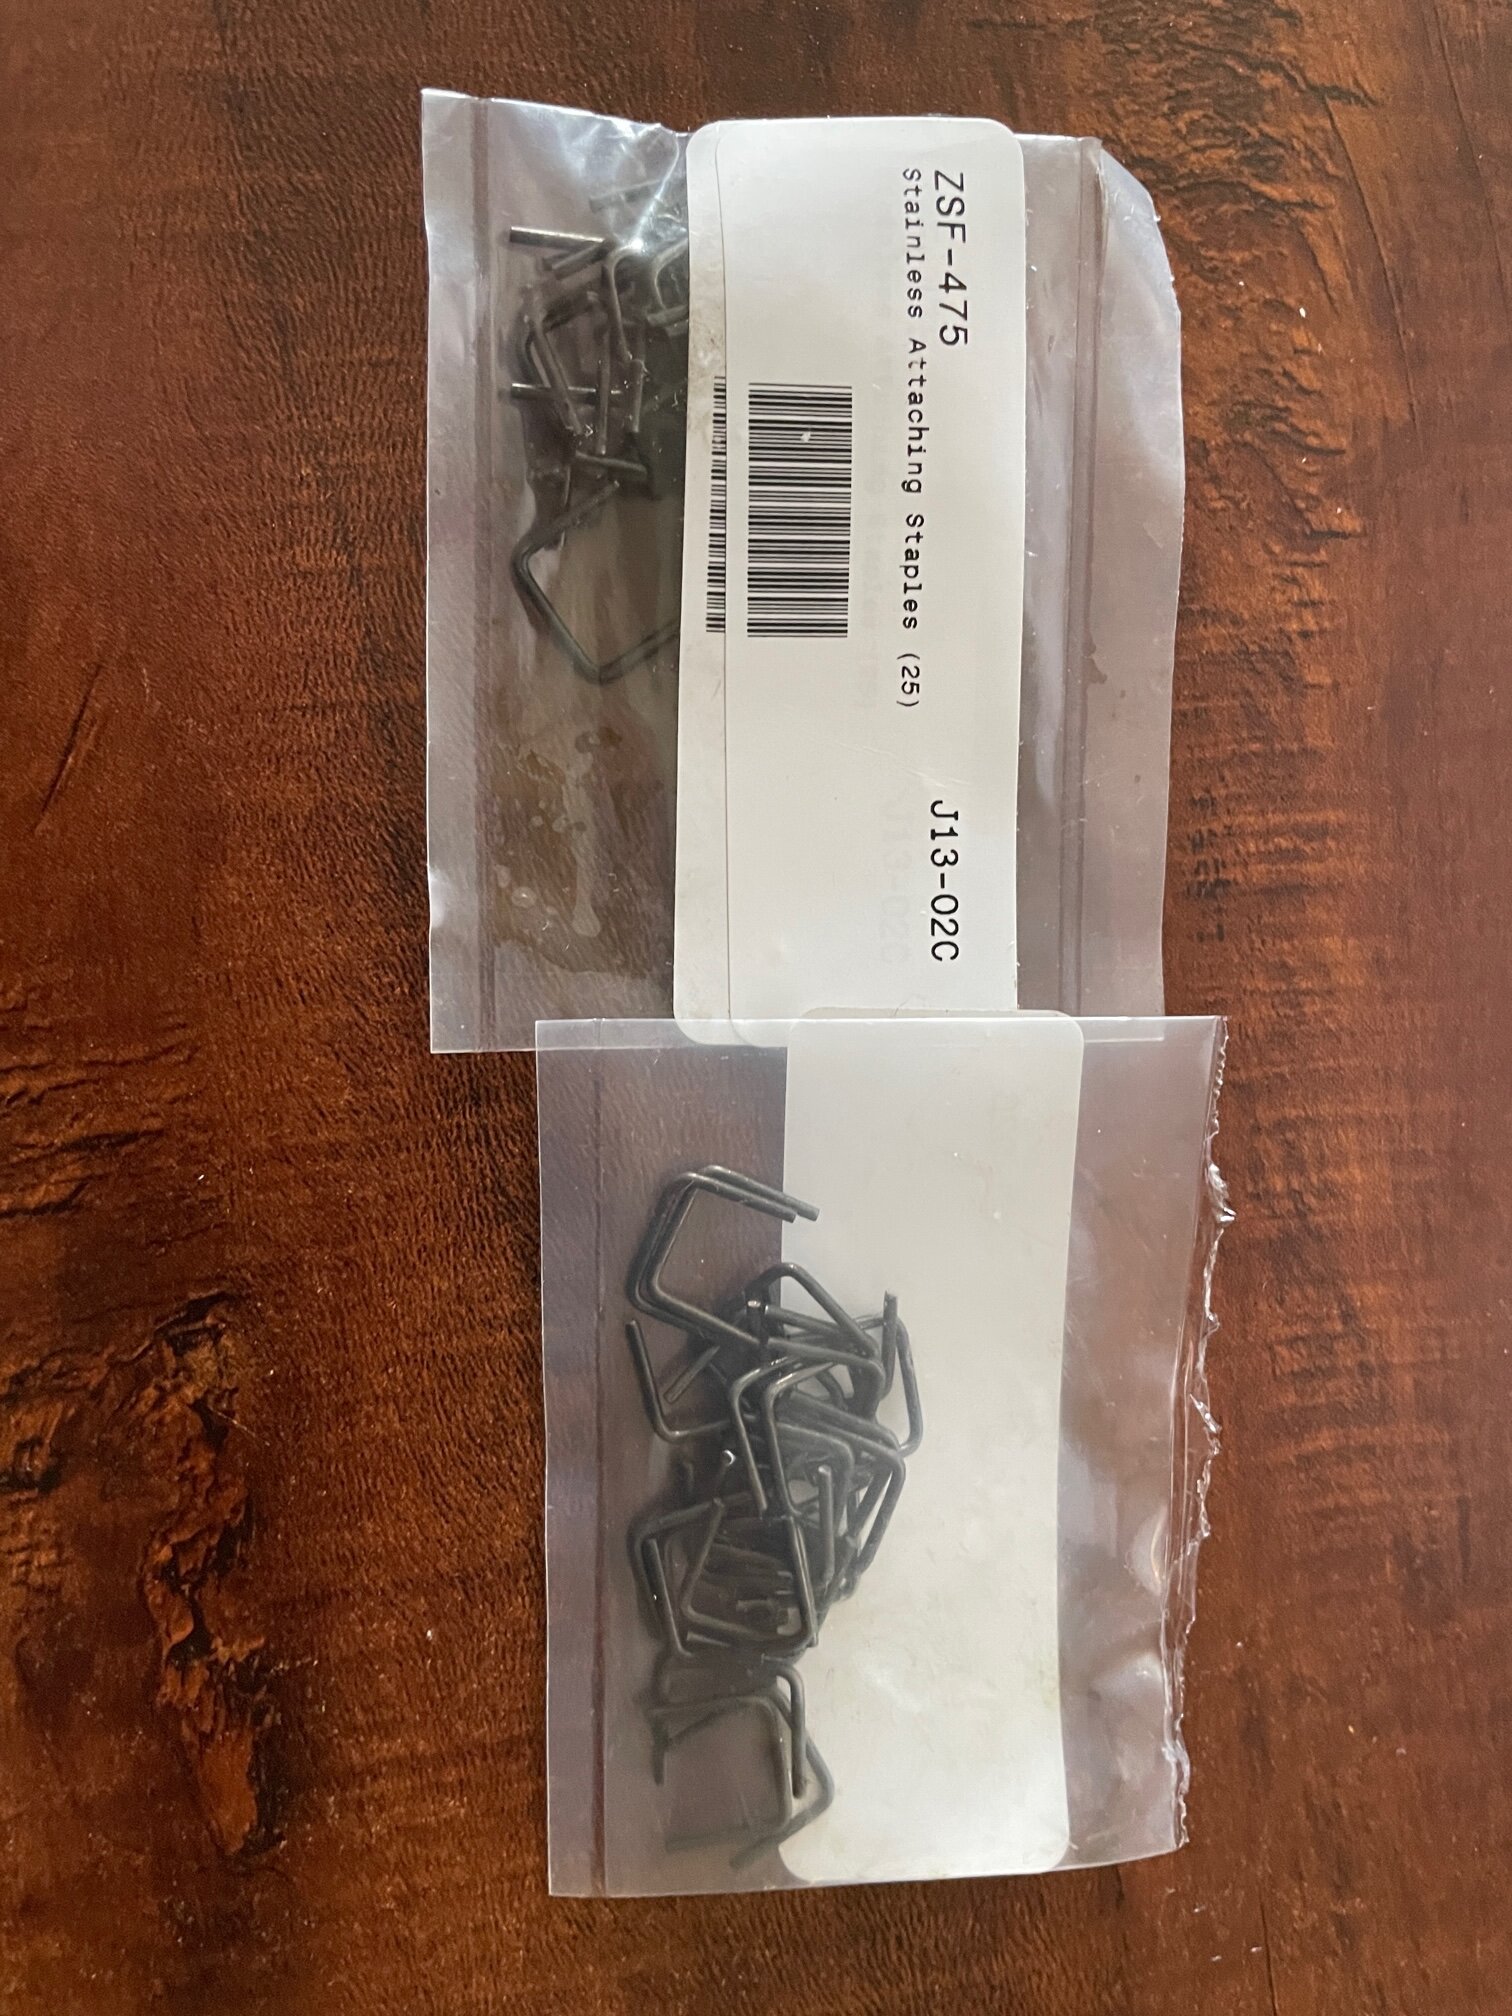
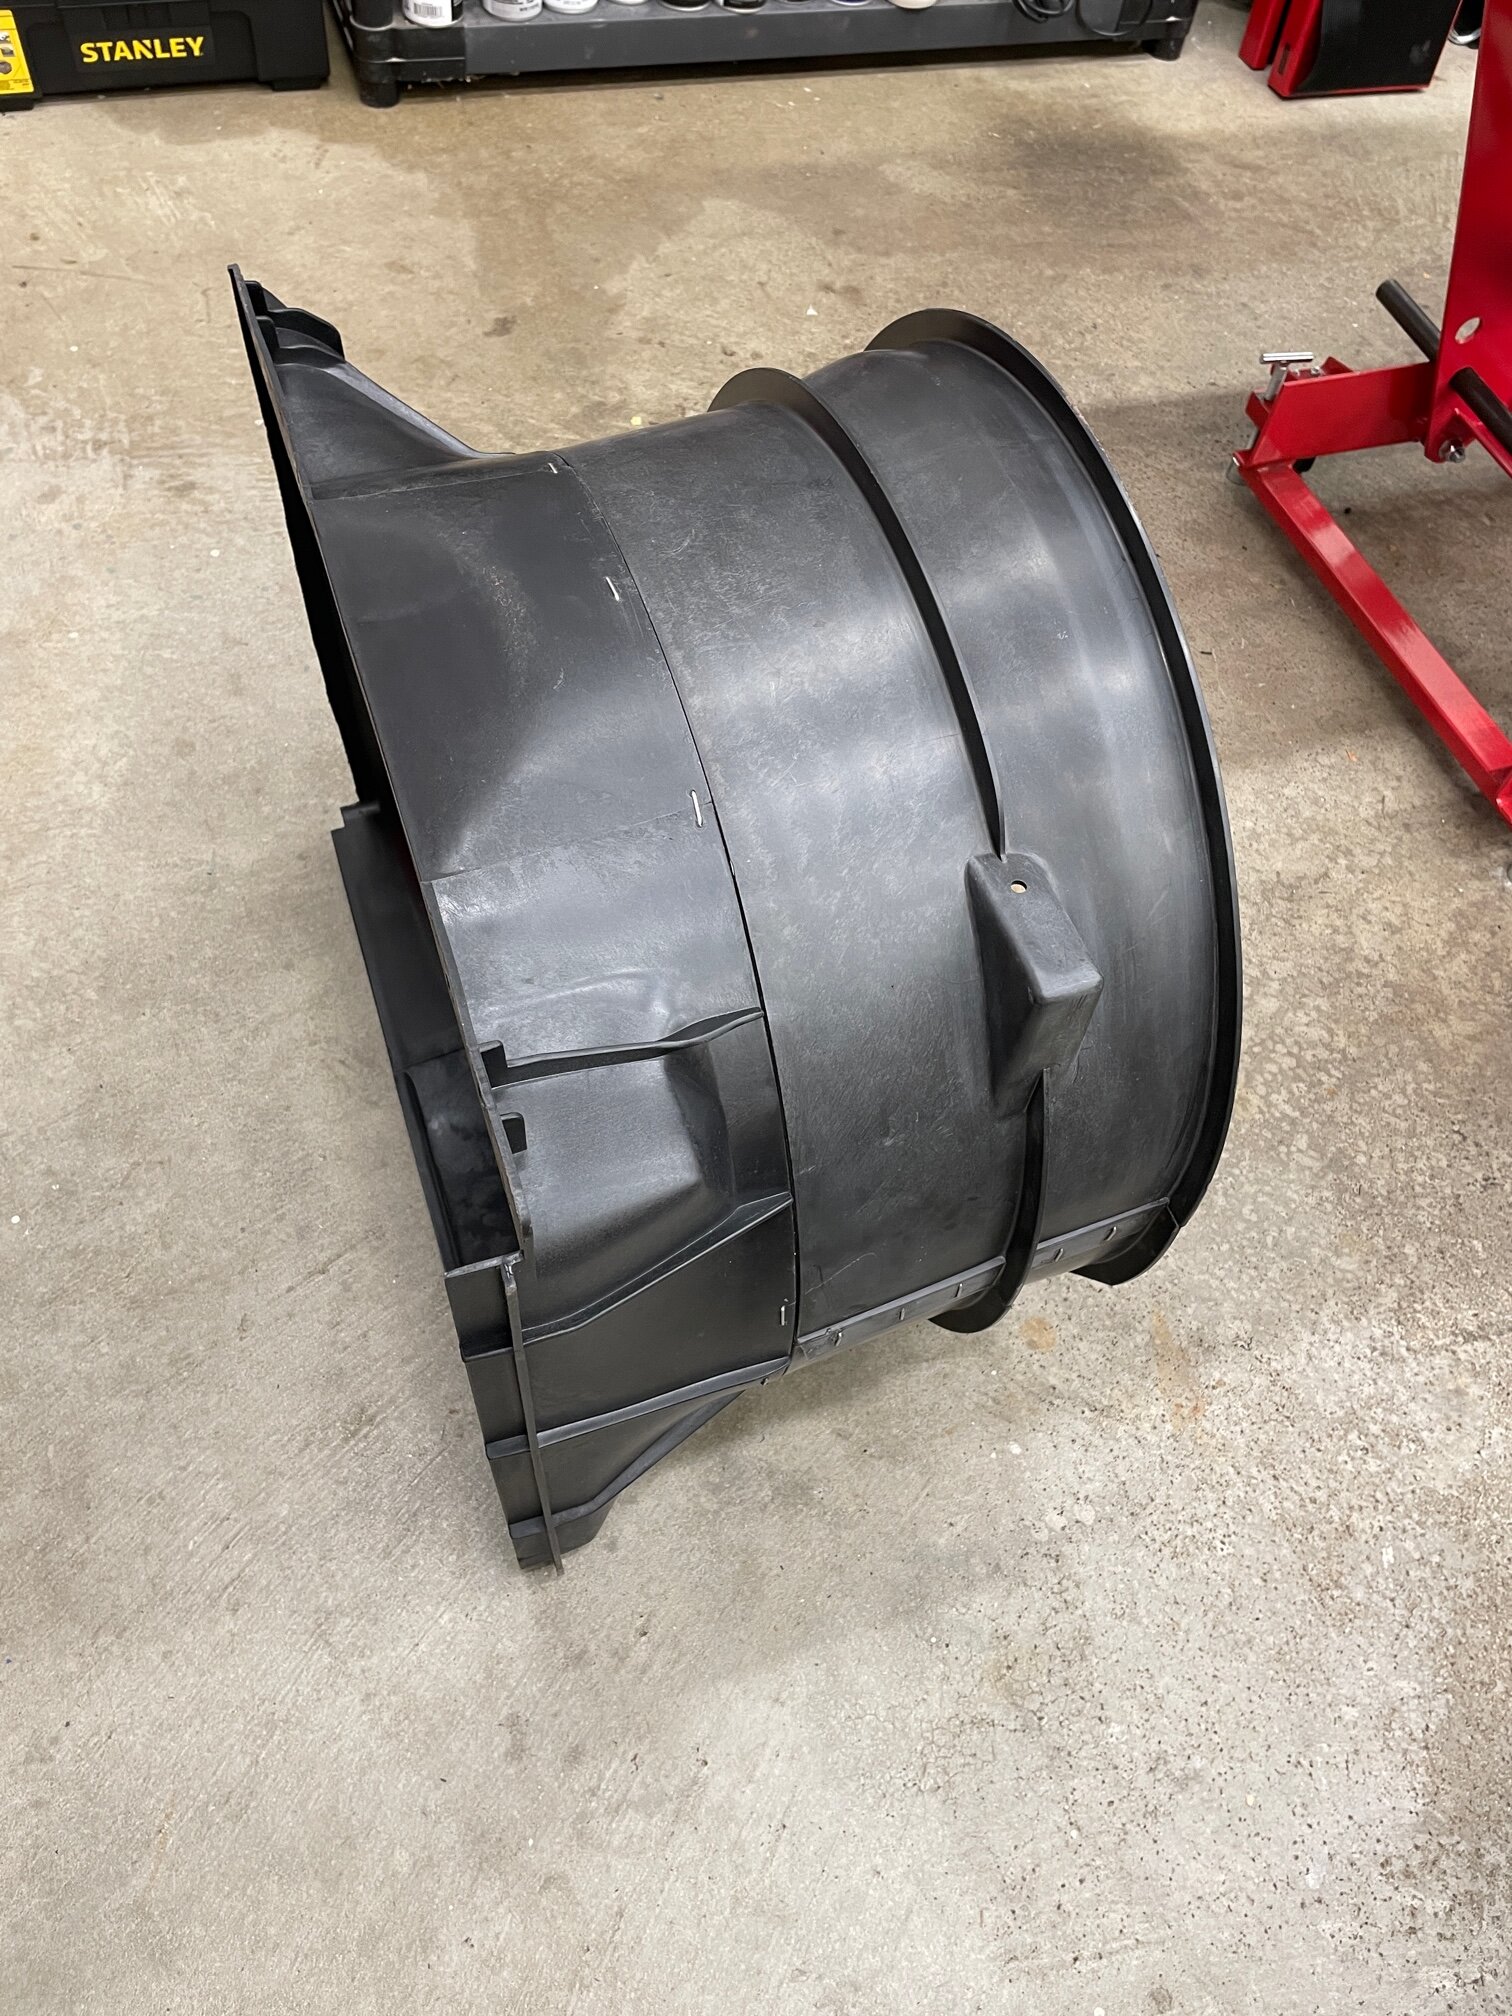
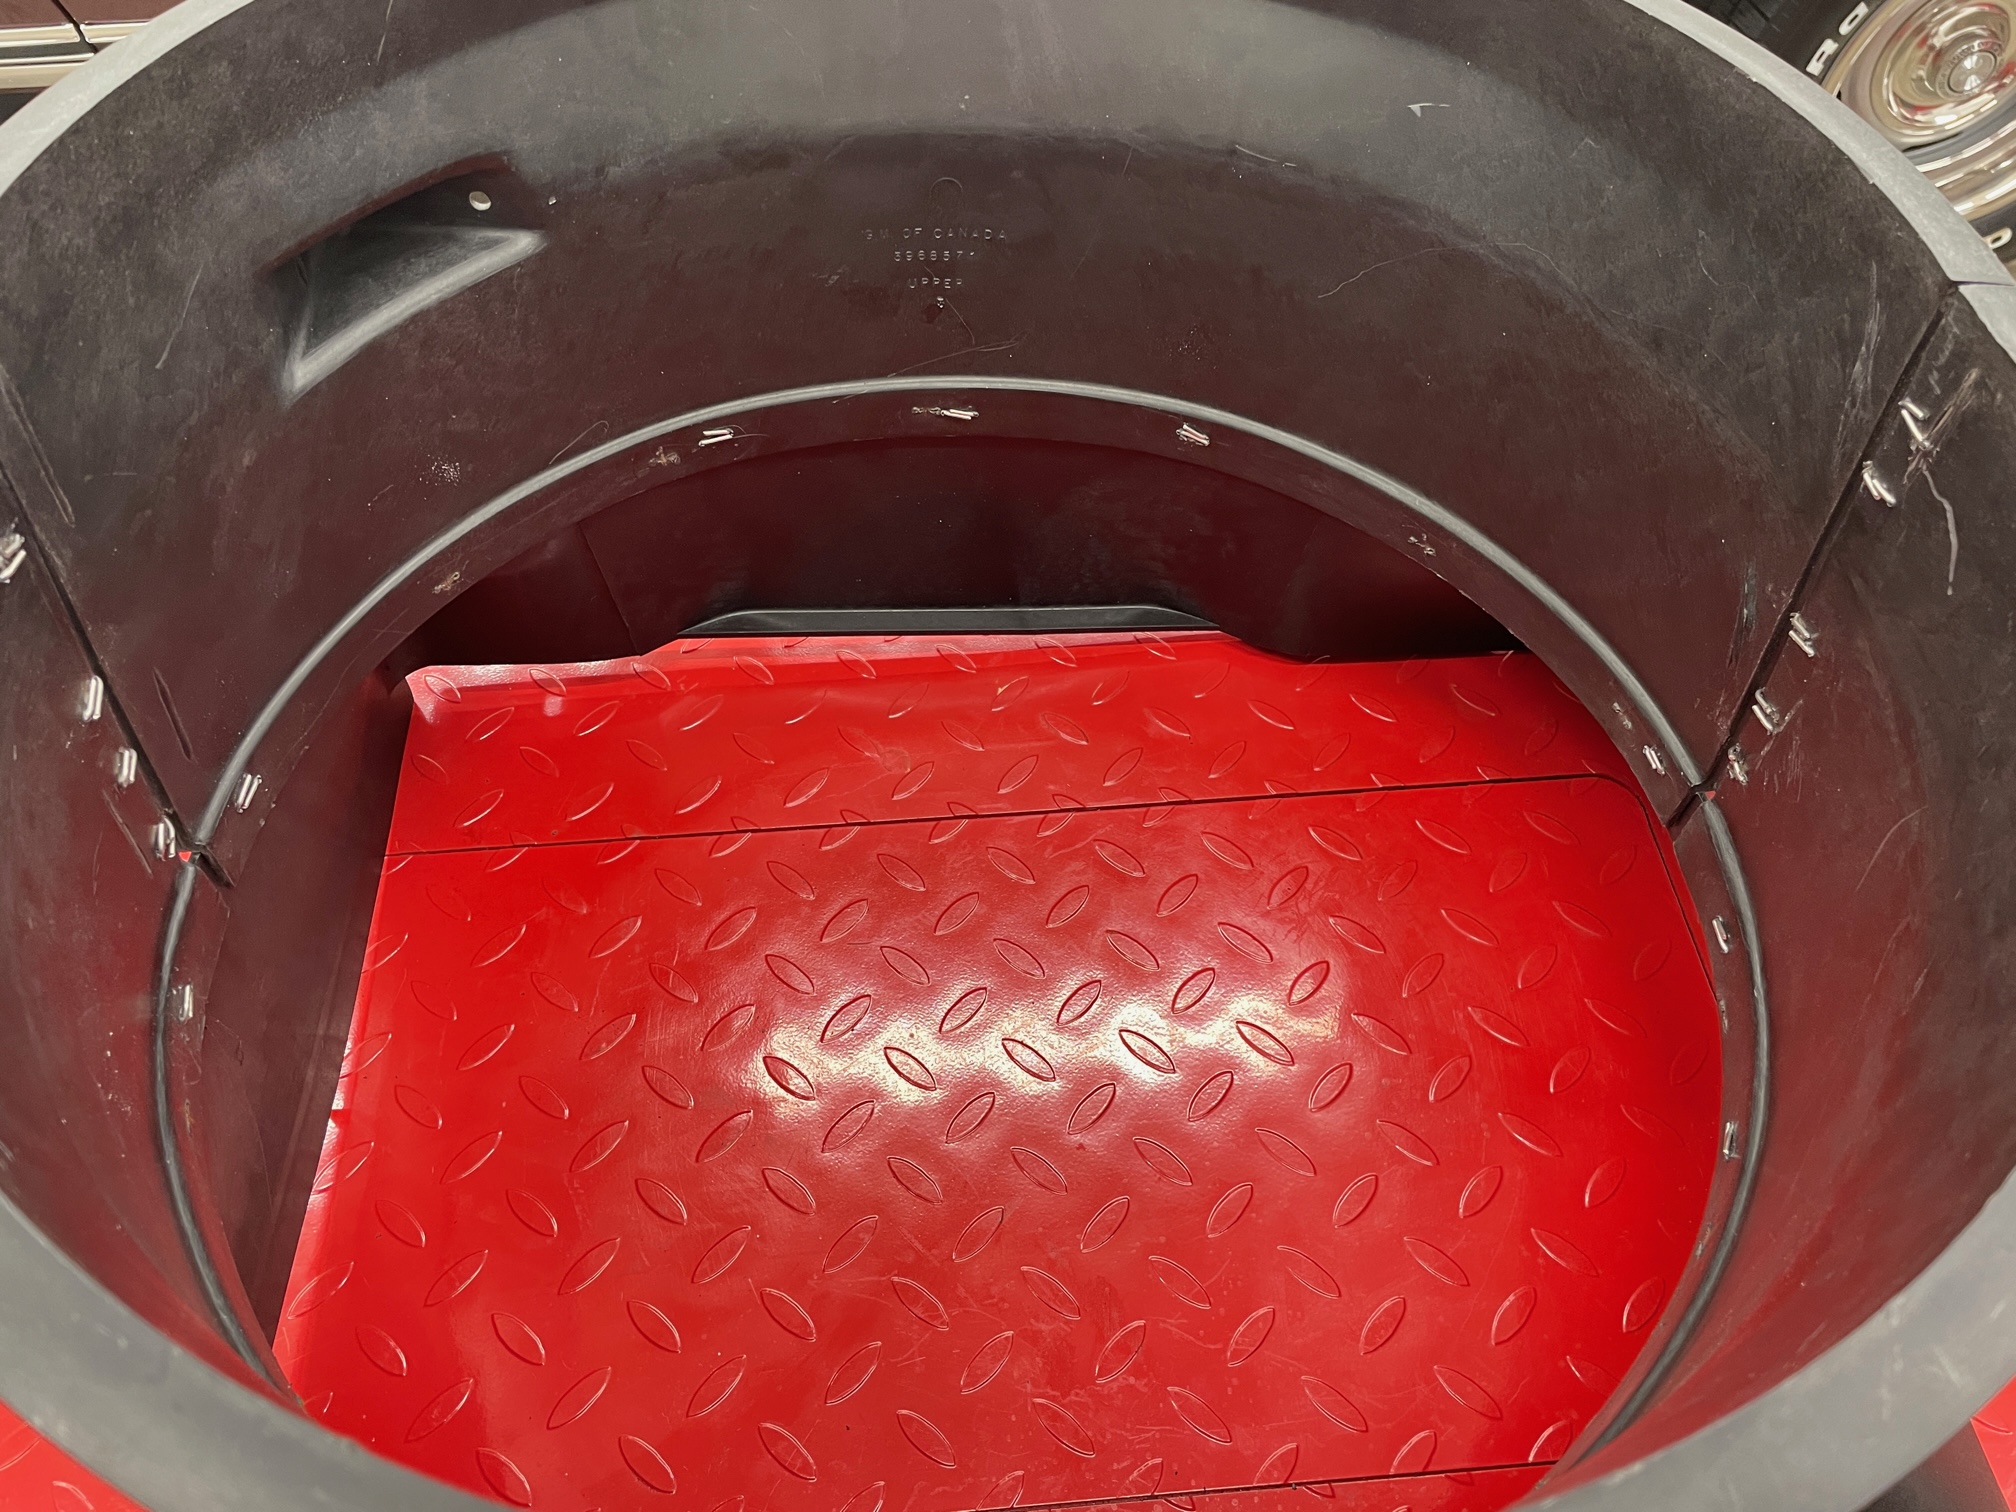
Okay guys, I finally got this done. I purchased staples (image attached) that I thought were the correct ones. Turns out they were not (these staples are for splash shields, etc). I contacted Corvette World based on a comment from @willie that I saw on this post. They were not very helpful and could not/did not know what I was talking about. I also checked with The Parts Place but had no luck. So I had to get creative and make my own staples, which I did. I found and used 1/16" steel rod (same as the original staples) and cut and bent all the staples I needed (about 20). Image attached. I carefully removed all of the old staples, paired the two halves of the shroud and secured it with blue tape, also per Willie's suggestion. I used a 1/16" drill bit to drill pilot holes and then tapped the staples into the holes and used a hammer and dolly to bend/secure the staples. Despite being only 1/16", this steel is quite stiff! Is it perfect? No, but I'm happy with the outcome. I will have the entire shroud assembly Cerakoted to restore the black finish. If you aren't aware, Cerakote is a process similar to powder coating except the baking process is done at a much lower temperature (powder coating is baked/cured at 400°, which would melt plastic). Cerakote is very durable as well. As always, thanks for your help. You guys always come through and I'm very grateful! Hopefully this post will help someone in the future.


-
Oh man, that sucks. I agree that you got your money's worth but look at the bright side... you get to rebuild a small block chevy, which is always fun! By the way, your engine compartment looks great!
-
Welcome and congratulations! Great looking Monte Carlo!
-
I've had the connector in both locations without much difference. I think the reason is related to the kick down. Still trying to figure it out, I appreciate all of the feedback!
-
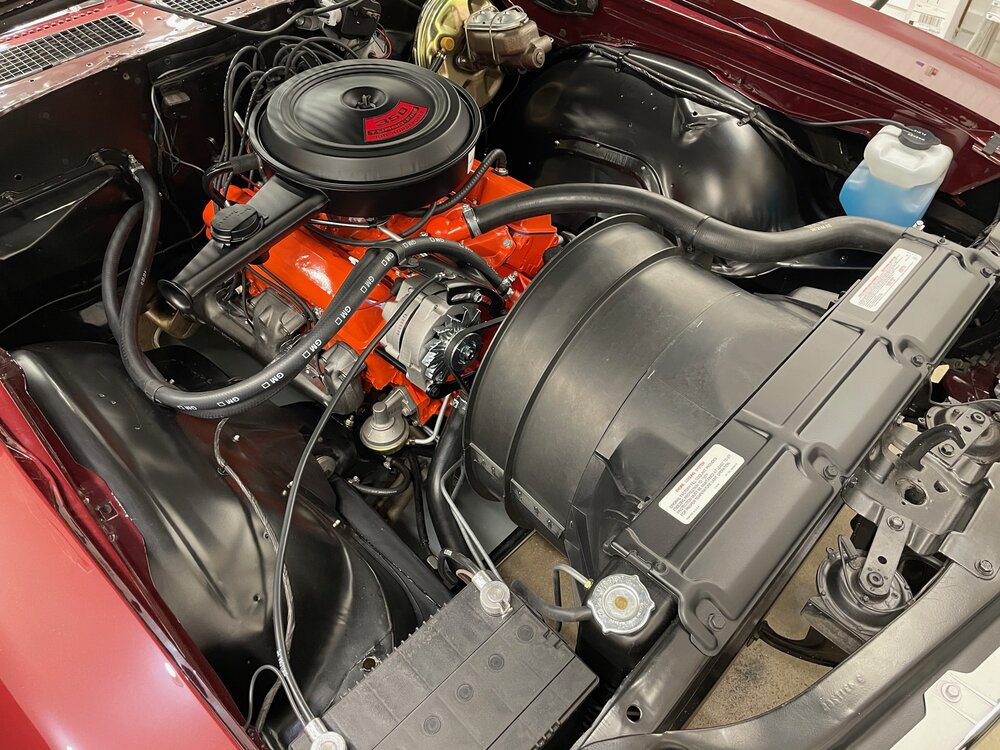
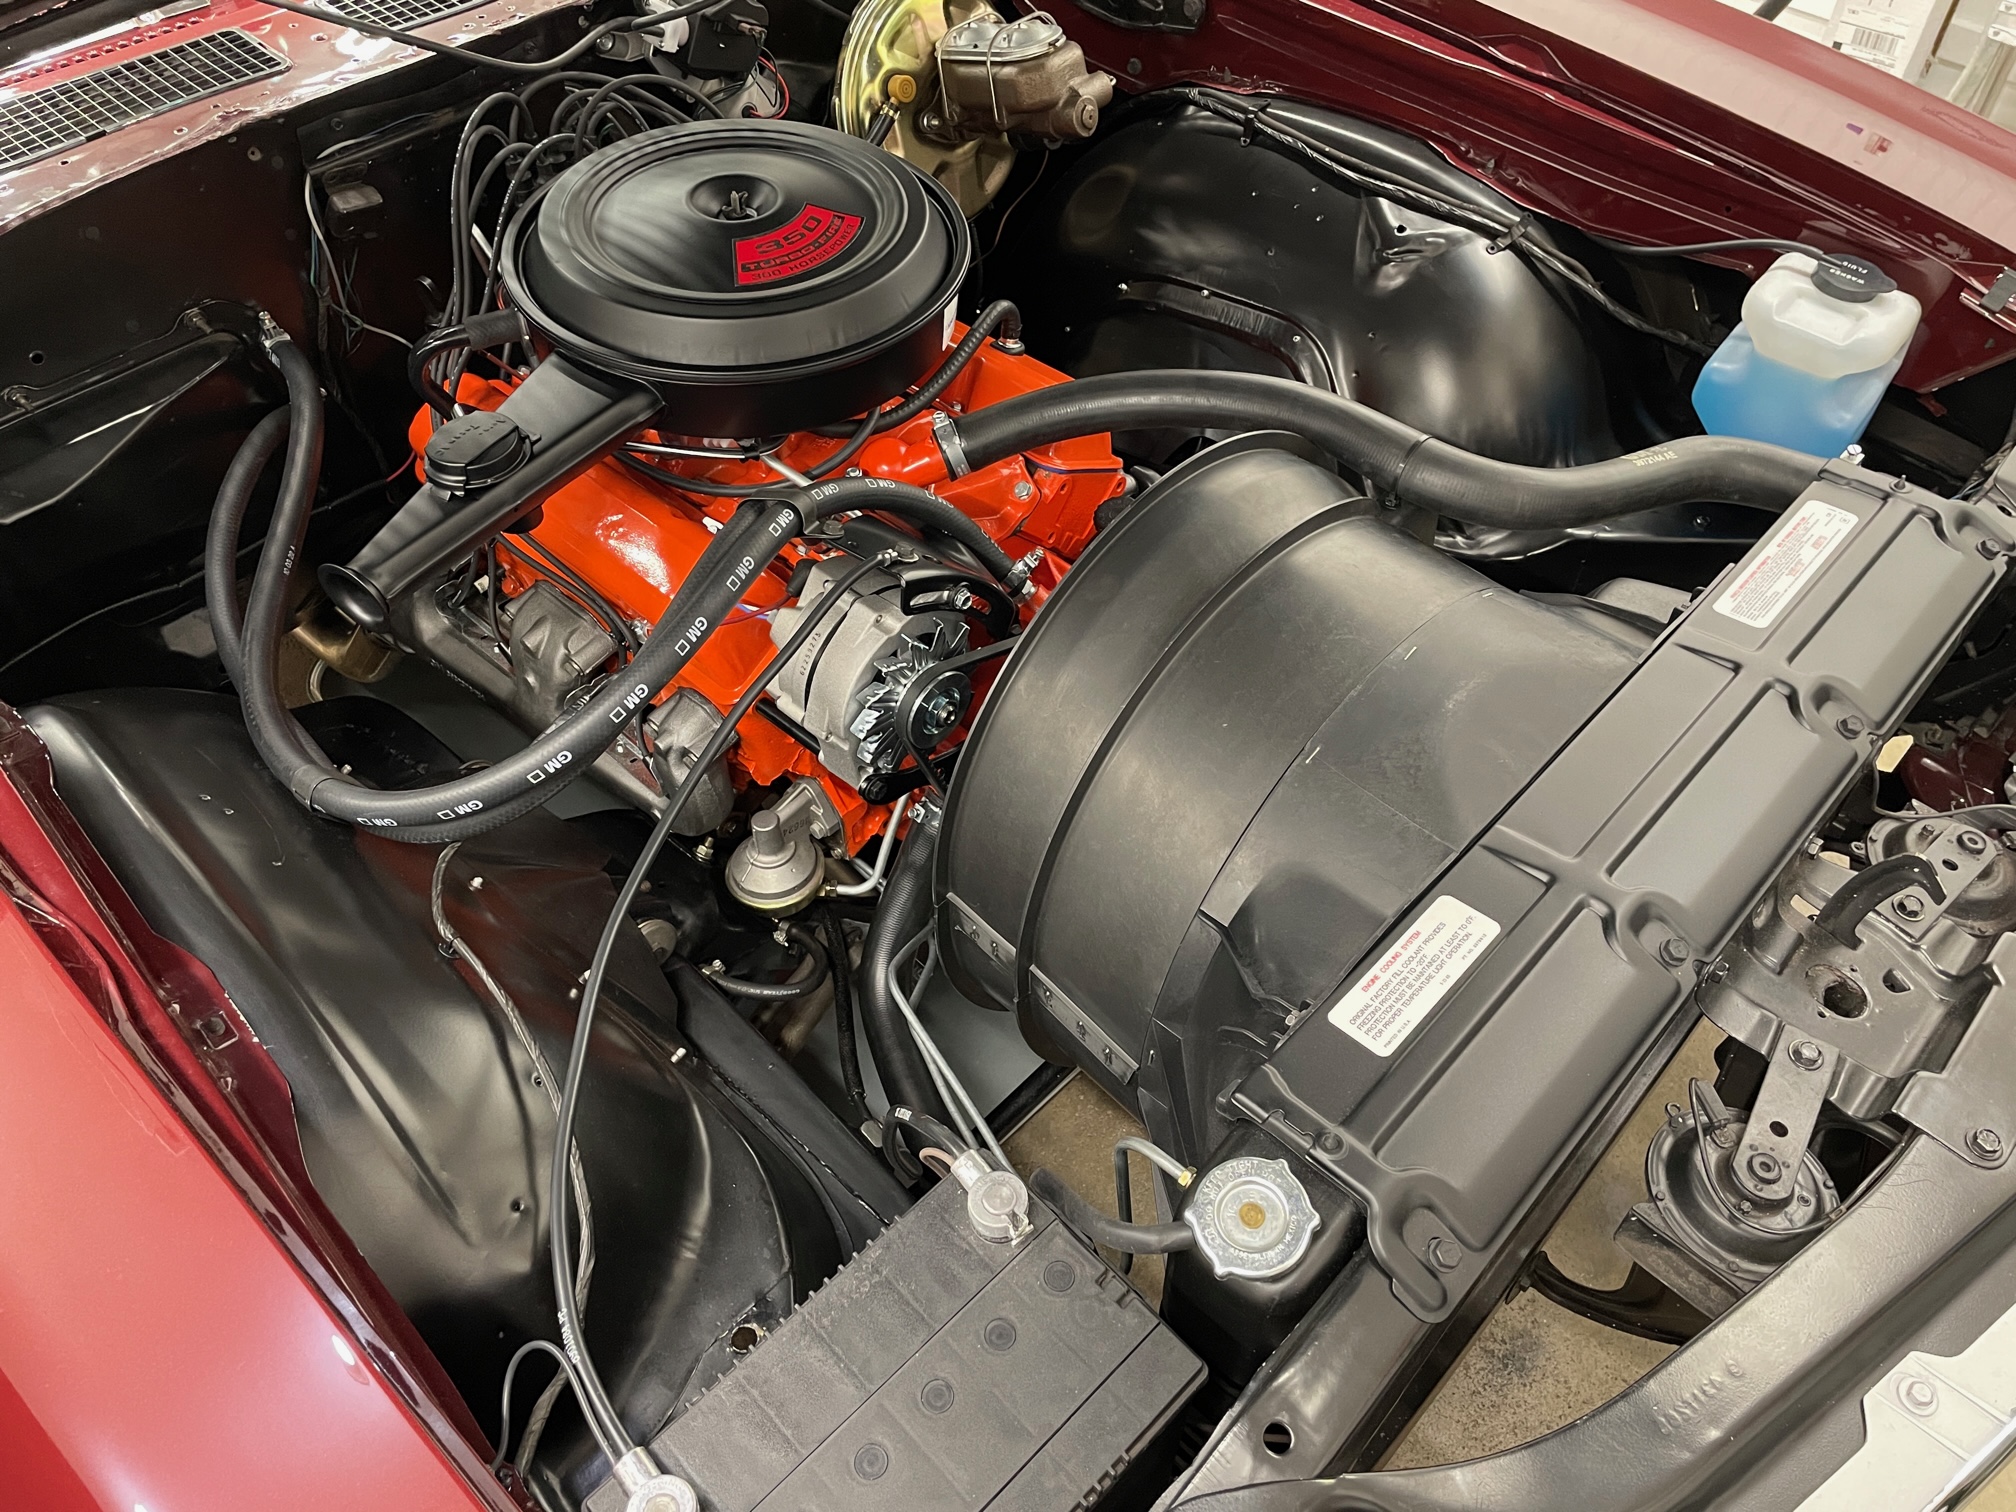
Thanks Bruce. I just finished restoring the engine bay, that's why it's so clean.
-
Yep, I checked the carpet (and floor mat), it's not an issue. And, like you, I won't ever drive it very hard, but I do want to make sure that it operates the way it's supposed to.
-
Hey guys, I have my hands in all sorts of projects on this car. Can someone with a small block/Quadrajet take a photo of their setup so I can see if mine matches? I'm trying to solve a problem where I can't get wide open throttle and I suspect the linkage or setup may be different. Photo of my setup attached. Thank you!

-
Thanks Willie. I found these staples. I'll have them early next week and will provide an update after I get things put together. @1970mcss
-
I had to get a new shroud which I have to mate with my old tunnel. Staples are used from the factory and I want to duplicate that method. I have no idea what type of staple gun to use to get this done. I'm guessing a normal staple gun won't have the oomph to get it done since it has to go through about 1/8" of plastic and there would be no closure mechanism to fold the staples over on the back side (although I could do that manually). Has anyone done this before or have any tips on staple guns? Pictures attached.
.thumb.JPG.98320cad8777941030bf12ce48abc62a.JPG)
-
These parts are sold. Thanks!
-
I totally understand not wanting to do under-car work. Not only does it suck to go up and down and work lying on your back, but I have a fear of jack stands. LOL Anyhow, I can't recommend any shops in MI, but it shouldn't be terribly difficult to find a trans shop who works on the Turbo 350. I'm not saying that you shouldn't take it to the Chevy dealer. After all, you would think they would be the experts. BUT, I don't know of any dealerships that repair transmissions these days. When there is a failure (rare), they replace the entire unit. I remember back in the day, you could walk into a service department and see engines and transmissions in various states of disassembly being repaired. Those days are long gone. And I'll bet the dealer would be very expensive even if they can/do work on them. I had my Turbo 350 rebuilt a couple of years ago. The total bill was less than $1000 and that included removal and installation. These are not complicated transmissions by today's standards. The guys and gals who rebuild them can do them with their eyes closed. Maybe do a Google search for transmission shops near you? I'm not familiar with your location, but there must be one or two that would have no problem working on a Turbo 350. Good luck!!
-
Beautiful car, Aaron! A nice grille and rear trim on a 72 is indeed rare. Be thankful because, as you probably know, it's ridiculously expensive to restore that grille; I was quoted $2500 to do the grille on my 72.
-
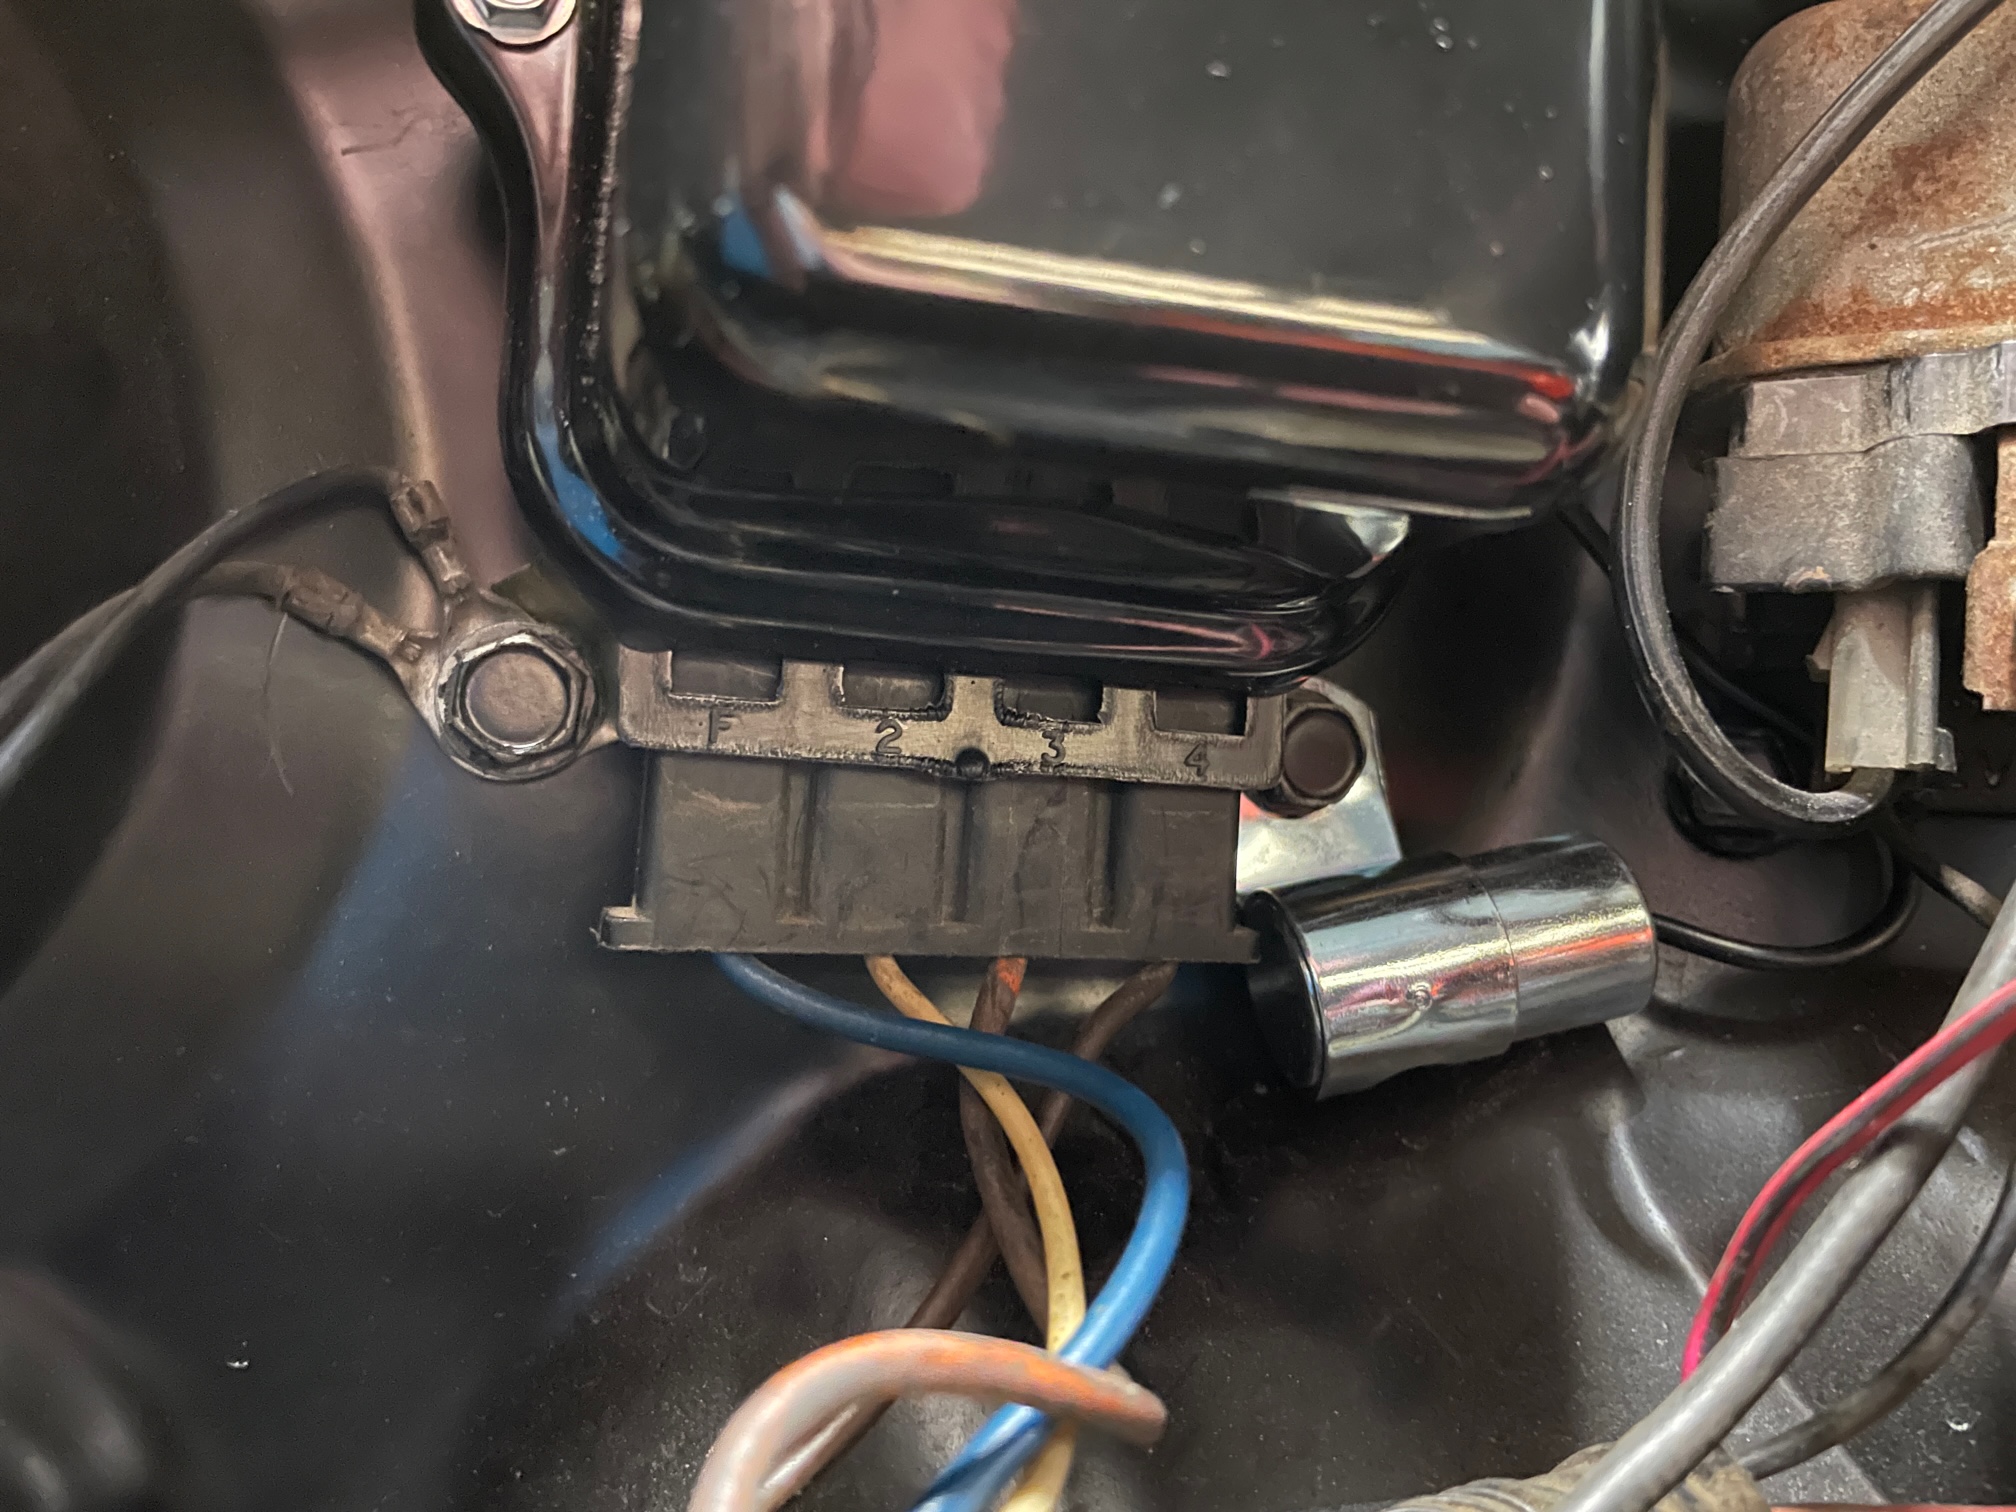
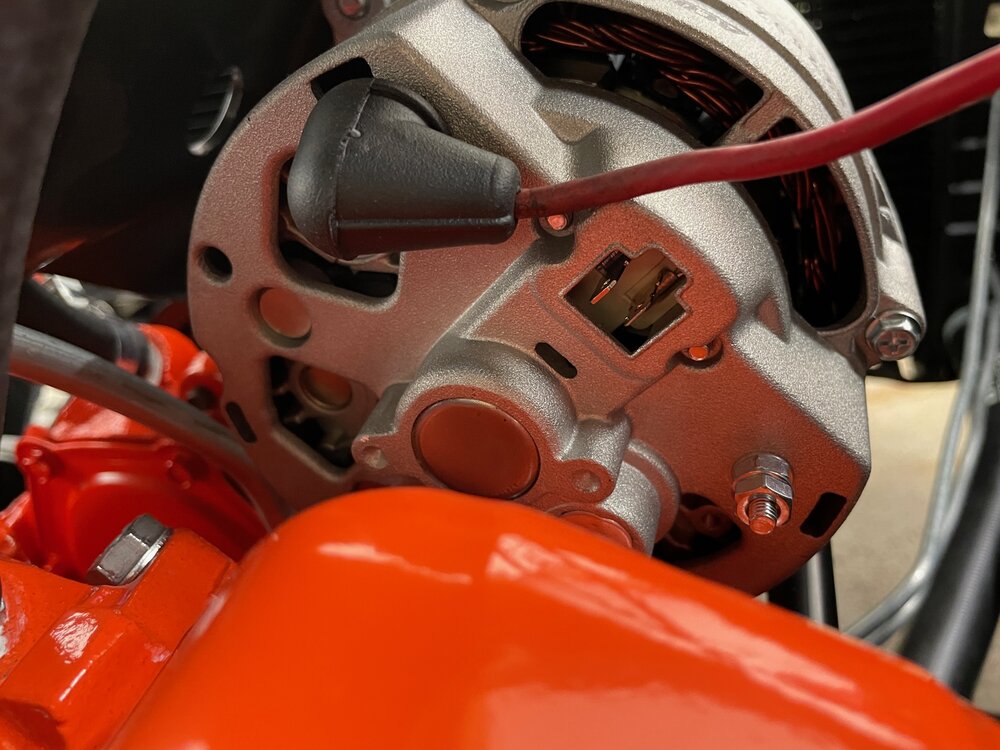
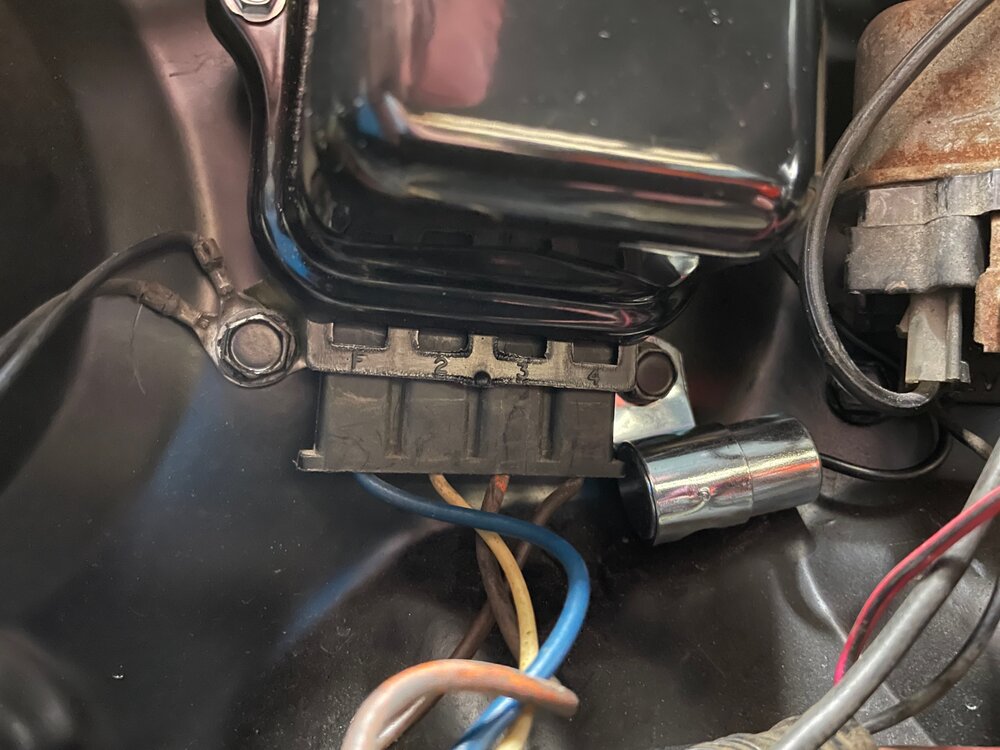
@jft69z Problem solved. I replaced the new voltage regulator with another new unit and the voltage is now 14.3. Perfect. I was questioning myself in this entire process because I had the re-convert the car back to external regulator and had to fix some wiring, which isn't my strong suit. That said, your tip to check the manual (duh) was the closer. Appreciate the tip and the help. Sometimes we just need a little nudge. 😉
-
You're absolutely right, I do have a manual and I just got done reading the test procedures. I put a test light on terminal F and 4 at the regulator; the test light lit up. The manual says that means a bad regulator. I have [another] new one coming. I'll install and re-test.
-
Thanks Joe. That means I have those wires correct. That's one thing I can eliminate as the possible problem.
-
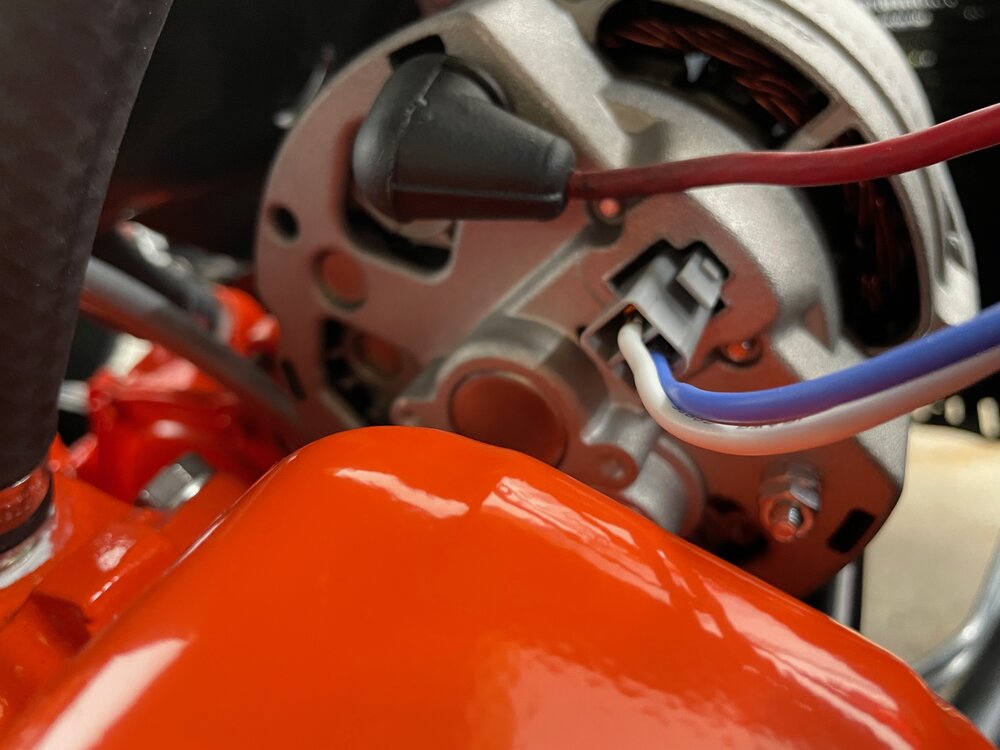
Hey guys. The 70 MC that I purchased had an internal regulator alternator on it. I put it back to stock with a new external regulator alternator (three wire) and new external voltage regulator. I am seeing 16+ volts at idle. I looked at the wiring diagram for the car and made sure that the blue and white wires run to the regulator and have continuity. The F wire (blue) is hot with the key on. I read that the other wire should be hot all the time. Is that with key on or off or both? My white wire is never hot. I have Googled and Googled and Googled and what I can't confirm is which terminal is which on the alternator. Mine is not labeled F and R (or 1 and 2) as some are. You can see in one of the photos how I currently have it connected. Also, trying to figure out what the disconnected wire is as seen in one of the attached photos. Is this related to the charging system? It was this way when I purchased the car. Any help is appreciated!

-
Yep, scrap metal now. I did find one for reasonable money on eBay. I cleaned it up and painted it and it turned out nice.
-
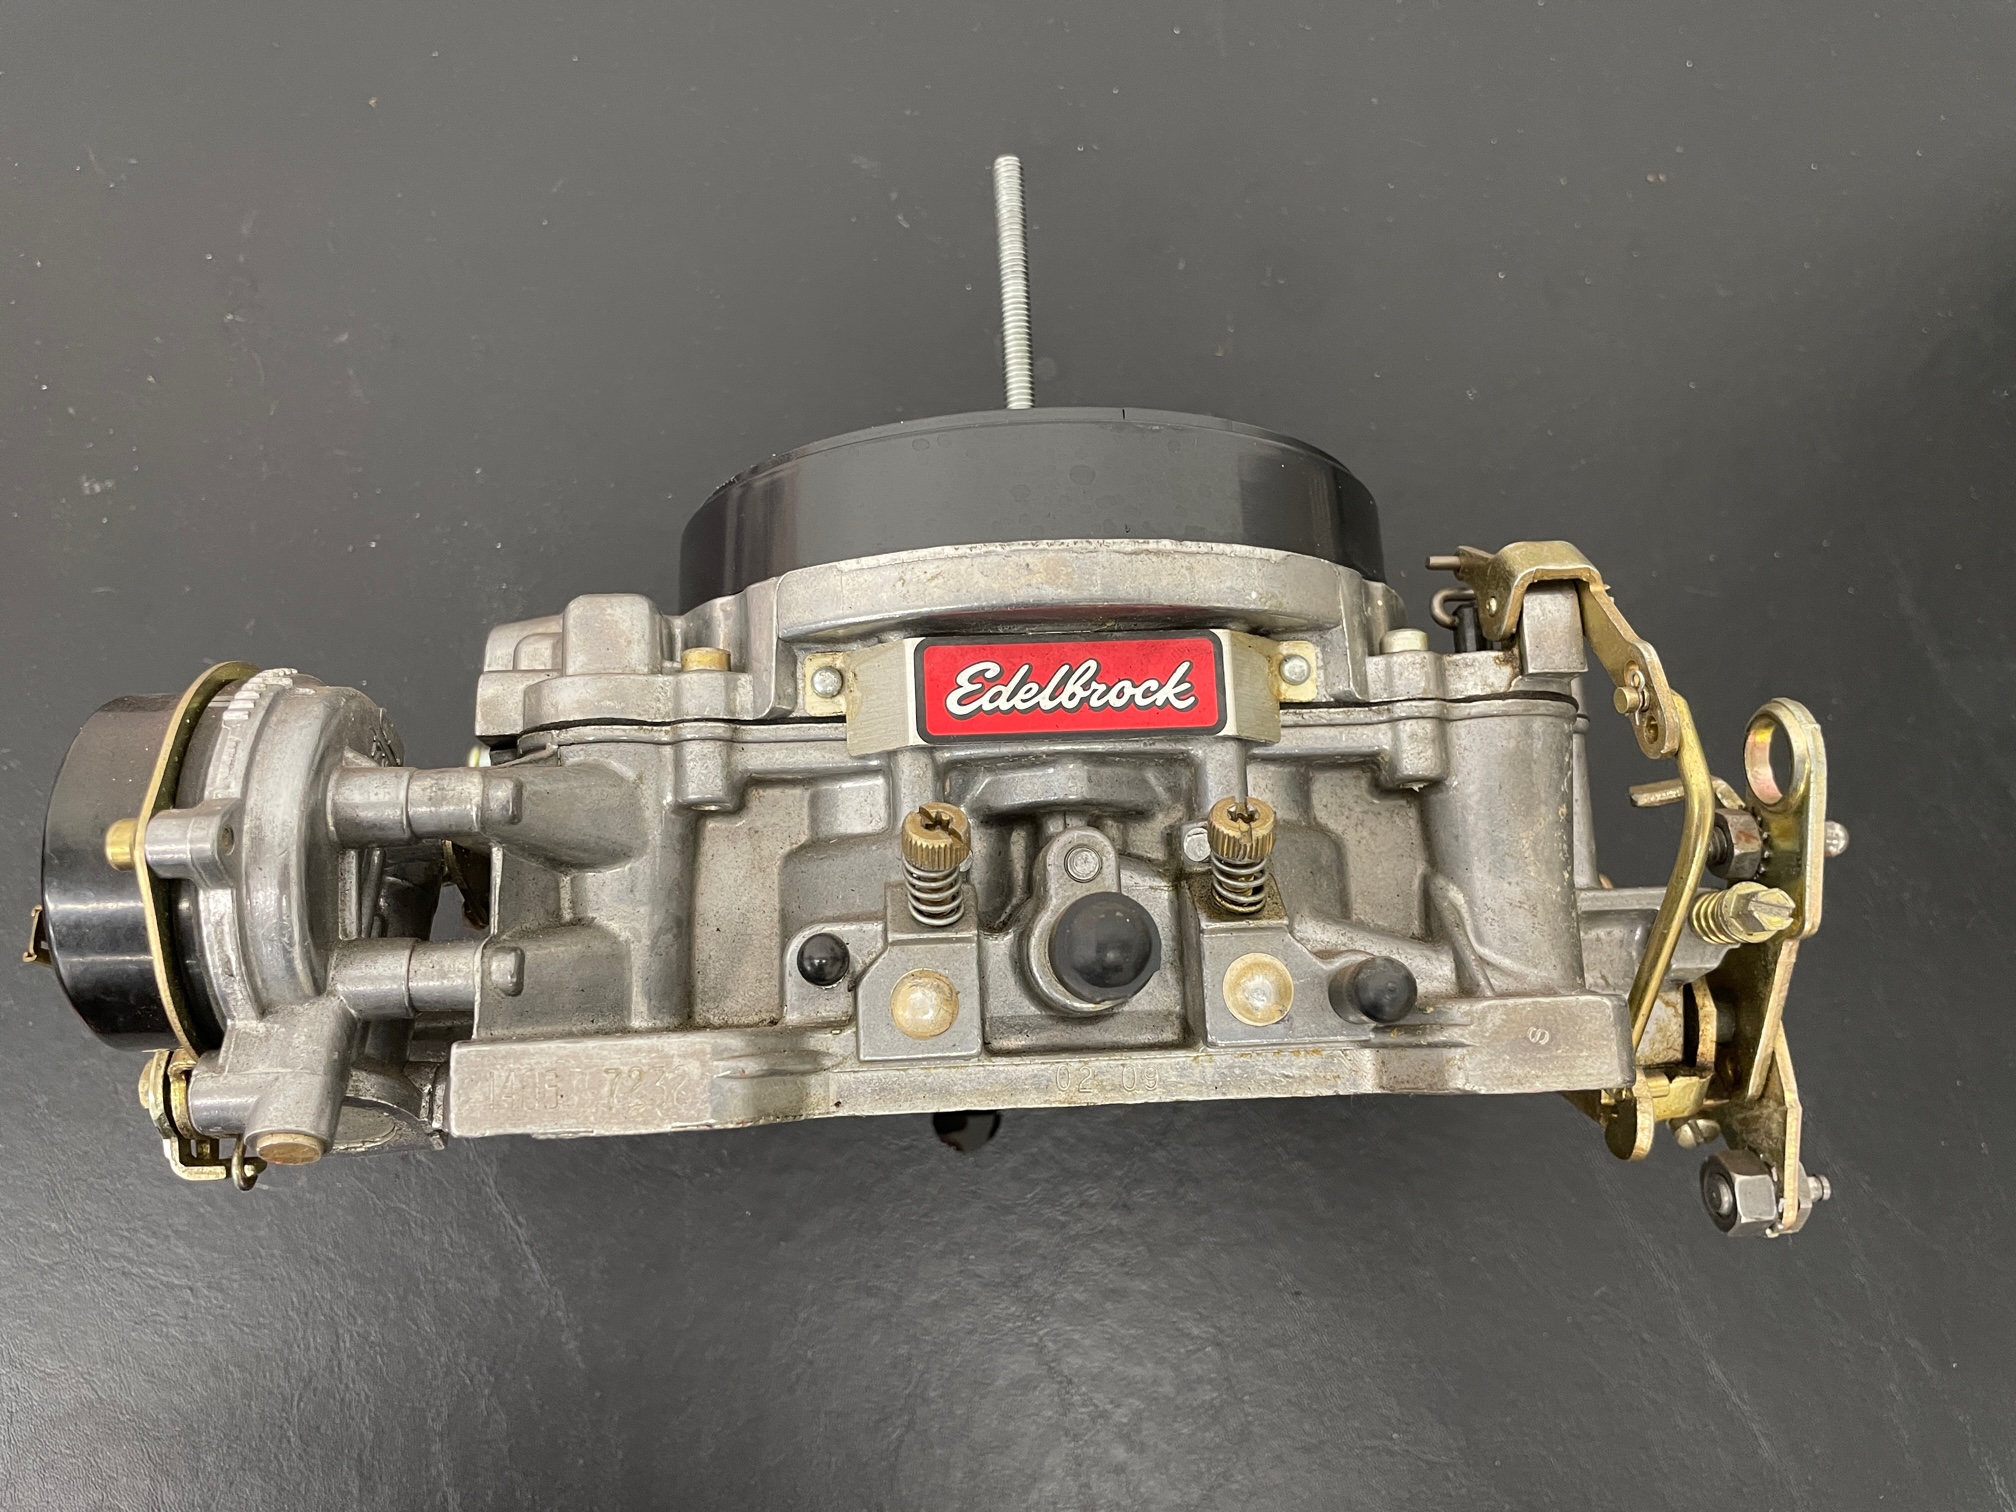
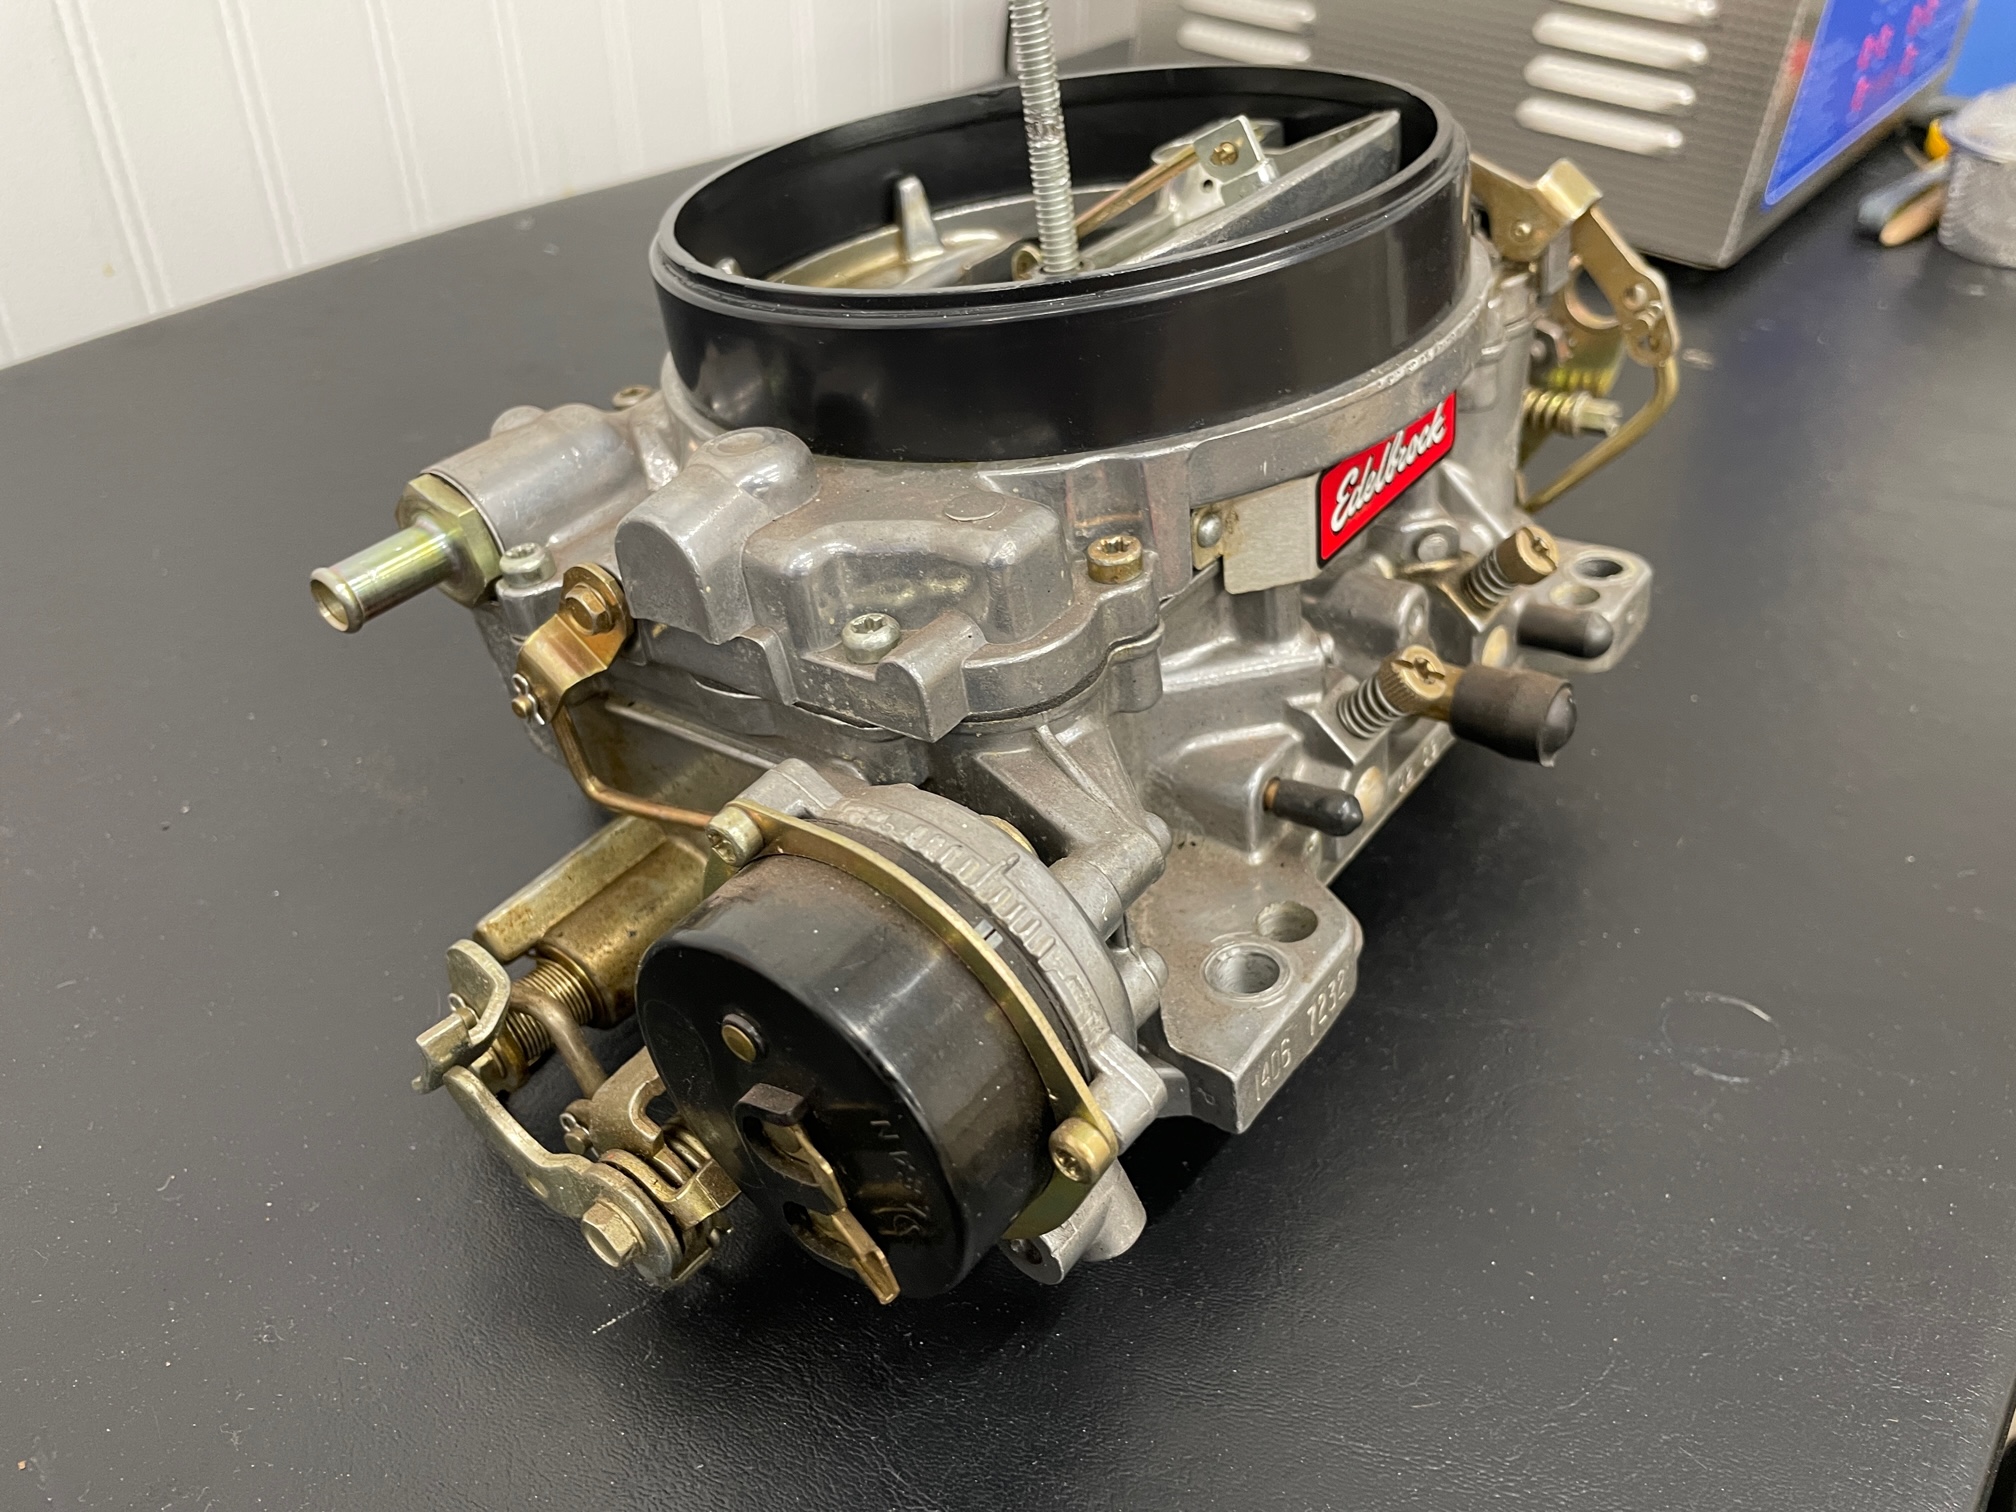
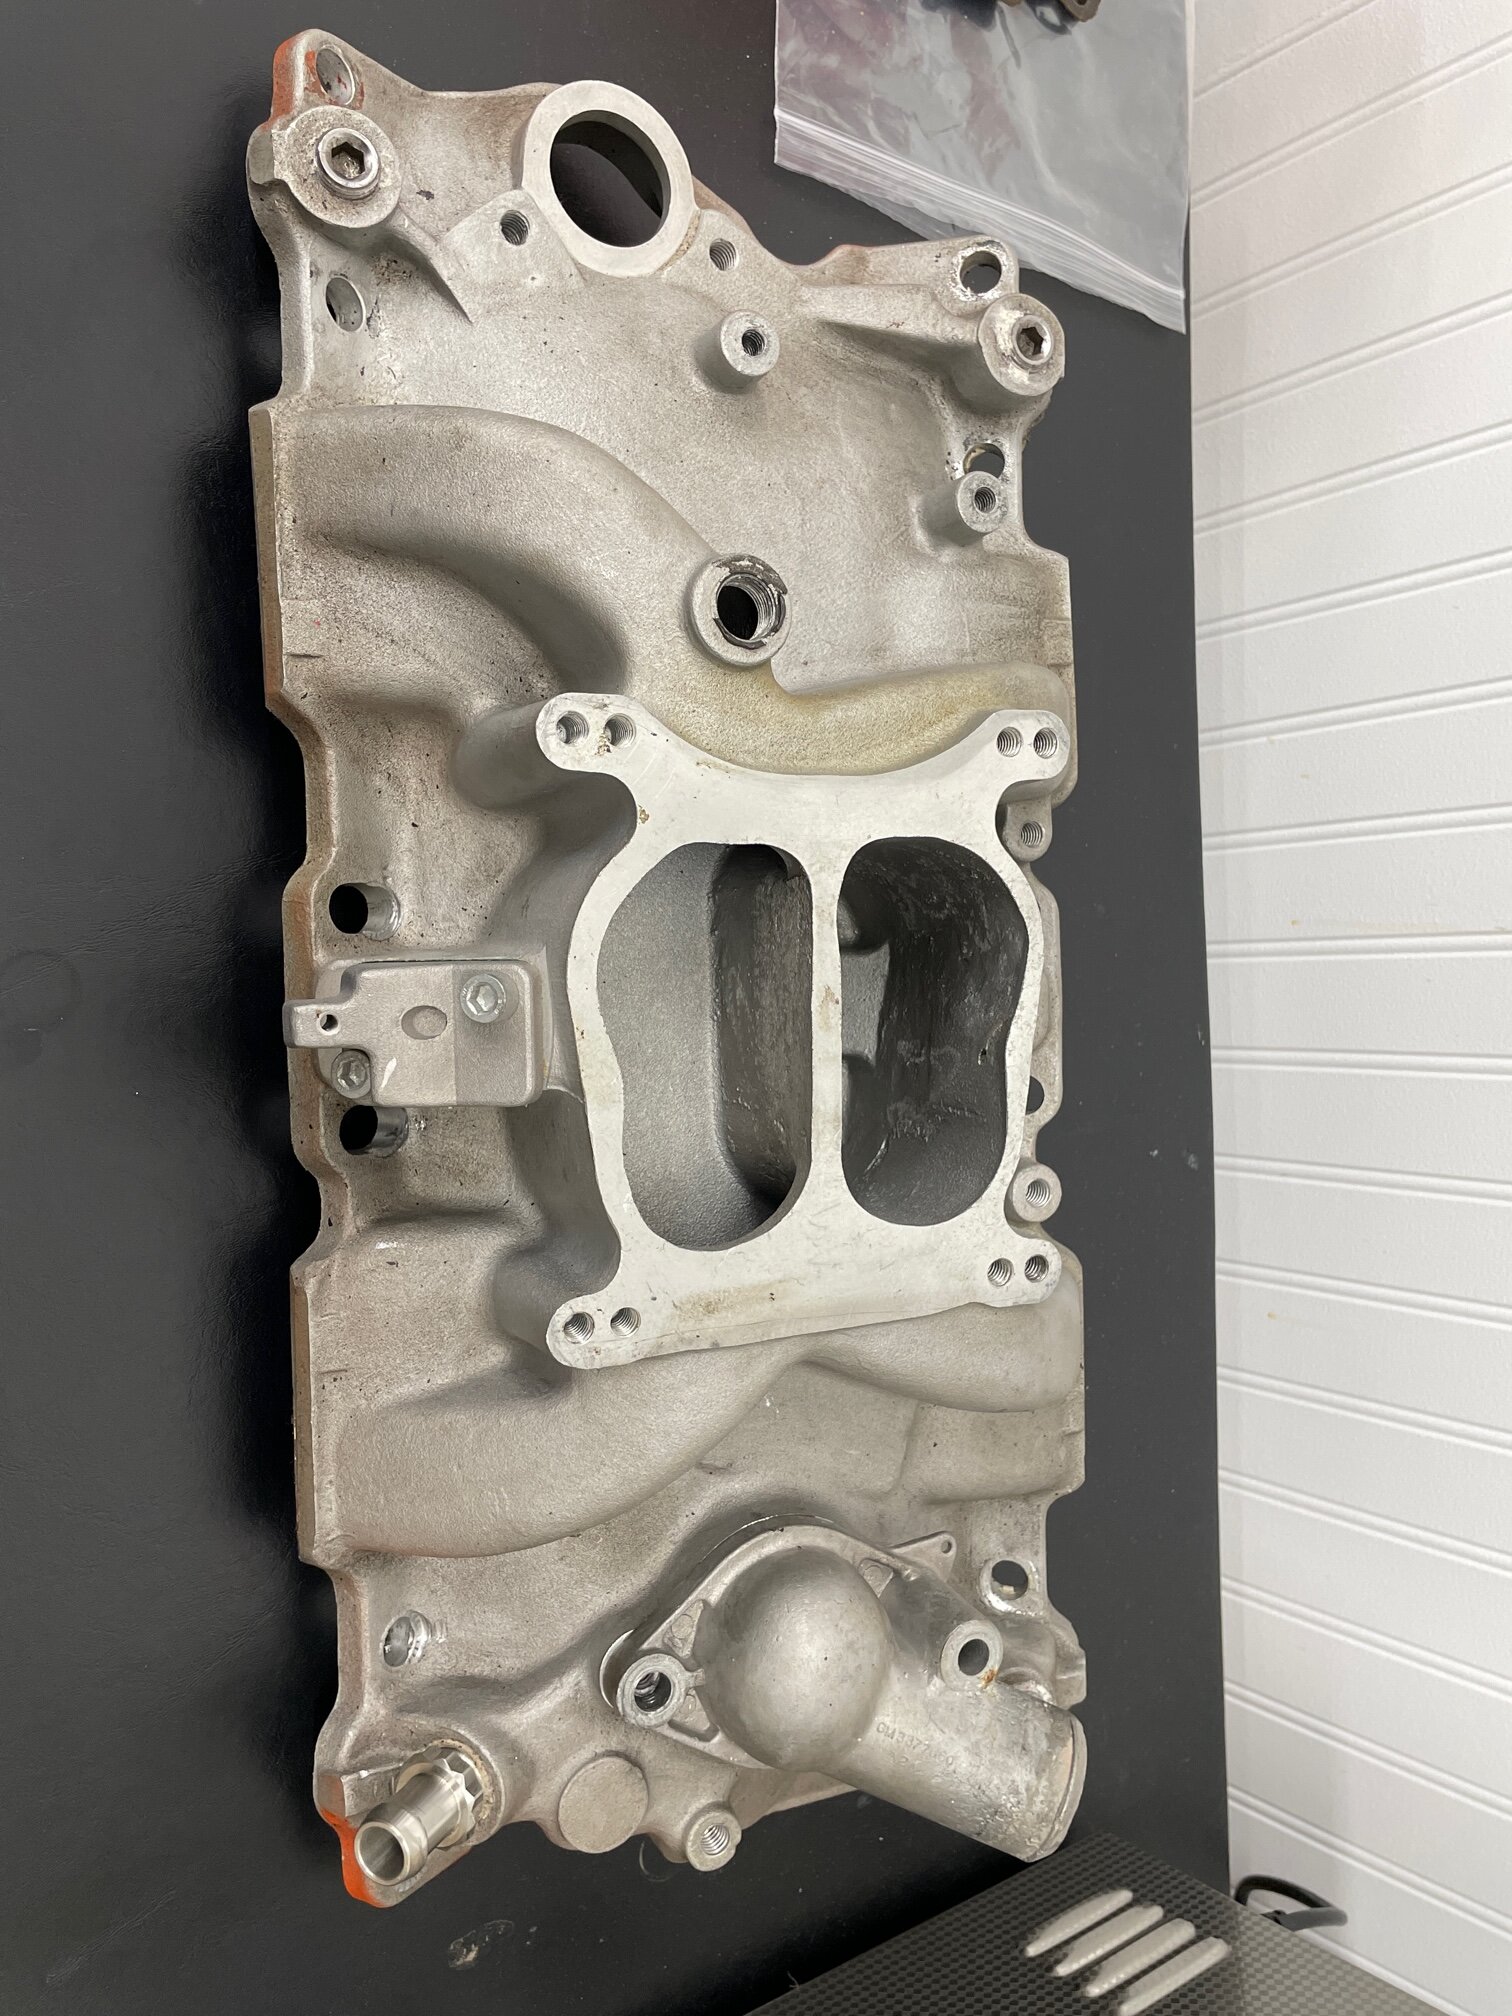
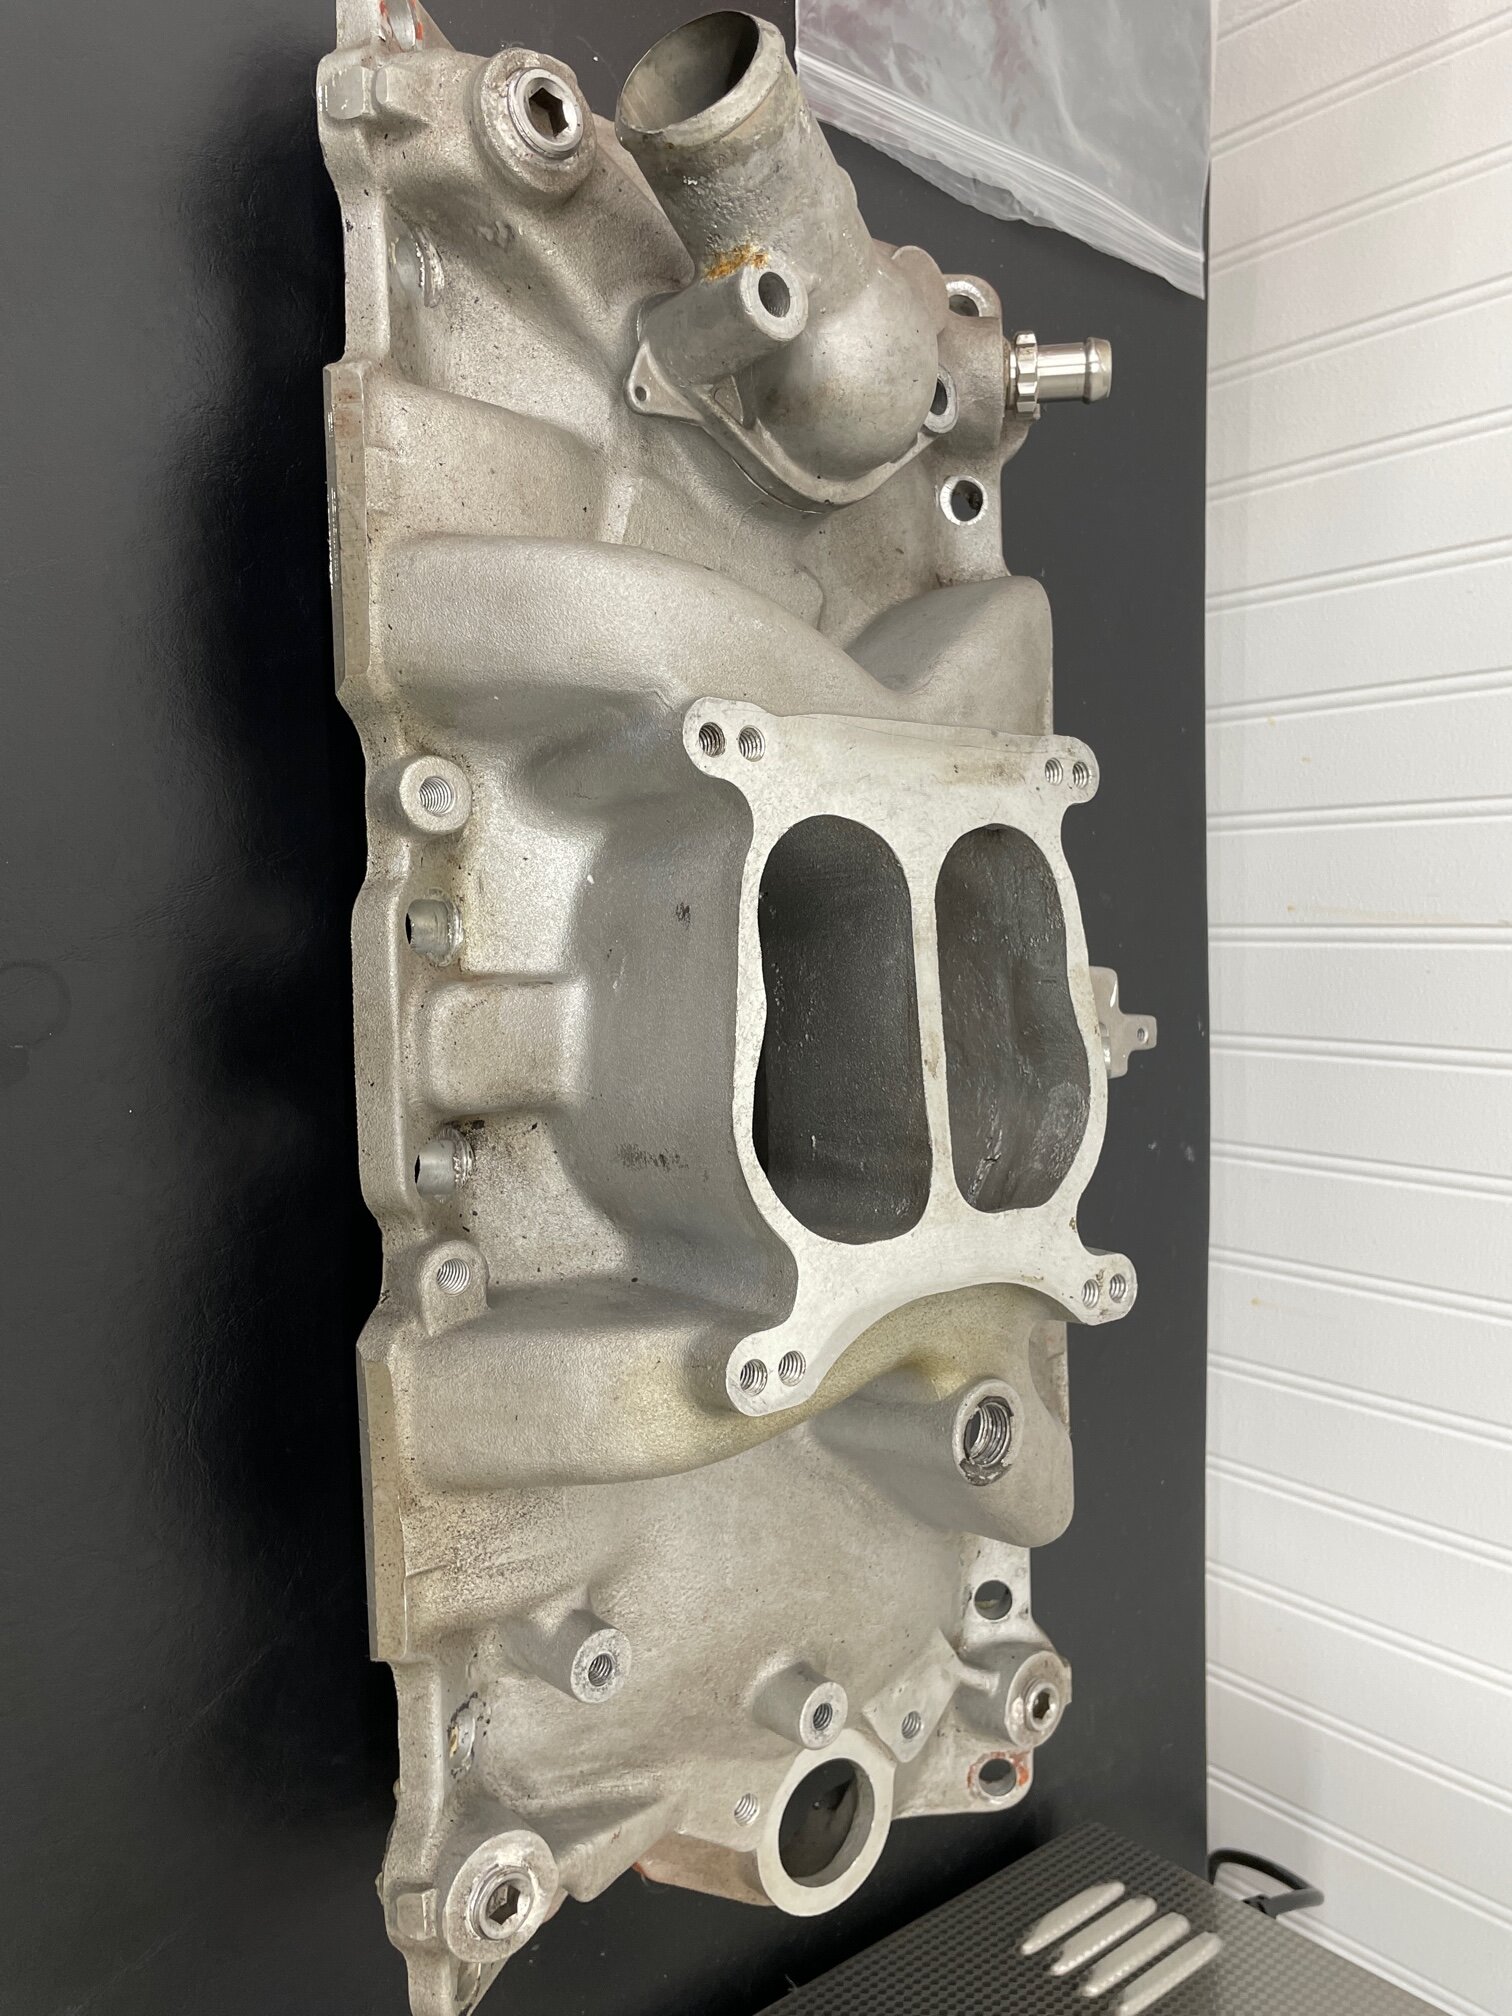
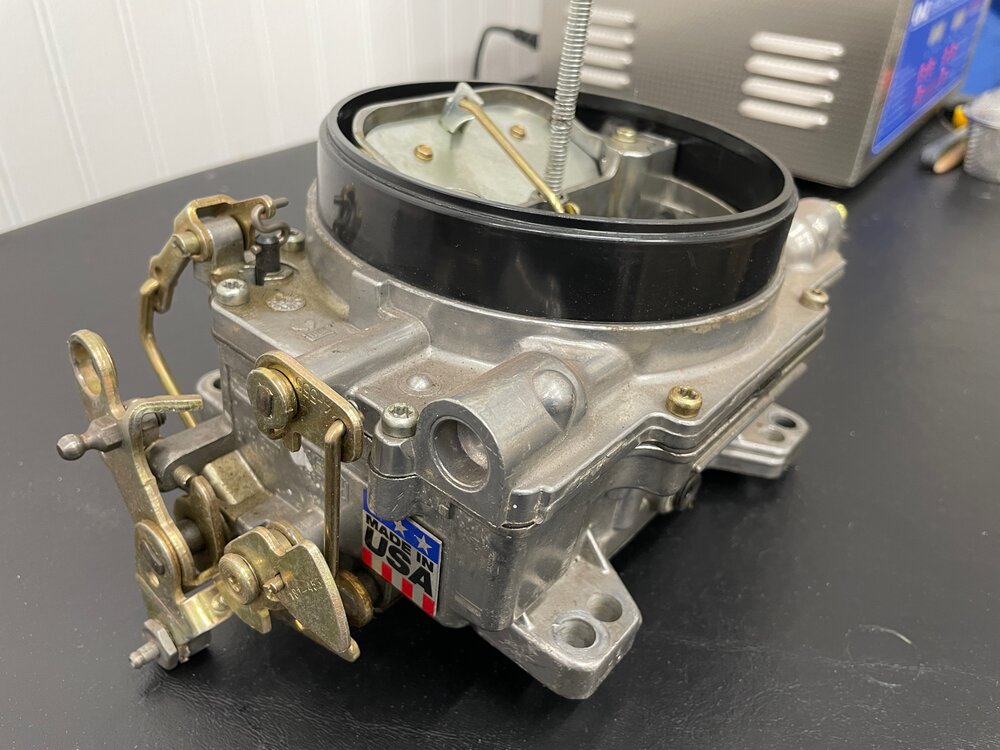
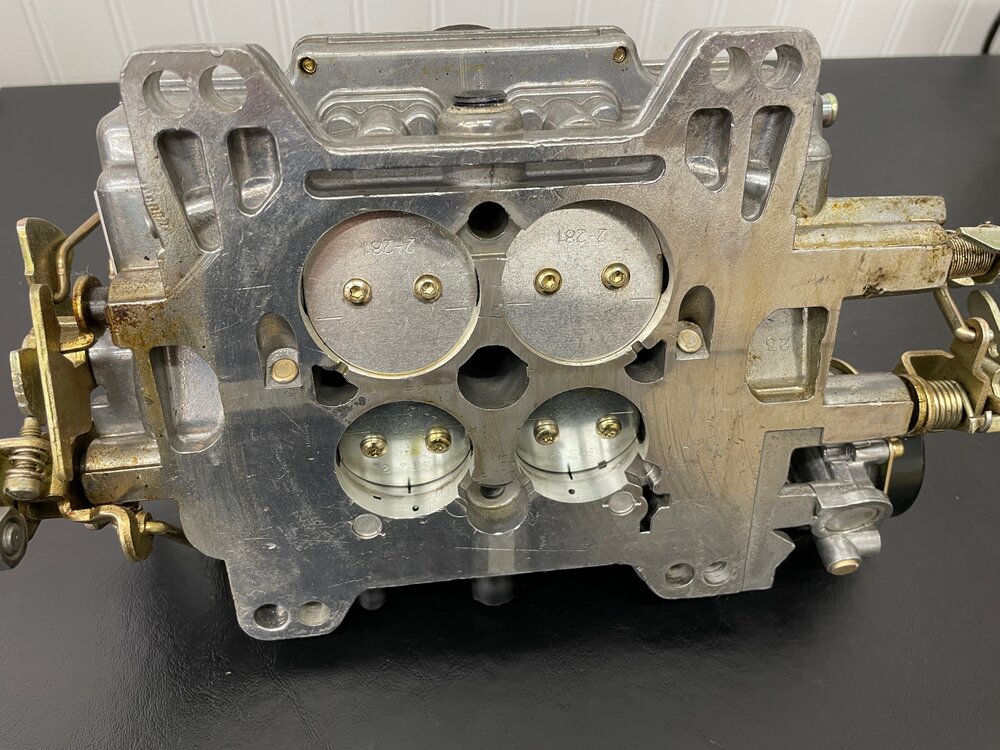
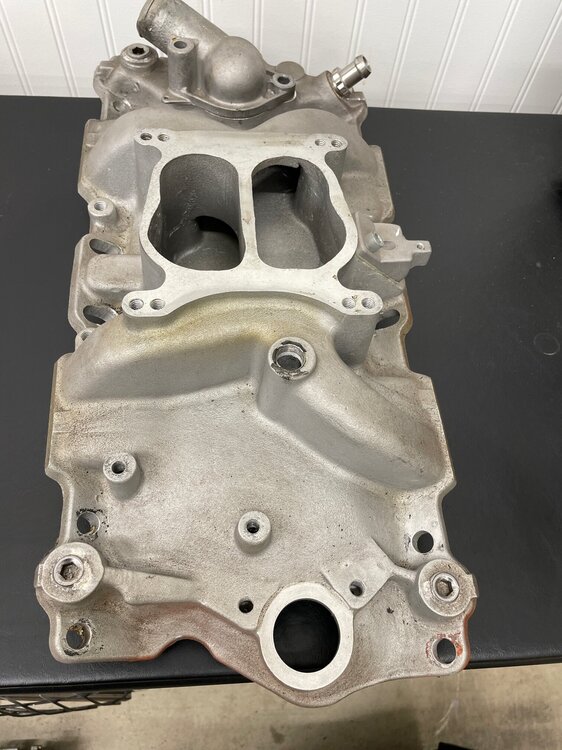
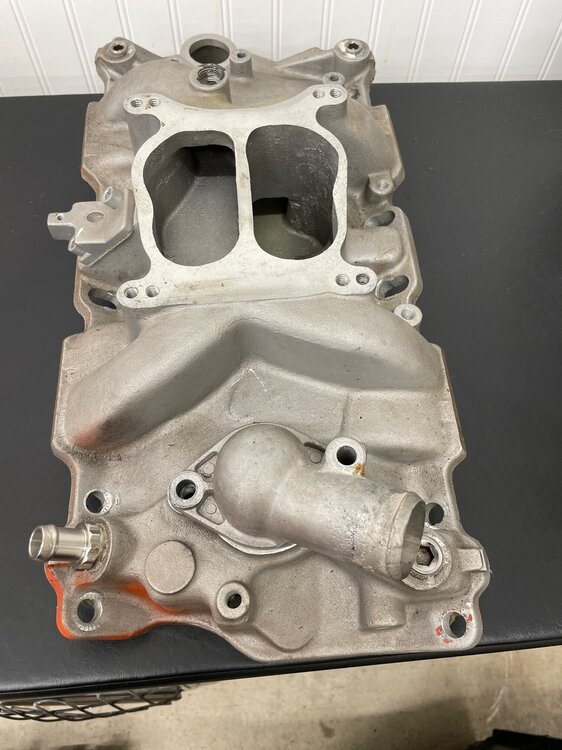
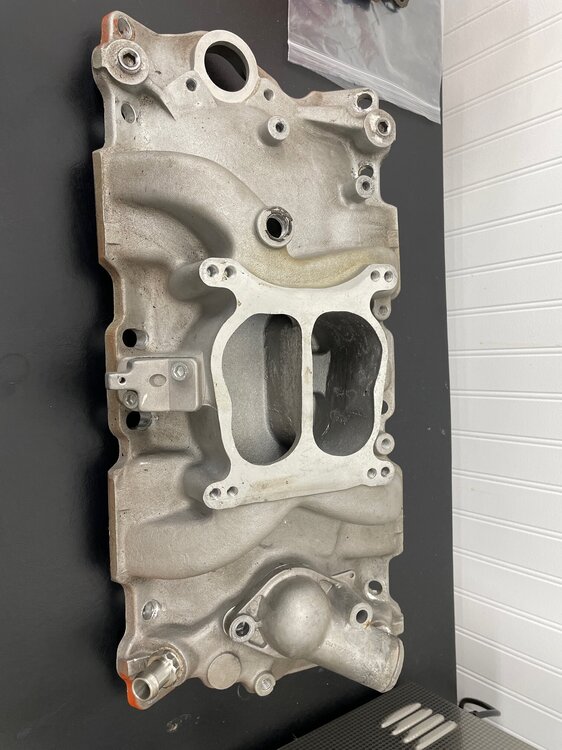
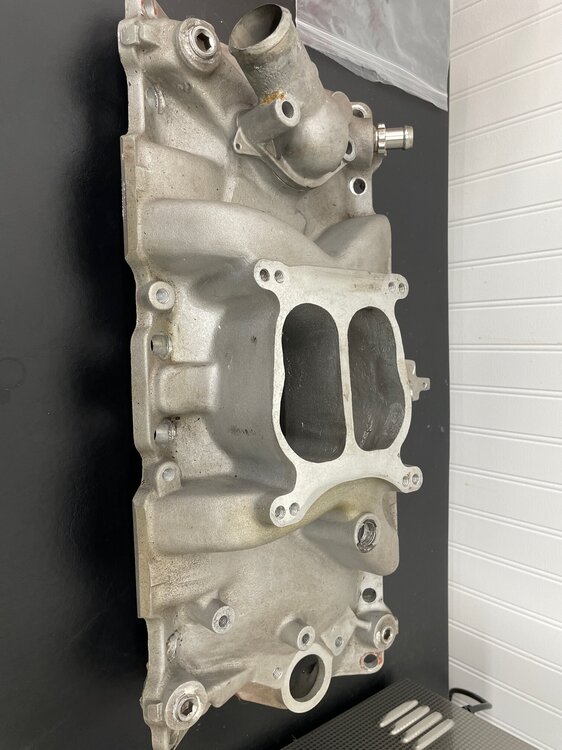
Edelbrock 1406 600 CFM carburetor with electric choke & Professional Products Cyclone Intake Manifold 52001. These parts came off of my 1970 Monte Carlo (I'm going back to stock) and are looking for a new home. I try to list things here first before I list on eBay. I only drove the car a few miles with this setup after I purchased it so I really can't vouch for the performance but I'm guessing it would be an okay setup for someone. I think these intakes are knockoffs of the Edelbrock Performer and of course the Edelbrock 1406 carb is quite popular. Also included is the throttle cable and cable mounting bracket as well as the thermostat housing. Does not include any bolts or hardware. I would clean the intake and probably freshen up the carburetor but it ran when I took it off. $225 including shipping for all of it. Continental U.S. only. If you're interested, send a private message.


-
I've heard of others doing this with good results.


.JPG.fcc397e84468ccb564c83c8539a33e29.JPG)