


Bluemalibu
-
Posts
166 -
Joined
-
Last visited
-
Days Won
9
Content Type
Profiles
Articles
Forums
Gallery
Events
Everything posted by Bluemalibu
-
Likewise, I picked up a set of the plastic units from The Parts Place to replace the new metal inner fenders that were on the '72 when I bought it, as the metal ones did not perfectly match the wheel opening contour. I am really happy with the quality of the new plastic replacements.
-
What did you do to your Monte Carlo today?
Bluemalibu replied to Canuck's topic in General 70-72 Monte Carlo Forum
Doug, I once fought with a friend's car for months trying to diagnose an intermittent stall like that. Sometimes it would die six or seven times in a day, then it might go three weeks before dying while running. I ruled out all of the usual suspects one-by-one, and then dug deep into the internals of the engine and peripheral pieces. What I ended up finally finding was a plastic printed label, submerged in the fuel tank that would temporarily plug the fuel uptake. It had apparently been on a replacement fuel pump at one point and had not been removed before it was installed. What a relief that was, to finally find the culprit. -
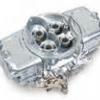
By the look of the light gauge wire (14ga?) the manufacturer of those generic fans do not appear to be very concerned about the need of their motors to draw very high amperage. That makes me suspect. Remember the laws of physics... if you want to accomplish substantial work, it going to mandate the expenditure of power. High amperage draw of 12 v electricity requires large gauge wire for reduced resistance and safety. We're just trying to help you from being burned here... not trying to put down the merchandise, but I would really doubt that those two fans could even move 1800 CFM of air through your radiator. I'm a DIY guy, and have had real success with using the OEM Mark VIII fans on three previous vehicles. So, I just pulled the Flex-A-Lite dual fans set-up below (Straight blade reversible version, with thermostat installed) off of the car that I just purchased. They looked new, and seemed to be up to the task of cooling my big block when I bought it in the fall, but it gets 120* here in the summer, and I believe that over-built is just about right. The measurements on it is 16" x 27". Let me know if you want to use it. Doug Reversible dual 12 1/8 inch X-Treme S-Blade electric fan Part Number: 490MSRP: $449.53 Flex-a-lite® Reversible X-Treme dual electric S-Blade fan system that moves 3,000 cfm of airflow
-
What did you do to your Monte Carlo today?
Bluemalibu replied to Canuck's topic in General 70-72 Monte Carlo Forum
Wow... that has some meat to it Rob! Today, I began prepping the '72 to run A/C lines. The previous owner had pulled the OEM unit to lighten the car for the track, installing a polished 16x28" cloud-like shaped block-off plate in its place on the firewall. I'm running the A/C lines under the fender to keep the engine bay clean, and so, I grabbed the hole-saw to place the bulkhead fitting on the far outer edge of the block-off plate. FOUR hole saws later, the two holes were through the plate. What I thought was a polished aluminum plate, turned out to be polished TITANIUM. LOL!! -
Presamax, From one tin badge to another... I've used both the 700R's and 200-4R happily for years in a lot of different platforms. (My Malibu pictured below sports a 700) In each, I was obsessed with ensuring that the TV was properly set up... and even with all of my hammering on them, I never lost a tranny. Nonetheless, I just installed a 4L80E behind the big block in my '72... and I made that decision even though I had two fresh trannys, one of each flavor - a 700R4 and 200-4R, sitting in my garage; and both were built with billet internals. The 4L80E is a rugged unit. They are both physically larger and heavier than the other overdrive transmissions I've mentioned... and both is due to the extra size and beef of the internal components within this transmission that lends to its brute strength. If you're wanting to get a heavy vehicle moving through the production of mega torque, the 4L80 will provide that in spades. And they fit into A bodies without surgically altering the sheet-metal. Mine fit as-is, although simply for peace of mind I indented a silver-dollar sized section to provide a little extra room around the speed sensor outlet. The stand-alone controller that the tranny uses is now plug-and play as well. In a nut-shell, I am extremely pleased with the transmission.
-
What did you do to your Monte Carlo today?
Bluemalibu replied to Canuck's topic in General 70-72 Monte Carlo Forum
This is the evaporator that worked so well for me: Classic Auto Air fabricates it. They sell the unit as the Custom Colder Elite... they also supply it to RestoModAir which markets it as the Haymaker II. Here is a link to the picture callery for the system: http://www.restomodair.com/shopproducts/haymaker-ii-custom-air-conditioning-system/ I made my purchase direct from Classic Auto. http://www.classicautoair.com/ 1-888-791-6384 Doug -
What did you do to your Monte Carlo today?
Bluemalibu replied to Canuck's topic in General 70-72 Monte Carlo Forum
UPS delivered the Classic Auto Air system today. I went with a hybrid kit flavor... consisting of the Custom Colder Elite evaporator, as I wanted to run the hoses under the fender and the Custom setup doesn't sprout the A/C and heater lines out of the firewall right adjacent to the headers. To this, I had them add the balance of the perfect-fit SS A/C-car install kit and direct electronic controls. I am thrilled at the way the evaporator unit tucks up tight against the wall under the dash... it leaves lots of room around it to run hoses, speakers, an MSD box and fuse panels, and looks like it was always meant to be there. (Only about an inch and a half of the box is visible under the dash and it clears the glove box with an inch of clearance with no need to hack it all up as others do!) -
Thanks again, for adding activities for this extra day, Aaron. We had posted earlier that we'd be arriving on the 25th... but it will actually be in the early AM, so I wanted to give you the heads-up for your logistics planning. We'll be hitting the border late the 24th, and have reservations to stay the night in Oroville, WA... arriving in Penticton at O'dark-thirty the 25th.
-
Sam has hit it dead on... the stratospheric hydrocarbons are causing the smell and will cause your eyes to burn. The engine's begging for a richer fuel mixture.
-
I'll second the advice given above... a week after picking up my '72 I pulled the built 'glide and 3600 stall converter. When I got under the car I found the scars of a previous shaft that had beat the hell out of the tunnel, unable to hold up behind the 468. As I was needing to replace the shaft anyway for the new 4L80E, I had a drive shaft constructed with all billet chromoly yokes, solid u-joints and the pinion yoke likewise replaced with a billet chromoly unit. It ended up being pricey, but was money easily spent after the pucker factor of seeing the carnage of a sub-par shaft.
-
Mine was delivered Oct 69... unfortunately, I can't help with the sequence number as the build sheet that I retrieved from under the rear seat belonged to the 350 car immediately before it in line. I found the sheet a week after purchasing the car, and when I saw the 350 engine designated, I about went through the sealing, as the car had been represented as a true numbers matching SS. Luckily I spent another hour examining every detail on the sheet before reaching for a gun to go after the seller... only then did I catch the discrepancy in the last of the VIN number.
-
Too funny Sam... LOL!!
-
Thanks so much, Rob. As of yesterday though, my garage looks like an IED went off, blowing bits of my shiny car all over it! As usual, any change that I make to the car triggers a cascade of revisions to other parts.... I decided that I wanted to relocate the battery to the trunk to ease a little of the weight off of the nose of the car. So, I pulled the rear seats to run 2/0 welding cable through the floor pan and along the inside of the frame rail. With the seats out, I thought that this would be the perfect time to run new speakers and speaker cable as well; along with new side glass. When I pulled the dash pad off to install the speakers, I was dismayed with the condition of the balance of the wiring... so I pulled the rest of the dash board and began rewiring the entire interior. With the dash off, what better time to pull the steering column as well, and install the new tilt column for the car. AND, why not take advantage of the dash being apart to order the new Classic Auto A/C that I had had my eye on! The new A/C dictated that I pull the accessories and cooling off of the motor to install a March Performance serpentine kit in order to mount the compressor and to replace the Philadelphia Racing electric water pump with a new Victor pump. I also had to install an A/C condenser for the new A/C, but I had no room left after installing a 26" cast aluminum oil-to-air heat exchanger for the new 4L80E transmission... so, I pulled the radiator and redesigned the lower radiator support, in order to mount the condenser inside the header panel instead of in front of it. And, because I was moving the radiator anyway, why not use this opportunity to add a spin-off trans filter to the -8 AN trans lines and to install a large Caterpillar oil-to-water heat exchanger into the lower radiator hose in lieu of the small in-tank trans cooler. The A/C lines needed to be run behind the inner fenders to keep them out of sight, so I pulled them off, only to find that the inner surface of the fenders themselves hadn't been painted when the frame was powder-coated, so that has to be addressed new as well... Aaarghhhh!!!!! Make it stop!!!!
-
Another area to have them address is the accelerator pump. Your issues (aside of the cam lobe concerns) are pretty classic for our old iron. The pump cup dries out and loses the seal against the carb. Mashing the go pedal then leans the mixture out too much. You get the "pop" and she falls on her nose off of the line. Doug ___________________________________________________________________________________________________________________________________________________________________
-
Thanks again Larry... I got your answer about the glass on your other thread.
-
Larry, here is a pdf on the console install: ://macc.chevelles.net/console_install.pdf (prefixed by http) I'd lean to reverse engineering it, if nothing else works... attach the mount to the rear of the console and then affix the console itself to the horseshoe shifter, subsequently marking your mounting point from the attached rear mount. Can I ask where you purchased your quarter glass?
