

Slaman
-
Posts
164 -
Joined
-
Last visited
Content Type
Profiles
Articles
Forums
Gallery
Events
Everything posted by Slaman
-
What did you do to your Monte today?
Slaman replied to Xxyyzz's topic in General 70-72 Monte Carlo Forum
Looks good Jim -
What did you do to your Monte today?
Slaman replied to Xxyyzz's topic in General 70-72 Monte Carlo Forum
Nothing today, but finished the metal replacement around the windshield yesterday and my daughter even came out and helped me Had her sanding the filler work on the drivers door for me. :)She did a good job too! -
The CCP ones are fairly inexpensive, but I have heard they mimic the orginal stamped steel ones and do not help any with the steering geometry. BMR has some stuff on e-bay as well but unsure of their benefits. I know some of the guys have some really nice set-ups hopefully they'll chime in.
-
Sounds like you need to change the gears for the speedo. These are located where the speedo cable is attached to the tranny. I've never done it yet but understand it is not too hard.
-
IIRC when I did the rear brakes on my daughters Blazer the parking brake is like a drum brake inside the "hat" section of the rotor. Bob please correct me if I'm wrong. I too have considered the S-10/Blazer swap on mine in the future.
-
Mine were not welded. Of course it didn't matter much as most of mine snapped when I took them out.
-
What did you do to your Monte today?
Slaman replied to Xxyyzz's topic in General 70-72 Monte Carlo Forum
Spent some more time last night working on the windshield channel: And tacked into place: As you can see I have some more I'll have to replace in the center top section and that will about finish the windshield area repairs. I have some industrial metal epoxy type stuff that I will use around the entire area like filler that should fill any small holes or small gaps. Steve -
What did you do to your Monte today?
Slaman replied to Xxyyzz's topic in General 70-72 Monte Carlo Forum
Thanks. I've waited to tackle this after I had gotten somewhat better at my welding and fabrication skills. Once I finish the window channel I have some work to do on the tailpanel weather stripping channel and truck opening gap and that would finish the metal work. -
What did you do to your Monte today?
Slaman replied to Xxyyzz's topic in General 70-72 Monte Carlo Forum
Started on the cowl and windshield channel repairs. Cowl before: After: Another are of the cowl that I did not get a before pic. Had to replace part of the panel underneath too. An ugly repair to part of the upper channel. If I can't clean that up better I may redo it. And beginning on the drivers side top corner: That's where I'm at for today. Have to take my daughter to pageant practice. She is going to be in the National American Miss Pageant again this year... -
What did you do to your Monte today?
Slaman replied to Xxyyzz's topic in General 70-72 Monte Carlo Forum
Finished replaceing the o-rings in the fuel rail and injectors, Replaced the T-stat gasket and started it up for the first time in months.... -
Sorry about the breakage but that was an awesome video. Awesome numbers.
-
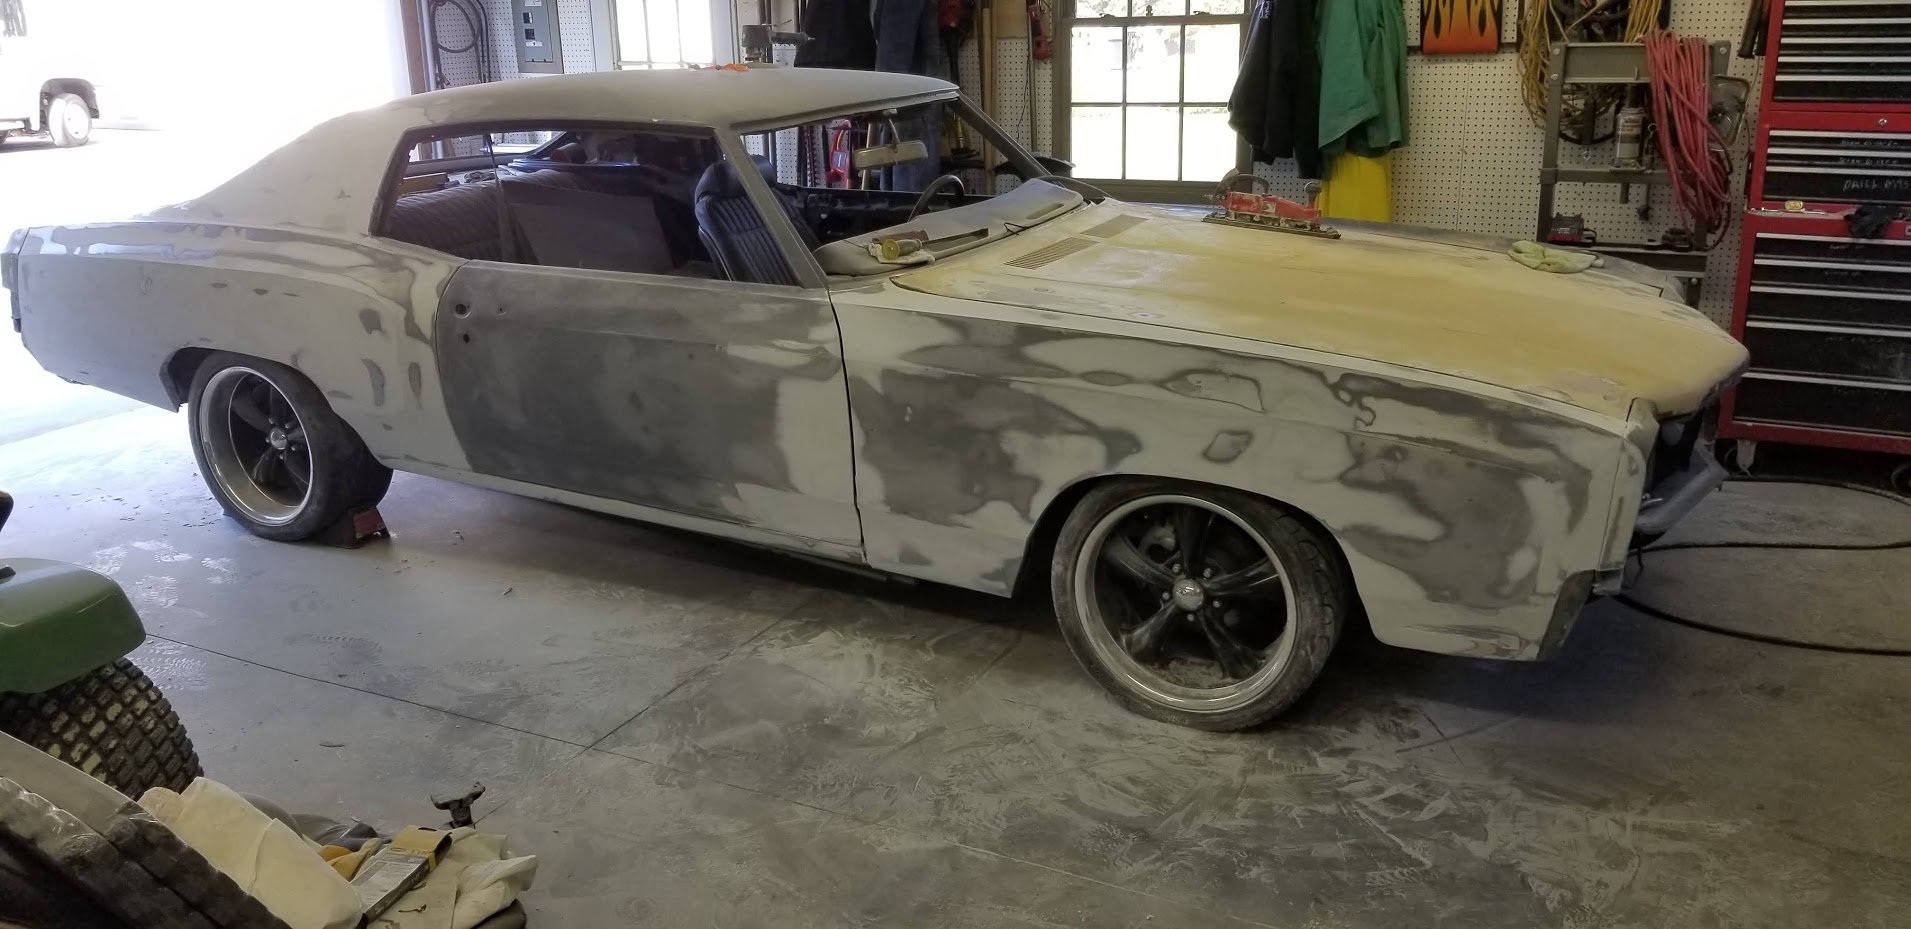
That is the most recent picture of it as a whole, but I have alot of pics of the process in my album. Here is a link to my album . It has been a slow process, hoping to get it in paint this spring/summer.
-
Keep up the nice work. That is going to be a nice setup!
-
Or this? Originally Posted By: bigtankjones And allot of friends Both very good ideas... Maybe the lots of Beer will bring lots of friends... I did mine by myself and would not recommend doing it, Scared myself a couple times..
-
I would probably go with a 400 or 600 wet before spraying. Remember Lacquer paint is very thin and does not have much build so it will take several coats IIRC. Maybe some of the others with more painting experience can chime in on this. Sorry I didn't back to you sooner on this.
-
Do check on the primer type. Plus 2000 grit is more used for color sanding and buffing after paint. Normally 400 grit for soild colors and 600 for metallics at that is not normal for urethane paints.
-
I am pretty sure this is the same as the Chevelle's. Check Year One, NPD, or any of the other reproduction places they'll have them. Should try Leo too. He may be able to beat their prices.
-
When I dropped the tank in an old parts car I had it had a couple vent returns on the sides and one supply and one return on the sending unit IIRC. Steve
-
It is specific for body work and painting not any degreaser. Here is a link to some that Summit Racing sales: wax and grease remover Tack Cloths from same company. You can probably pick these up at your local auto paint store, auto parts store or wal-mart as well.
-
If I am not mistaken that is wax and grease remover. I have gotten mie from wal-mart or any poaint and auto supply store will carry it. It is used to get the wax and grease off before you paint. If you have any type of wax or grease on the primer etc you will get fish-eyes.
-
I'm not going to post on your parts list although it does look pretty through. But I will say congrates on the orders to Hawaii. It was the best 3 years I spent in the service. Shore duty in Hawaii was great. Wife wishes we would move back. I know you said 3 years in storage. Hope you have someone to watch it for you and will take care of it for you. Unfortunatly I thought I would only be without my Monte for 3 years but it took 13 before I was able to get to a place where I could work on it again. Needless to say it has been a labor of love to try to get it back into shape. Enjoy Hawaii! Steve
-
I think it is simply pressed in. Probably grab it with pliers and twist back and forth and pull up... Which reminds me I need to replace mine since I snapped it off somehow. that is going to be fun trying to get the reaining pice out.
-
The brand of Bondo is your choice. I have found the cheap Bondo Brand bondo to be a pain to sand. I hear lots of good things about Rage or some of the other higher end fillers. I have been using one of the in between brands to off set the cost. I can't remember the brand right now... Please, DO NOT use Bondo to fill in rust holes! You will hate yourself. The rust will continue and start bubling in a few months to a year or two most likely and then when you fix it again you will have a biger hole to fix. Go ahead and weld in fresh metal. It is the only way to get rid of the rust. Then use an epoxy primer and your filler (Bondo). Some say use the filler first then epoxy, some say epoxy, filler, another coat of epoxy then a high build 2K primer, the choice is yours. The epoxy primer is suppose to be the best out right now to prevent rust. Try to use the thinest coats of filler you can. You can get the metal straight with out filler but I have no where near mastered the art of metal work to that extent. But I have watched you-tube videos of people that can.. It's pretty amazing. I am no pro just a guy that is trying to bring mine back from the dead and have been trying to do it right this time. My $0.02. Steve
-
How is this set-up for a round town cruiser?
Slaman replied to 1970MonteMotion's topic in Engine Tech
I use to have a very simular set-up in my Monte. I had a Crower solid lifter .496/.502, 236/240@.050 cam in a 350, with a single plane Team G Street Ram, Holley 750, headers, race prep'd 350 tranny and 3500 stall with a 3.73 posi 12 bolt. 1. It was being built mainly for drag racing 2. Was NOT street friendly for a daily driver 3. Converter was way too loose for the street, (wouldn't hardly move if lightly accelerating until about 2400 rpm 4. I think I was under carb'd when I got to aroung 5500+ rpm 5. got about 5-7 mpg 6. Had to add a vacuum can to ensure I had brakes... All that being said the motor made great power to about 6000 then started to kind of lay over like it was straving for fuel. I loved it,overall, but had I of went with a good dual plane monifold (maybe a rpm air gap, etc) and around a 2400-2600 stall I think I would have been much happier with it on the street. -
What did you do to your Monte today?
Slaman replied to Xxyyzz's topic in General 70-72 Monte Carlo Forum
I have spent the last couple days working on the passenger fender. Basically what I started with: The inner brace: Brace repaired: Home made patch installed: Steve