-
Posts
124 -
Joined
-
Last visited
-
Days Won
1
Content Type
Profiles
Articles
Forums
Gallery
Events
Everything posted by NavyCPO
-
Nice Looking Car! Same Color as my '70 Forest Green. Mine has white vinyl top. Welcome to the club! Great group of folks here. Everyone eager to help you out. Let us know if there is anything we can help you with!
-
Wow! That is SWEET INTERIOR and Wicked Interesting Car! Love the 442 front end. Says Classy all over.
-
Yea I tried one side at a time, but just couldn't get enough umph on it. I'll have to try again.
-
Looks great! Nice Job!
-
The higher stall will help with idling and it will allow the engine to get into the power band of the cam before engaging. It will still pull off idle at stop lights and slow starts but it will really grab when the RPM hits stall speed and allow the engine to rev up to the power band easier. They're great with a Line Lock, next best thing to a tranny brake! But that is more for racing or street/strip performance. I'll be getting one for my car too. Depending on which cam and heads I settle for will determine how much stall I will need. I had a 3500 in my Camaro and I liked it. For the Monte, it'll probably get a 2-3000. If I put my 383 in it, probably 3000 for sure.
-
Making some progress on getting the Monte back together. Had the bumper down, bumper filler out and painted, got all that back together yesterday and today finished up the hood latch and rest of the front end stuff for changing out the condenser. Got the receiver dryer back in after having to drill my own holes because the replacement did not have holes drilled for the receiver dryer at the condenser. Got the A/C lines back together, and got the replacement power steering pump but they sent me someone else's return, and they didn't include the nut on the back but I still had the one from my old pump and I'm sure I could have dug around and found a nut. Pulley went on without having to freeze the pump this time YIPPEE!!! So got the power steering back in, and got the New A/C Compressor installed, but I have to take the rear mount bracket back off again because I put it on before connecting the manifold to the back of the compressor. Rookie mistake. Oh well, it's only 3 bolts. Now putting the manifold back on.......................Need help here..........can I put a touch of grease in the grooves to hold the o-rings in place before I install the manifold to the compressor??? Not sure if a dab of grease would be contaminating the system or not. Re-man'd compressor was a PITA, I had to run a tap through the 4 mounting holes because the bolts would not go through and start. I would think that when you re-manufacture an A/C compressor that you could at least re-tap the holes to clean out the old rusty threads and paint out of them but they didn't. I guess it's got new internals, but they sure don't spend much time on the housing, bolt holes were rusty and full of paint where they painted the casing. 5/16 - 24 tap did the trick and went ahead and ran a die over the threads of all my bolts too while I had the kit out. But got it in there, man those things are heavy. Tomorrow I'll try and get the manifold connected, and put on the new belts, then I'll move over to the passenger side of the engine bay and try and figure out how to install the POA Valve Update Kit to remove the non stock 2nd receiver dryer my car had and see if I can hook up the expansion valve without having to replace the lower line from the condenser. Oh yea, got to install the new battery tray too. Hopefully the rest of the A/C Update will go smoothly and I'll have A/C soon, we're gonna start needing it soon. Once all that is done, then I'll start on the front brakes and shocks, then rear brakes and upgraded to Gabriel Hijacker Air Shocks on the rear to add some lift to the rear end and get a little stance on the car. I still have to figure out what is wrong with the speedometer and I hope it's not the speedometer itself but rather a cable or gear keeper or something simple like that. But progress is coming along after several delays and problems. Working through them one at a time.
-
Yes Sir!!!!
-
Well I crawled into the back of the car and tried my best to bust the back seat loose to look for a build sheet but I guess I don't have enough Ummppphhh left to break it loose. I'm gonna try again but if you guys have an old Indian or Navy trick to get it loose, I'm all ears.............................. Used my knee but can't get enough leverage, tried my arms but not strong enough to release it. Sigh...................
-
Well after all that trouble getting the pulley installed on the shiny new chrome power steering pump, the damn thing wouldn't fit on my application. Apparently the part that was supposed to fit 1970 Monte Carlo had the return line right in the center of the back side of the pump and was hitting the cylinder head and would not allow me to get the pump installed. Had to pull off the pulley, take the brackets and pressure line (I installed the pressure line first because I could not get a wrench on it while in the car. I disconnected the lines at the gear box and pulled them out with the pump when I took the old one off, easier that way) and box it up and return it to Rock Auto and ordered another pump that has the return line at the bottom of the pump so it will clear. Gheeez.............I hate working on cars!!!!!! LOL
-
Thanks Wayne, but won't come out the top. The hard line on the right side of the condenser has to come through the hole in the radiator support. And there is not enough room because of the bumper and the bumper filler panel. Bumper has to come down and filler panel removed to be able to free condenser from radiator support. I tried the top route first NO GO, went to the service manual and they said it has to come out the bottom and pull all that stuff out of the way first. But the new one went in nice and easy though!!!!! LOL Got it installed today. Treated some rust around the battery tray area as I am replacing the battery tray too. Painting the filler panel before reinstalling, and hood latch assy and center bracket, condenser brackets and horns all got new paint too. Waiting for paint to dry before reassembling bumper and grill, plus I'm not seeing any mounting holes for the clamps on the receiver dryer on the new condenser. Will be studying that issue tomorrow as well.
-
So I started to replace the condenser, and thought I could take it out the top, but NO........You have to drop the bumper and remove the bumper filler panel, and the parking lamps. The manual says you can disconnect parking lamp wiring, but the connector is on the other side of the panel with a 53 year old hard rubber grommet, so I just removed the parking lamps. Had one screw froze in their pretty bad but PB Blaster and a few hard raps with a screw driver did the trick. When I took out the hood latch assembly, I made the fatal error of removing the spring that holds the pull handle in place because I thought I have to take it off. Later I realized, I probably could have just wiggled it through the bumper and twisted the hood latch to get the pull handle out of the bumper. I don't know how I'm gonna get that spring back on because it's extremely stout!!!! Sigh! Learning experiences of disassembly. Then, I went to take the bumper filler panel out and broke of two of the anchor nuts because they were rusted in there so bad. I didn't soak them enough in PB Blaster. I broke off the part of the anchor nut, tried to get wrench, vice grip, channel locks and could not get the 2 bolts out but could not so I ended up using a cutting wheel on my die grinder and grinding the bolt heads off to remove the bolts. The anchor nuts are between the headlamp panel and I'm not going to pull that apart too, to replace the anchor nuts so those 2 are just going to have to get a nut and a bolt. Finally got the filler panel out and finally got the old condenser out. Whew! New one is supposed to be here on Tuesday, so now I have more parts to clean and paint, and can put my power steering pump back on and maybe the ac compressor. The saga continues.....................
-
Shazaaam! The HOT/COLD trick WORKED!!!! After putting the PS Pump in the freezer for about 3 hrs and heating the pulley with MAP gas for about 45 seconds the pulley fairly easily slid over the woodruff key and onto the steering pump shaft enough that I could get about 3 threads started on the nut. Using a strap wrench (cuz there is not enough clearance on the back side of the pulley and the pump to use my Handy Dandy new Pulley Holder tool! *#_*&#*&$&)*$)*&$@*&)(*_!@!! ) The strap wrench worked to hold the pulley and the nut tightened to bottom out fairly easily. Moral of this story? Don't forget the FREEZER trick for items with a tight fit. HOT/COLD works often!
-
Yea, I think this Lares pump must be made in China or something. The shaft size and the woodruff key may be slightly oversized for my pulley. I'm thinking the ones with the woodruff key are supposed to slide on to the shaft effortlessly at least enough until you can get the nut started and press it on the rest of the way with the nut while holding the pulley with my Handy Dandy Pulley Holder Tool! Yes, New Tool Day! LOL I also bought a PS Pulley Puller/installer kit for future use. I'm about to pull it out of the freezer, I hope it doesn't warm up too much from the walk to the shop from the freezer. Fingers Crossed.....................
-

Ambient Air Temperature Sensor on HVAC Box
NavyCPO replied to NavyCPO's topic in General 70-72 Monte Carlo Forum
Last time I talked to him he was on the couch! LOL -

Ambient Air Temperature Sensor on HVAC Box
NavyCPO posted a topic in General 70-72 Monte Carlo Forum
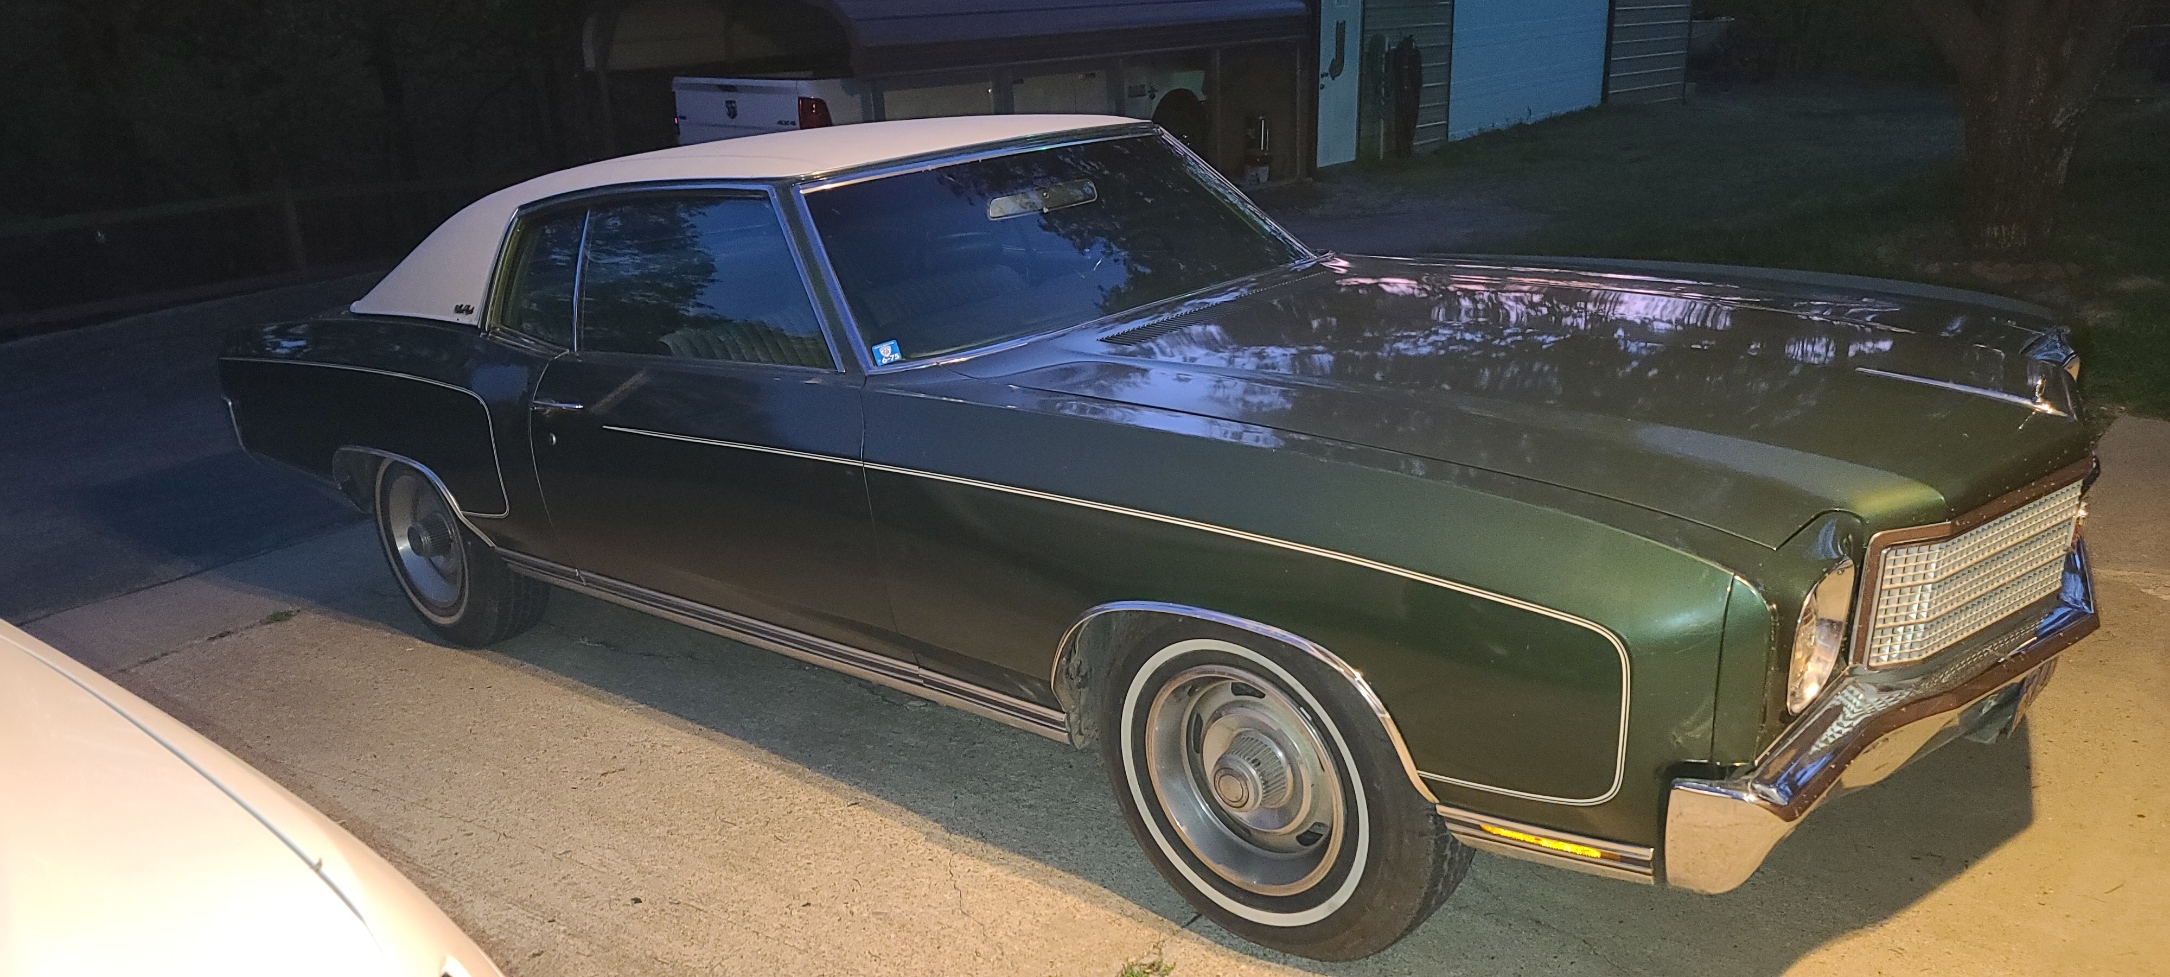
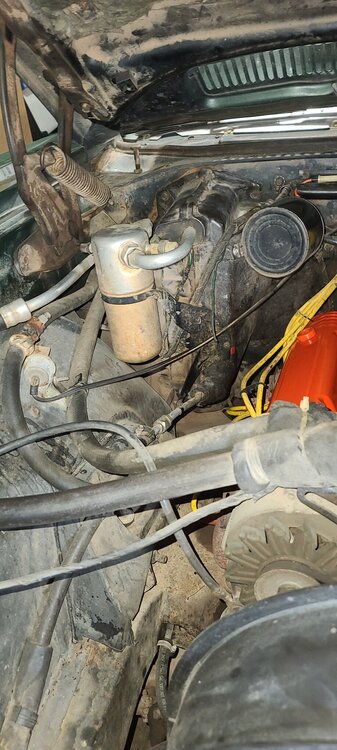
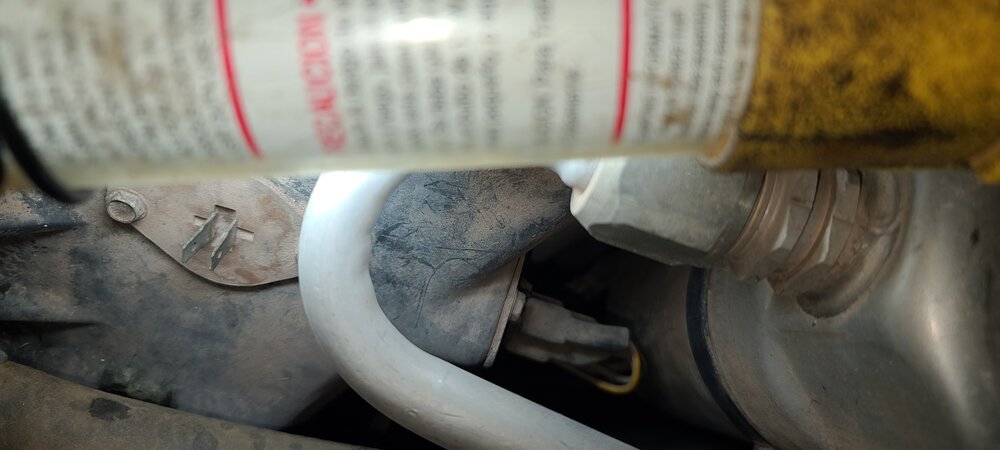
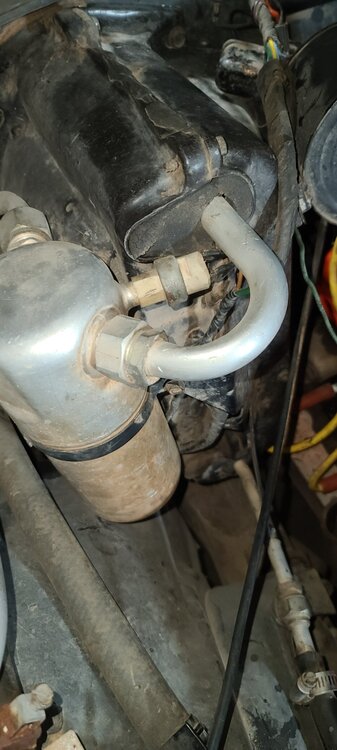
So while Joe has been helping me with figuring out what in the heck is going on with my HVAC System, I keep finding these other issues. Some Background, I bought my 70 Monte which was supposed to be an all original car. And for the most part it is, except when it came to the A/C system. The A/C didn't work and after some troubleshooting I decided to go ahead and buy a Compressor Kit for my car. The kit came with the Compressor, the Reciever/Dryer and the Expansion Valve. As I went to try and find the Expansion Valve (I had no idea where it was and started to tear into the HVAC box, when luckily Joe stopped me cold and showed me how the system was supposed to be and the Expansion Valve is located outside of the HVAC BOX. Whew!!!) Well come to find out there was no where to tie in the expansion valve because somewhere along the line someone replaced the evaporator and did not put in the correct Evaporator and also added a 2nd Receiver/Dryer and elminated the POA Valve and there was nowhere to install the expansion valve. (See Image 1) I'm going back to the original setup EXCEPT for the POA Valve by ordering the POA Valve Update kit (See Image 4) from https://www.oldairproducts.com/. I'm also opting to go ahead and replace the condensor since I'm going from R12 to R134A just to play it safe. The Evaporator can be flushed and I'll have them do a Vacuum leakdown test prior to ever servicing the system up and running the new compressor. The POA Update kit will delete the POA valve which have a history of sticky plunger (what I've read) and provide a place to tie in the Expansion Valve to help regulate the refrigerant, as well as adds a Pressure Switch for cycling the compressor as in newer vehicles. So after all this, and Thanks SO MUCH to JoeT for his bending over backwards to help me figure this stuff out, I have been digging around the engine bay and I found this 2 pin sensor on the HVAC box with no connector on it. (See Image 2) So I'm scratching my head thinking now what? Where is the connector for this thing? Do I need it? After researching the service manual and again with Joes Help, I found that that is actually the Ambient Air Temperature Sensor which is what was used to cycle the Compressor on and off with the original system and POA Valve in place, instead of the pressure switch used on new systems. When the Air Temperature in the Evaporator gets below 37' F it opens and shuts down the compressor, when it is above 37' F it turns the compressor on for proper cooling. It prevents the Evaporator from freezing and helps maintaing system efficiency. So after reading this, I said Ok so where is the connector for that????? Sounds like I need it. Then it dawned on me that the improper upgrade made to my system had a pressure switch on the added on receiver/dryer and THAT is where my 2 wires are for that Ambient Air Temp Sensor. (See Image 3) Eureka!!!! And then I realized that since I'll be adding the POA Valve Update Kit, it comes with a pressure switch and those 2 wires will be attaching to that. (the kit comes with the proper connector for the switch instead of 2 spade terminals which is what I have now.) So that lonely old Ambient Air Temperature Sensor will continue to sit there unused and all alone. Sigh....BUT!!!! If you still have your POA in place, YOU NEED IT! And lastly, the 3 Pin connector on the right side of the HVAC Box (See Image 2) is the Blower Motor Resistor. Hope this information may be useful to someone who may come across a similar jury rigged system as mine. -
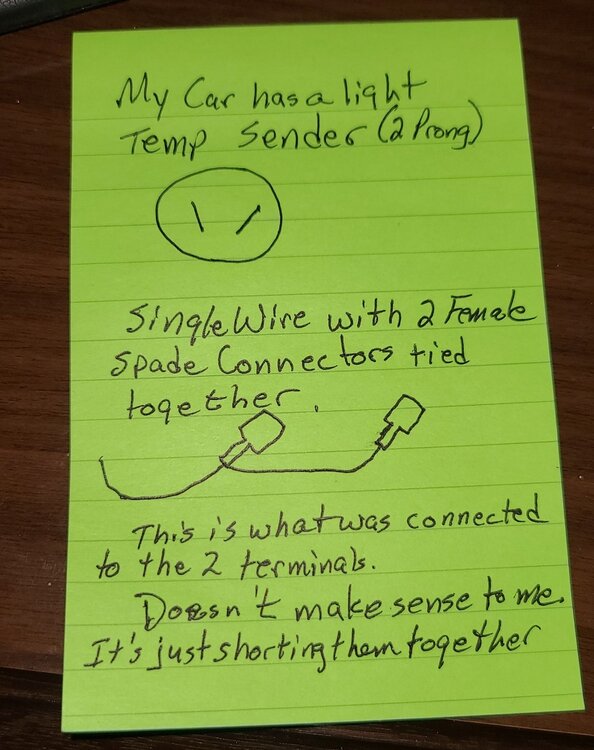
Thank you all for your responses. I repaired the wire with 2 terminals and heat shrink. Thank you Joe for solving this riddle. Most switches are NO or NC and I've not seen any that are Normally in the Middle! LOL The 2 wires into 1 makes sense now. I looked around the intake manifold and I don't see any solenoid which is where it says that wire goes, so I don't know if I have TCS or not, but I put those wires back where I found them!!!!!! Thank you Dennis for the link to the part but I don't have anything to plug that single end into. I'm happy with my repair for now. I thought it was a Water Temp Sensor till I found the Water Temp on the Driver Side head and it has the correct plug on it. Single pole. Have not looked for the oil pressure sensor yet. I know it's around the oil filter on the side of the block or along the rear edge of the block. You guys are GREAT! Thanks EVERYONE!!!!
-
The early power steering pumps DO NOT have hollow threaded shafts on them and use a woodruff key. They are still a tight fit and need a puller to remove. I used a bearing puller to clamp the collar of the pulley and a balancer puller with bolts to fit the bearing puller and got the old pulley off easy peasey! My Chrome Power steering pump arrived and the old brackets fit perfectly. Now time to install the pulley. I clamped the pump into my large shop vice, took off the nut on the shaft and tried to slide my pulley on to the shaft, ummmm no go. I cleaned the pulley shaft hole with a wire brush to get all of the paint out since I repainted it while it was off and it's clean. I tried to put the woodruff key into the pulley but it didn't want to fit in the groove. I sanded it on both sides and along the back to try and get maybe .001 off of it but didn't want to make it loose in the groove on the shaft either. I figured it was just a tight fit. So I put the woodruff key back into the pulley and with a flashlight and my spectacles on I made sure the pulley slot was lining up with the key and took a plastic mallot and gave it a couple of sharp moderate blows and got the pulley to fit over the shaft partially but it drove out the woodruff key. (Jesus I said, but I got lucky and found it right off, WHEW!) Since the shaft doesn't have internal threads you can't use the "Pulley Installation Tool" to easily install the pulley. (of course not) I'm going to try to put the pump in the freezer in the morning and bring my torch over to heat the pulley core and see if that makes a difference and I can tap it on far enough to let the retaining nut push it the rest of the way in, but I'm also worried about stripping out the flimsy retaining nut. They're not very thick and don't know if it could handle the stresses of pressing the pulley the rest of the way on. I do have a small 6 ton bench press, but I saw the video where the guy pressed the pulley on improperly and shoved the shaft right through the pump case. If any of you experienced mechanics out there have an old Indian Trick or Secret Method your willing to share, I'm all ears. I can't imagine why Lares would manufacture a Brand New Power Steering Pump without drilling and tapping the pump shaft so that you can use modern day tooling to do the job. Go Figure............ Well I guess you can use the nut to press on the pulley according to the Service Manual. They don't give any detail on how to install the pulley. (see attached) I can't get the pulley to go on far enough to get any threads to protrude the the pulley hole. Maybe I'll get some emery cloth after the pulley hole and try to open it up a bit more, maybe the cold approach will work. Ideas? Solutions? Film at 11:00............... You young fellas won't get that! HA!
-
So I have a light with no gauge on my car for water temp. The sending unit in the block is a 2 prong unit. The wiring that was attached to it was a single wire with 2 female spade connectors on it. While trying to put the terminals back on it the two connectors fell off of the wire. (worn) I got to thinking about it and can't figure for the life of me why you would have 2 connectors wired in series basically shorting out the two terminals on the temp sender. There is a 2 receptacle connector up on the firewall that is not connected to anything, that I think might be for the Transmission Controlled Spark option which I don't think I have on my car and it is not long enough to reach the temp sender (although that connector does look like it would fit the offset blades on the sender). I keep finding this stuff while Joe T is helping me with my HVAC issues (a whole 'nother story). Anyone have any pictures of your temp sender and wiring or insight into this? Would be helpful. Thanks in advance! P.S. I have searched the chassis service manual, the assembly manual and can find very little about the Temperature Sensor Unit or the wiring for it.
-
Very Nice!
-
Is that some type of Header Heat Shields I am seeing on this beast? Are those custom manufactured or is something like that available for the rest of us? In SBC format too maybe?
-
I can relate to that. Time definitely flies by faster as we get older. I know this.
-
I'd recommend getting something like this. There are more expensive ones out there, but the reviews on this one were very good and for the price, they're easy to use. Better than a tape in my humble opinion. https://www.harborfreight.com/timing-light-with-advance-40963.html?utm_source=google&utm_medium=cpc&utm_campaign=12144811130&campaignid=12144811130&utm_content=117789256718&adsetid=117789256718&product=40963&store=&gclid=CjwKCAjw0ZiiBhBKEiwA4PT9z82Yv-PM5Rugju0rR3-w6dvNYW8pB9tNEIJYZCtXCLbERzwKXXVkMxoCl-4QAvD_BwE
-
So I never got the clutch to engage properly and went ahead and ordered a new compressor kit (includes receiver/dryer & expansion valve (Yuk have to get into the A/C Box)) When I removed the old compressor after I relieved the pressure from the system by removing the rear manifold from the compressor. (probably should have removed the valve core from the low pressure service port) but I had the compressor ready to pull and suddenly the front of the compressor turned fairly easily and I could hear the pistons in the compressor pumpin and hissing as they should. It seems to me that the front of the clutch is attached to the compressor shaft even though the clutch wasn't engaged to the pulley???? Is there a gap at the end of the compressor shaft that the front of the compressor clutch actually moves the compressor shaft aft when it engages the clutch to the pulley? I always thought that the front part of the clutch should turn over fairly easily with the clutch disengaged but it's like the front part of the compressor clutch was frozen to the compressor shaft, but the clutch would never engage to the pulley. Not sure how the compressor bearing fits into all of it. I'm debating on whether I need to return this old compressor as a core and get my $50 back or keep it as I think the compressor may actually be good. It was a replacement 4 seasons compressor already so this car has had problems with AC previously. Your thoughts?????
-
Thanks for your feedback!

