
John S
-
Posts
536 -
Joined
-
Last visited
-
Days Won
6
Content Type
Profiles
Articles
Forums
Gallery
Events
Everything posted by John S
-
I have .30 on each side. Here is a picture of the parts Muncie.
-
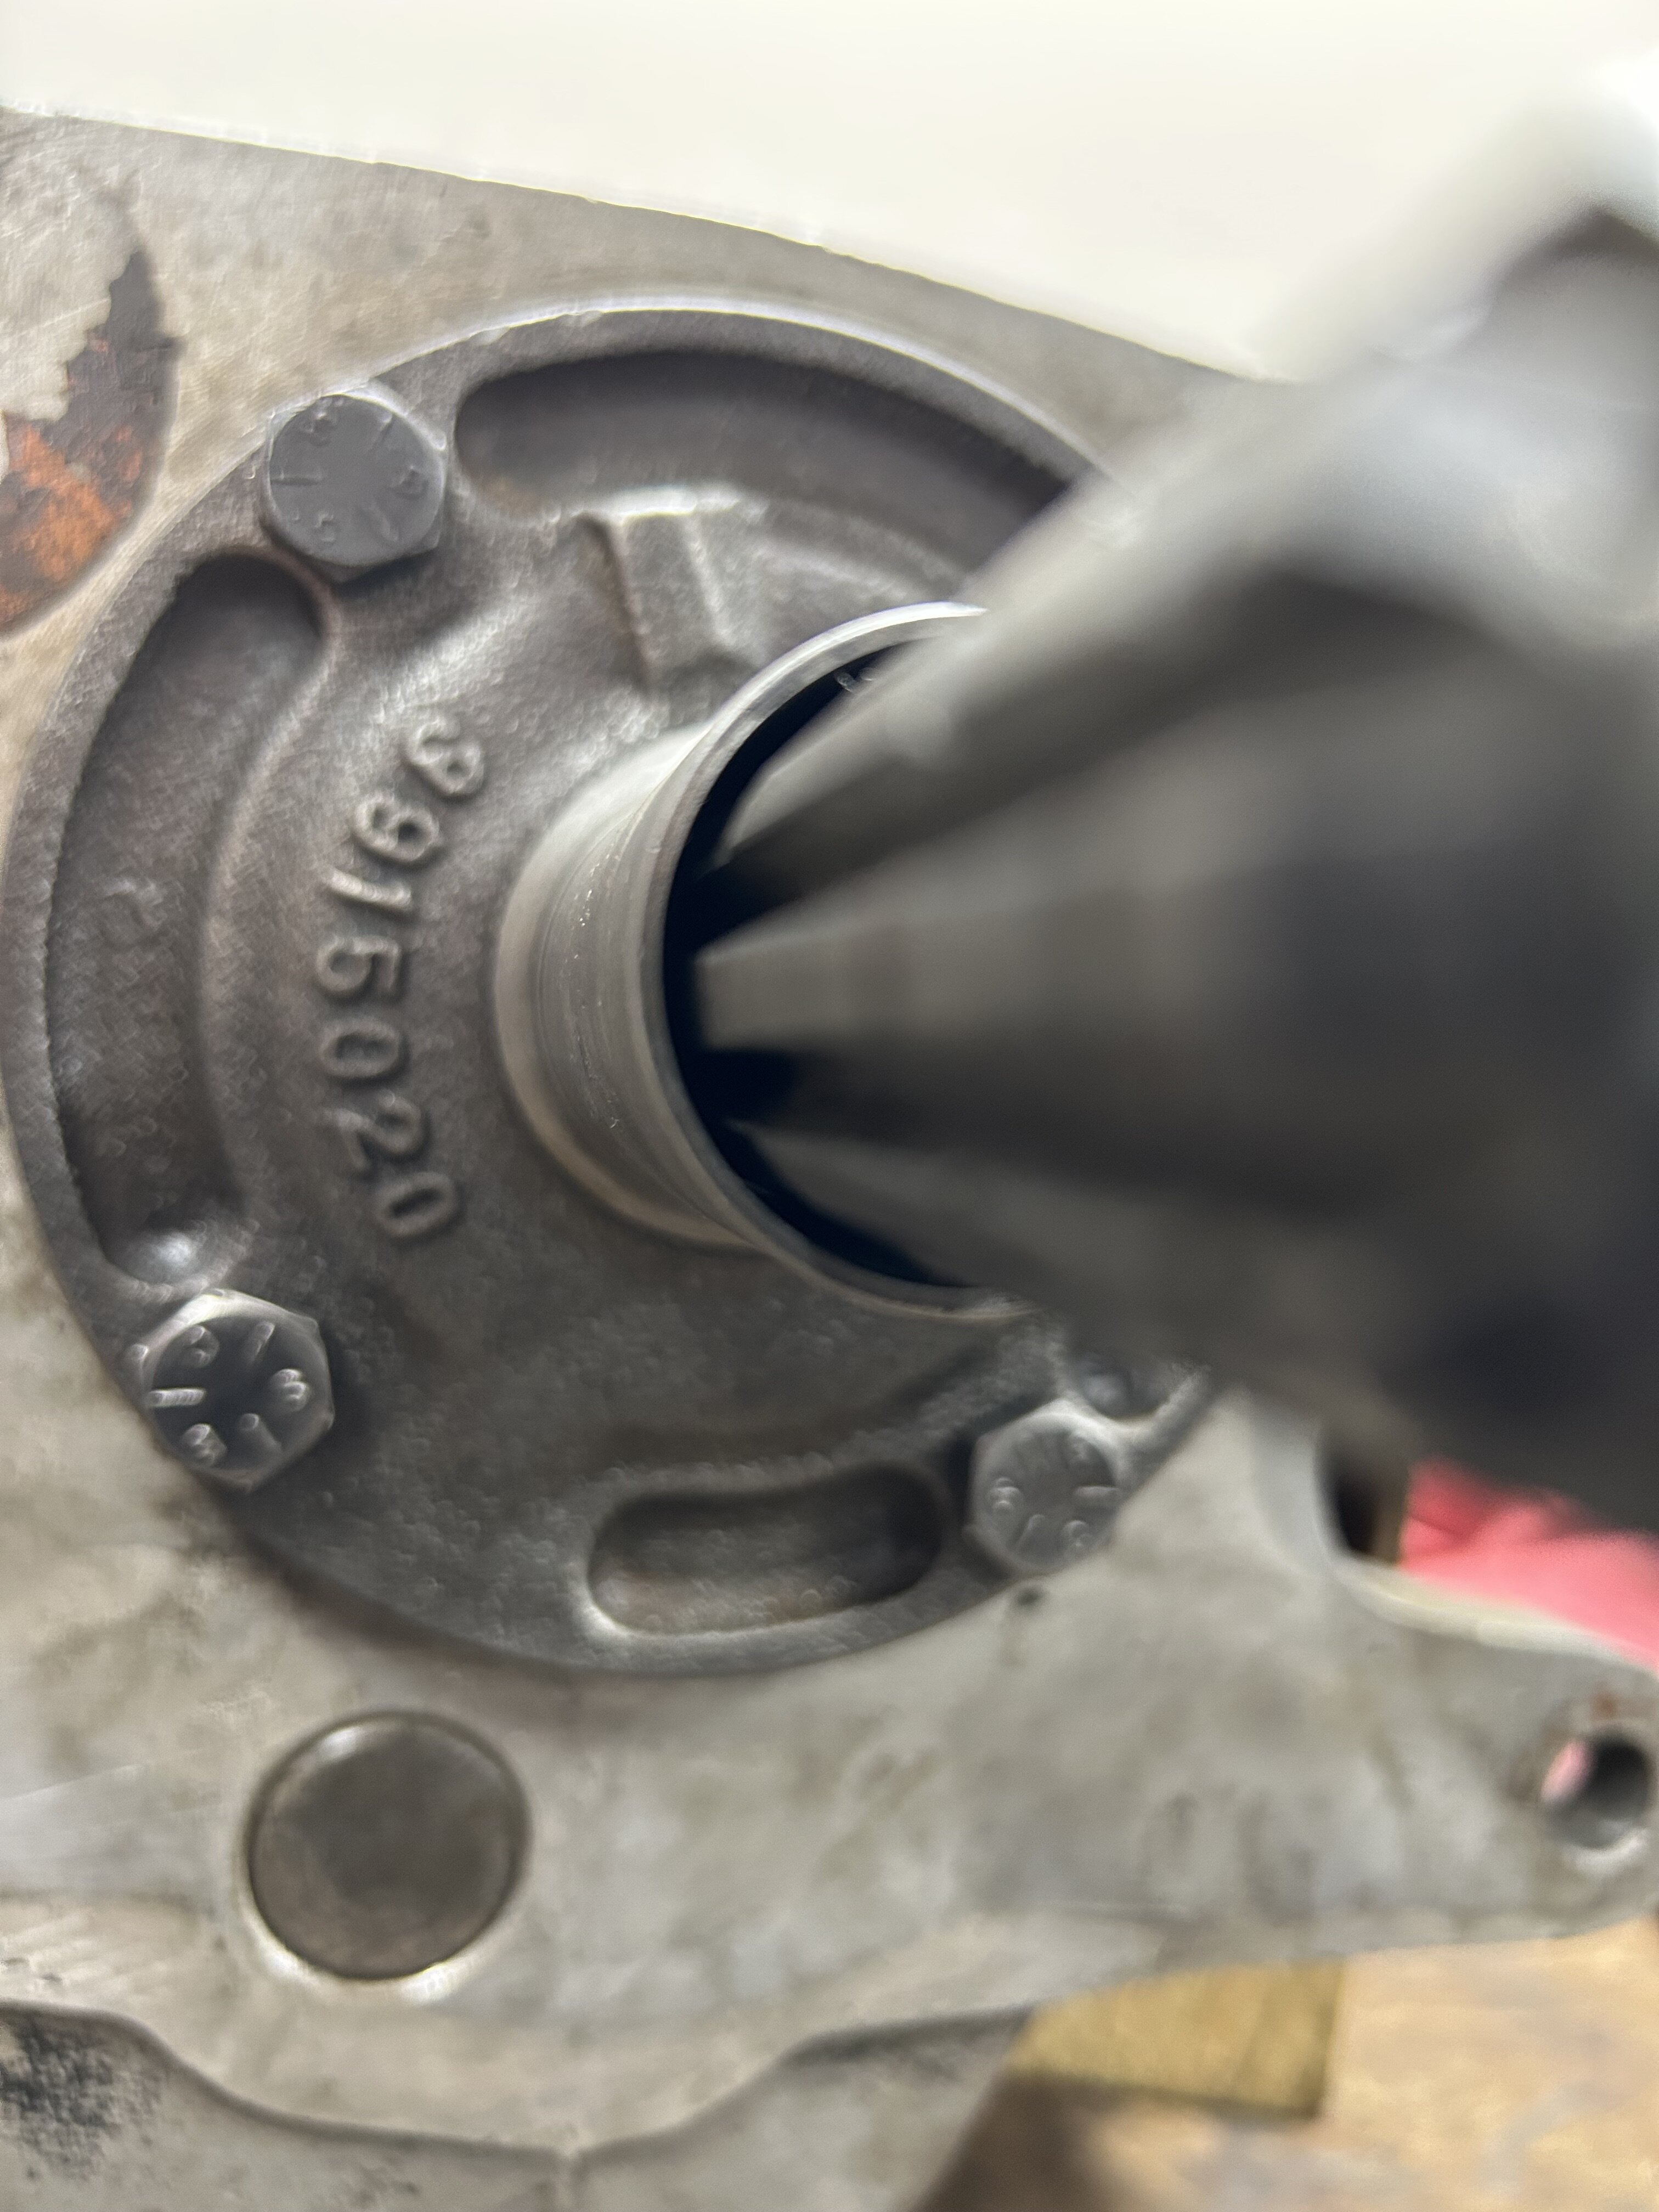
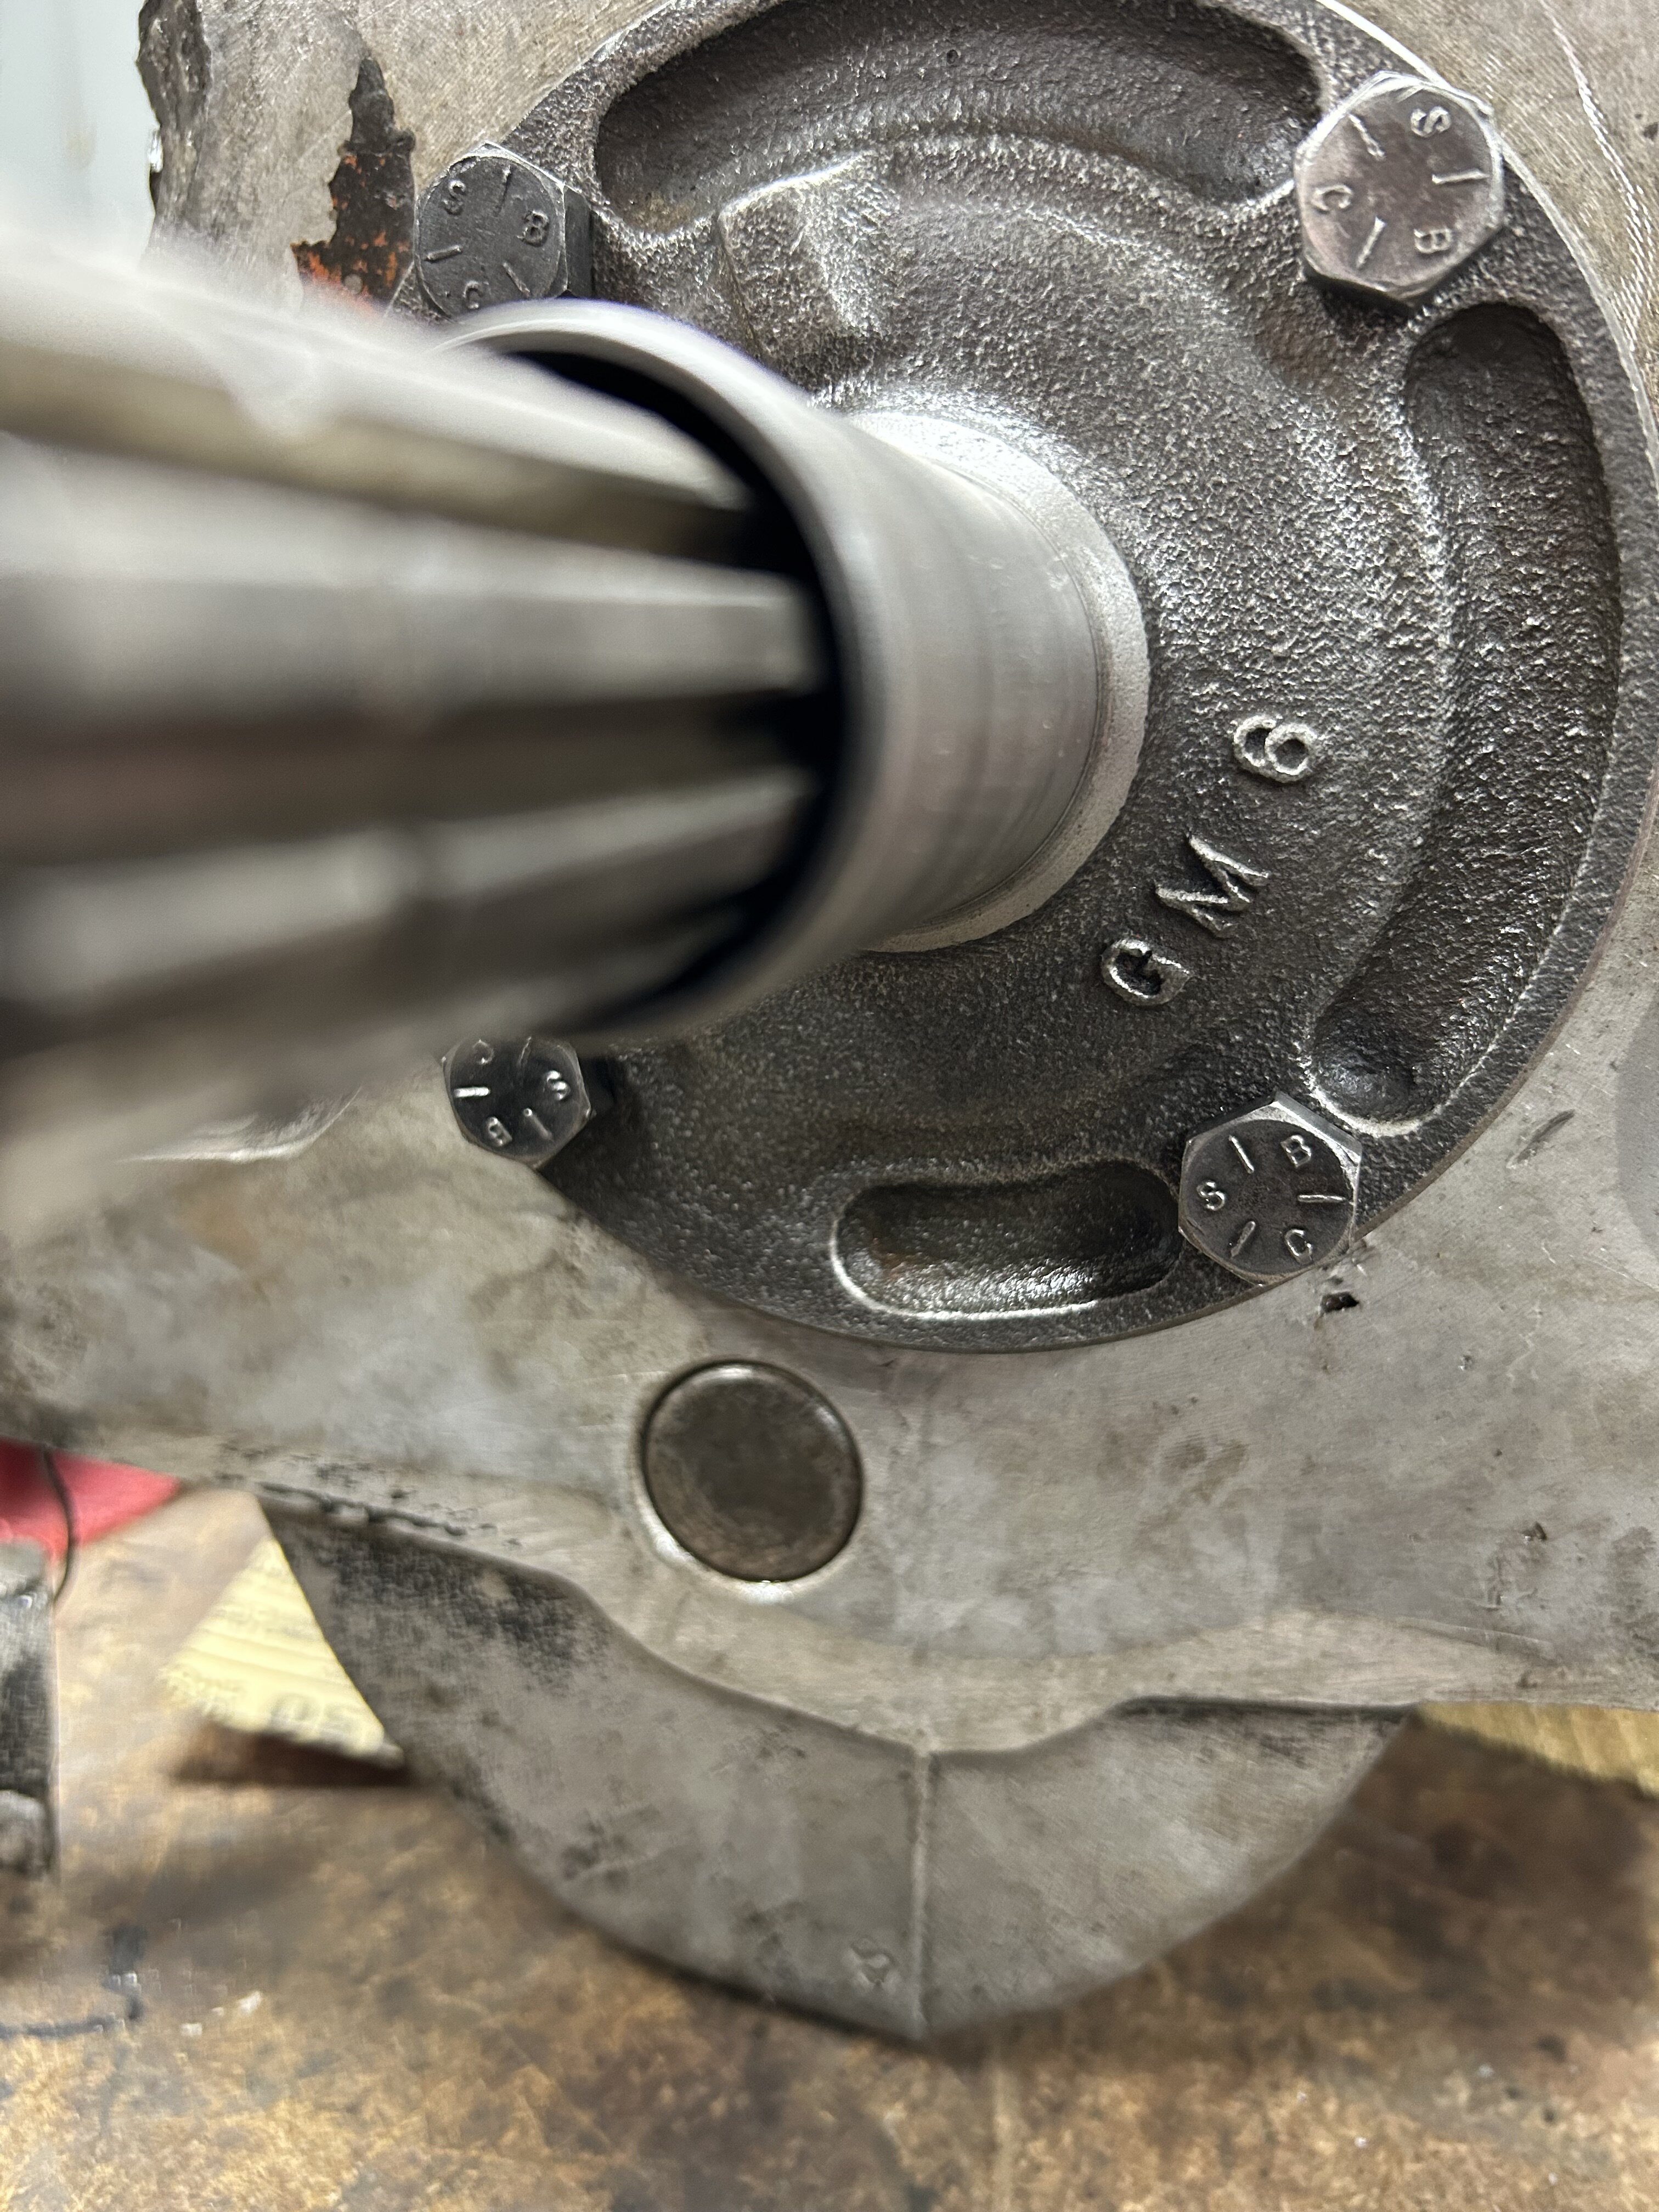
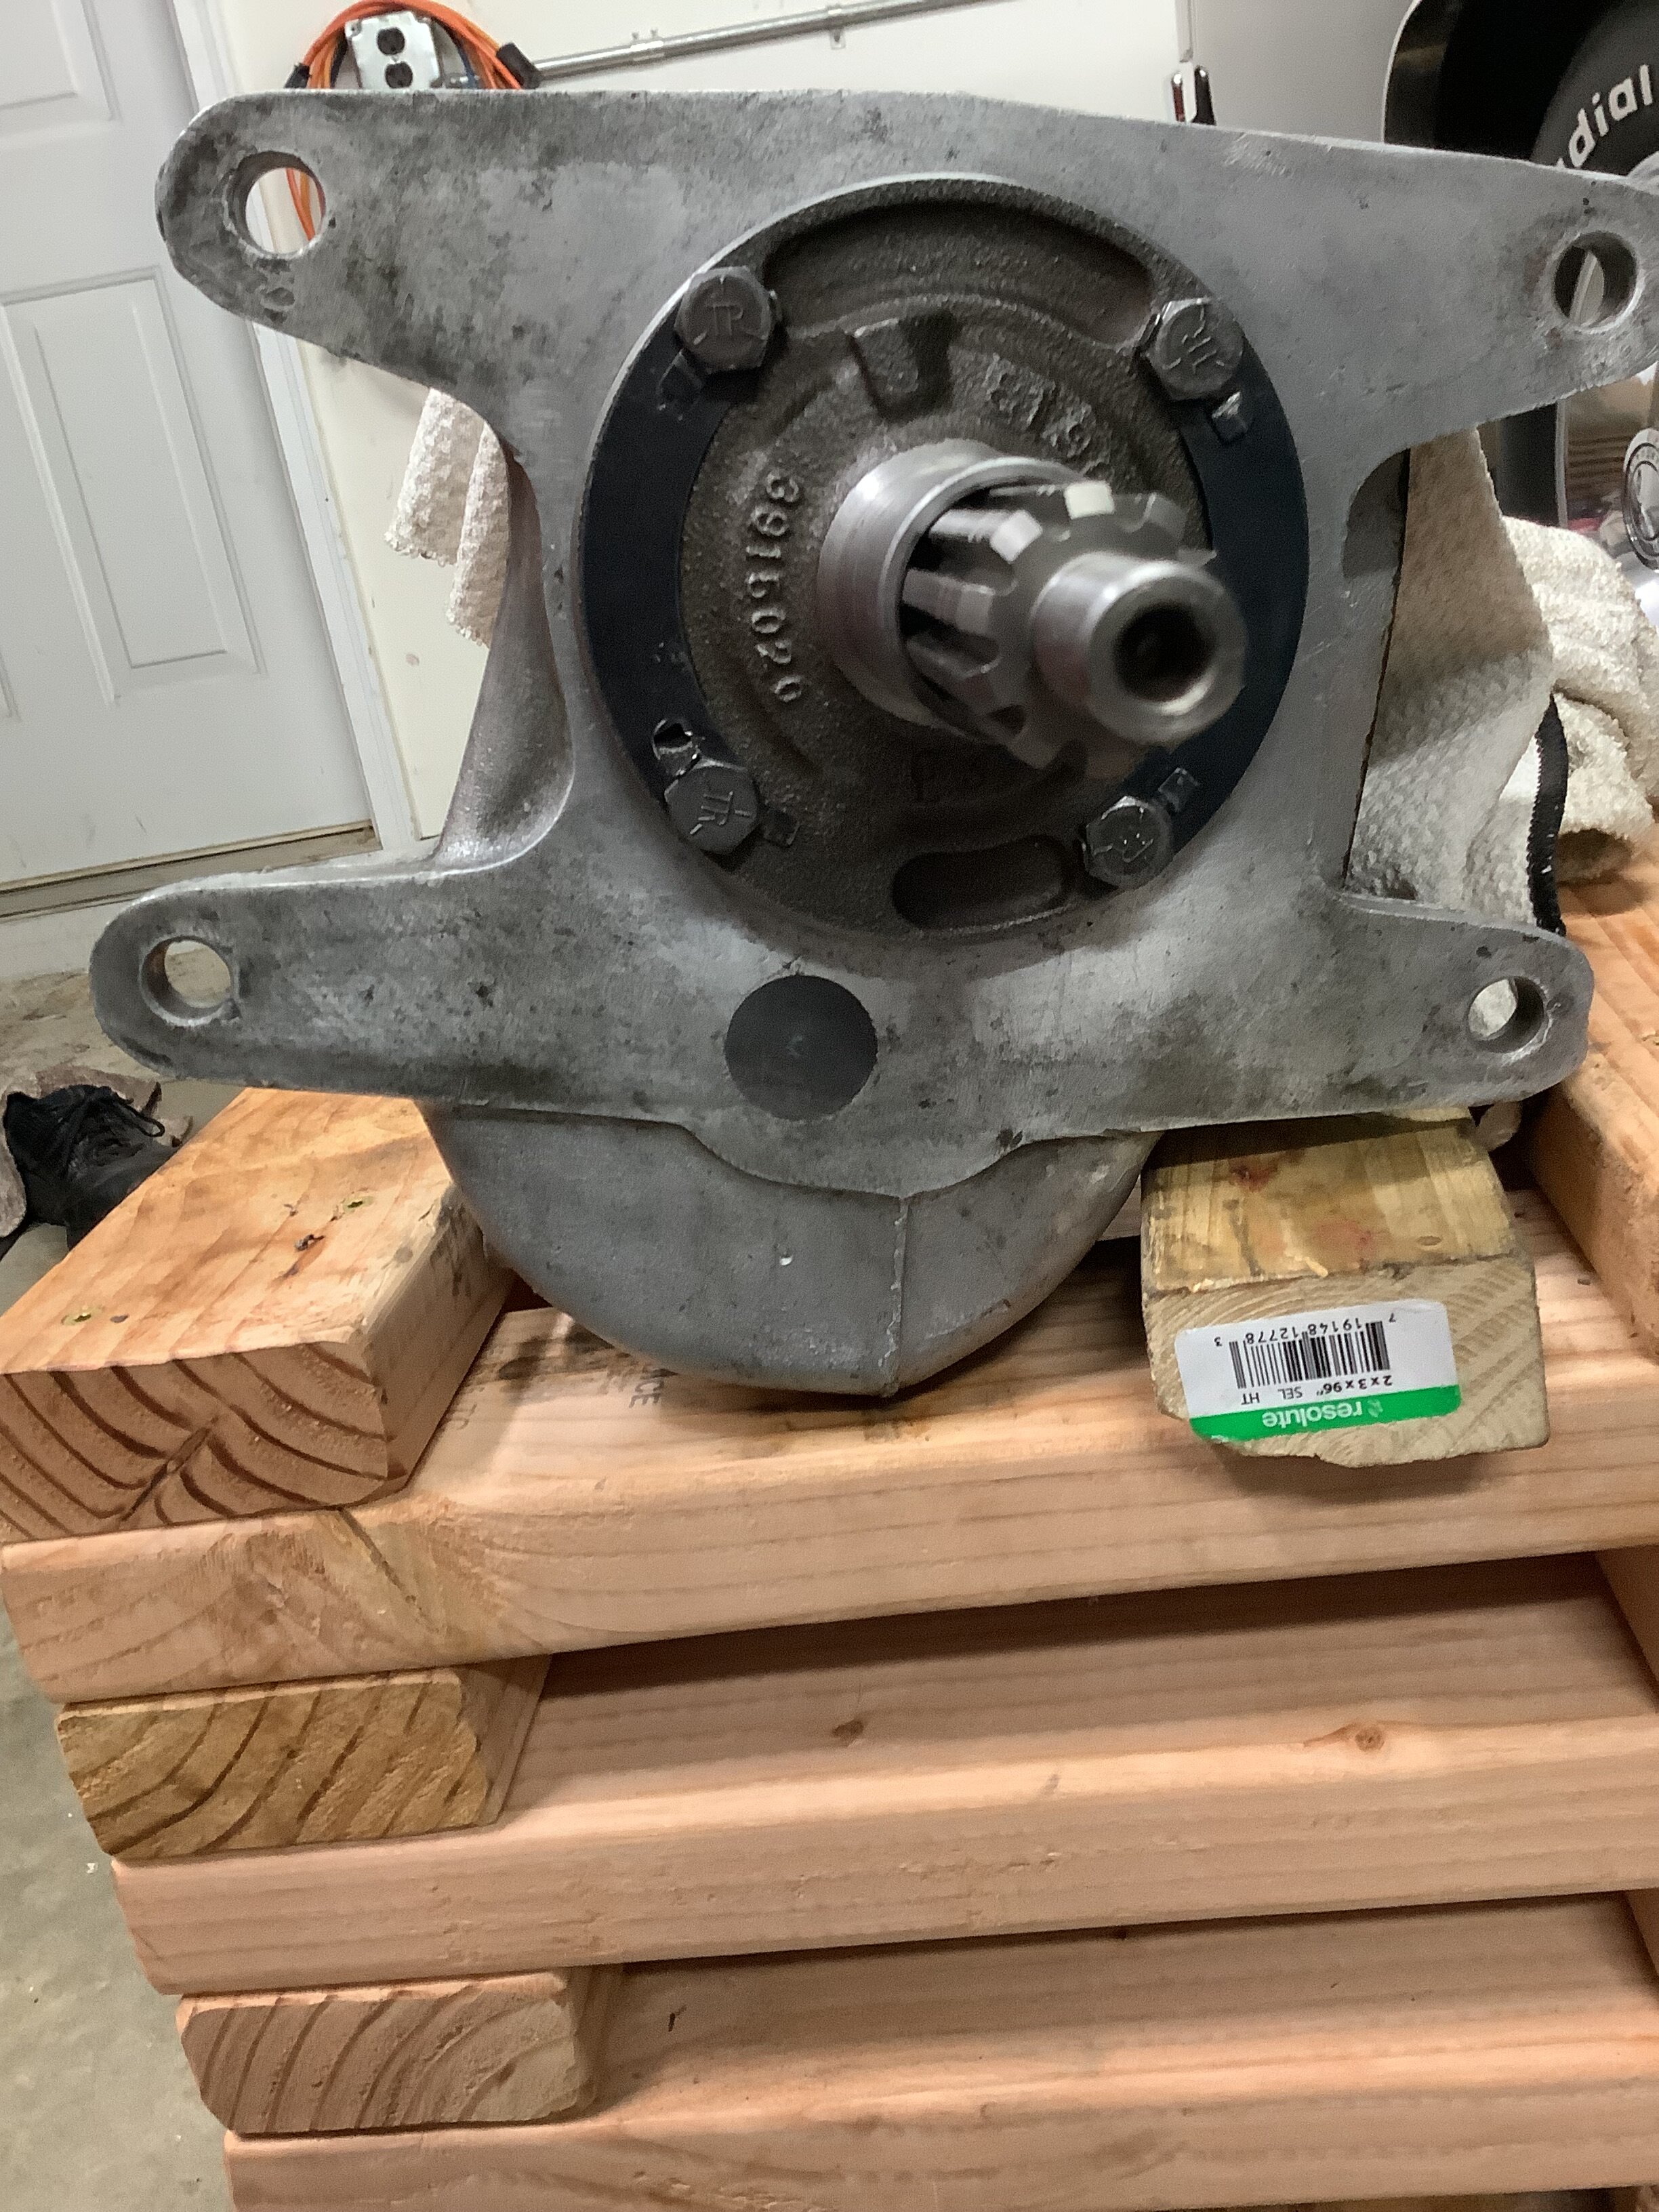
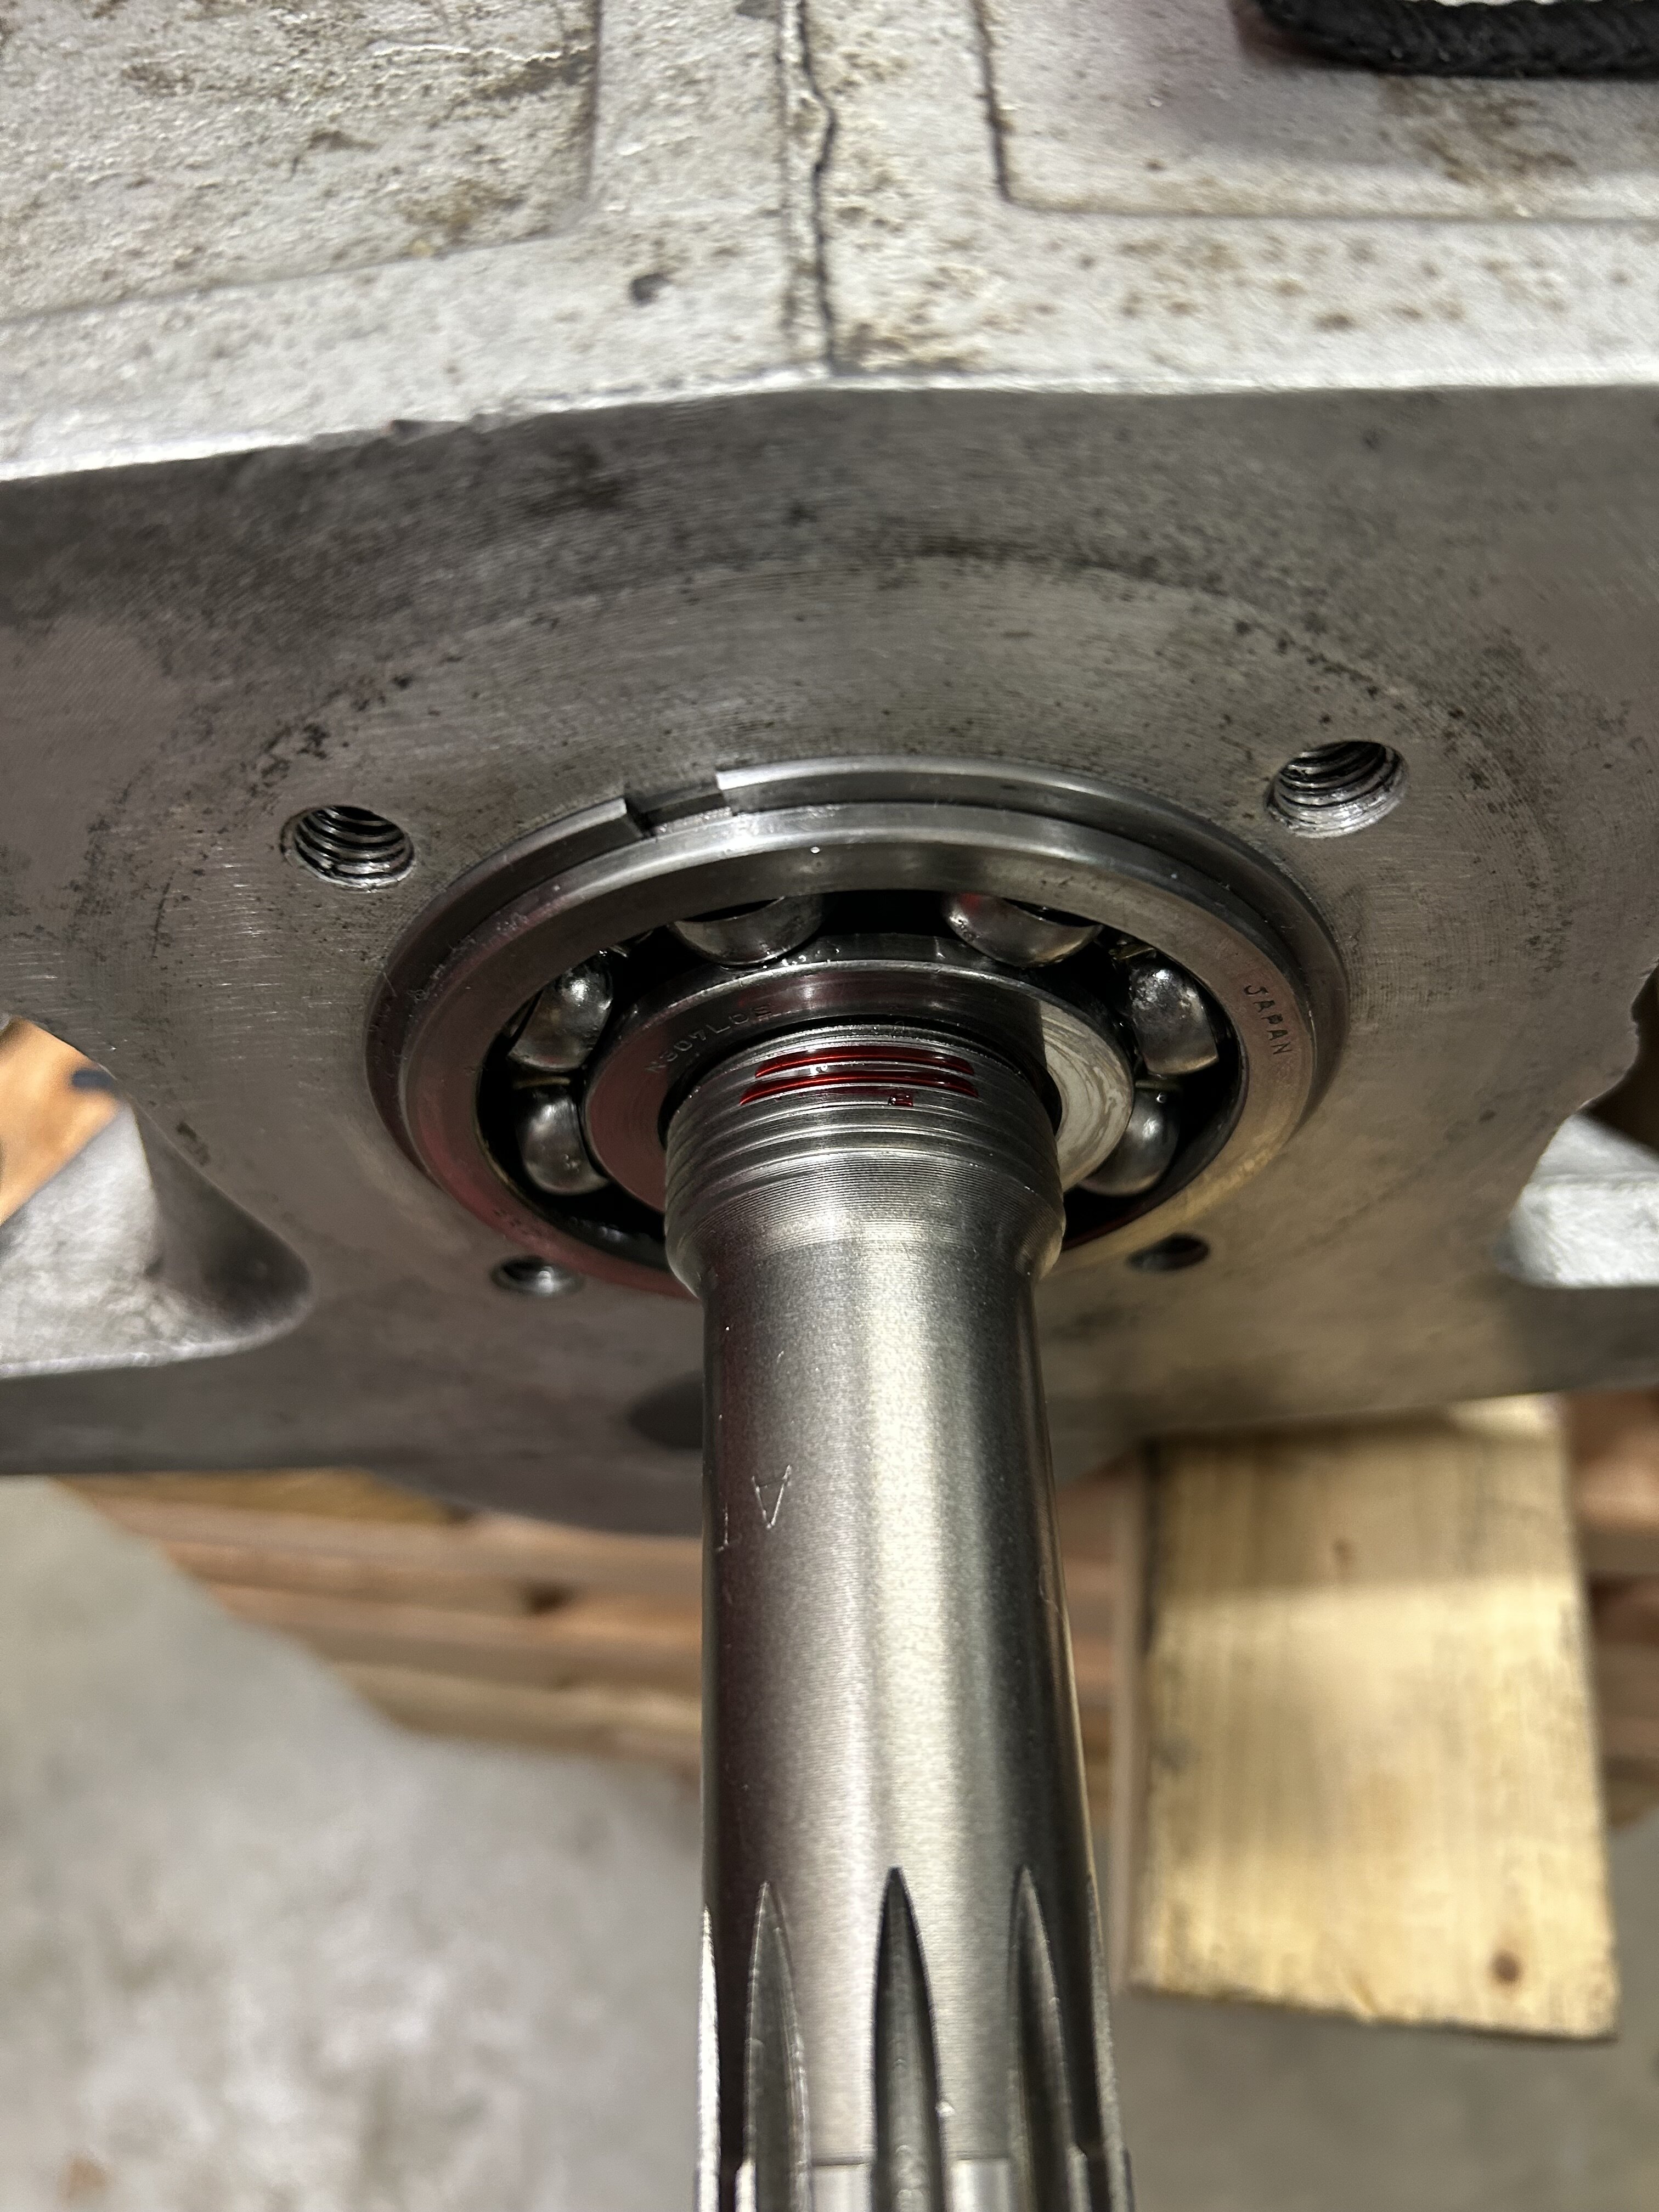
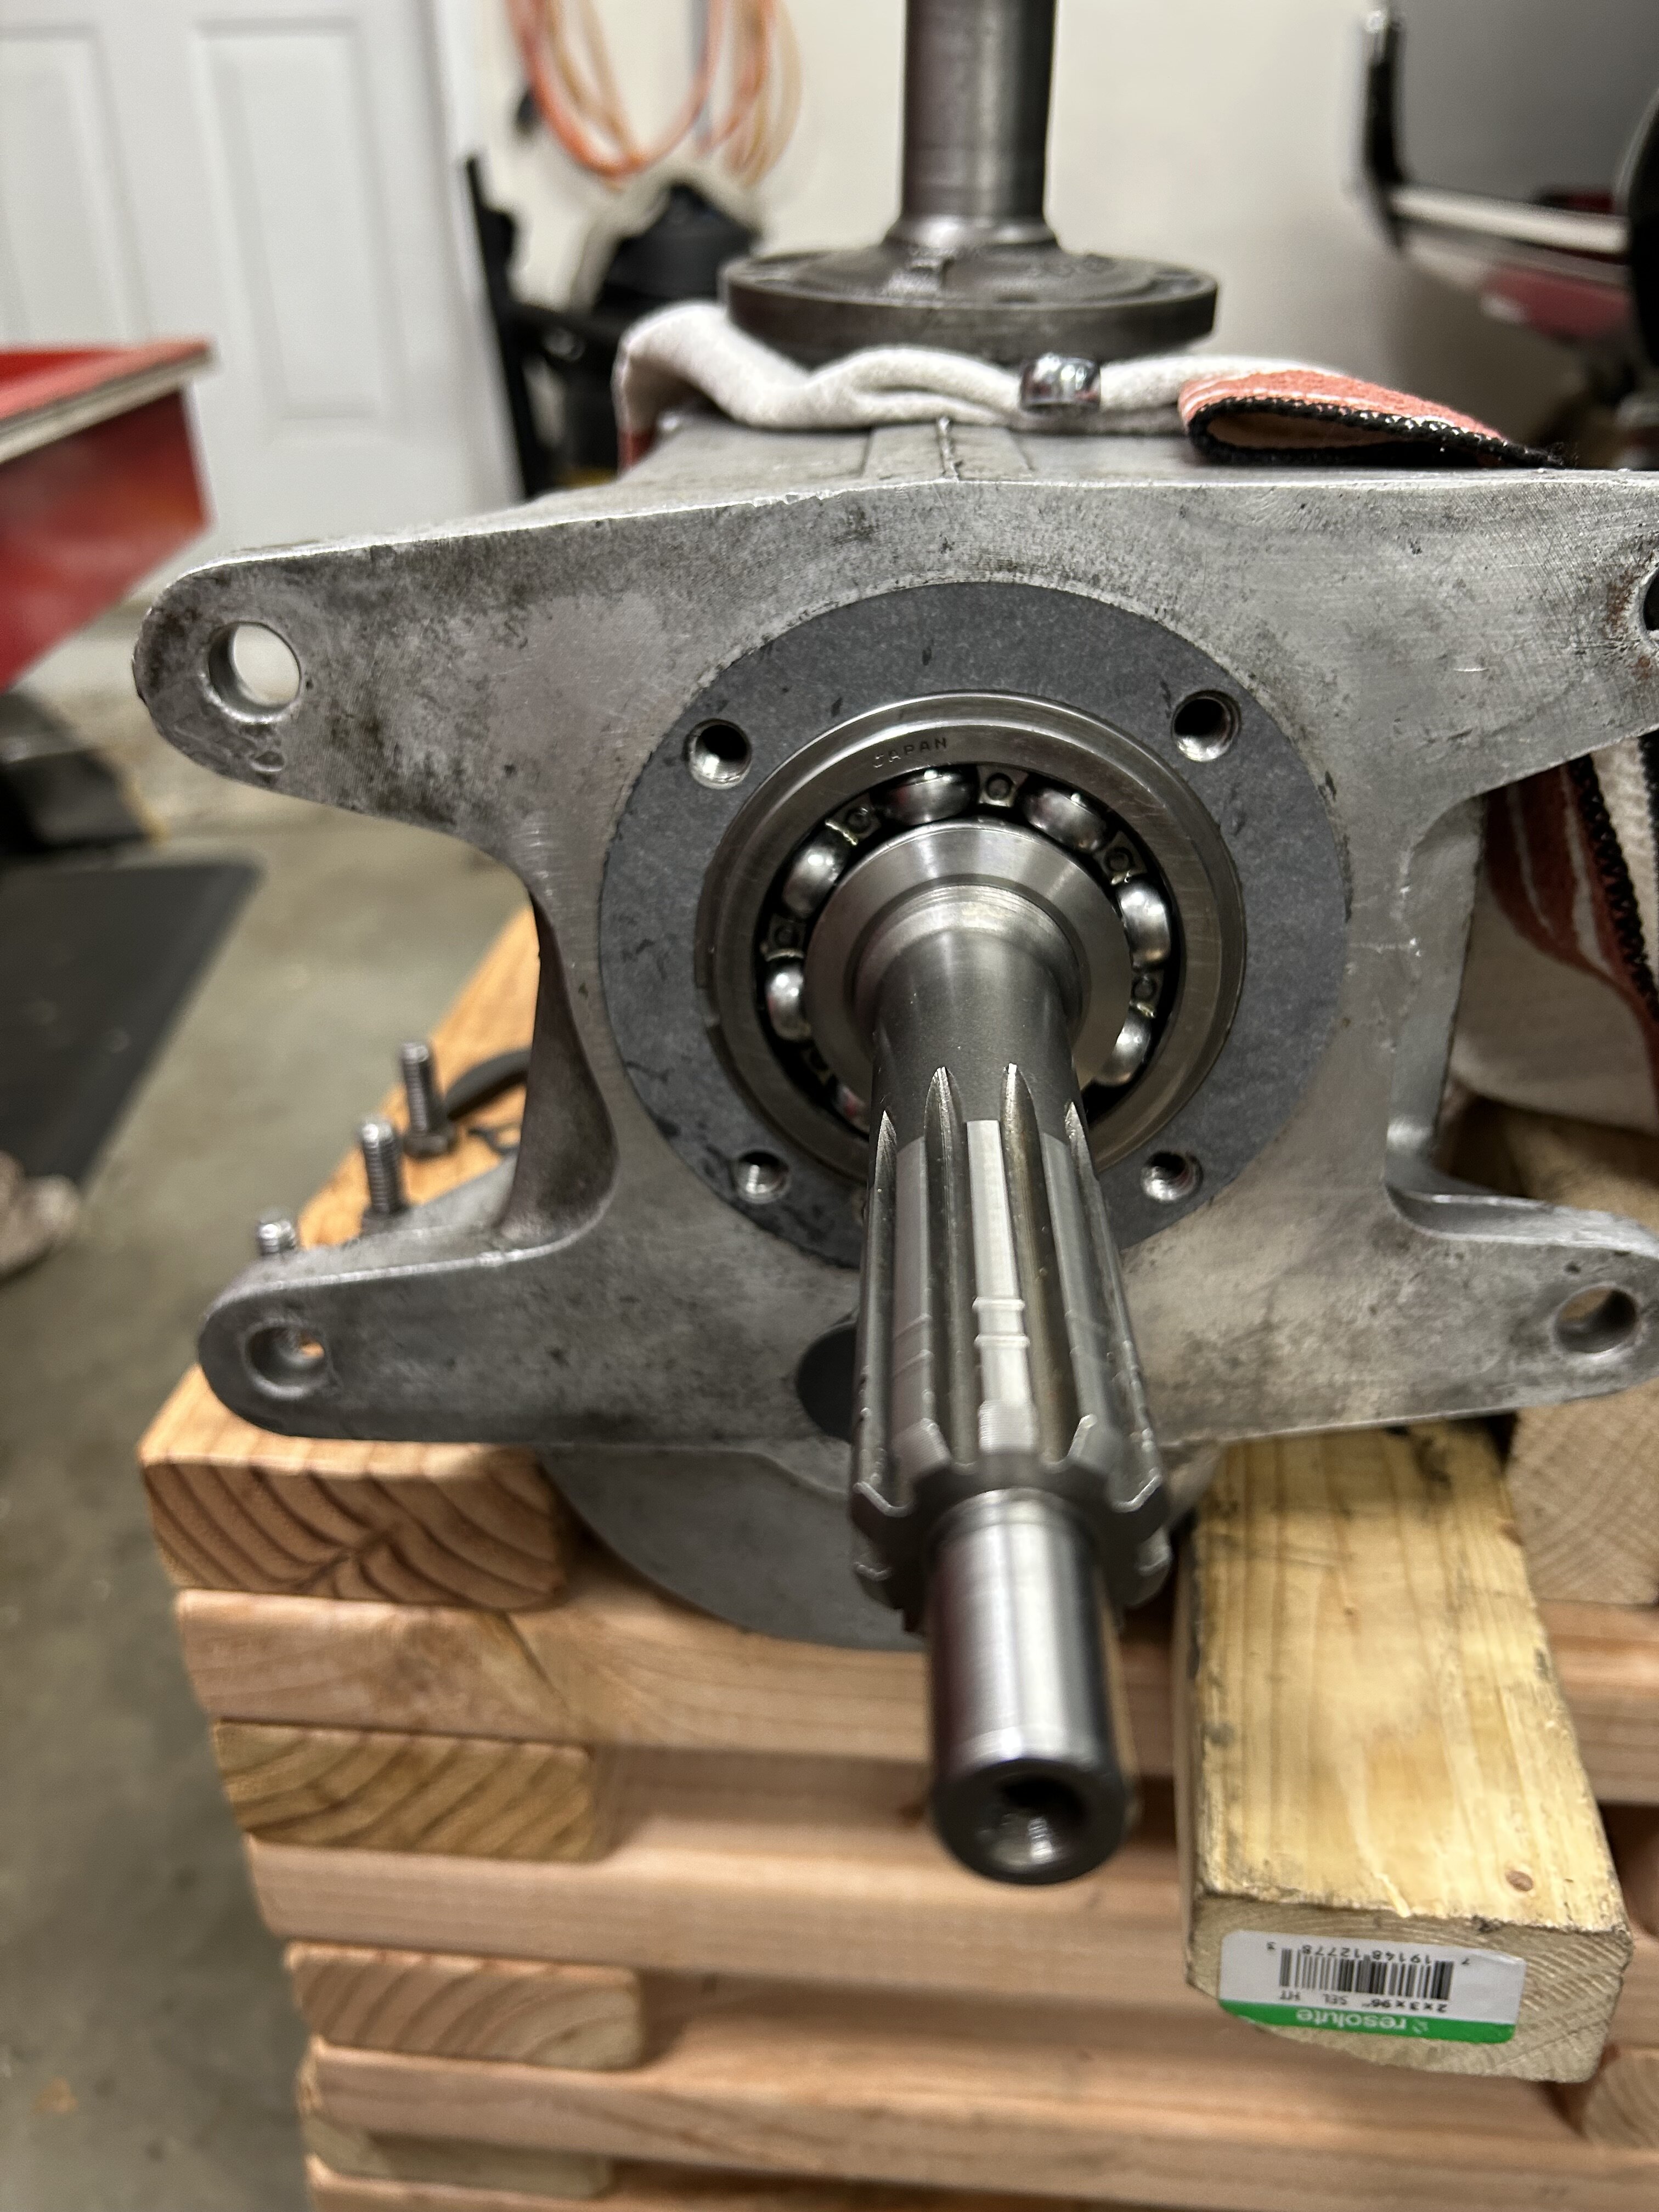
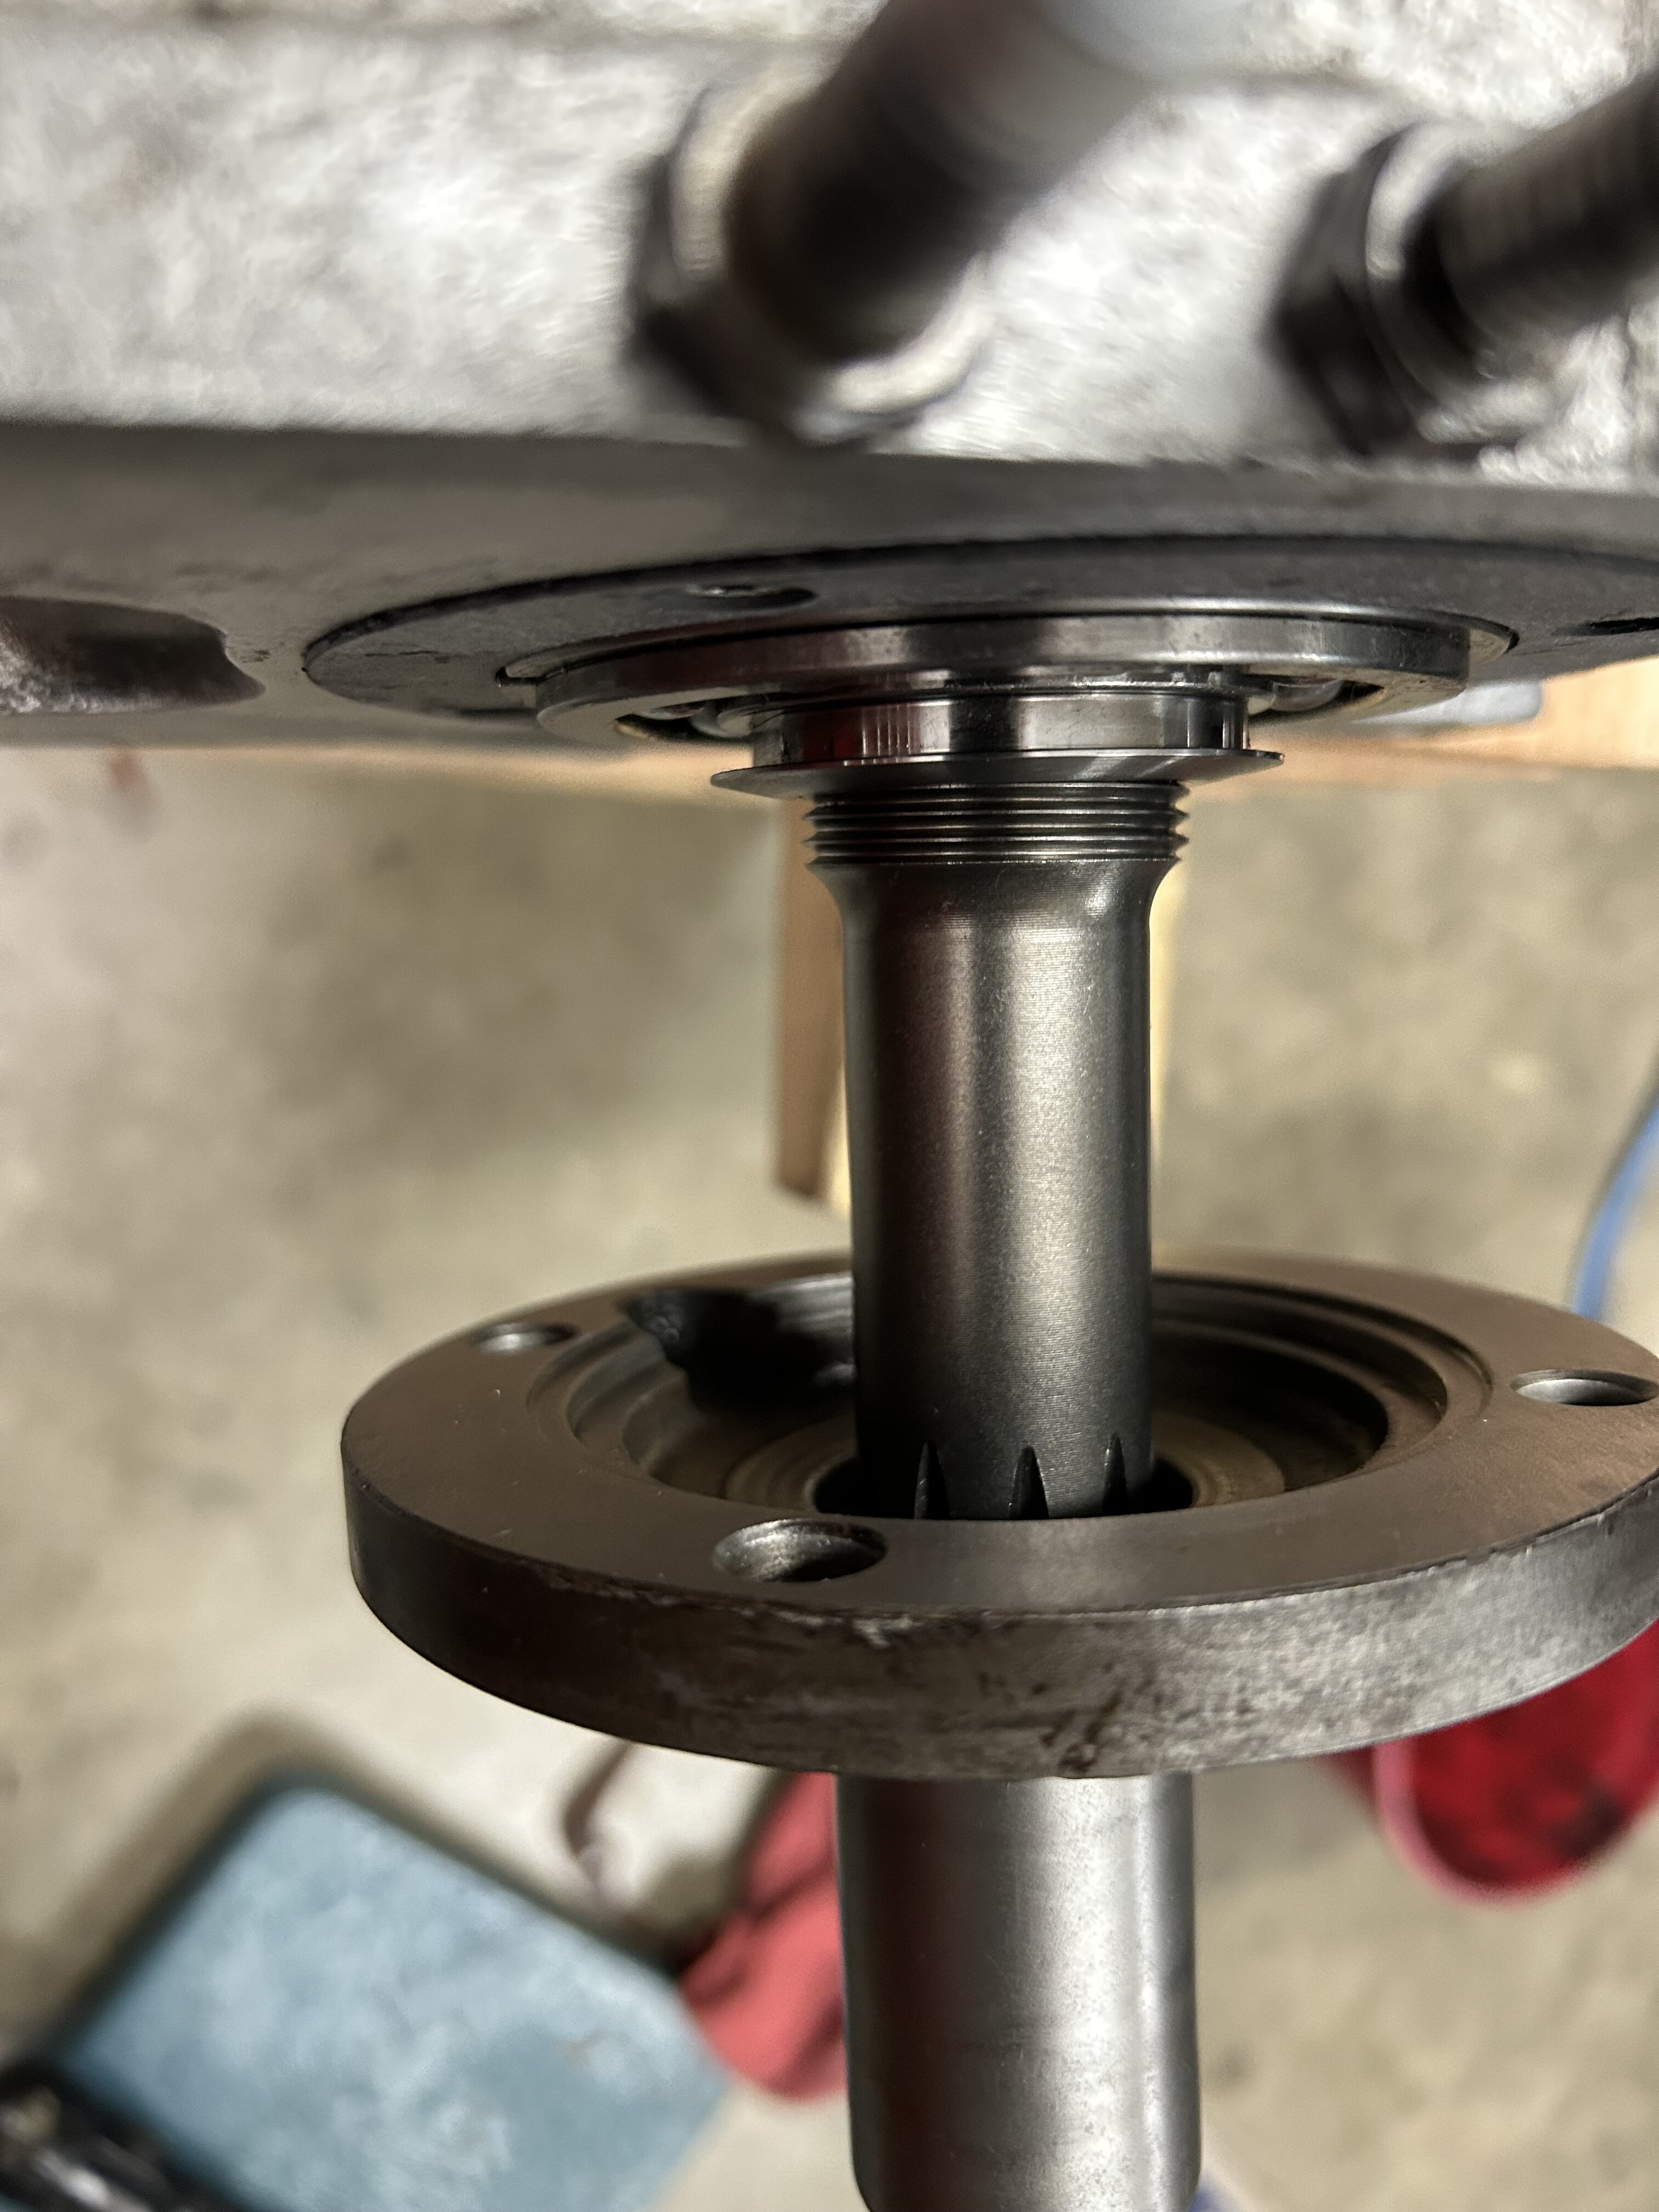
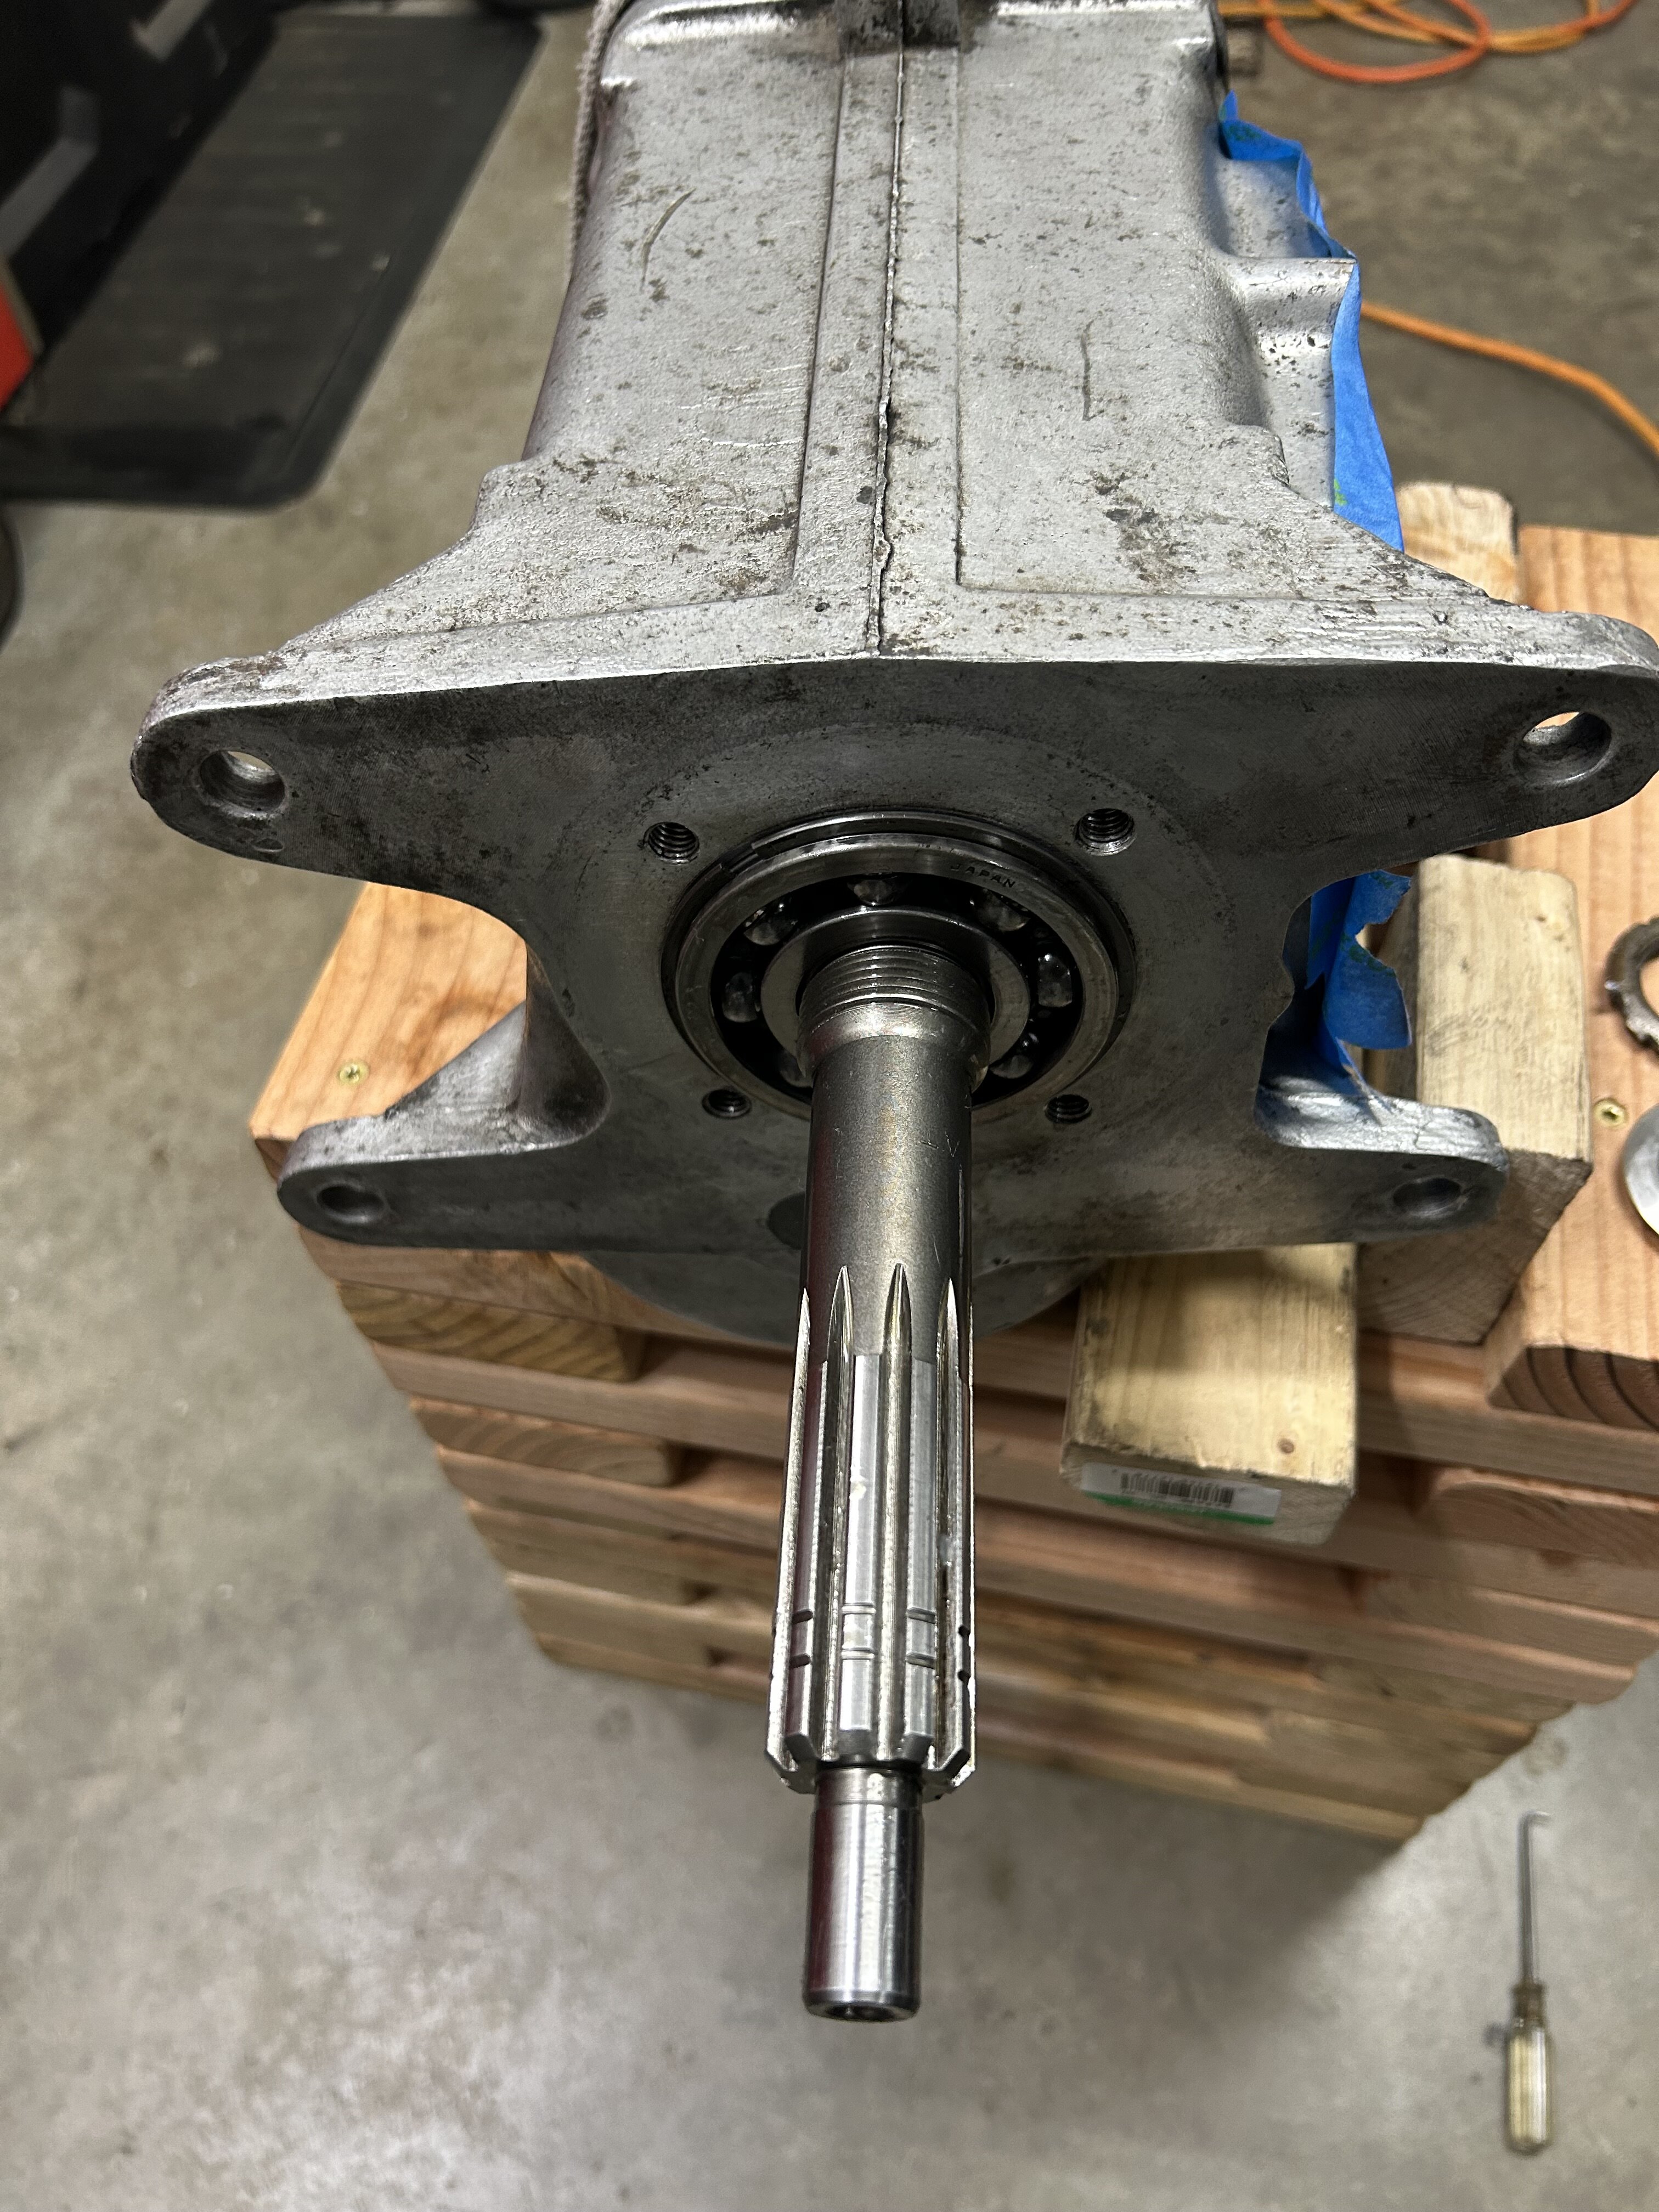
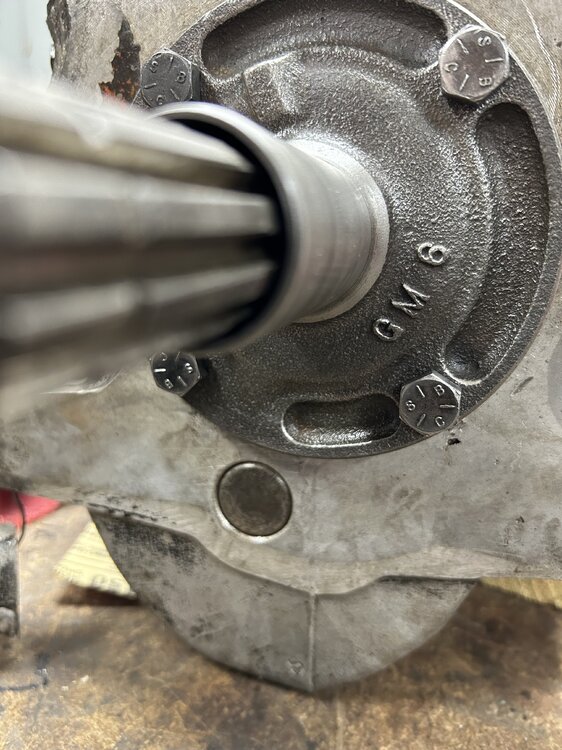
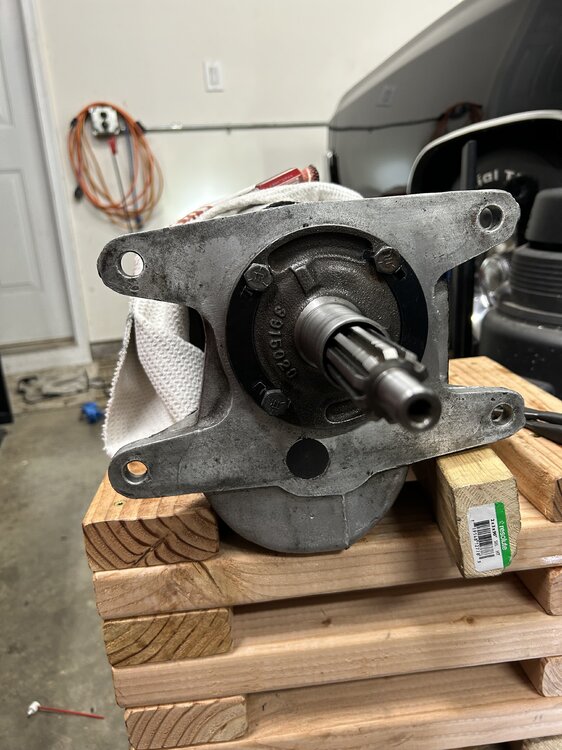
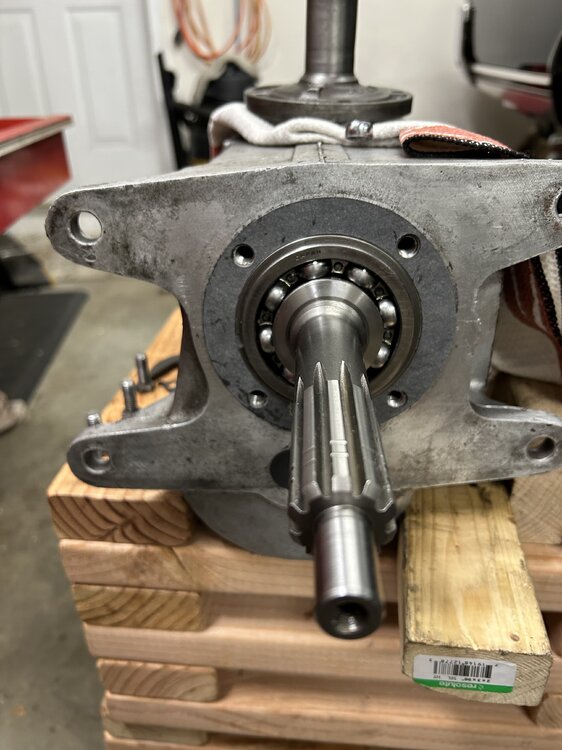
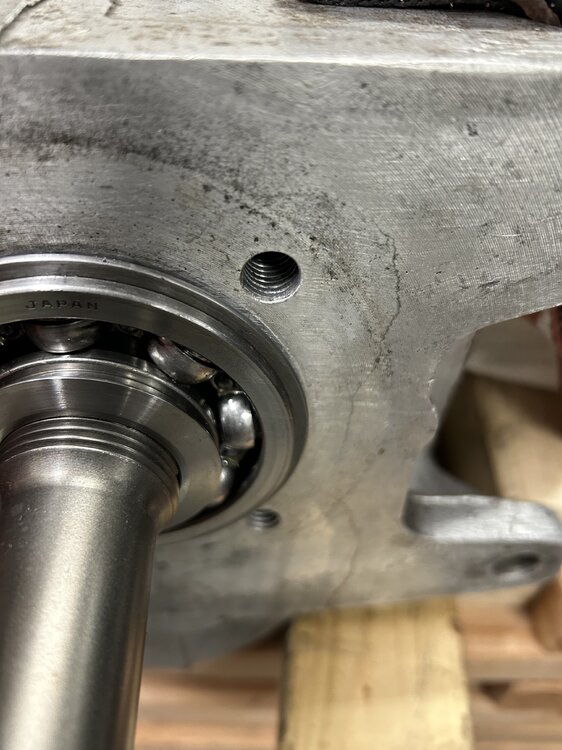
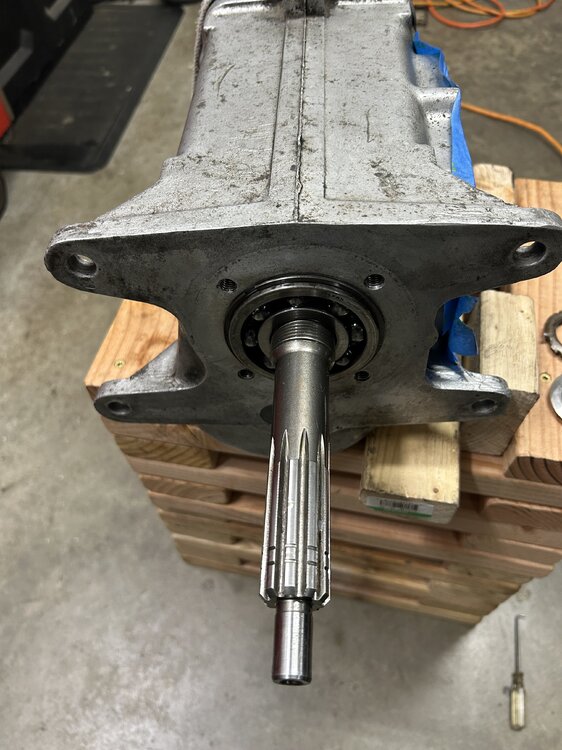
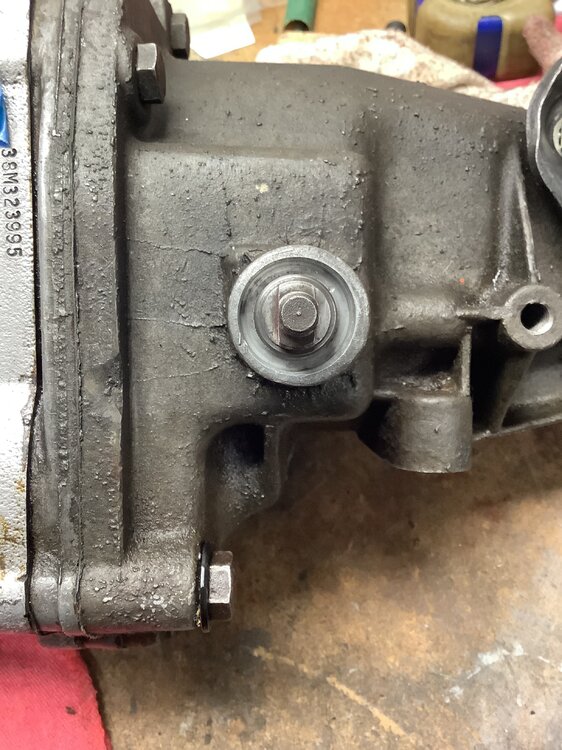
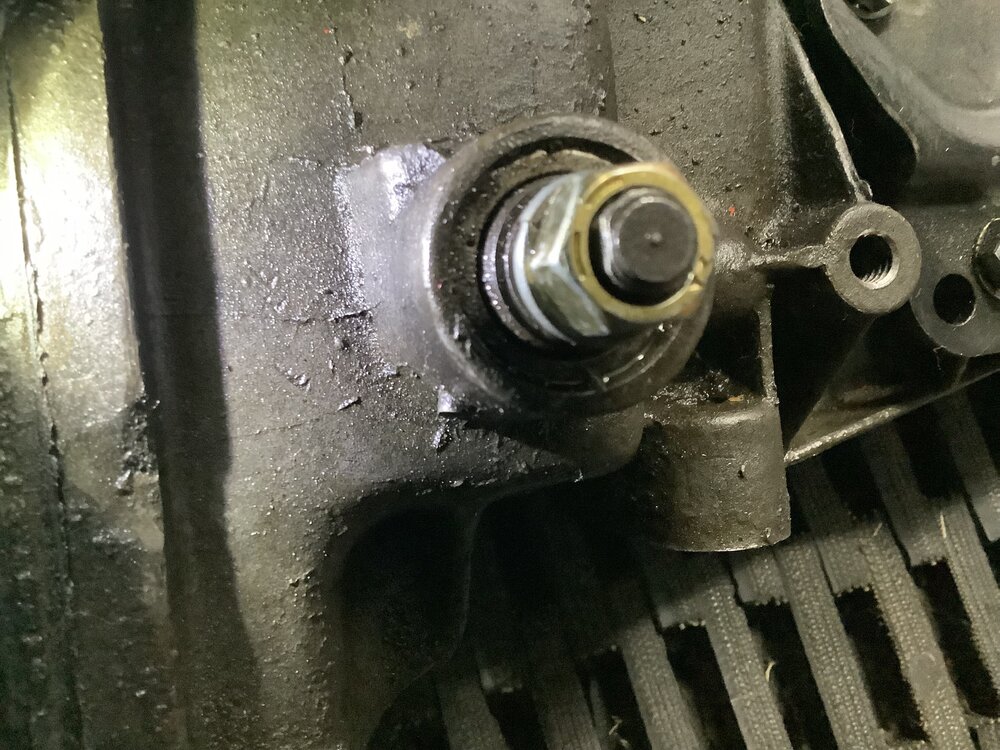
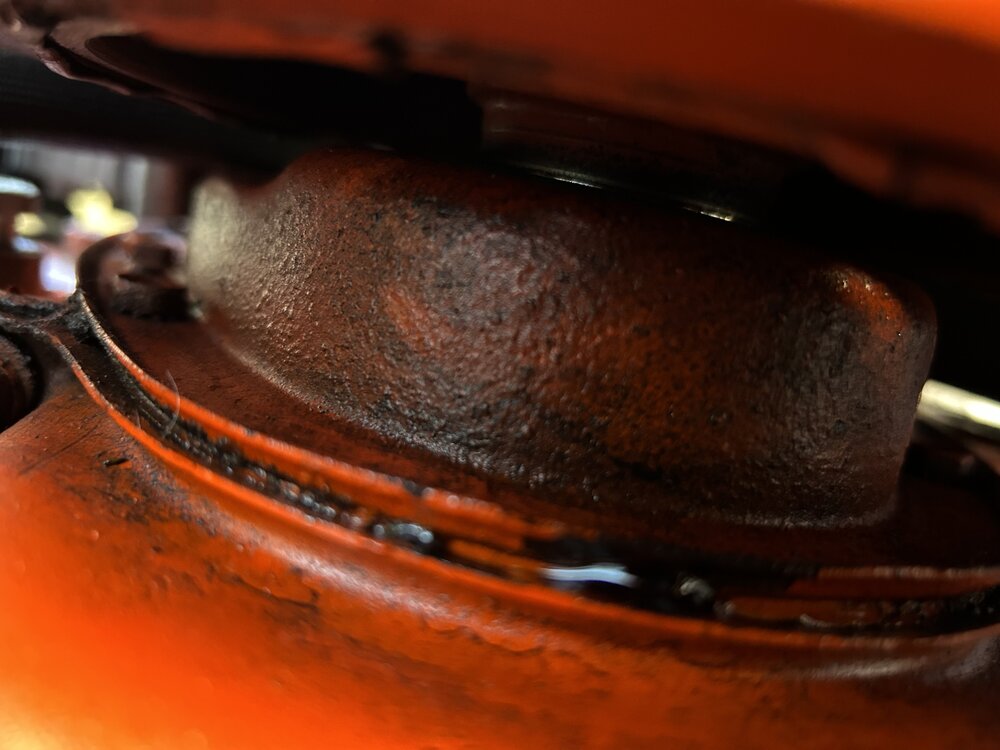
I may be splitting hairs on this sometimes I get to be too much for perfectionist, but I’d like to know what some of you people thought is on this. The bearing retainer sleeve with the throwout bearing rests was worn badly. I recently picked up another M20 Muncie transmission for parts, so I switched out the bearing retainers. Same part number, but look at the pictures and see how there is considerably less clearance around the input shaft with the second bearing retainer compared to the original bearing retainer. Let me know what you think. The first photo is the original bearing retainer the second two is the replacement one. John S

-
https://www.ebay.com/itm/274913644530?hash=item4002214ff2:g:dtcAAOSwUIxhH80G&amdata=enc%3AAQAIAAAA0J5ShvKquNnzZUJDnXTmE5YafMAPUcJ%2FdZorOGaJnADZ2xRlTM8JDDoStbn%2FhZuG5iMUzv7mpfM7YzZYBqBya3DpOhRhyKVgEUOwxPDUZ1Jtu0Ow1GtdC7xCGe05AdoNkvEjMpi3TXgjRz4910RMSNE%2BUnlkbxMjNjrUUN1lKf6NK%2BwfUWTavbdzOp817Ye4kQcAgxIKovmOR4e8Lr3Y3OkpMa%2F3p6g60ErB%2FNDjnzyVO7H%2FgRHHhtKY%2BV4m4Rr1gWS24YmMMRF%2Ff9HB7W4zQX4%3D|tkp%3ABk9SR6regMuDYw not gonna like the price, but I saw a couple of them.
-
What did you do to your Monte Carlo today?
John S replied to Canuck's topic in General 70-72 Monte Carlo Forum
Now it’s done. Heli coil in, torqued the retainer bolts to 20 foot pounds the Muncie guy said 25 foot pounds but I didn’t want to risk it. Got most of my information from the Muncie tapes. There were four parts to disassemble and rebuild a Muncie 4speed. Putting the retainer nut on he does not recommend staking the nut he recommends red. Loctite tighten it down a couple hits with the hammer and good to go. I guess that retainer nut works as an oil seal don’t want to risk damaging it. One last thing to possibly do I’m debating whether I should drill and tap a 1/2” NPT drain hole in the case like M22 has. John S


-
What did you do to your Monte Carlo today?
John S replied to Canuck's topic in General 70-72 Monte Carlo Forum
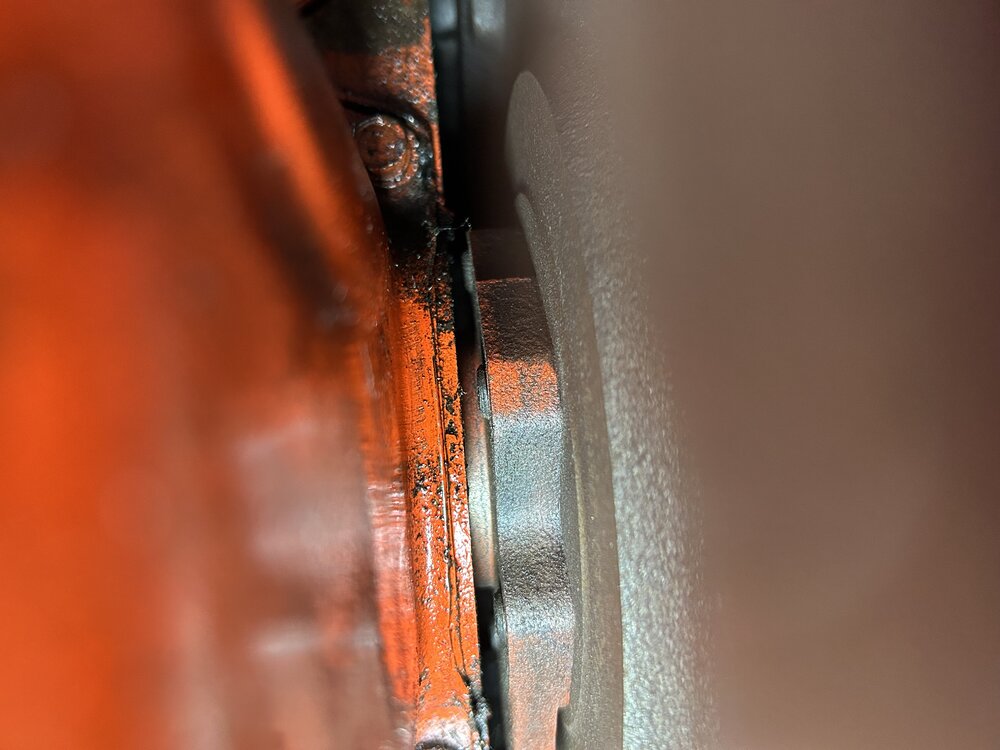
No, it is not a crack just some oil tracking when I sprayed brake clean on it. When I saw the picture, I figured somebody would pick up on that. -
What did you do to your Monte Carlo today?
John S replied to Canuck's topic in General 70-72 Monte Carlo Forum
I was going along good got the new bearing retainer nut on and tightened and then I found the upper right bearing retainer bolt case hole stripped out. Gotta get a Heli coil. Damn. John S

-
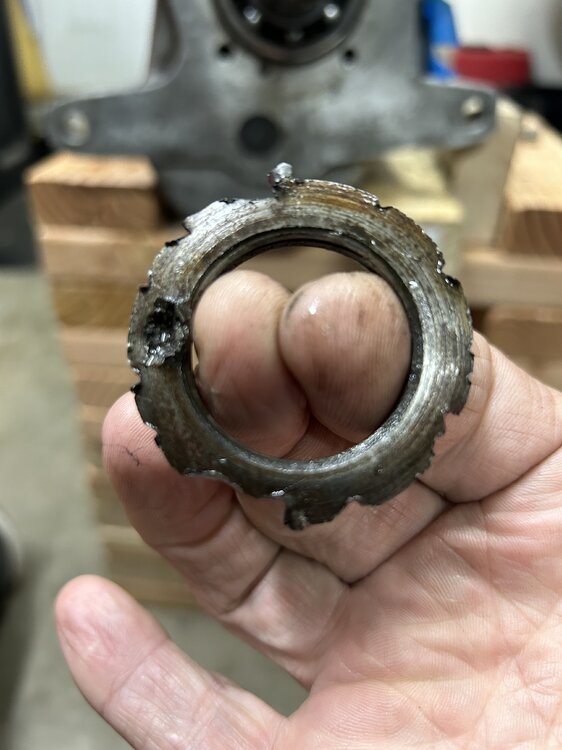
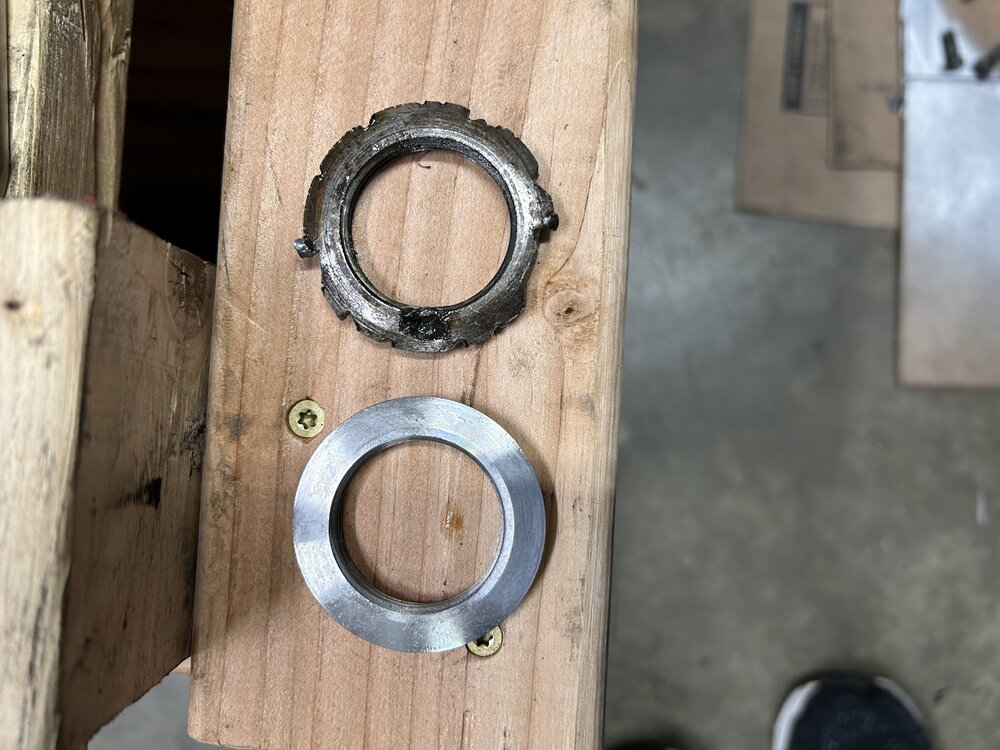
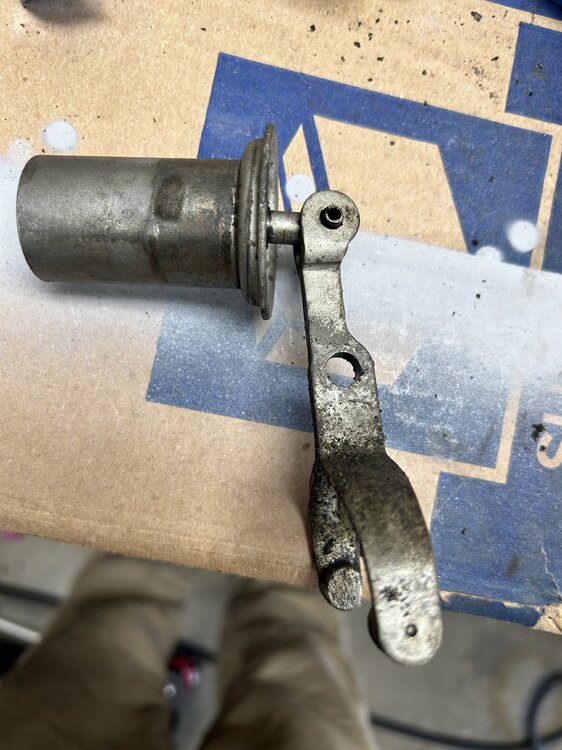
I couldn’t deal with that butchered bearing retainer nut. I took it off got another one going to use the proper tool to put it on. After changing out the Tailshaft housing, side cover, and the reverse idler gear going to do it, right. John S
-
What did you do to your Monte Carlo today?
John S replied to Canuck's topic in General 70-72 Monte Carlo Forum
I understand your point and that of others in this forum and it is well taken. I’ve worked a number of years at Pontiac and Chevrolet dealerships and seen warranty work come through where clutch had to be removed and reinstalled when there was a warranty problem GM would always pay to fix the problem, but would never pay to put in a new clutch simply because it had to be removed to fix the problem. If I get burned, I get burned. I personally many years ago when I worked on these cars reinstalled clutches in far worse shape than this with acceptable results again roll the dice and see what happens. If it doesn’t work I’m retired I can do it again. I’ve got nowhere to go and all day to get there. -
What did you do to your Monte Carlo today?
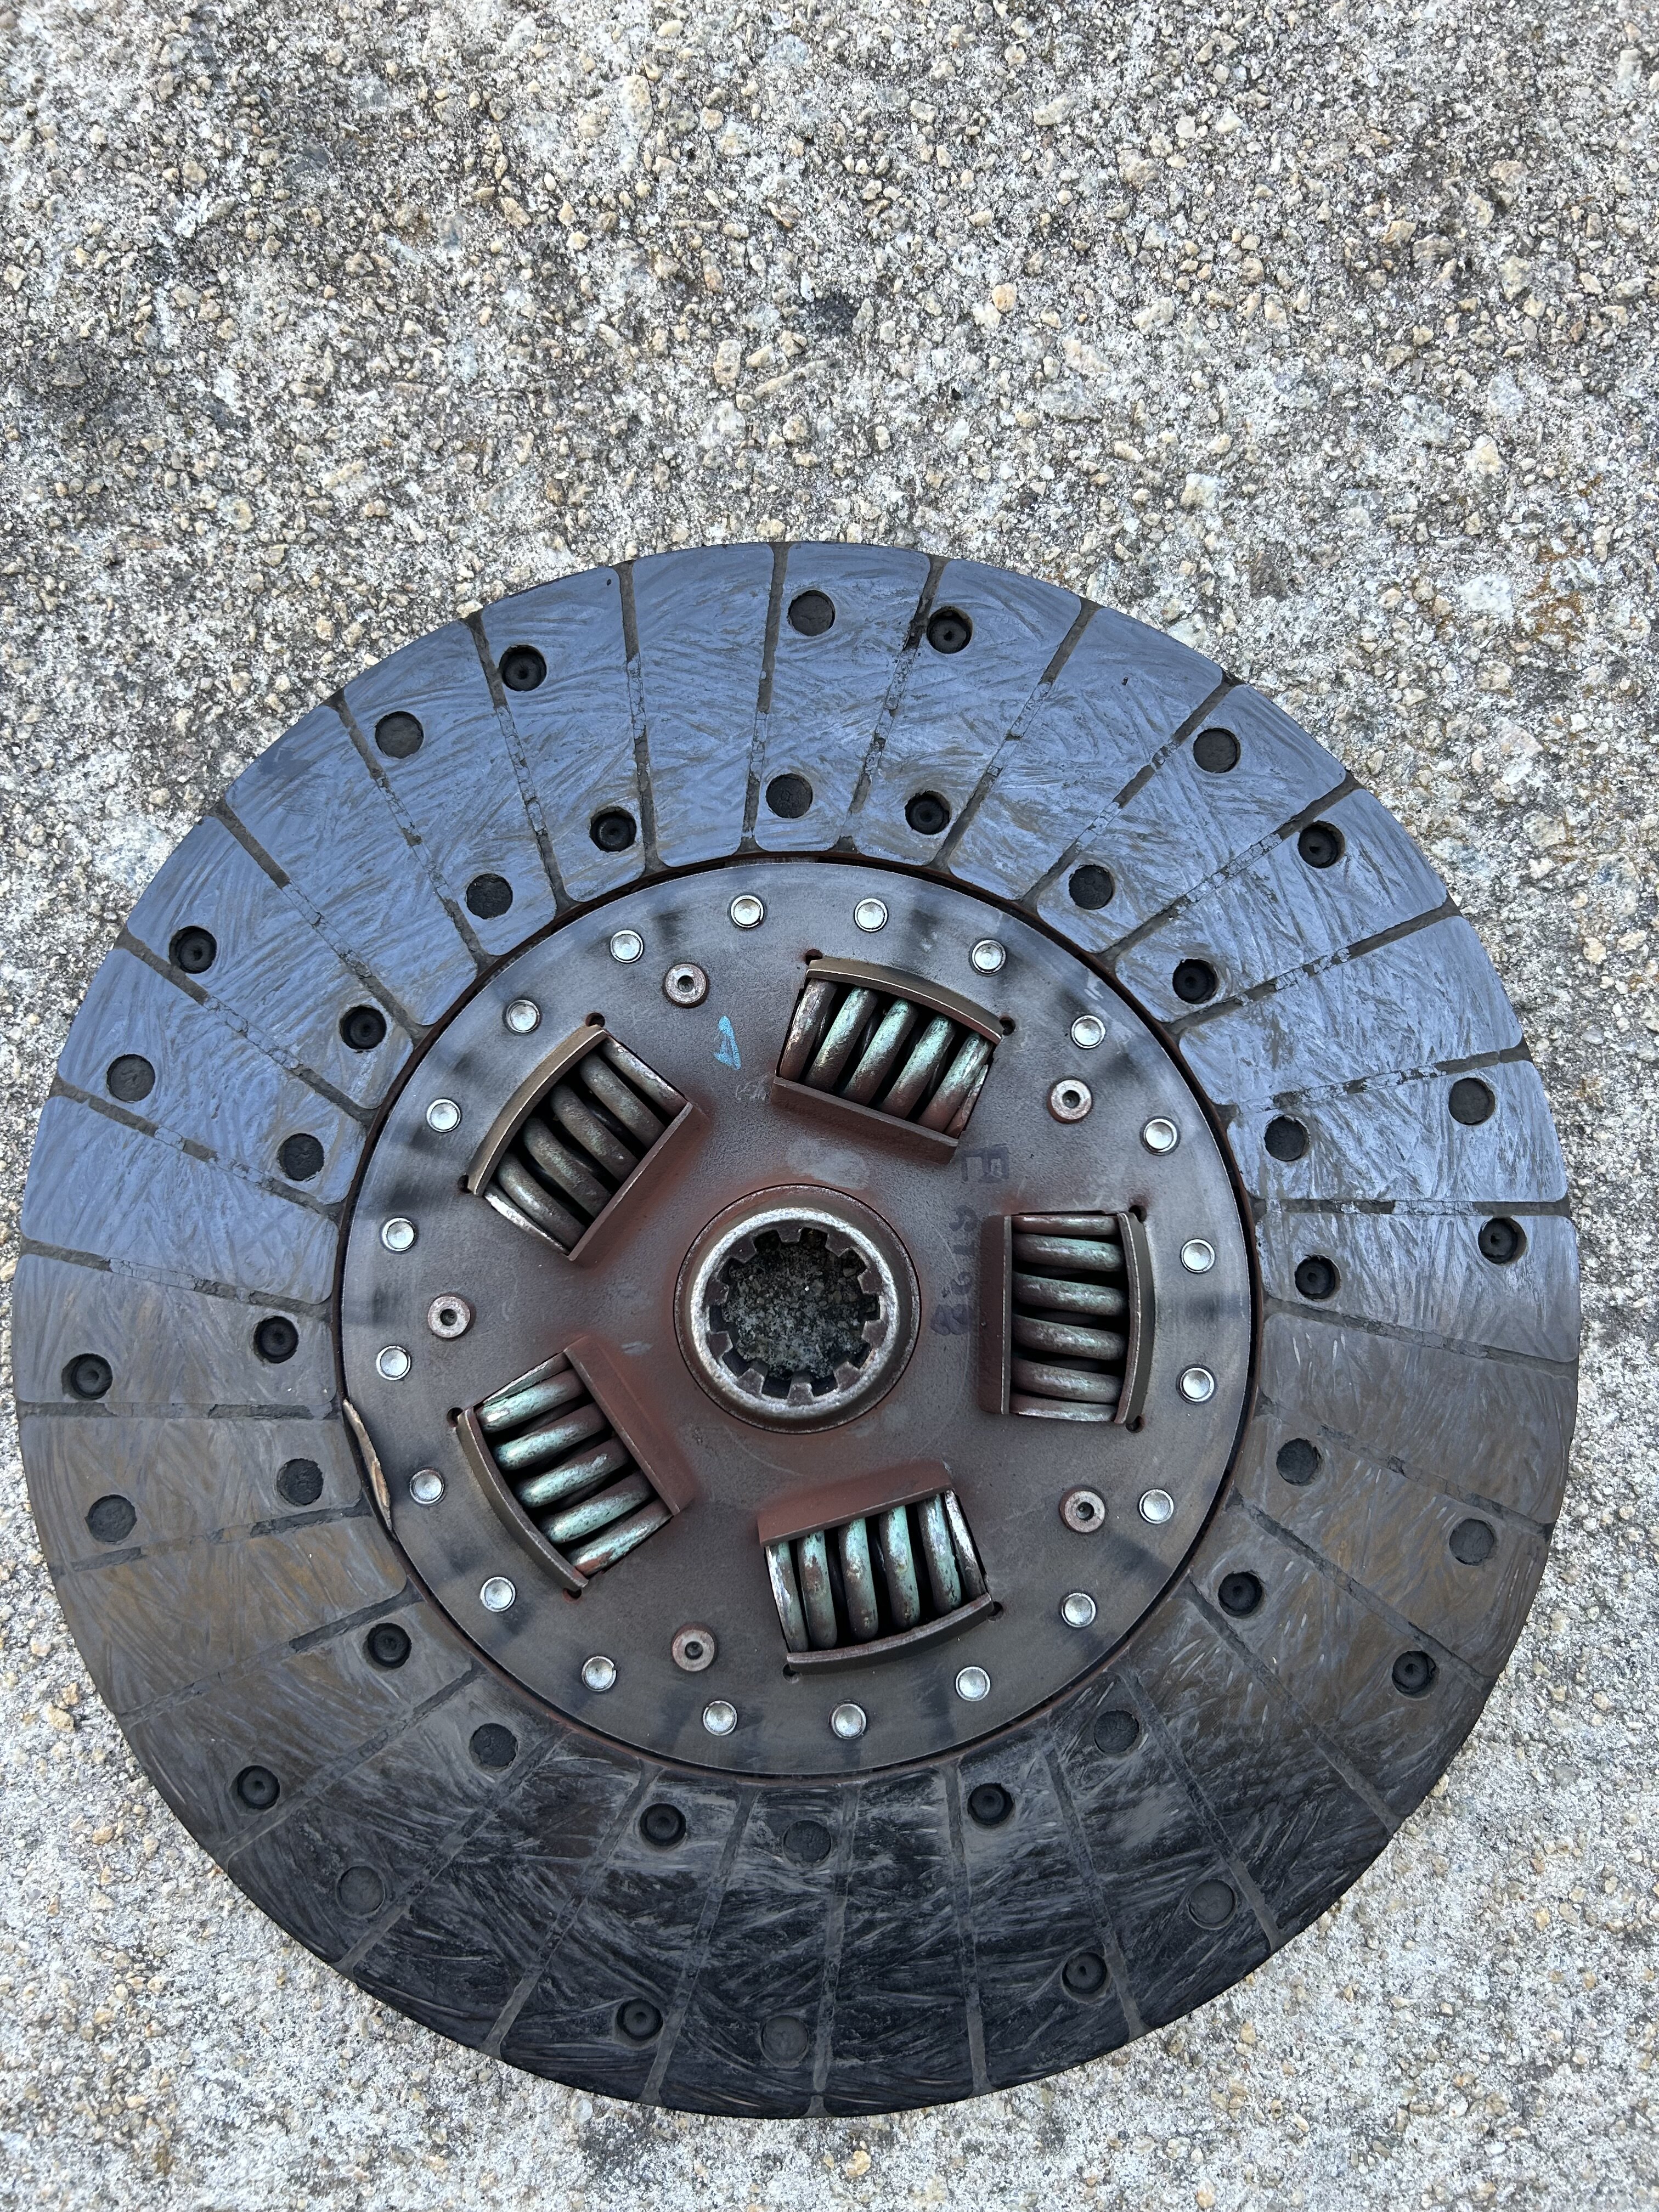
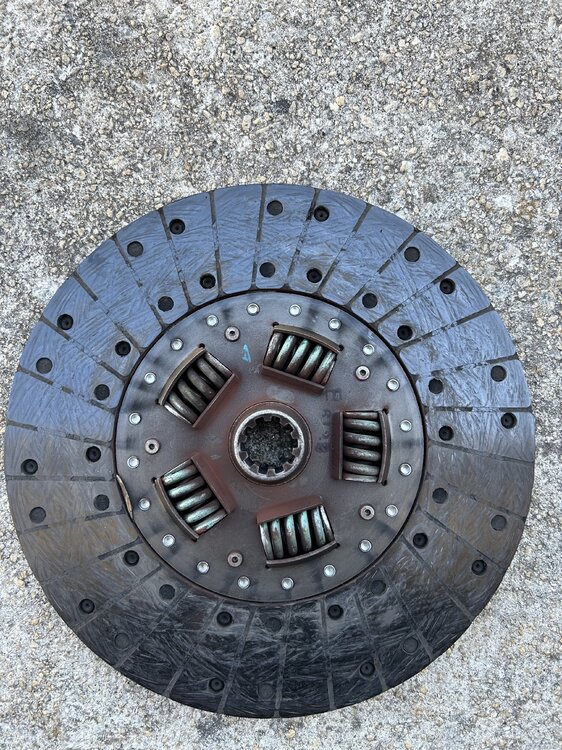
John S replied to Canuck's topic in General 70-72 Monte Carlo Forum
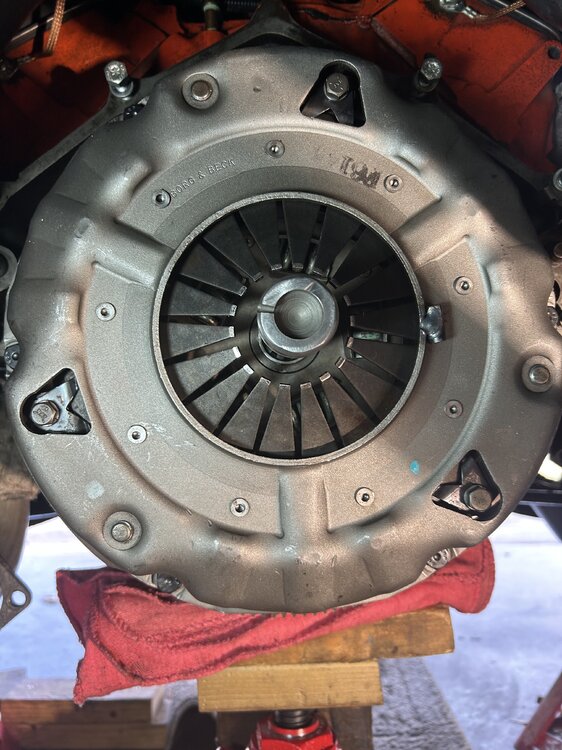
Reinstalled the clutch today I know I’ll get different opinions on this, but I reused the old pressure plate and disc. You may notice I used two guide pins to support the pressure plate instead of trying to hold it up and put the bolts in.


-
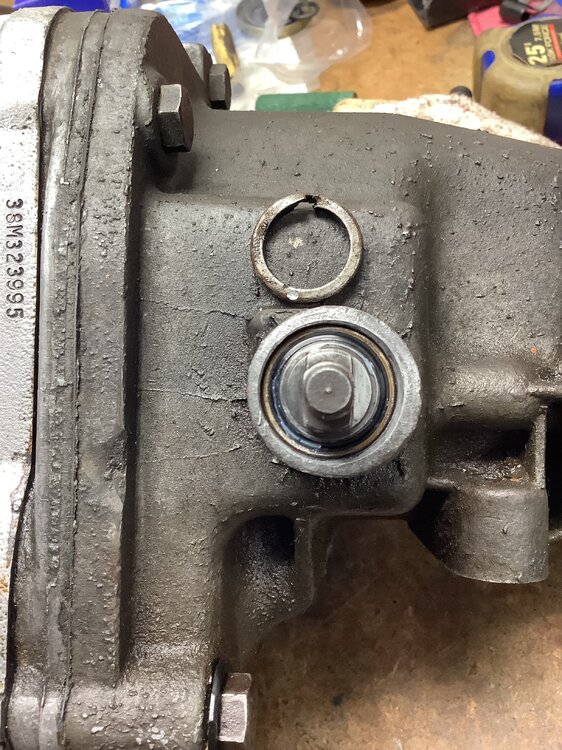
Disaster averted. I was able to pry the old seal out and put the new seal in.
-
Had the car for 10 years. Transmission drives shifts well and is very quiet. Never had any issues. Just had to change a couple leaking seals and gaskets.
-
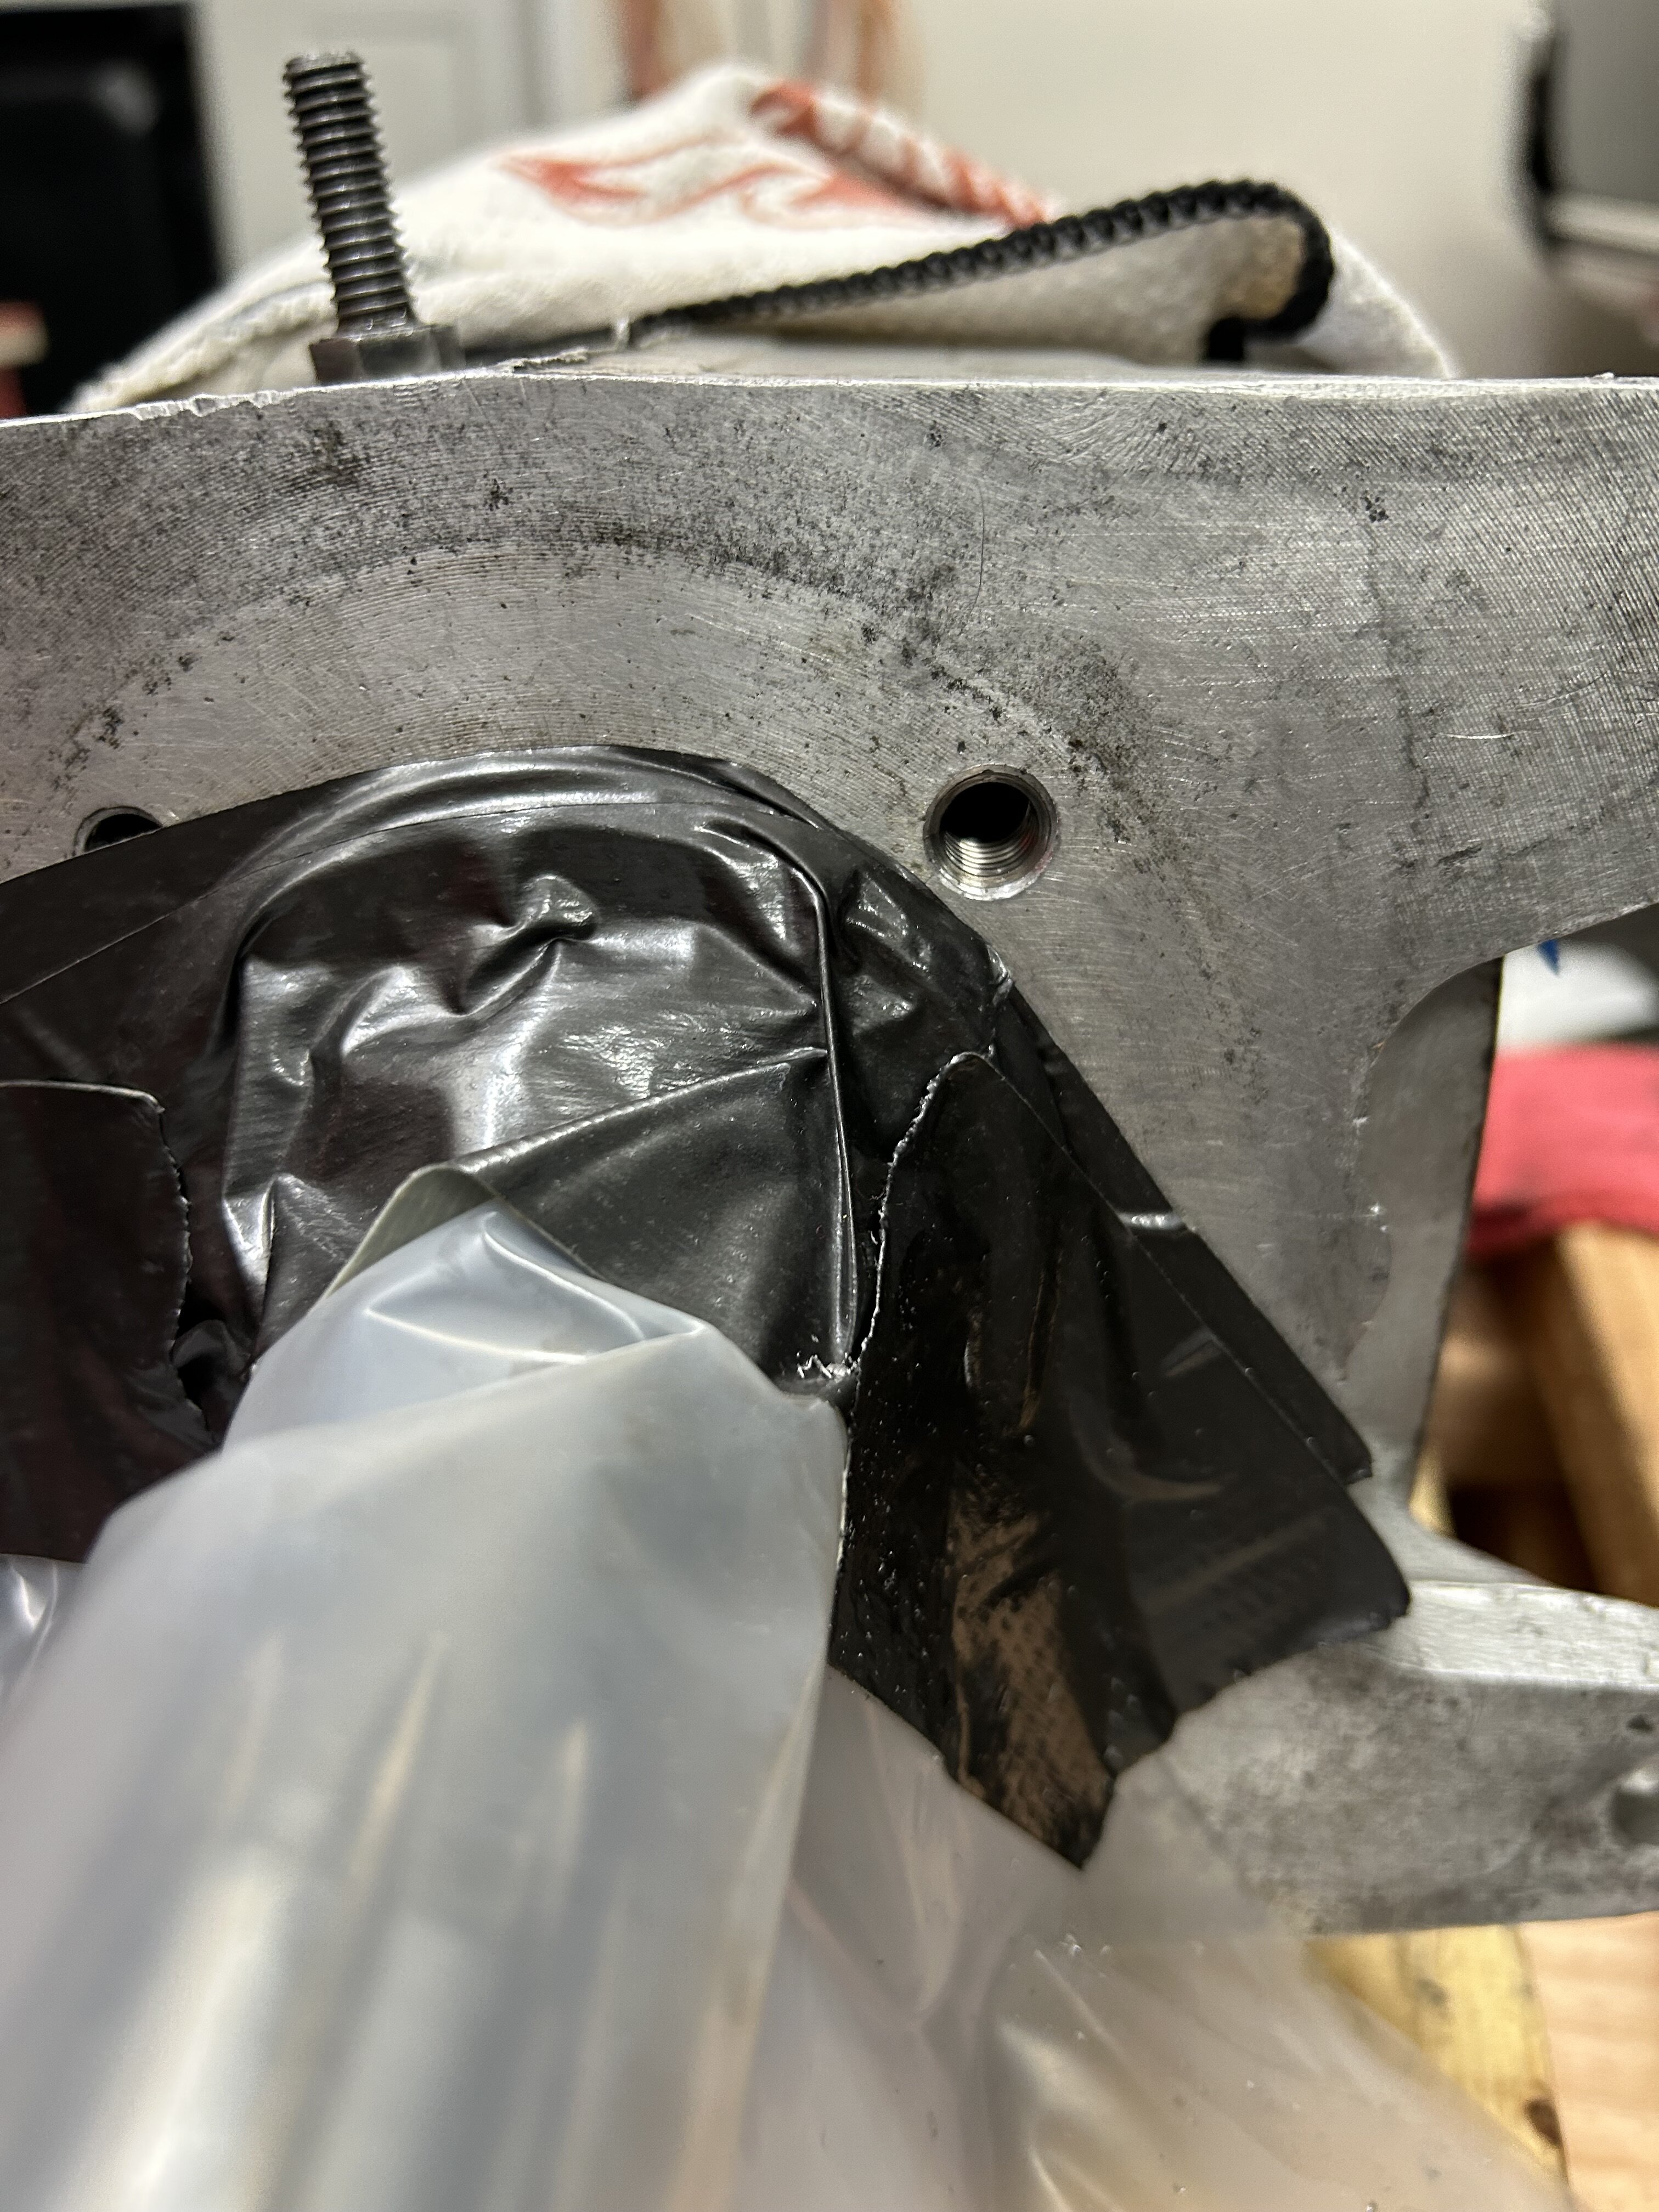
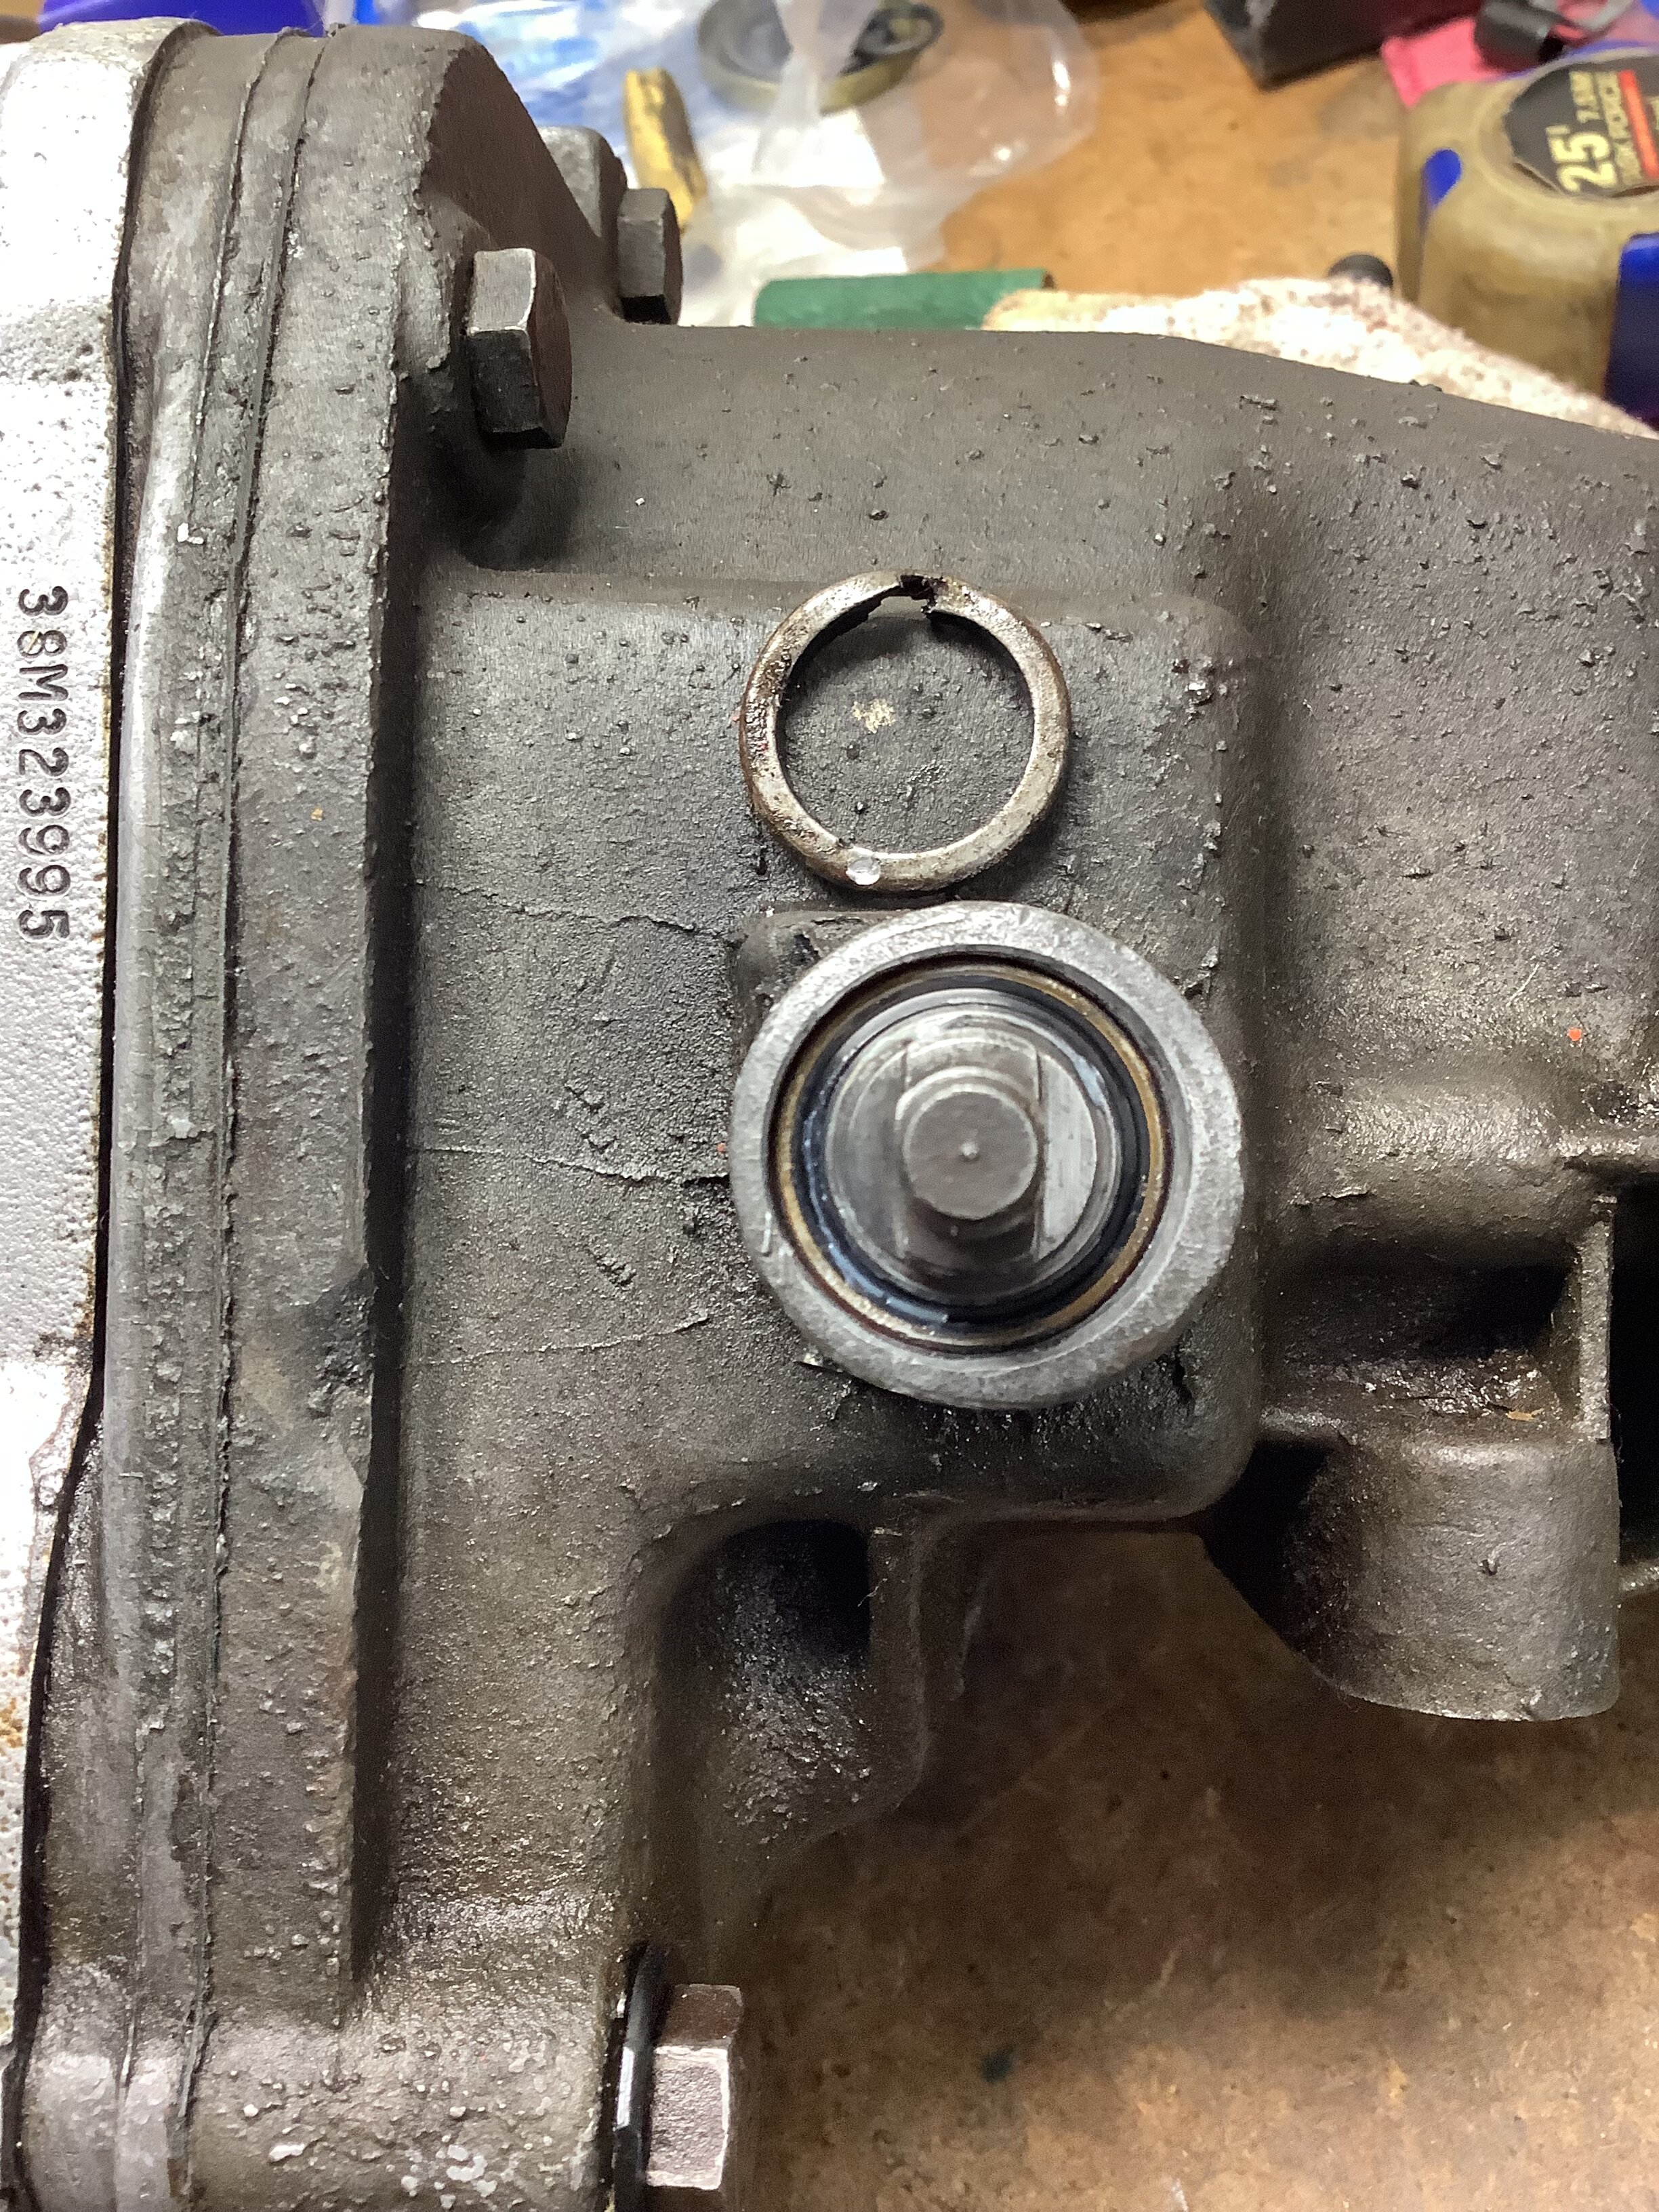
Was going to pull the tailstock and remove and replace the reverse shifter shaft seal. But as the picture shows the reverse cam boss taper pin is installed upside down. It should go from top to bottom not bottom to top. That is a problem. I decided to read up on that and found it could cause a lot of problems Might just have to leave it alone. Don’t know if I want to open up a big can of worms. You can see by the pictures.

-
What did you do to your Monte Carlo today?
John S replied to Canuck's topic in General 70-72 Monte Carlo Forum
Shifter shaft seals inside cover replaced next pull off tail stock, push out pin and replace reverse seal.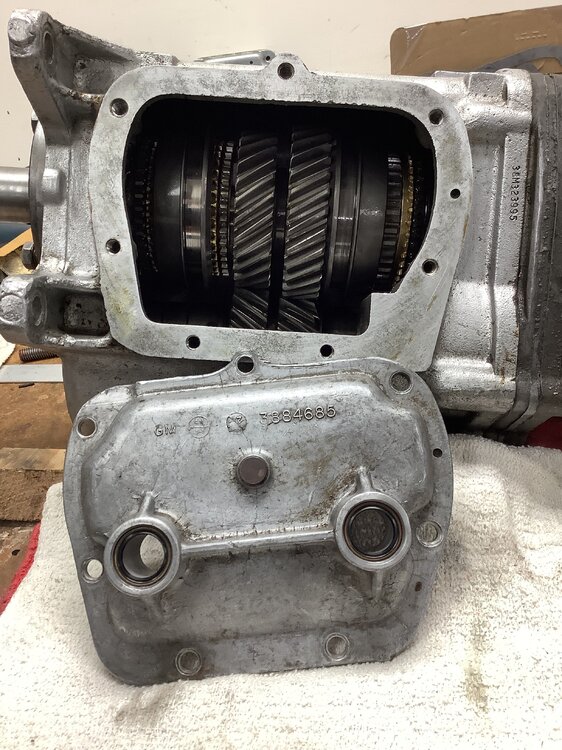
-
I found on eBay the lock plates from 5speeds.com. I bought them wait for them to be delivered and then install them. A number of pictures I’ve seen of Muncie 4 speeds on eBay had the lock plates on so that’s what I’m going to put on. Thanks for your help. For now I’m going to leave the retainer nut alone it looks like they’ve staked it in place and I don’t want to damage the threads. John S
-
Muncie, four speed do the four bolts on the front bearing cover have lock washers, star lock washers or locking tabs. Pictures of Muncie 4 spd on eBay show locking tabs for those bolts. A couple of rebuilt ones have star washers. The two bottom bolts on mine were hitting the gear on the counter shaft. If someone has an answer, let me know. Thanks. Someone evidently did not have the proper tool for the input bearing retainer nut. John S

-
I will set it up as per their torque specs. Thanks for the help a lot of people on this forum work with this stuff a lot more than I do so I value your input, again thanks. Also, back in the late 70s and 80s working in auto shops we used to follow More’s law if tight as good tighter better and too tight is just right. John S
-
It seems unusual that both bolts are 3/8-16 but one is torqued at 35 foot pounds and ARP at 45. Seems like a lot of torque on a 3/8 bolt.
-
Which bolts would you use for pressure plate. Grade 8 bolts or ARP bolts factory manual says 35 foot pounds of torque for pressure plate. ARP says 45 ft lbs. for their bolts with their lube. Tell me what you think. If the ARP are better I’ll get them. John S
-
What did you do to your Monte Carlo today?
John S replied to Canuck's topic in General 70-72 Monte Carlo Forum
I found my input shafts years ago in salvage yards. -
The engine ID is CNJ same as mine. I also have a 350 4 barrel four-speed. The application of that engine is with a manual transmission.
-
What did you do to your Monte Carlo today?
John S replied to Canuck's topic in General 70-72 Monte Carlo Forum
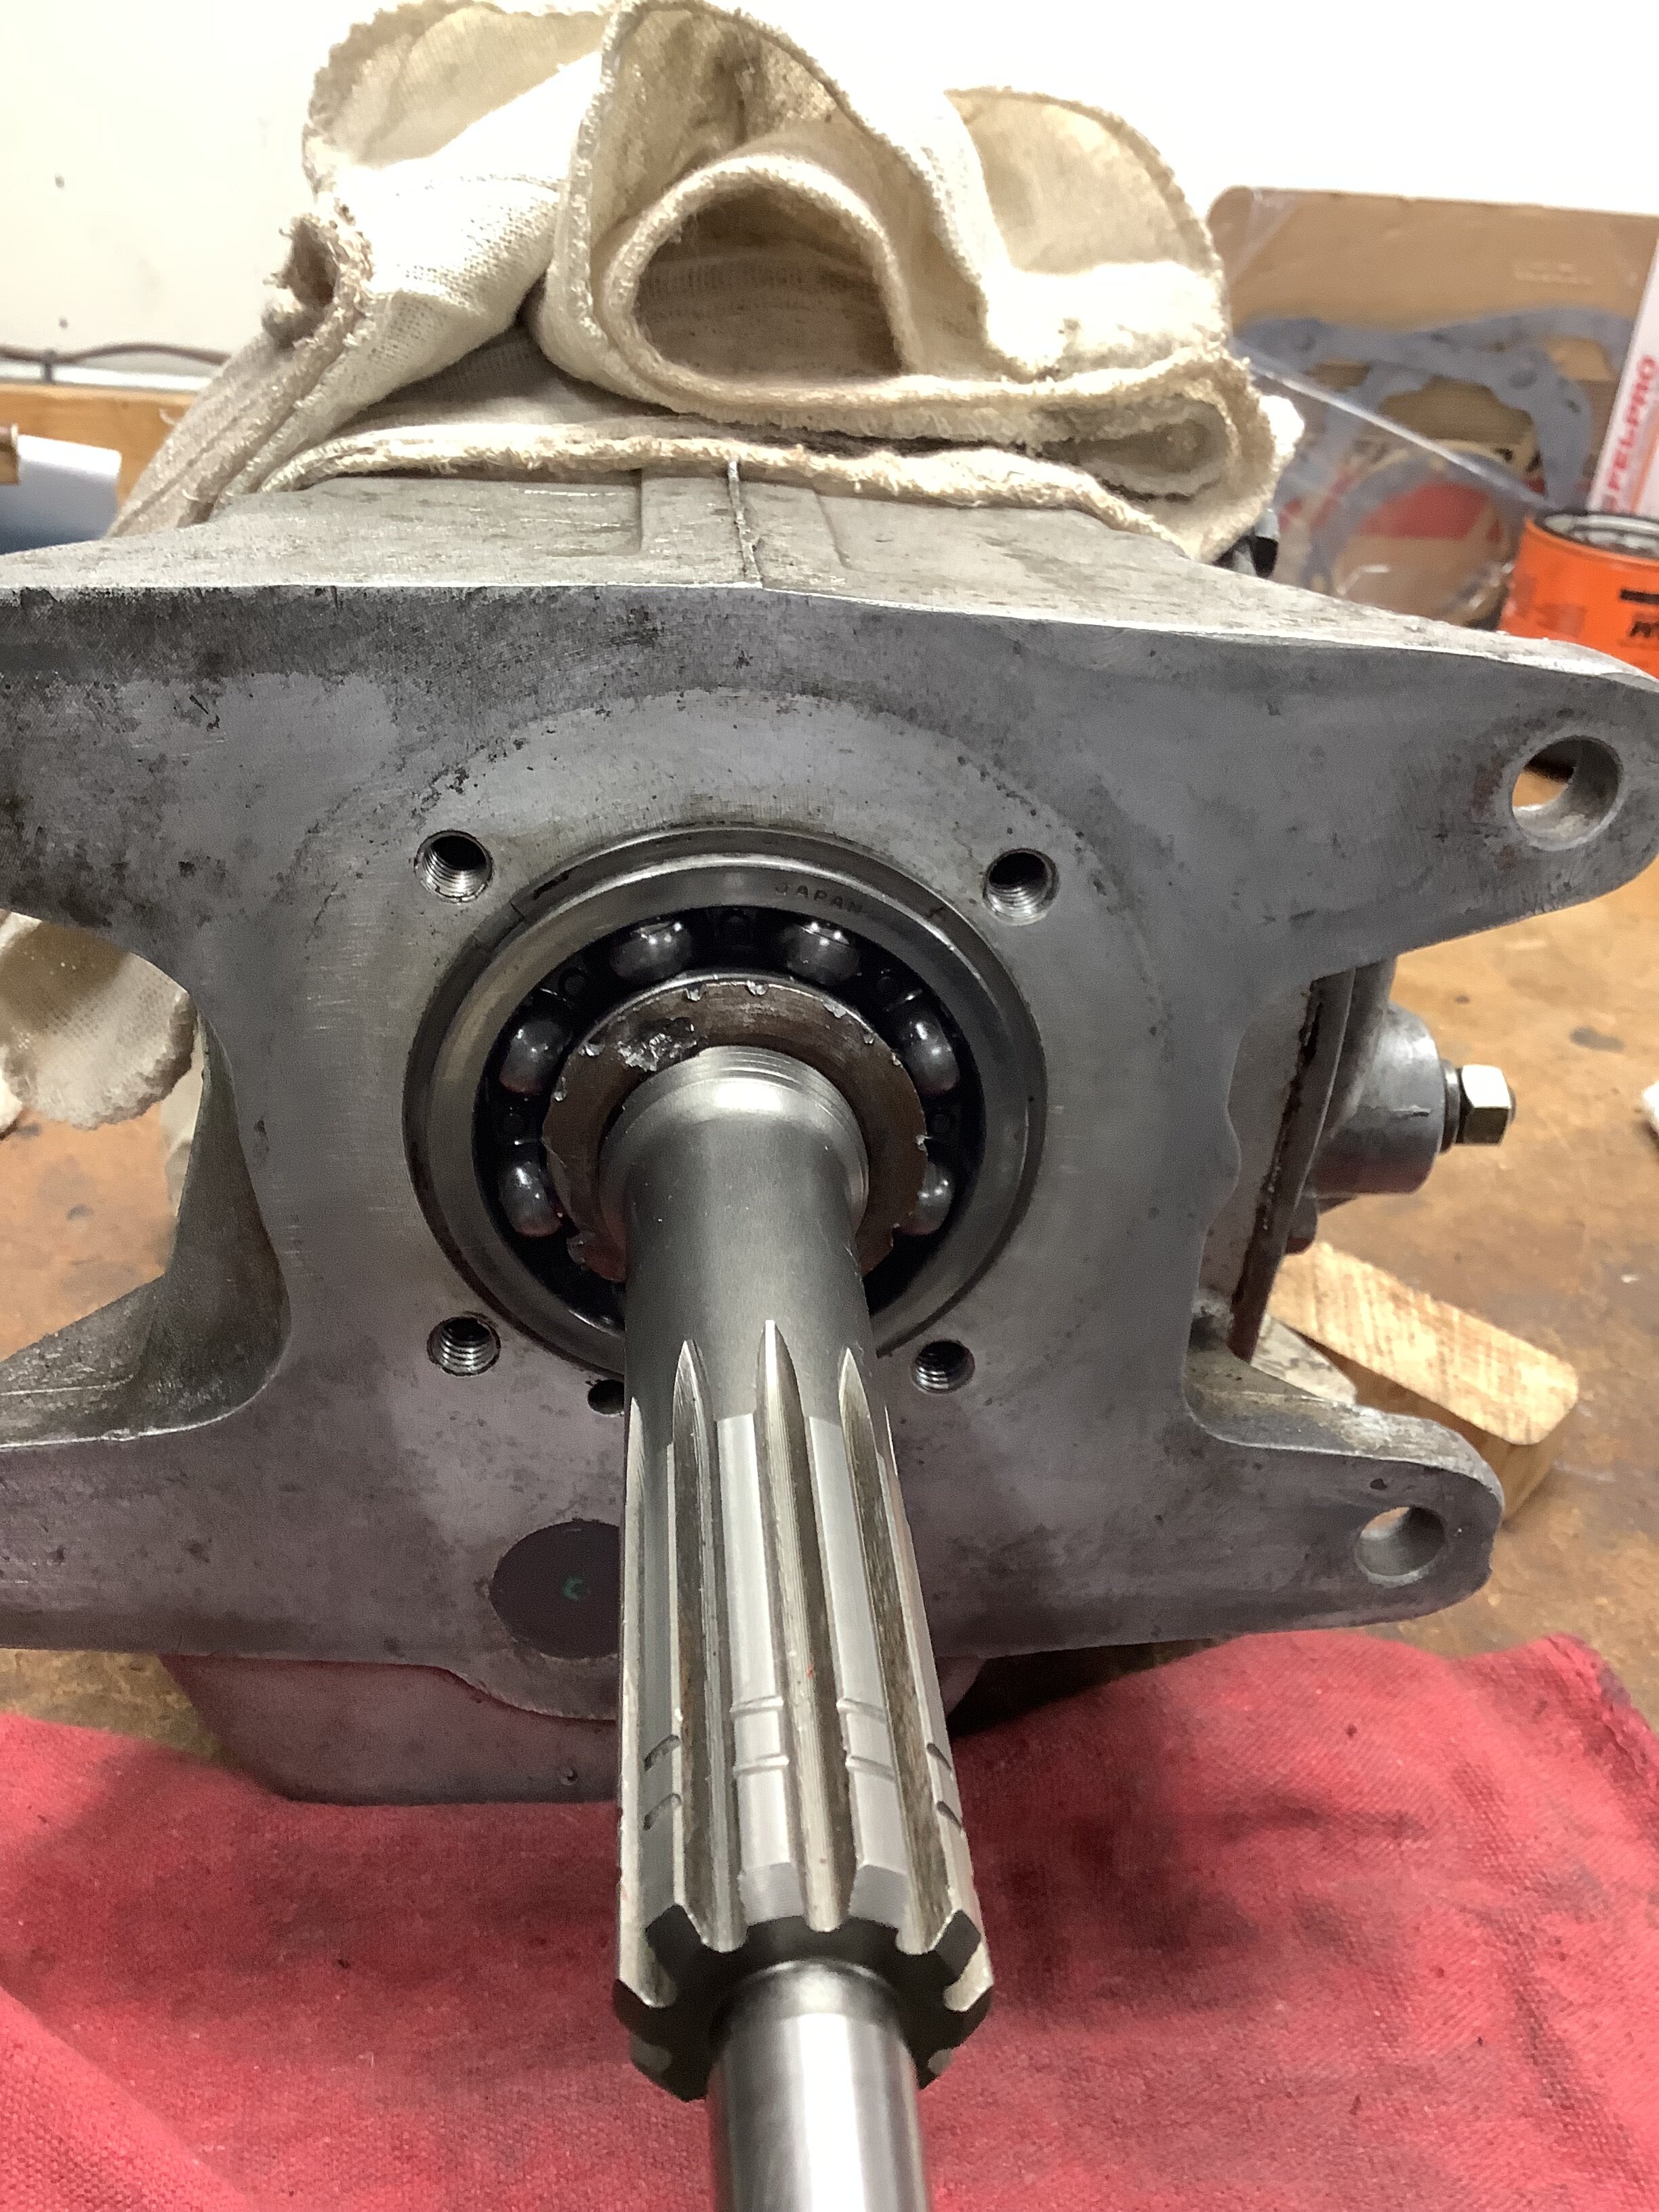
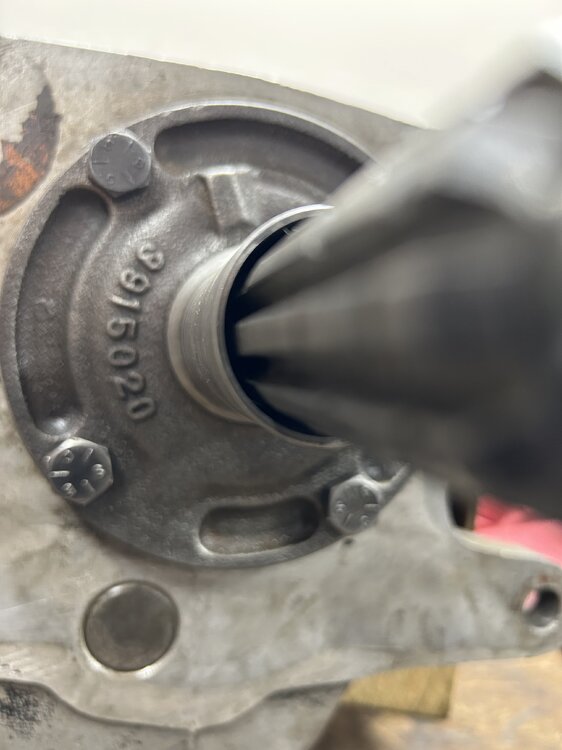
Yes, the bushing was out. I’ve had bad luck trying to get them out in that manner. Evidently it doesn’t seal tight enough around the sides of the bushing so it doesn’t press it out what you’re essentially doing is hydraulically, pressing it out unfortunately, the majority of the ones I’ve removed have been so tight That this was the only way I could do it. The ID of a new bushing is .593 The input shaft on my transmission was .589 before I pulled the bushing out. I found a socket with an .600 outside diameter put it in the bushing and there was 1/8 of an inch of movement in it very worn out. I will freeze the new one overnight install it and of course trial fit it to make sure the input shaft will still fit. -
What did you do to your Monte Carlo today?
John S replied to Canuck's topic in General 70-72 Monte Carlo Forum
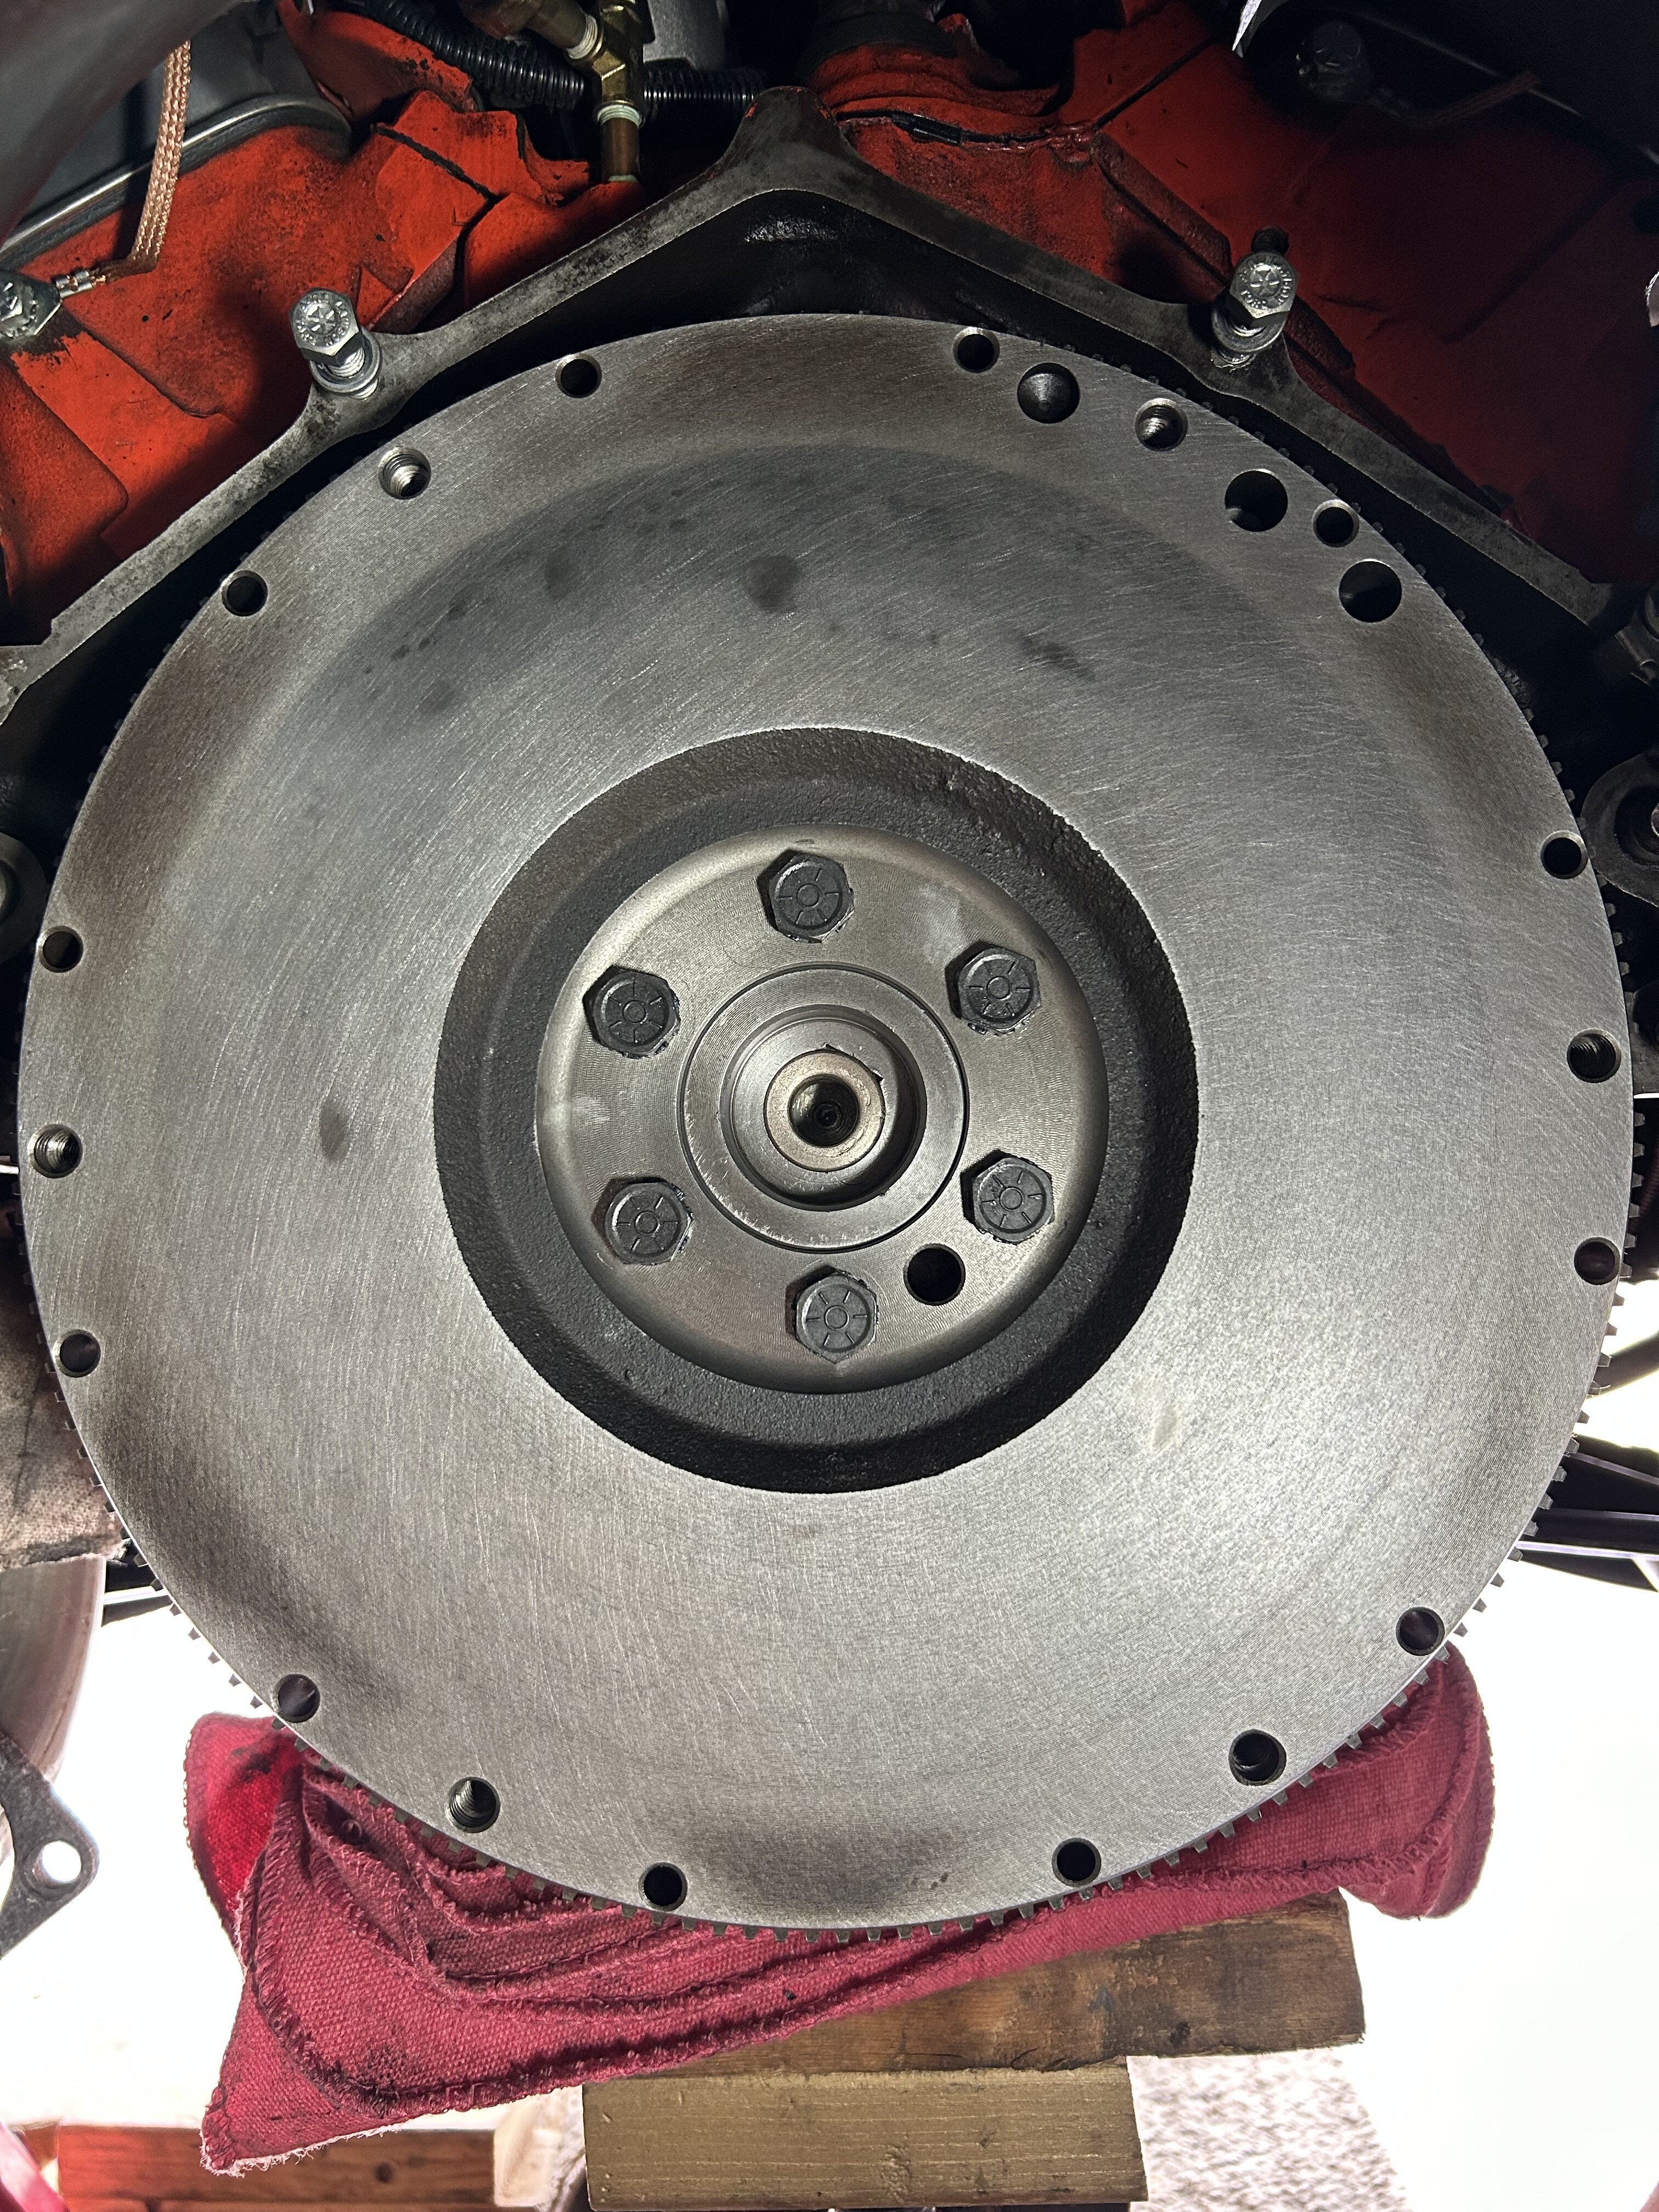
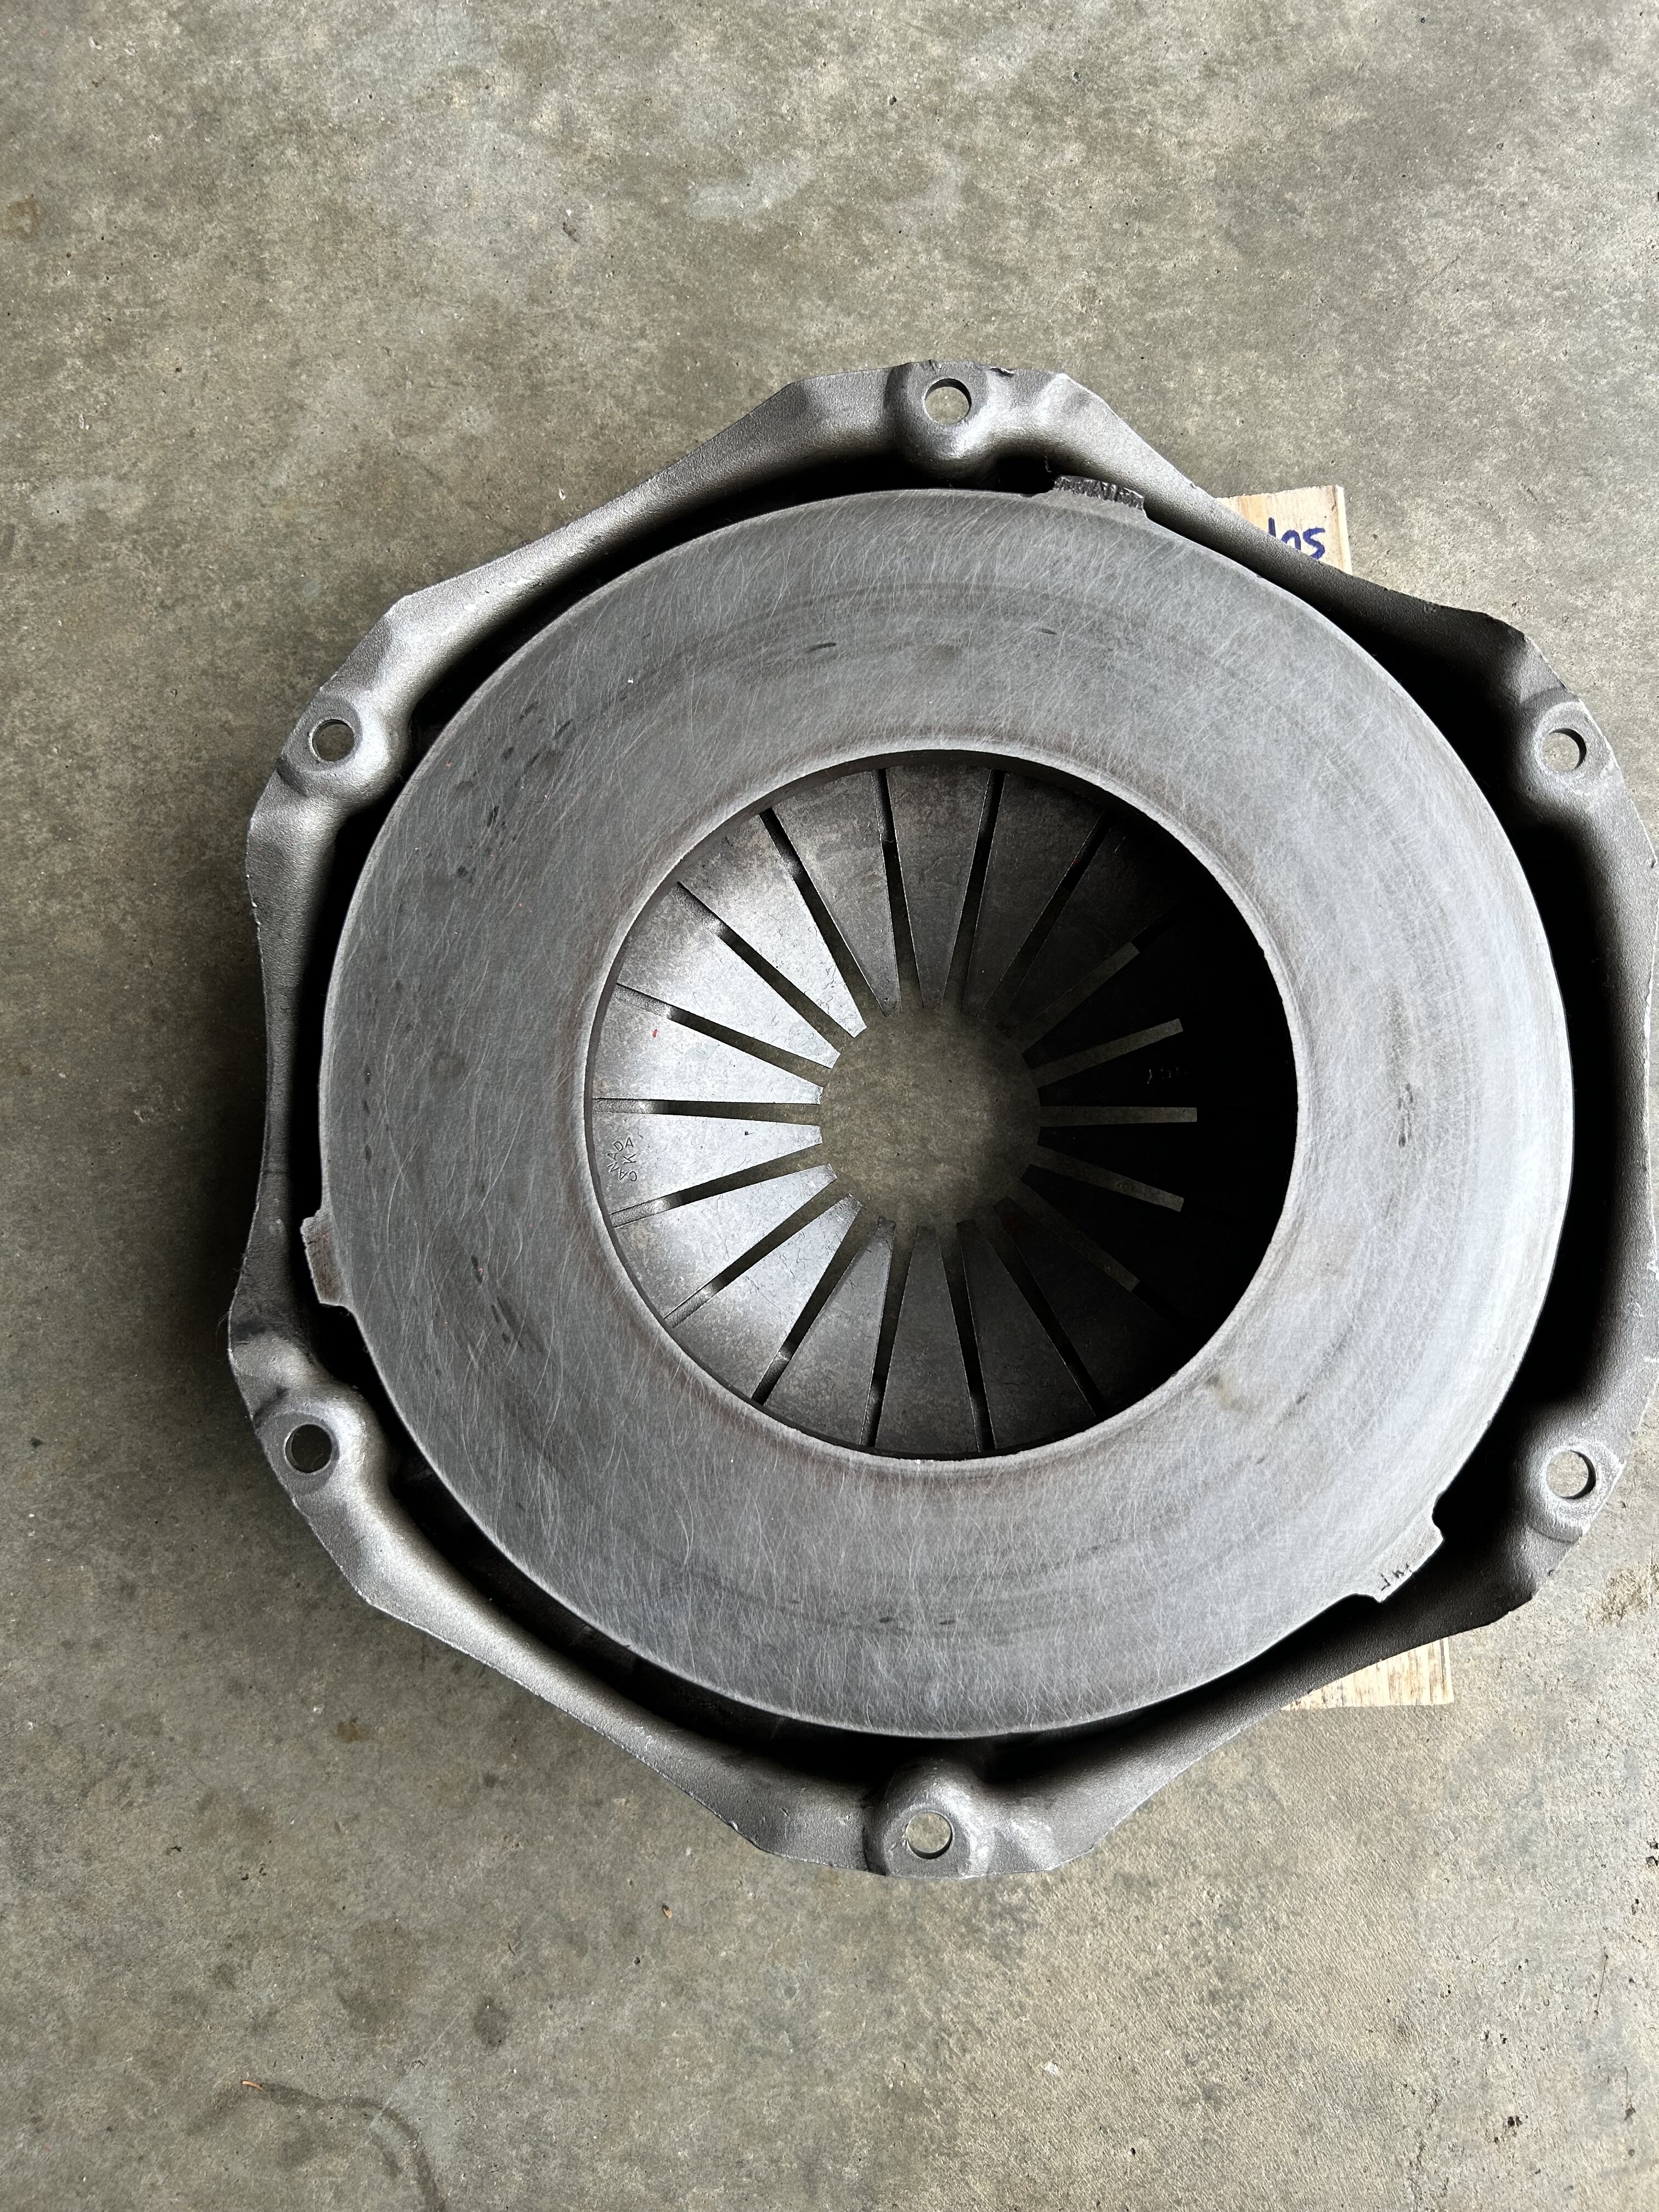
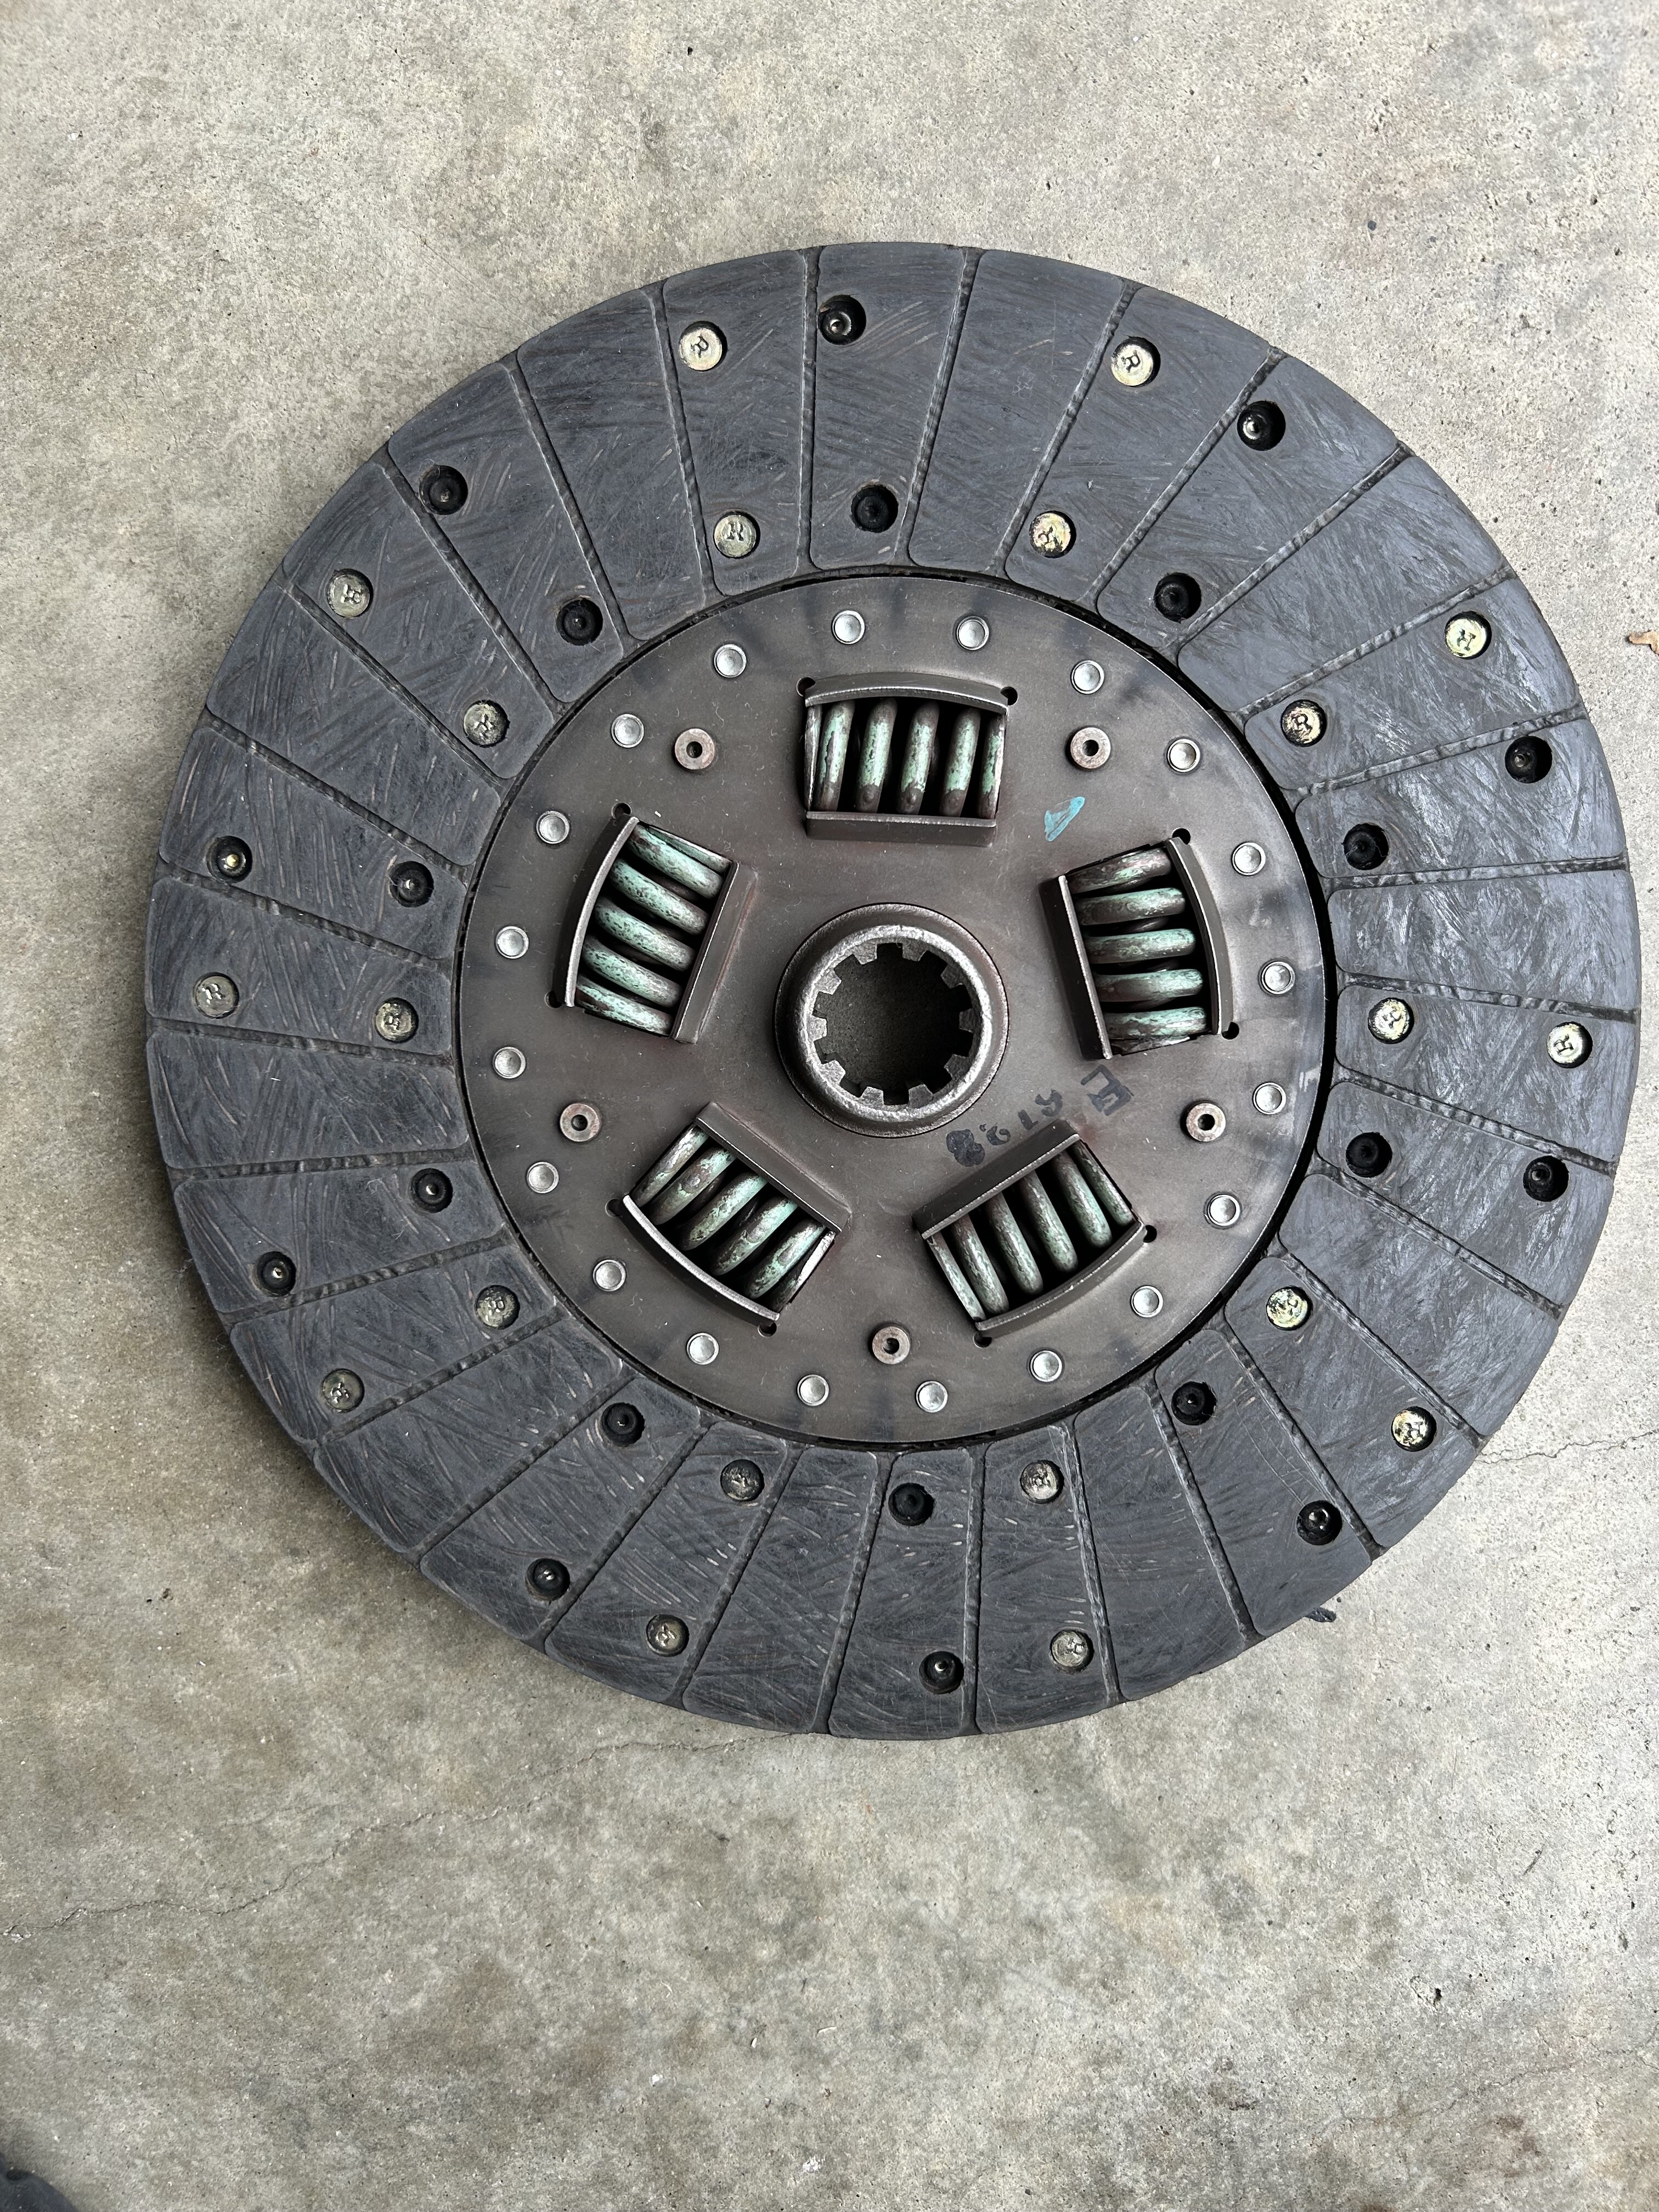
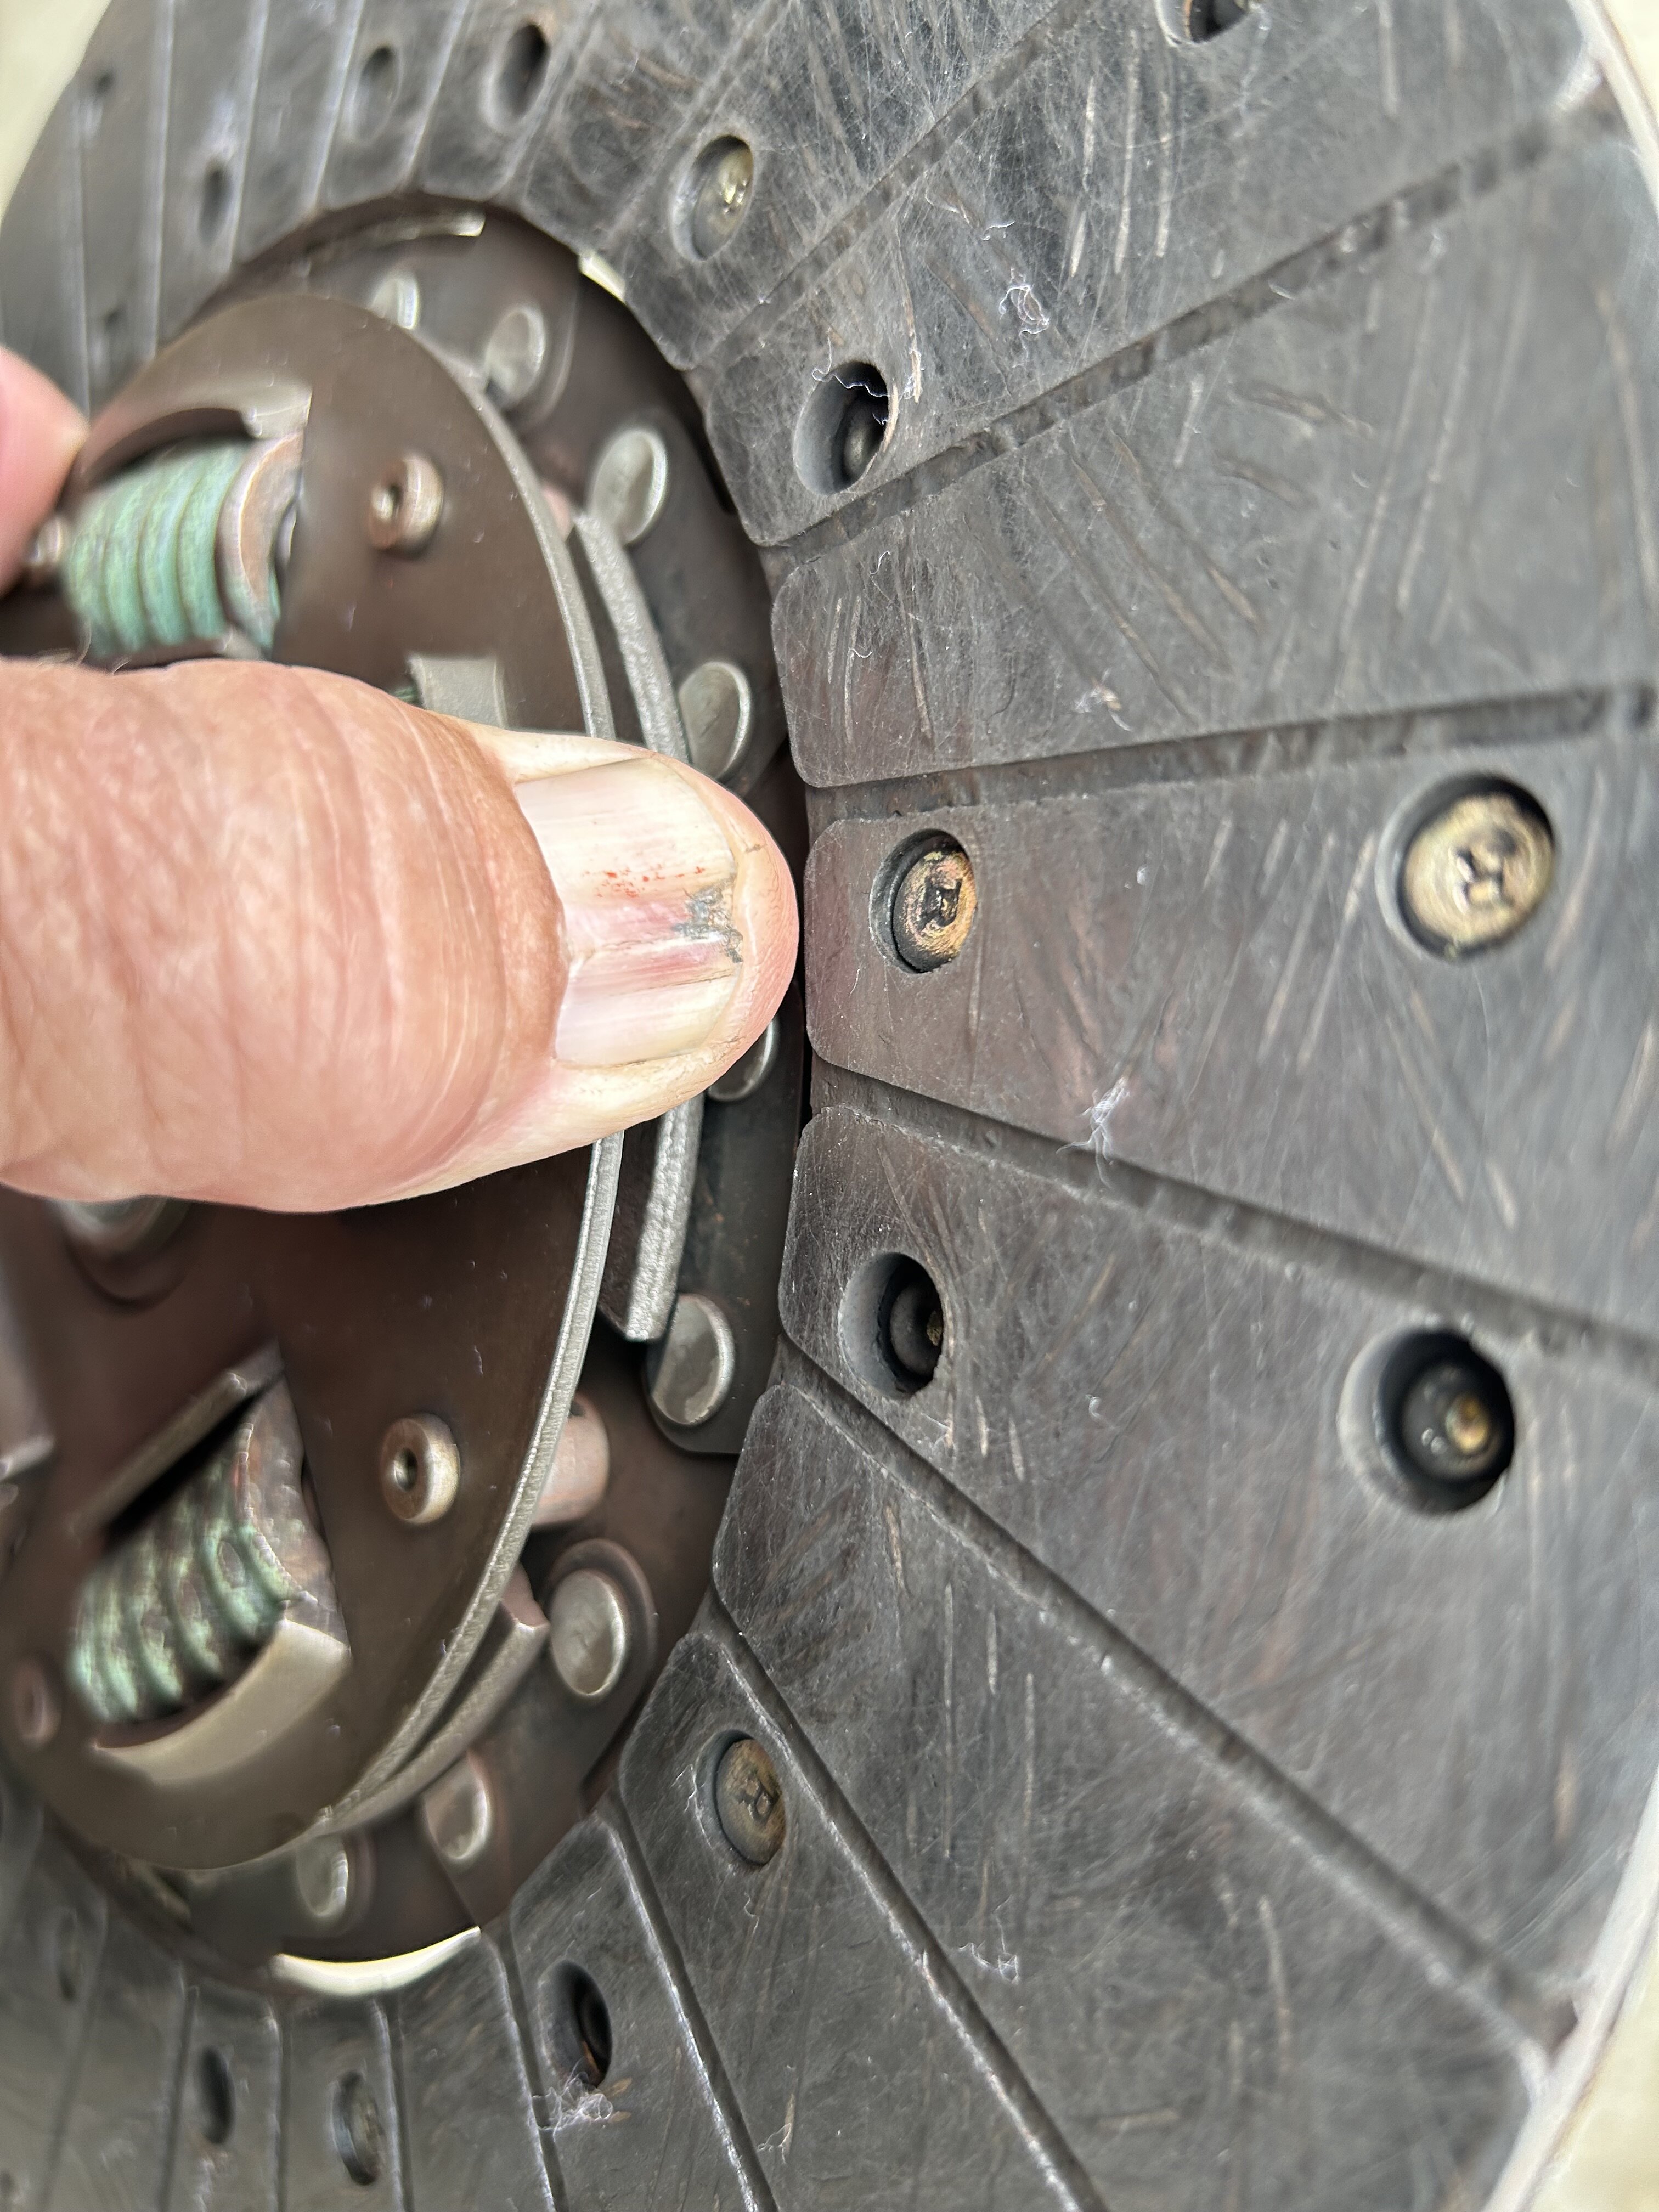
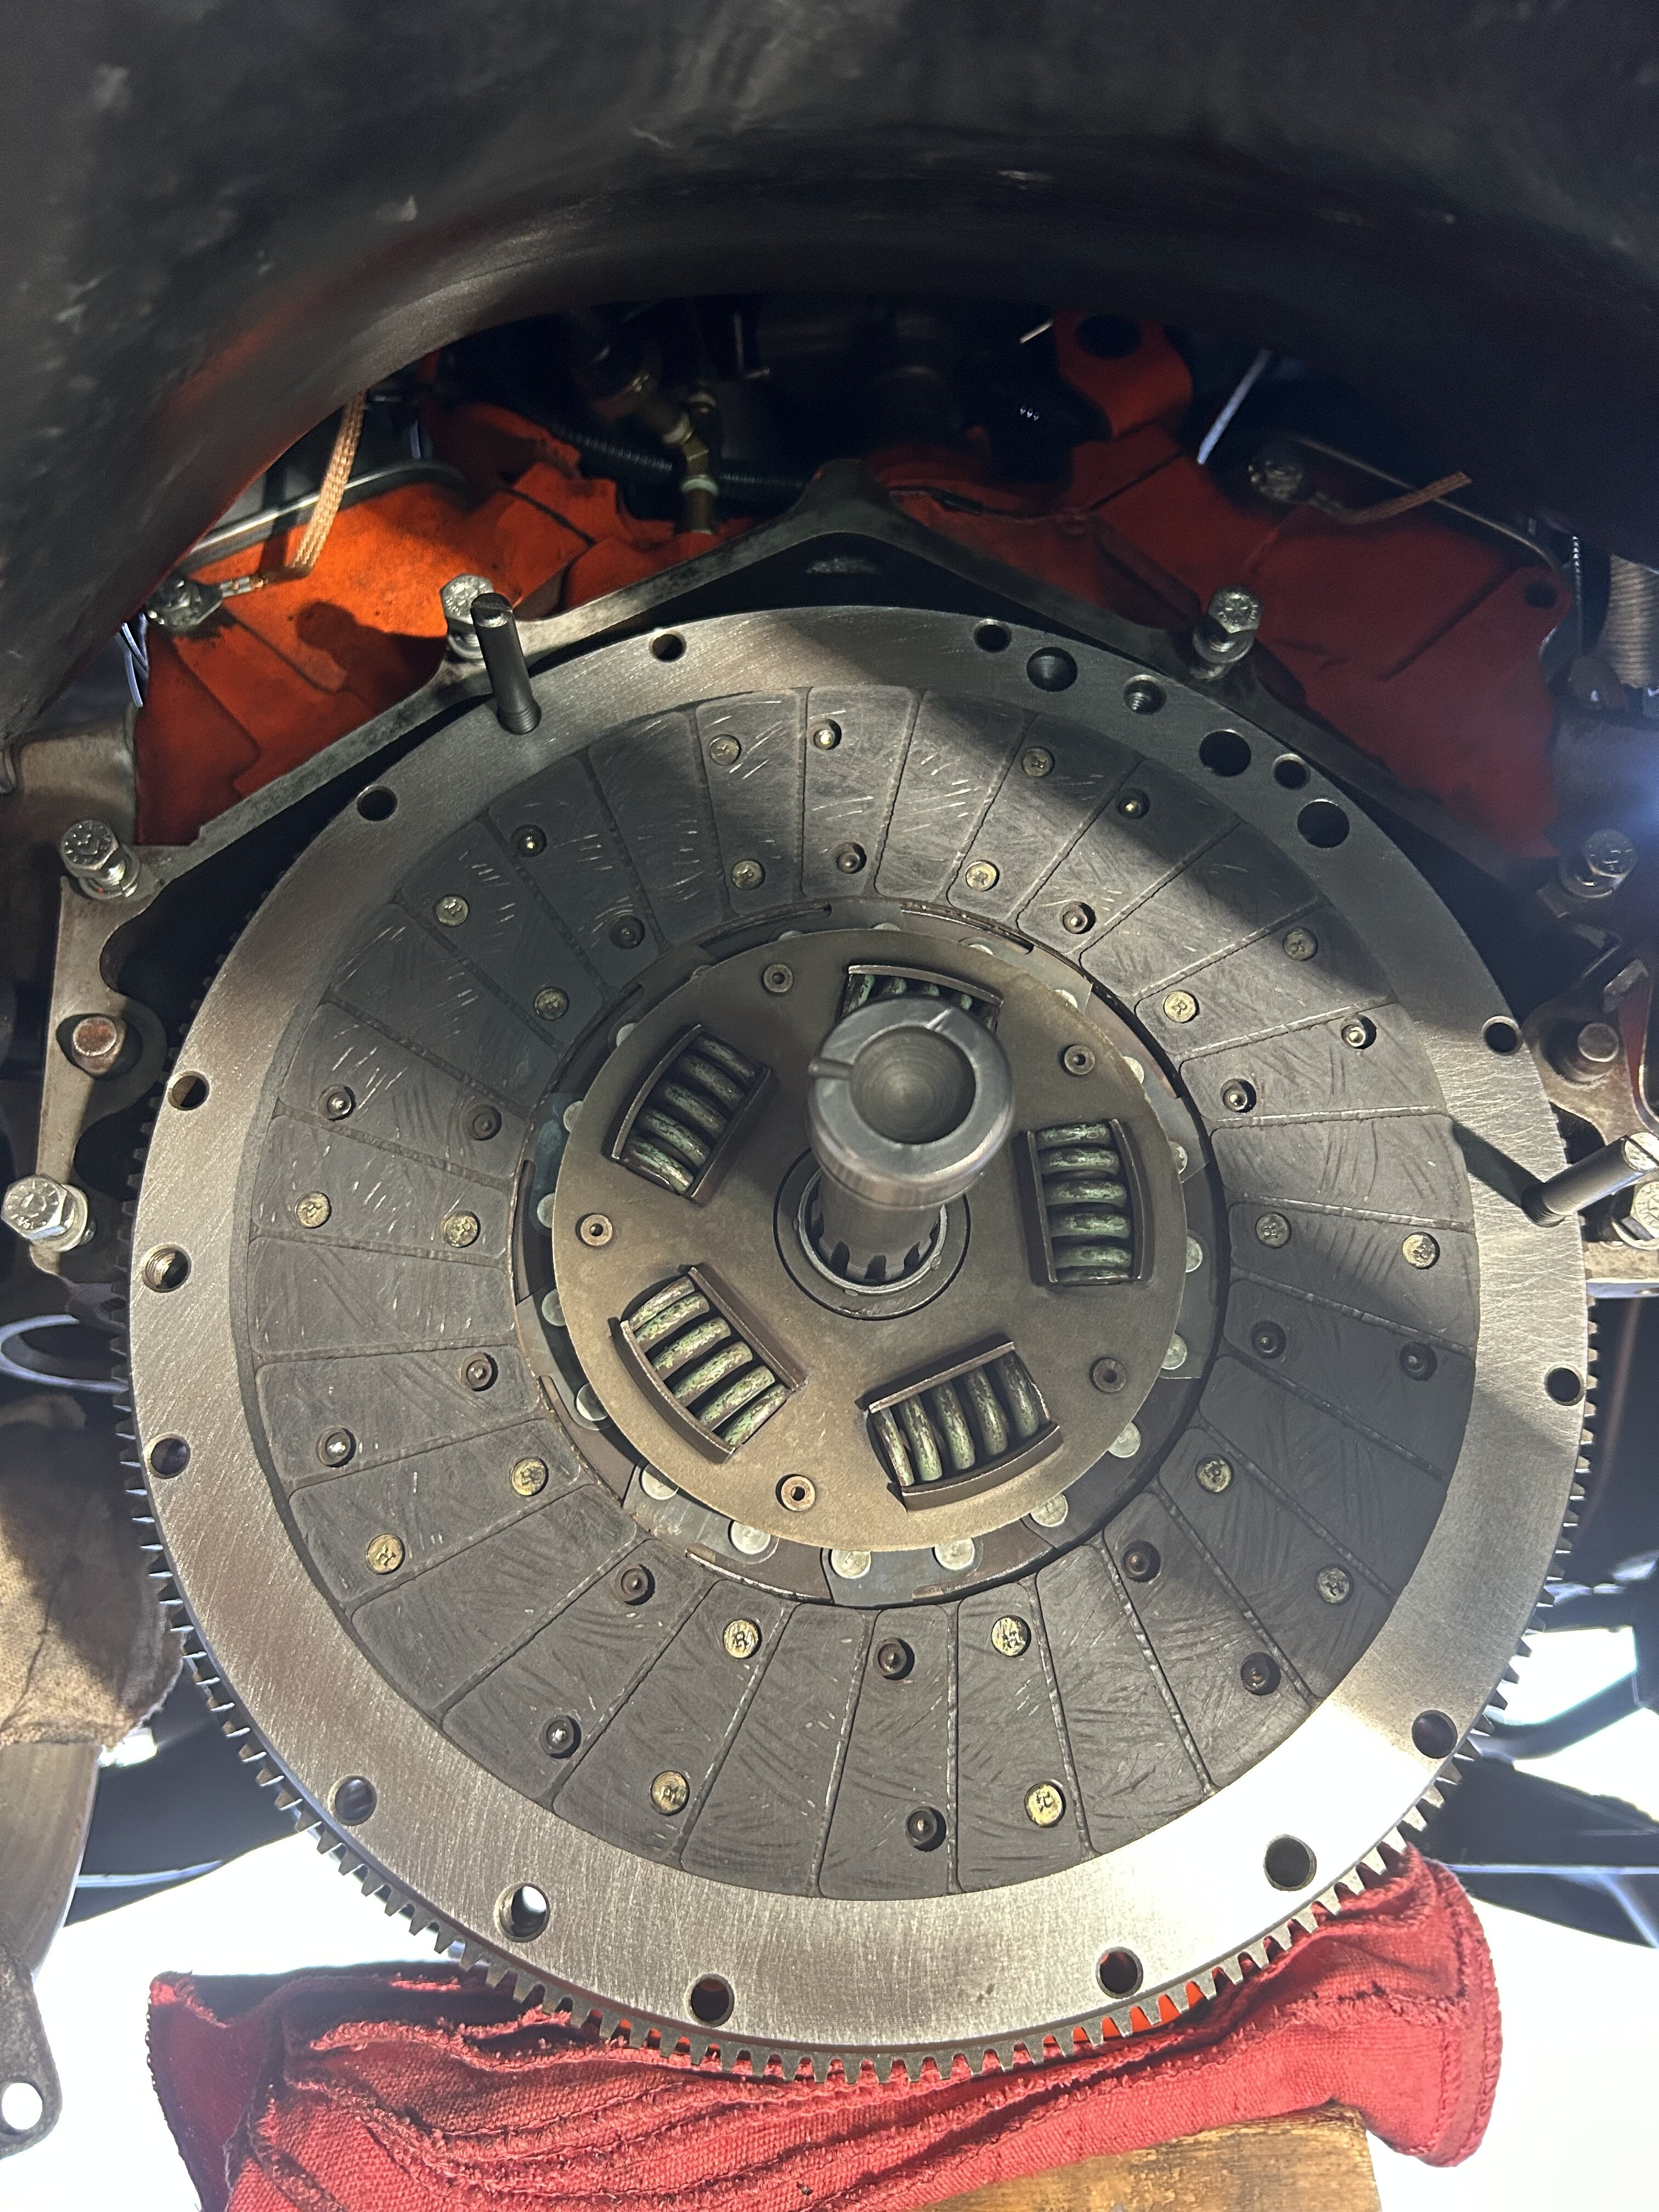
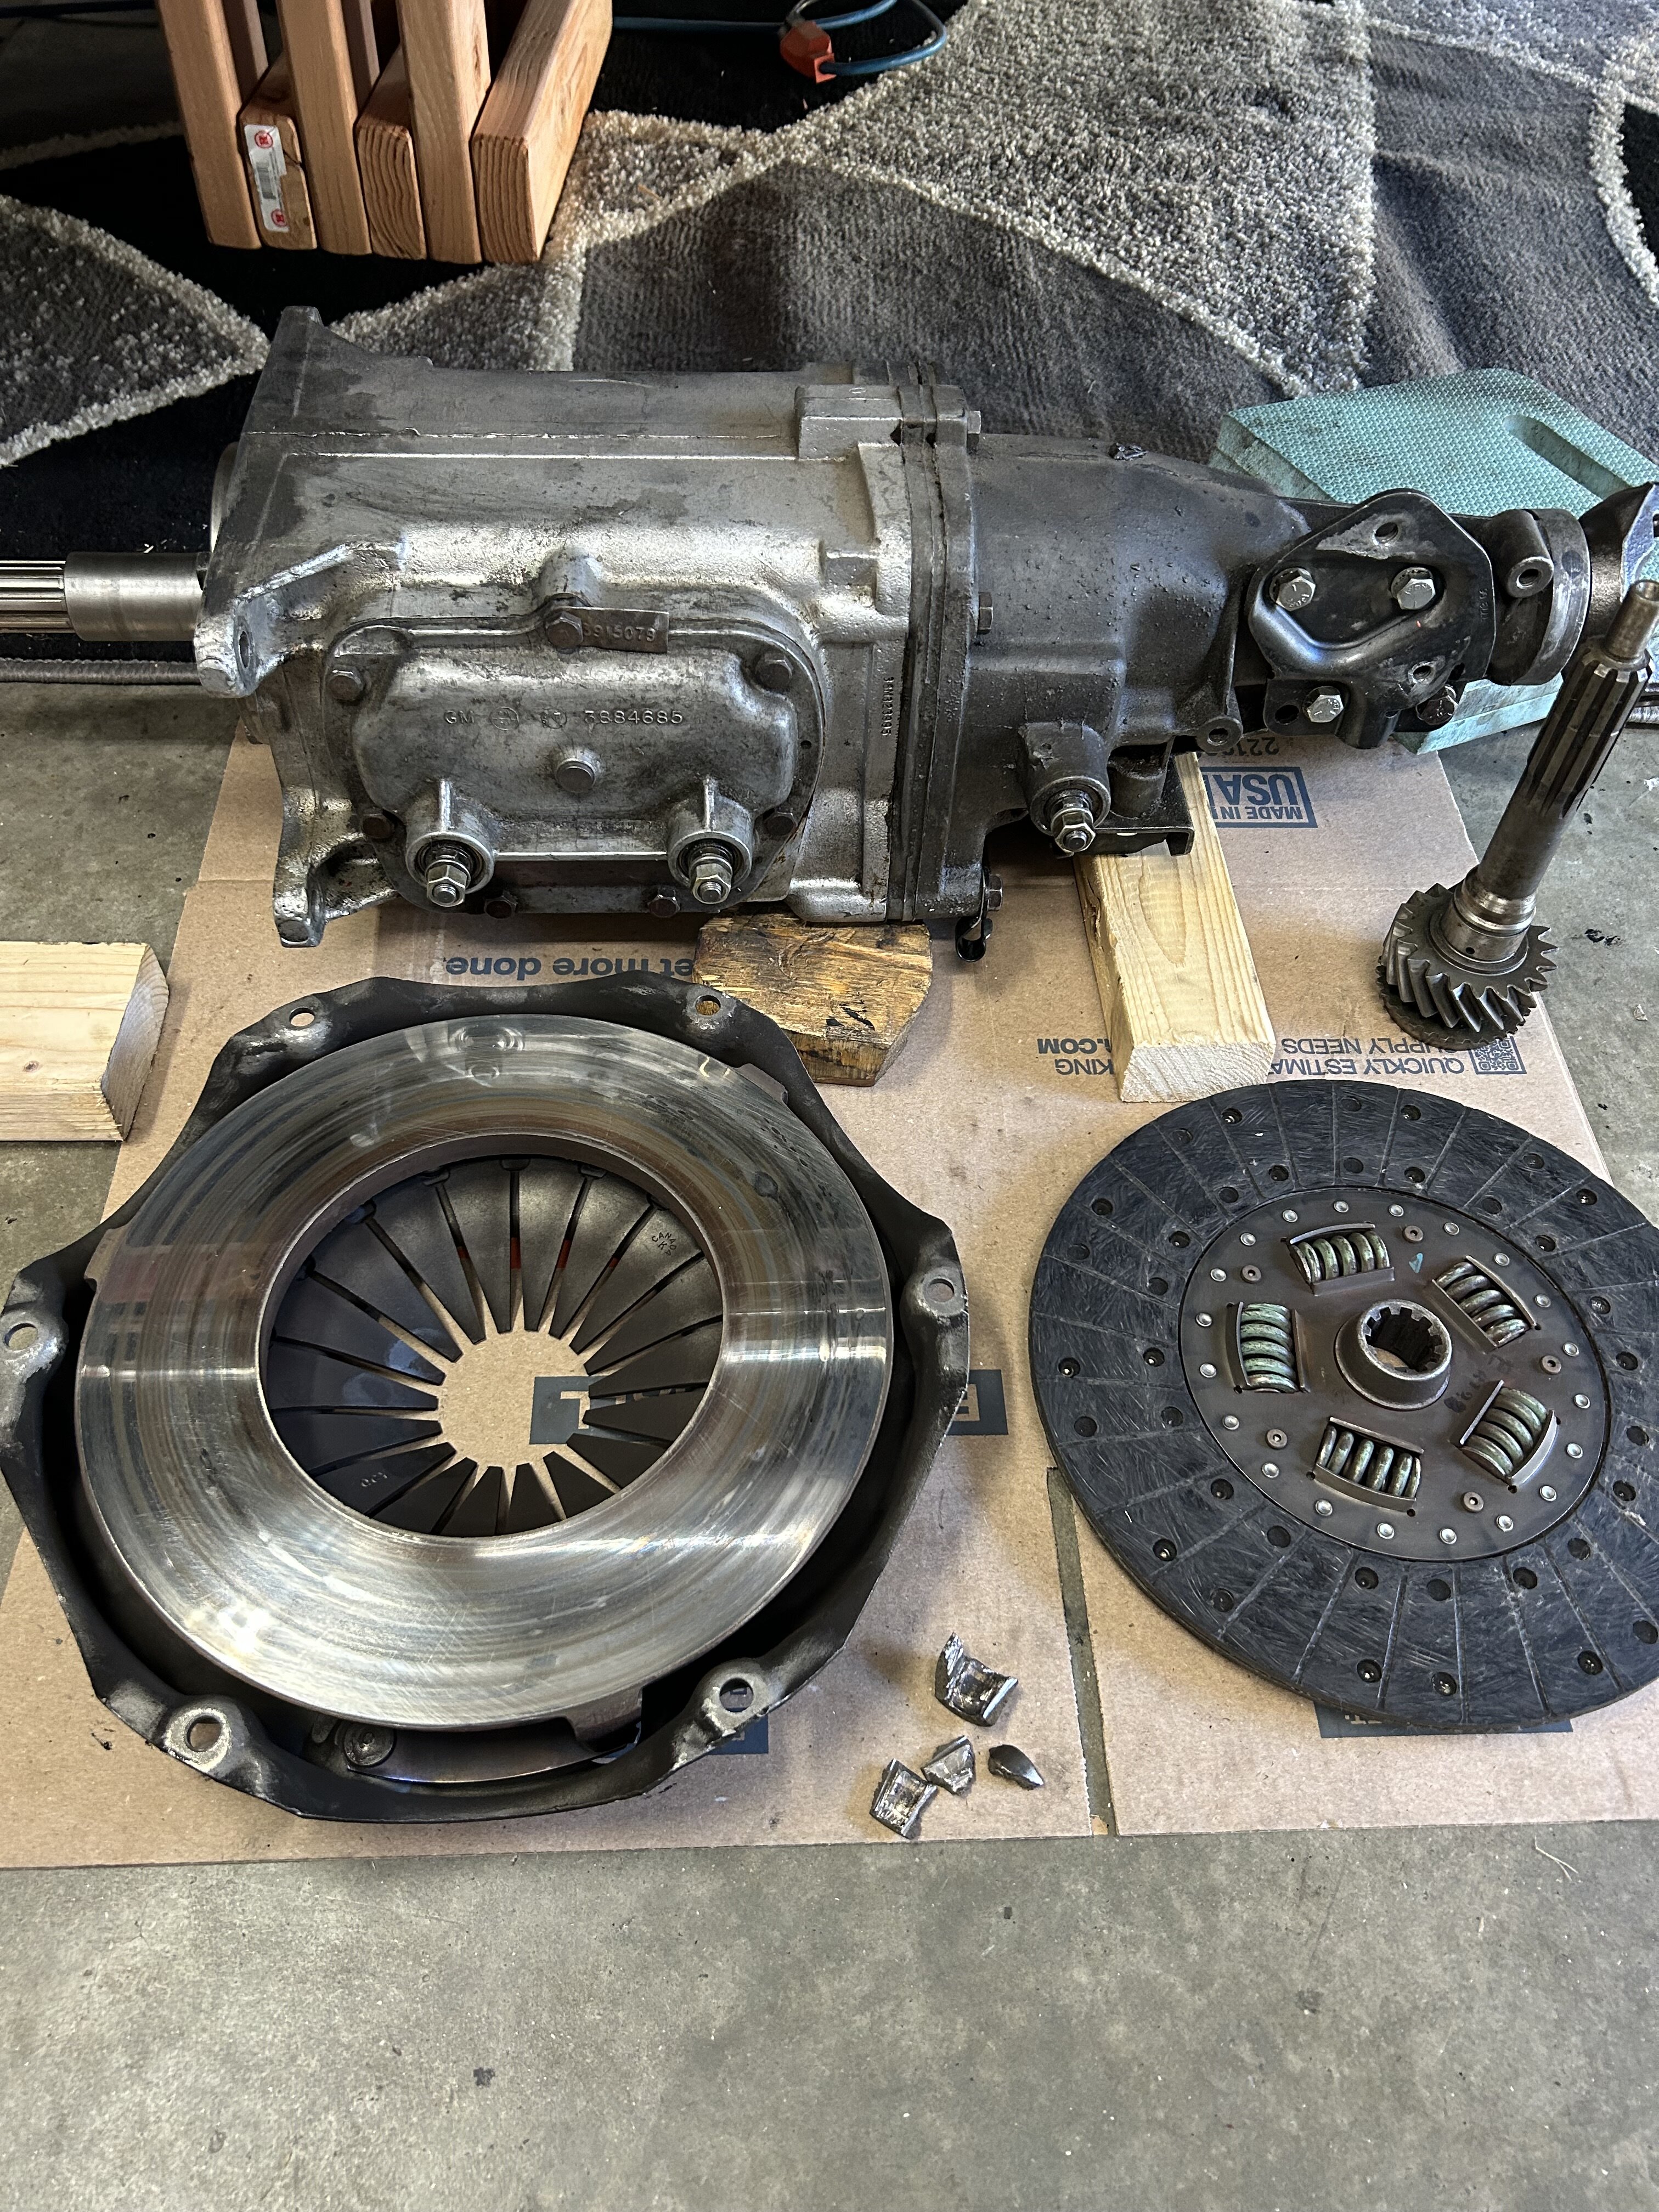
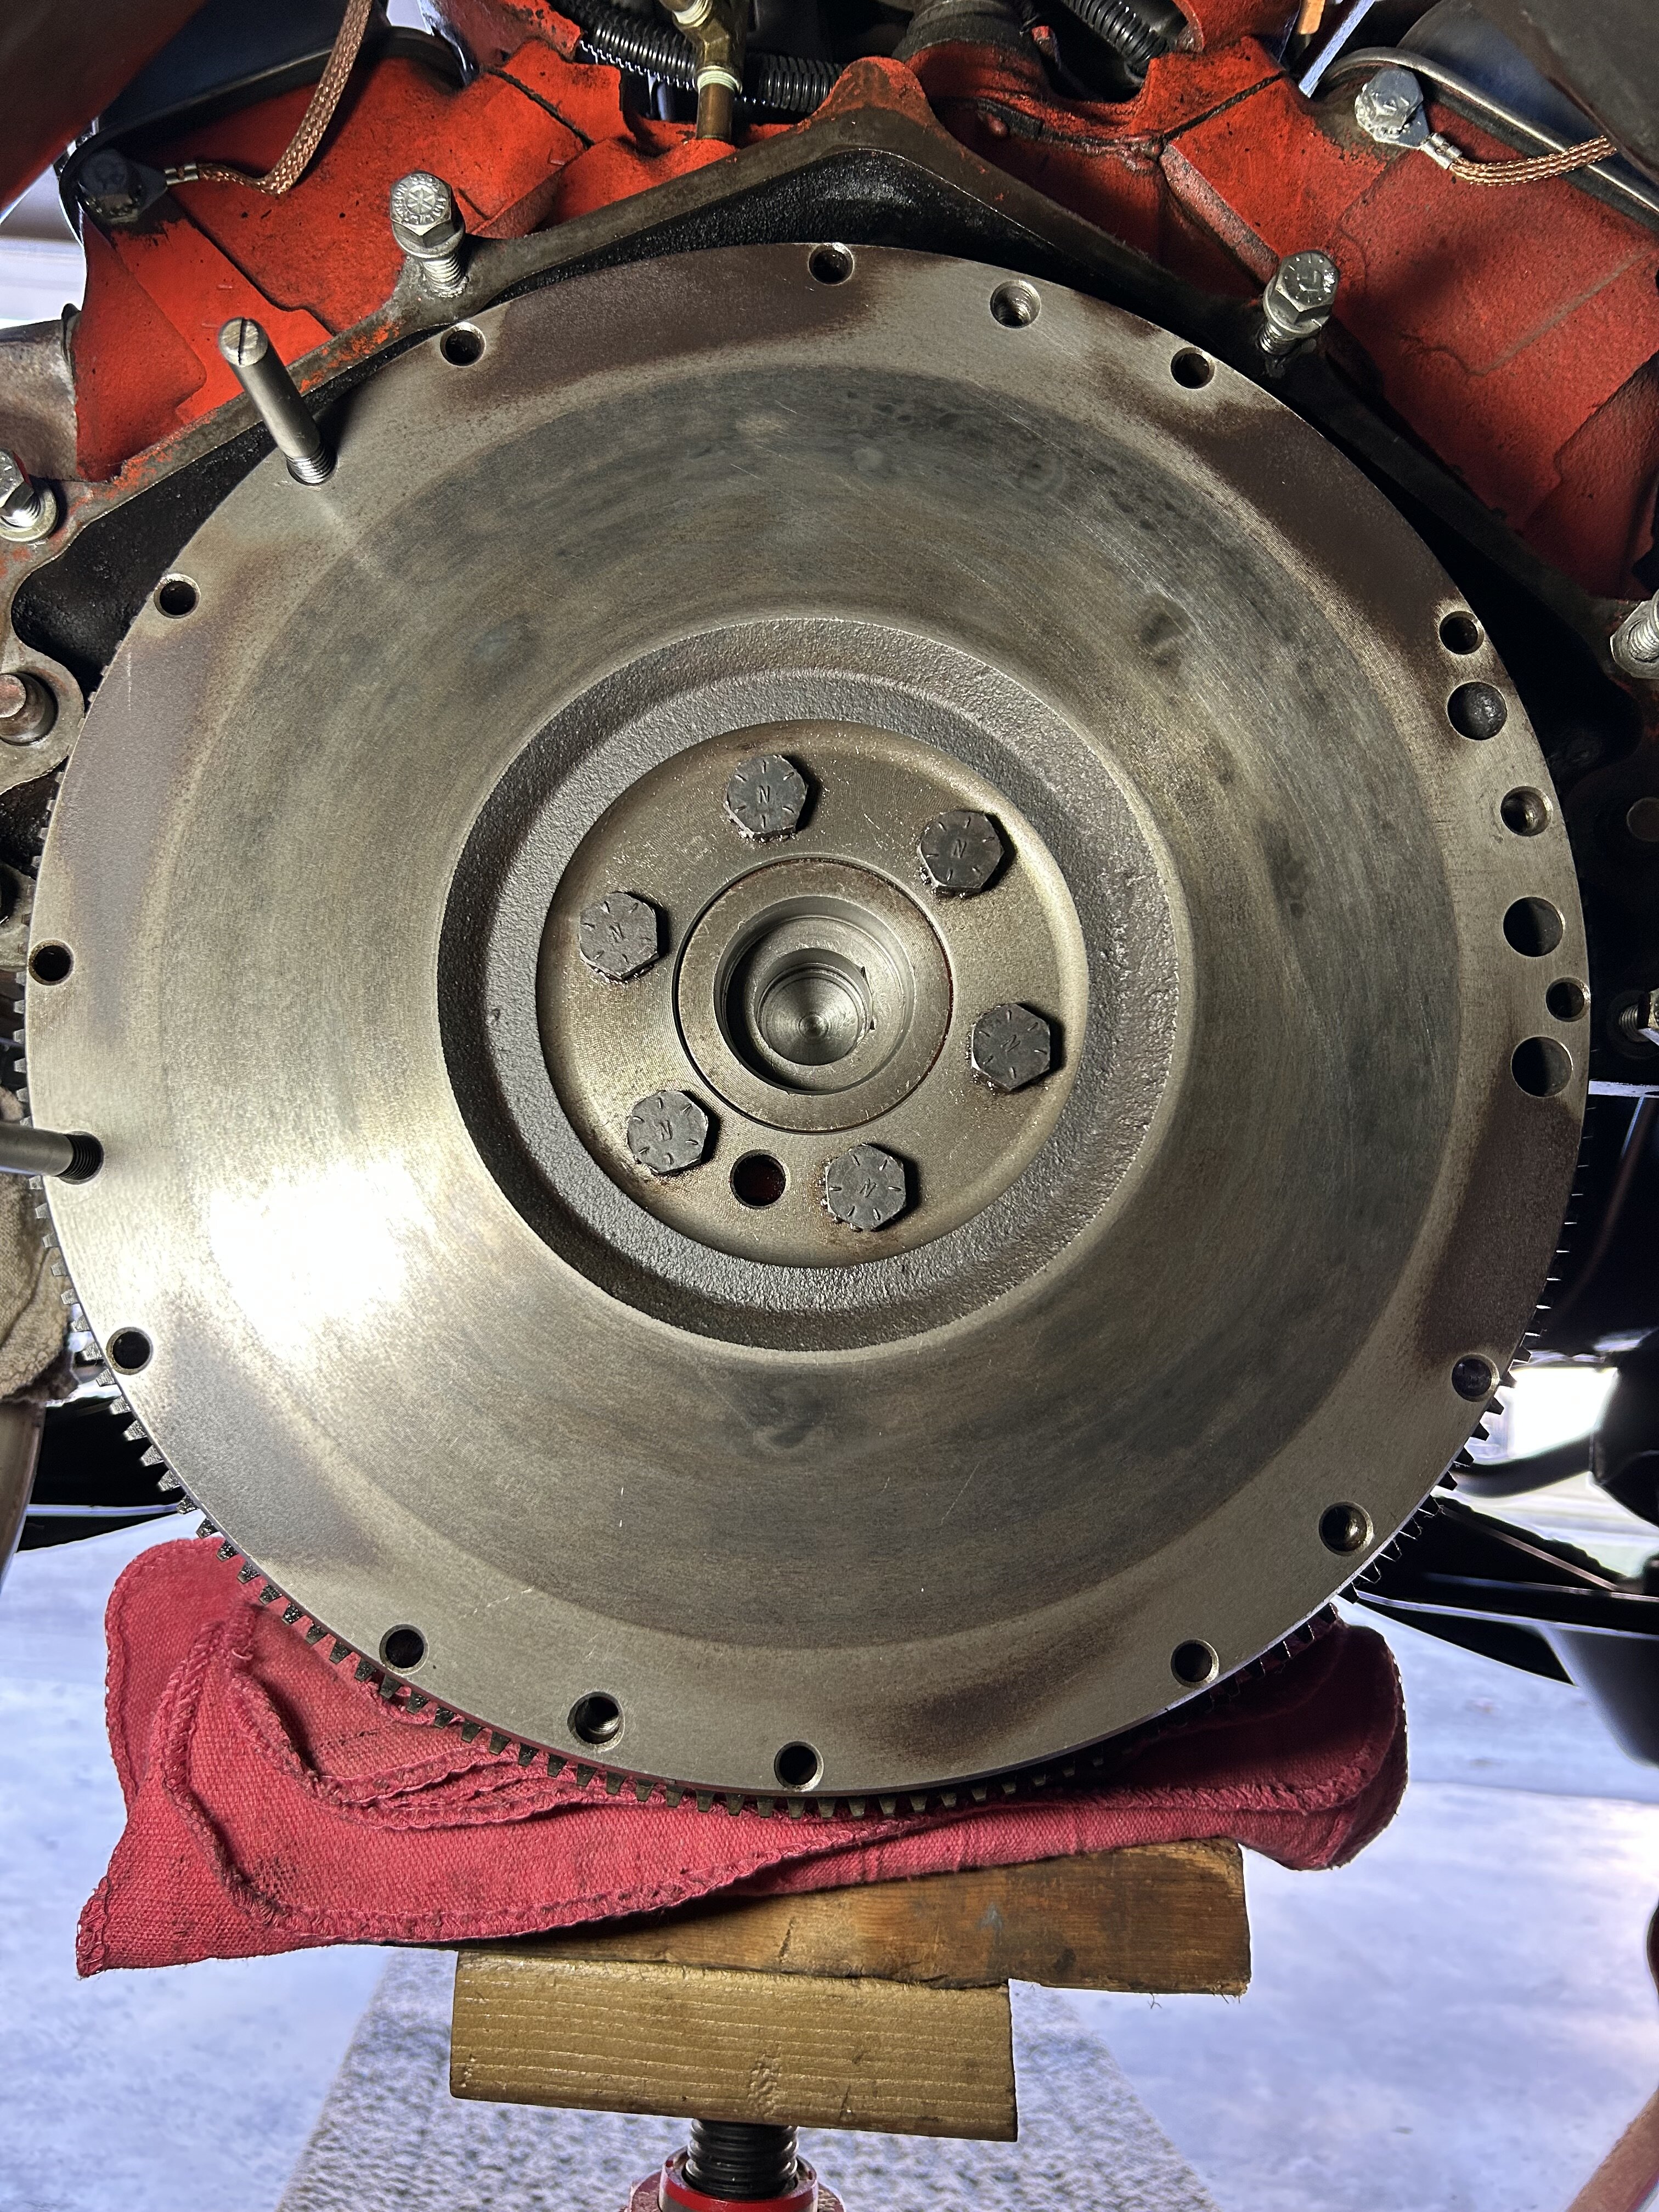
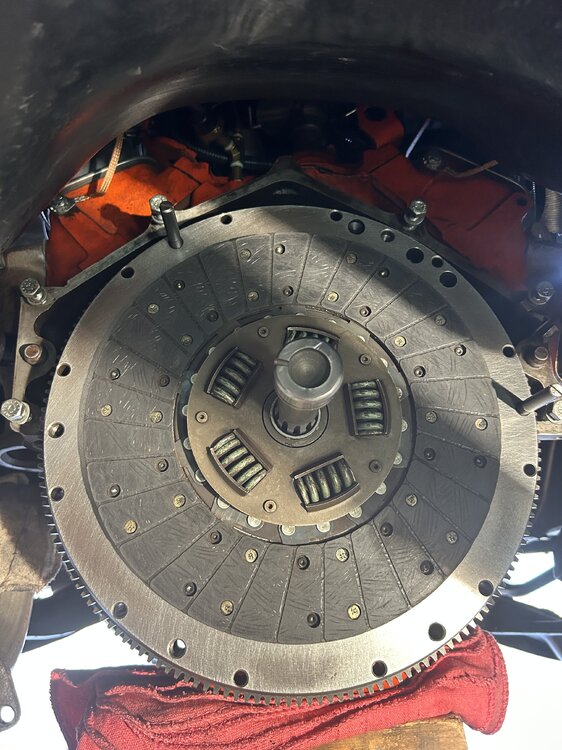
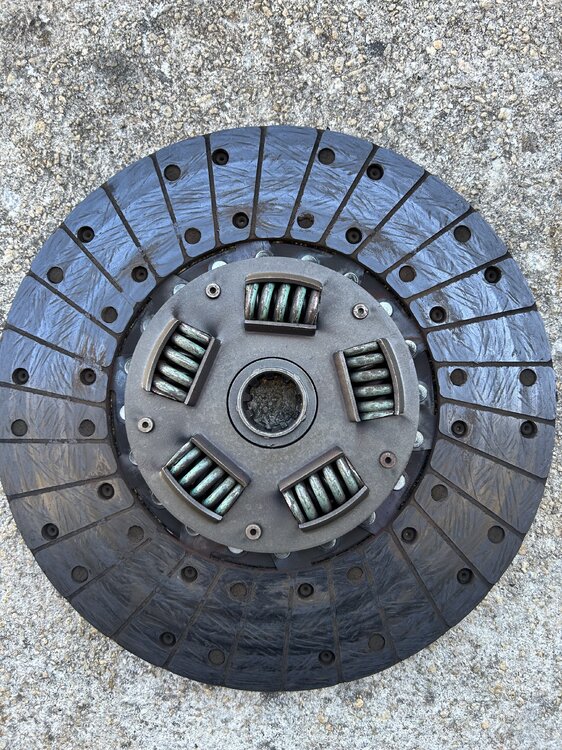
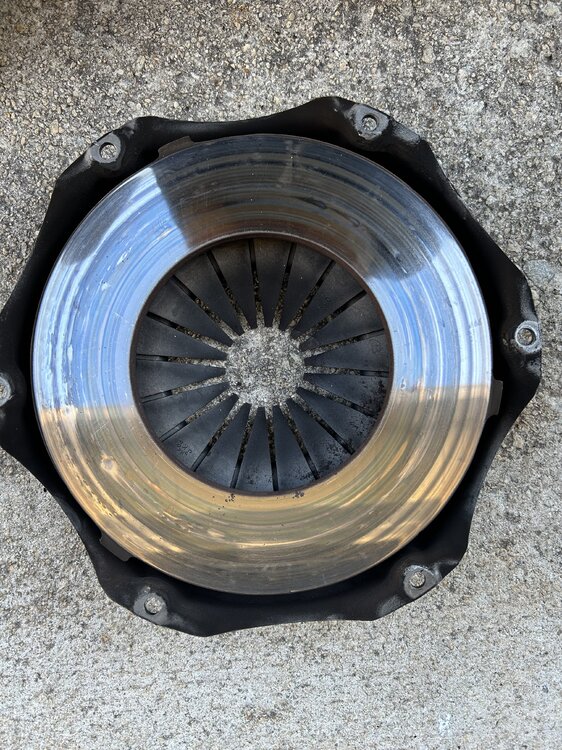
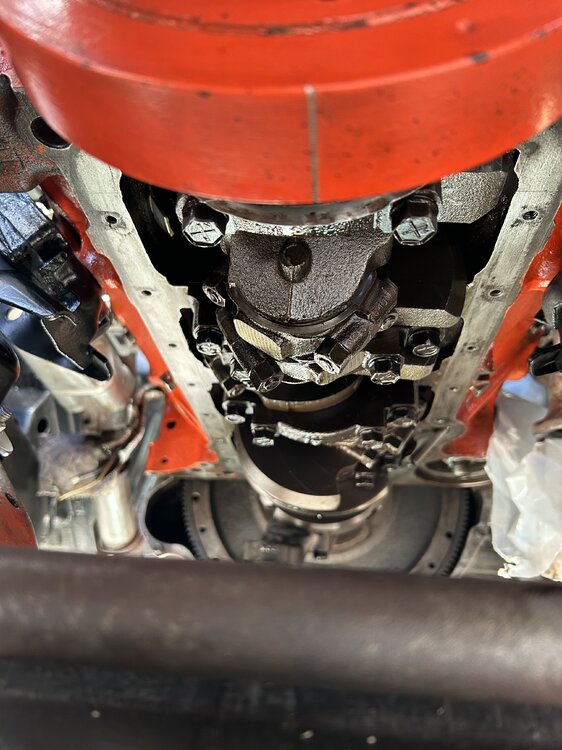
Pull the transmission found the pilot bushing to be excessively worn so out comes the clutch. By the pictures the flywheel, pressure plate, and disc look good. According to receipts I have when I bought the car clutch kit was replaced along with flywheel in 2008 everything but the pilot bushing. And of course, as luck would have it my new pilot bushing puller did not work, imagine that. Out comes the hacksaw, cut bushing, and chop it out in pieces. Fly wheel cleaned up. Very nice since I’ve gone this far. Probably a good idea to put a new clutch in. Any thoughts on that or use the old one? Also yes if you notice you are correct, the transmission is pre-1969 it is 1968 M20 P8C11 John S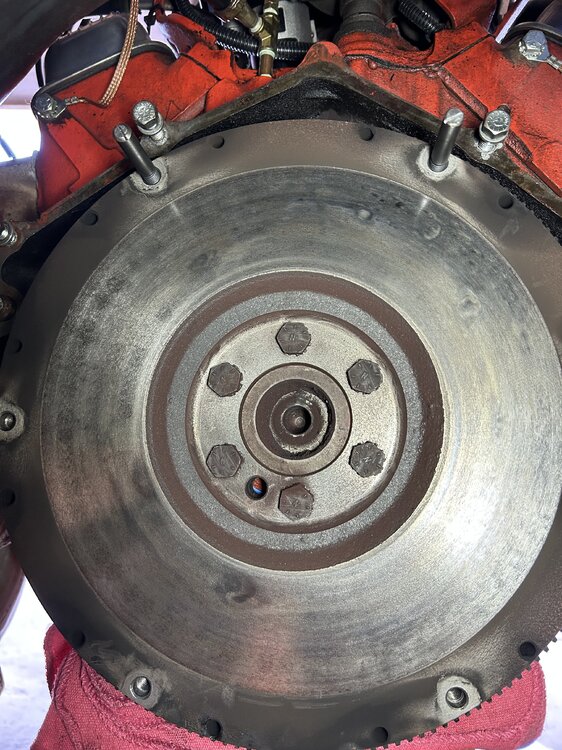


-
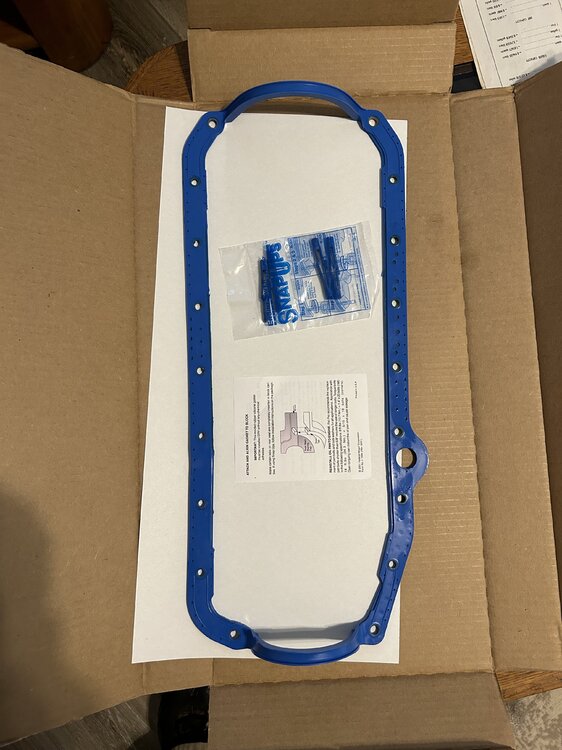
Thought I had a rear main seal leak. I didn’t see any oil tracking coming from the rear main bearing. I have a couple pictures looks more like oil pan leak at the front. I’m not going to attempt the rear main seal now I could make it worse. Of course it evolved into more. Had to replace motor mounts and get new bolts for the mount to engine bolts since they were corroded. The frame mount bolts after checking were all loose. Took the mounts off got new bolts. Used flange head bolts since on the inside of the frame is rough look like somebody attacked them with an impact. Those bolts are fairly easy to get at if you have a 9/16 universal socket not a universal and a socket but a swivel socket. Also, thought I’d check out the starter fairly dirty on the inside solenoid shift lever was worn. Found one on eBay an NOS shift lever solve that problem. Had to fight a little bit to get the motor mount through bolts to line up. I don’t know if others had this problem, probably due to both mounts being new, but a couple lineup bars took care of that. The Fel-Pro one piece gasket sure seems to be the ticket went in very easily. Also I did measure the opening at the front to make sure I did get the proper seal, and it required the thin seal. Now pull the transmission and change the shifter shaft seals. Correct me if I’m wrong but the reverse shifter shaft in the tail stock appears to have a pin that is driven out to remove that pretty straightforward should be reusable, correct? John S
-
That is a nice car. Back in the 1960s you could get some big engine, four-speed and 4.10 gear options in those lower model, Belair and Biscayne‘s. John S
-
Drilling a couple new holes is a minor detail.