72-CLASSIC_RIDE
-
Posts
1,170 -
Joined
-
Last visited
-
Days Won
33
Content Type
Profiles
Articles
Forums
Gallery
Events
Everything posted by 72-CLASSIC_RIDE
-
The Mercury Switch is encased and built into the body of the lamp housing and yes, both trunk & Hood Lamps have Mercury Switches. Sorry, don't have pic's but had installed a second Hood Lamp a few Months ago. With the Hood up, see if your getting power to the Lamp Assy using a simple test light. I'm guessing it isn't the Mercury Switch that's the problem. The possibility of the bulbs burnt out is also more likely. Doug
-
What did you do to your Monte Carlo today?
72-CLASSIC_RIDE replied to Canuck's topic in General 70-72 Monte Carlo Forum
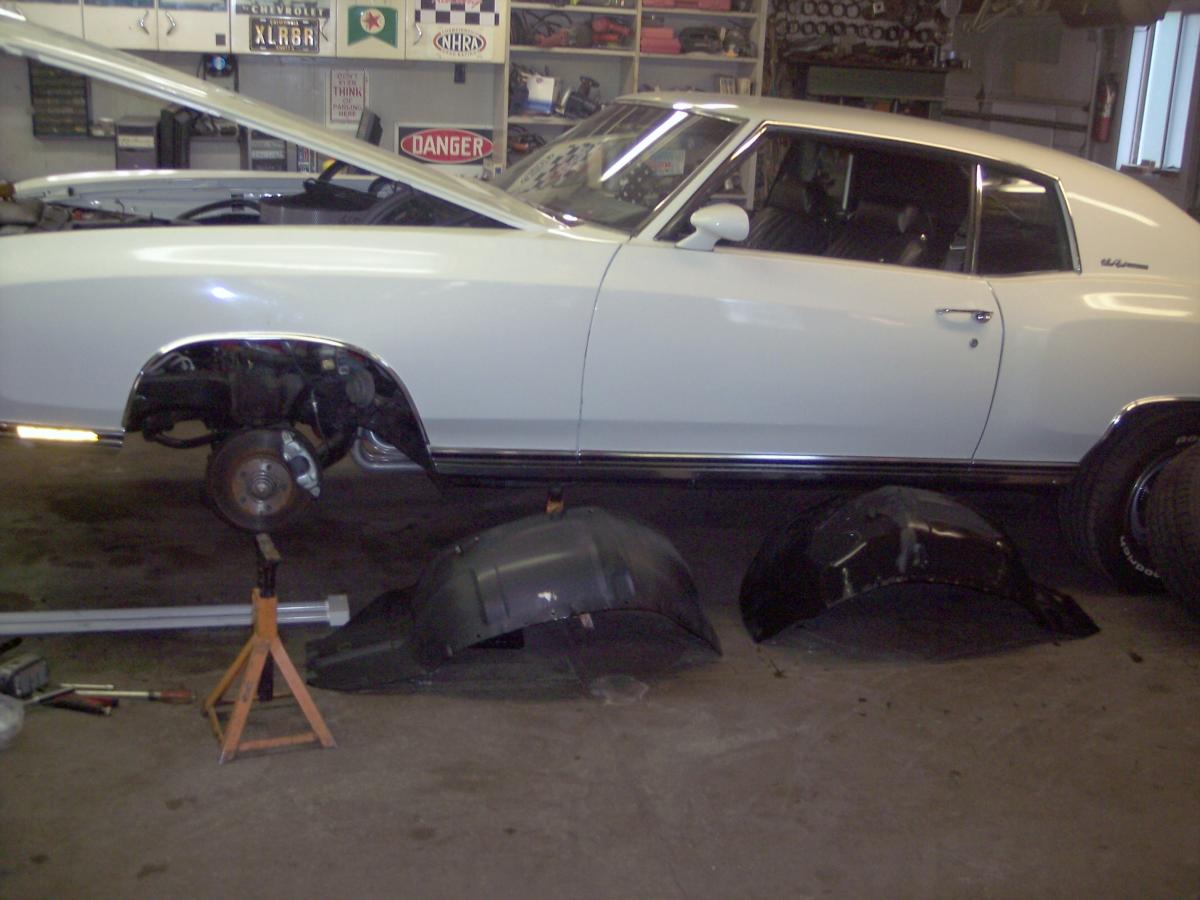
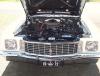
How about this Aaron. Both Steel Inner Fenders removed and had a broken "J" Nut that caused me about 2 hrs of pain before they were finally out. Cleaned them and then scuffed them for paint I hope Tomorrow Replaced Heater Fan Blower Motor and brushed POR 15 on both inside of Fenders and other vulnerable area's exposed surfaces for protection. My battery went dead and thought it was due to the Hood left open. During the second charging yesterday we couldn't figure out why it keeps discharging and assumed a defective battery as it is fairly new. While charging I noticed the Dome light was on and assumed one door was ajar. Both were closed solid so started checking things as I had prior routed the A/C wiring and assumed I did something in the process. As I was investigating, I remember that happening a few years back and found the passenger side door switch was darn hot when I pushed my finger against it to check if working. That plunger burned the crap out of my finger tip and at the same told on itself. Well, just me pushing it with my finger corrected whatever cauised it to malfunction and I forgot about it. Anyway, I decided I should check that Switch and it had malfunctioned again so today replaced with a new Switch on top of the several different issues I initially had planned. Long story short, tomorrow Paint Inner Fenders, Monday I hope to start putting Inner Fenders back in and once done there check the voltage going to the Blower Motor to ensure it is getting what it should need for maximum output. Don't expect to be completely done until Wednesday or Thursday. These were the Chevelle Steel Fenders before Monte's were made and required massaging going in. While fitment will be much improved even after these past 7 or 8 years, looks like some massaging to get em back in. And again, my assumptions for completion are based on more surprises moving forward. Doug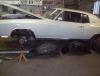
-
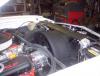
Spent today routing the A/C wiring and changing how POA electrical plug connects due to the clearance issues I explained in earlier Post. While I can't say as yet if when I start car and run the accessories to make sure everything still works because Hood was up so long battery got drained (will run checks tomorrow A.M.). So I modified the POA Electrical Socket so that I could use that function (whatever it may provide), routed the wiring through wire looms and connected the wires as told in discussed in previous Post. Tomorrow I am removing the Inner Fenders for paint and while out, I am replacing A/C Heater Fan Motor (weak). With Inner Fenders out, I will check back in Fender corners to make sure no debris and may use POR 15 splashed on protecting against corrosion in that area(s). So the pic's are what I did today to (hopefully) complete this part of my project. I have less than 2 weeks now to get her ship shape for the Western Meet. I will be as done as I can be before that date. Doug

-
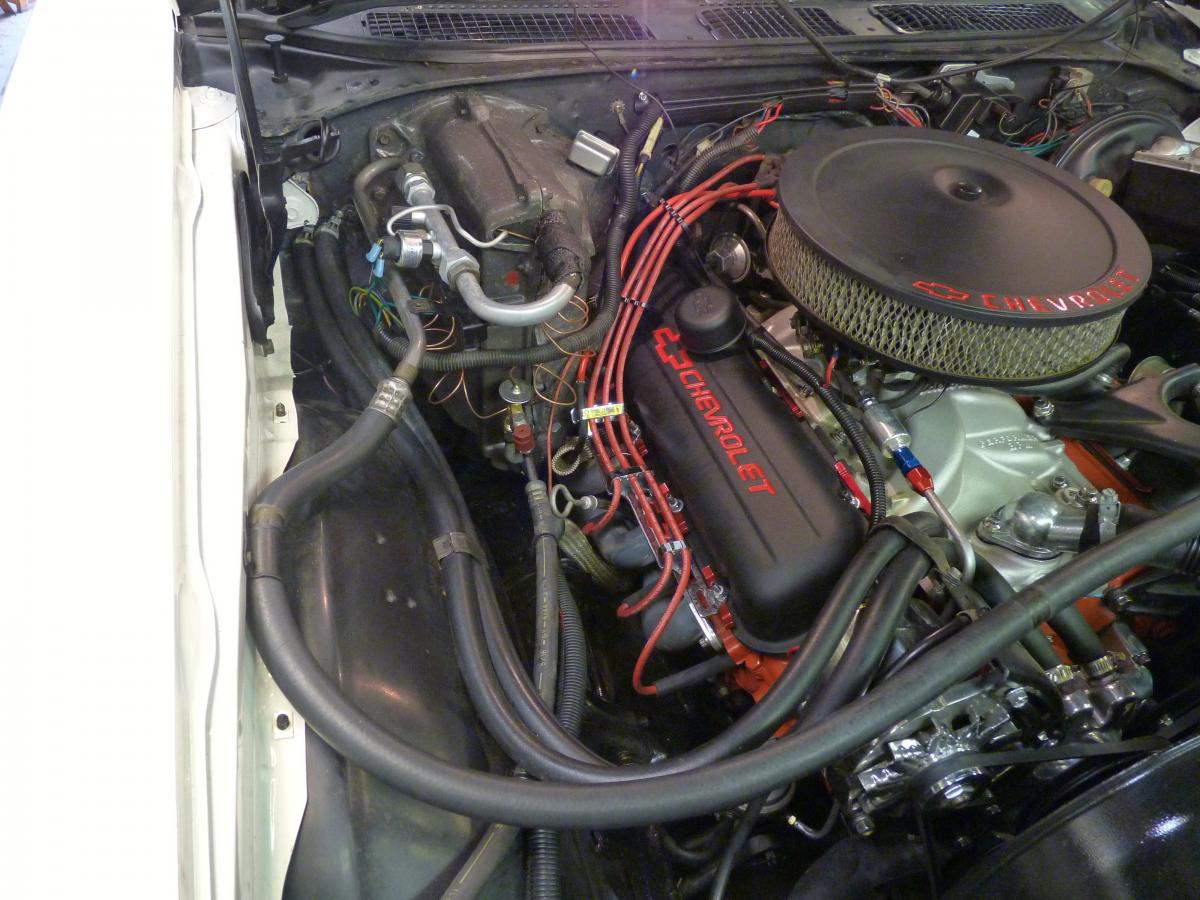
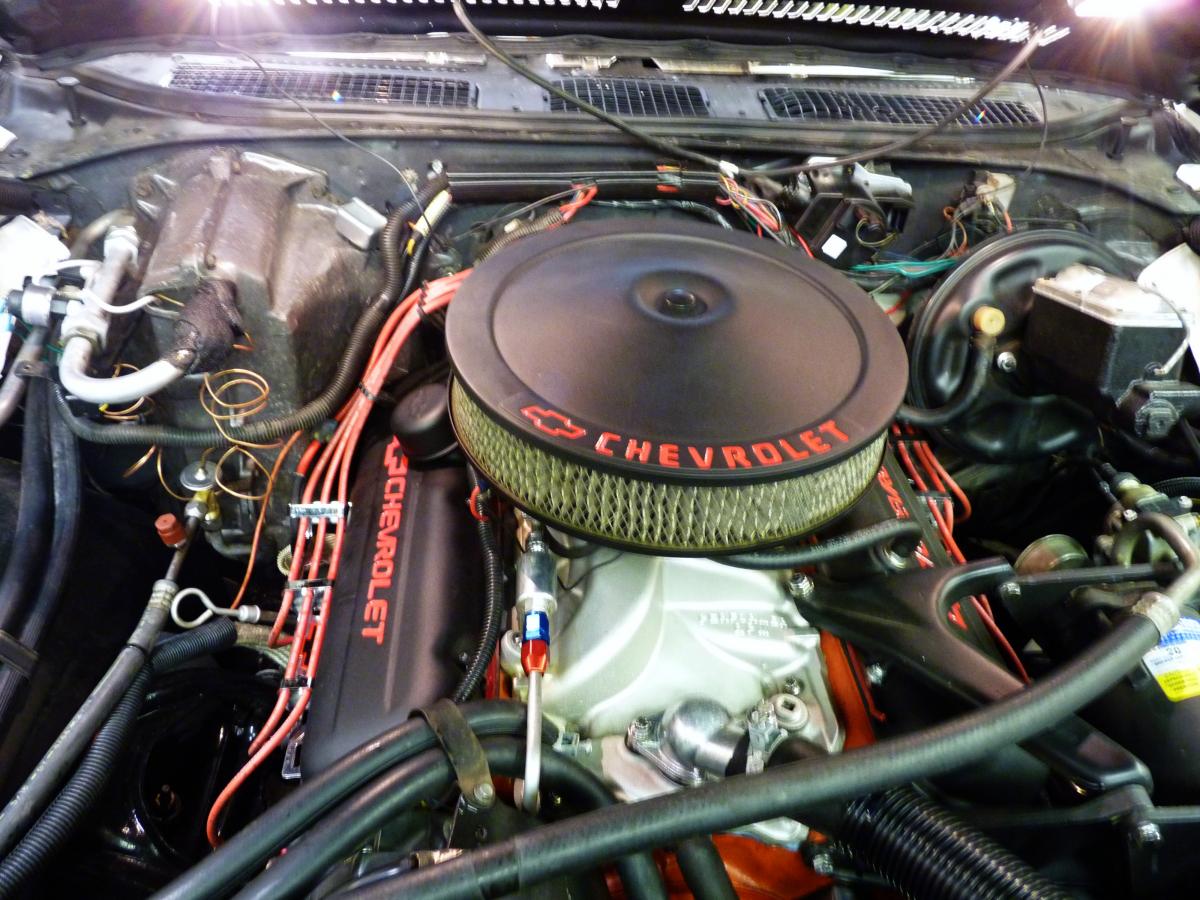
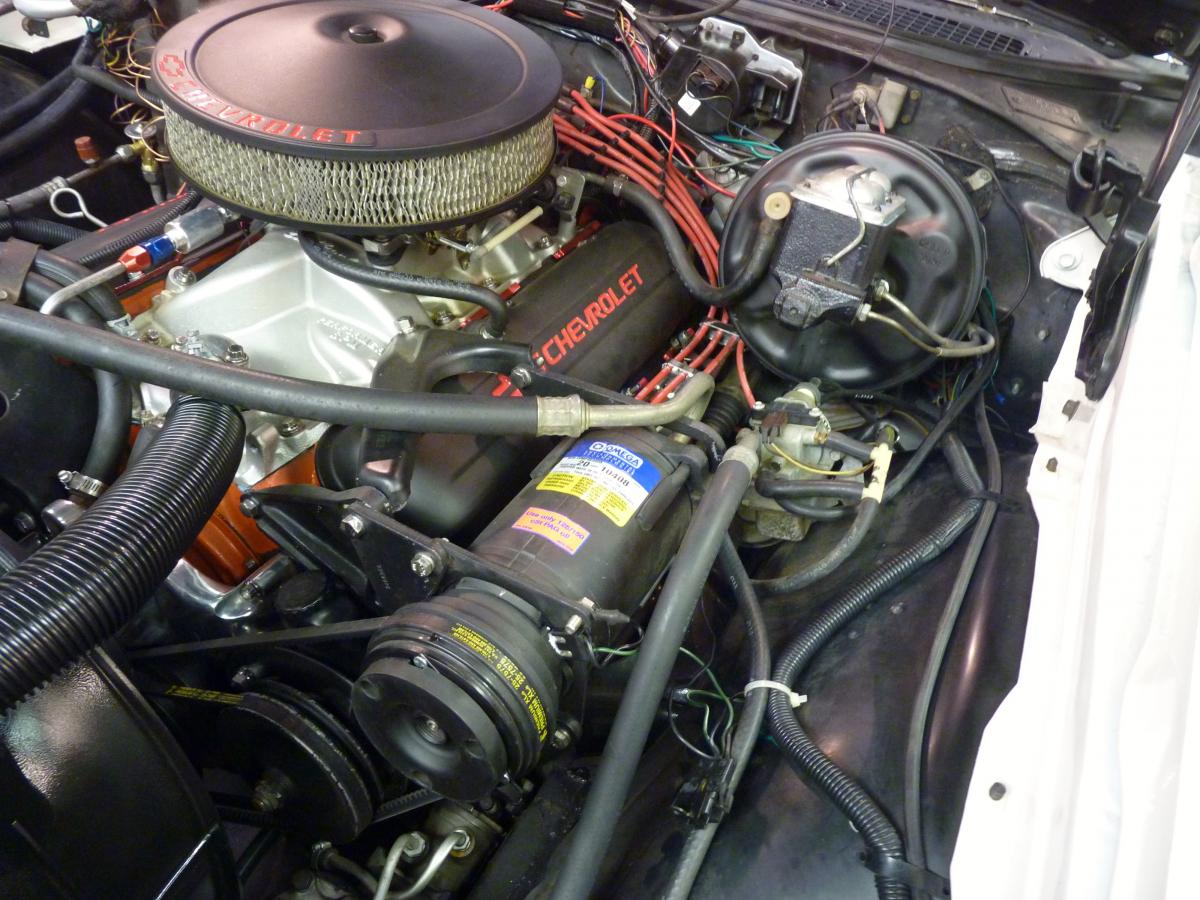
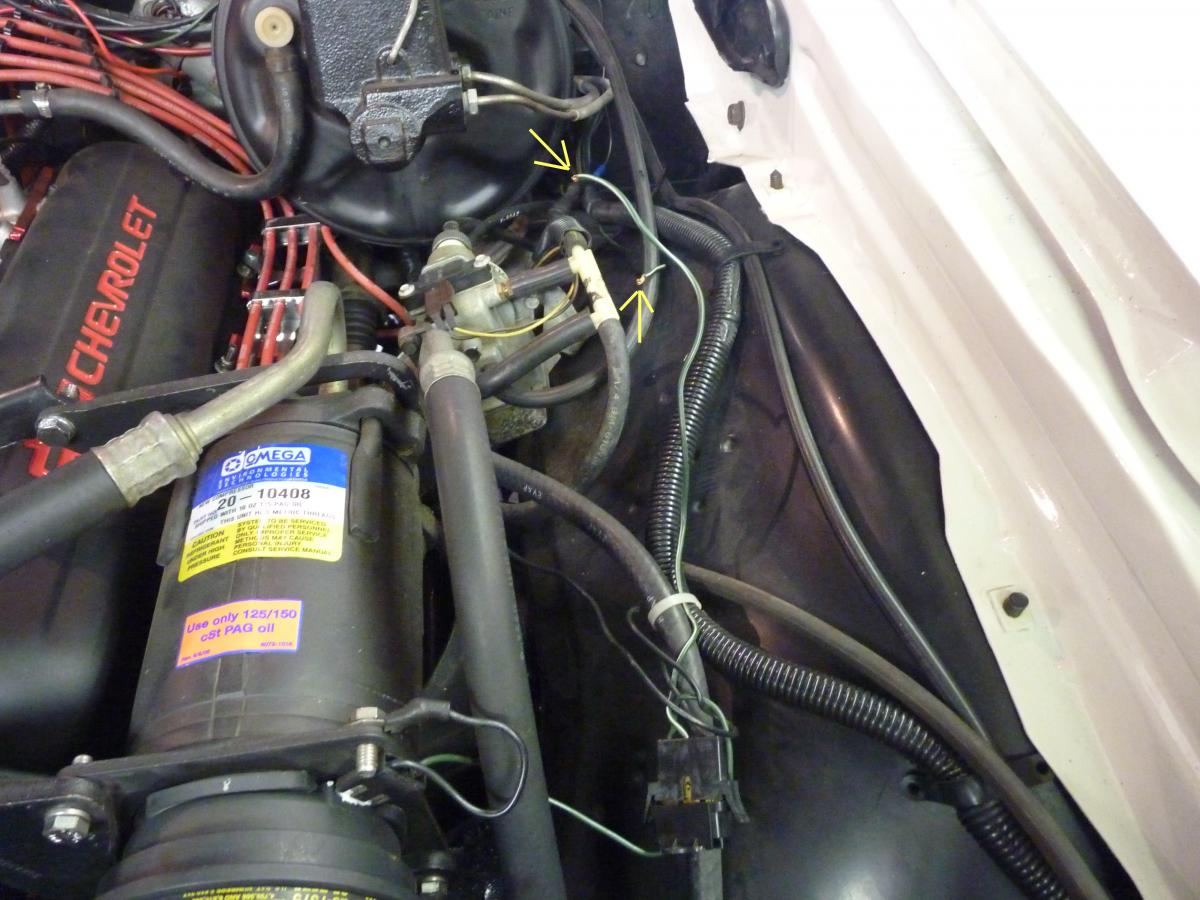
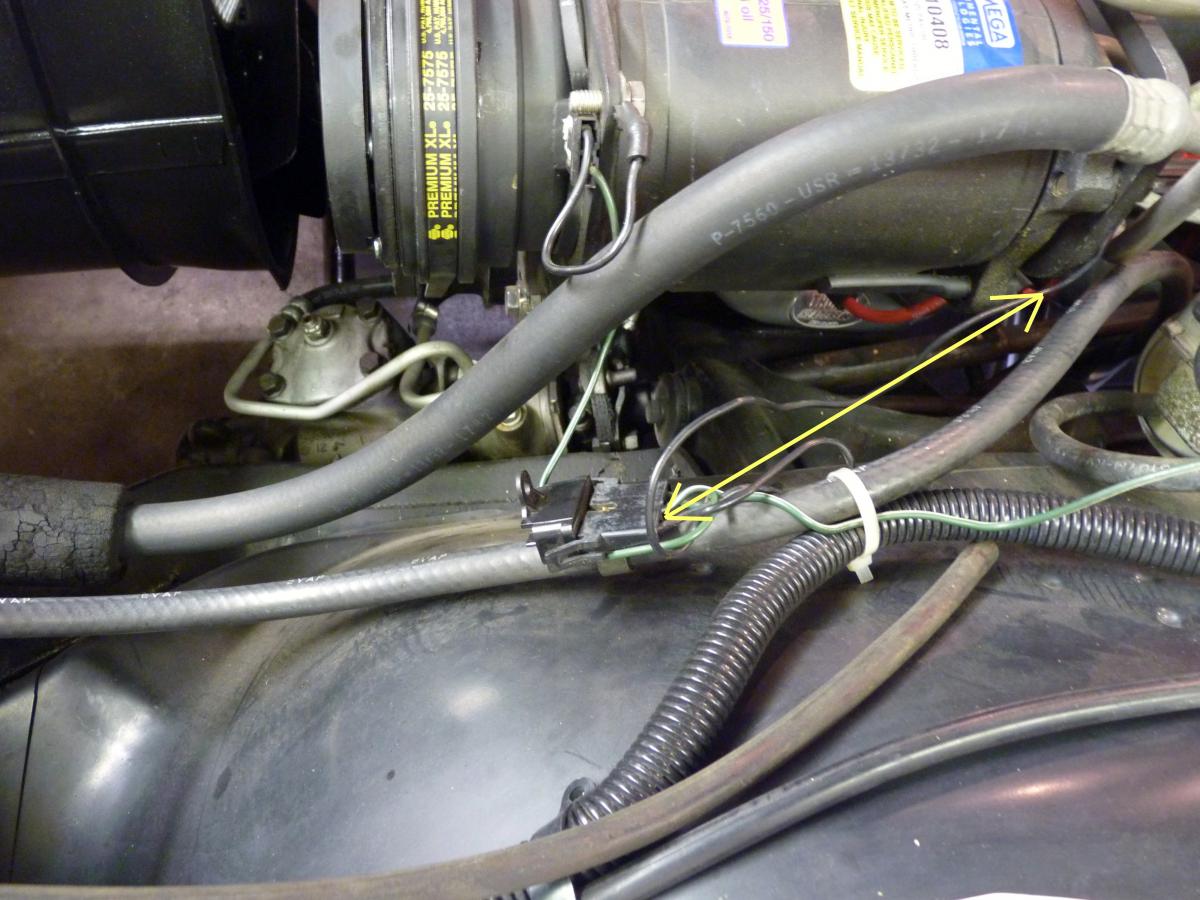
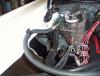
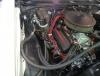
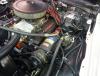
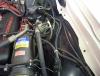
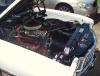
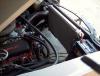
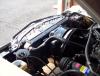
Not certain this is the place to POST this query, but does involve electrical so here goes. My POA Valve on my A/C failed recently and needed a replacement POA Valve. Well, couldn't locate a OEM replacement so I got on of those POA Valve Upgrade Kits. It is my understanding the Upgrade Kit allows for the A,.C Compressor Pump to cycle on and off where under the old system, the Compressor ran all the time. Does anyone know if this is it's purpose for sure? So took my Monte to the A/C Shop and had the conversion done. Well, found out the A/C guys Wife has a form of Cancer she had just recently started Chemo and has (rightfully) distracted him from his Business. He had gotten so backed up with work that he just couldn't get back to mine to finish. So he had already made the conversion, drained and recharged A/C but hadn't completed the wiring through the wiring loom(s) and said a fuse had blown and that's where he ended while checking the system for functionality. He said everything else had been done and only needed the wiring completed. (He had replaced the Fuse & I had no further trouble from it) I expressed my sympathies for his Wife's affliction and I asked if it would make his life easier if I finished up where he left off and he agreed as all that needed to be done was route the 2 new wires from the POA Valve across to the Compressor Pump and Connect each end to the cut wire ends (says it doesn't matter which wire connects to which) on inner fender (see pic). So I jump in the car and drive her back to my brothers house where I will finish the work. Now my Brother is well beyond me on Auto Mechanics and had a couple questions I could not answer. After calling and talking to A/C guy, he said if I chose, I did not have to use the electrical upgrade on POA Valve. He called it a safety mechanism that prevented (and here's where I am fuzzy) excess pressure to build up in Compressor Pump damaging it (that's what I got from our conversation). He admitted he should be better versed on our antiquated A/C systems and explained as best that he knew and that's why I'm asking these questions in order to put all the pieces together. Okay, am at home and looking how I will route those two wires from POA Valve across to that cut wire and splicing each end of the 2 routed wires onto each cut wire end. This is where I start getting confused because earlier in my conversation with the A/C guy, he explained I don't have to have those wires connected at all (but recommended I use it) even though it wouldn't affect the performance of the A/C System. Again does anyone know if that upgrade controls the Compressor Pressure in some way or what is it's function? Moving on I was getting ready to run my wires along the firewall and connect each to those cut wire ends. I stopped for a little while and lowered the Hood as the Underhood Lamts were on (didn't want to run down battery). Well, when I raised the Hood back up and started back to work on her, I saw that the plugin socket was sitting oddly and almost disconnected from the POA Valve. After some investigation I found that that electrical connection interferes when closing the Hood! The Hood Spring will hit that connector each time Hood closes. I am hoping I find some 90 degress spade connectors or I am going to have to bend the 2 prongs on the POA Valve downward drastically in order to keep that plugin from getting knocked off. And I find this black wire at the Compressor Pump side of car with a plugin socket on the disconnected end. I can't see it, but there is place on the rear of the Compressor Pump that this socket plugs into. I can feel where it plugs in so I connected it (A/C guy said it wasn't plugged in when he got the car) and I can't recall ever noticing it before. Anyway, it is now plugged in and am curious what does it do? Lastly, I am told I have a Temperature Limit Switch that is designed to short the 3 prong switch out and prevent overheating damage of the A/C Compressor. So from ALL the Info I am trying to absorb, in order to put it in perspective, I believe below are the functions of those issues I described above and they are: 1: Temperature Limit Switch (and this seems pretty straight forward). 2: A High Pressure Switch (on new POA Valve) that prevents Compressor from over pressurizing? 3: That Plug In Wire I connected on Rear of Compressor Pump. (I have no idea what it is for)! So after reading my lengthy explanation, can anyone shed light on these 3 questions? I have 3 pics with arrows pointing to those questions to help in describing what I have written. Again any help is appreciated up front......................... Doug


-
No, no clamps, just the Hose. I was happy with the job he had done. Doug
-
I bought one from a guy in Florida who makes them including the GM p/n painted on the Hose. Here is a pic of the upper Hose & I believe this was his first attempt on a Monte Big Block car. His eBAY name is "PacecarJeff". I see things he offers from time to time so think he is still around if you want to try and search his eBAY Name on eBAY.. I then bought a replacement of both upper & lower to keep in trunk. One I bought I think the upper at NAPA and found an OEM original lower. Either of these have been fitted but look every bit as the ones on the car now. Doug

-
Thanx for the info Murphy. I will certainly have a conversation with them and determine which Valve it is and if my Valve can be refurbished. Doug
-
Seems like each time I want to use the A/C. something in the system takes a dump! So this time the POA Valve quit letting 134A propellant pass thru the POA Valve and into the cabin. A/C guy said POA Valve needs replaced. I ended up getting the UPGRADE KIT as I could not locate a OEM POA Valve at that time. I have since seen a few that pretty much are vague in description/applications but all look alike. When advertised GM cars from 1965 to 1975 in the description tells me that is only part of the story. So anyone here versed in our OEM A/C cars that can shed any light on what I need to look for for a replacement POA Valve? Thanx in advance for your input. Doug
-
We used to say "Never buy a vehicle made on a Friday or Monday". They are in to big of a hurry on Friday so that they can get an early start on the Week End. And on Monday when they returned, were to hung over to hurry...........
-
What did you do to your Monte Carlo today?
72-CLASSIC_RIDE replied to Canuck's topic in General 70-72 Monte Carlo Forum
Just touching up & polishing today. PS: Never noticed this before but my vehicle serial number is 536635 and would be correct reading in either direction, forward or reverse. Also am suspicious my Heater Blower Motor is weak as the flow just doesn't feel like it's strong enough. Measured the AMPS and RPM of the Motor and compared to brothers 65 Chevy, his fan motor runs almost 700 RPM faster than mine. I believe I need to replace Fan Motor in car. Doug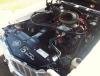
-
What did you do to your Monte Carlo today?
72-CLASSIC_RIDE replied to Canuck's topic in General 70-72 Monte Carlo Forum
I'm jealous! Doug -
Aaron, considering there will be a filming crew to film this event and am pretty sure your way ahead of me on this but, it should be known that the largest group of 1st Gen Montes will be attending the Peachtree Event and will be the largest gathering of 1st Gen Montes West of the Mississippi coming from different parts of the Western US & Canada. Maybe that will help them in deciding to add a segment for the 1st Gens. That would be GREAT exposure for the 1st Gens. What do you think? Doug
-
A/C Replacement Parts Question?
72-CLASSIC_RIDE replied to 72-CLASSIC_RIDE's topic in Restorers - Archive
cbolt: I will try running a Jumper from the hot battery lead to the High Speed Relay. If Fan speed jumps, Relay is okay. I have had the ducting out and all resealed. The POA Valve is toast & recommended replacing Expansion Valve at same service. 420ponies: I have verified those things I need above are in stock currently, just not absolutely certain of fitment, even though they claim functionality & fitment in the Ad. While A/C guy is competent, just want to offer what ever assistance/guidance I can to further a successful repair. As the A/C was never a real concern and did work 10 years ago, In the course of time, the propellant would slowly seep out & needed to recharge each year. I pretty much ignored it once the Compressor had been changed out twice due to leaking. Last year I made an effort to get it into shape and with the help of the A.C guy, finally found me a New Compressor, installed it and propellant stays filled in system. The POA Valve just couldn't handle a working system I guess. So once again, hoping to get A/C working properly and maybe this time it will hold & want it to work well. Once understood, will advise on what it took to get A/C system to perform. Doug. -
What did you do to your Monte Carlo today?
72-CLASSIC_RIDE replied to Canuck's topic in General 70-72 Monte Carlo Forum
Not really sure if these Tach's can be recalibrated. Someone probably has that answer. Don't know why it's so far off, maybe old age? Doug -
A/C Replacement Parts Question?
72-CLASSIC_RIDE replied to 72-CLASSIC_RIDE's topic in Restorers - Archive
Okay, I have found the POA, Expansion Valve, Heater Fan Motor on OPGI (shudder) & the Fan Relay elsewhere. POA Valve Kit https://www.opgi.com/monte-carlo/1972/cooling-heating/air-conditioning/CH28459/ Expansion Valve https://www.opgi.com/monte-carlo/1972/cooling-heating/air-conditioning/CH26778/ Heater Fan (Says both Non & A/C)? https://www.opgi.com/monte-carlo/1972/cooling-heating/heater-blower-motors/C210219/ Thanx, Doug I am hesitant to buy parts on line when I can't say for sure it's the right part. So should anyone who looks at the parts see's any reason why any won't work, please advise. Been around long enough to know not always true. Thanx Much, Doug -
No sure this is the correct Forum but here is my question. My A/C no longer cools with the cold air stopping at the POV valve (does not cool beyond POV Shrader Valve) going into Cabin side. My A/C Guy informed me there was a Kit that replaces POV & Expansion Valve that would make the A.C a lot simpler and also to work on. I informed him it is & has been my goal to maintain as close to Stock as practical so while the part(s) may not be NOS, but OEM Replacement works just fine for me. I was informed by my A/C Guy the POV Valve needs replaced and also should change Expansion Valve at same time. My Blower Motor does not seem to me to produce significant volume when high speed selector fan switch engaged. May need a new High Speed Blower Fan Relay as well. I will jump from battery to switch and check if Fan Motor increases significantly with Jumper. If so, likely the Relay and if not, probably the Blower Motor. (The A/C ducting inside the Cabin has been resealed when the Dash was removed several years ago so sure it's not a result of air escaping before it reaches cabin ducts). I have seen the POV & Expansion Valves on eBAY but do not necessarily trust them to be accurate................................... So, I am looking for 1) Correct POV Valve for a 72 Monte 2) Correct Expansion Valve for same 3) Correct High Speed Blower Relay (maybe) 4) Blower Motor (maybe) Is there anything special I should know when purchasing any of these items? I wanted to hear about others experiences and any tips before I go further as I am not versed on the A/C. My A/C guy is going to also look and we will compare notes prior to purchase of parts or before doing any work. Just want to ensure I am getting what I need the 1st time and avoid any problems. So any advise, suggestions, part suppliers etc. will really help me putting this back into operation. P.S A/C is Factory less R134 Conversion Much appreciated......................... Doug
-
What did you do to your Monte Carlo today?
72-CLASSIC_RIDE replied to Canuck's topic in General 70-72 Monte Carlo Forum
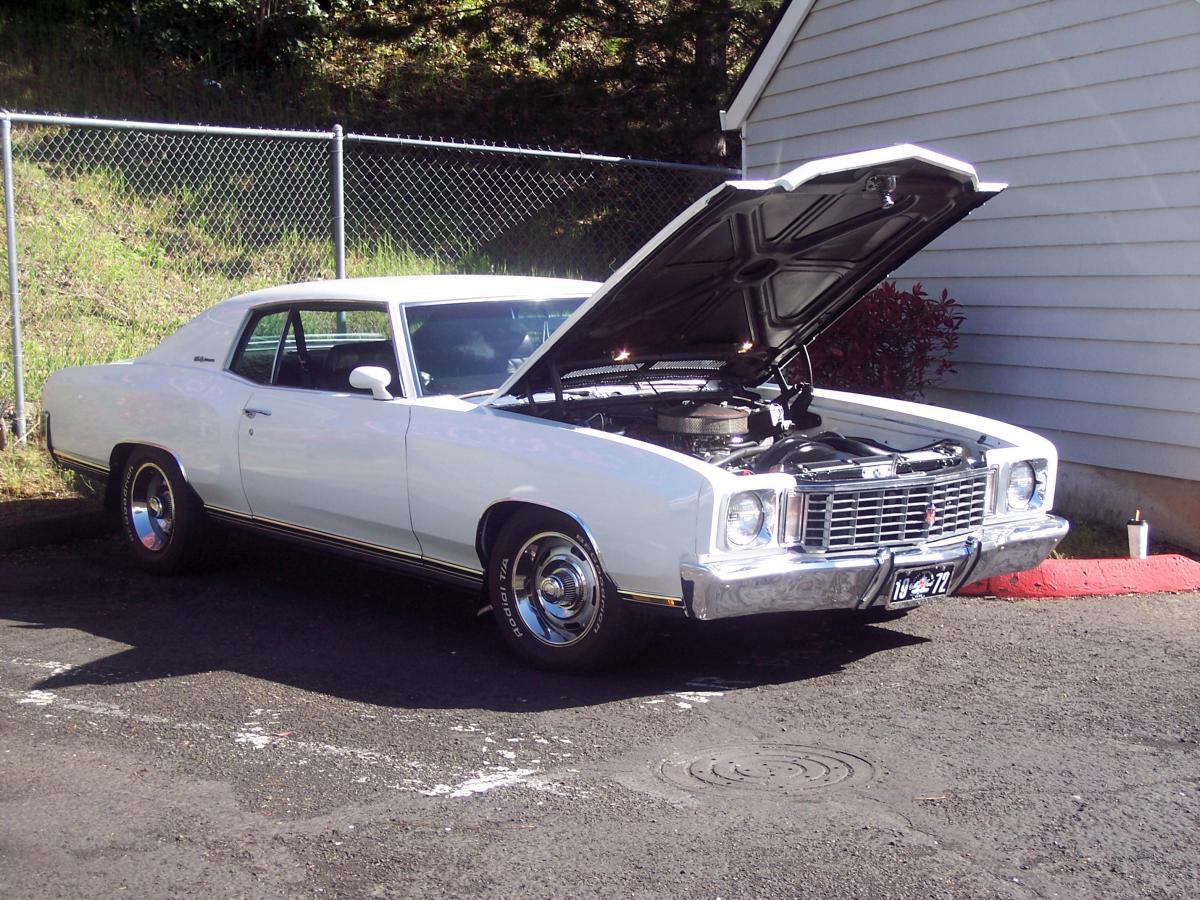
Nice day so time for a bath. Also raised front end about 2" and while I liked the stance, Headers to close to the ground for my comfort. Also investigated Factory Tach accuracy suspicion by measuring it against a RPM Meter. I knew it was off but had a suspicion at different higher RPM's, the difference between the Meter and Tach would grow further apart (with the Tach reading the higher RPM's). I was right, at 4000 Tach RPM, Meter read 3300 RPM. At 1100 RPM, Meter read 1050. I also did some inbetweens so I can more accurately measure actual RPMs. Next will be trying to read actual engine temperature using the factory gauge. I'll have to paste new numbers over the gauges plastic faces to remember what each is really doing. Anyway, here is the new stance look on a freshly washed car. The third pic is what it was prior. Doug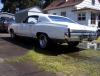

-
Major hvac problem on air conditioned monte
72-CLASSIC_RIDE replied to V8Freak's topic in Interior Tech
Are you referring to the dash driver side vent? If so, and Iv'e never tried or considered removing driver side vent but it can be done with dash in on passenger side and easier if you remove dash pad. I'm betting driver side can be installed with dash pad removed. Good luck, Doug -
Here is what capacities are based on specs for each Factory Engine Displacement/Radiator capacity. Straight antifreeze will cause engine temps to rise reducing engine temp performance. 50/50 Mix is what is advised. Open the petcock l/h bottom inside edge of Radiator to release the water from radiator. When drained, close petcock completely before refilling radiator. If this is what you mean't. There is always some water left internally as gravity alone will not let it all flow out. Unless concerned with contamination in Radiator, the amount left trapped in engine block under normal conditions should not create a problem 350 CI - 16 QTS = 4 Gallons 402 CI - 24 QTS = 6 Gallons 454 CI - 23 QTS = 6 Gallons Doug
-
Hey Alan. When posting pictures, below the box you type your message in, on right hand bottom next to the Post command is a "More Reply Options" prompt also. Click on that prompt and you will be given options on the left lower of page to select your pics for loading onto this Site. When you have located your pic and uploaded it, then save it. Continue this process until you have the pics wanted. Once done and your body of message is complete, just Post it and pics show up in your Thread you created for all to see. Not sure if Microsoft Explorer is still a problem when using the features on this site, but Chrome works great. You may need to open Internet using Chrome to get features to be seen, let alone open them, Just a thought. There is only so much space devoted for pics, so be mindful that size is manageable. If many pics, you may have to create more Posts to include those pics. I typically go by inches when sizing pics and keep them around 8.5 inches. Hope this helps posting pics. Really interested in seeing some pics as your Custom is quite rare. Doug
-
The inner door handle mechanism has a slightly longer shaft that allows clearance for the snap ring to seat & is needed due to the chrome backing plates on our 1st Gen Montes. Those cars without that chrome backing plate will have a shorter mechanism & will prevent snap ring from seating as the door handle bottoms out against door panel before snap ring can seat. I had drivers side replaced some years ago and my mechanic was not aware there were length differences, thus I had that problem with handle falling off on occasion. Just need to find a good driver side from a 1st Gen to get right length. I got one locally from a club member, MALIBU 400 is his member handle & he is not on the Boards much anymore. But if the problem can't be corrected, I can get you his email address to see if he has a GOOD one laying around. I wouldn't think finding a good one will be to hard to find. Good Luck................... Doug
-
What did you do to your Monte Carlo today?
72-CLASSIC_RIDE replied to Canuck's topic in General 70-72 Monte Carlo Forum
Well, the first thing I think about is what my vision is. That to me is selecting the paint(s) by Flat/Satin/Enamel texture/finish/authenticity. Then deciding just what and how far you plan on going. Unless your looking for a complete stock look, really the skies the limit. When unsure, ask those questions from the Membership as you progress and you will get plenty of instruction/help. Example: when I replaced my Master Cylinder, I painted the body black & I was done. Some replace with chrome, other variations or none at all. Depends on what you think looks good so really, no one answer will satisfy your question(s). I pressure washed the Firewall and kept the factory paint that was on it but in retrospect, wished I would have painted it now. My A/C box is also original color. I went with a satin finish under the Hood originally but now am slowly changing that look to gloss enamel. It shows better and cleans up much easier. Make a list of what you want to do, then prioritize. That's the easiest part........................ Doug -
What did you do to your Monte Carlo today?
72-CLASSIC_RIDE replied to Canuck's topic in General 70-72 Monte Carlo Forum
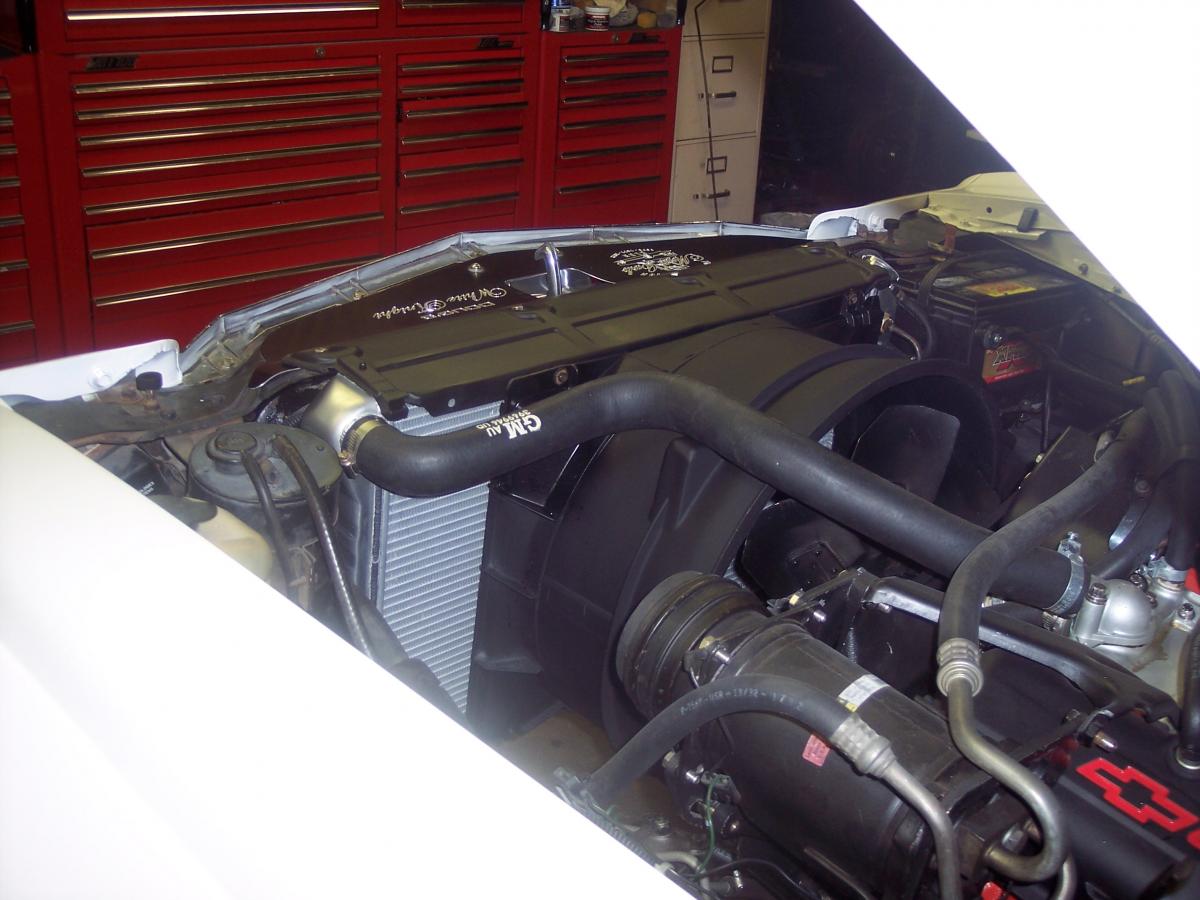
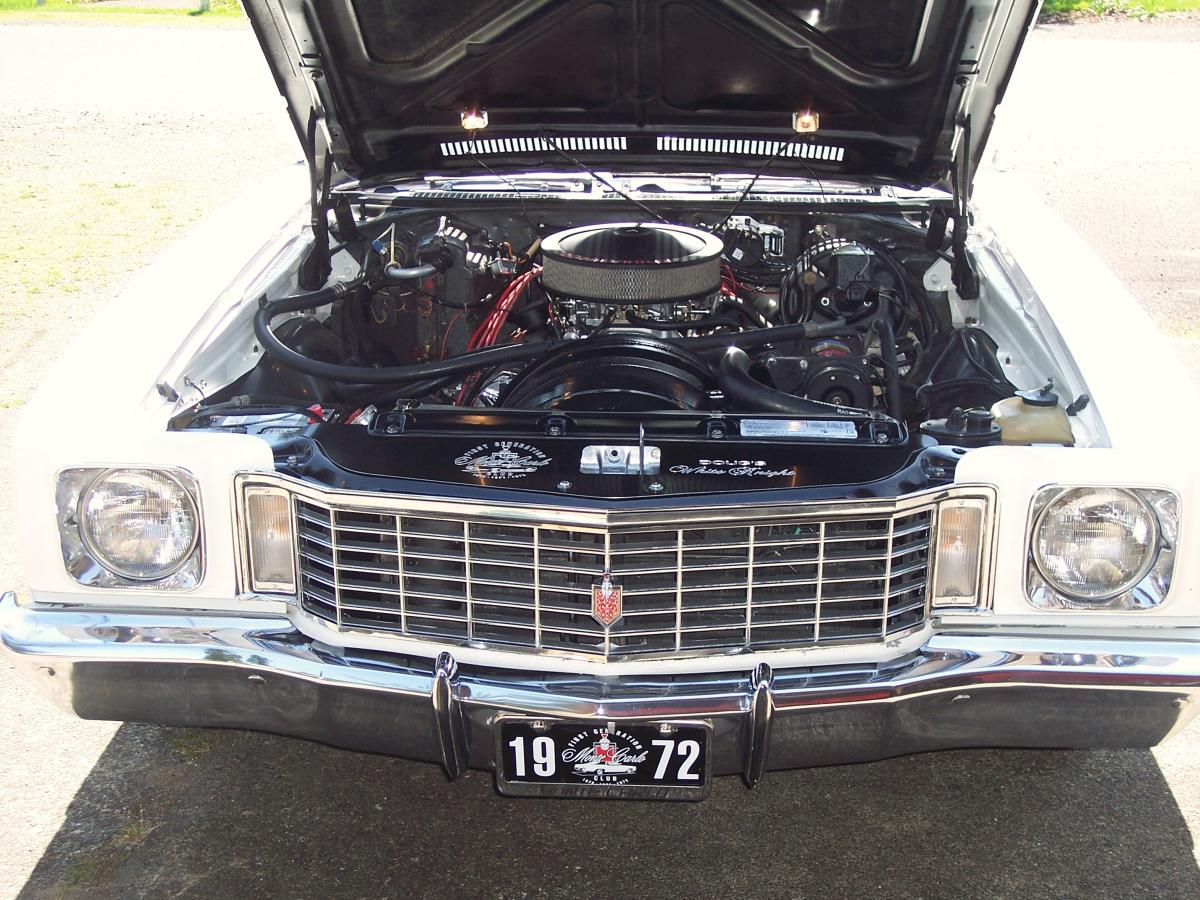
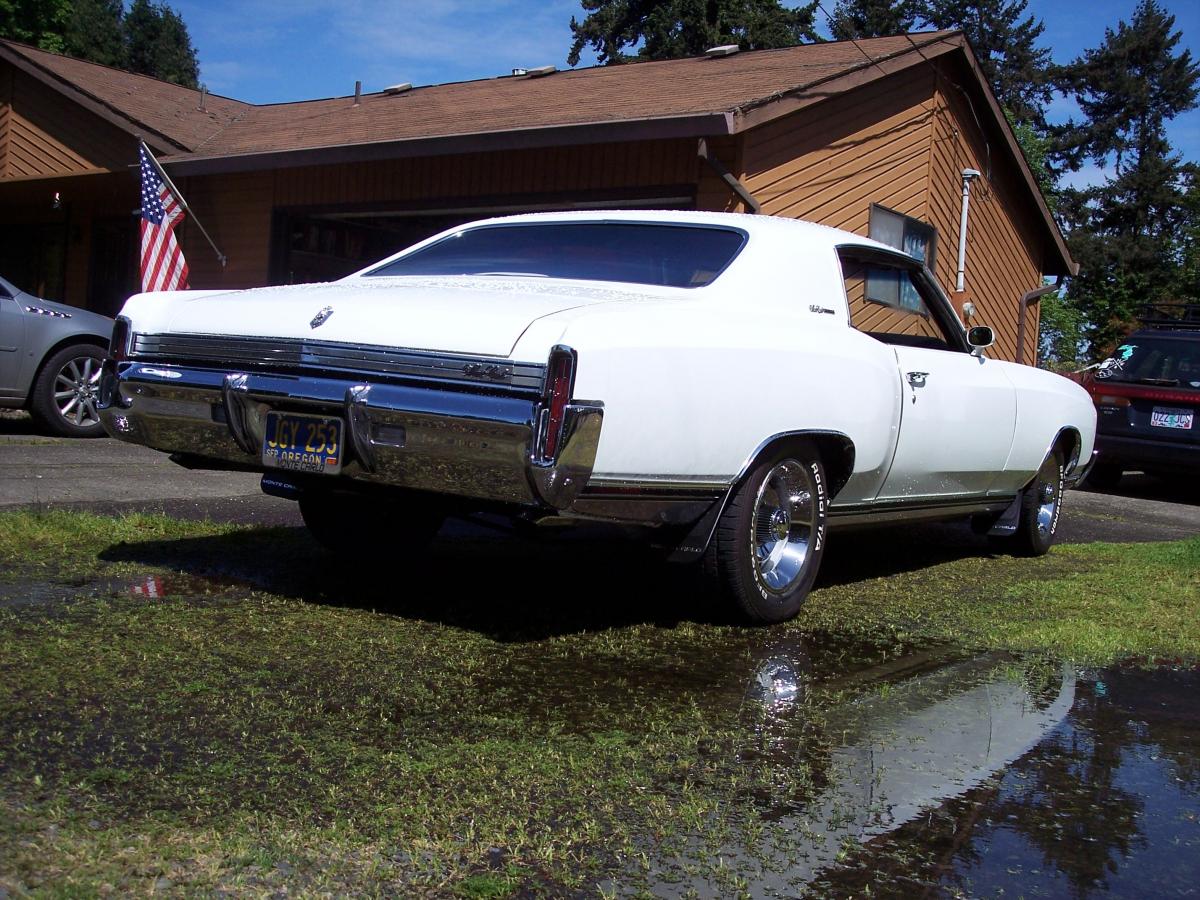
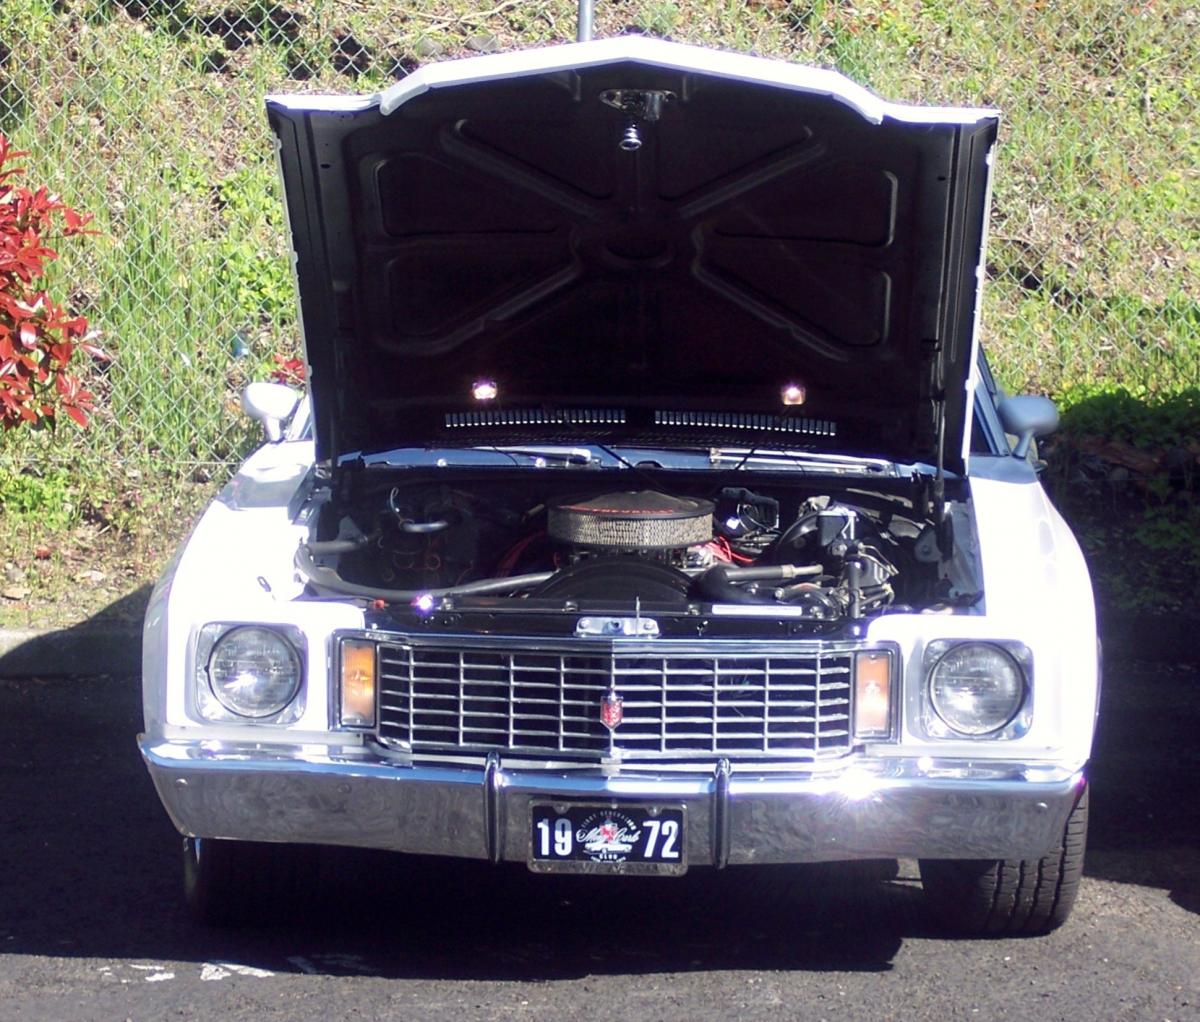
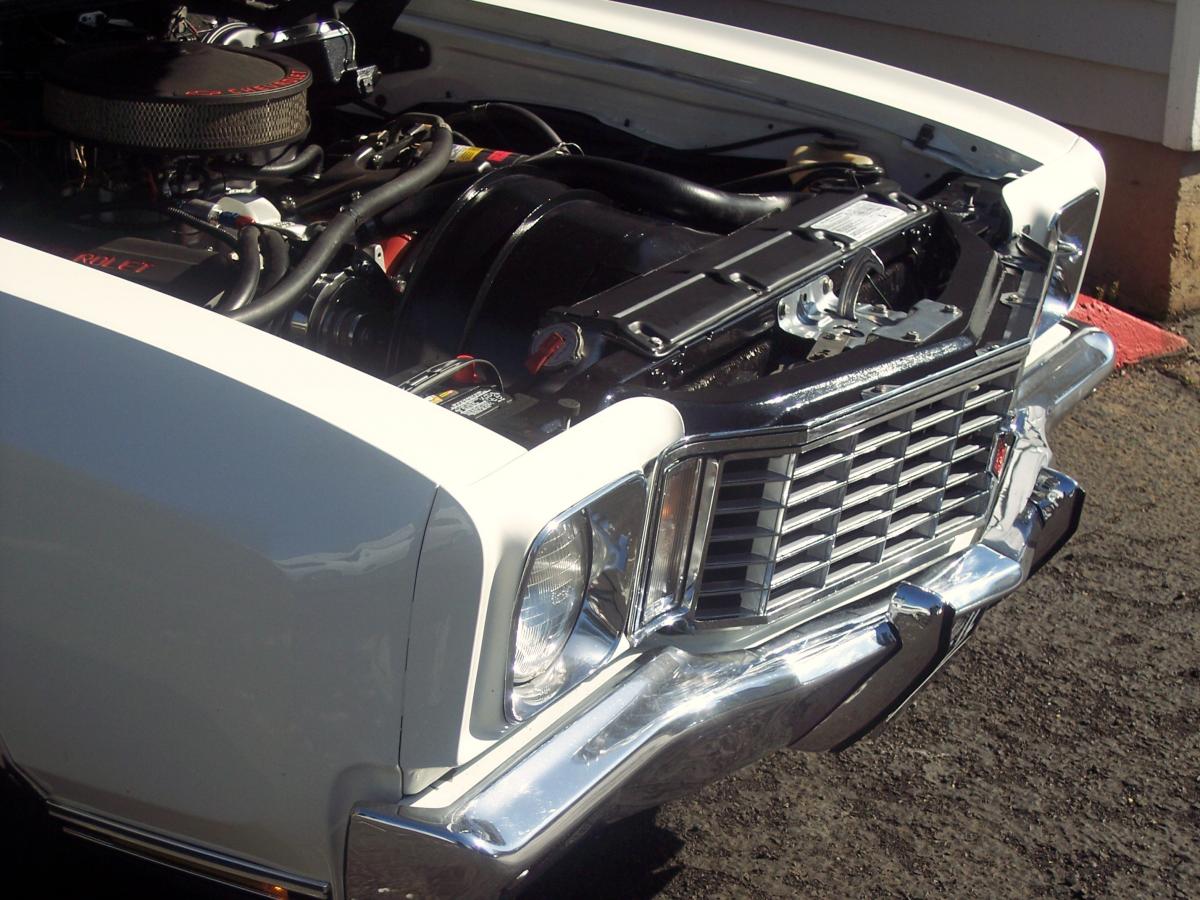
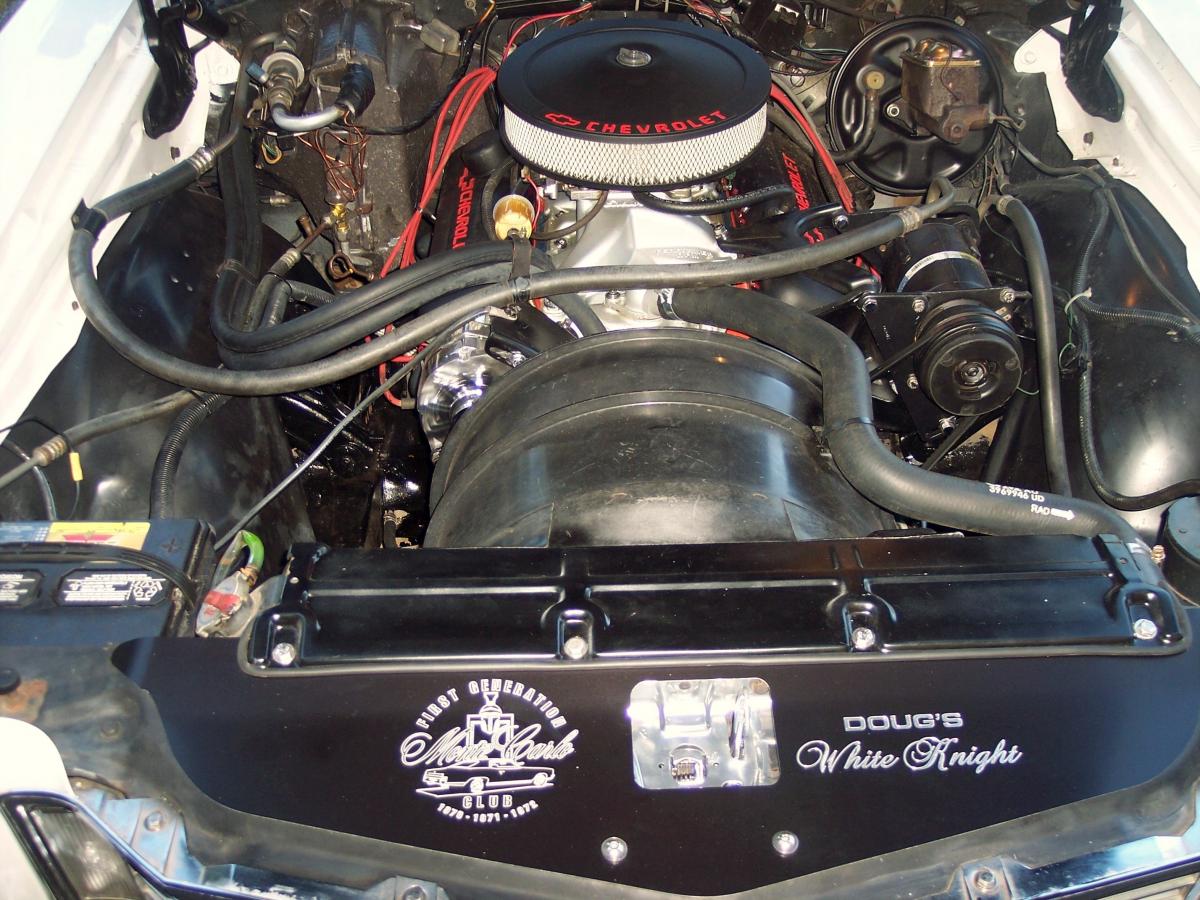
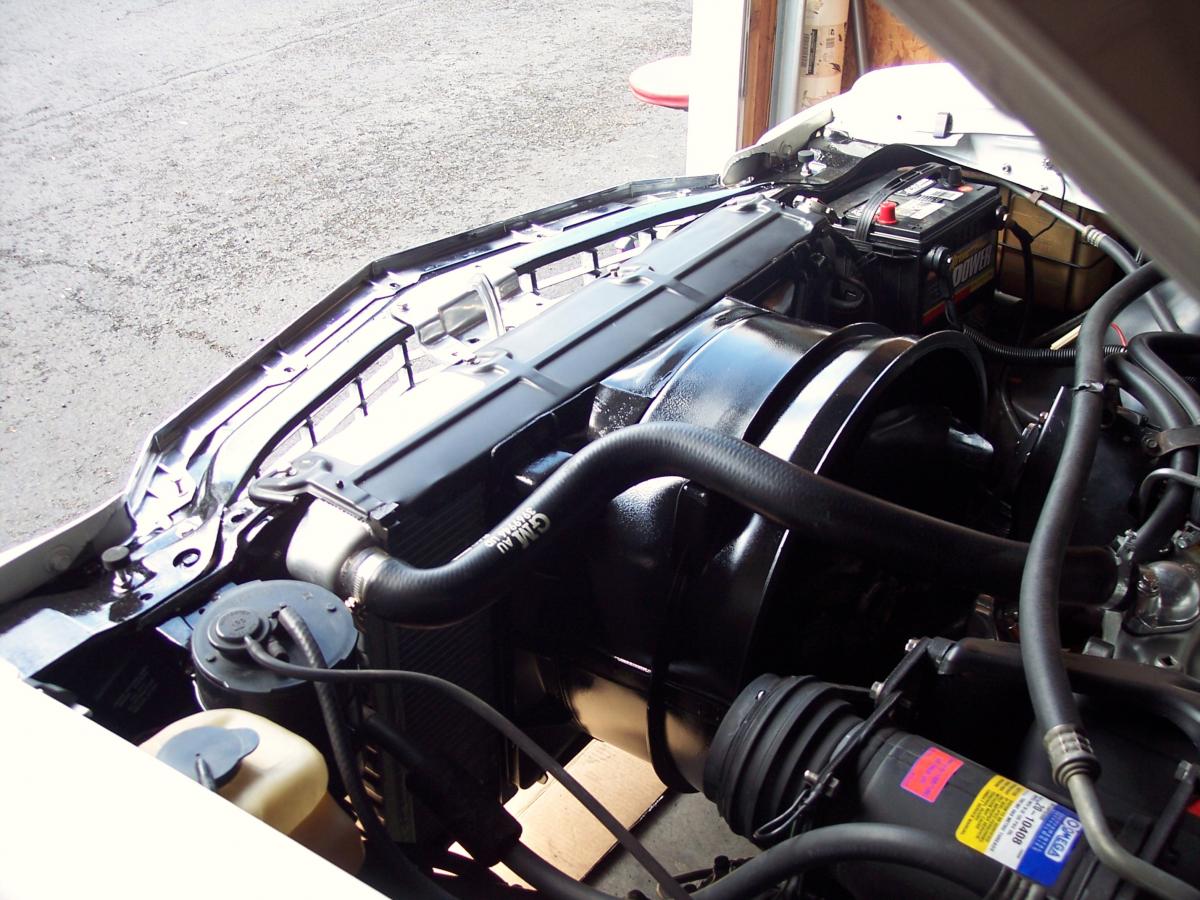
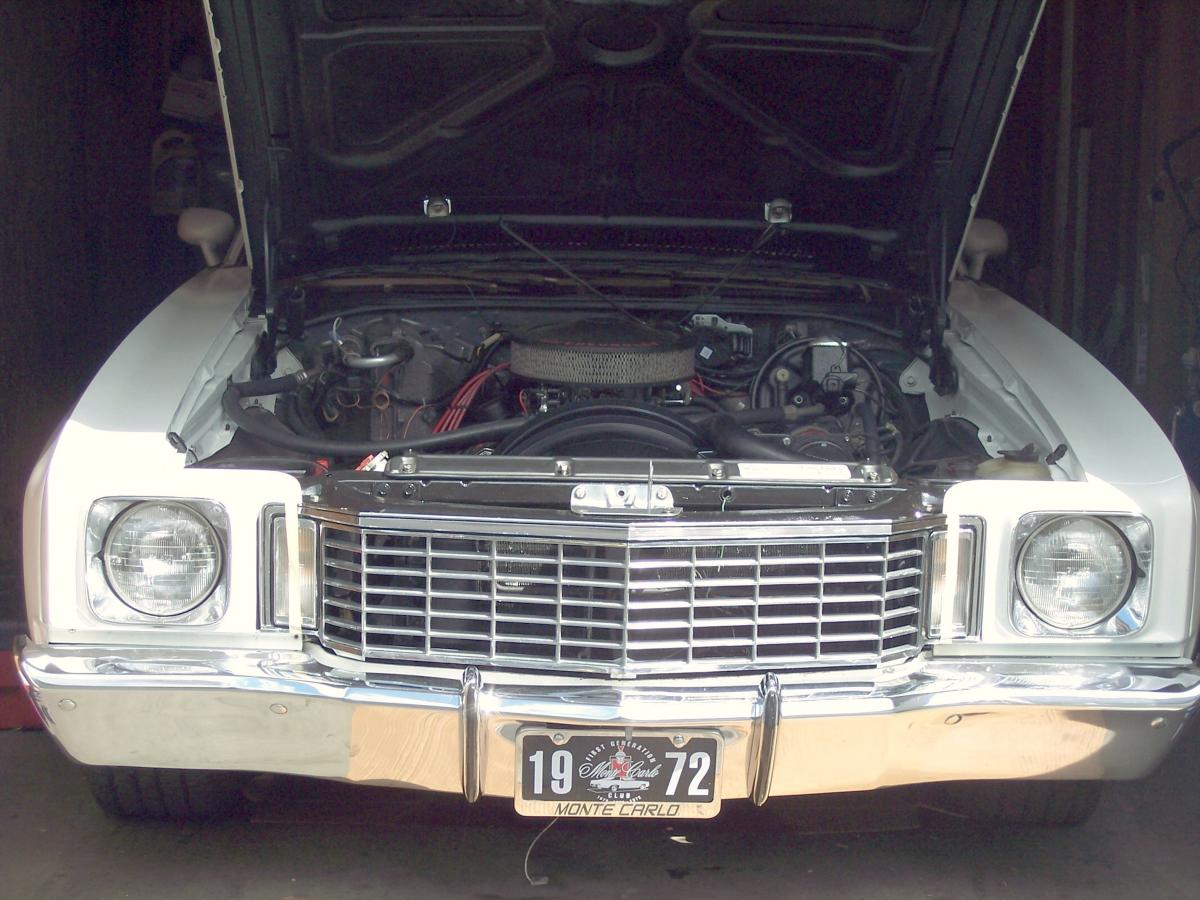
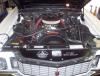
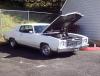
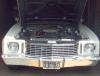
This has been a fairly lengthy project for me and am pleased to say, I think I have completed it! The short version is replaced Rear Harness/reconditioned Tail Lamps and reconditioned under the Hood (cleaned/painted & ditto the Grill. Without further elaboration, this is how She sits as of today. Now I can start doing the detail cleaning/polishing of the exterior as the weather cooperates. Doug.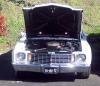


-
What did you do to your Monte Carlo today?
72-CLASSIC_RIDE replied to Canuck's topic in General 70-72 Monte Carlo Forum
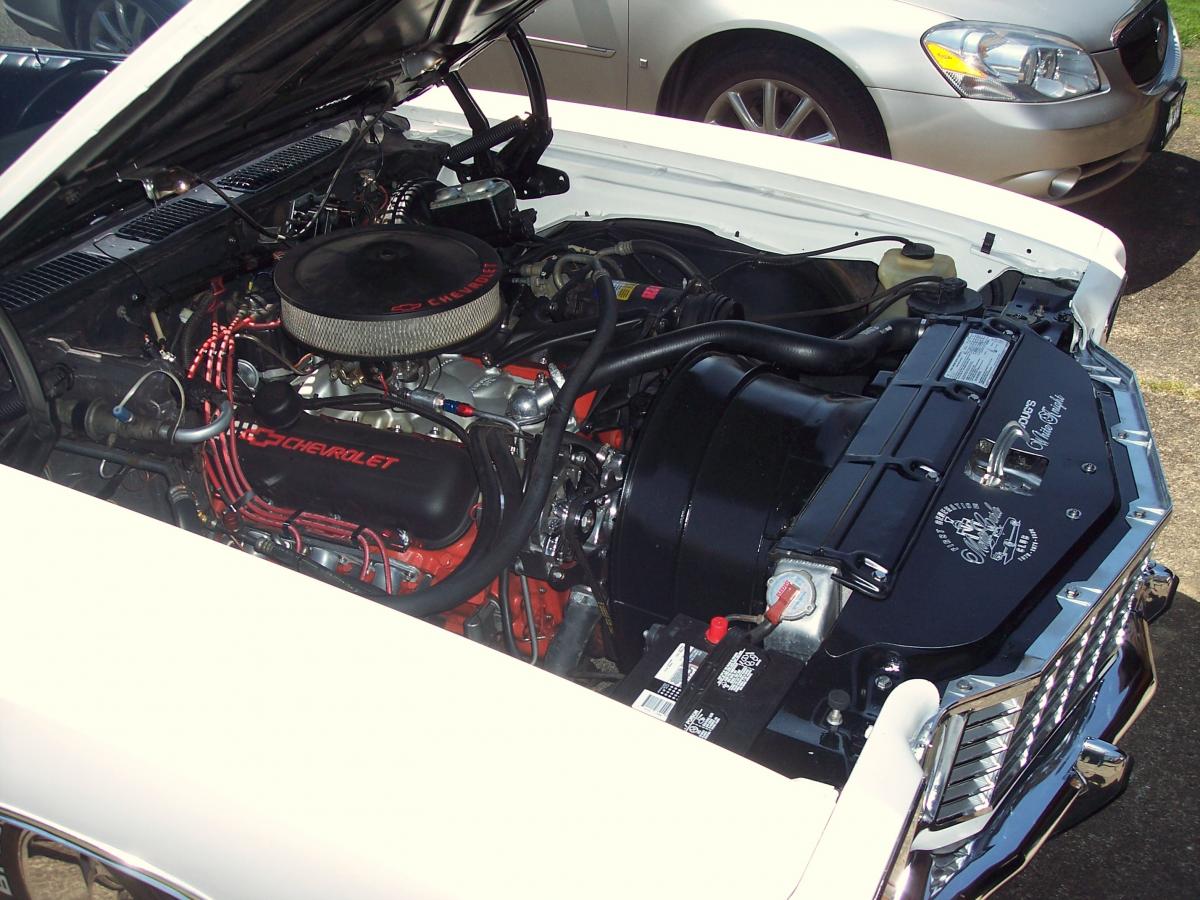
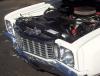
Close to having her all back together again. Basically, paint is done as is my work on the Grill. Still have to finalize installing/securing remaining bolts but other than the 2 horns and radiator custom top plate, I think I am done for awhile with some minor items I may chase after next. Anyway, a before & after. Before not very representative but essentially, cleaned, painter Core Support area and repainted Fan Shroud. Grill also received attention. Once I get the battery recharged and everything anchored down, I can move it outside for a better look. Doug
-
What did you do to your Monte Carlo today?
72-CLASSIC_RIDE replied to Canuck's topic in General 70-72 Monte Carlo Forum
Me likey! Looks very nice............... Doug