


McCall72
-
Posts
198 -
Joined
-
Last visited
-
Days Won
10
Content Type
Profiles
Articles
Forums
Gallery
Events
Everything posted by McCall72
-
https://www.youtube.com/watch?v=5Kd-ftCTf4I
-

What did you do to your Monte Carlo today?
McCall72 replied to Canuck's topic in General 70-72 Monte Carlo Forum
I took the interior out and installed Fat Mat down on the floor and also upgraded the seat belts to the modern Morris shoulder belts. -
Just went back and re-read where you said you drained the tank and it still shows a qtr tank full. My guess would be the float arm is hanging as well. Mine was reading a qtr tank when I had it full of gas and would eventually go to empty when the tank was actually empty.
-
I had the same issue. Ended up being the 90 ohm capacitor that's mounted to the back of the fuel gauge. Yeah, you gotta pull the dash which is a bummer. There's a guy on eBay that sells those 90 ohm capacitors if that's what it turns out to be. https://www.ebay.com/itm/NEW-GM-AC-DELCO-Gauge-Shunt-Calibration-Resistor-Dark-Green-/192510311607
-
Man, I remember that machine back in the day. Great piece of nostalgia. I owned an old "Haunted House" machine a few years back and loved it.
-
Wow, I've never actually seen that rear seat seat belt storage option. Any idea what those were called and if you can buy them anywhere?
-
Thanks for the compliments folks. I'm happy to not relying on idiot lights anymore. Lol
-
Here's the finished product:
-
Instrument Panel Bezel Restoration?
McCall72 replied to 72-CLASSIC_RIDE's topic in Restorers - Archive
Be careful with the cleaning agents on that burlwood insert. It's an ink transfer and you can literally wipe it off with a cleaning agent that is too aggressive. It should have a dull clear coat covering it, but time can break down those clear coats and not offer it the protection it once had. -
Hi folks, I wanted to let you know that I recently was able to replicate the 1st gen MC burlwood pattern while working on an aftermarket gauge project. Fairly simple project here's what you'll need: 1. Rustoleum Dark Brown Satin or flat if you can find it. 2. Testor's or another brand of dull coat clear. 3. MyDipKit.com DK 32-10 Burlwood Grain pattern.- I bought the kit that comes with the transfer film, scotchbrite pad, gloves, mask, activator, primer, and base color. You don't need their base paint as it is too light for this project. I bought their kit on ebay, but if you have stuff like primer and sanding material already all you really need is their transfer film and activator. http://www.ebay.com/itm/121890986162?_trksid=p2060353.m2749.l2649&ssPageName=STRK%3AMEBIDX%3AIT Here's what I started with- a plain black bezel for the gauges: You'll want to take a scotch brite pad and scuff your surface and then primer. Once your primer has dried, lightly scuff it and then coat with your Rustoleum Dark Brown paint and let it dry thoroughly. Next is the hydra dipping process. Rather than type out how to do it, here is a video on how its done: https://www.youtube.com/watch?v=NI5CgKUiEi8 Once you've rinsed the part and let it dry, you'll need to coat it with a light coat of dull coat clear-the dull coat will match the sheen of the original burlwood insert in the dash. Here is the finished product:
-
25K eh? Yeah, no.
-
Local newspaper editorial from 1971....
McCall72 replied to LostnFound's topic in General 70-72 Monte Carlo Forum
Same here. Rock solid build on my 72 as well. -
What did you do to your Monte Carlo today?
McCall72 replied to Canuck's topic in General 70-72 Monte Carlo Forum
I succeeded where two alignment shops failed by aligning the 72 today using a length of string and a tape measure. Car drives straight as an arrow now. -
Good Info On Different G.M. Plants
McCall72 replied to LostnFound's topic in General 70-72 Monte Carlo Forum
Very cool link indeed. Neat seeing where my Monte was assembled (Oshawa). -
Can't say that I've ever seen this one before.
-
Thanks for the replies all, I'll forward this data over to him.
-
Asking this question for a friend. Does anyone know the maximum rear size tire you can use on a 70-72 Monte with out modifying the rear wheel wells? My friends wants to go with a 295 and wanted to know if it would work without rubbing.
-
Sparky, not sure what engine you are running but I'm in a SB with AC and I used the Moog 6332's Non AC ones which had a much lower spring rate and I got a 1.5 inch drop in the front and the ride is really nice as well. 89.00 bucks at Auto Zone and made in the USA. Cutting coil springs are a major P.I.T.A. because you really need cut a little off at a time because cutting them just a little can be a MAJOR drop in some cases. Cutting springs off in increments means cutting, installing, dropping the car down, letting them settle, and possibly having to do it all over again. It's best to research and install a spring that doesn't need to be cut at all, JMO. If you do go the cut route, this site has some good info: Eaton Springs If you go the non cut route, this chart will help you to see what kind of spring rates you'll be looking at per your spring part number: Spring Specs As you can see, the 6330 has a much higher load rate. If you are running a SB, I'd go with the 6332. Spring # Inside Dia Bar Dia Install Height Load rate (lbs) Spring Rate (Lbs/in.) Free Height Ends Type 6330 3.68 0.63 11.25 1827 293 17.5 ST 6332 3.69 0.63 12.5 1296 271 17.28 ST
-
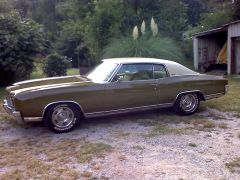 My Monte was 100% the exact same color combination originally.
 -
What did you do to your Monte today?
McCall72 replied to Xxyyzz's topic in General 70-72 Monte Carlo Forum
Fixed the little nicks on my kick panels when I took my dash out to replace the vents about a year ago. Had a old rattle can of Plasticote vinyl spray that was a perfect match. Now I'm bored, as there's nothing to do to my Monte anymore. -
Can anyone recommend good springs ?
McCall72 replied to MonteNH's topic in Brakes and Suspension Tech
I was a good Guinea Pig this week for spring experimentation. Under the hood, I have 350, with aluminum intake and aluminum water pump, the rest is stock. Before with the Hotchkis 2" drop small block springs, from the floor to the bottom of the wheel well centered with the derby hub cap, it measured 27.5 inches. Before: As stated above, I bought a set of Moog 6332 Non AC springs. Now since the springs where a good bit taller than my 2 inch drop Hotchkis springs that did not drop my car at all, I went ahead and blindly cut one coil off the Moog springs....Boy did that ever drop it! The floor jack could not even get under the cross member anymore! I didn't want to have to worry about speed bumps so this had to change... After with 6332 Moog springs with one coil cut off. Measurement was 24 inches- a drop of 3.5 inches. Now, in its current setup with Moog 6332 Non AC springs with no coils removed. Measurement is 26 inches-a drop of 1.5 inches from the original height. This was the height I was shooting for. The ride is great as well. -
What did you do to your Monte today?
McCall72 replied to Xxyyzz's topic in General 70-72 Monte Carlo Forum
Took out the old springs and installed some Moog 6223 non A/C coil springs and got the front to drop about 1.5 inches like I wanted it to. -
What did you do to your Monte today?
McCall72 replied to Xxyyzz's topic in General 70-72 Monte Carlo Forum
I've been busy. When I took out my dash to replace the vents last year it kinda boogered up my column...I decided to paint it back black so I could switch back and forth from my original wheel and my Grant wheel. Patching up some dings... Painted semi flat black Installed with the original wheel -
Can anyone recommend good springs ?
McCall72 replied to MonteNH's topic in Brakes and Suspension Tech
I'm halfway through my spring change going from the Hotchkis 2 inch drop springs to the Moog 6332's. I cut one coil and installed it and dropped it down and she is about 2 inches lower in the front now giving me the look I was looking for. I figure I'll cut the driver side spring just a little less since it has the AC on that side..Looking like I'm gonna need to turn the tie rods out some as the camber is way out now...Just need to get it drive-able for the 3 mile drive up to the alinement shop.. -
Yeah, I know right? Is anything metal made on our shores anymore?
