70MC402
-
Posts
78 -
Joined
-
Last visited
-
Days Won
1
Recent Profile Visitors
1,067 profile views


.thumb.jpg.7a3ac5094fbad913fb873614cbf51f97.jpg)

-
Just be advised if you’re still using the brake pressure warning light you want the line lock solenoid after the distribution block or when engaging the line lock the brake pressure warning light comes on.
-
What did you do to your Monte Carlo today?
70MC402 replied to Canuck's topic in General 70-72 Monte Carlo Forum
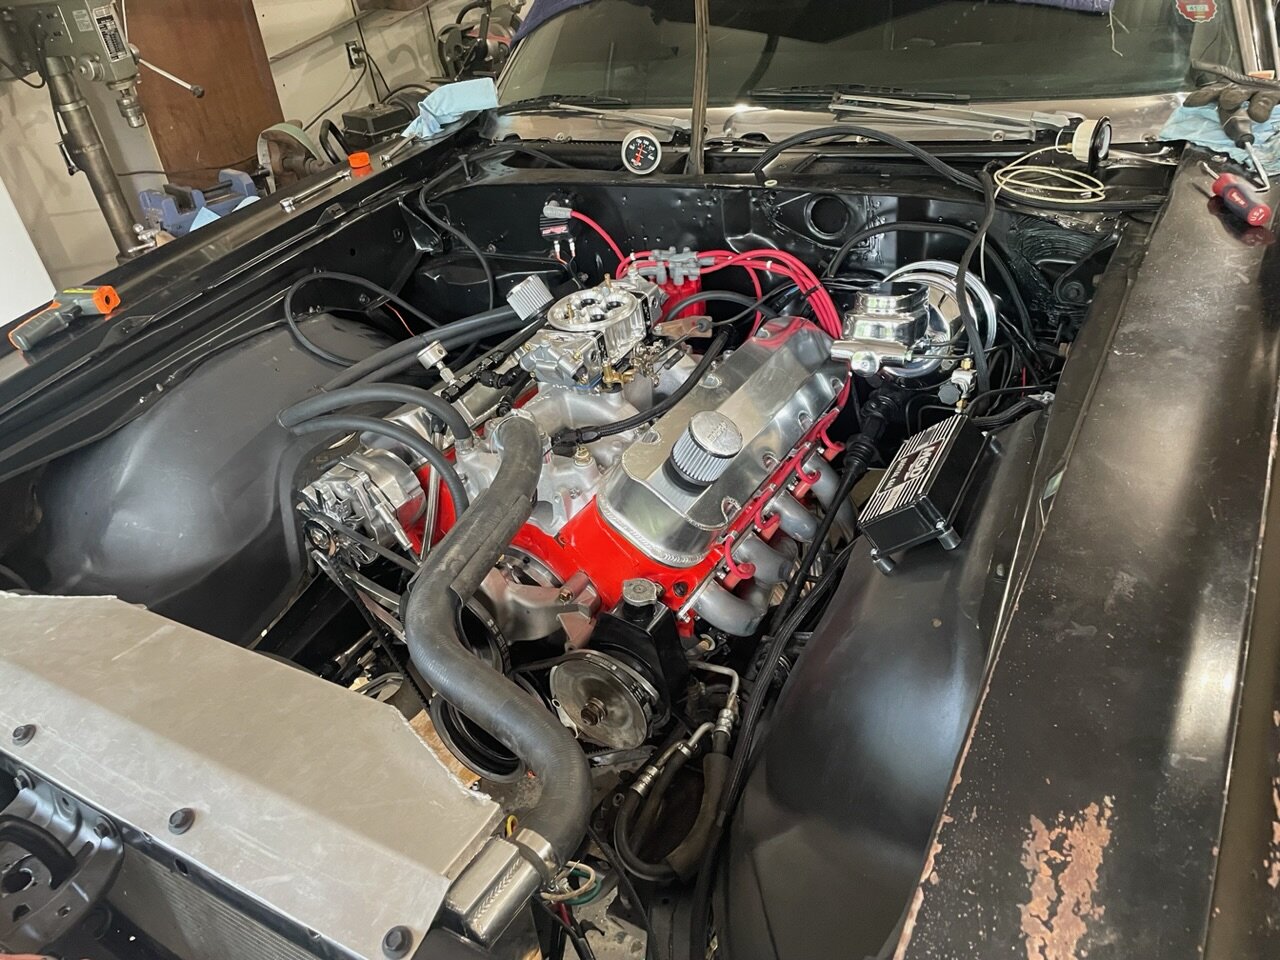
Got the engine in, running and timing set, the new MSD box and the new dual 8 inch booster from Leed is in. Would have gone cruising with a friend and his Nova but the brakes are giving me some trouble. New master and booster and the pedal has some slight resistance but goes to the floor. I bench bled the system and have bled it atleast three times with the up down second person method.
-
What did you do to your Monte Carlo today?
70MC402 replied to Canuck's topic in General 70-72 Monte Carlo Forum
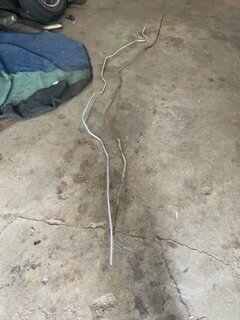
Got the firewall all cleaned up, the 505 and the th400 mated back together. Swapped the used FTI 3000 stall converter for the Coan 3800 stall today. Earlier this week made up a new 1/2 inch aluminum fuel line, waited until today for the “tubing Armor” from the stop shop and got that in today.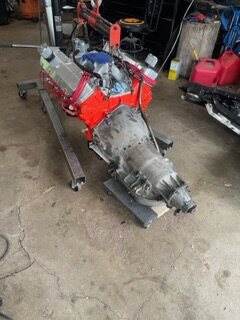


-
What did you do to your Monte Carlo today?
70MC402 replied to Canuck's topic in General 70-72 Monte Carlo Forum
Yeah the booster will be getting replaced! I’m torn on what size to go with but I know I want smaller than the stock 11 inch booster. -
What did you do to your Monte Carlo today?
70MC402 replied to Canuck's topic in General 70-72 Monte Carlo Forum
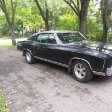
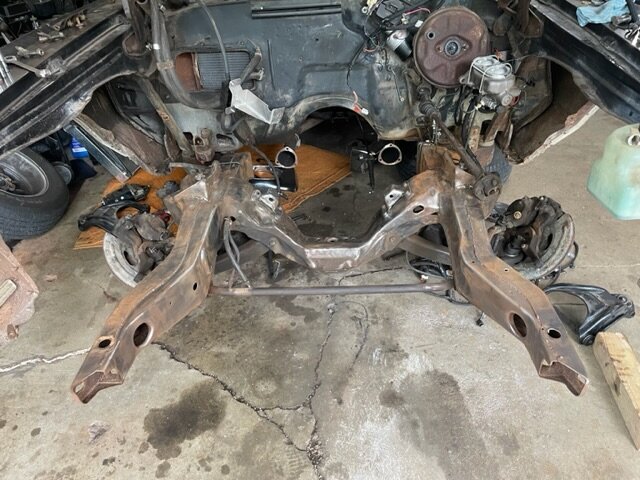
Yesterday a friend of mine and I pulled the 402 out along with the trans so I could clean the front frame section and the firewall, as well as replace the 402 with a 505 I recently finished. The frame was pretty crusty but nothing worse than superficial rust found in front of the firewall with the wire wheel. Going to use implement paint on the frame to see how it does, if it looks good I’ll likely do the firewall with it too.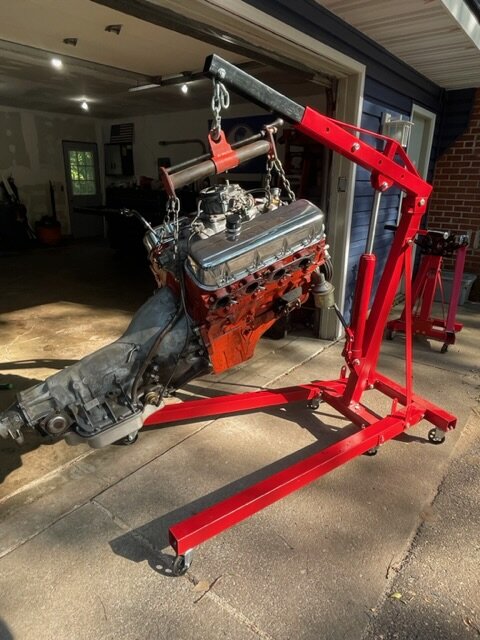
-
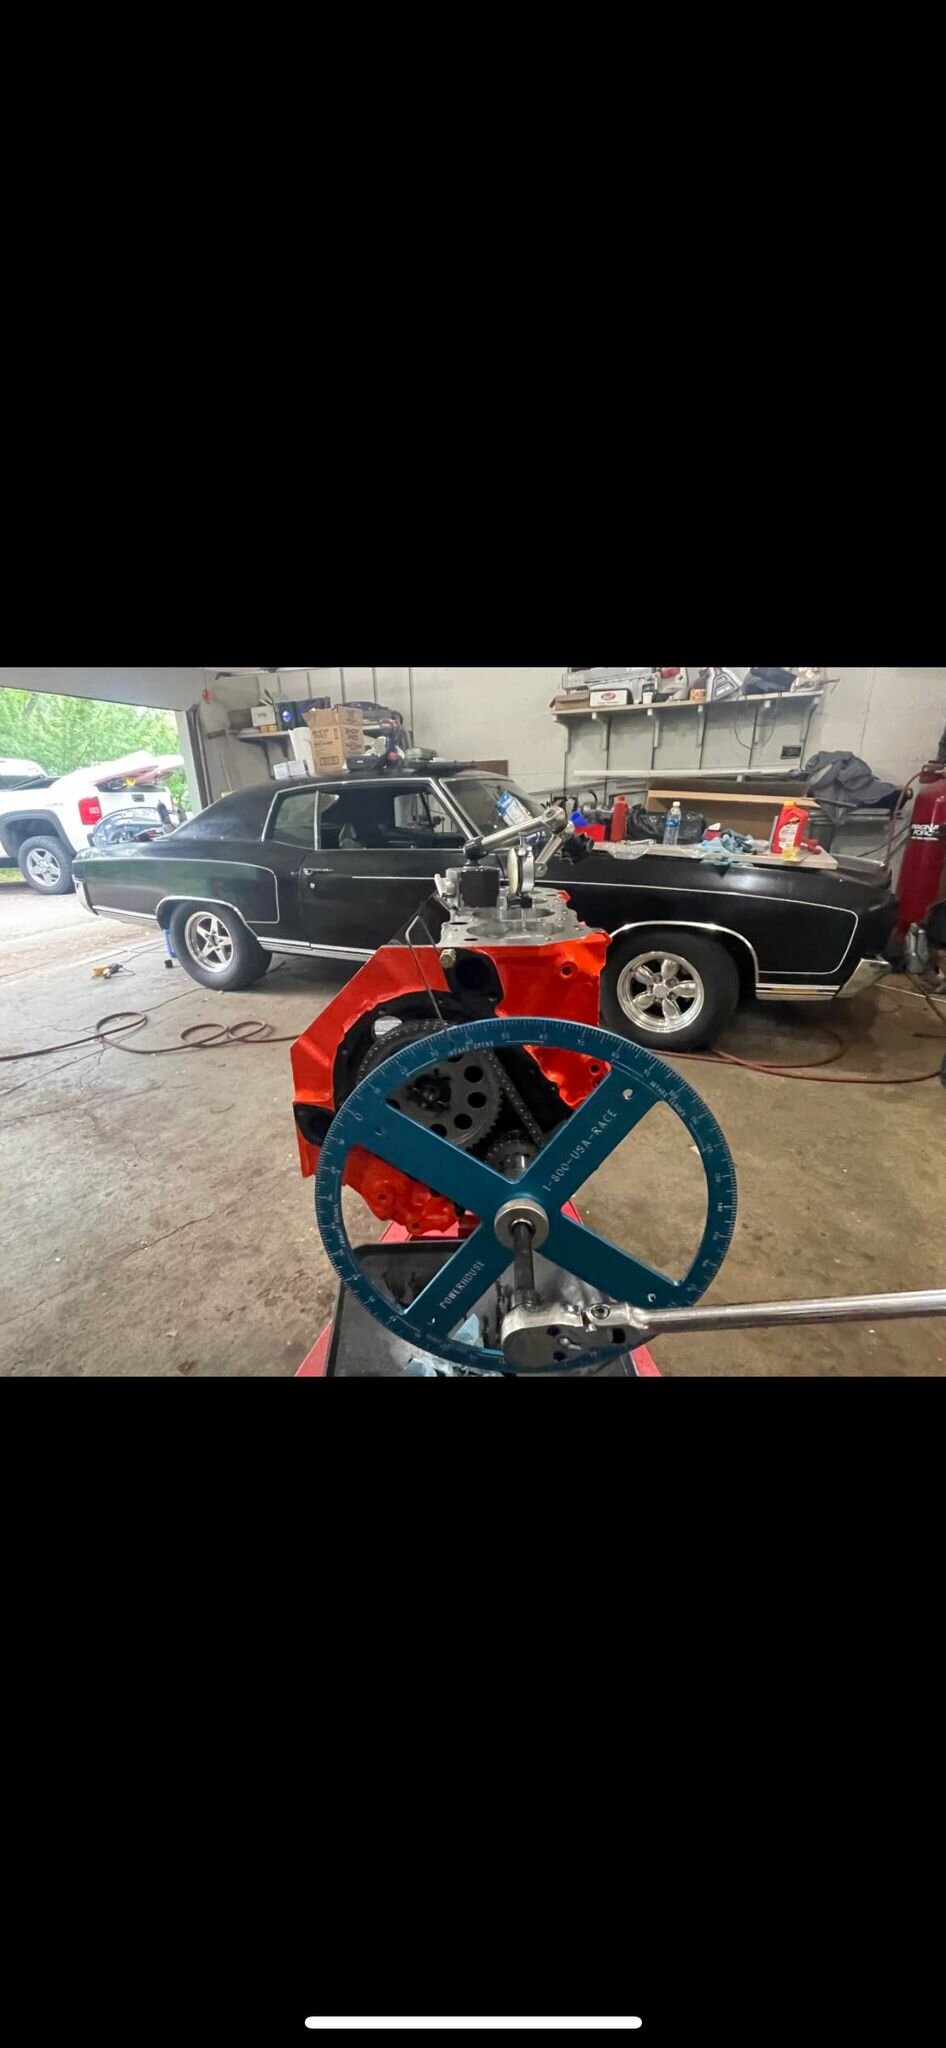
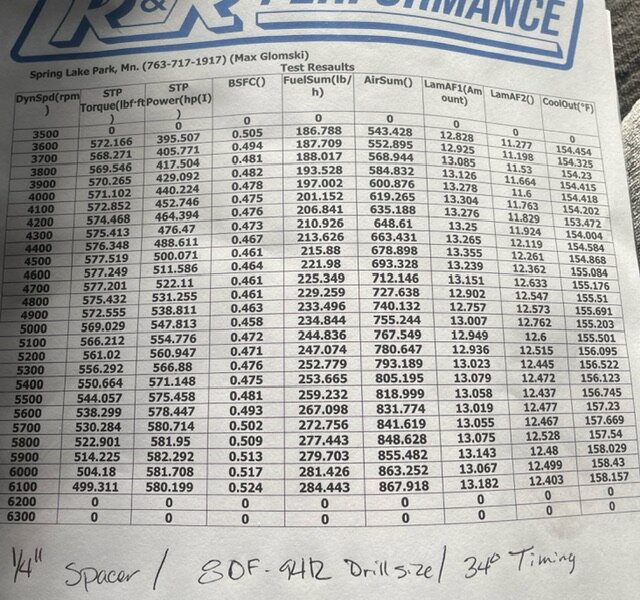
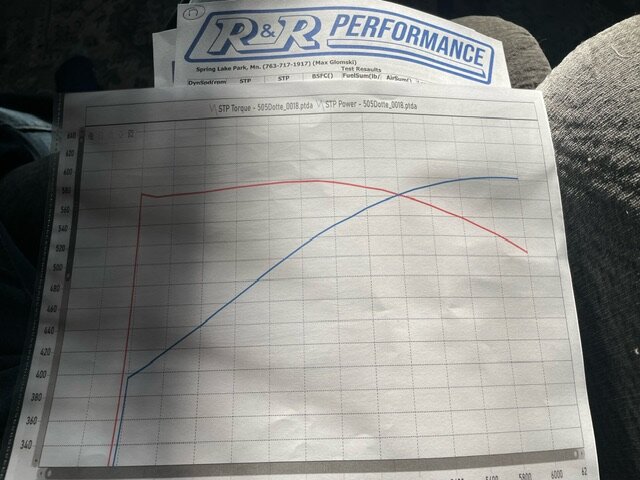
Well it didn’t quite make what I was hoping but it should still be a handful! After an afternoon of jet changing, spacers, timing adjustments best we could coax was 577 torque and 582 horsepower.
-
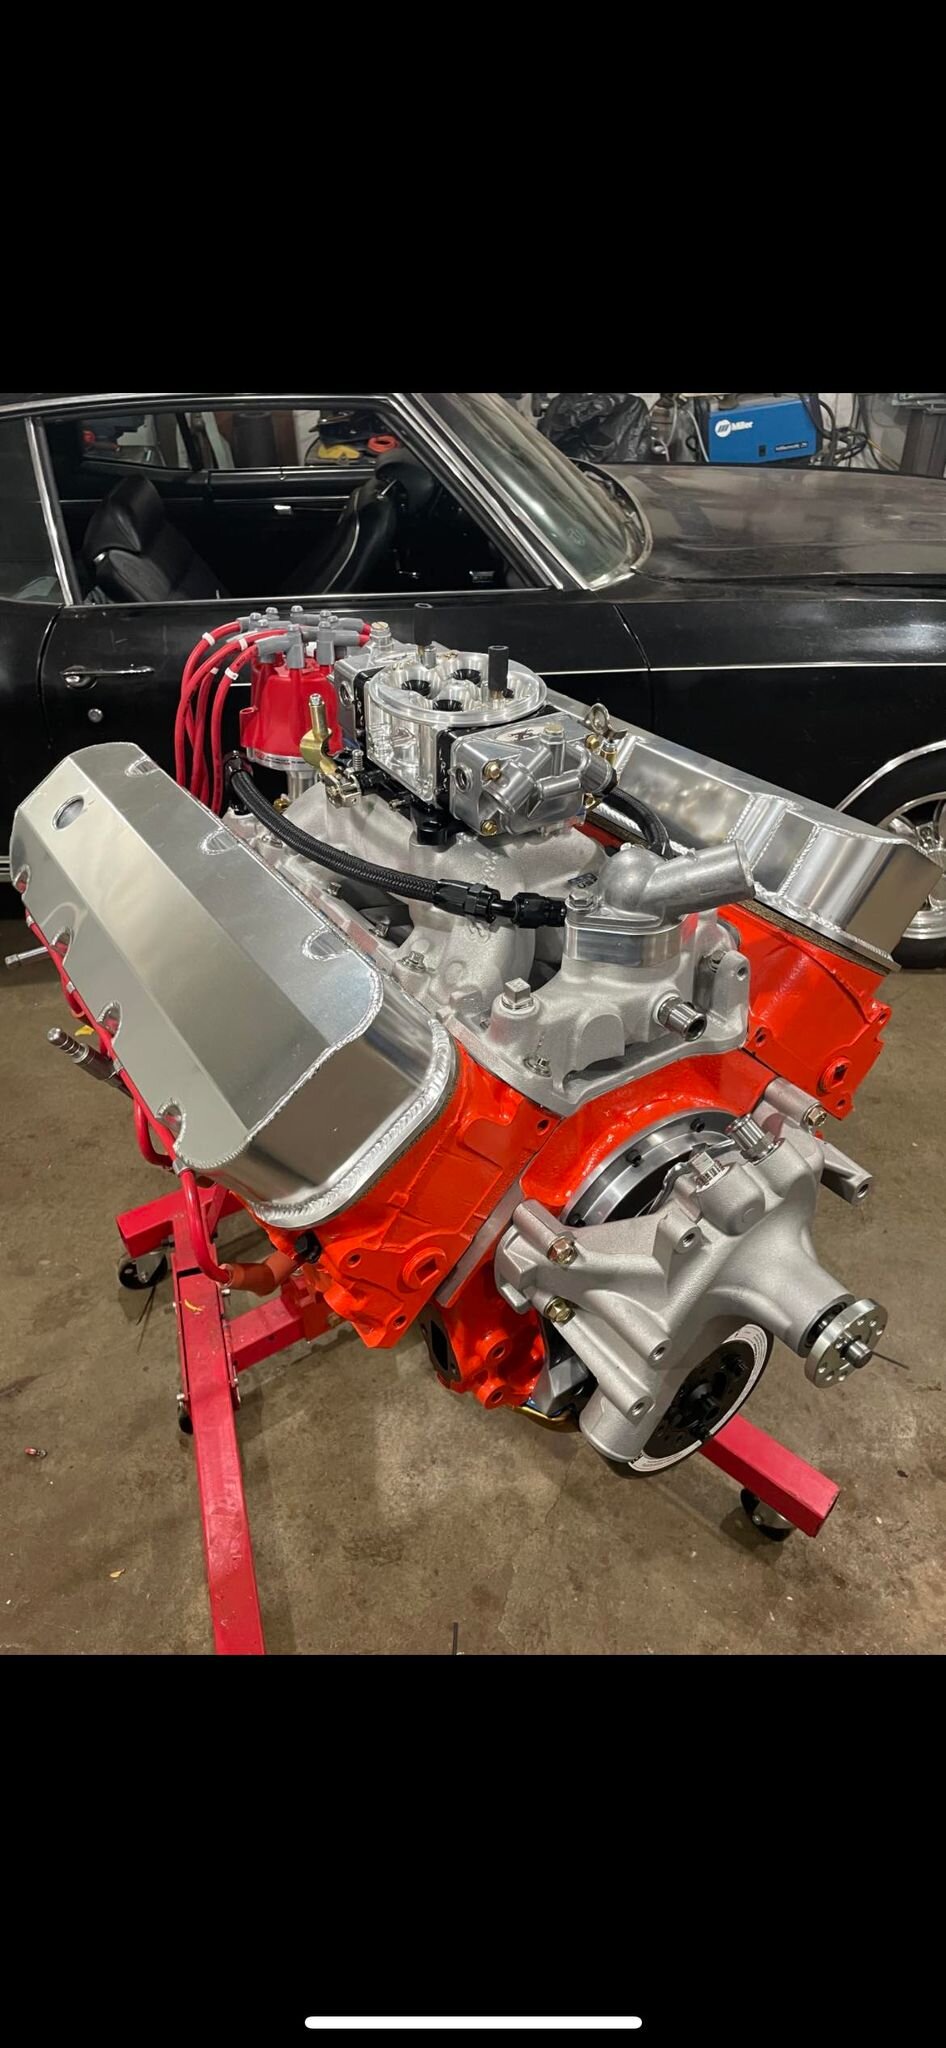
The engine isn’t one that Mark put together, it’s one that me and some friends built. Mark did the cylinder head porting and has given helpful advice numerous times along the way. If I was going to do it again I’d take some of that advice and use a Mahle piston vs the Icon, I’d either pick a cam a little closer to the .600 lift range or I’d use 1.8 rockers on atleast the intake. Once all the porting/shipping costs and the setup for the valve springs (stupid spring pockets are 1.500 and should be larger like 1.550-1.575 for a larger spring) I’d likely go with a set of AFR 290s next time for just a couple hundred more. But for what this is I think it should do pretty well!
-
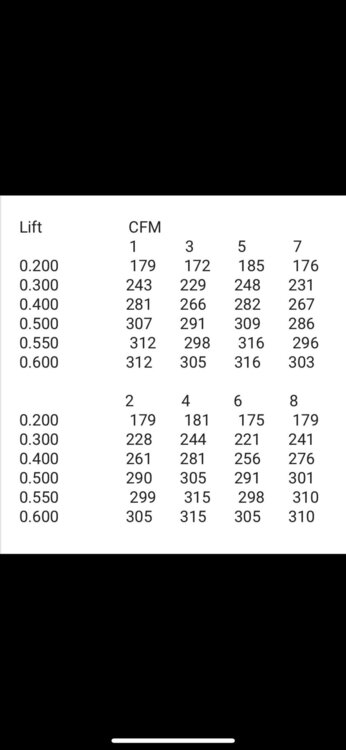
Hi everyone, in early August I’m going to be bringing my 505 to the Dyno to see how it does. Any guesses at power and torque numbers? Let’s see who can get the closest! The Dyno altitude is roughly 930 feet above sea level. In August my guess is it’ll be 70s-80s when we run it. I’ll be running it on 93. The engine is 505 cubic inches. 4.350 bore, 4.250 stroke. Two bolt main block, ARP main studs. Align honed, decked, bored and honed, cam bearings, magged. It’s a Molnar 8 counterweight crank, molnar H beam rods and Icon 1/16-1/16-3/16 12cc dome pistons. The heads are 049 castings with the intake ported by Mark Jones of Vortec Pro. I can’t say enough about how helpful, educational, and thorough Mark Jones has been through the whole process with all my questions. The heads had 2.190/1.88 valves installed before I got them, and measured between 118-120ccs, yielding roughly 9.8:1 compression.They currently have comp cams 924-16 springs set up at 1.800 installed height. 147 lbs on the seat and 343 on the nose. The cam is a billet core version of the comp 11-456-8. 242/248 at .050 and .566/.566 lift, 112 LSA, installed ICL at 108. Using a set of lifters I ordered from Crower, they are the high pressure pin oilers, and when unboxing them I found they’re actually Johnson’s! Still pin oiled lifters. 7/16ths Manton pushrods. Crower enduro stainless 1.7 rockers. The intake manifold is an out of the box RPM air gap. The carburetor is an FST 1050 built by Mark Whitener at Lighting Racing Carbs, another guy I can’t speaking highly enough about. Ignition is a MSD pro billet, 8.5mm MSD super conductors and NGK 4323 plugs. If there’s anything else I missed don’t be afraid to mention it! Thanks and let’s see who’s closest!


-
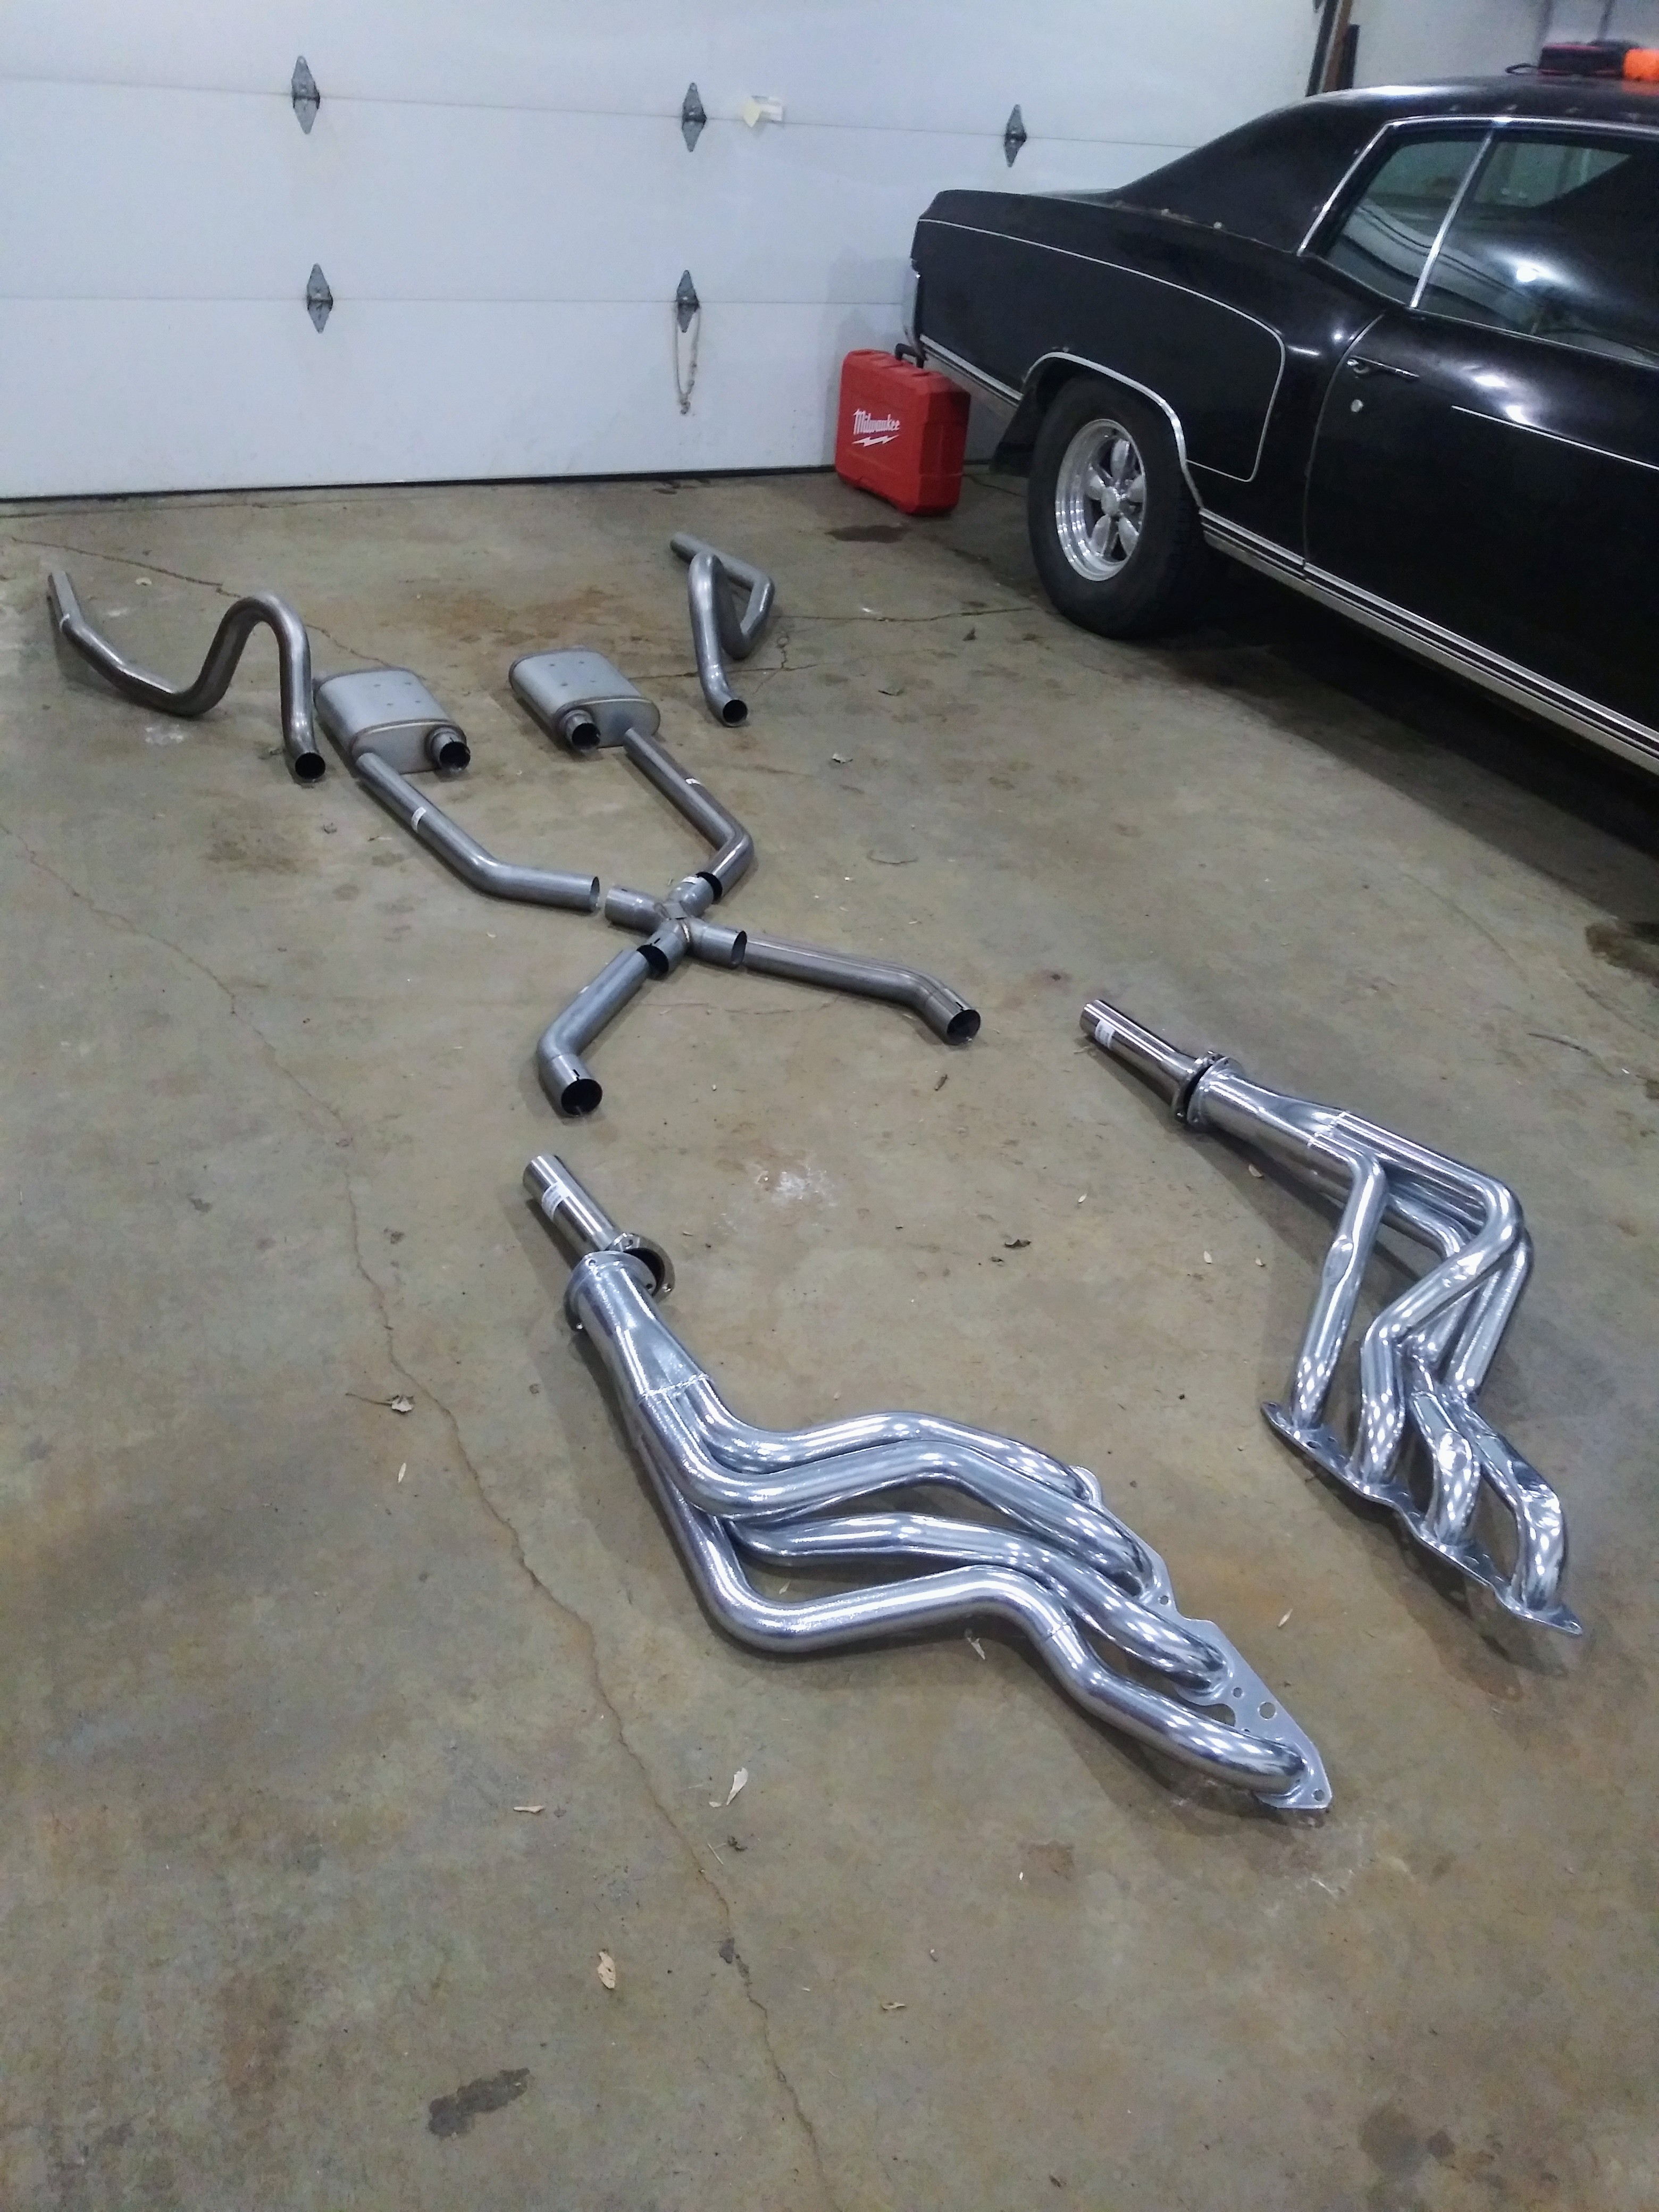
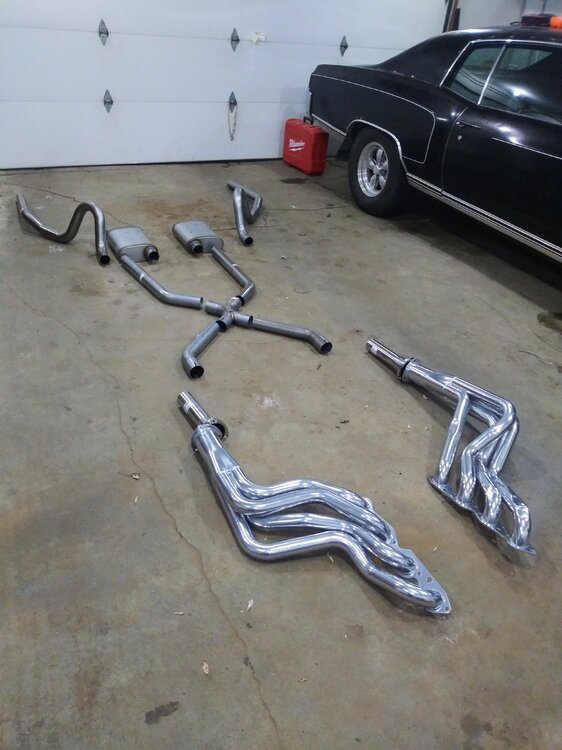
If you haven’t bought an exhaust system yet the pypes x pipe does fit pretty well, I have to take off my right rear tire to get the tail pipe off but that’s partially because I’m using an MT ET pro 275 with a 5.5 inch backspacing wheel. I will also say that if pypes is an option for you the race and street pro mufflers both are realllllllly tame. I ended up going back to my Flowmaster 40s after a week.
-
I have an older pair of hooker 2455, they fit in the car alright but honestly leave quite a bit to be desired for side to side consistency. They don’t aim the same way out of the header, the guy I bought them from did all the clearancing for the steering shaft and I had already relocated my brake distribution block. My honest recommendation would be not to use the hooker 2455s.
-
Do you have a copy of the alignment measurements after they aligned the car?
-
The correct way to do this is to measure the rotating torque prior to and disassembly of the rear end. The way we do it at work (GM dealership) is remove the rear driveshaft, remove both rear tires, if you want to pull the drums off you can too just to take any drag variation away. Use a quarter inch drive rotating torque wrench with adaptors up to the socket that fits the Yoke nut. Rotate the pinion a few times to get an average, you’ll probably have 10-30 inch pounds of rotating torque. Jot that number down. From here you can remove the yoke nut. If you’re doing it on the ground you can put the u joint straps back on and use a pry bar to hold the yoke in place by rotating it into the ground. Use a large ratchet/breaker bar to remove the yoke nut. Once off clean any debris/silicone from the splines and use a puller to remove the yoke. We use the snap on CJ2001P, but anything similar should work. Even Harbor Freight stuff should be fine for a one time deal. Once the yokes off you can just take a screwdriver and a hammer and tap the seal inwards a bit until you can get the screwdriver under the lip, pry it out and wipe the seal area with a clean rag. Tap the new one in. You can use a big socket or just firm taps around until the seal is seated. Once fully seated you are going to want to clean the splines on the pinion and on the yoke. Just so there’s not a ton of debris. Take and set the yoke back on the pinion and give it a few taps with a deadblow hammer. Once you can get a couple threads on and you’re sure it’s not going to cross thread or pull the threads you can run the nut down, not until tight yet, just until the slack is taken up and the pinion isn’t loose. Now is when I’ll take the nut back off, lightly coat the yoke to nut interface with silicone and reinstall the nut. Here’s the important part!!!! Beneath the nut is the yoke, beneath the yoke is the outer pinion bearing, beneath the pinion bearing is the crush sleeve, from there is the inner pinion bearing and then a few small (thousandths thick) spacers and then finally the pinion gear. When you tighten the nut what you are effectively doing is pushing the bearings both into the crush sleeve and into the bearing races. The idea is that the nut crushes the crush sleeve which sets the preload by controlling how much pressure is put on the bearing races by the bearings. As you tighten the yoke nut down you take up the clearance between the two bearings and the crush sleeve. When you first start to tighten the nut the yoke will flop around and it’ll seem wrong, keep going slowly tightening until there’s no clearance or lash in the pinion. Once you feel no slop you’ll want to grab that rotating torque wrench and measure the rotational torque by turning the pinion with the yoke nut and adaptors. At first it’ll be none or next to none. You slowly tighten the nut, we are talking 1/16ths of a turn at a time, until you reach the number you jotted down or 3-5 inches of torque higher than what you had before. If you leave it with significantly less rotating torque it’ll wear in quickly and become loose, wreaking havoc on your ring and pinion and taking out the rear end. Too tight (20+ Inches higher than originally measured) and you’ll overheat the pinion bearings or have to take the rear end part. It’ll probably also make noise. It may sound daunting but once you get under there and spin the rotating torque wrench the first time it’ll make sense. Good luck and take your time!
-
When’s the next race day? A Plug wire isn’t the worst thing that could be wrong.
-
How did the car do with the 275/60/15 Mickeys?
-
Is rotor replacement out of the question on this? It seems like it could have been repaired already with new pads/rotors.