72Ragtop
-
Posts
87 -
Joined
-
Last visited
-
Days Won
1
Content Type
Profiles
Articles
Forums
Gallery
Events
Everything posted by 72Ragtop
-
Kick Panels - Replacements with vents... Quality?!
72Ragtop replied to Ridercoachbob's topic in Interior Tech
I have a methoud of cutting the Butterfly Valve portion, from the whole of the Kick panel molding/assembly, and mounting the valve w/ sealer, to the metal opening. Using this methoud, the screen, trim panel, knobs & cables can be removed, for whatever reason, without removing the "Valve and sealant" (and park brake assembly!)from the metal plenum area. I did this on an AC car, too, removing the "re-circ-valve". Requires an Xacto knife, x-tra blades, 5 or 6 additional self-drilling screws, 6-pak of beer. I have full size drawings that double as marking and cutting templates. As methouds for attaching things to most websites are, by design, excessively* difficult, I doubt I'll be able to figure it out. (I can't even find Spel-chek on here.) I'm not even sure the post button is working. -
What did you do to your Monte Carlo today?
72Ragtop replied to Canuck's topic in General 70-72 Monte Carlo Forum
Not today, but last Saturday I did the 95 mile "Canyonball Run" in the mountain roads west of Boooulder with the Mustang & Corvette clubs. A Monte can be made to go around corners! -
I did what Darren suggested....I feel like work at Facebook!!
-
Interesting.....@ 12:48 Mountain time on 28 March, there were 67 people on the website. 5 were members. I hope the other 62 join.
-
I have a 3/4" thick file covering Custom Auto Sound and all the problems, issues, returns, re-returns and (worst) the total lack of any customer service. Now that was about 10 years ago, but it still makes me sick when I see them on TV or in advertising. I currently have an actual Am-FM-Cassette-Remote CD Kenwood (KRC-3007 w/ two actual Knobs!!!!) Love it!!! And I have a spare in the attic.
-
1st Gen Montes were also in "American Gangster" & "Kill the Irishman". I'm told mine made it in the "background" on "Bitchin Rides" on Monday the 27th, but I missed it.
-
What did you do to your Monte Carlo today?
72Ragtop replied to Canuck's topic in General 70-72 Monte Carlo Forum
Getting new W/W Tyres put on! -
1st thing....with car running, check Voltage at battery that at Lo and then Hi headlite wire connectors. More than likely, depending wire & switch age you'll see a 3 to 5 voltage drop at the headlites. Add relays.
-
What did you do to your Monte Carlo today?
72Ragtop replied to Canuck's topic in General 70-72 Monte Carlo Forum
What did I do with my Monte today....I'm getting ready to drive it home from work...with the top down.....during the Supermoon rise. -
I did the same as FastSS454 but can seem to attach foto. why is this so complicated?
-
Anybody got any updates, new info or part numbers on the small block valve cover gasket subject? Thanx Dave
-
Let's not rip on this Convertible too much...1) The design and classic proportions of the 1st gen Monte lends itself extremely well to the understated (Gentleman's) Muscle car, Bad-A*s-tricked-out muscle car, and Luxo-Cruiser in the classic styles of, say, the 50's & 60s Caddys, especially with skirts! I dare say that this "high-quarter-panel-kick-up" has the flavor of the 1953 Motorama Buick Skylark or even the Jag XK-120/140 (when I blurr my eyes a bit). The "Quarter-panel-kick-up" may be back just a bit too far from the Monte's side scallop/bulge vertical-to-horizontal transition radius, in some eyes. but it is a rear-seat car and not a two-place car. 2) Based on the painting of a Monte ragtop in the 1970 Chevy accessories catalog, Darren's "Chevelle-based" convertible is probably what Chevrolet would have (should have!) produced. {Darren; Yours is sweet and I love the elegant colour!} 3) With the price of Chevelles, try finding a ragtop donor car at an acceptable price. Skylarks and Cutlasses are a cheaper alternative. 4) Based only on the two photos, the important "blending" of the original Monte "side-scallop-bulge" up to the pinch-weld chrome seems pretty good. I dare say a bit better than my Skylark based conversion. 5) The seemingly high asking price is debatable, considering the existing paint, but if the conversion work is done correctly under the skin it may not be that far off. Consider too, the cost of a decent Monte to start with, a "complete" donor car (Note: the convertible rear seat is narrower", too), Shop time, reworked top frame and new convertible top. I'll bet $17,000 CASH would take it. 6) I'll bet Darren would agree, but there is nothing like pulling into a car show in a stately Monte with the top down, Sanatra on the radio, and all eyes upon you in awe and wonderment...I'm ready for Summer!!!
-
I can recommend, from experience on 3 other Chevys, using an 81 Camaro Z-28 Box. Drops right in.
-
Well I'll be....looks like it worked
-
This is my 4ht #$%& attempt...getting some &%$# "URL thingie-block" and site locks up...........Finally found the "Brouse thingie" (like Craig's List) buried in "Options"........"Add to post" @ bottom rite and "Attach this File" @ bottom left does nothing, #$%@. I give up. Give me a regular E-mail and I can "Click & Drag" attachment. @#$% ! 20150320052244003.pdf
-
I added "dig out kick panel drawing" to my S.T.D. list. I'll scan it and try and post it ASAP.
-
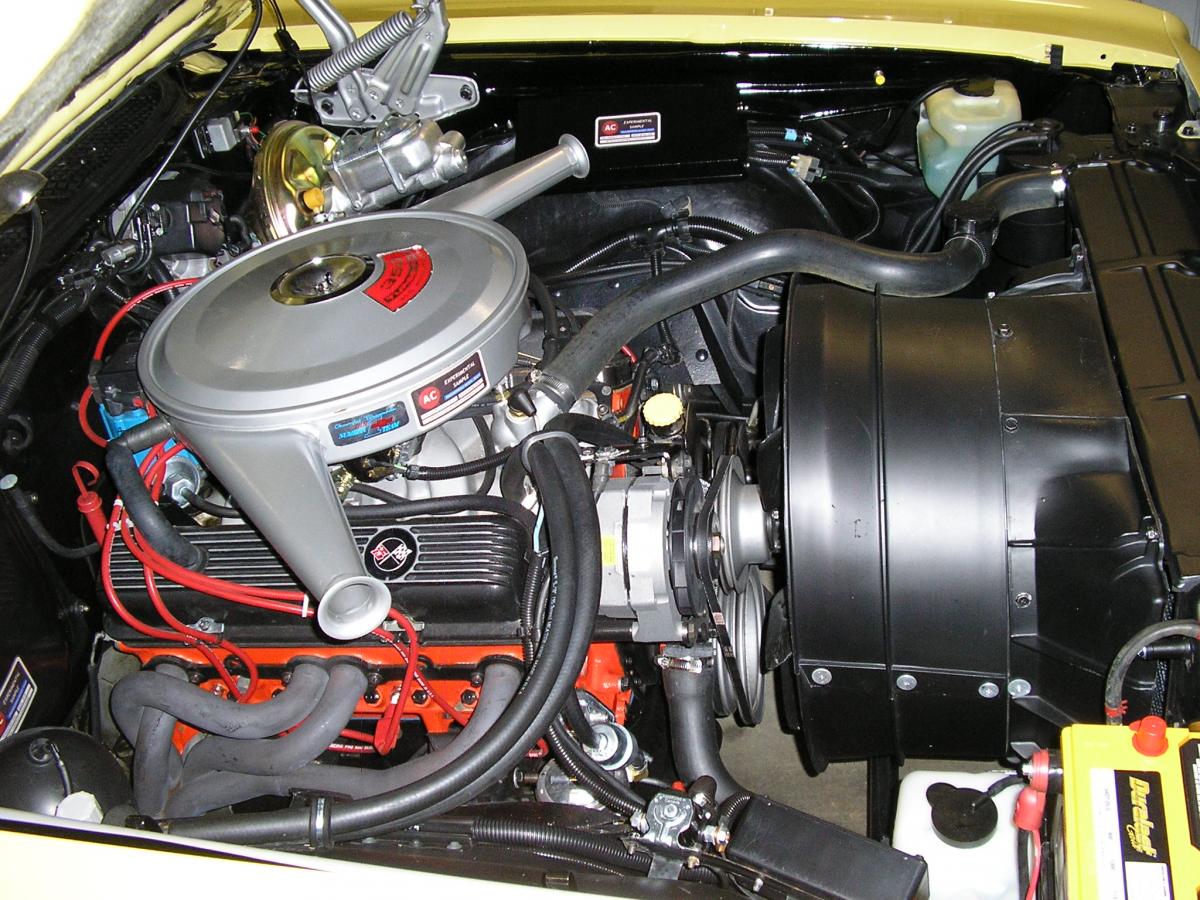
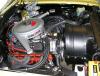
I put kick panel vents in when removed the O.E. AC...air flow is great. Also removed the Re-circulation flapper on the rite side cowl and plugged the unused vacuum hoses. I have a methoud to cut the kick panel butterfly valve, from the kick panel fascia so that both pieces mount separately. The butterfly valve should "heavy sealant" on it where it mounts into the air-hole or it will leak water in. and if you ever have to remove the kick panel, is a P.I.T.A. to remove as one big piece, especially on the drivers side. You cannot tell that the kick panel is two pieces and the vent grill fits as normal. If there is some way to attach a drawing that doesn't require a degree in computer gibberish, I'd be glad to provide.
-
I can't resist....All people who drive in traffic with fog lites , you'll notice are always aimed incorrectly--should be pulled over, heavily fined, have their license pulled on the spot, car or truck towed and a public smashing of the foglites. This is just my opinion and I am right!
-
And what's that Benz in the background of the foto?
-
What did you do to your Monte Carlo today?
72Ragtop replied to Canuck's topic in General 70-72 Monte Carlo Forum
drove it to work with the top down. -
Along with the heater/AC box, don't forget the lower heater/AC plenum areas, behind the kickpanels. These also serve as drain areas and can/will become plugs and a collection point for crap.
-
1) I'd install whatever Horseshoe floor shifter & cable assembly you're going to use (Camaro and Chevelle/M.C. are different) 2)Verify actual shifting function. 3) Then I'd locate the Cheapest, broken Camaro console I could find on the internet or swap meet and use that for the "Fit-up mule". I'll speculate that you may have to raise the Camaro console to line up the shifter within the gear position slots & PRND21 lense. given that, you have to determine which mounting brakets to use, or make your own. I've built probably 10 or so consoles over the years and I'd say this procedeure seems to work. My current M.C. uses a 69 Cutlass shifter w/ custom built console that incorporates a 2nd Gen Camaro arm rest & storage pocket, hand made PRND21 Lense, 1st Gen Firebird lense "light distribution socket", a clock housing from some 60's German car and chrome strips from A-body arm rests and (!)an 86 Jeep Cherokee roof rack. Cut/fit, cut/fit & cut/fit some more....but I enjoy that.
-
If you haven't mounted the switch yet, I would recommend mounting not in the glove box, but under or just behind the dash, near the Park Brake release. Trust me, over time you'll like it there instead of in the glove box.
-
I have the "Monte Carlo Rally" badge on my grill...there's been a lot of close up fotos of it taken at shows.
-
smear Die-electric grease all around the inside of boot...don't need much. Rotate boot after it is on. Prior to removal of boot, always rotate it on the plug. Try and grasp the boot at area of actual connection to the plug...not at the wire.