MCfan
-
Posts
1,291 -
Joined
-
Last visited
-
Days Won
60


MCfan's Achievements
")


-
“Ain’t nuthin’ wrong with the radio!” Somebody’s dreaming with that reserve … JMO
-
I can't remember which member I got my brackets from but he had them powder coated along with a bunch of other parts he kept. Too bad they don't show once installed! 😄

-
Welcome to the club and forums, Dennis! Hope you find all the help and support you need here to finish your '70 project. Just to clarify, there are possibly several other members named Dennis here (myself included) so we may need to use member ids in place of first names to keep things straight. I've been an active participant on the forums for the past 15 years and have never used a dancing banana emoji so that may be an identity clue for you. 😉
-
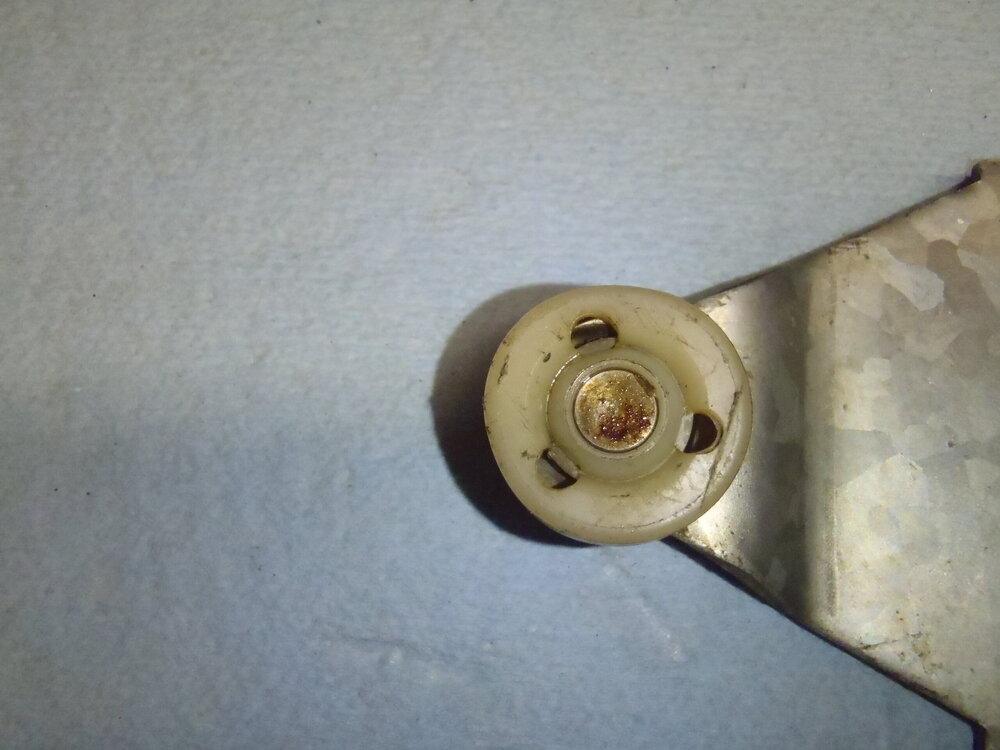
Glad to hear you found and solved the problem, John. After replacing that roller, you will have the fun task of getting the whole assembly wormed through that small opening in the inner body panel. I had to use a 12V power source to move the lift arms a couple of times before getting it back in place and connected to the window tracks but maybe you are more of a Houdini than I am. Good luck.

-
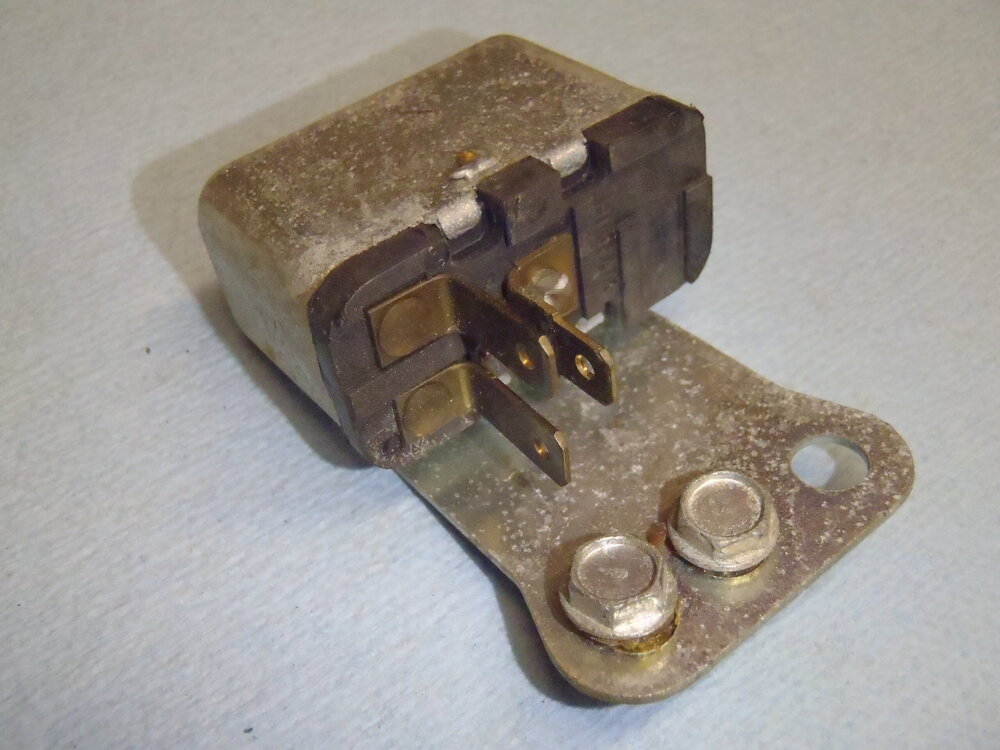
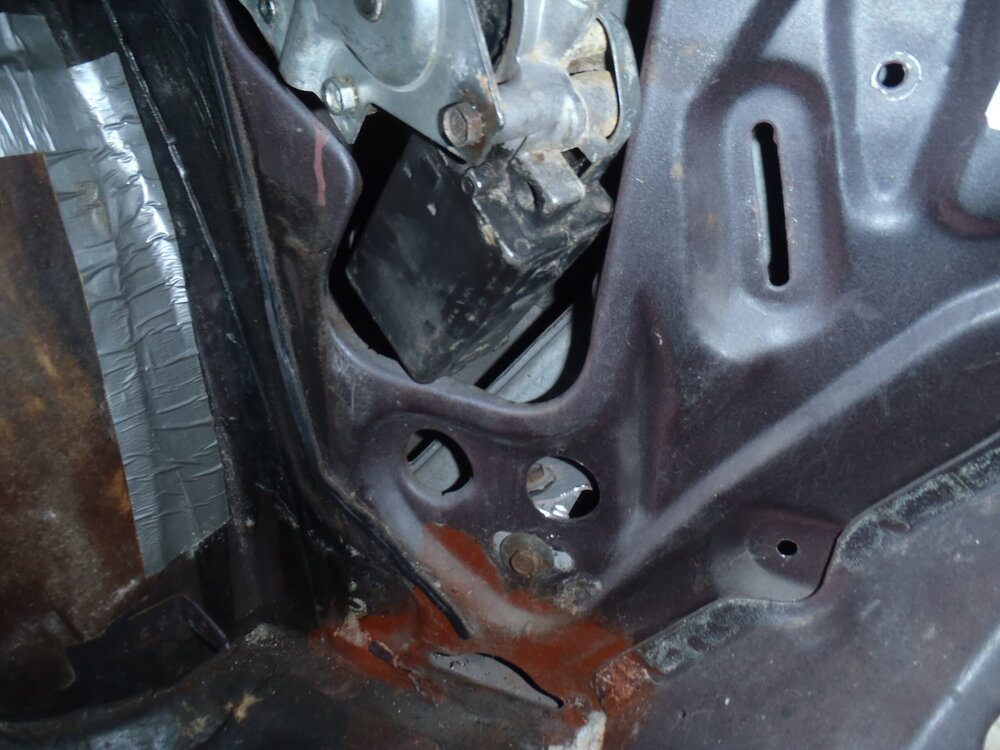
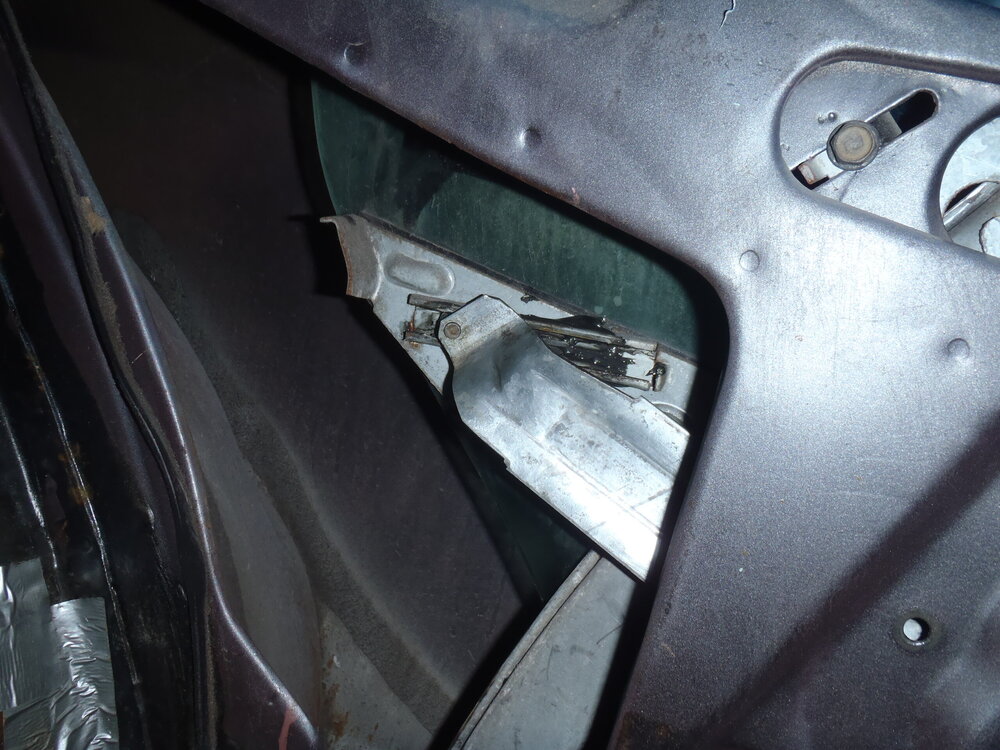
John, if the window glass being all the way down is preventing you from removing the regulator assembly from the tracks, I would try to move the glass up manually. A locking suction cup or two used on the inside might get it started and high enough where you can get ahold of the top of the window and pull it on up. I seem to remember that the track the linkage wheel runs in is attached directly to the glass so you'll probably have to reposition the linkage as you push/pull the glass up. If your motor was still working, it would be easy raise the glass or at least pulse it in the correct direction while you try to lift the glass upward. However, if you have already disconnected the regulator assembly from the inner body panel, you should be able to lift the glass while repositioning the linkage somewhat without running the motor. If you have to disconnect the arm guide wheel to escape the window track, I suggest carefully drilling that pressed-in axle stud out from its backside rather than risk breaking the wheel. It should be easy to weld that axle stud back in place later. I've never removed a rear regulator assembly, but I have installed two of them and distinctly remember having to use 12V power source to reposition the lift arms several times to snake the whole assembly through the relatively small access hole in the inner body panel. I don't know why it would be any different to take one out. Just a thought: If you unplug the factory harness from the regulator motor and attach a portable 12V power supply with the positive lead to one pole of the regulator, it should move the arms either up or down when you touch the negative lead to the regulator frame. One of the poles on the regulator is a horizontal blade, the other is vertical. I don't remember which is for upward movement, but you can easily test each one to find out. I know you say the regulator motor doesn't work properly and clicks when power is applied but I'm going to stick with my stripped gear theory. If that is the case, you will need to manually "help" the motor move the arms upward initially to engage intact gear teeth. There is a relay in the factory power window system but I have never hear it click on any of my Montes. It is simply used to energize the system only when the ignition is turned on.


-
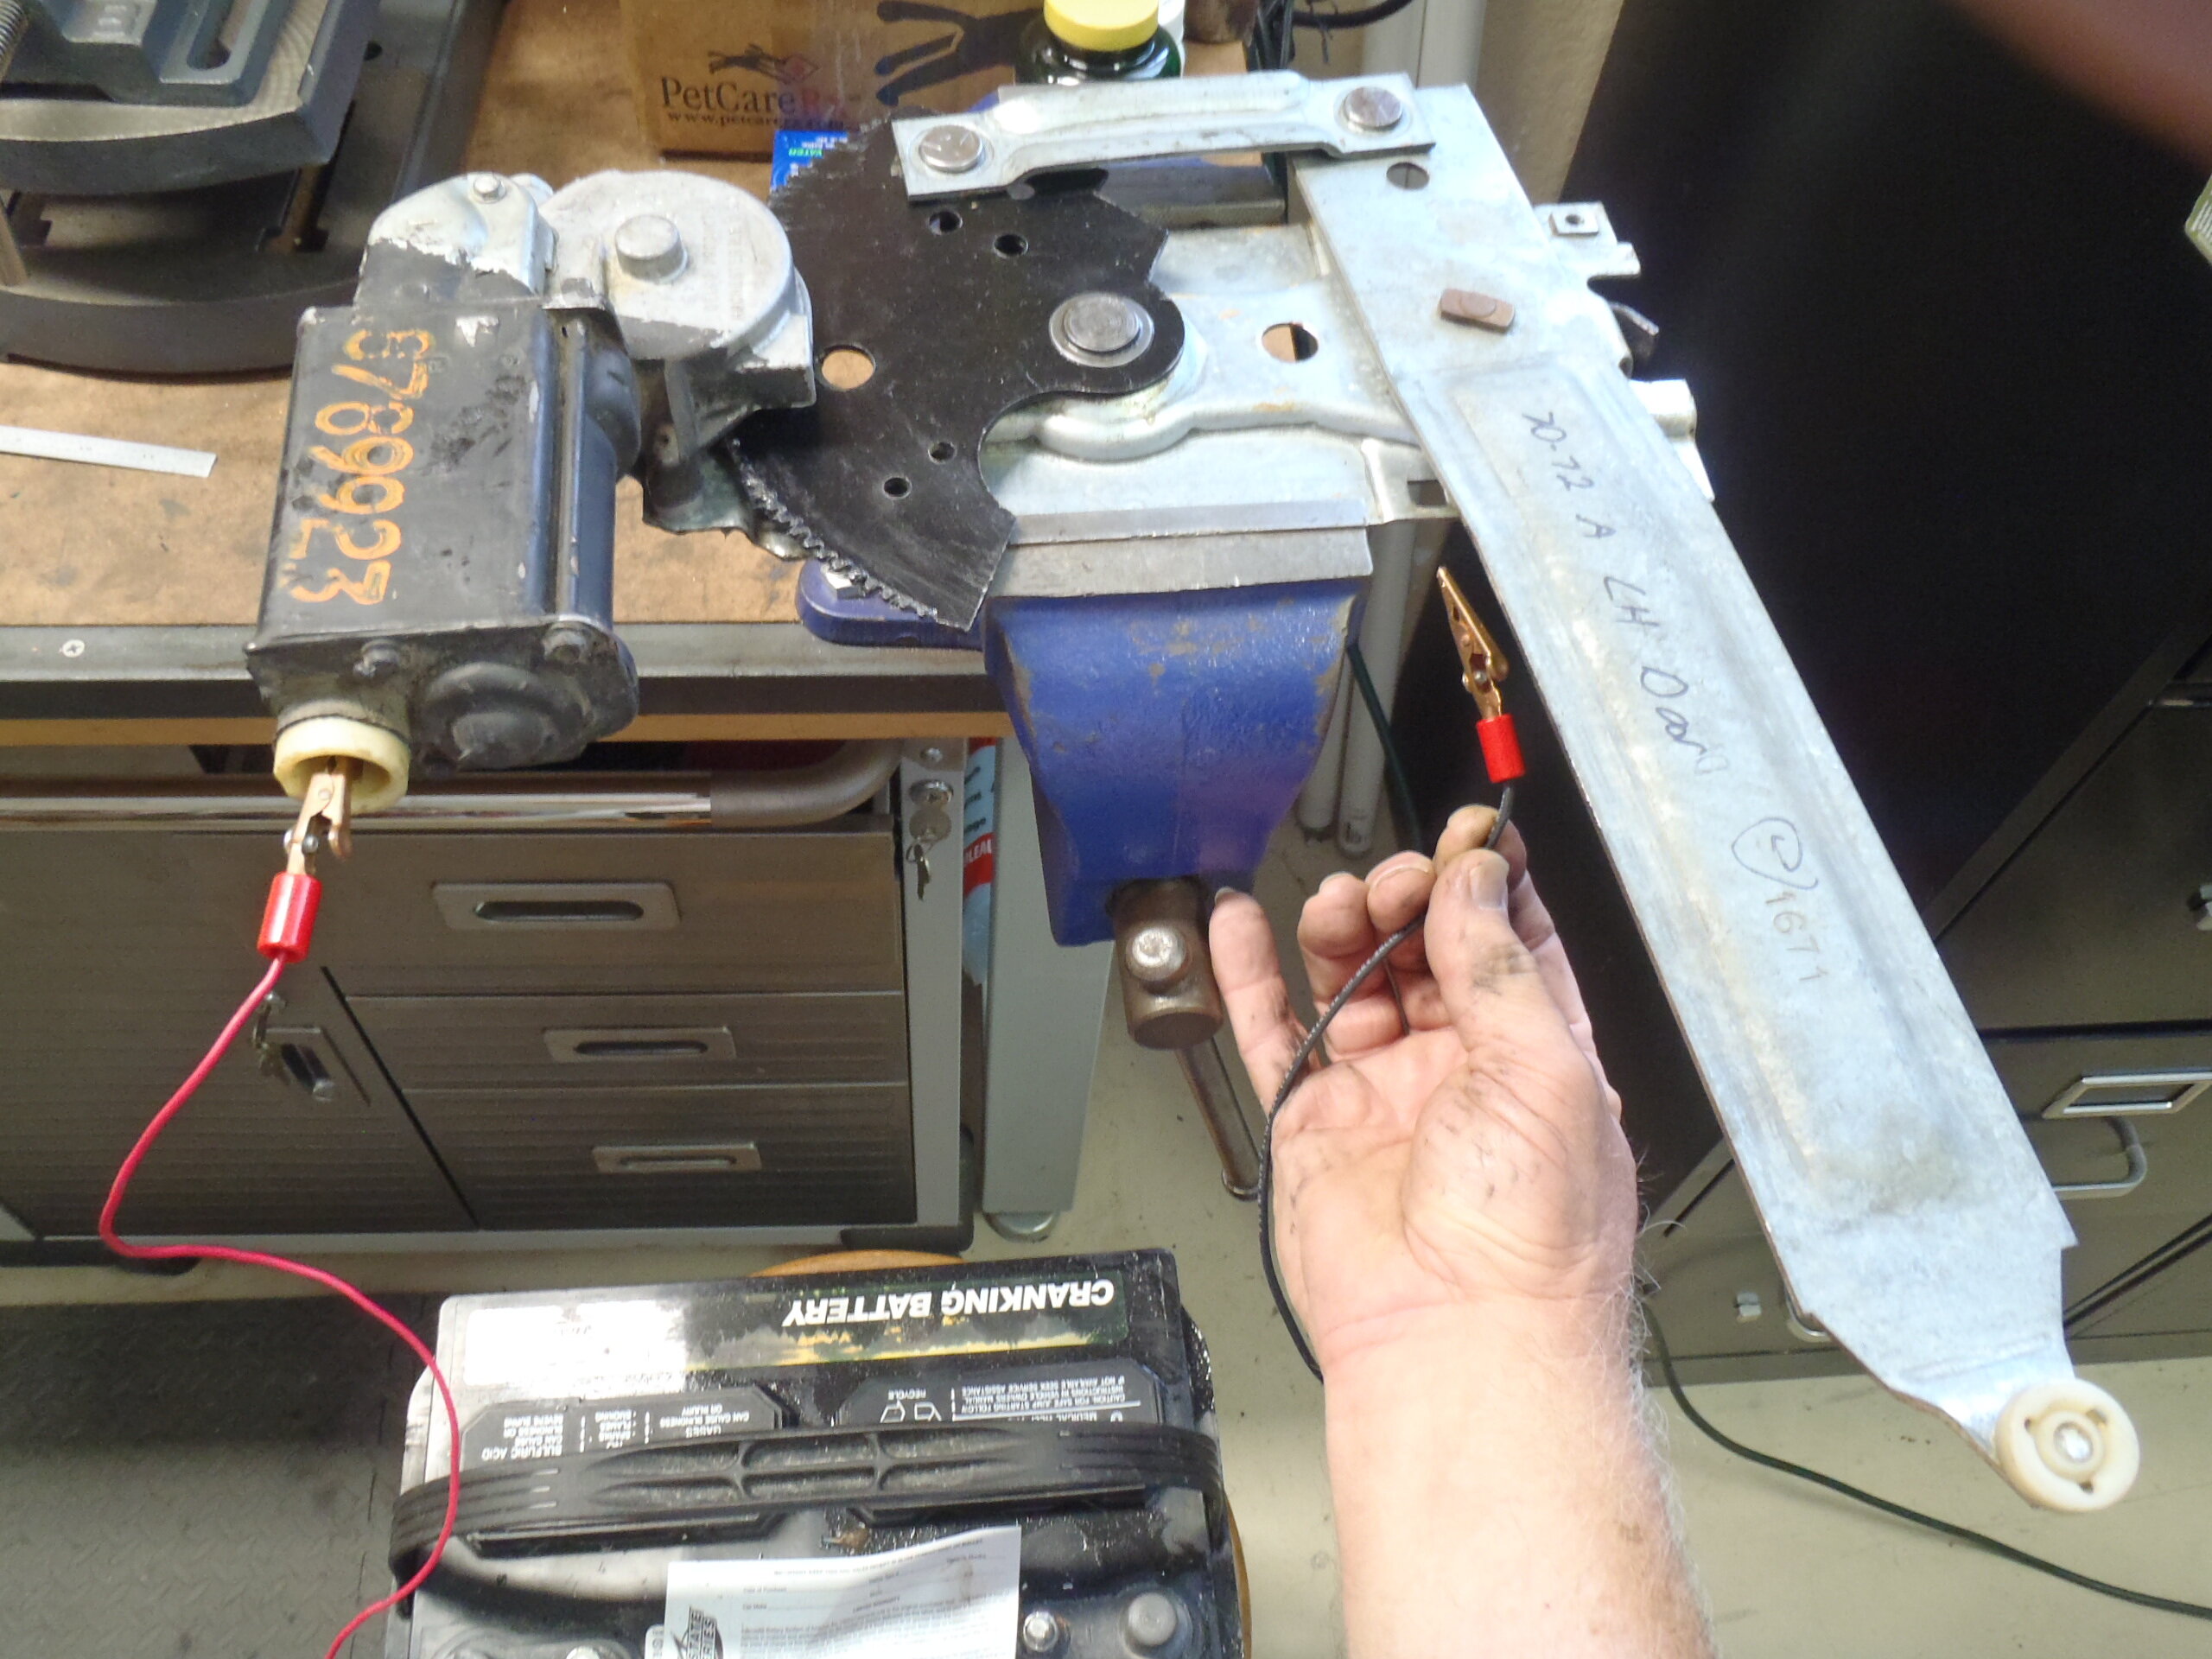
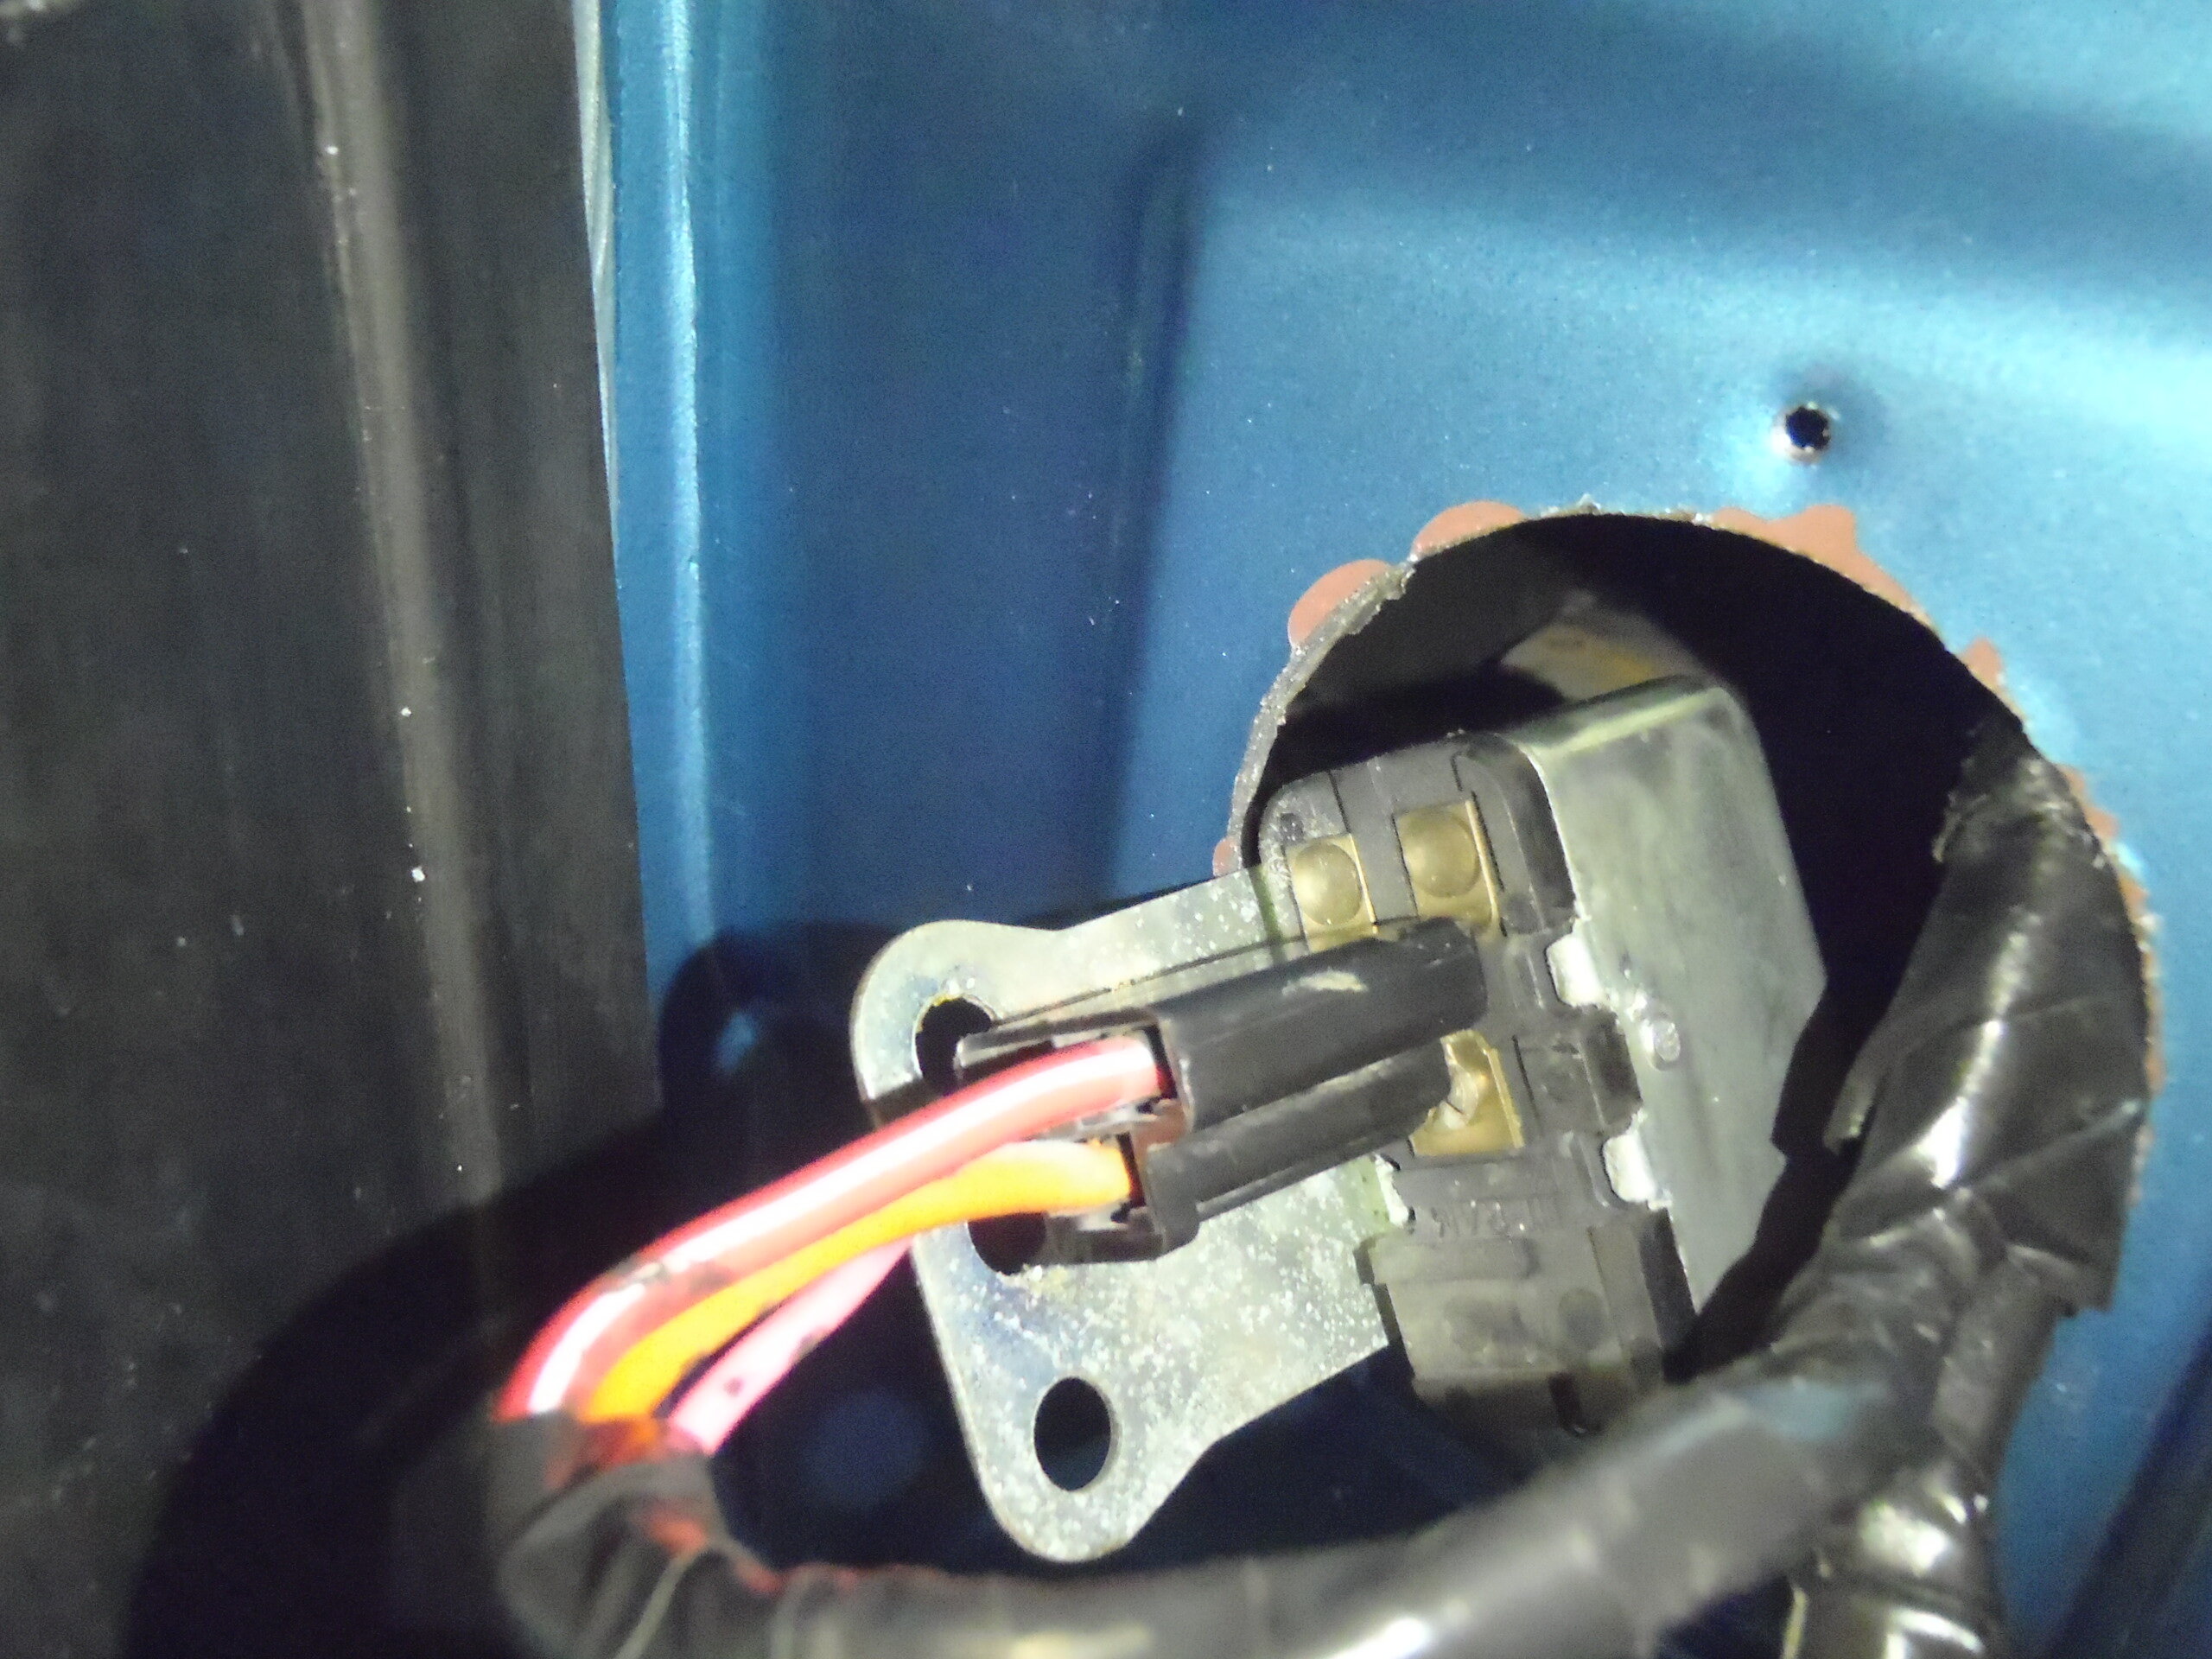
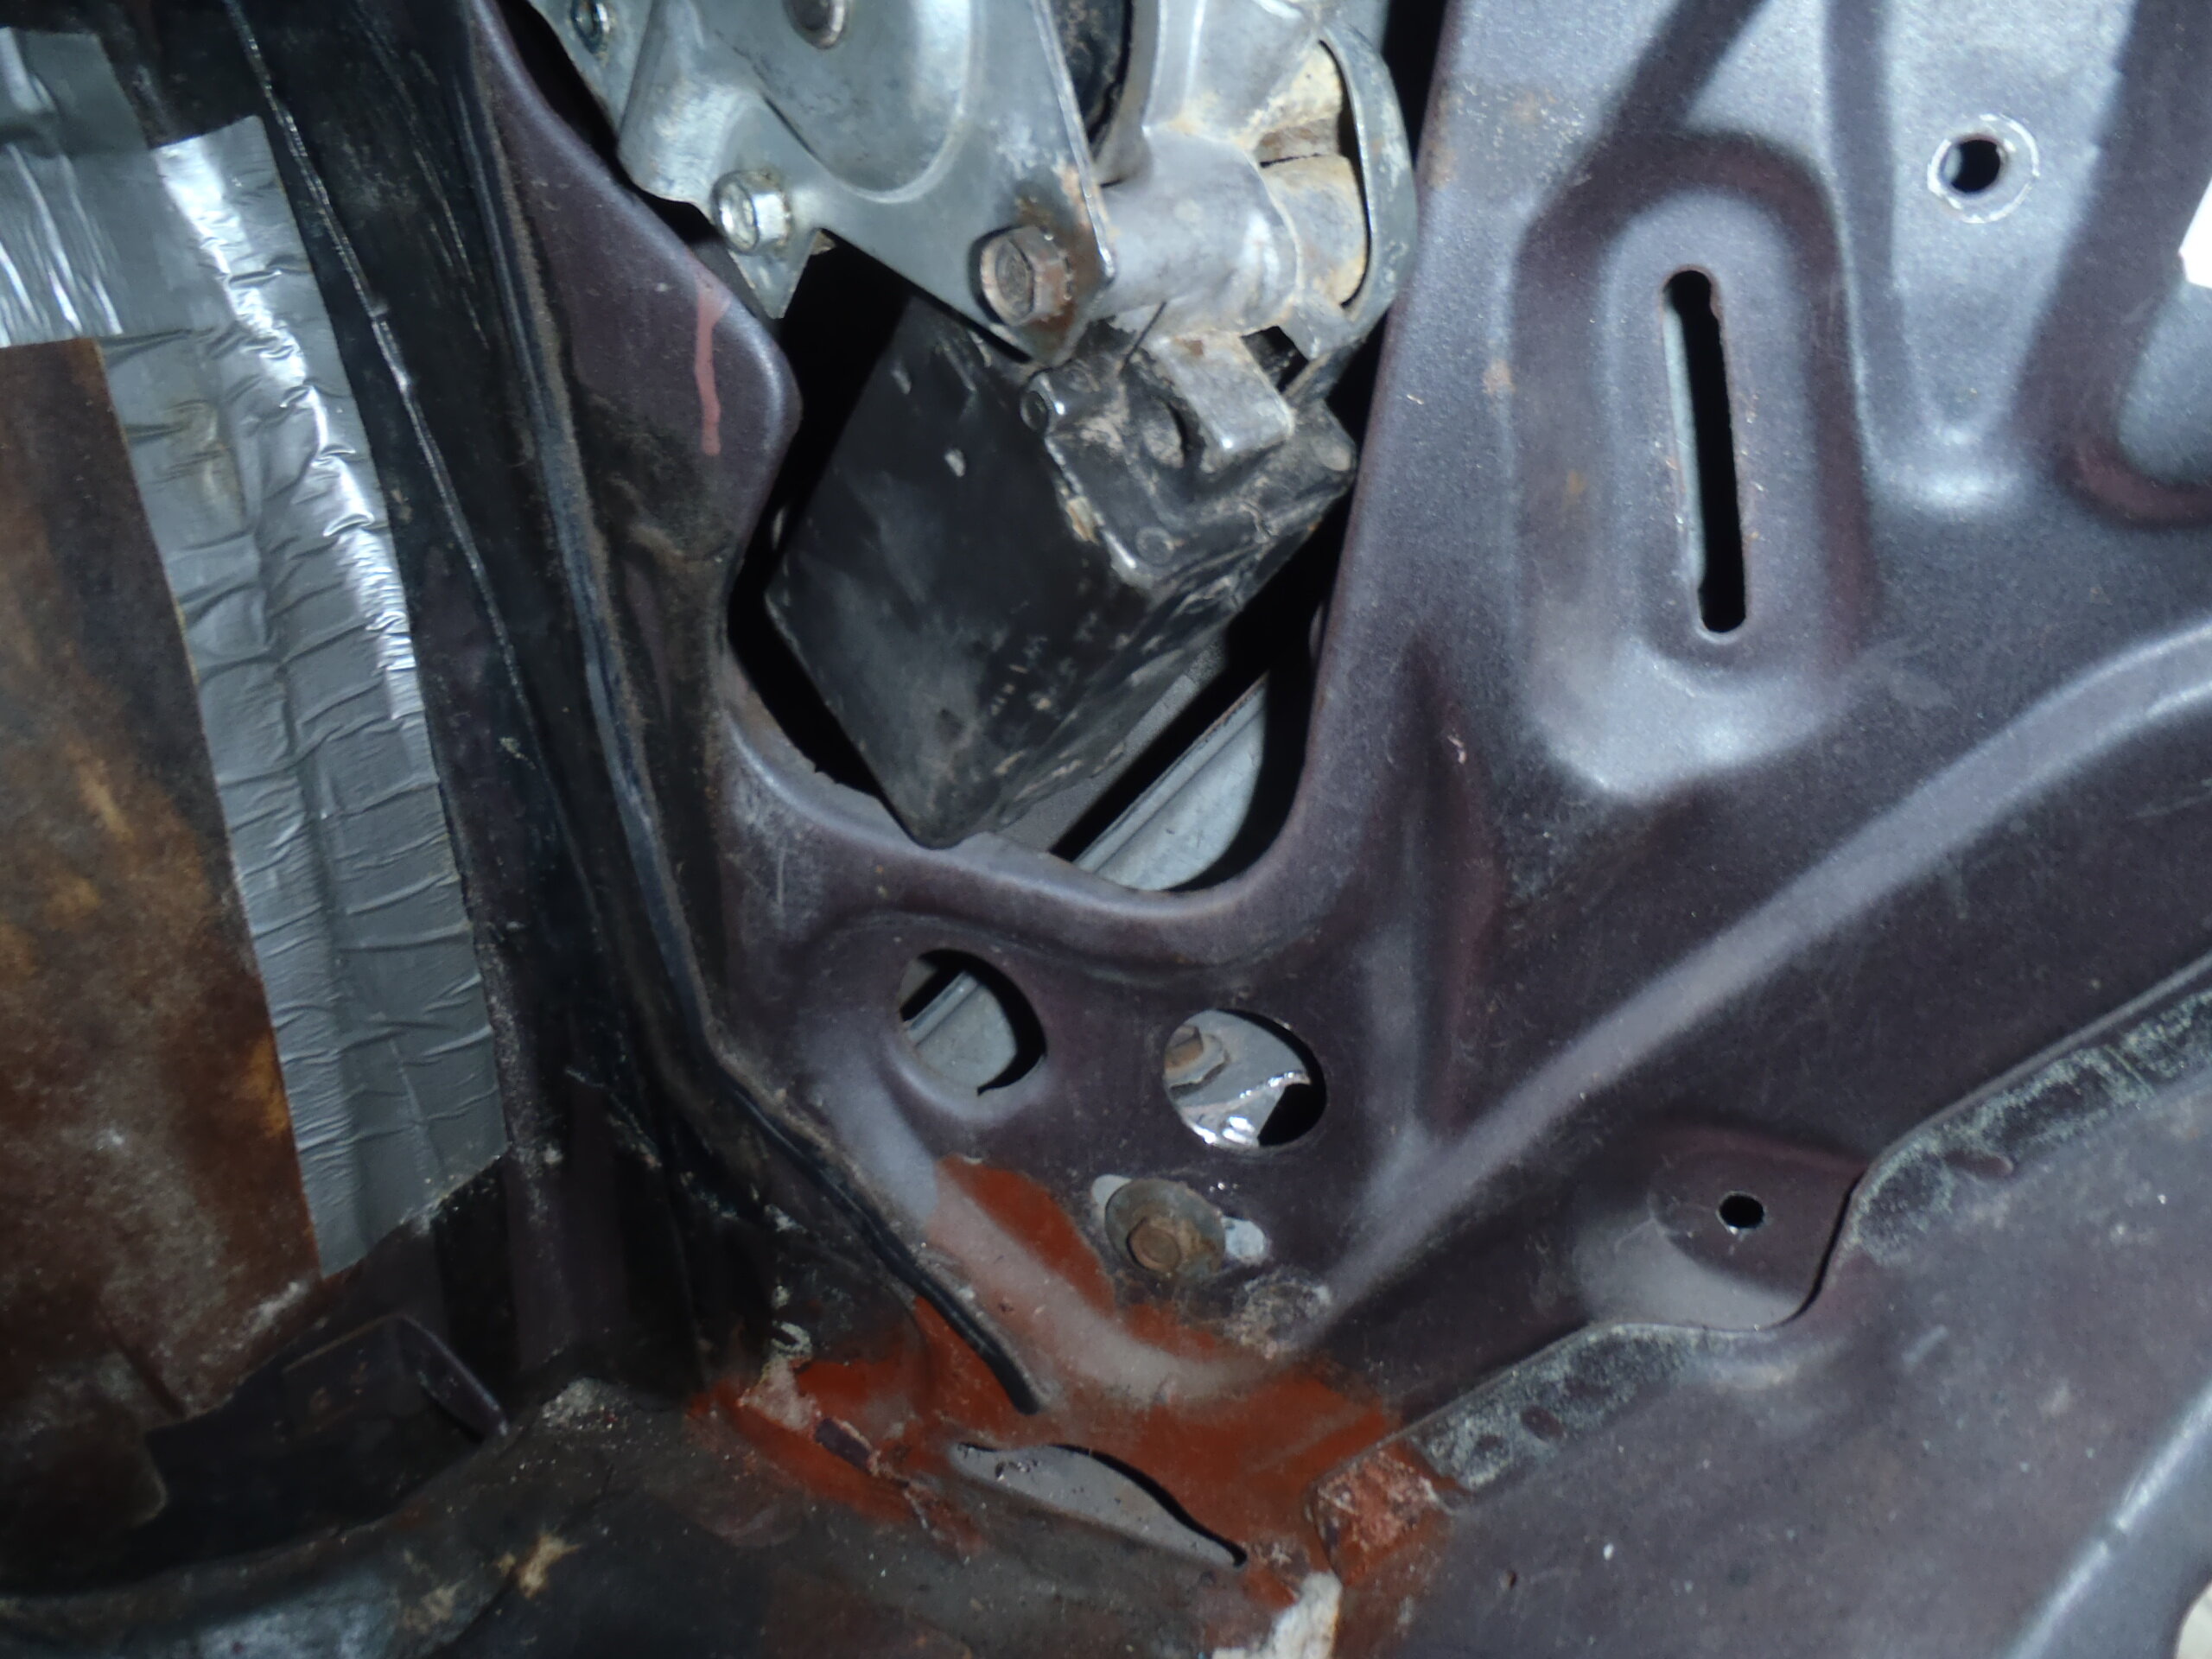
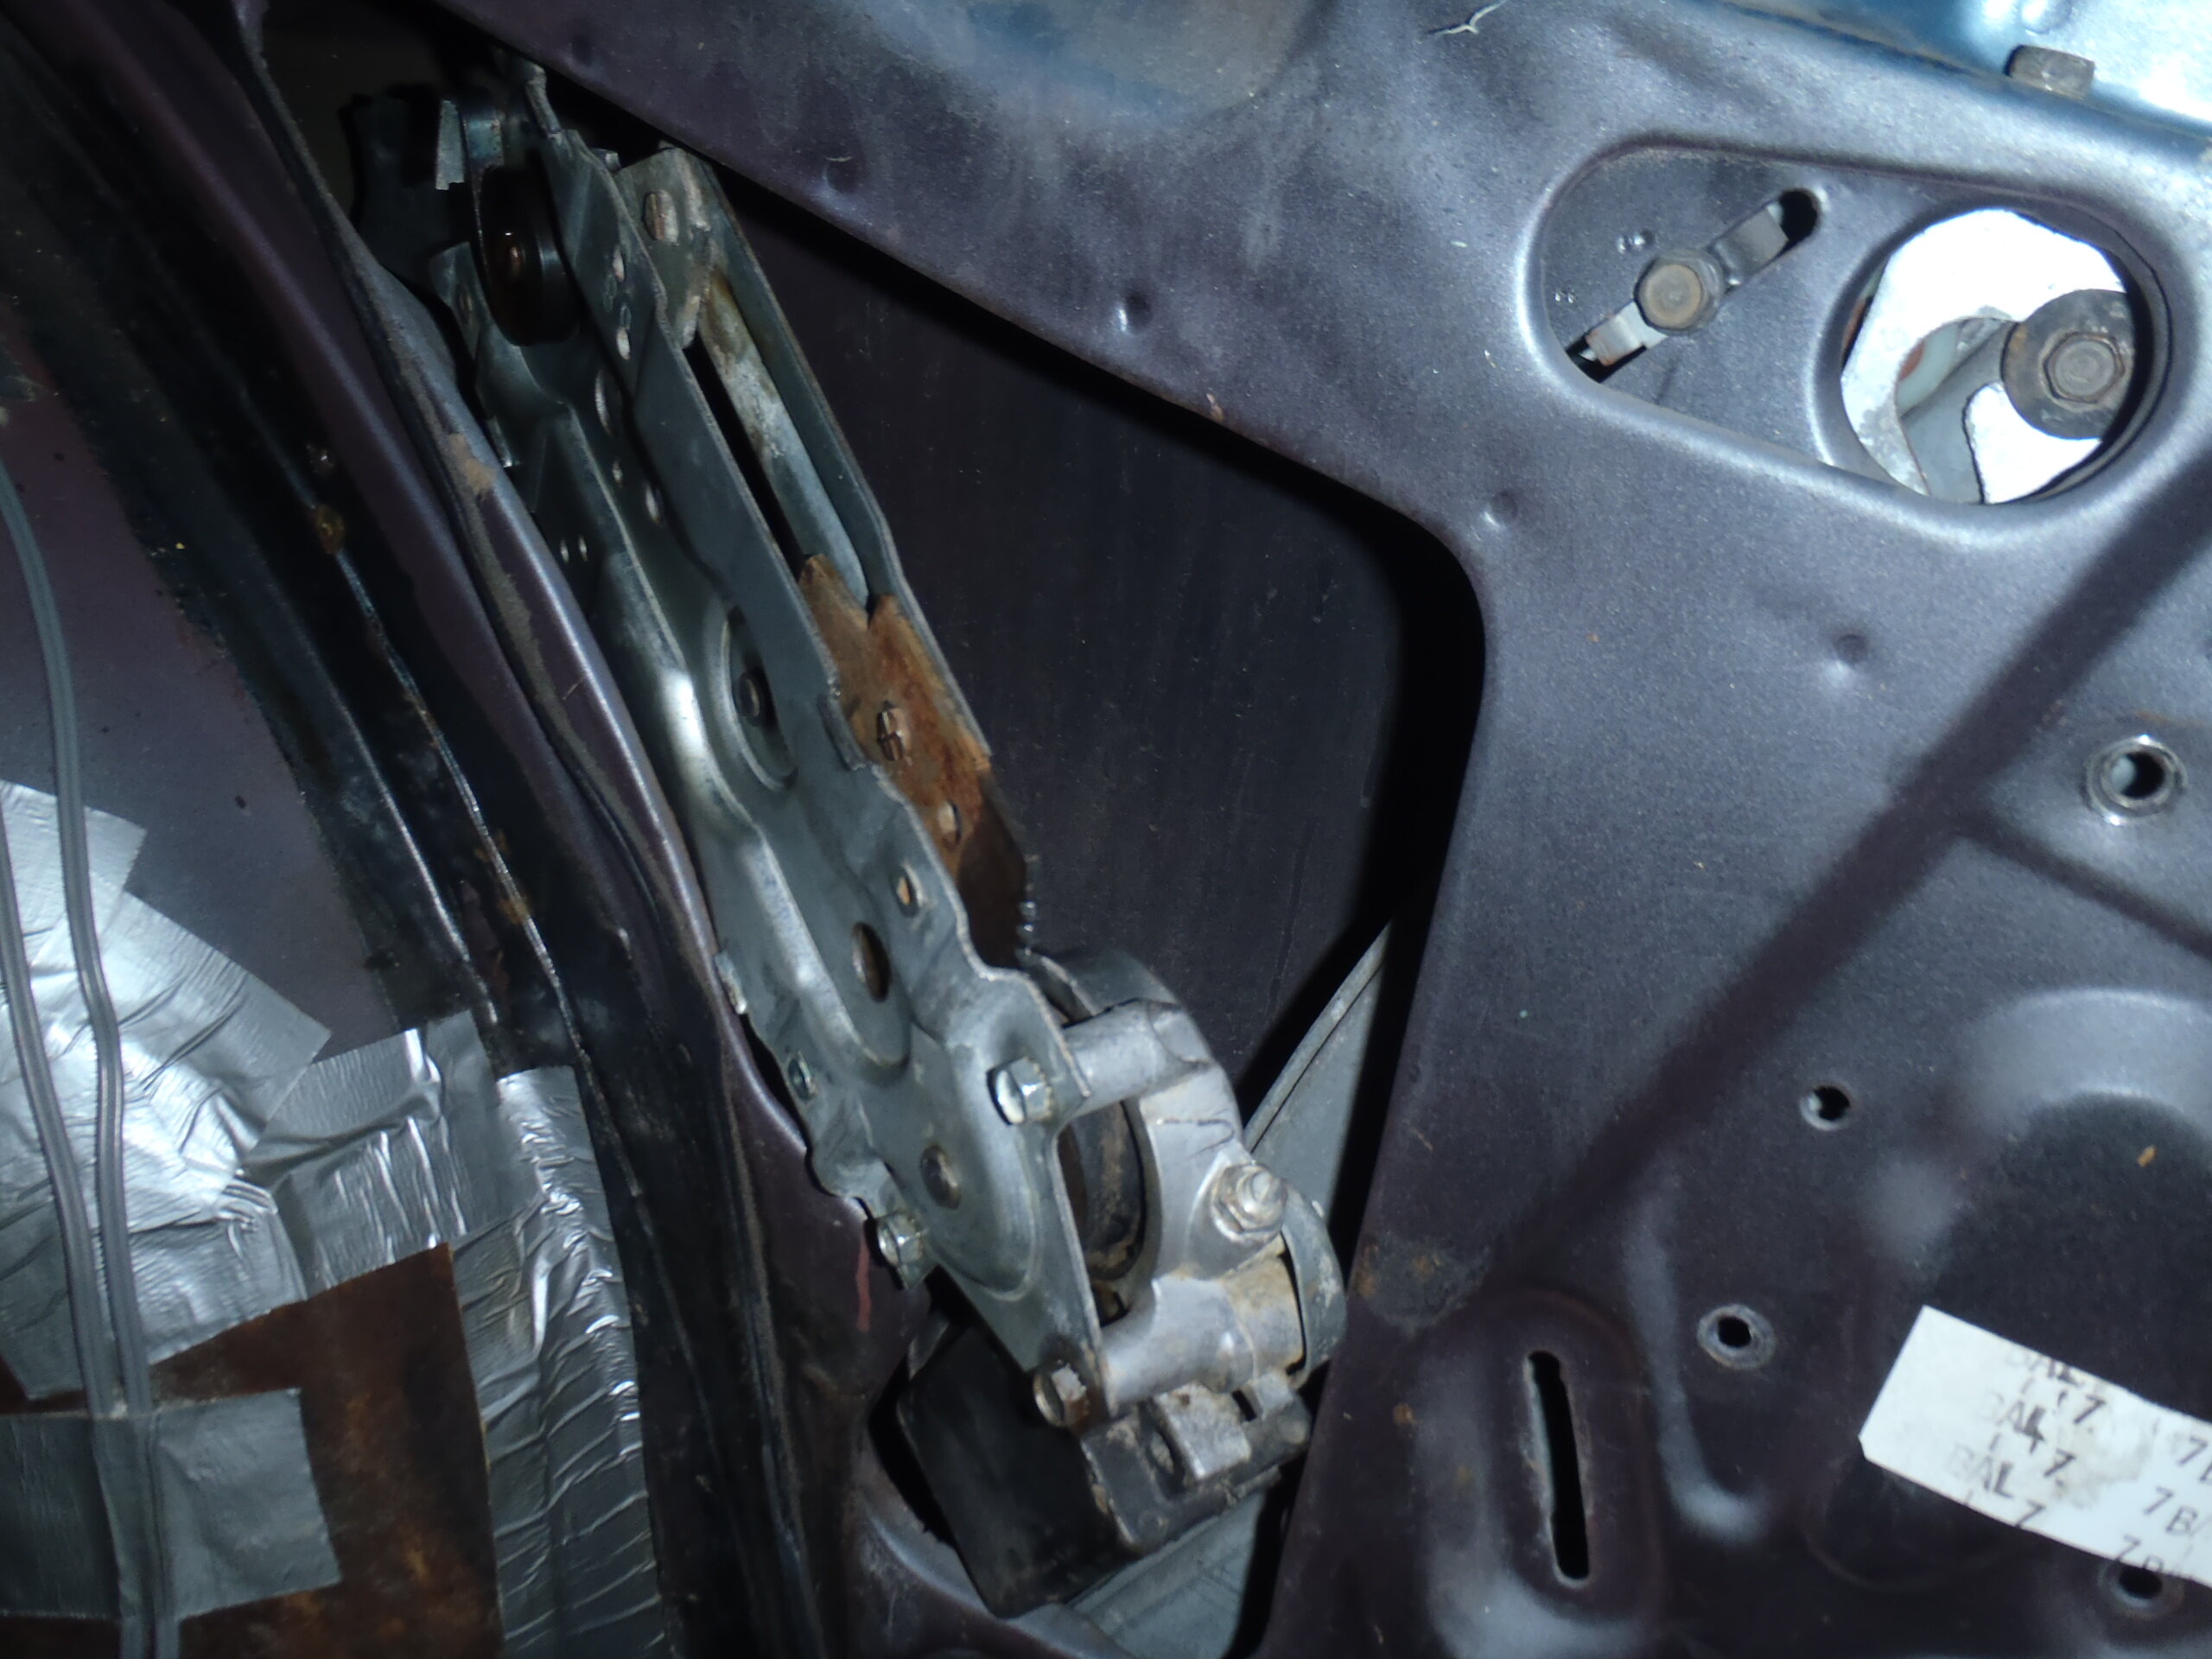
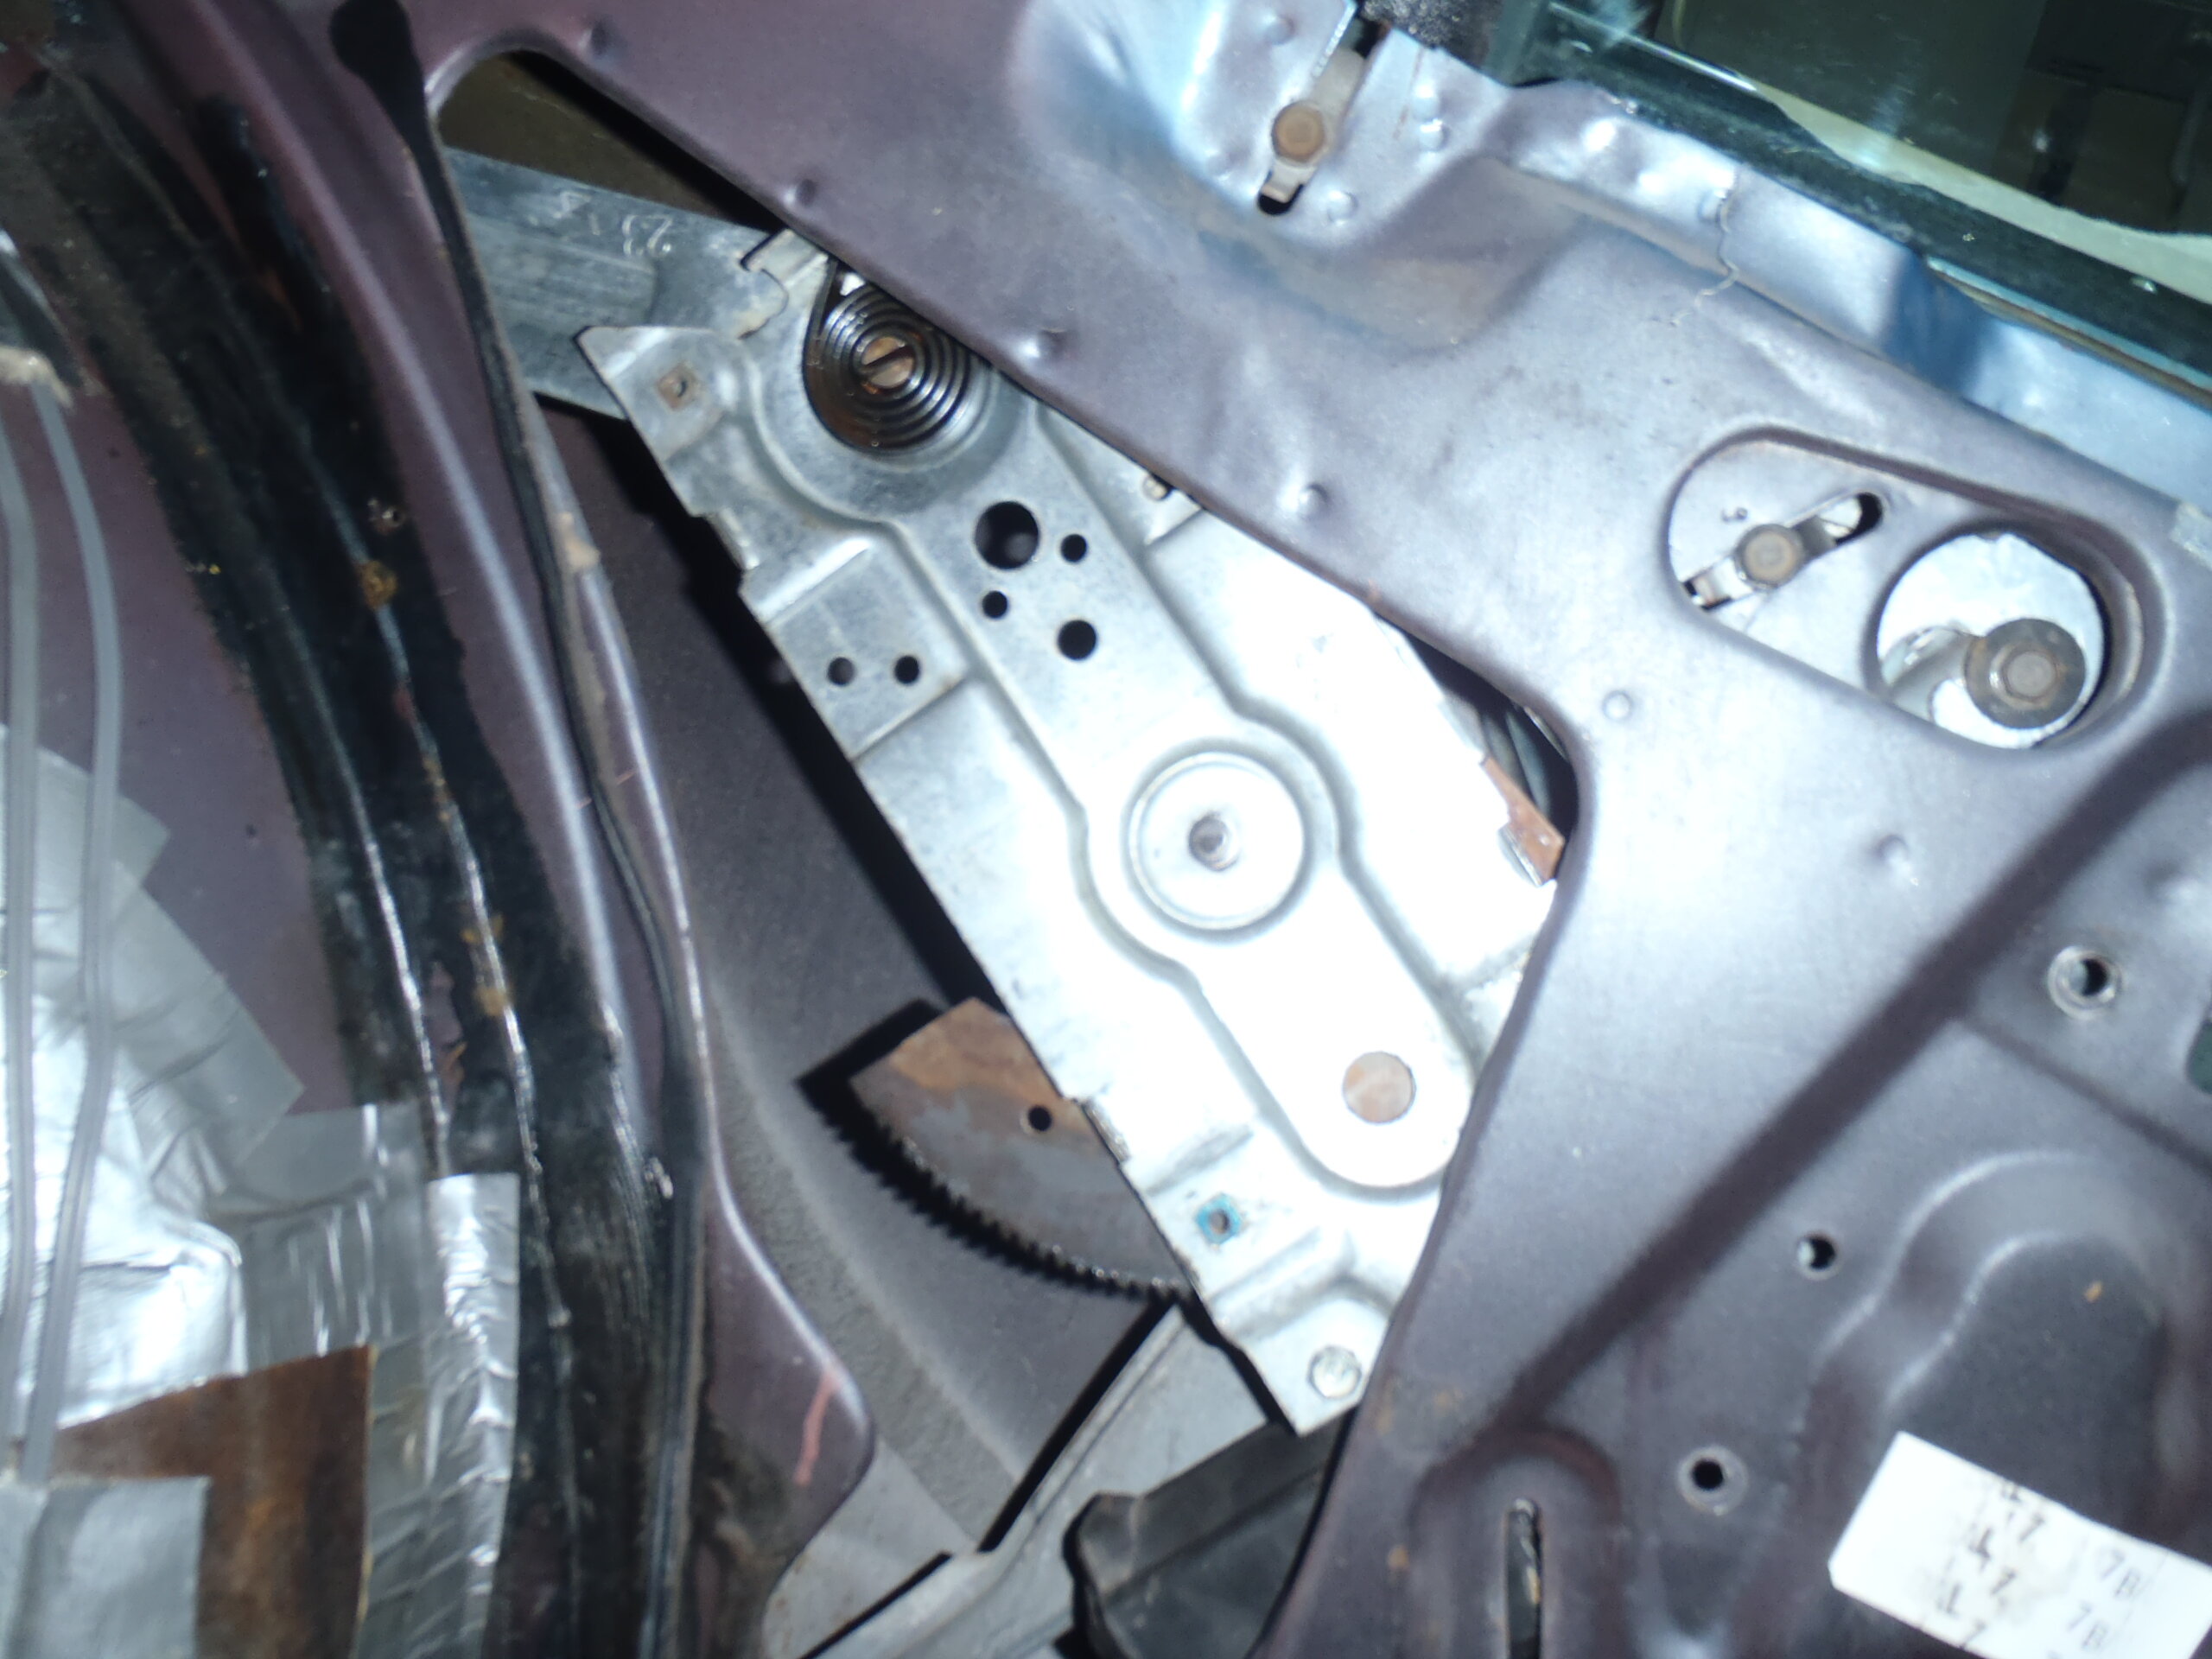
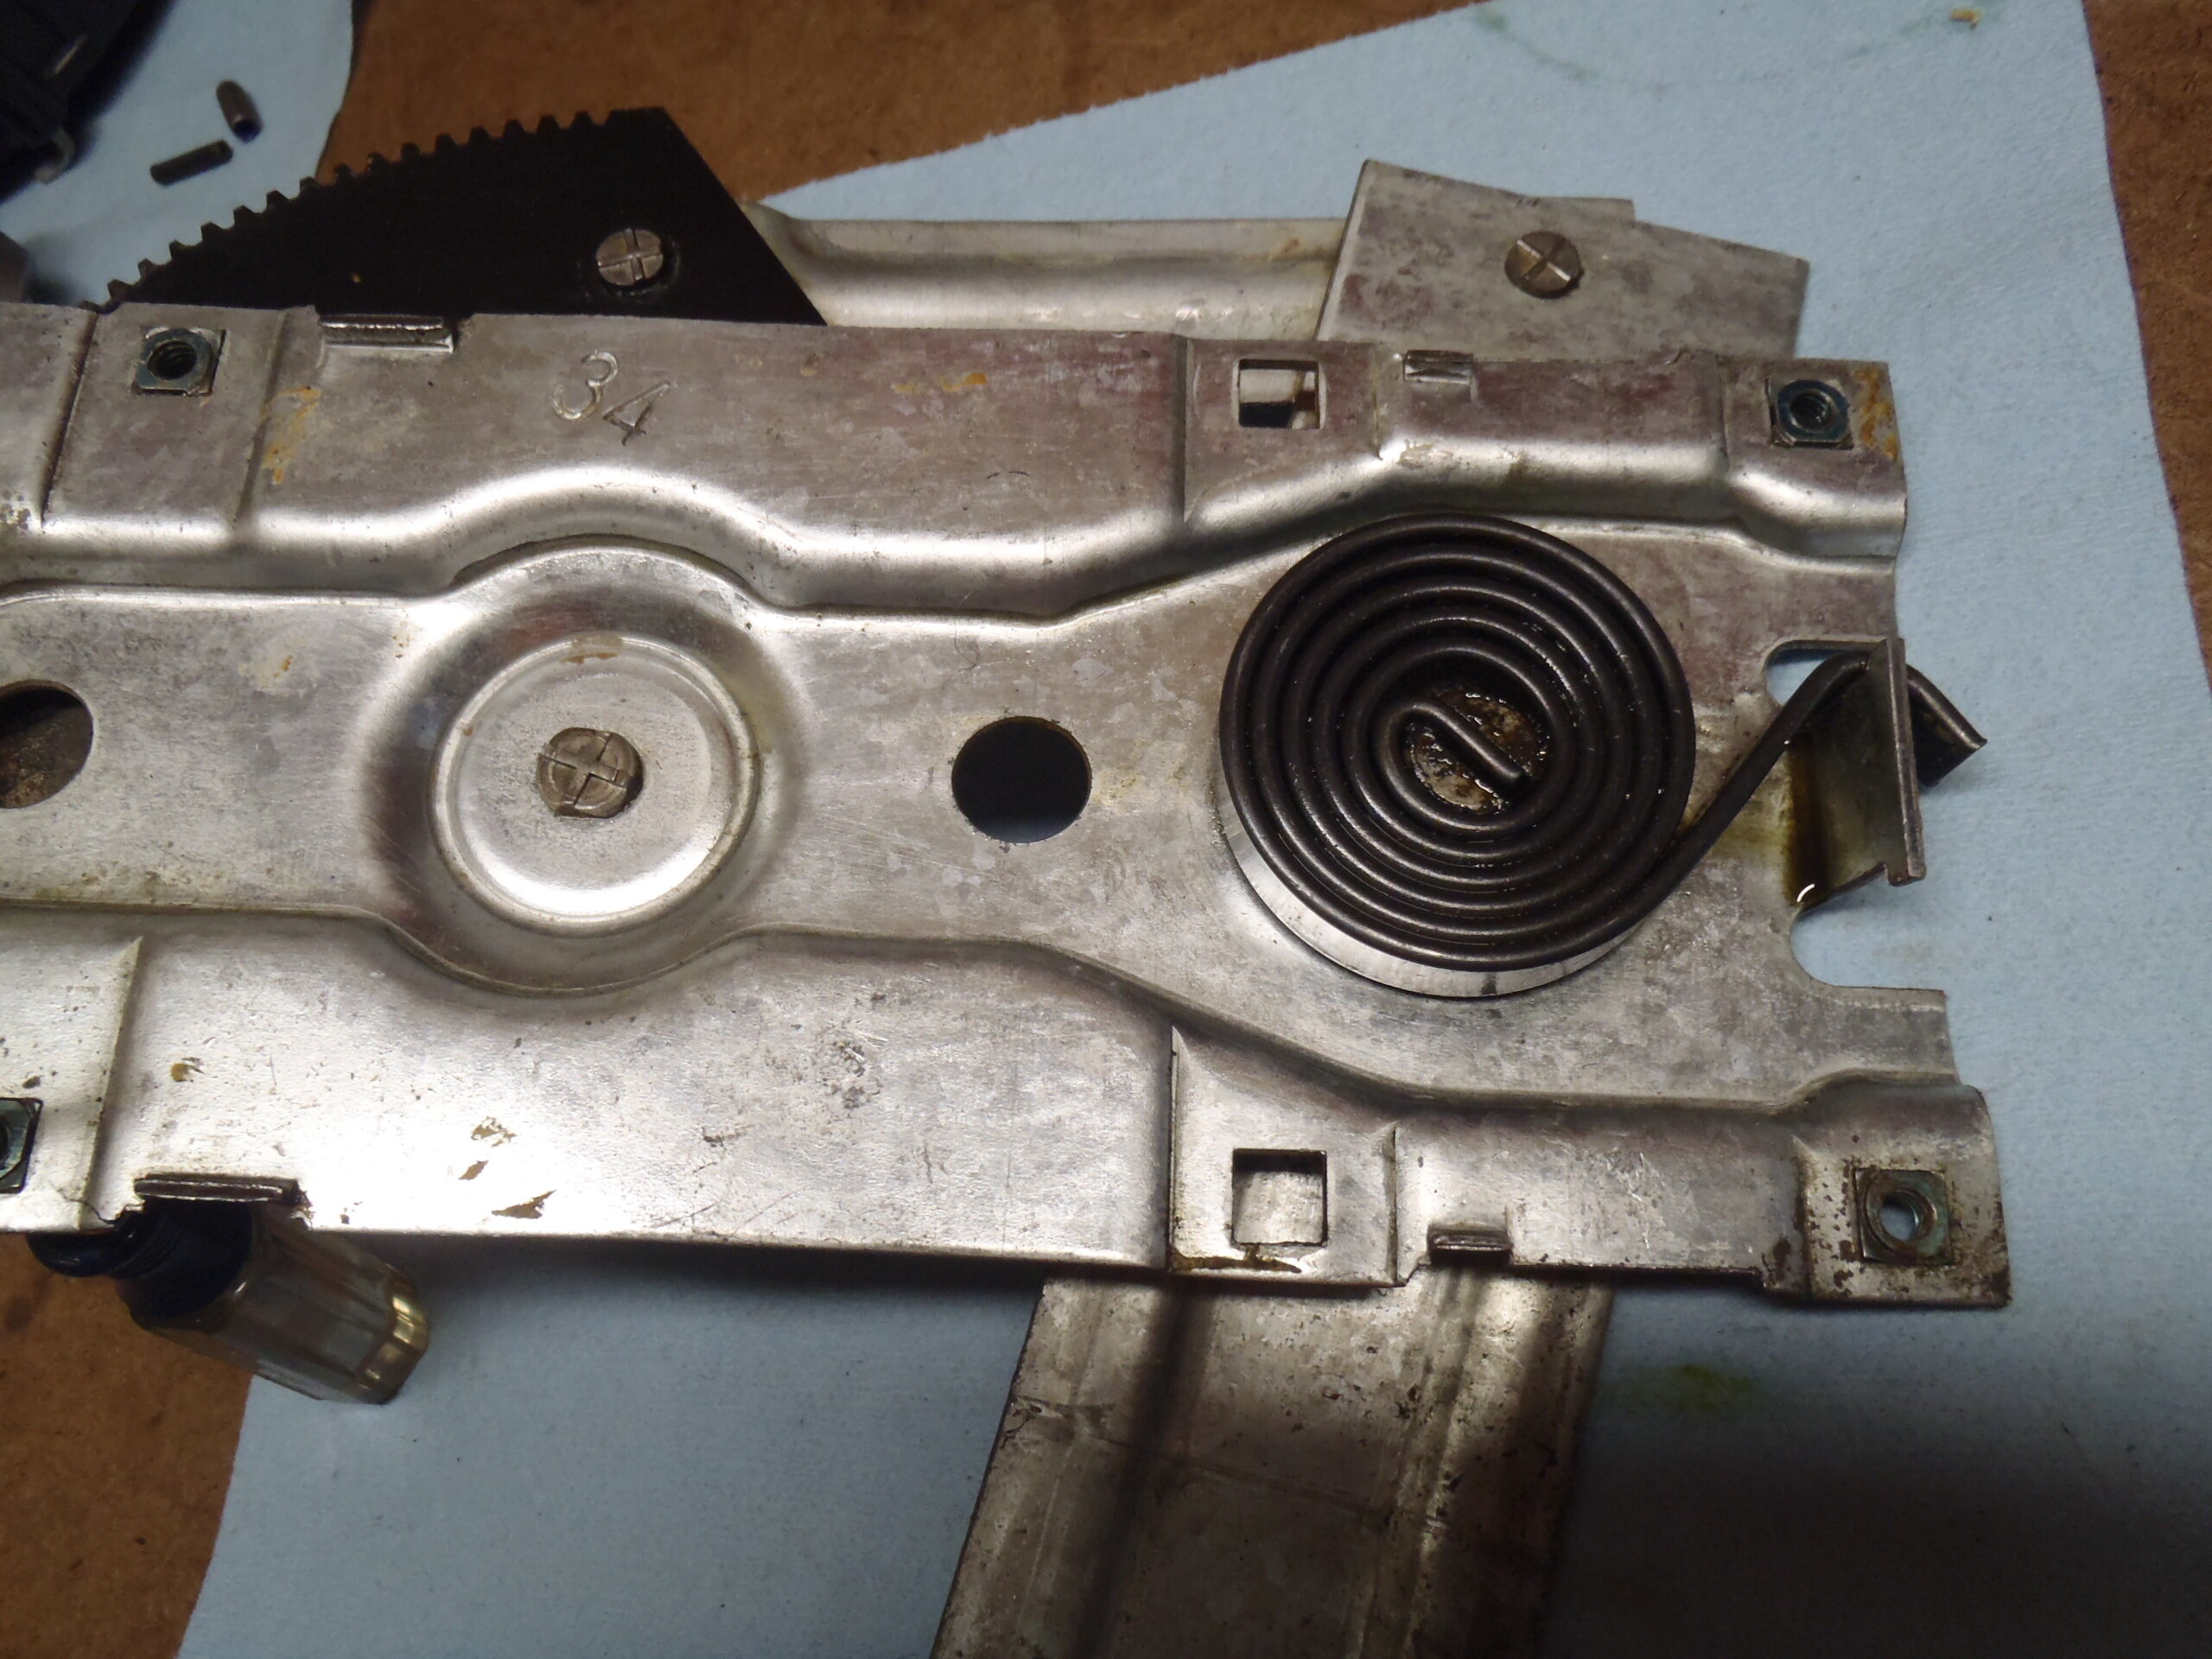
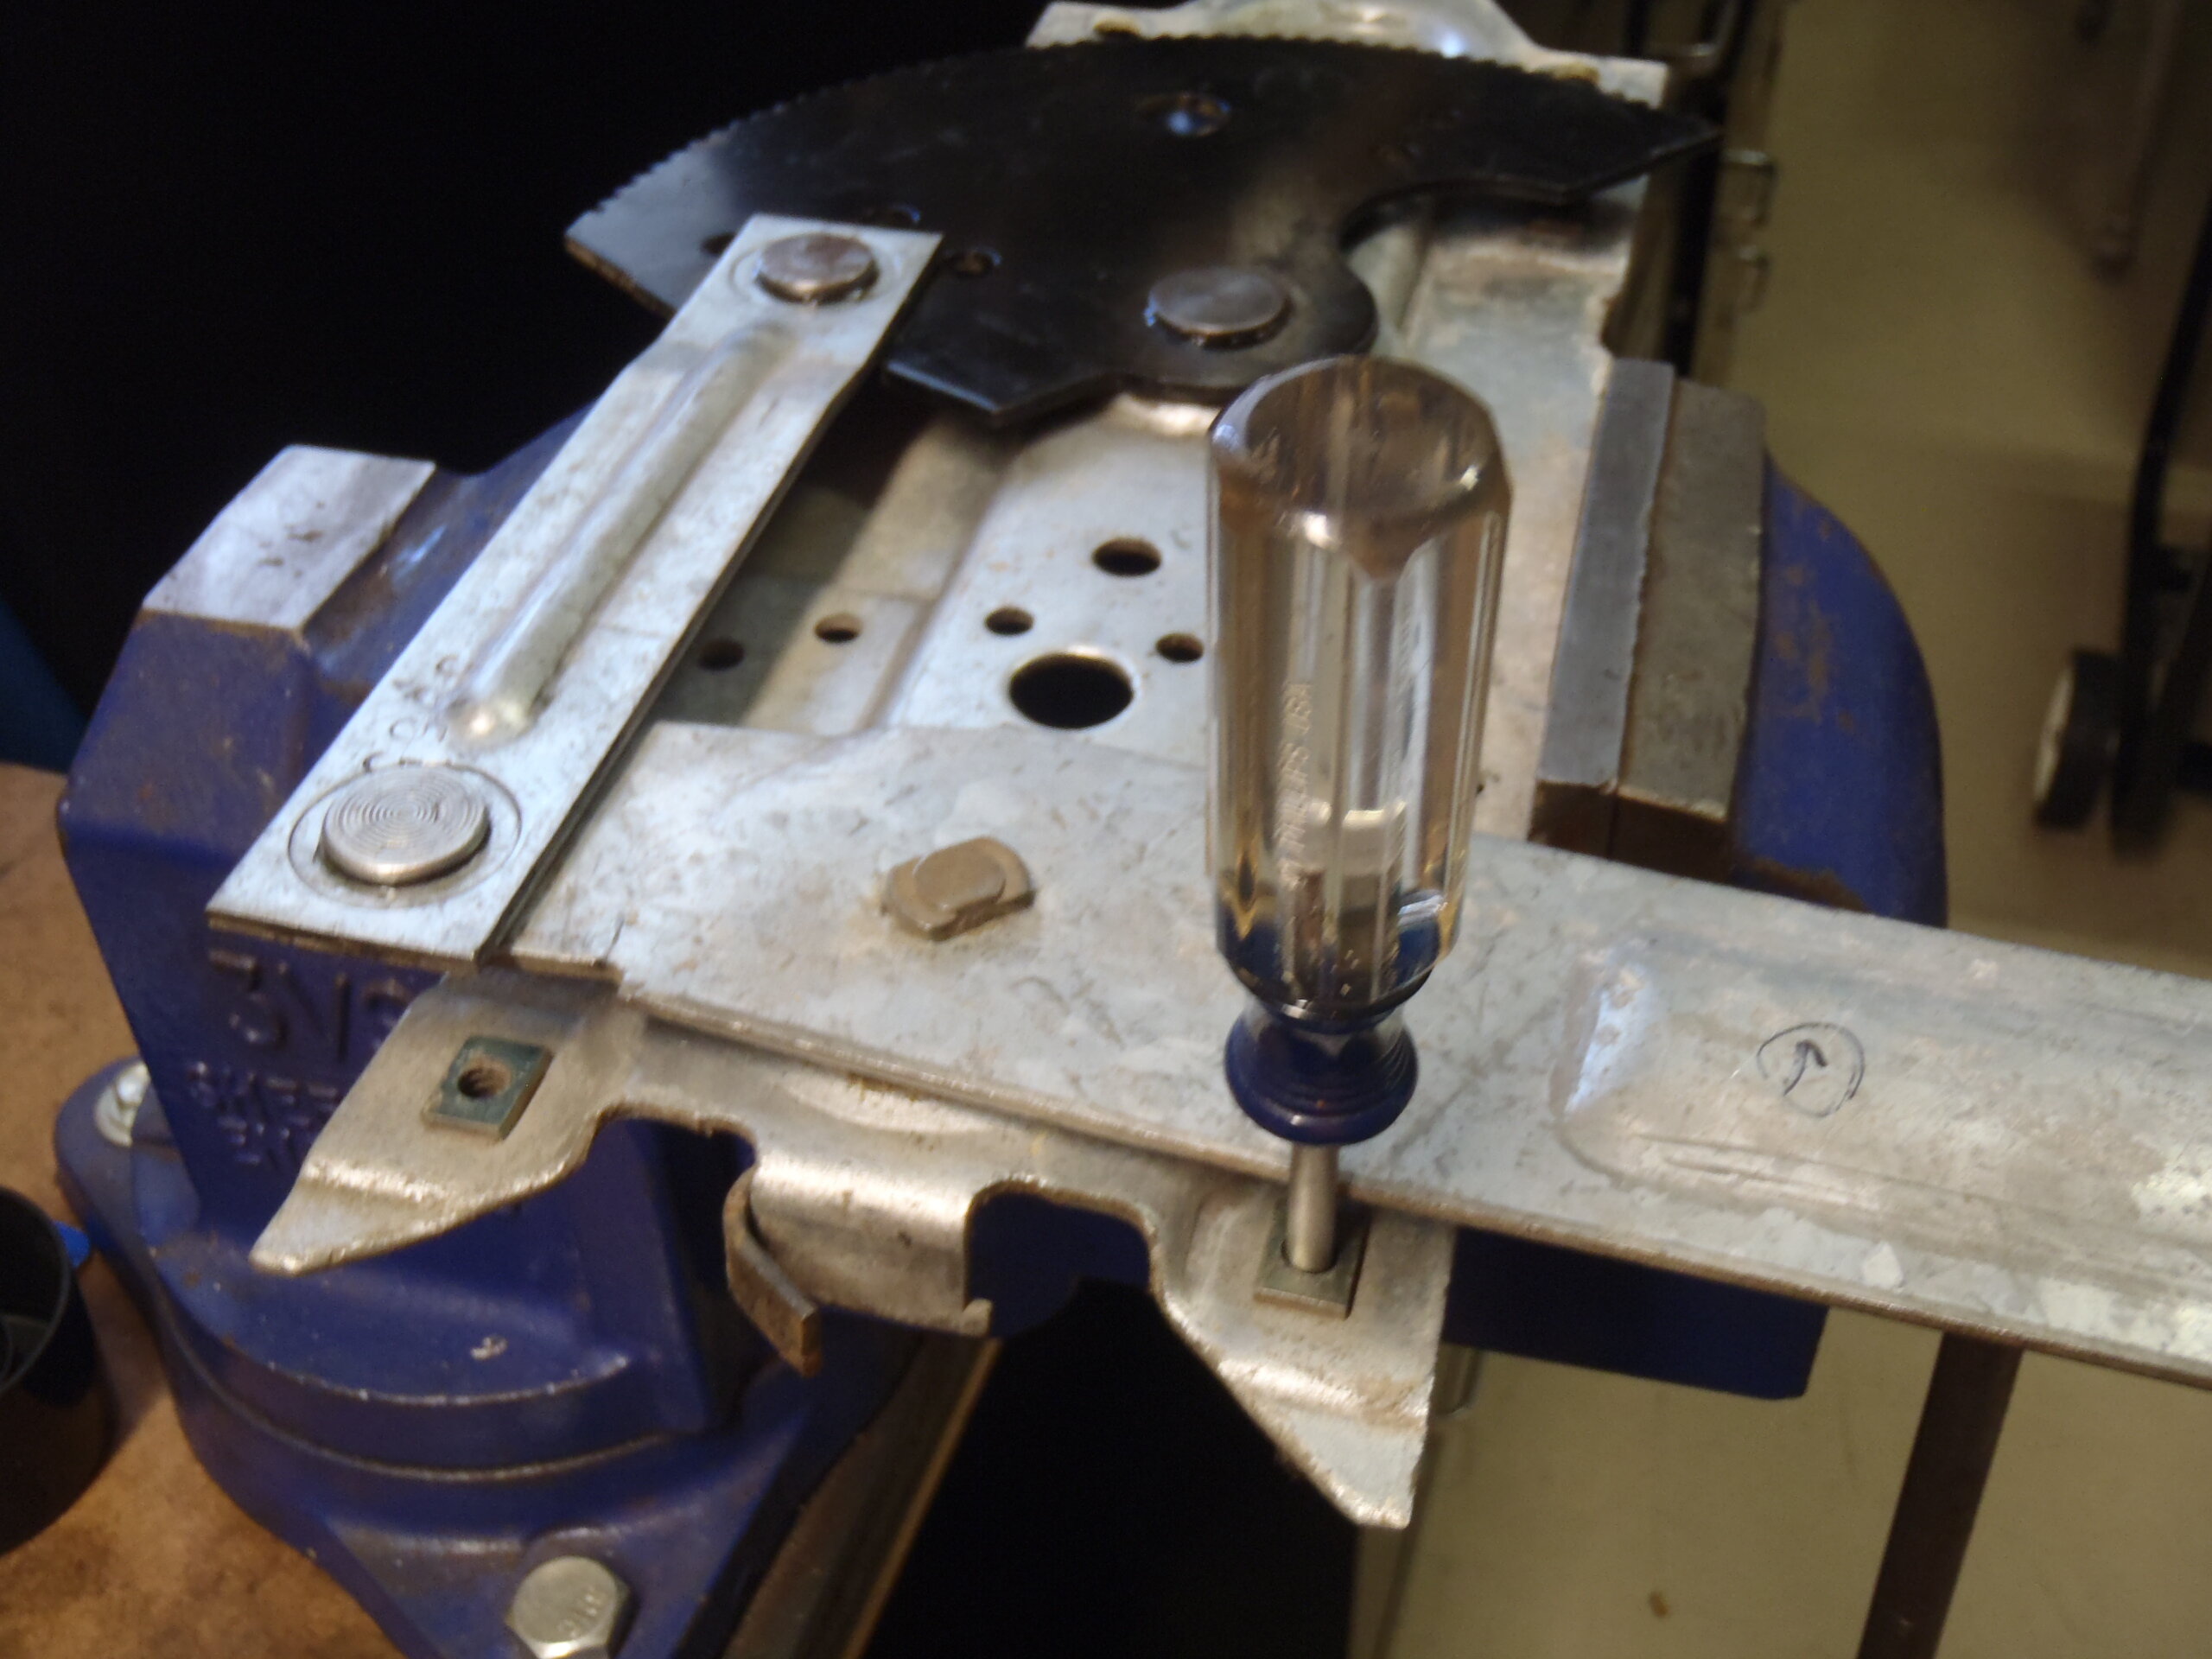
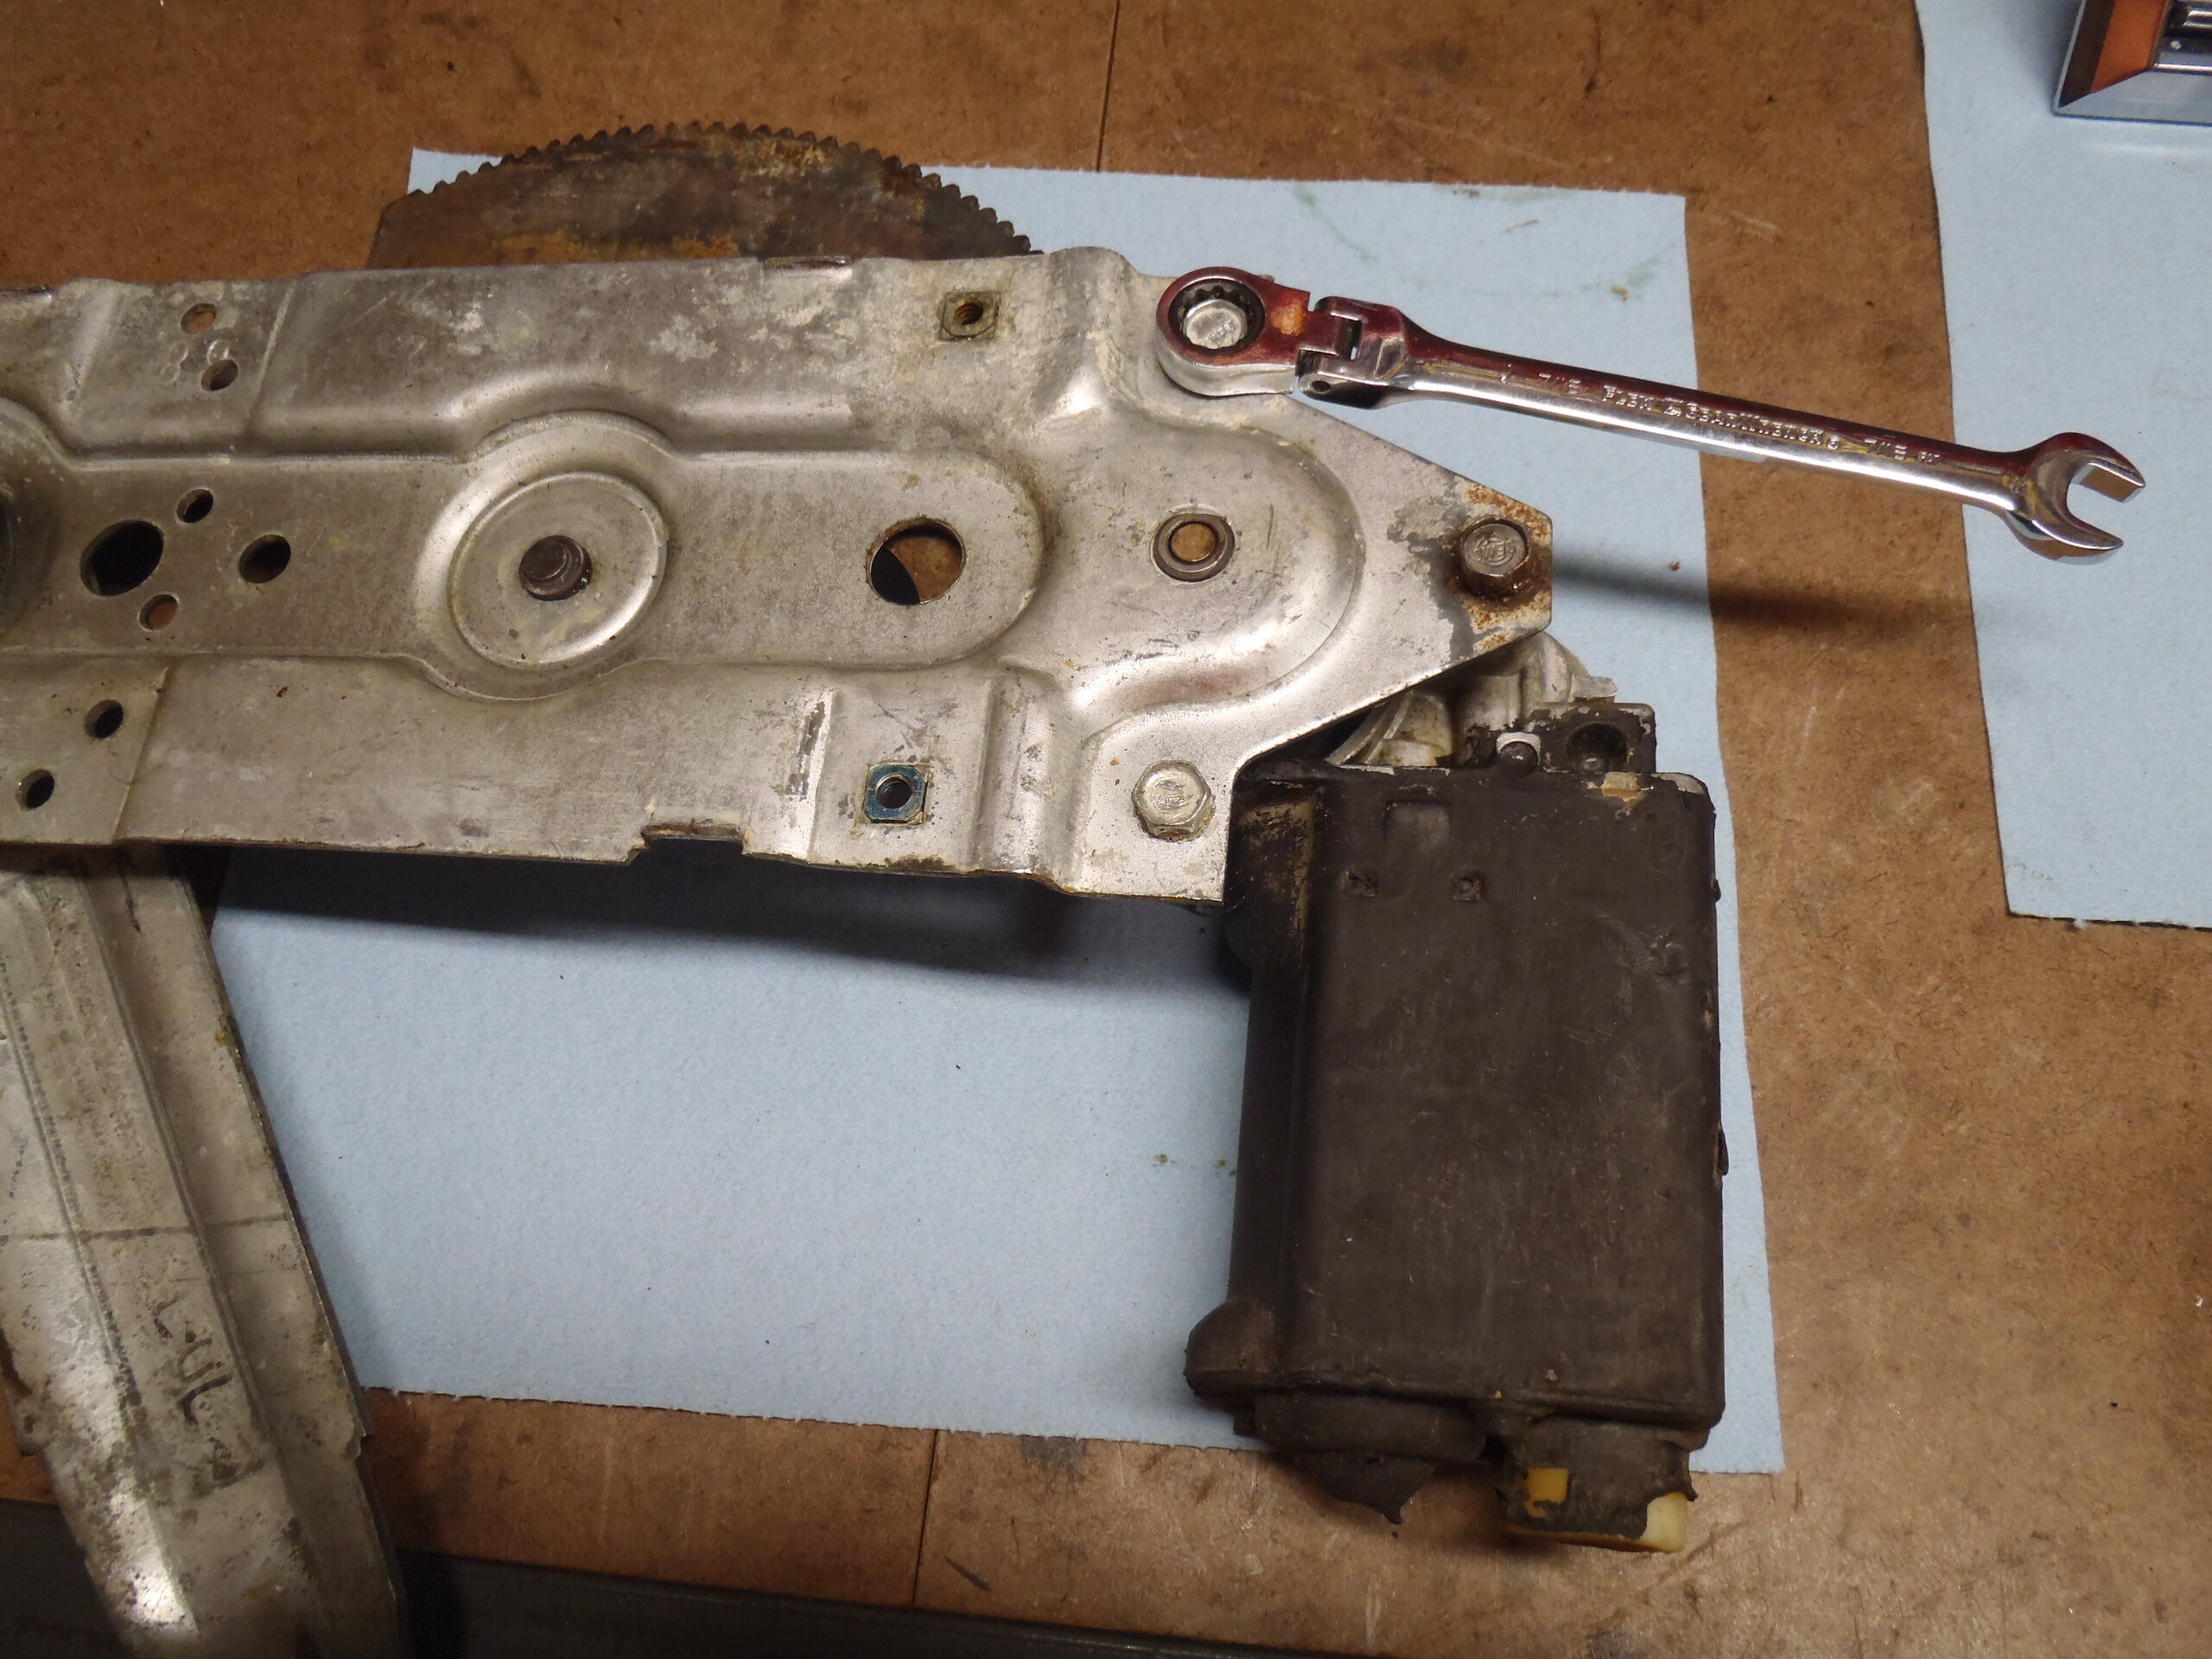
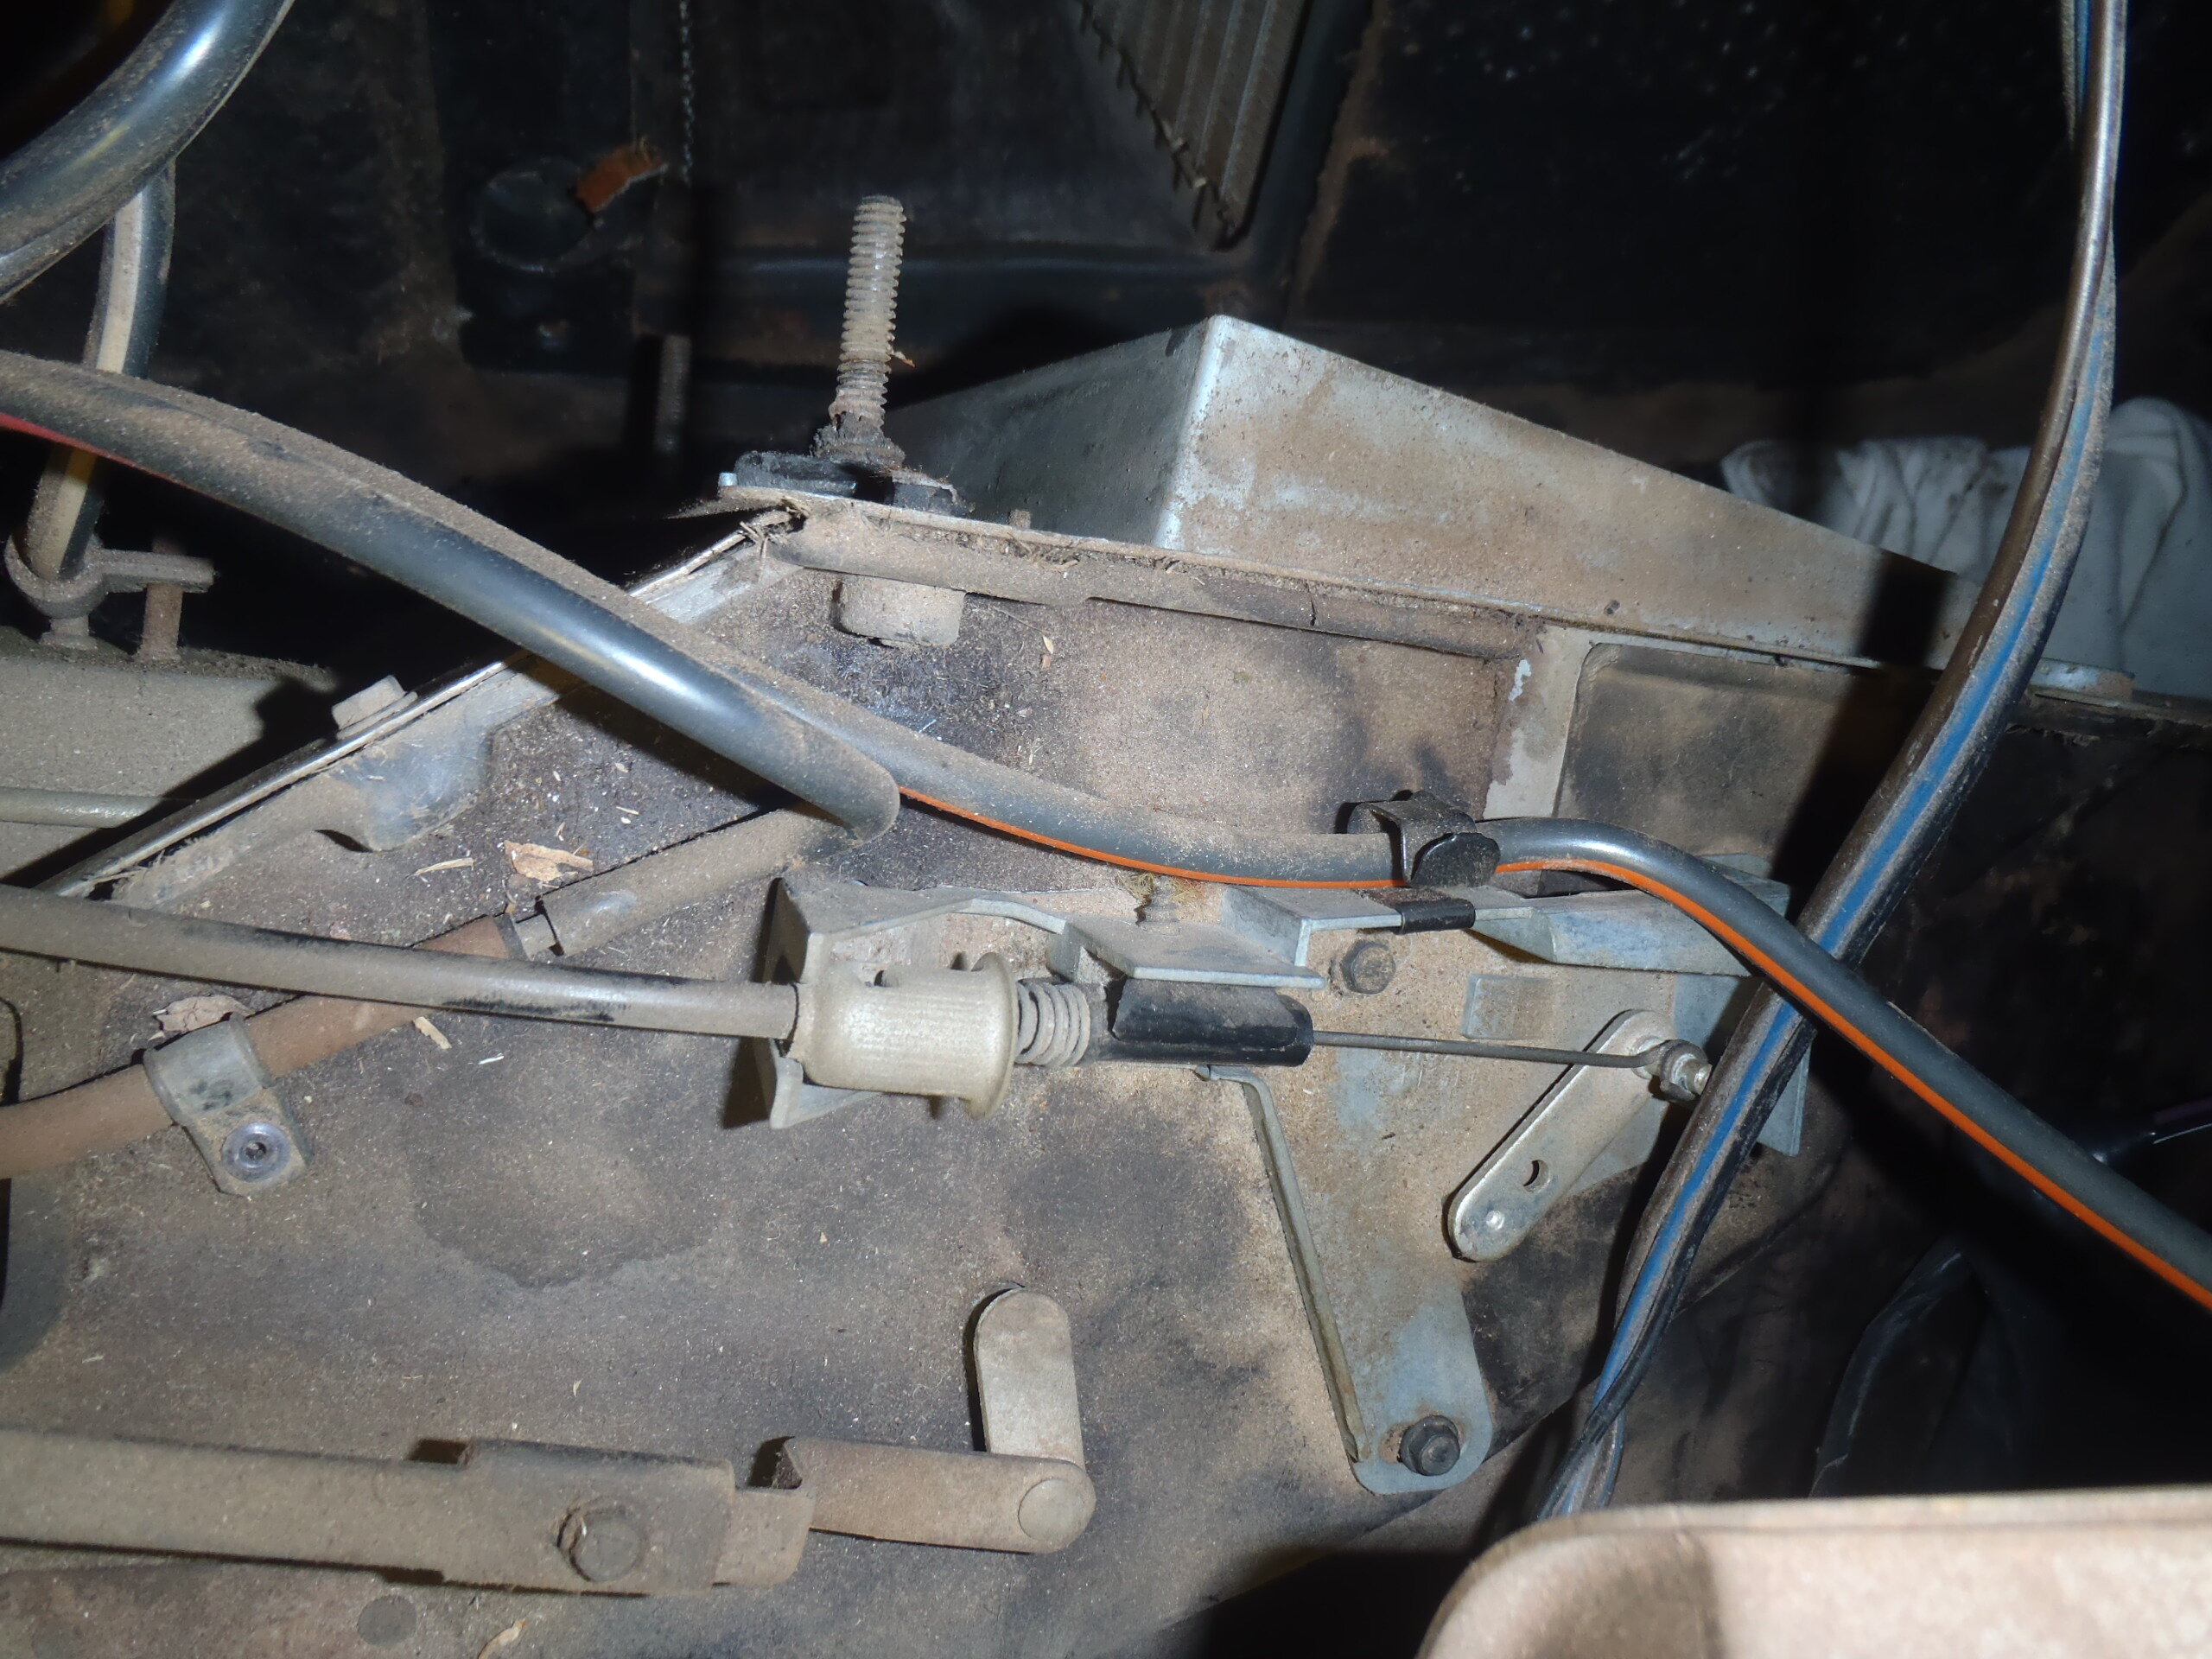
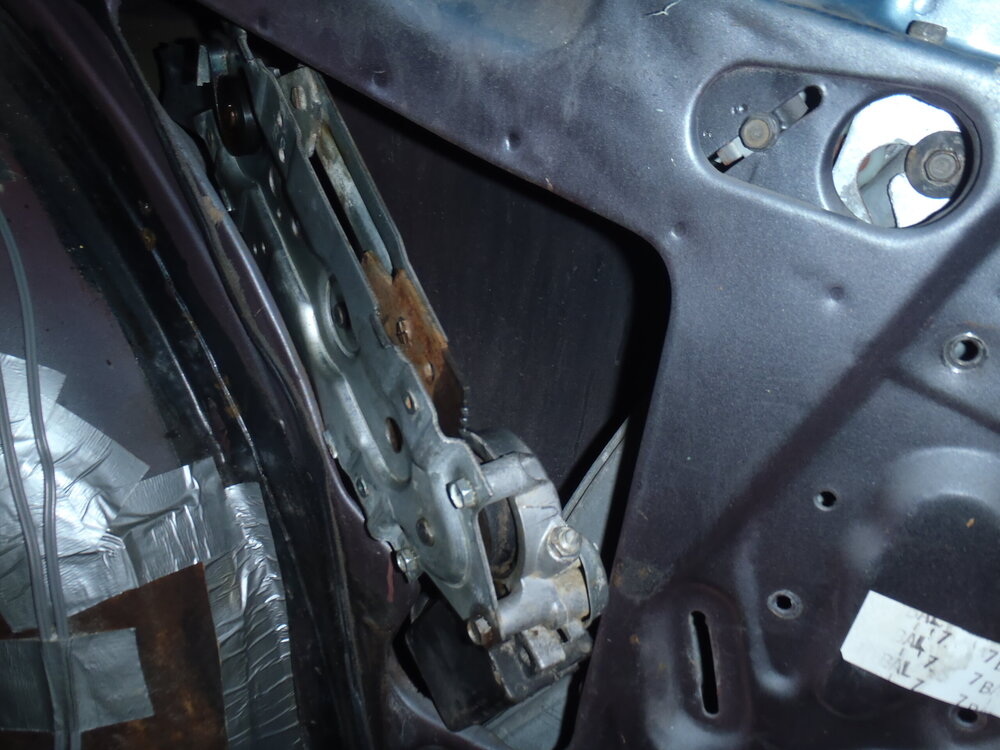
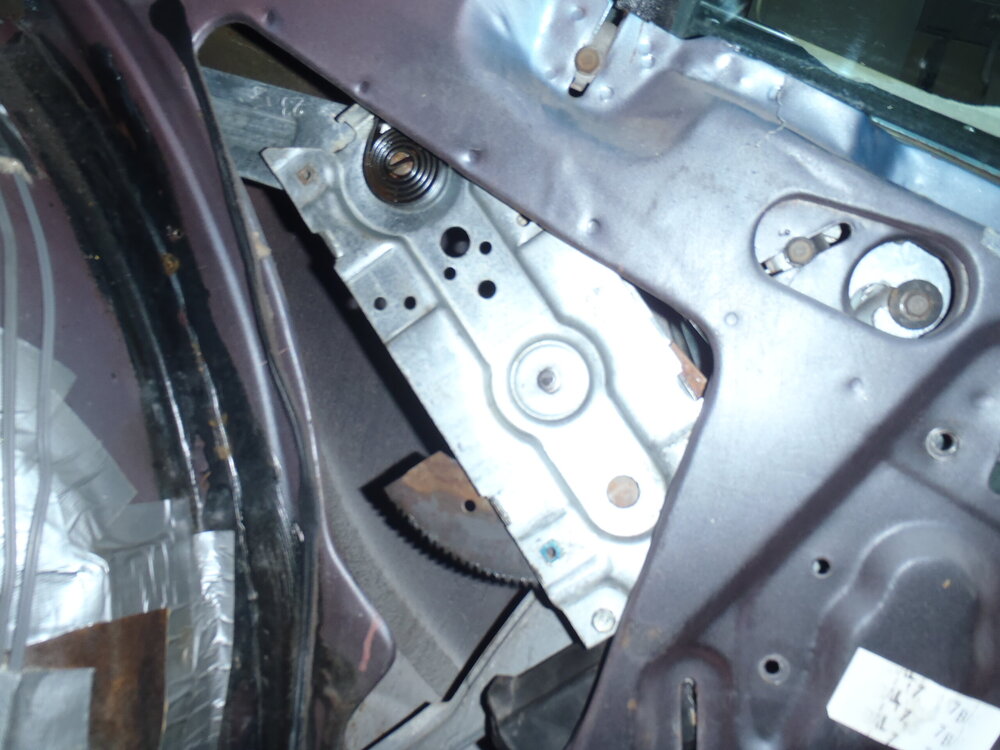
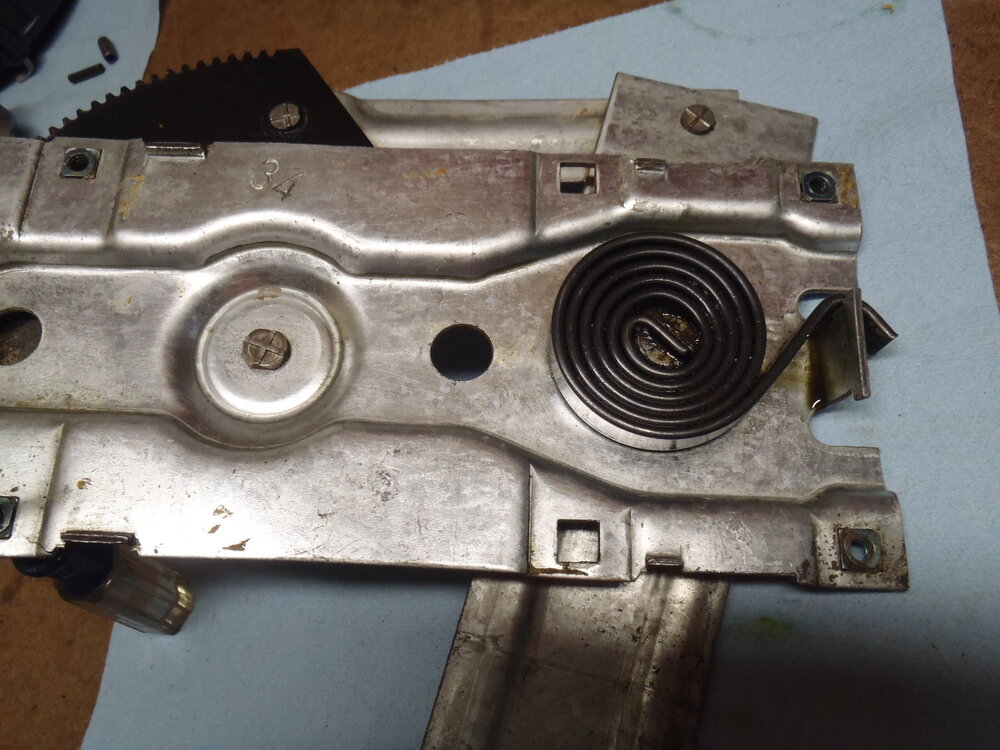
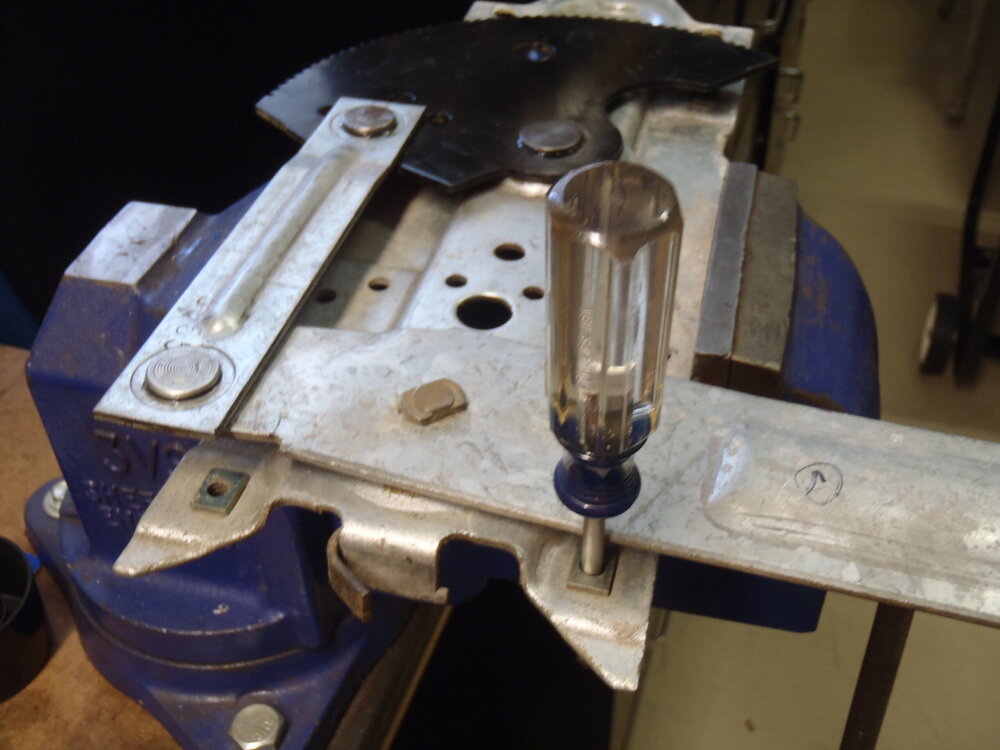
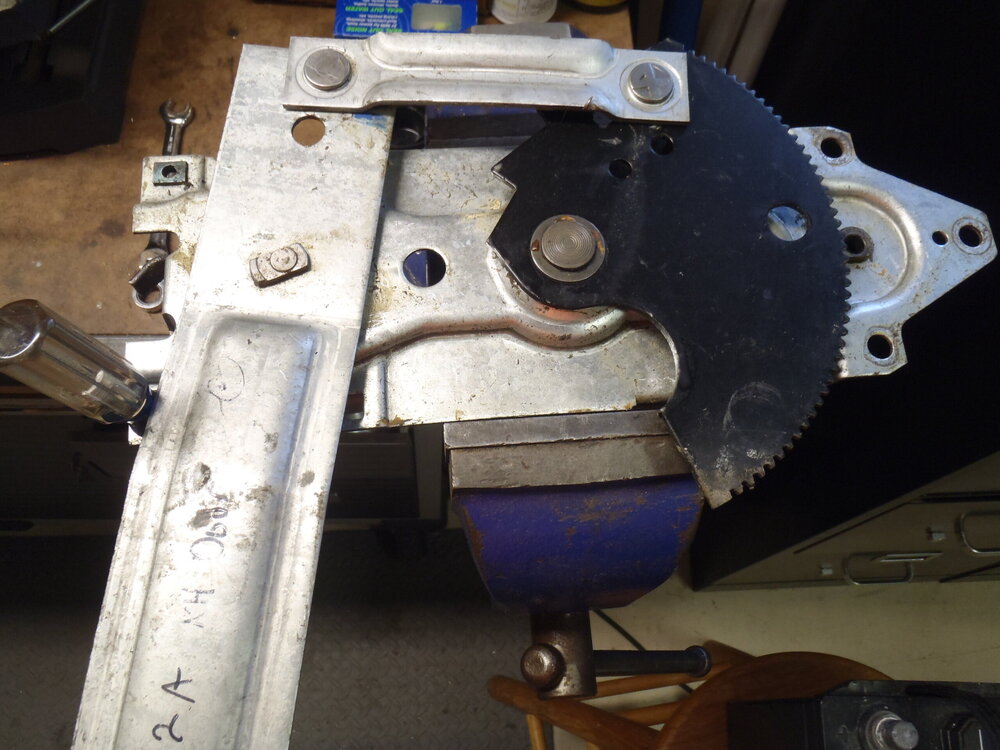
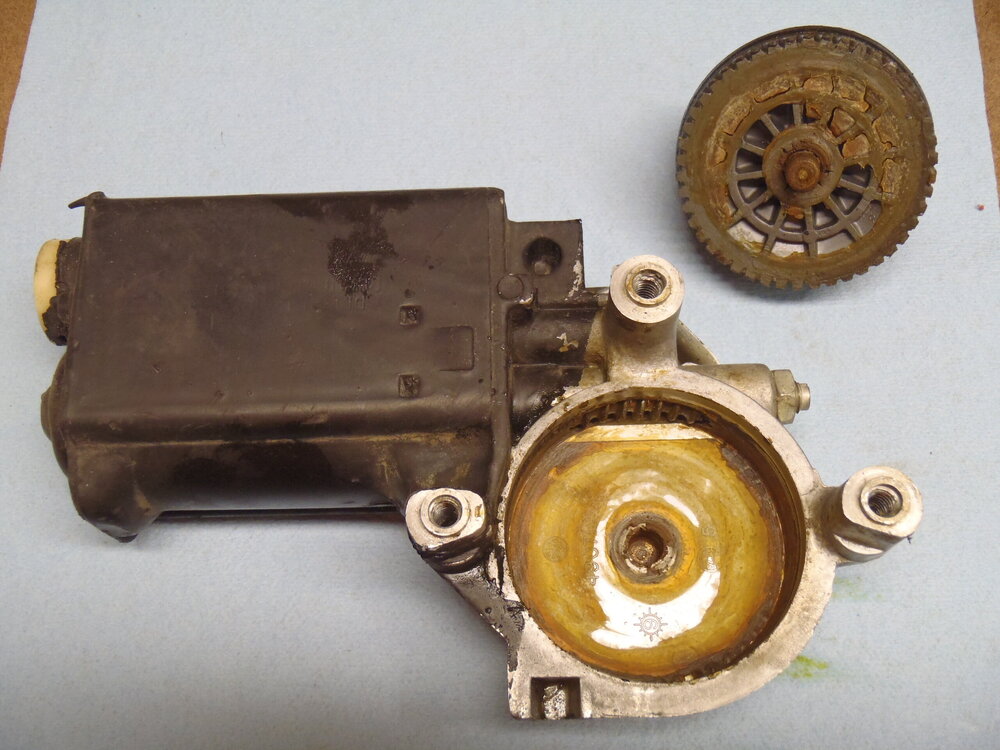
John, It sounds to me like your regulator motor is actually working and the clicking you hear is the worm gear on the motor shaft skipping over teeth on the drive gear inside the regulator housing (see photos). While the worm gear and/or some of the drive gear teeth may be damaged, I suggest you first focus on seeing if you can free up the glass travel as it seems to be bound up. I would NOT run that regulator motor any more until the window glass and linkage arms are confirmed to be free to move naturally. You may still have to remove the seat, back cushion and side panel to get access to the linkage and window glass just to free up/repair whatever is binding. Examine the linkage carefully for worn or broken guide wheels on the ends of the linkage arms and for dry/greaseless tracks for the guide wheels. There are also physical metal stops to keep the window glass from dropping too far which can come loose and may bind up the linkage. lf you determine the window glass and operational linkage are indeed free to move naturally, then you may need to replace the entire regulator, especially if teeth are damaged/stripped off the drive hub inside the regulator housing. NOTE: there is a strong coil spring attached to the linkage that is retained only by the compound force of the drive gear and worm gear. Anytime you separate the regulator motor/ gear box from the linkage, that spring (unless it is broken) will whip that linkage arm around with dangerous force! Fortunately, I don't believe it is possible to remove the motor/gear box from the linkage unless you first unbolt the linkage and remove the entire assembly - a challenging task, especially if the motor will not operate the linkage which has to be collapsed just to get through the body sidewall opening (see photos). If/when you get the regulator/linkage assembly out of the car, BE SURE to secure the linkage arm with the coil spring on it BEFORE you remove the regulator motor/gear box from the linkage (see photo with screwdrive blocking the arm). I'm guessing your "new motor" comes as an integrated assembly with a new gear box. If not, you'll want to open the original gear box, clean out the old hardened grease and repack it with fresh grease. Good luck!


-
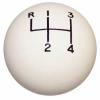
Is the owner of this 402 4 speed car on here ?
MCfan replied to Mrp's topic in General 70-72 Monte Carlo Forum
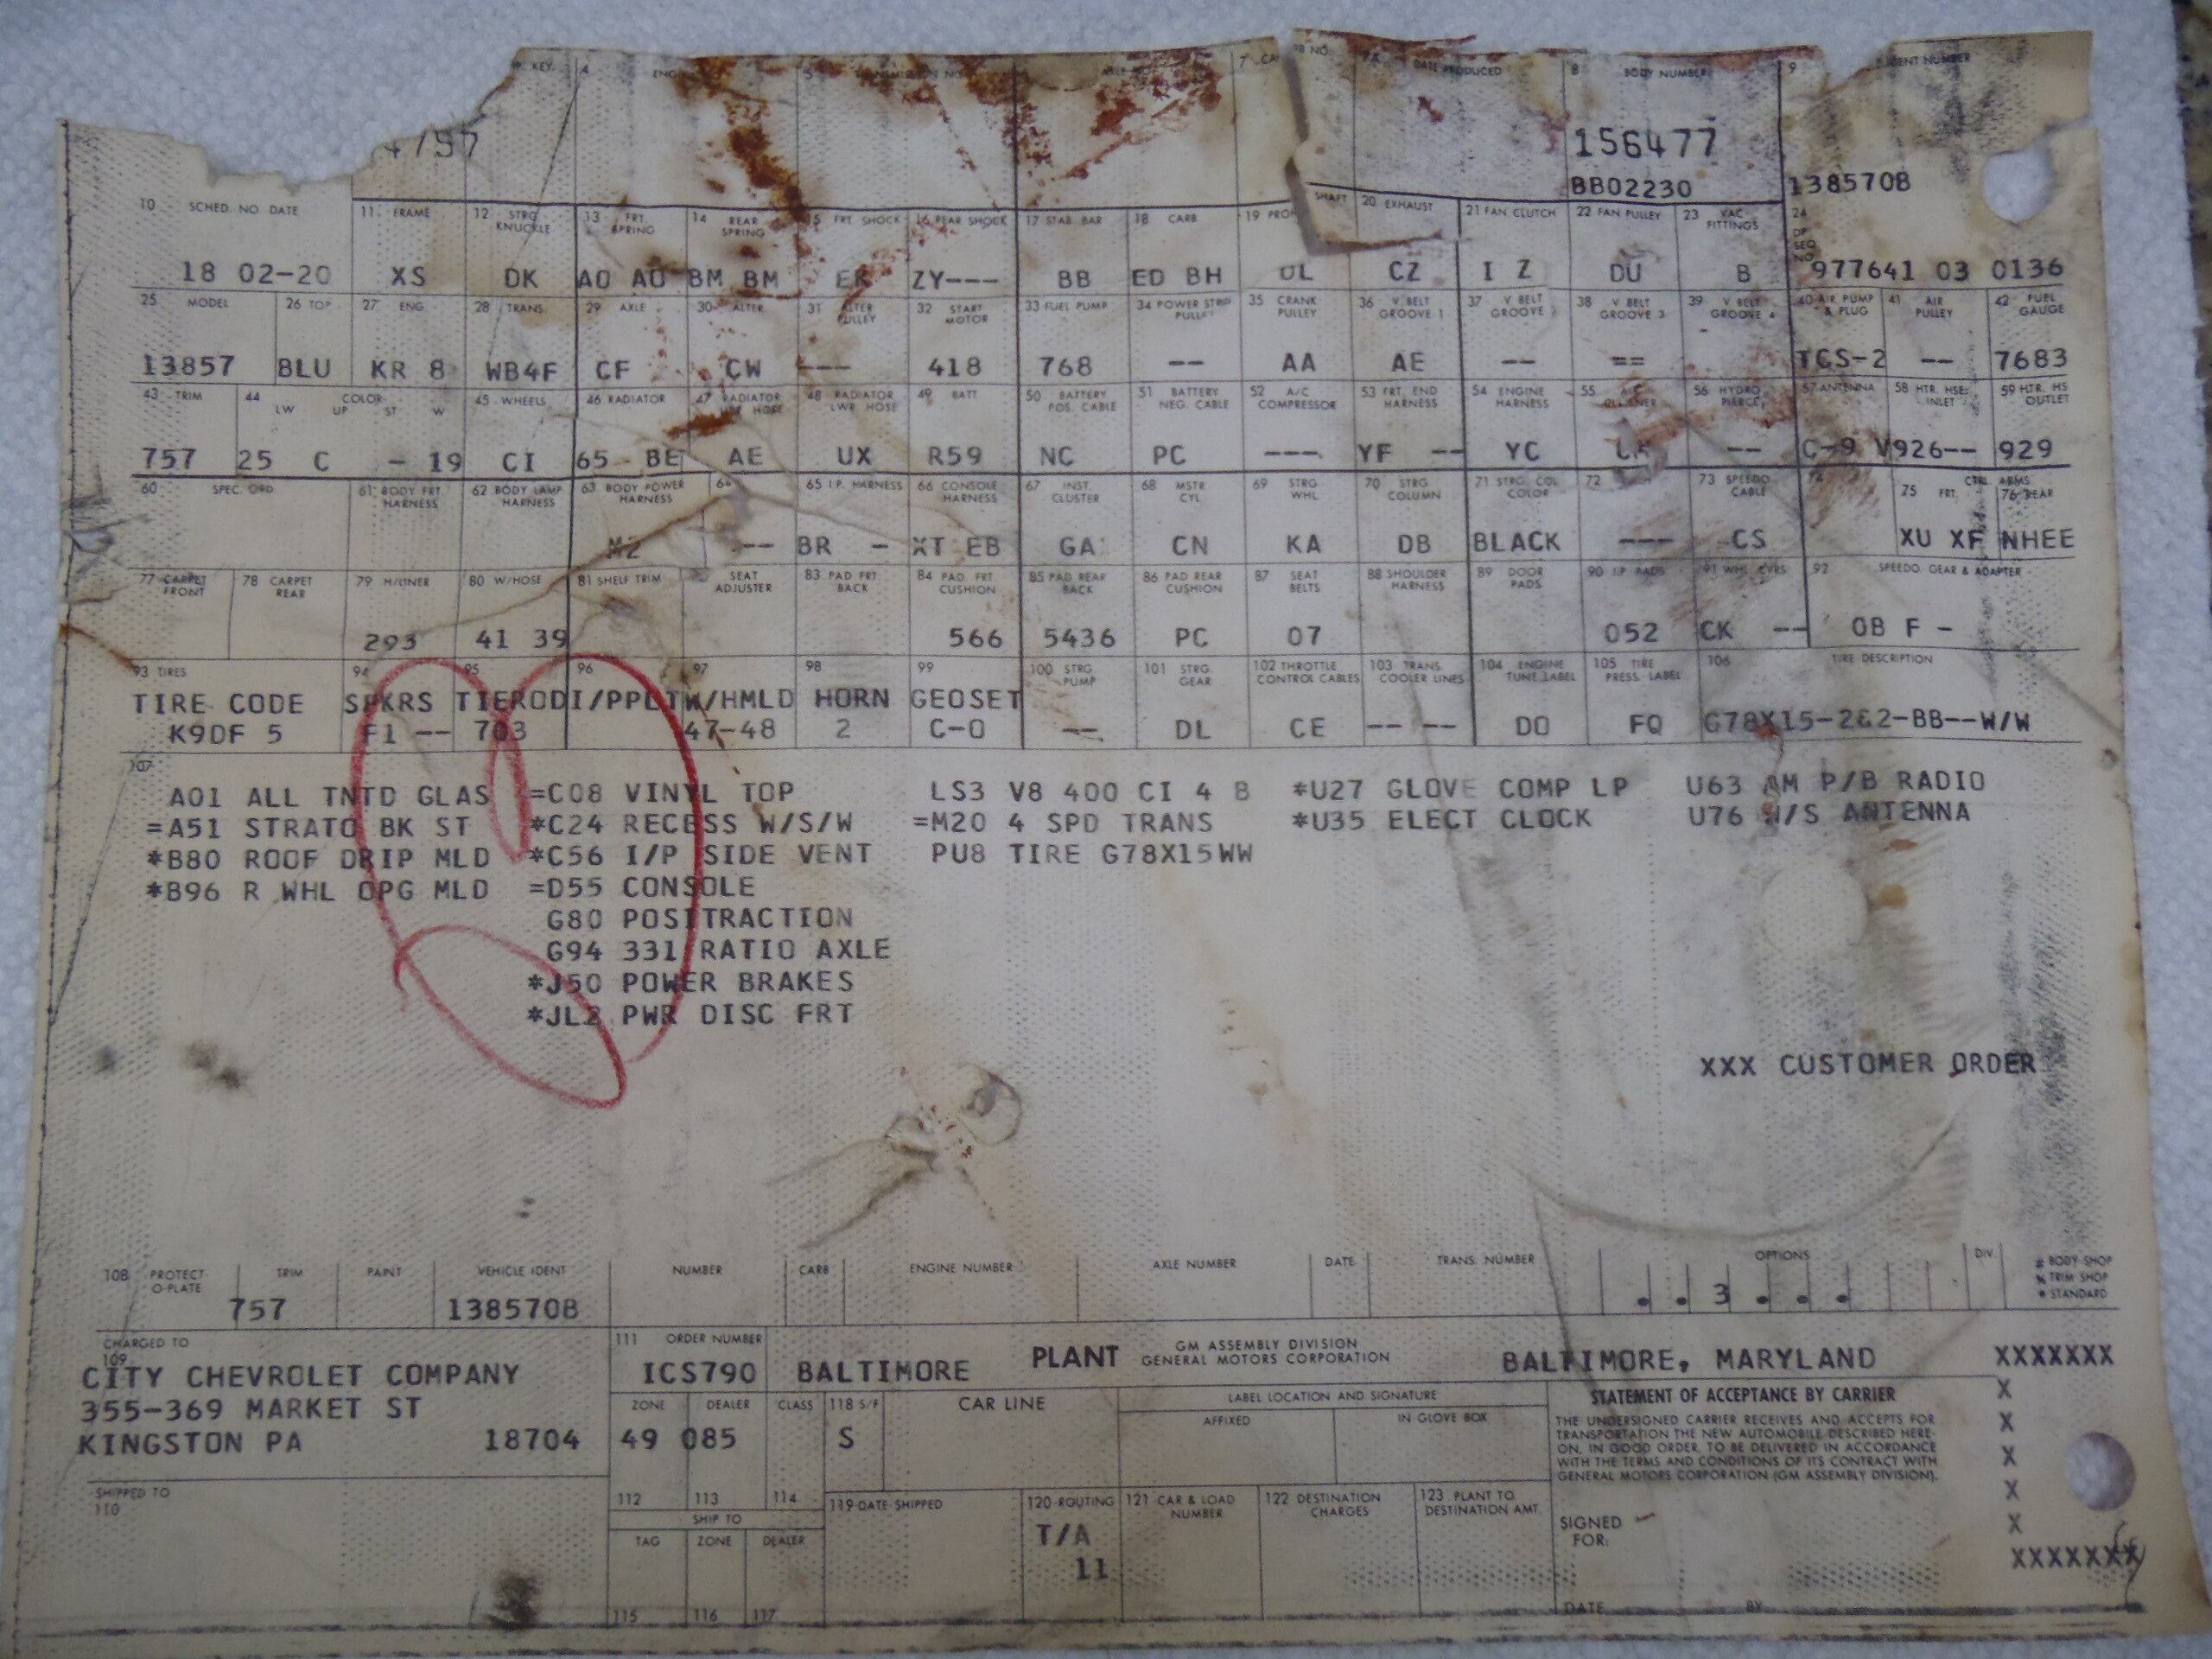
Mike, you can rest assured that Chevrolet did built 589 1970 Monte Carlos with 402 V8s and 4-speed Muncies. Several members in this club own one (including myself) that can be verified with Build Sheets. I believe some club member (possibly Overdrive) is building a data base of known/documented 402/ 4-speeds ('70 & '71) in existence. However, just from what has be shared so far, it doesn't sound like the car you are considering is one of them.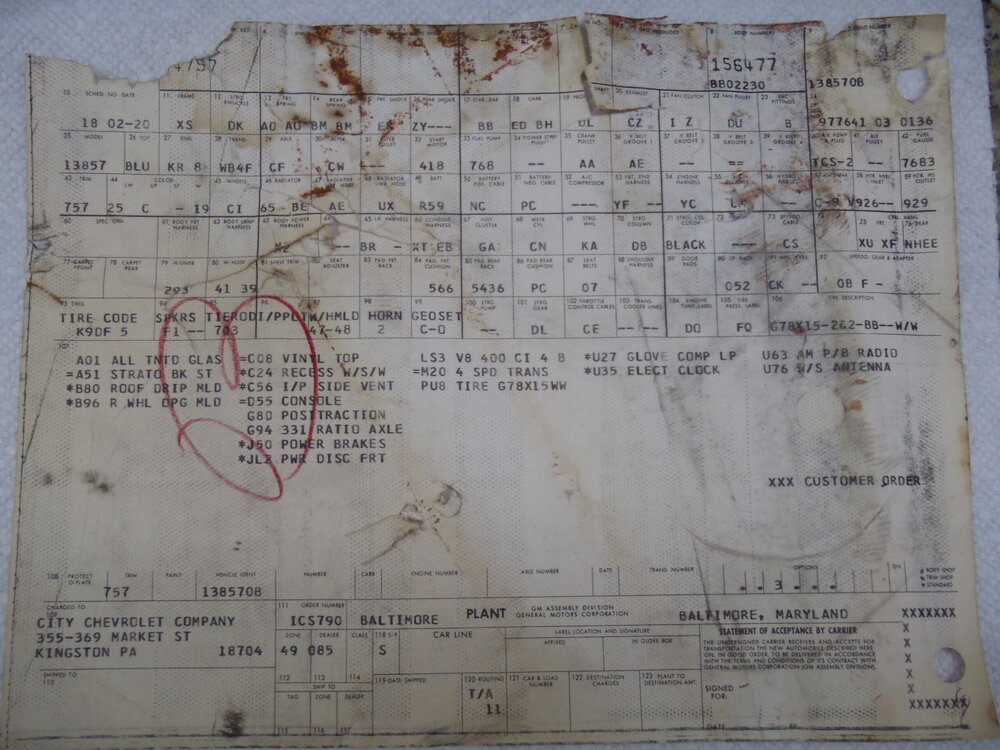
-
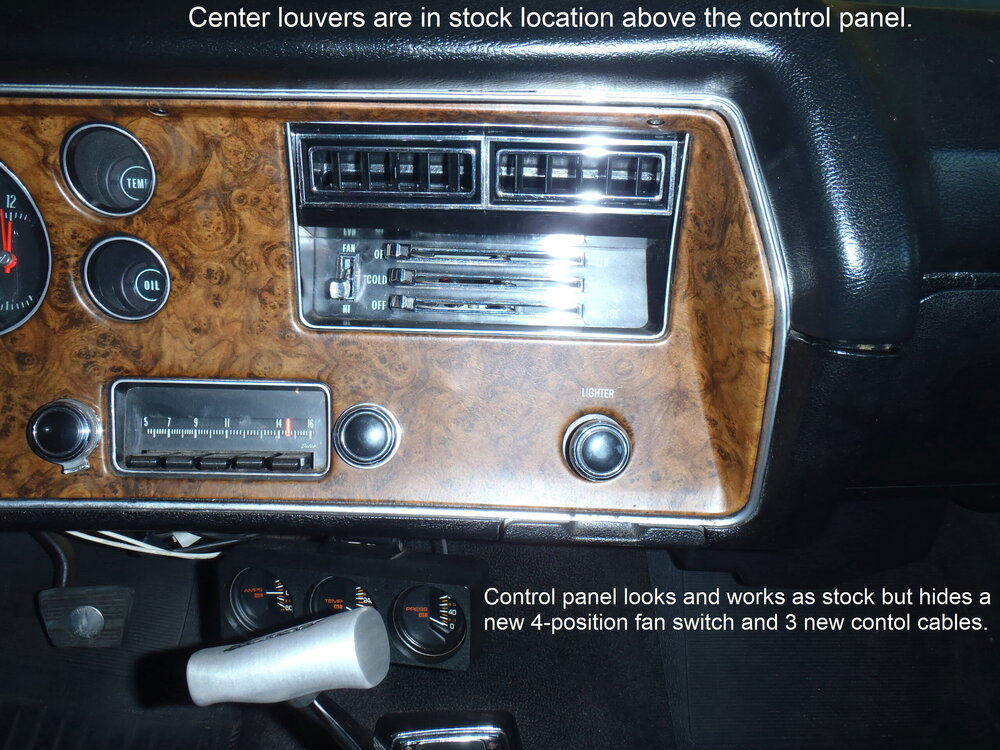
Classic Auto Air HVAC faceplate and controls retro mod
MCfan replied to TheBMan's topic in General Tech
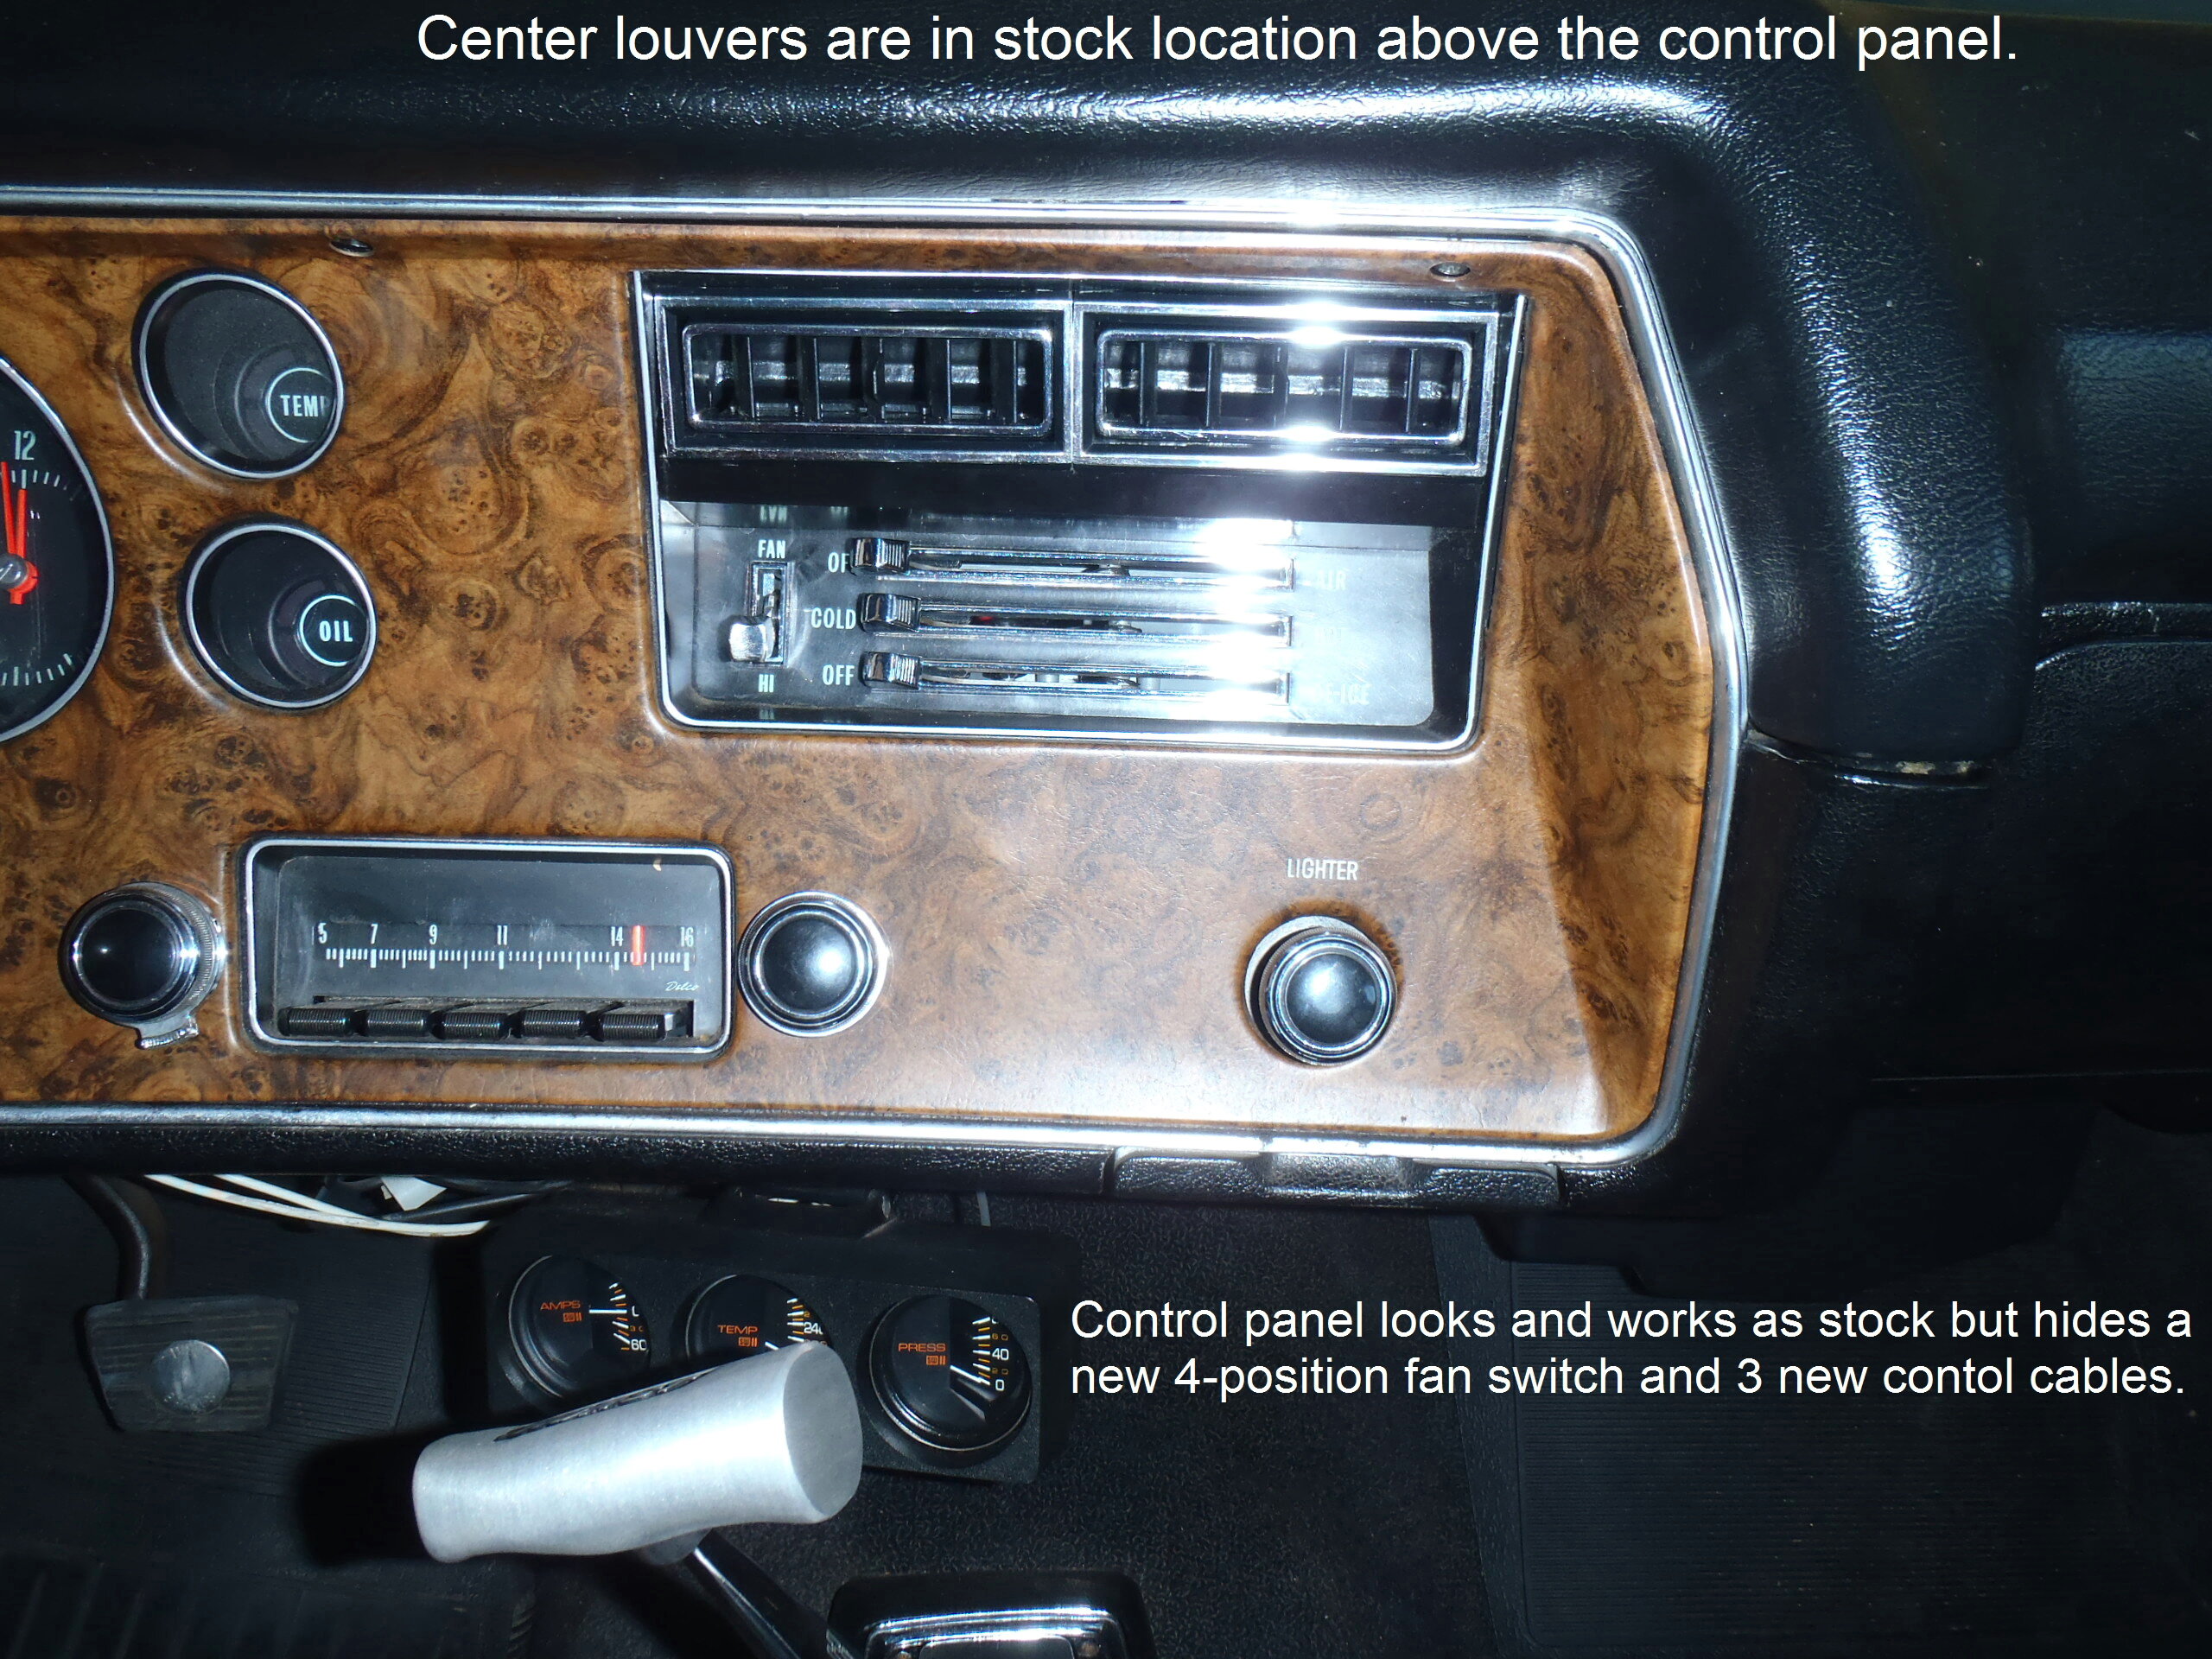
Nice work, Bryan! That is the first time I have seen their digital control panel. They sure didn't try to make it look period-correct or anything close! Your design is far superior! There must be real advantages to the digital controls but the manual controls that were available when I installed my CAA system in 2010 had a stock (non-AC) control appearance and used control levers and cables like the stock system. I had heard they no longer offered manual controls - bummer. At least they should adopt your design for their faceplate.
-
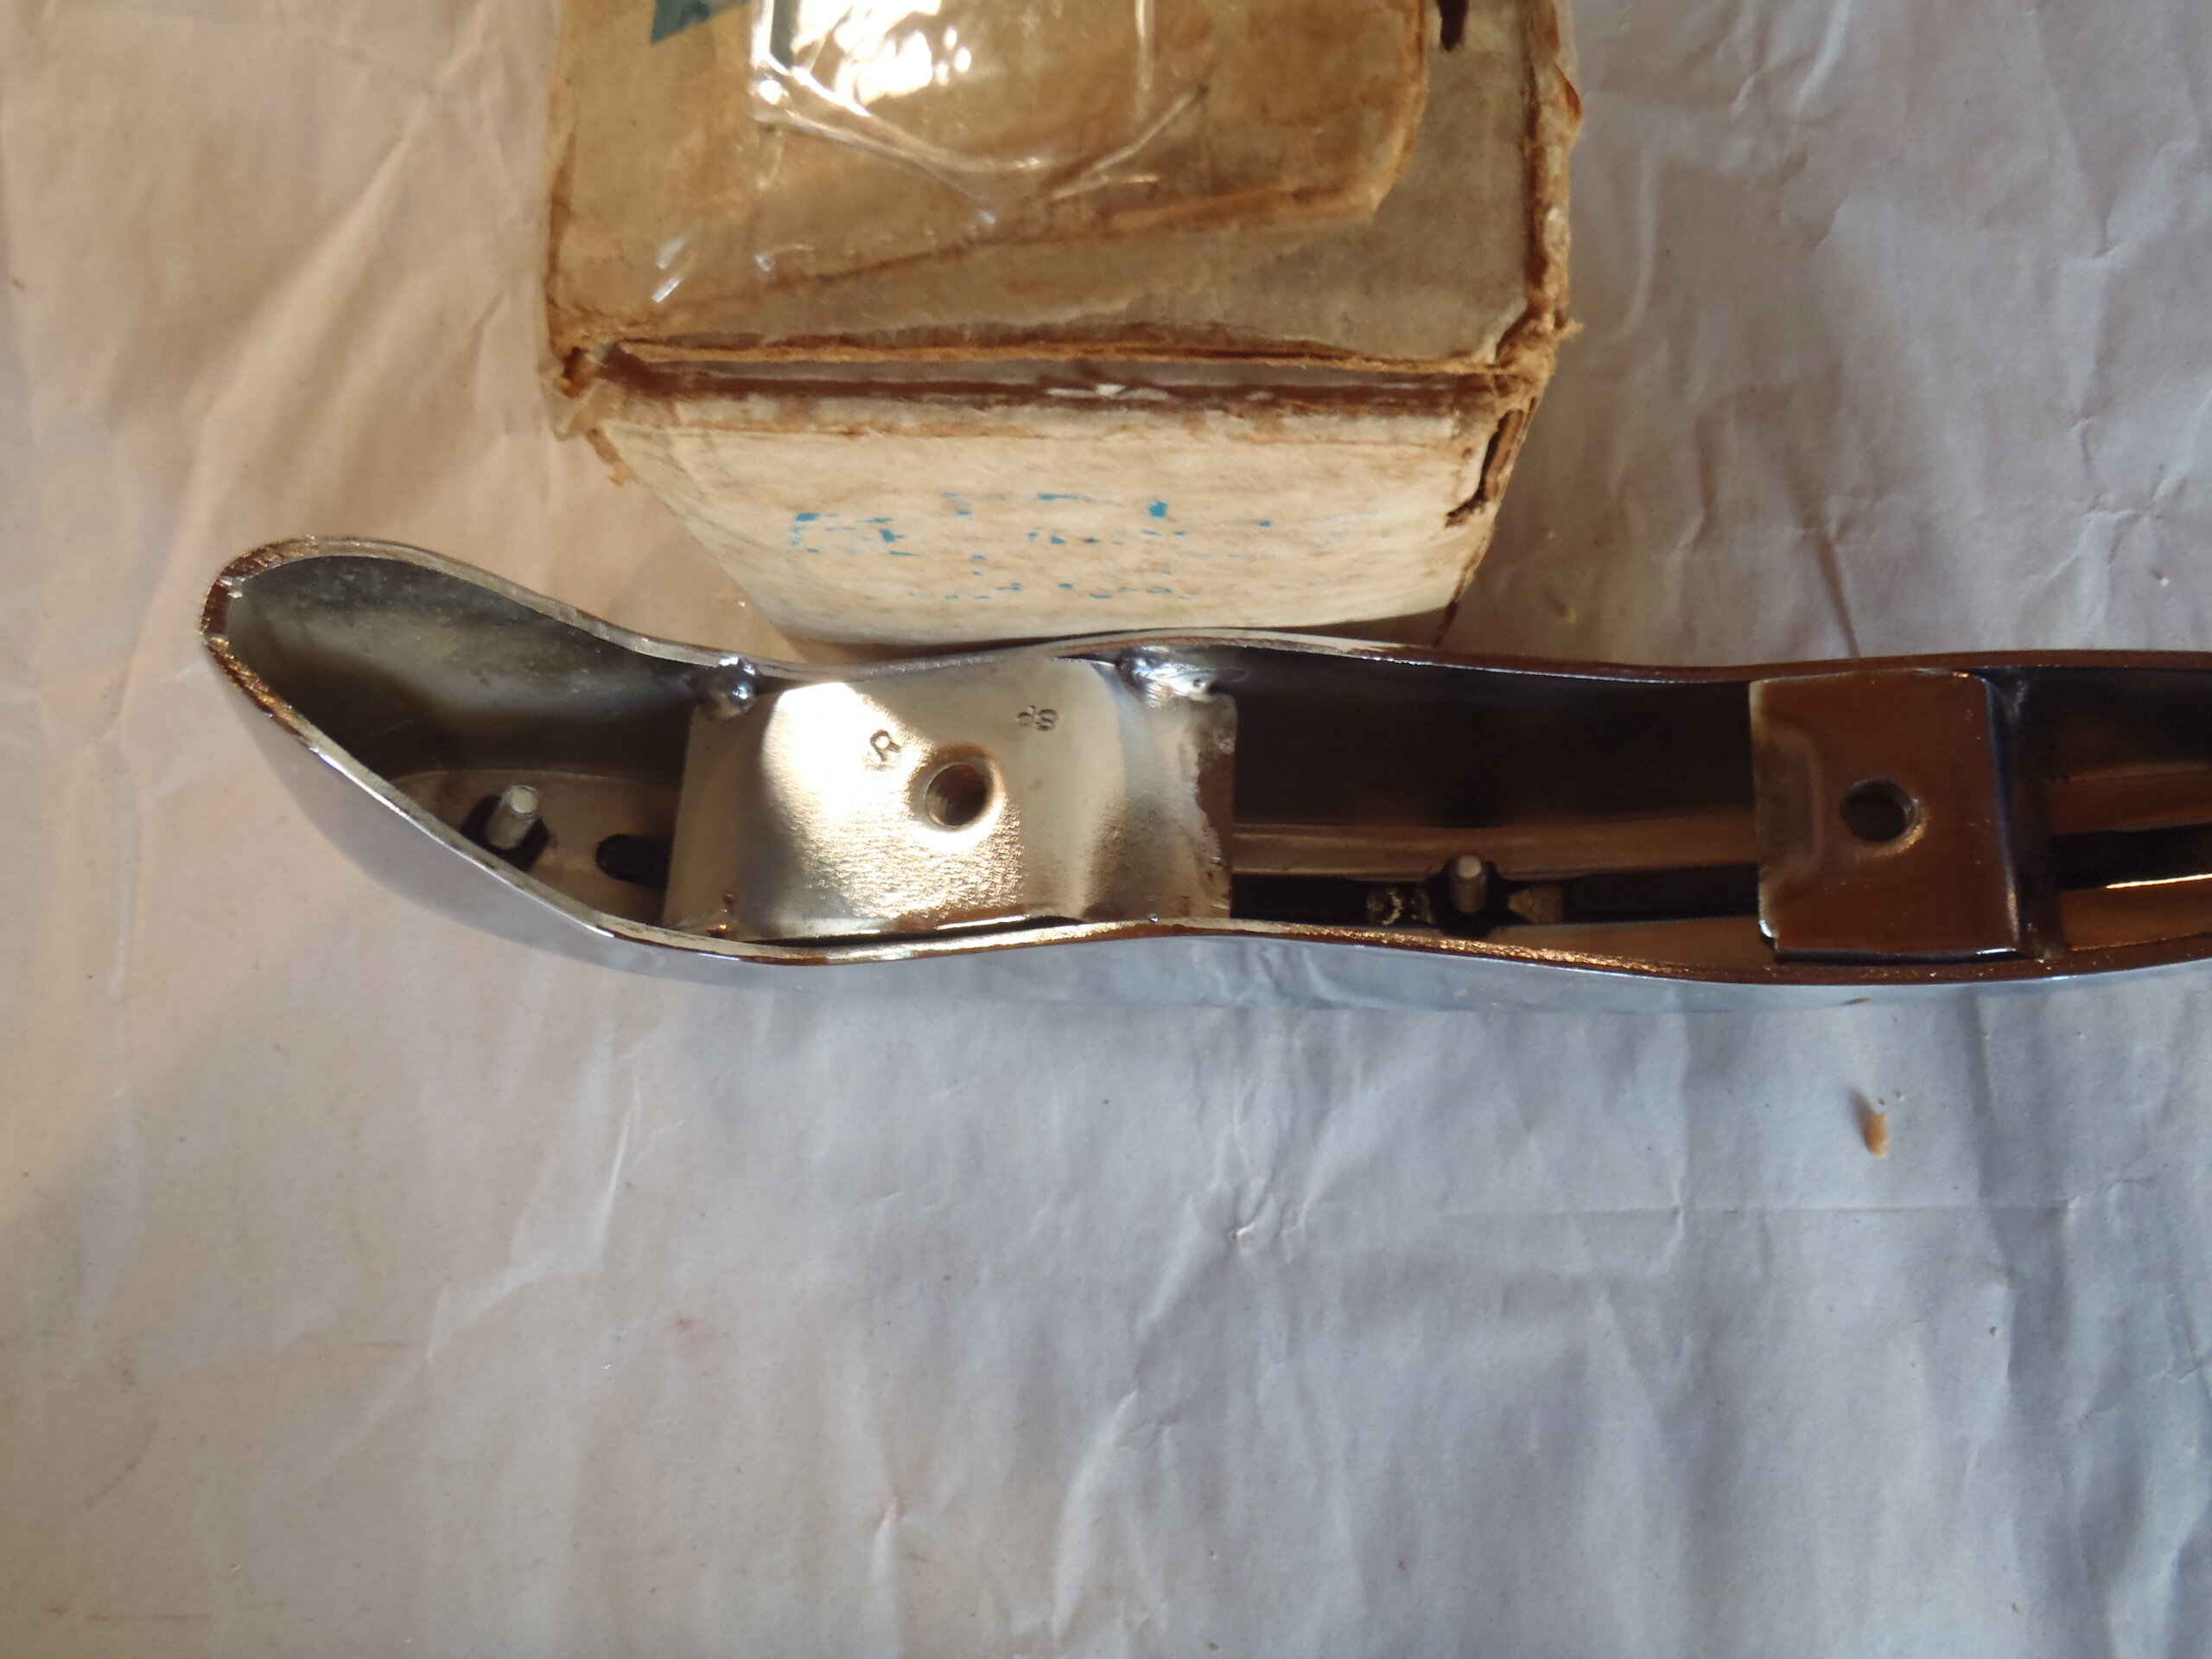
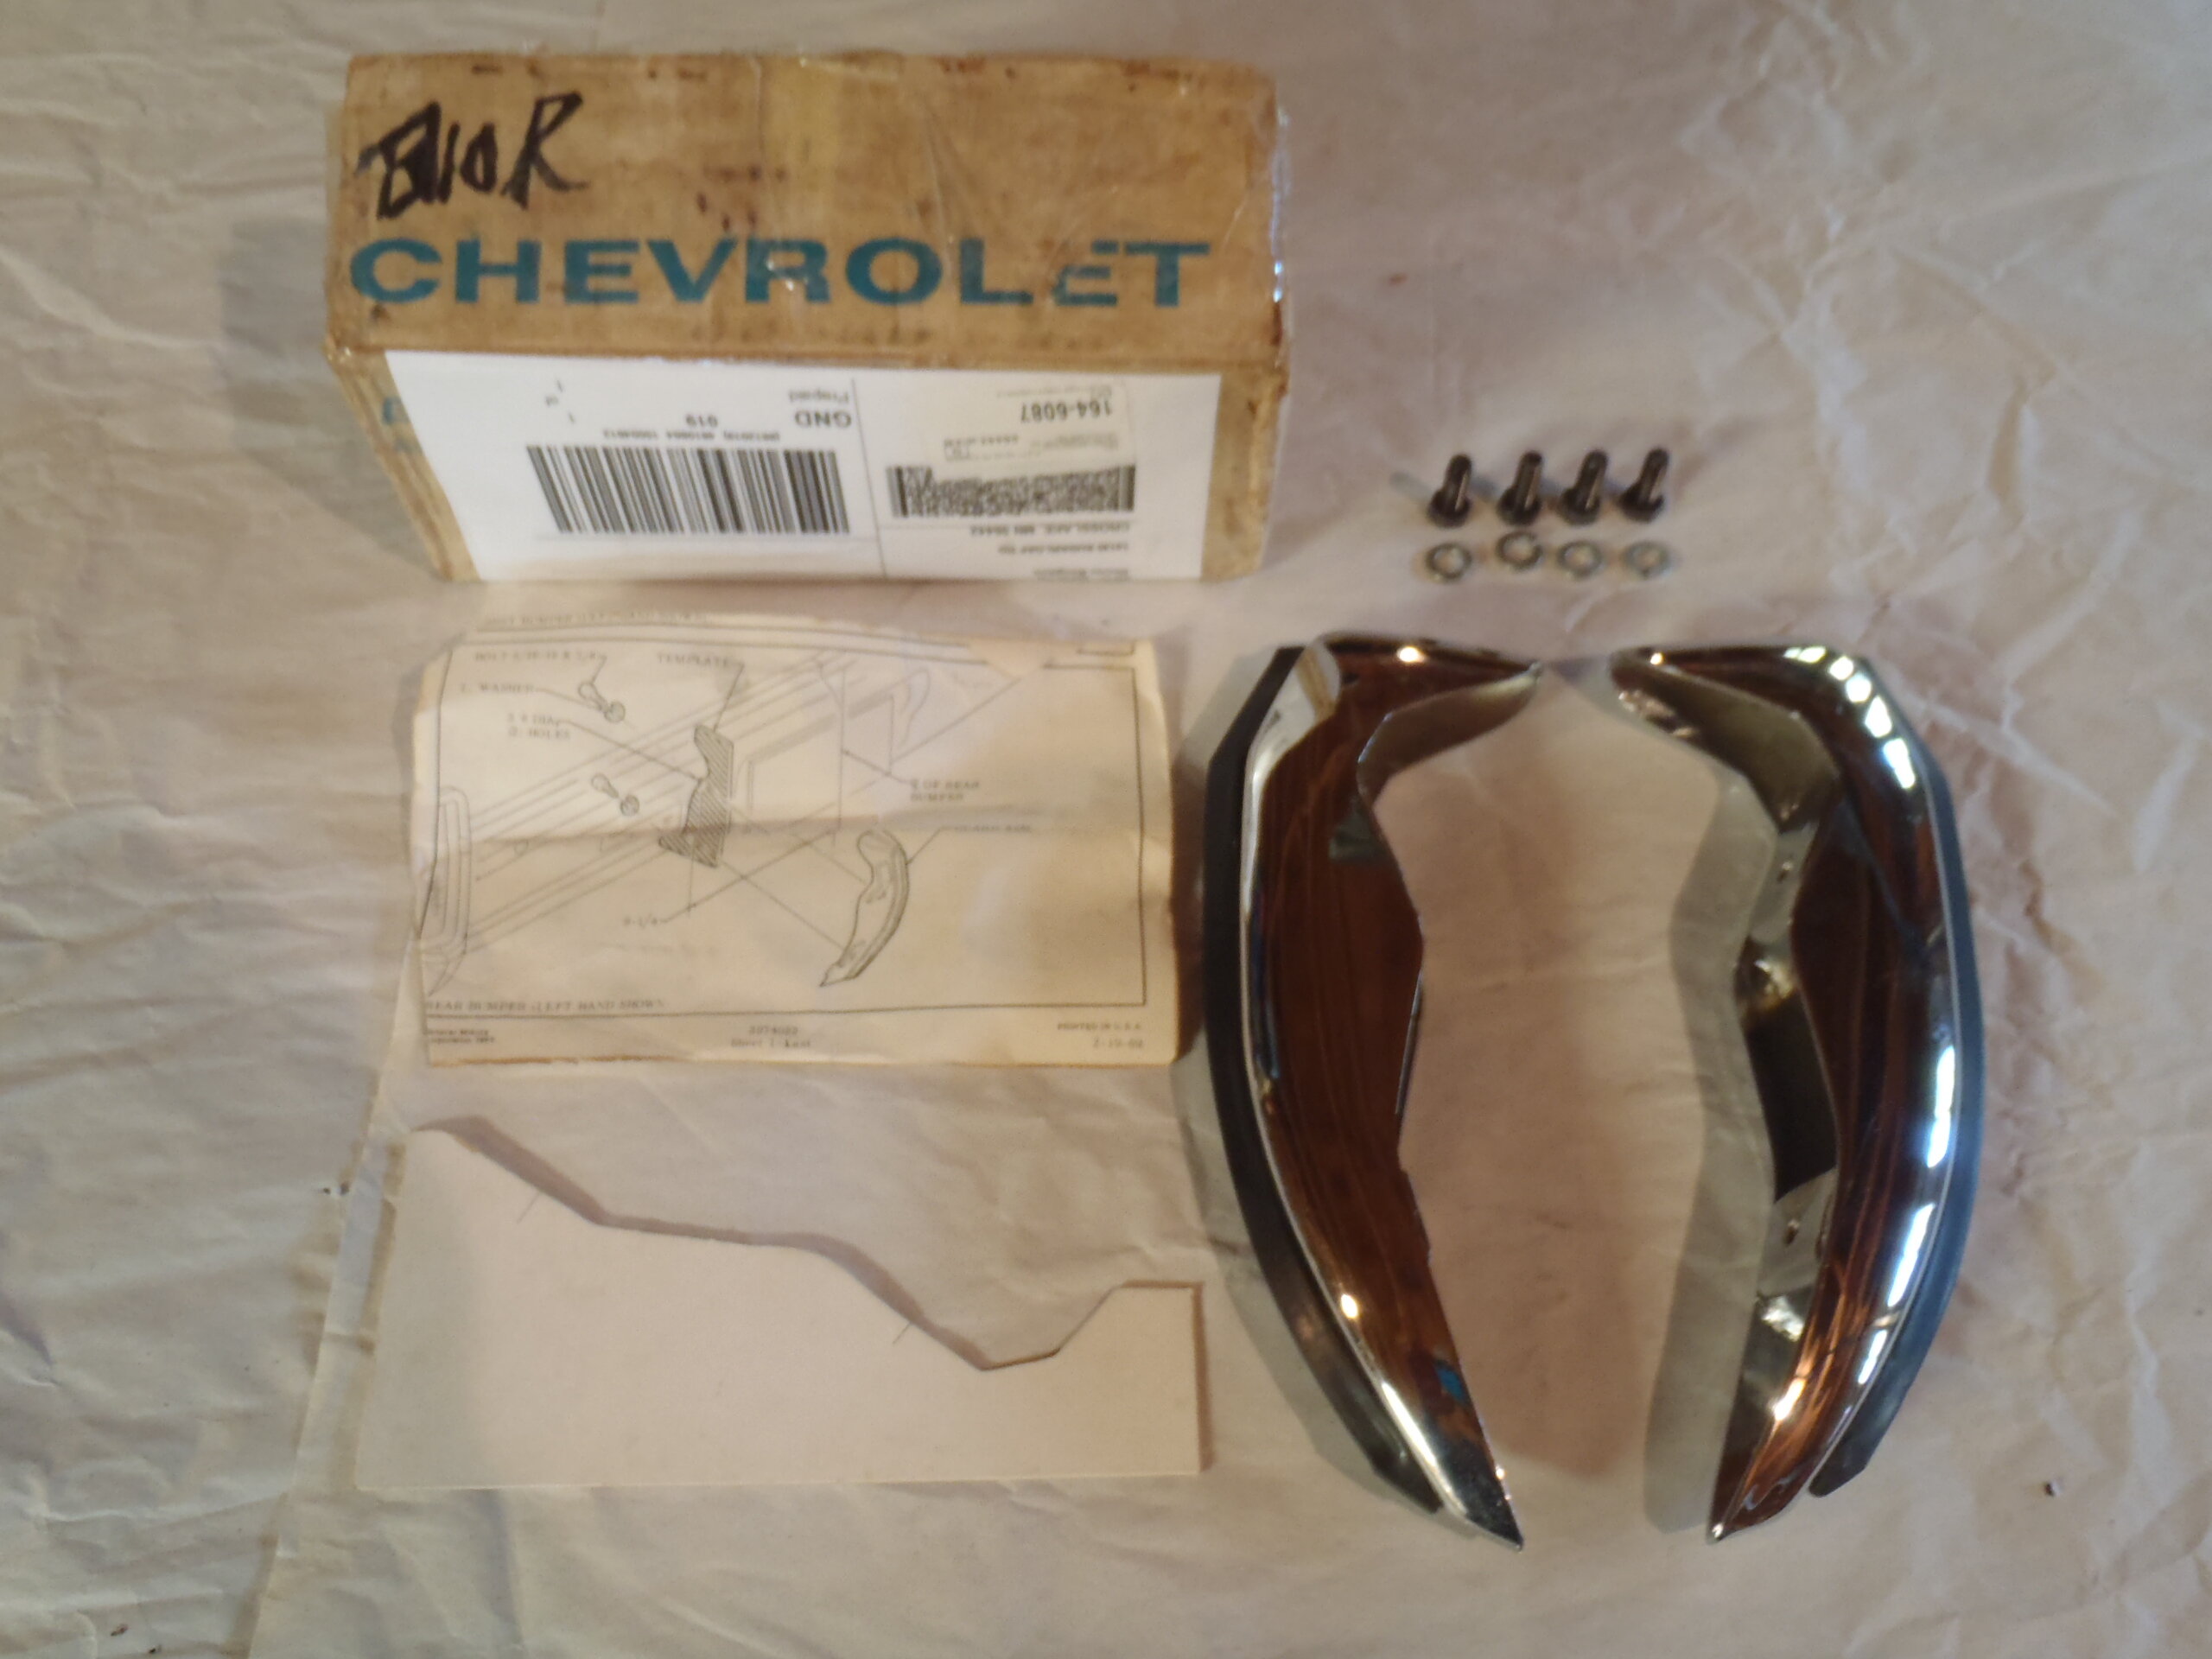
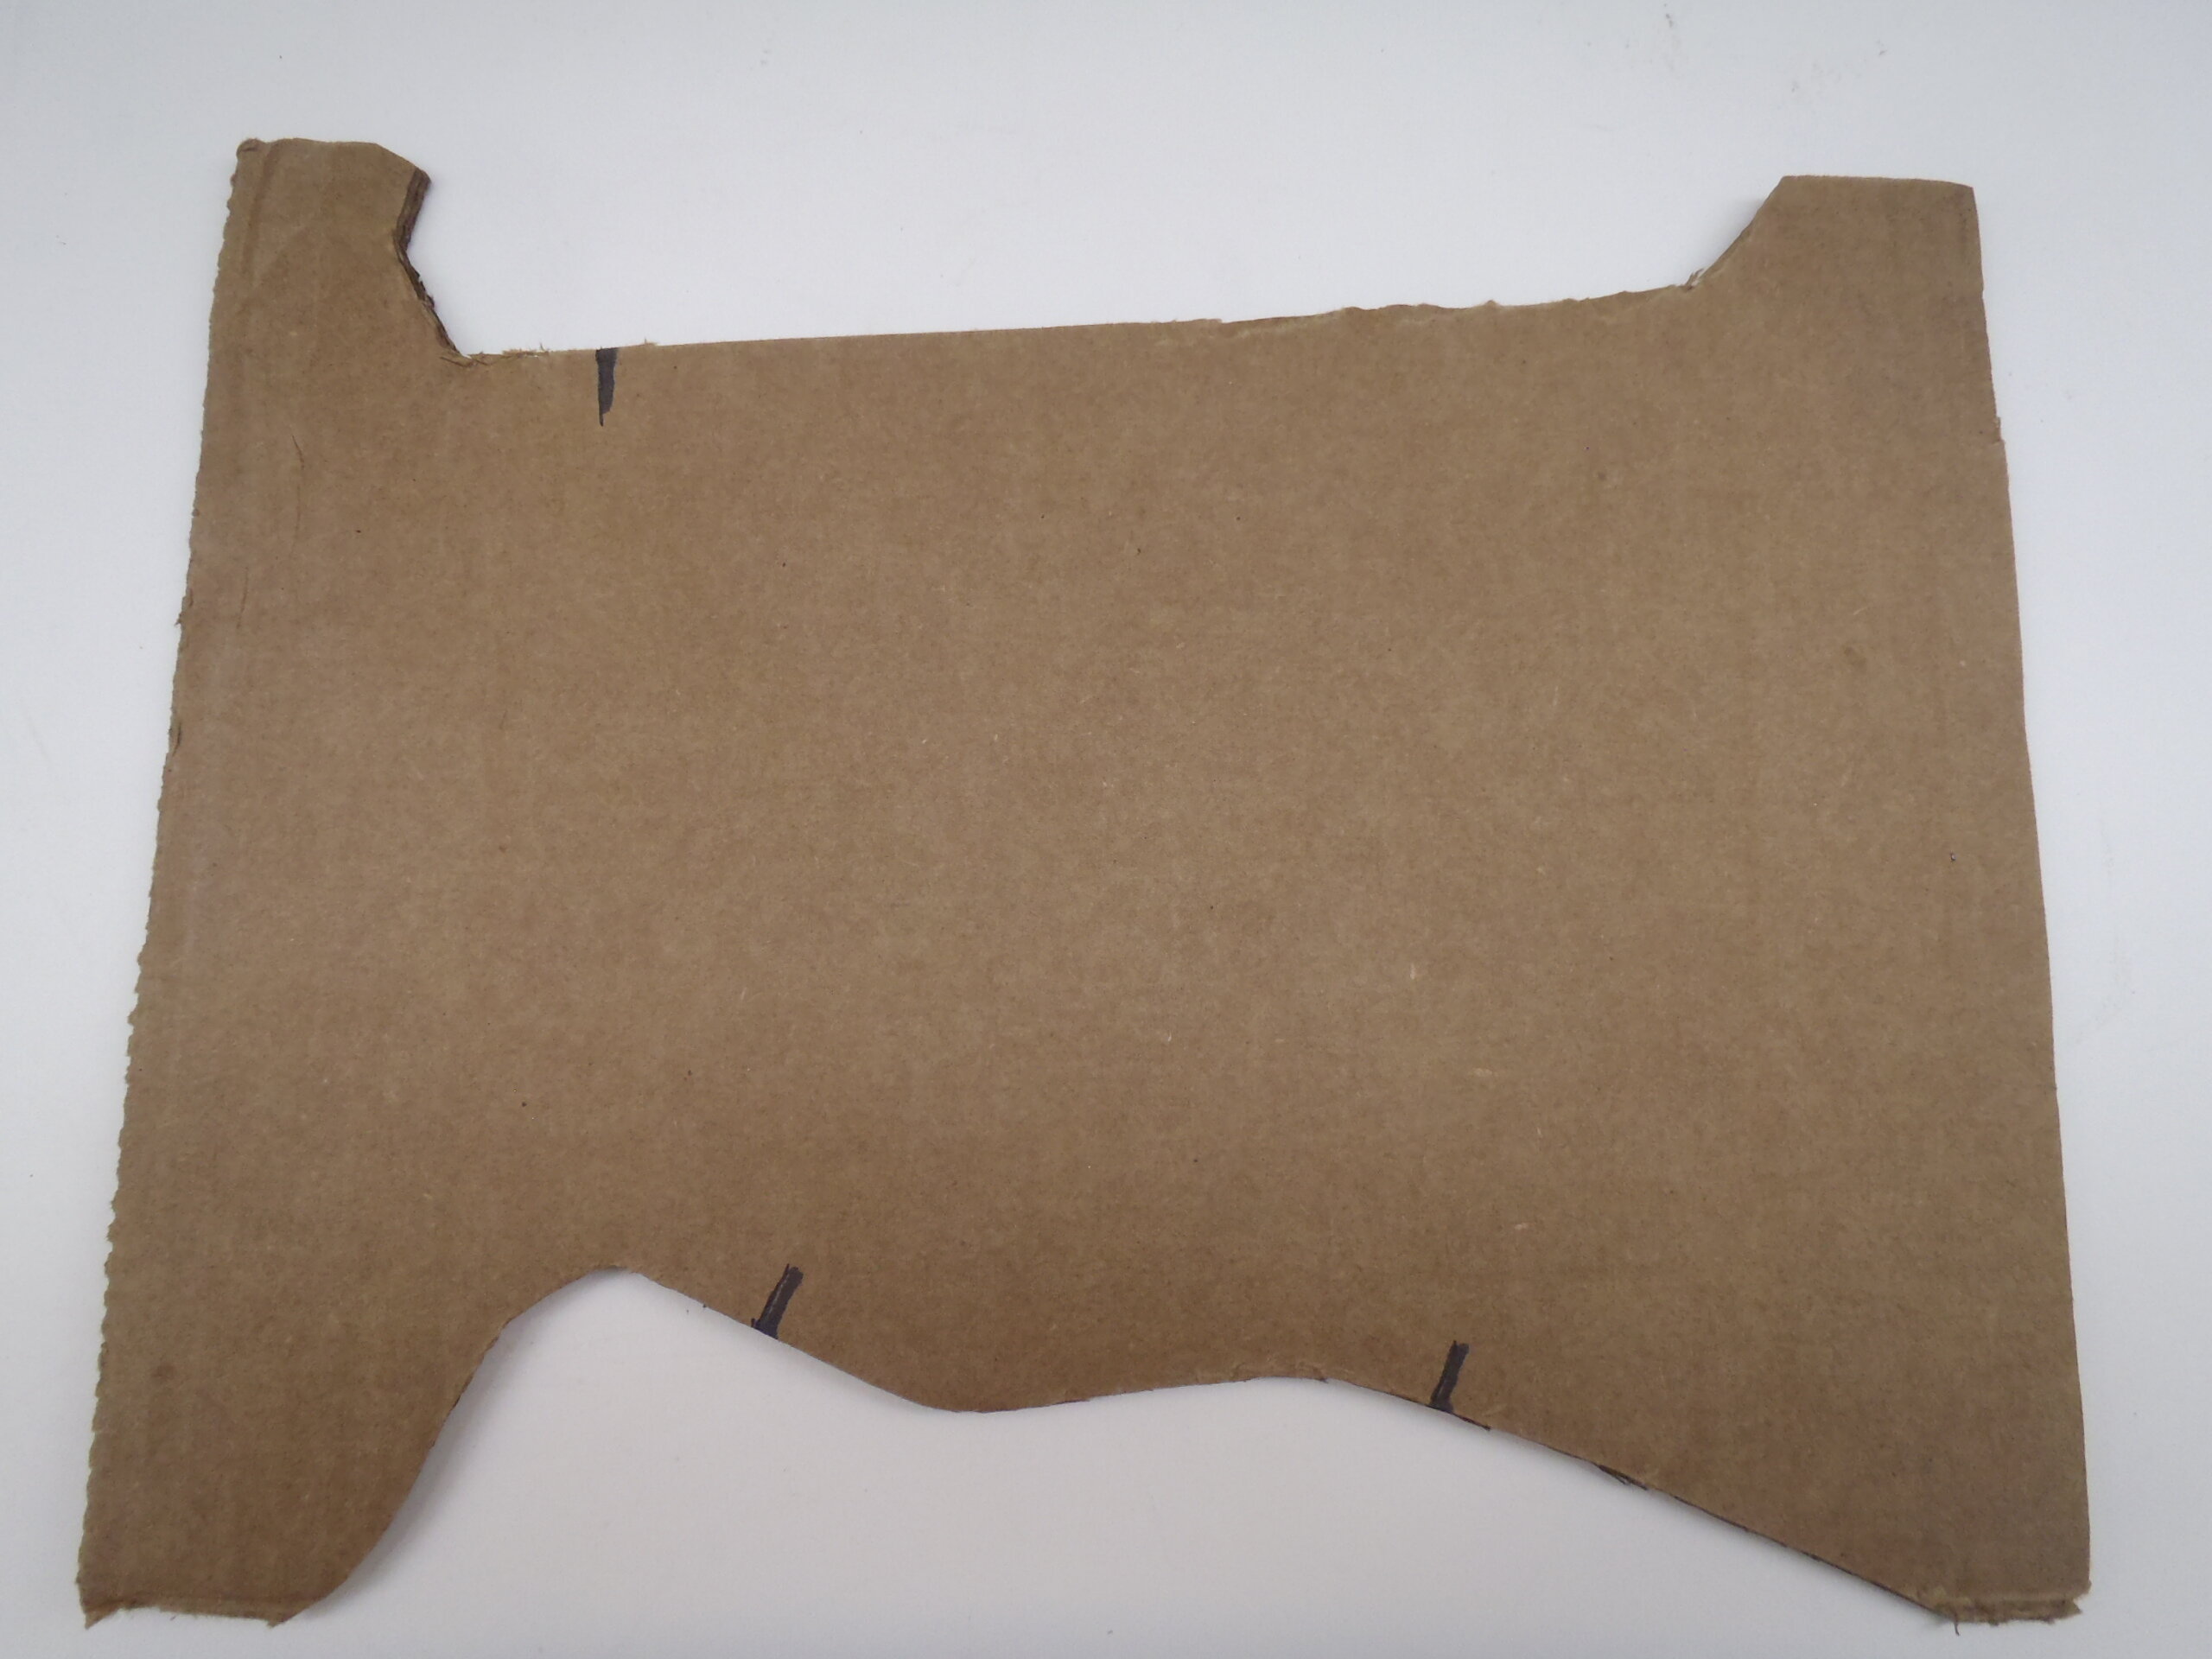
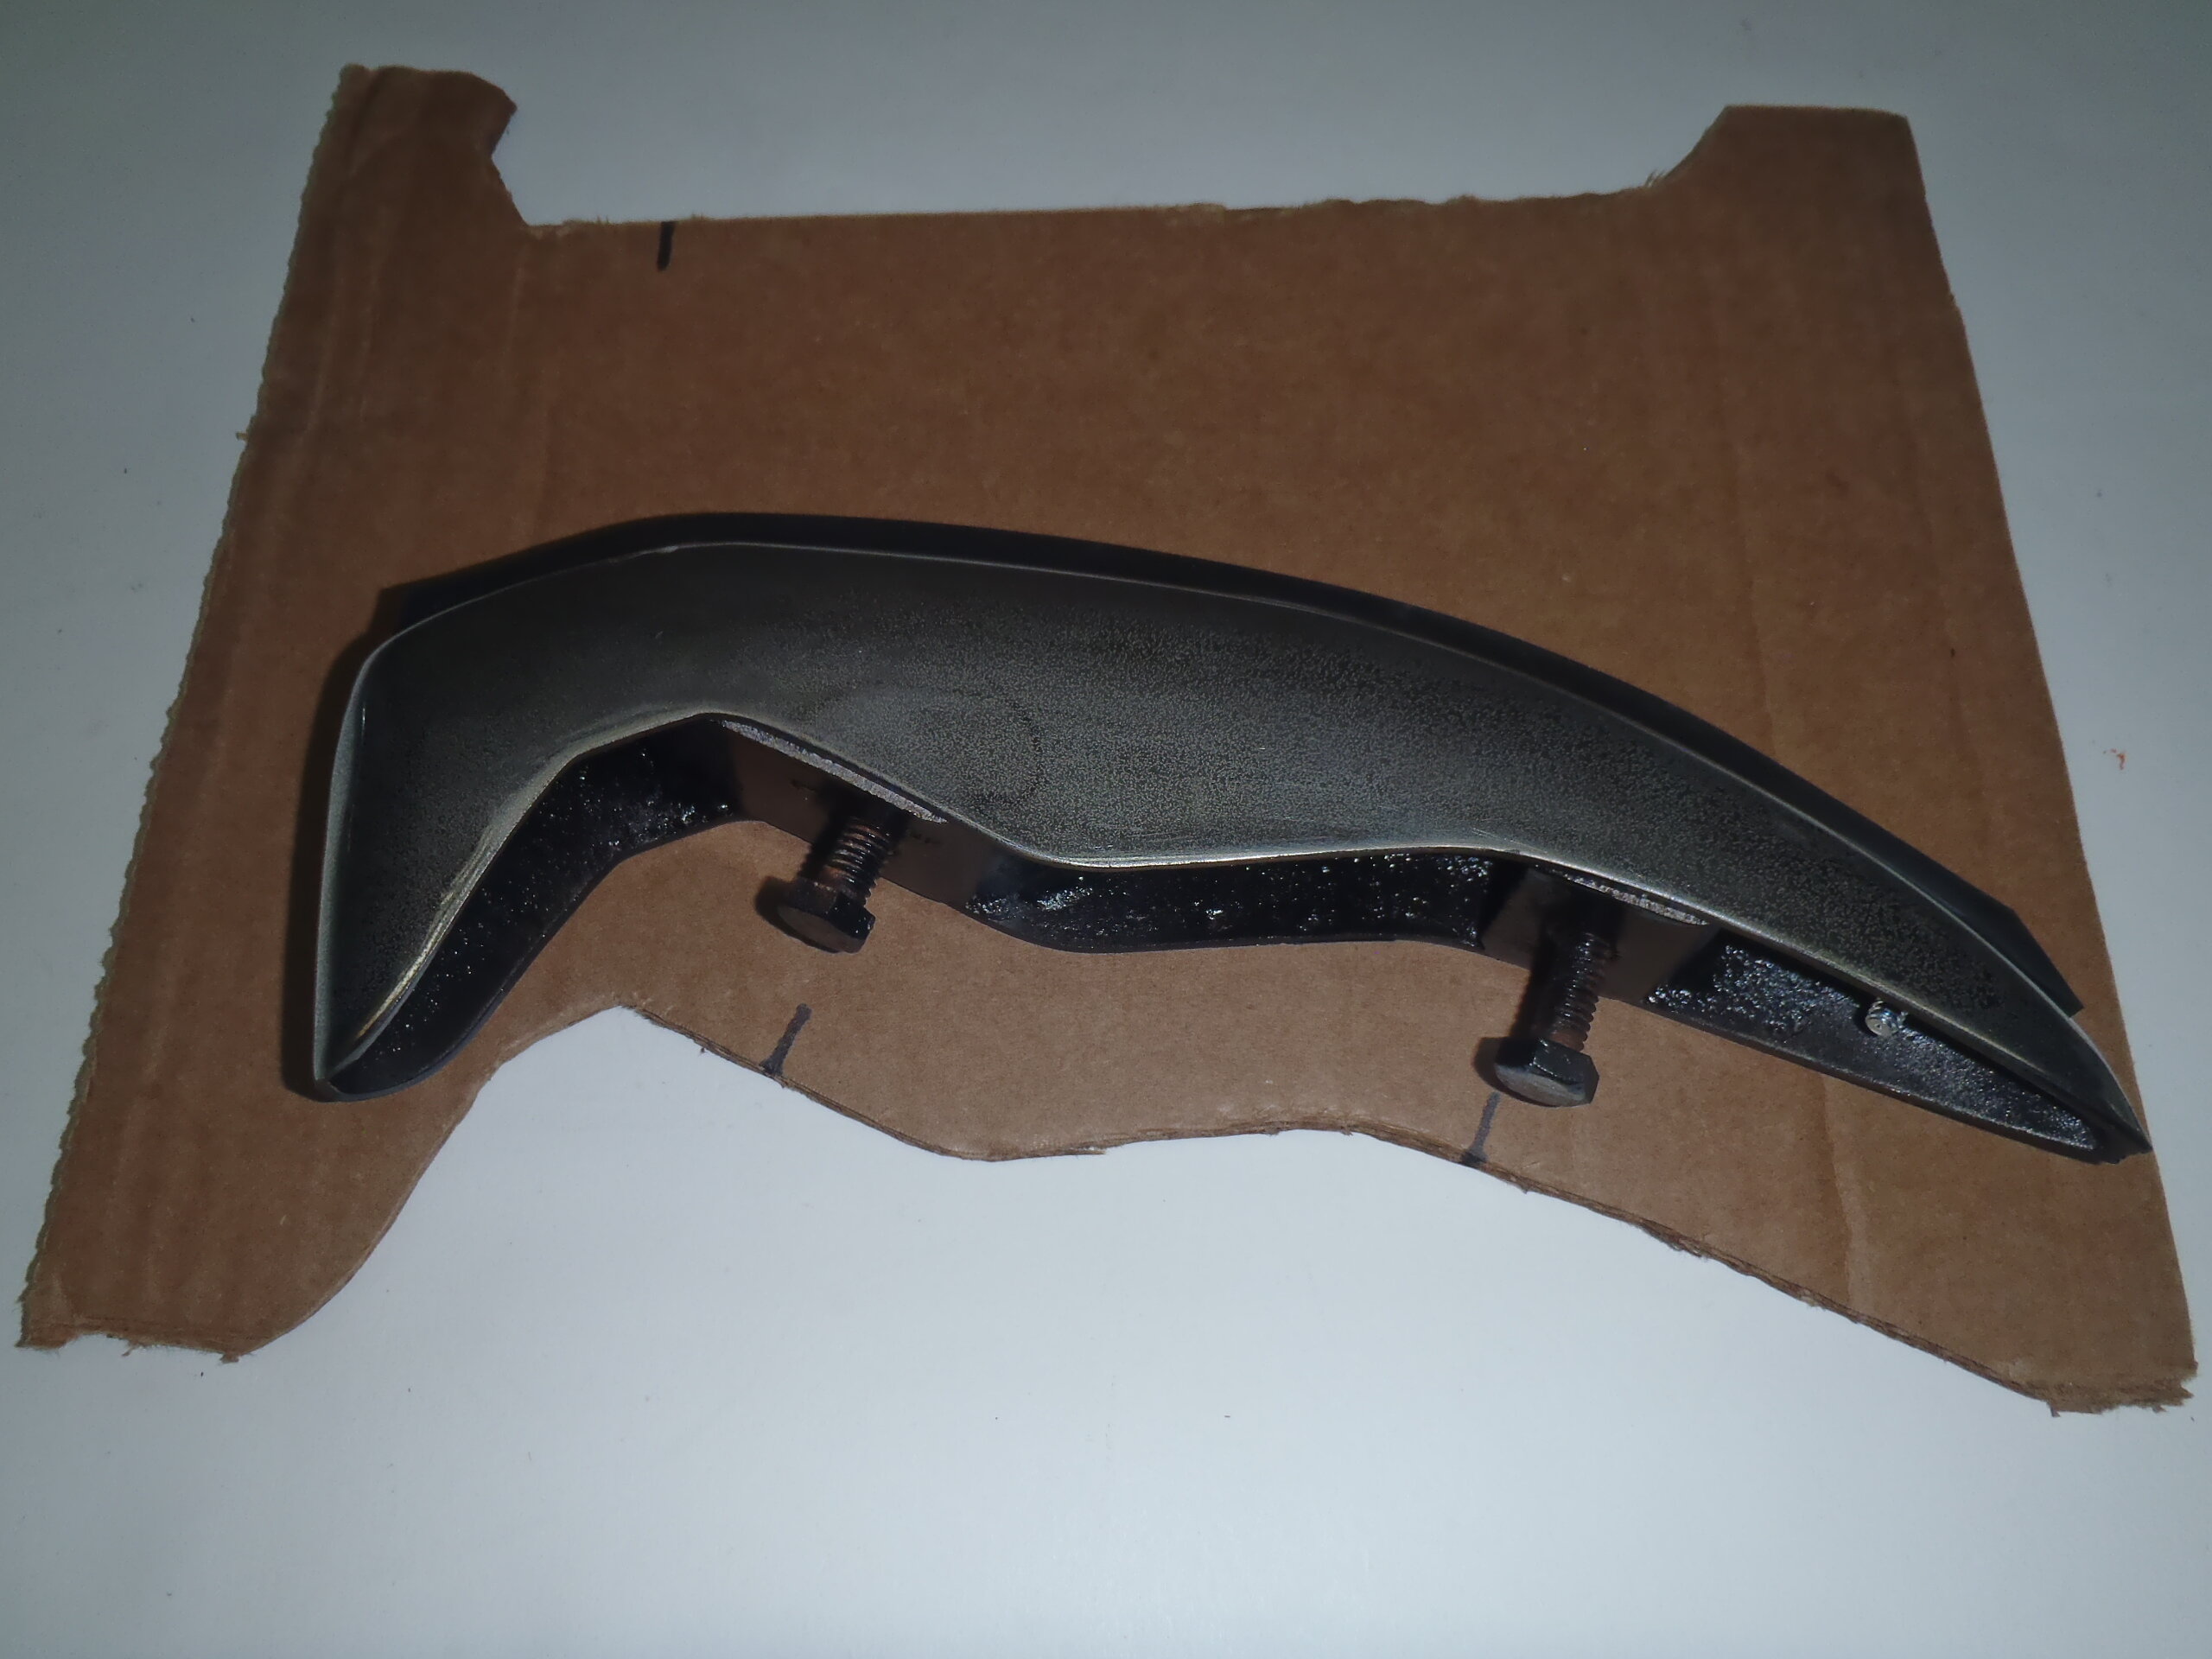
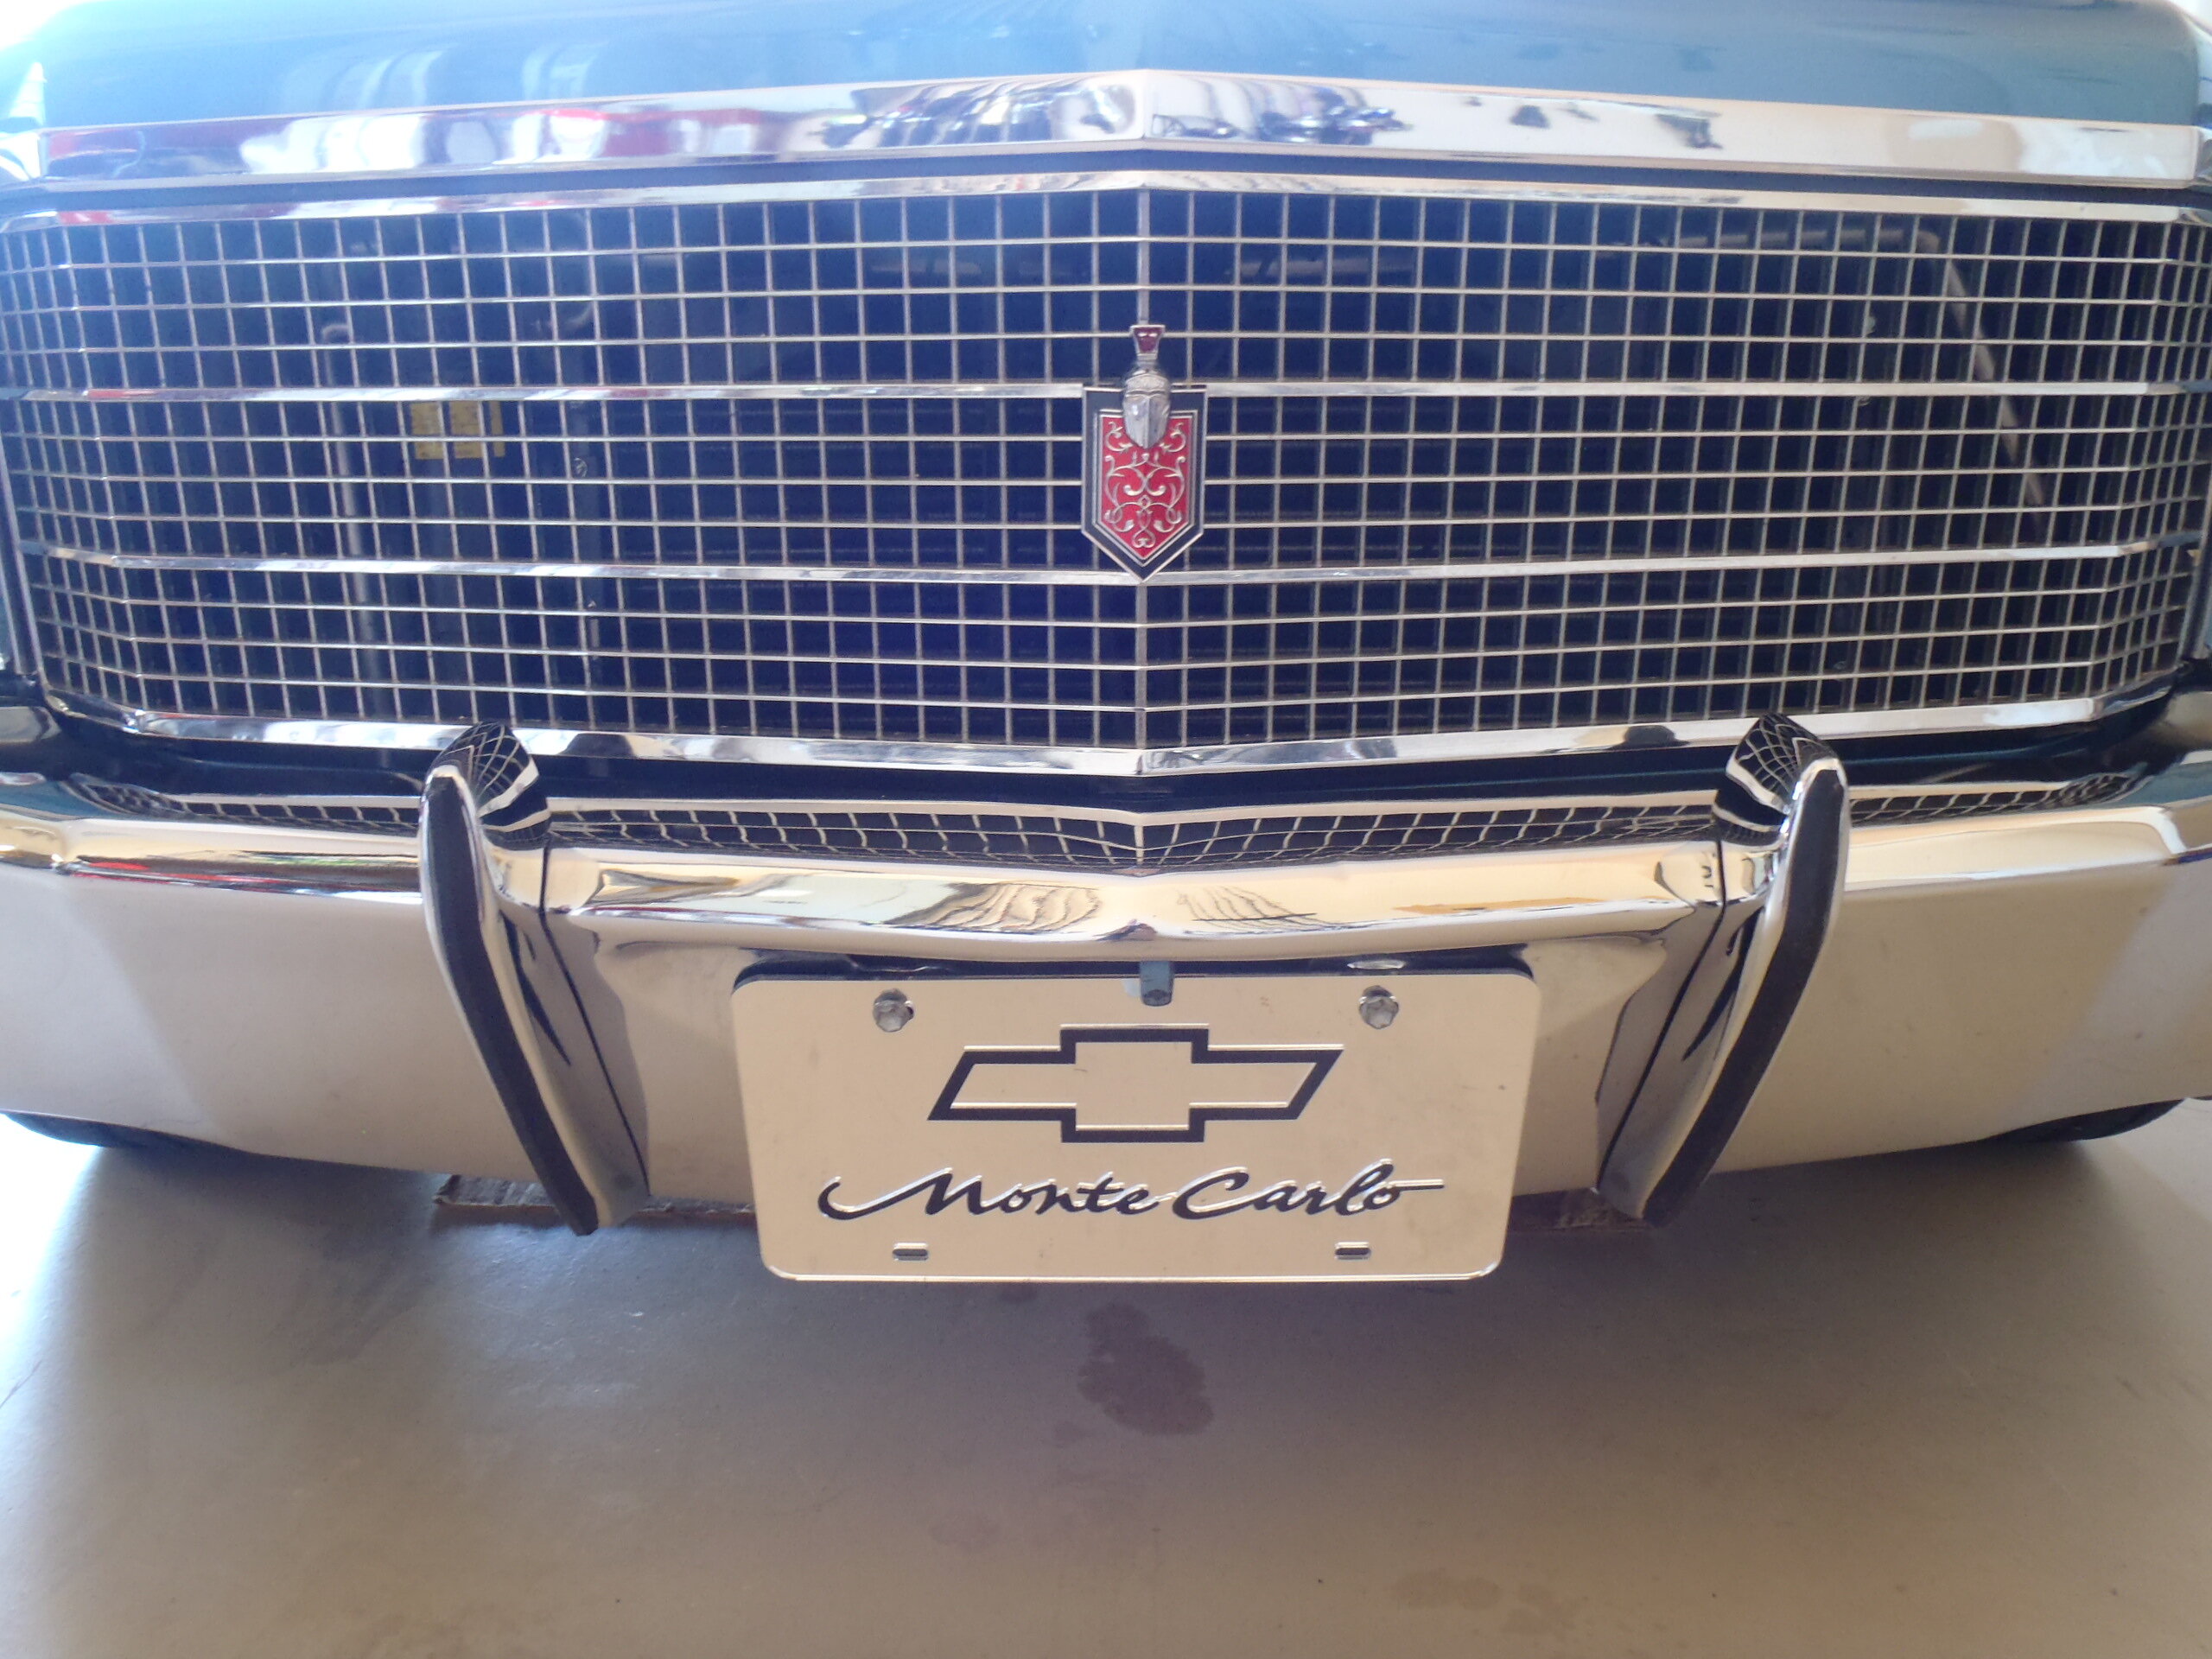
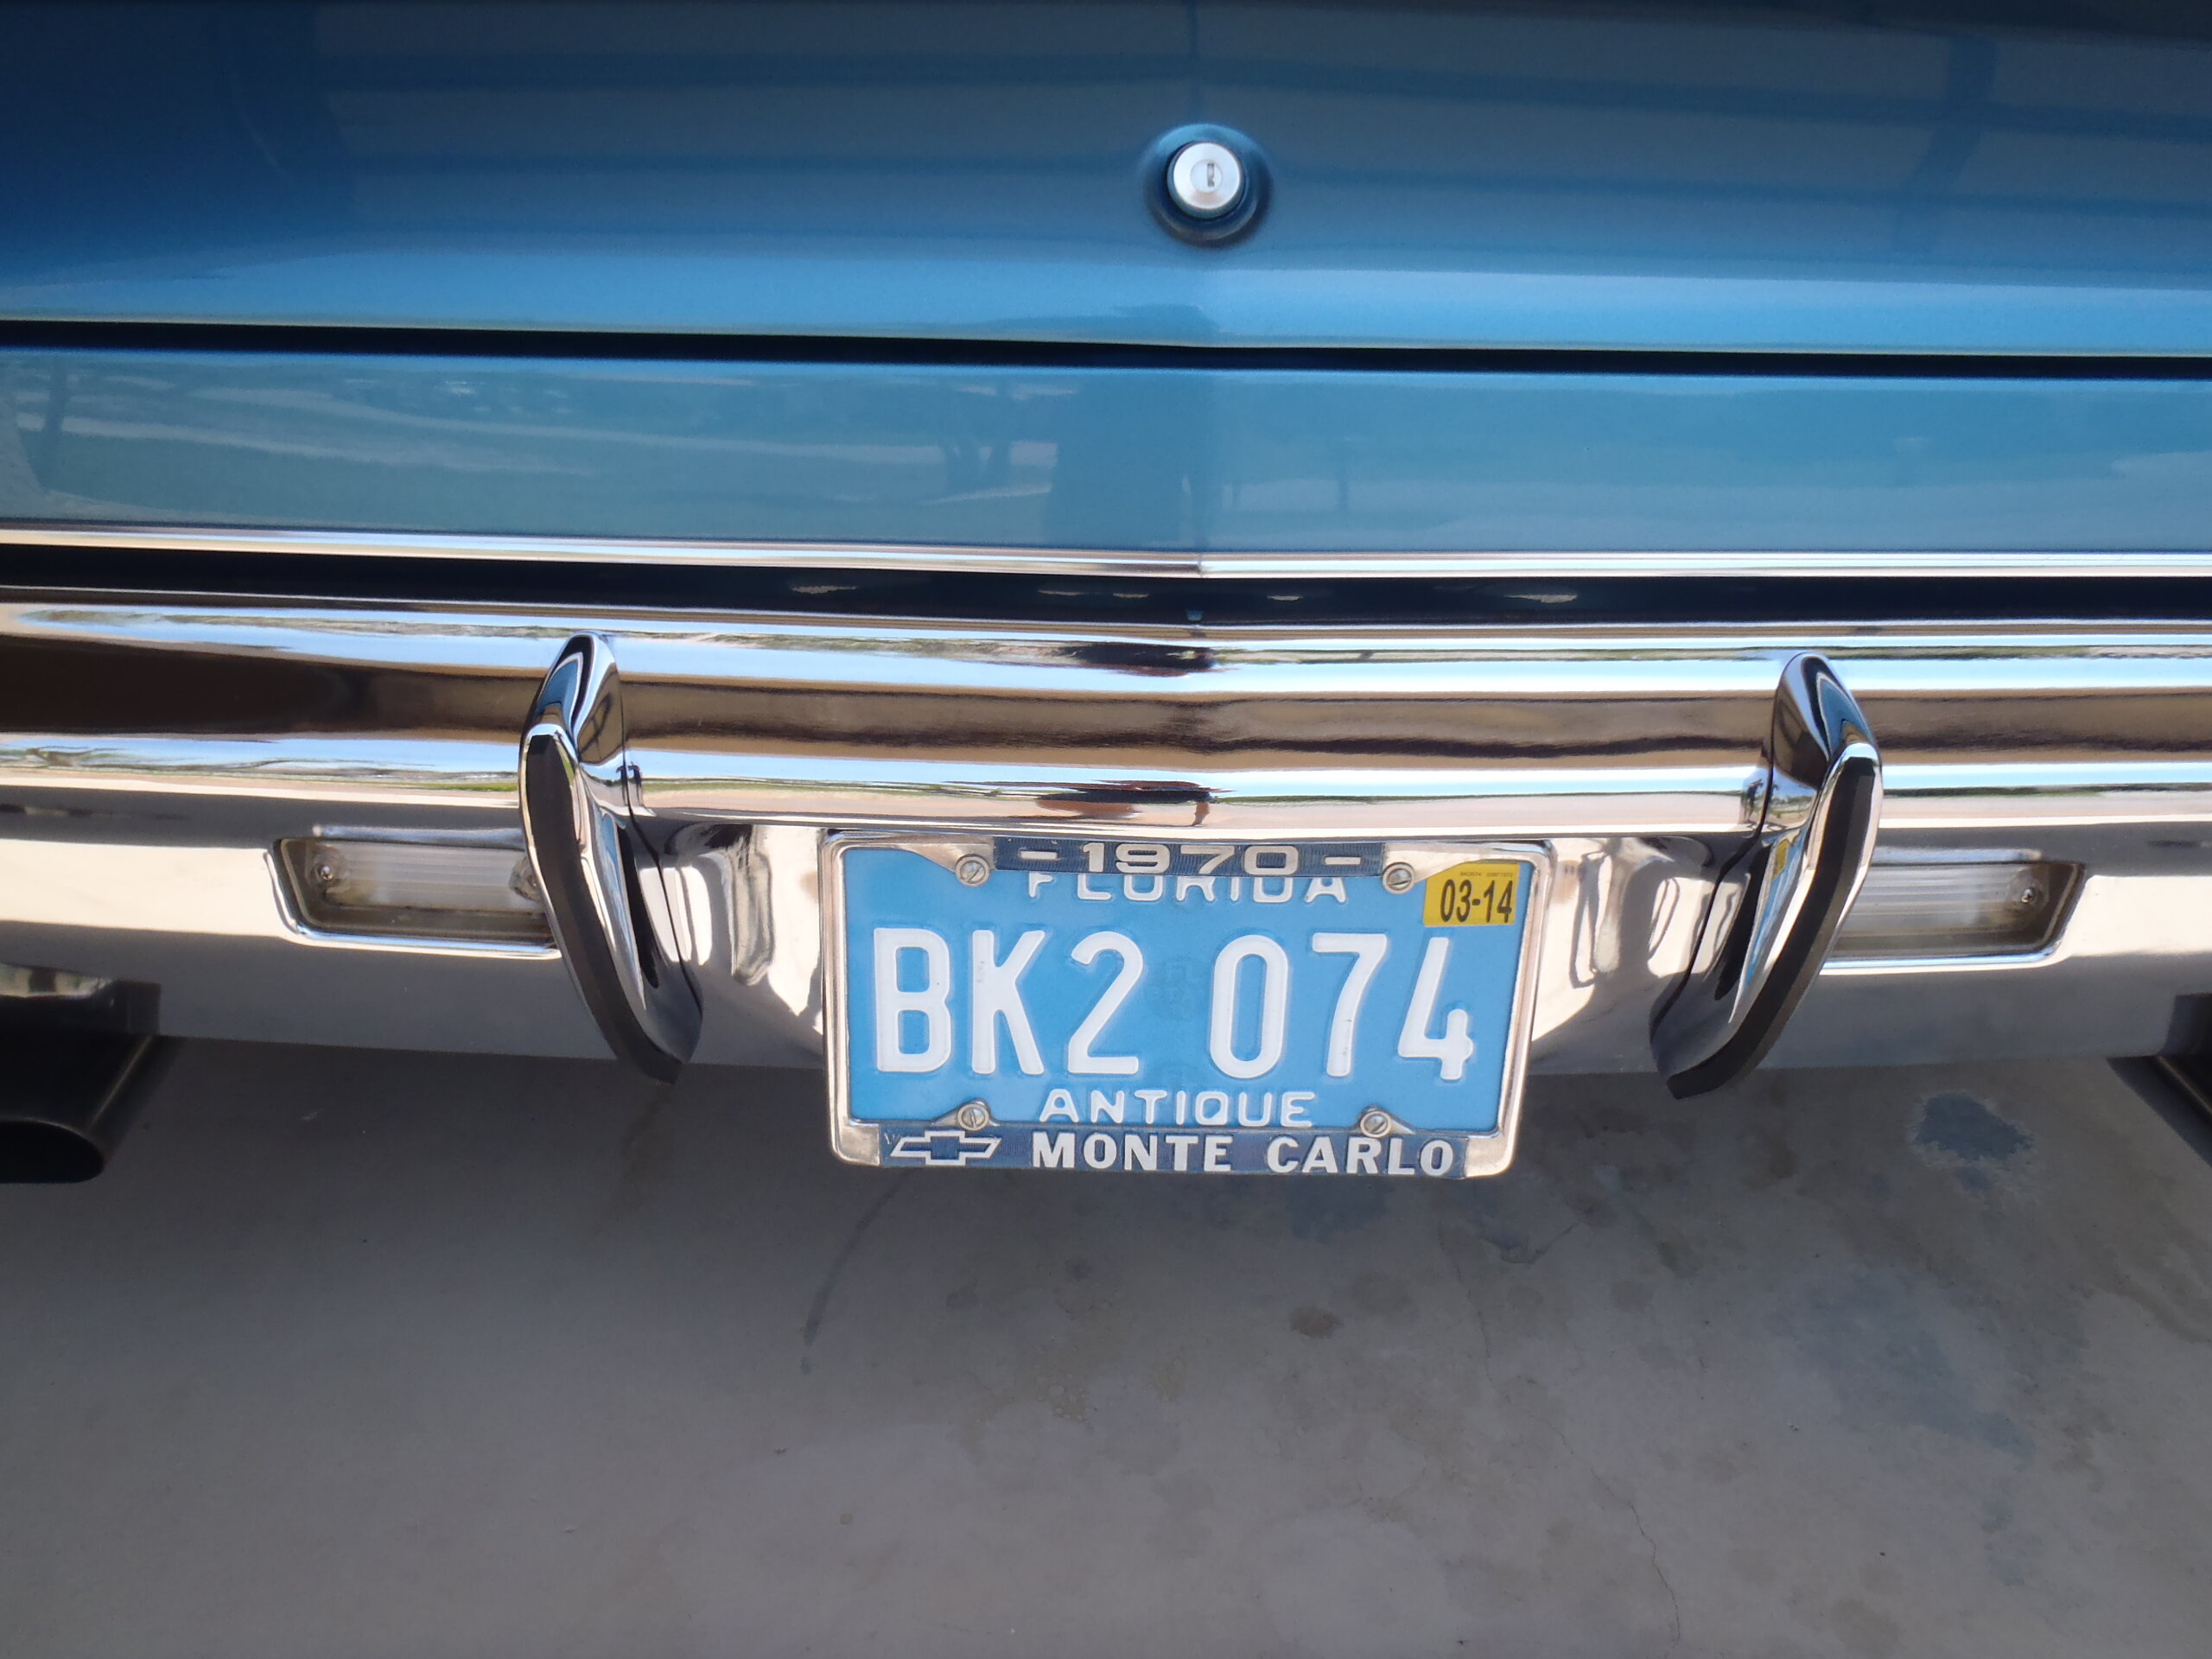
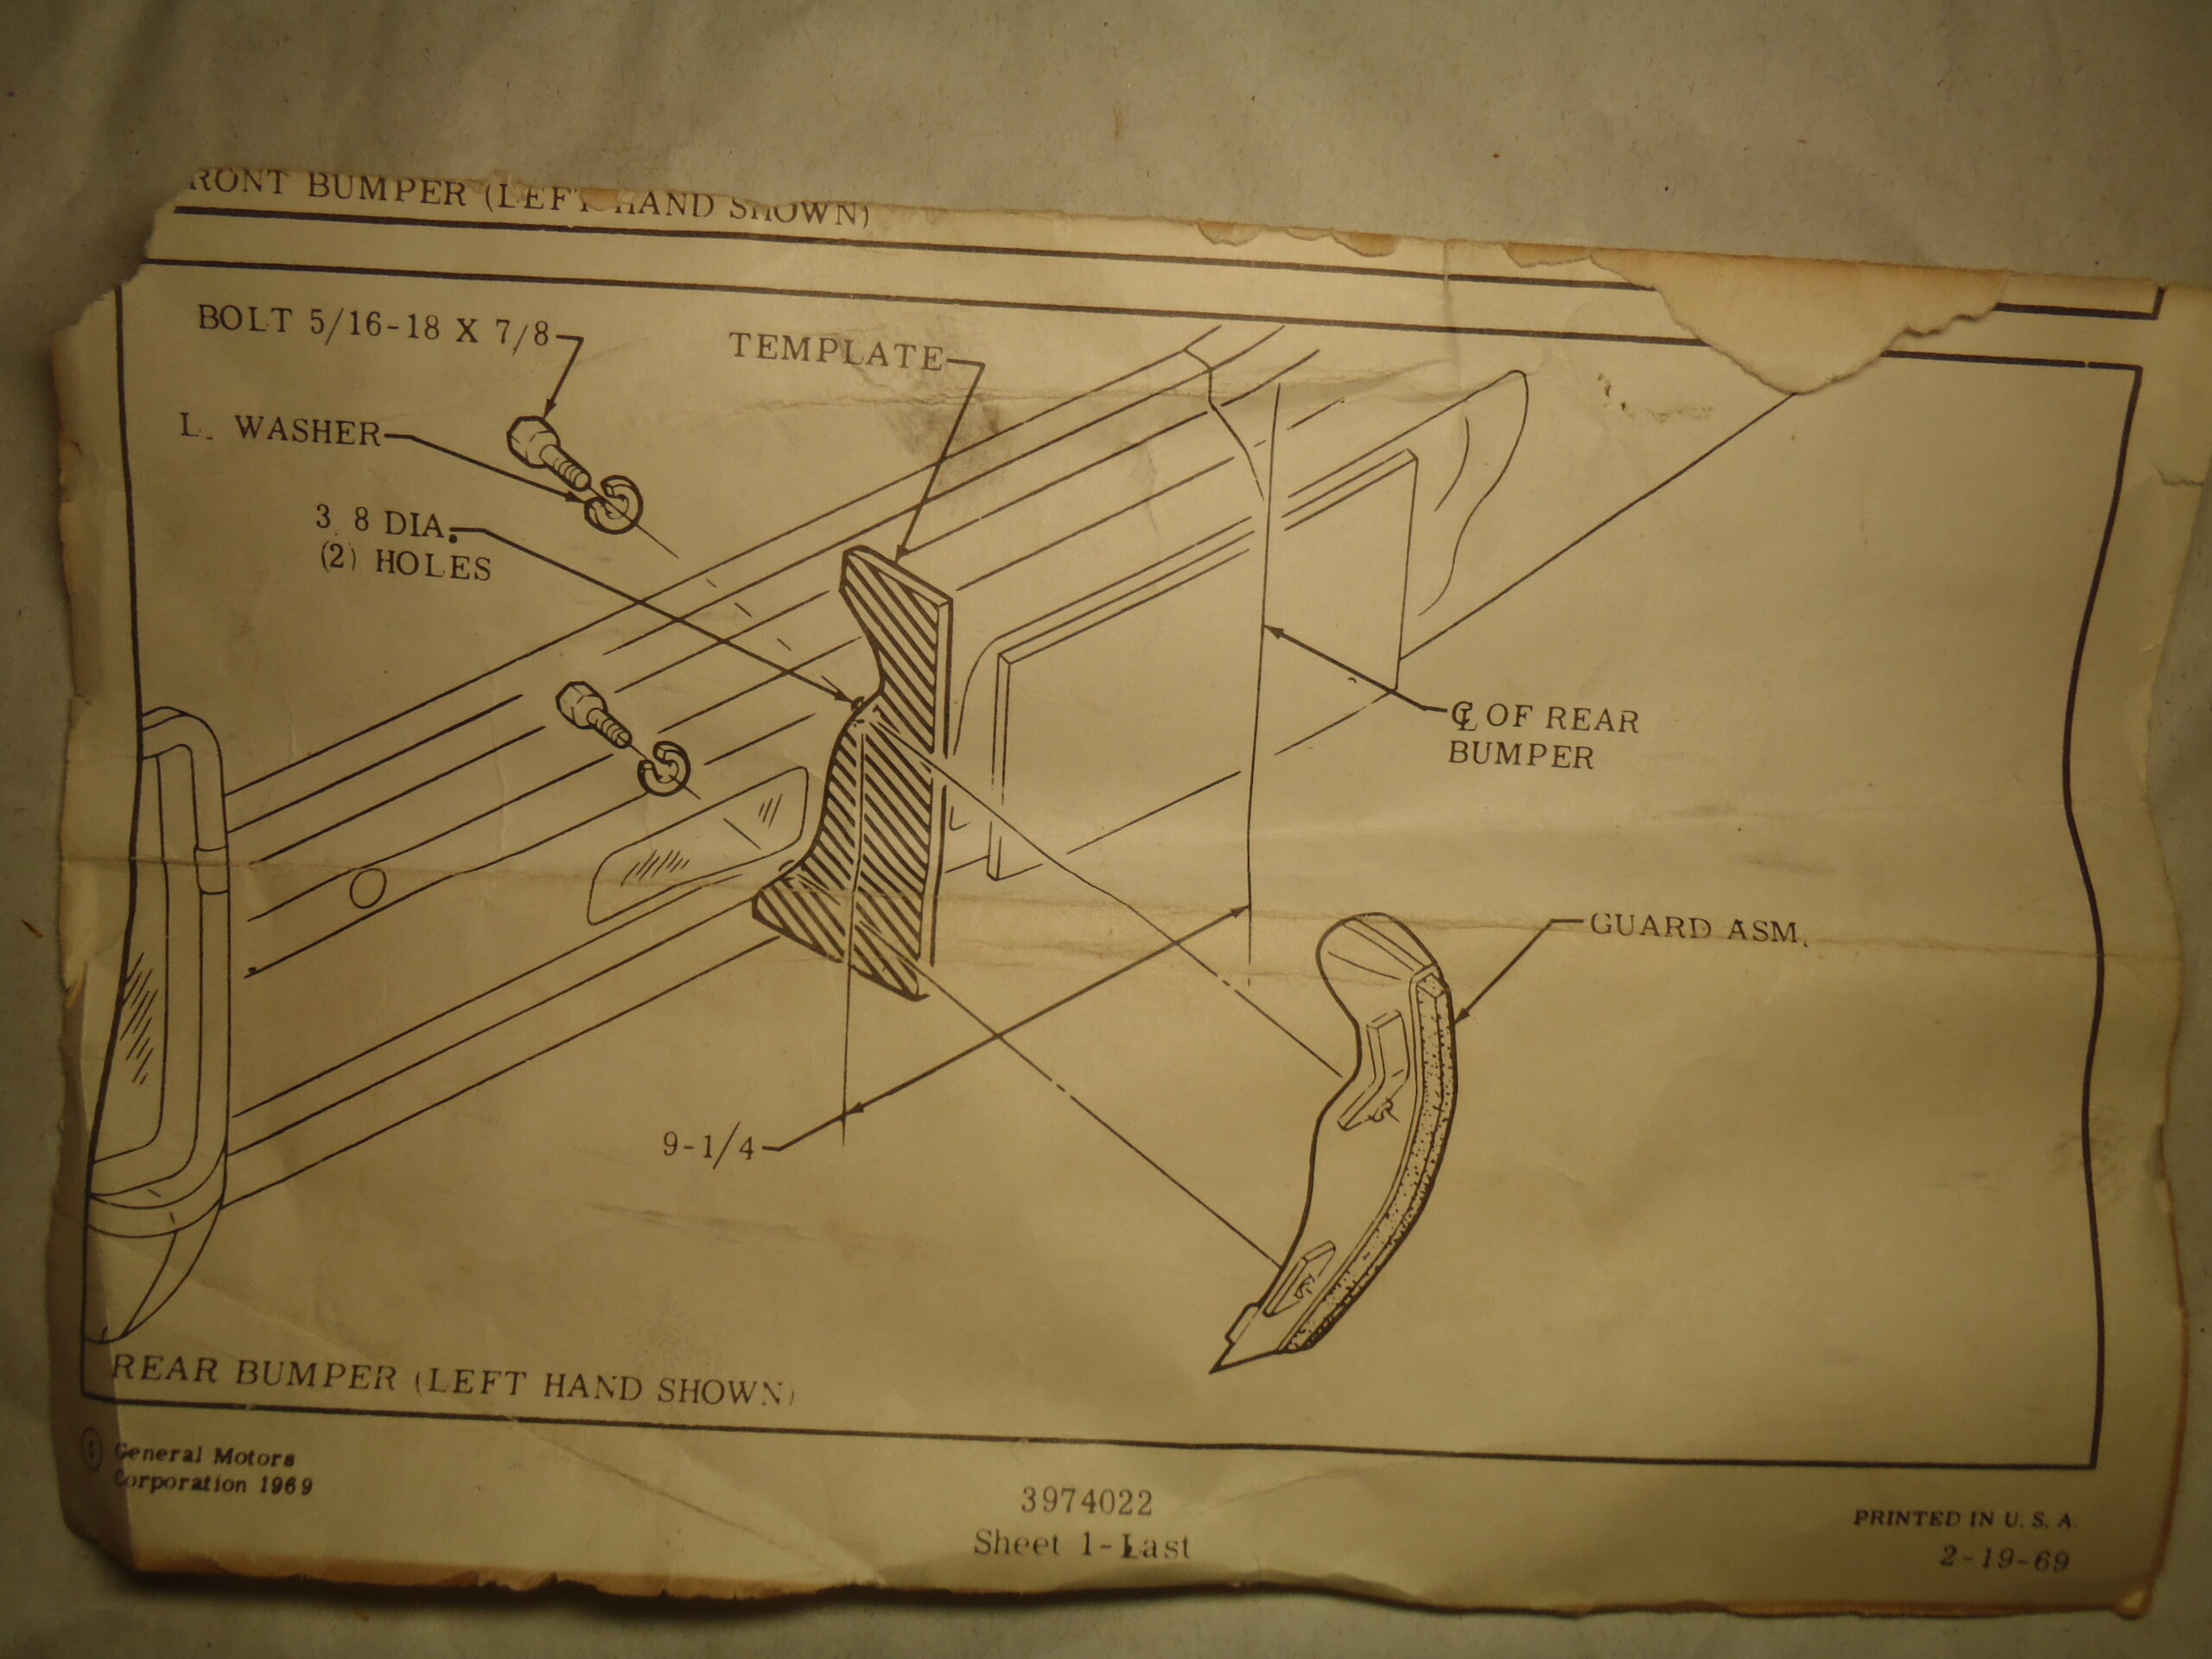
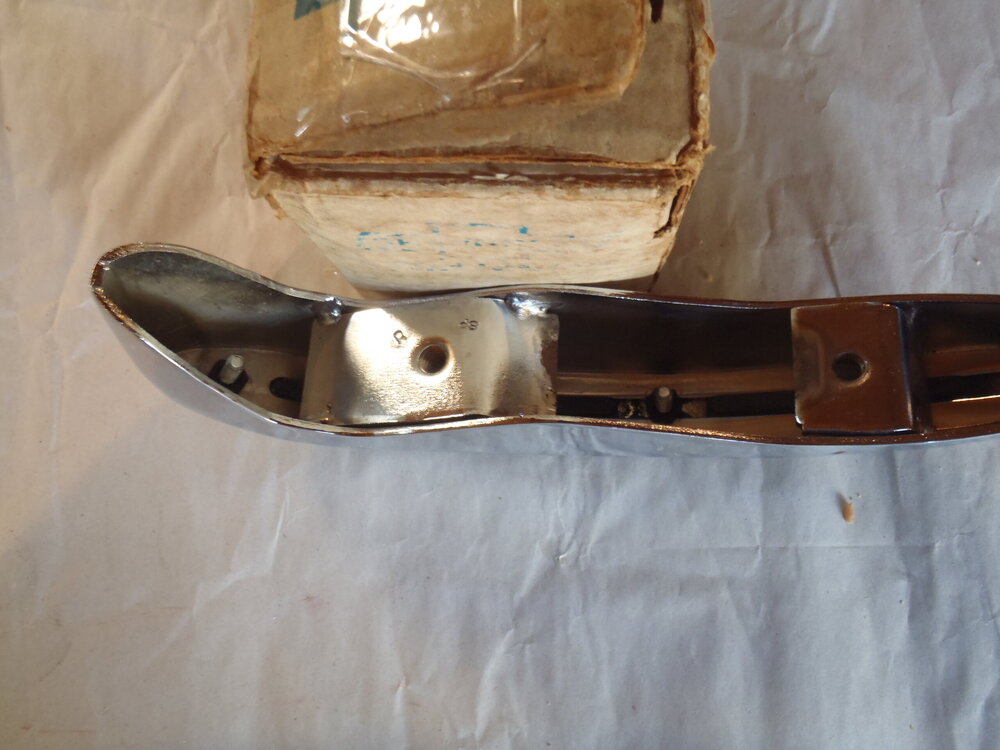
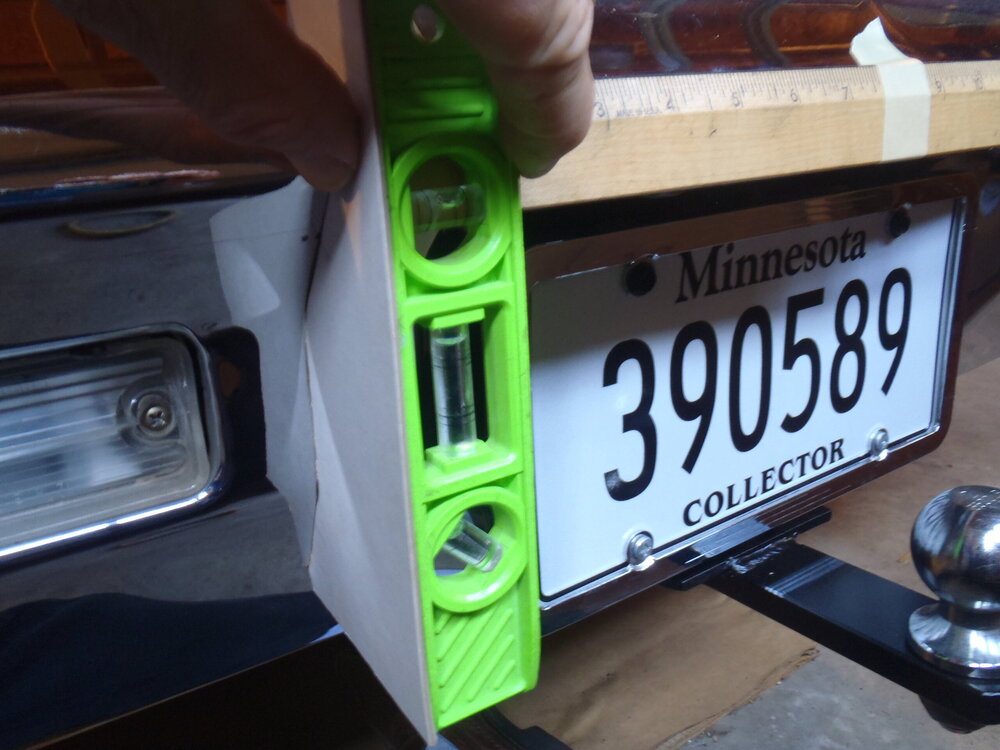
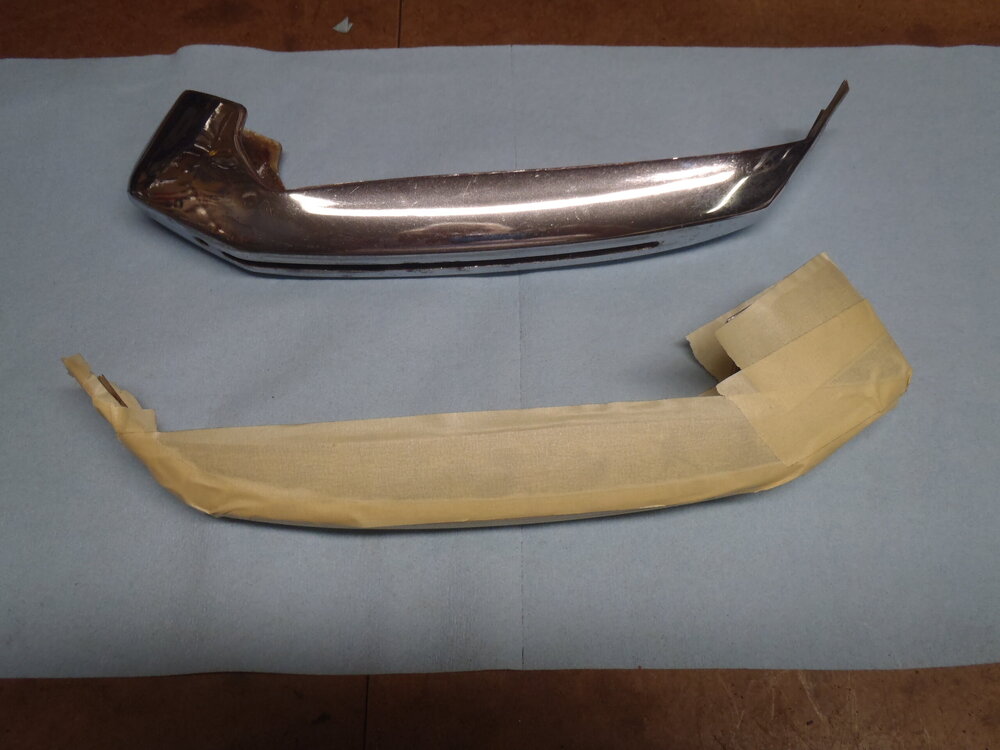
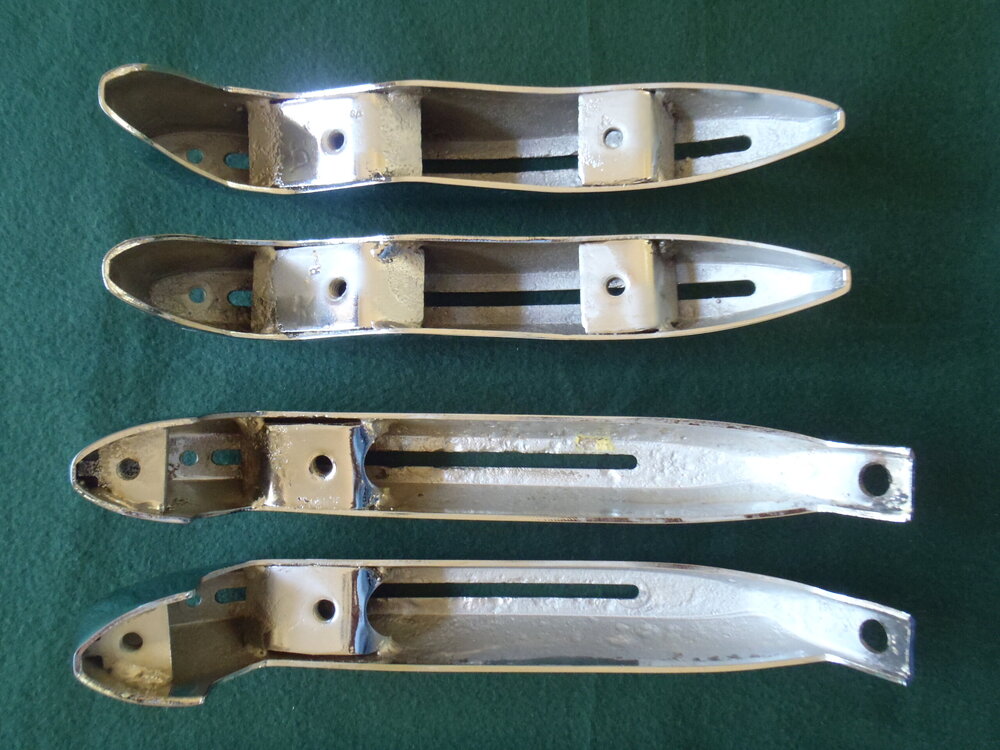
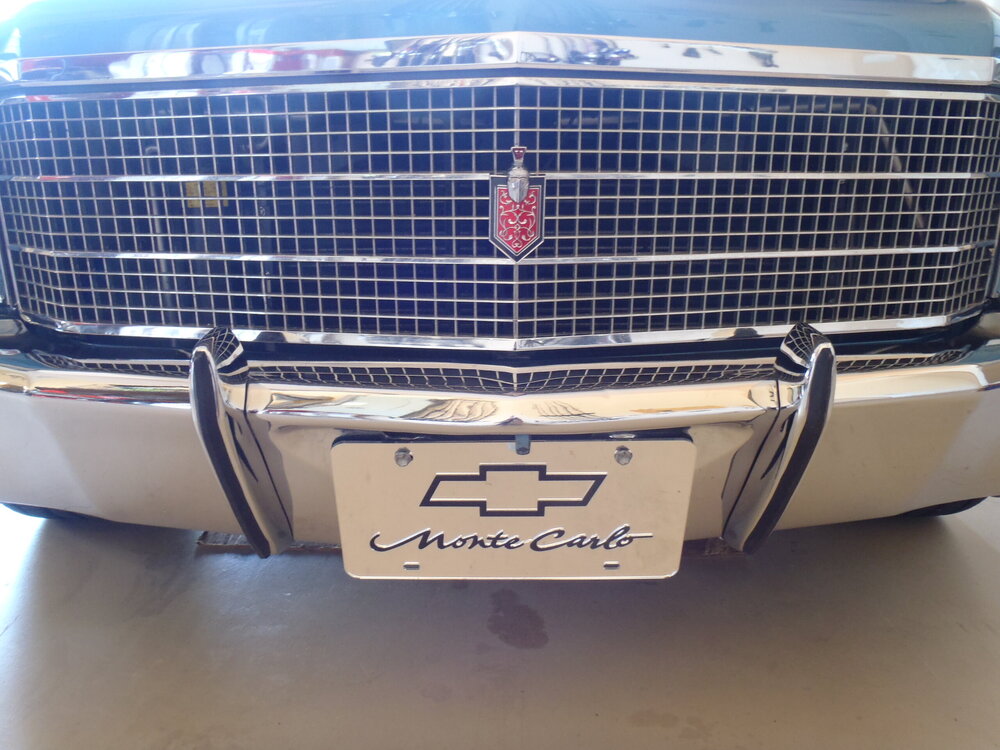
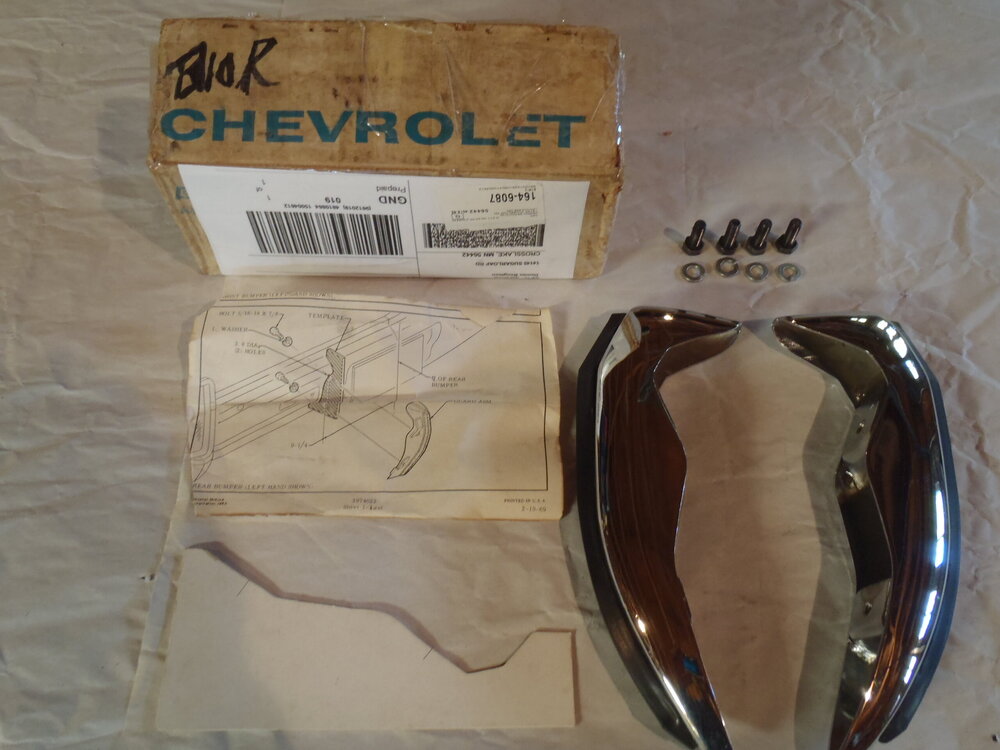
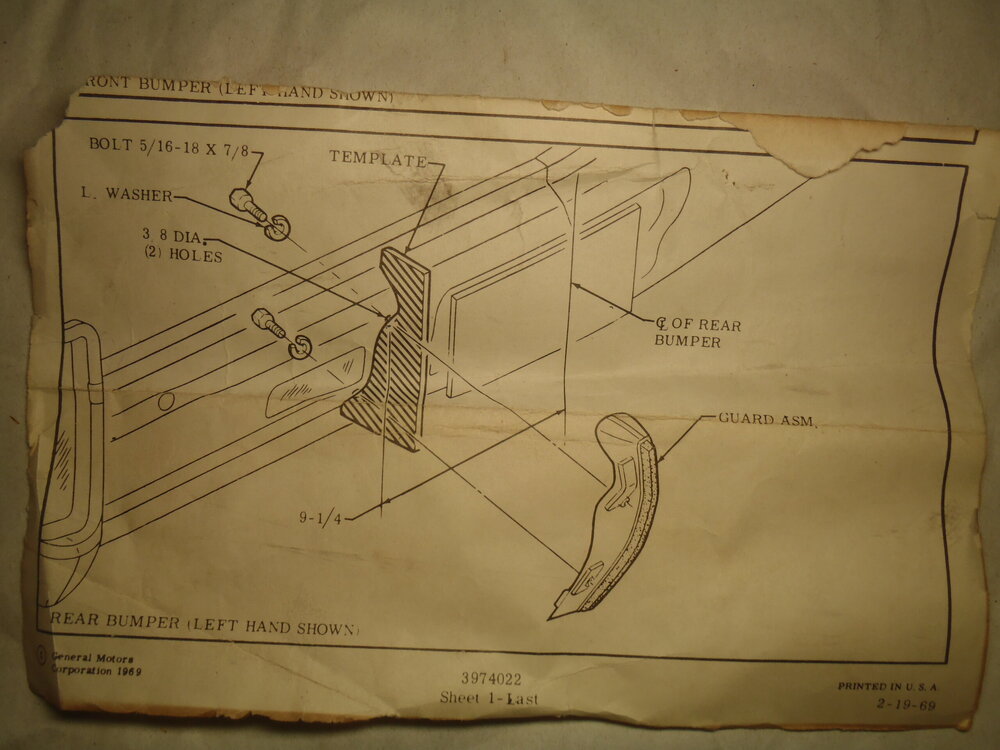
That may be the part number for the entire assembly or for the dealer installation kit for RPO V32. Page 893 of the 1970 Monte Carlo Assembly Manual lists all of the individual part numbers including the guard (3972331-2), cushion (3972335) and each of the attachment bolts, washers and nuts. It does not, however, ever show #3974022 anywhere on that page. Two things I neglected in my initial post: 1. The guards come as a pair with an "R" (Right Hand) and an "L" (Left Hand) stamped on the lower back side so be sure you have an actual pair as they are not interchangeable. 2. The template that came with the NOS pair was invaluable for precisely locating the holes (you must be certian the template is perfectly vertical when you mark the holes). It is easy to make a template by simply tracing the bumper-matching edge and bolt hole positions of one of the guards on stiff cardboard and then carefully cutting it out. I made a single template with front guards on one side and rear guards on the other. Worked fine.


-
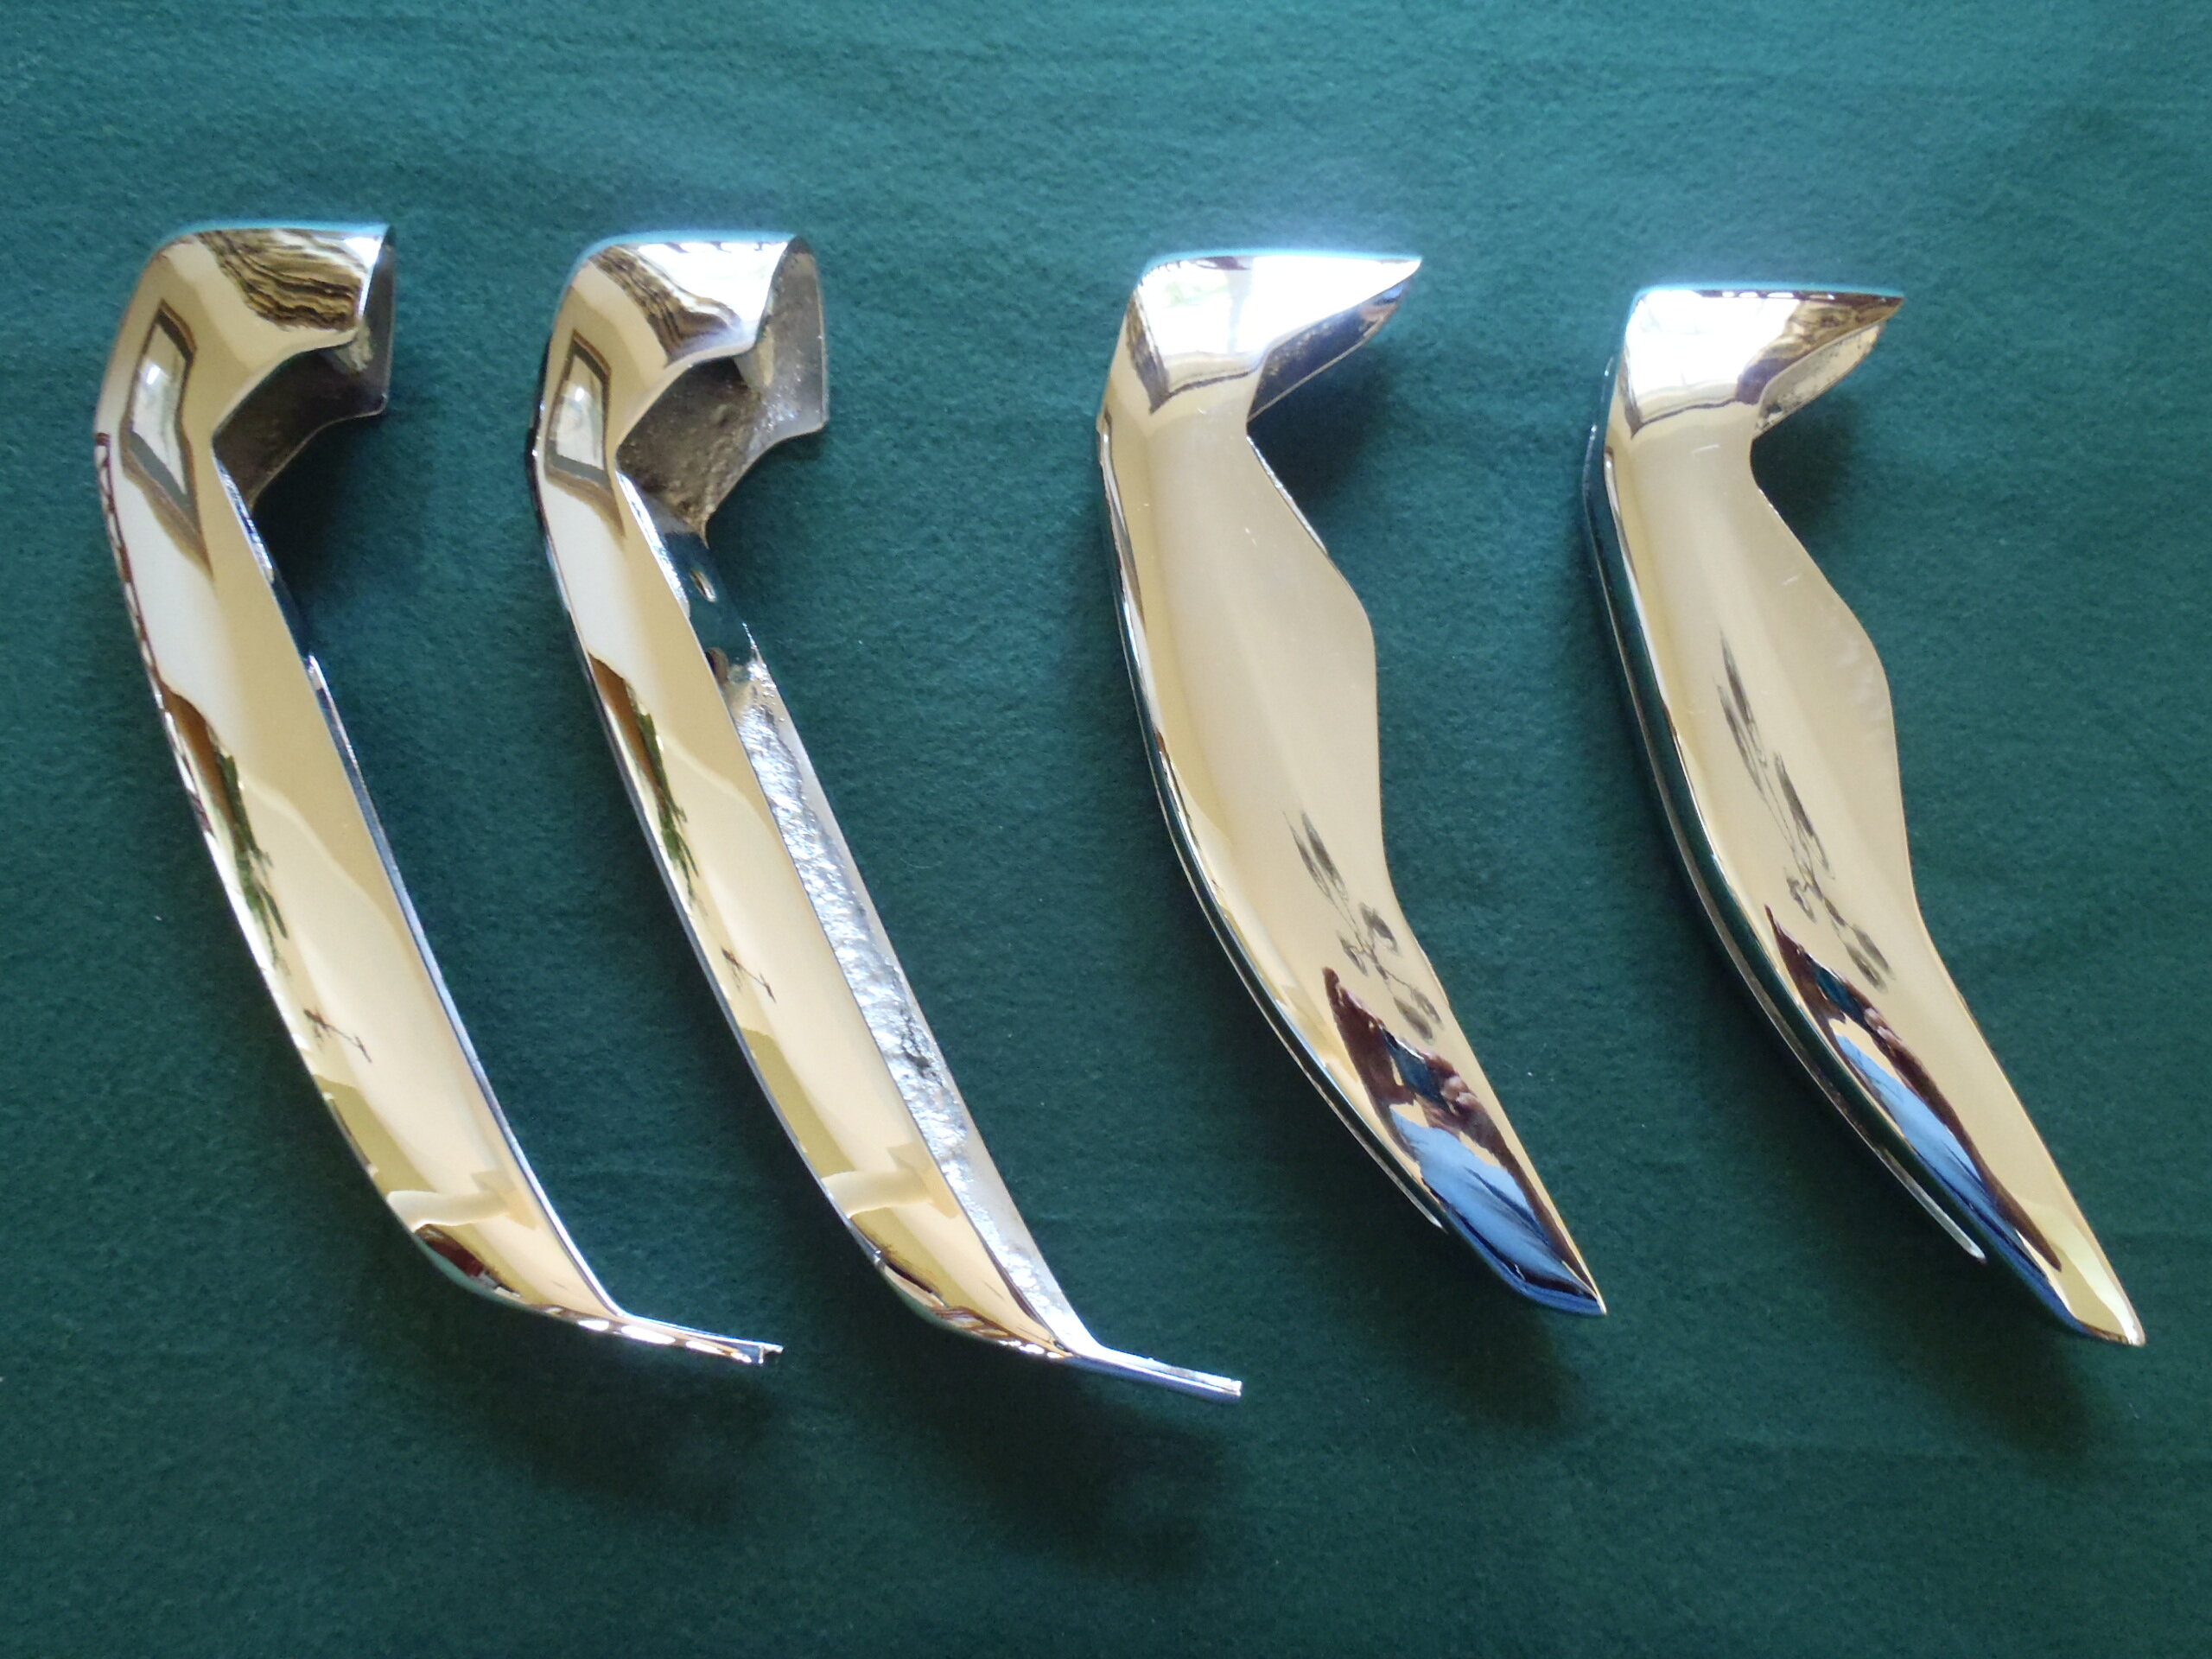
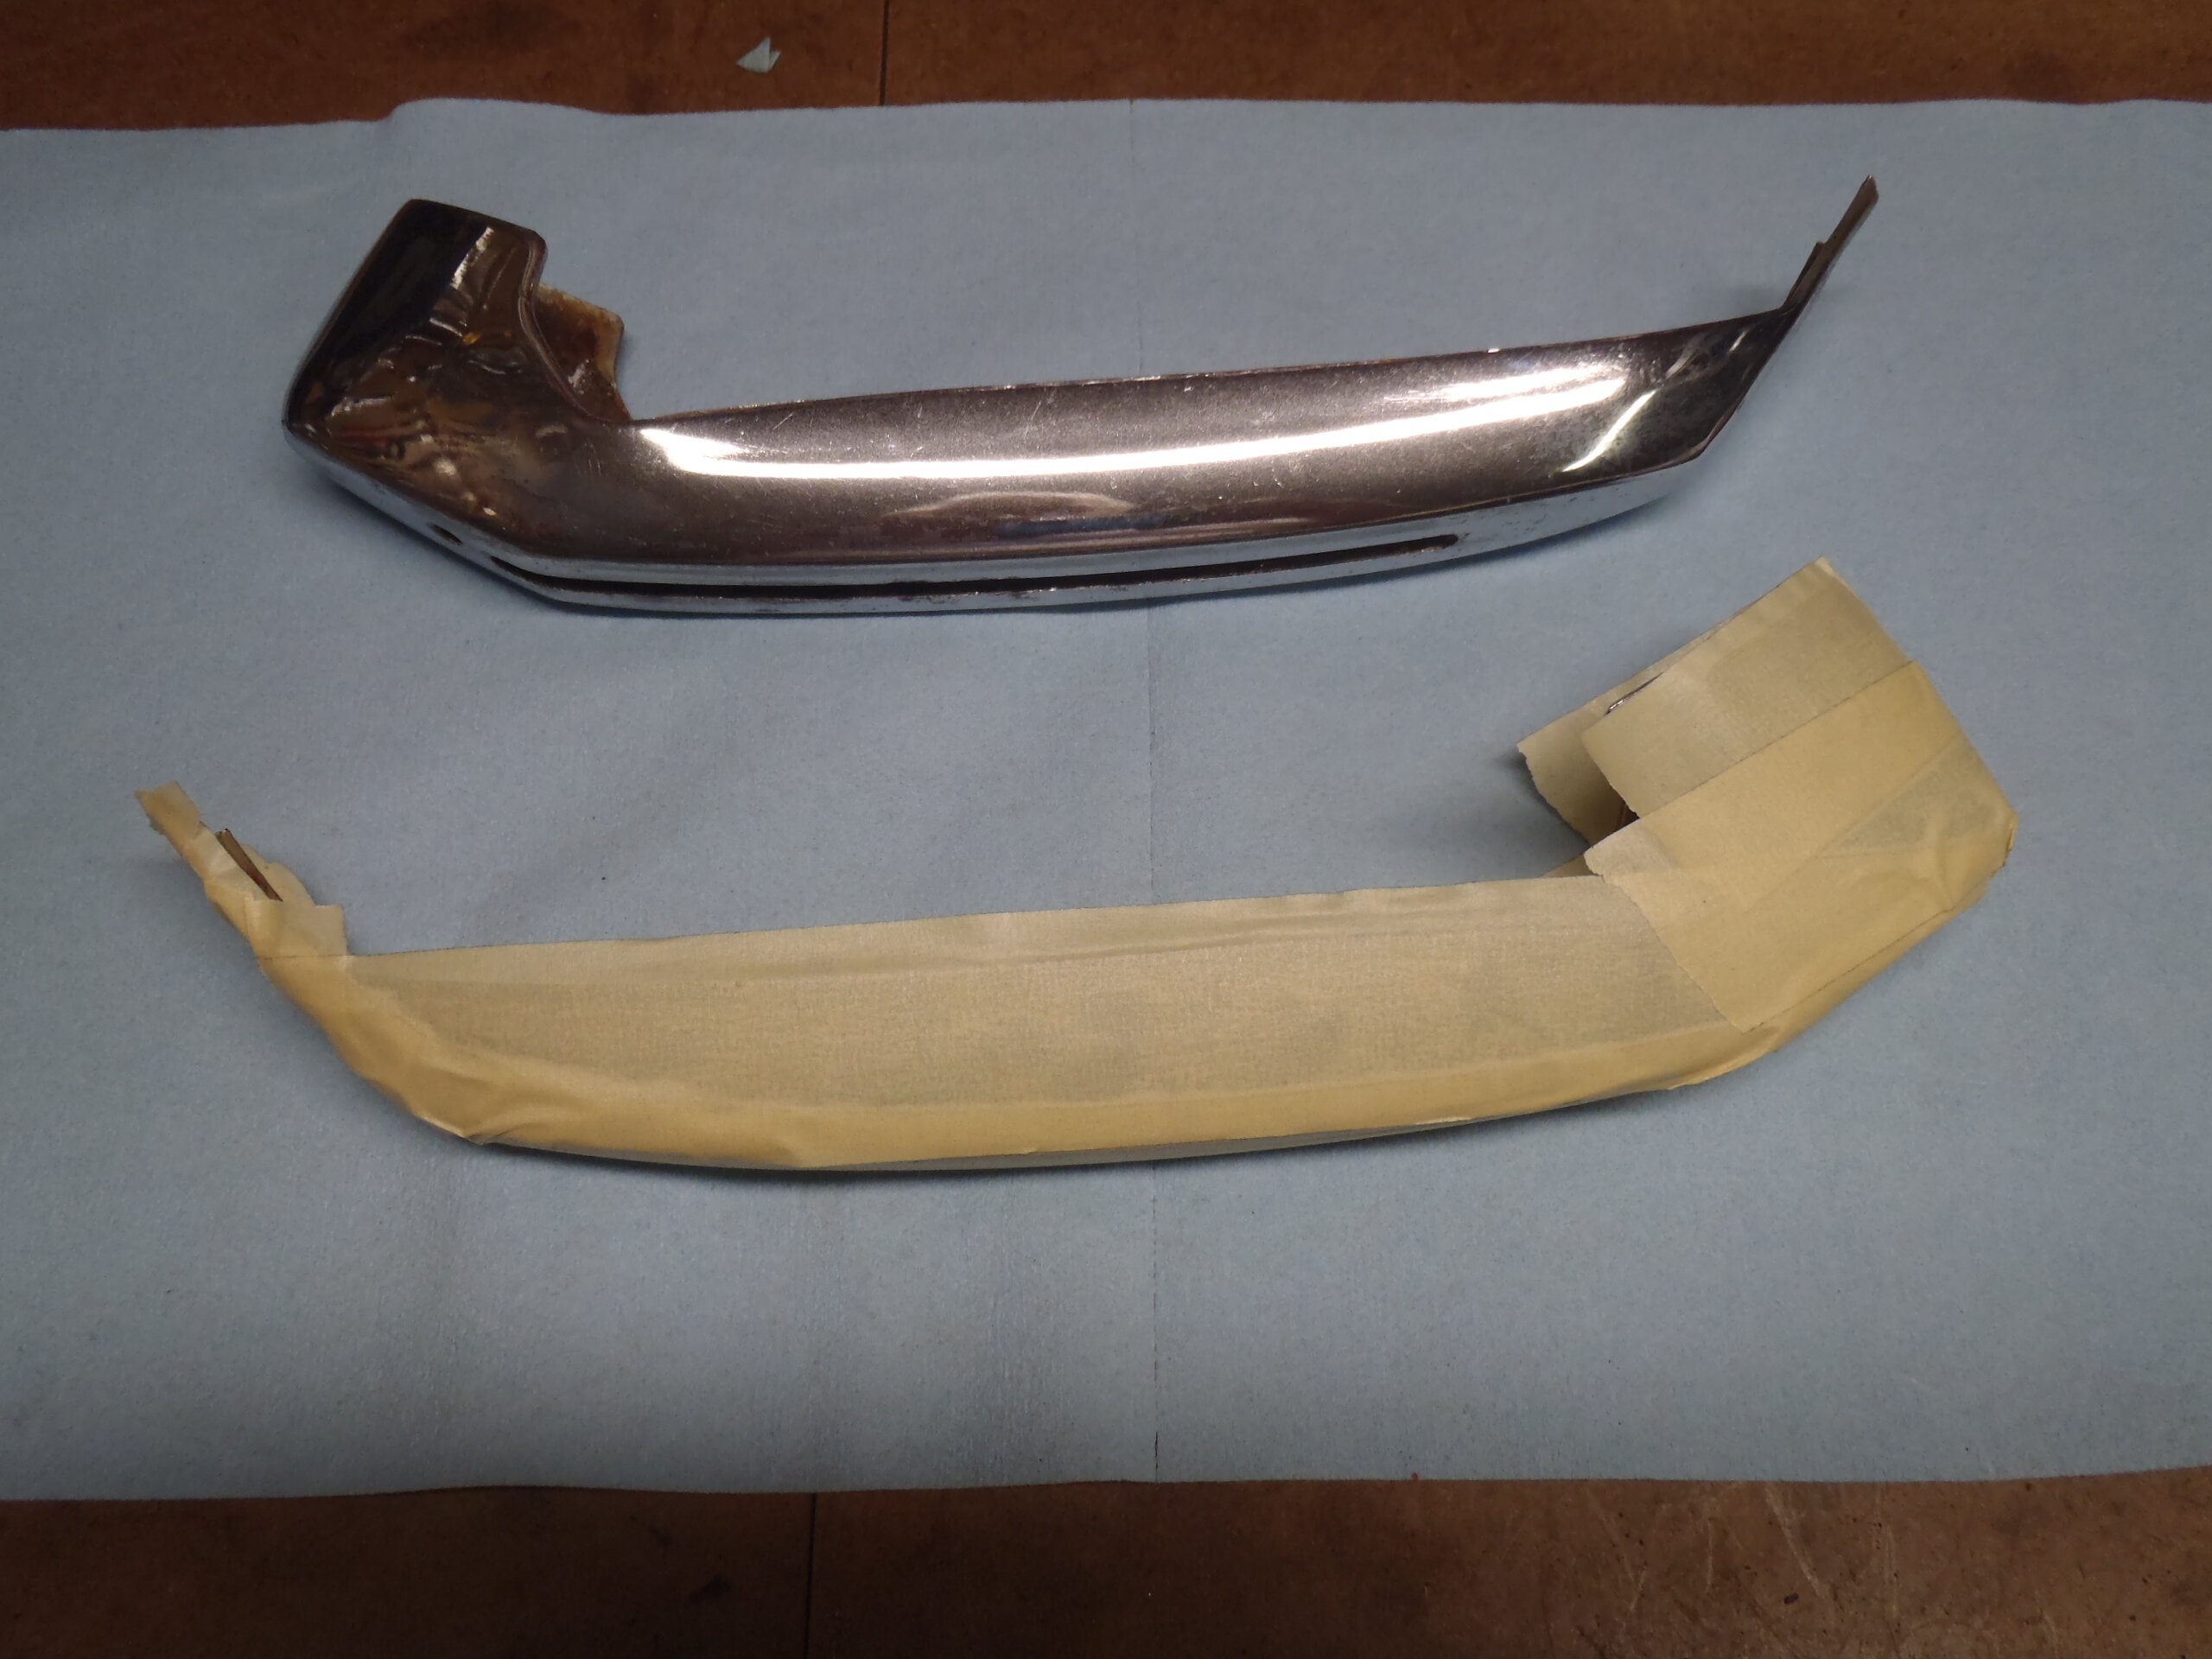
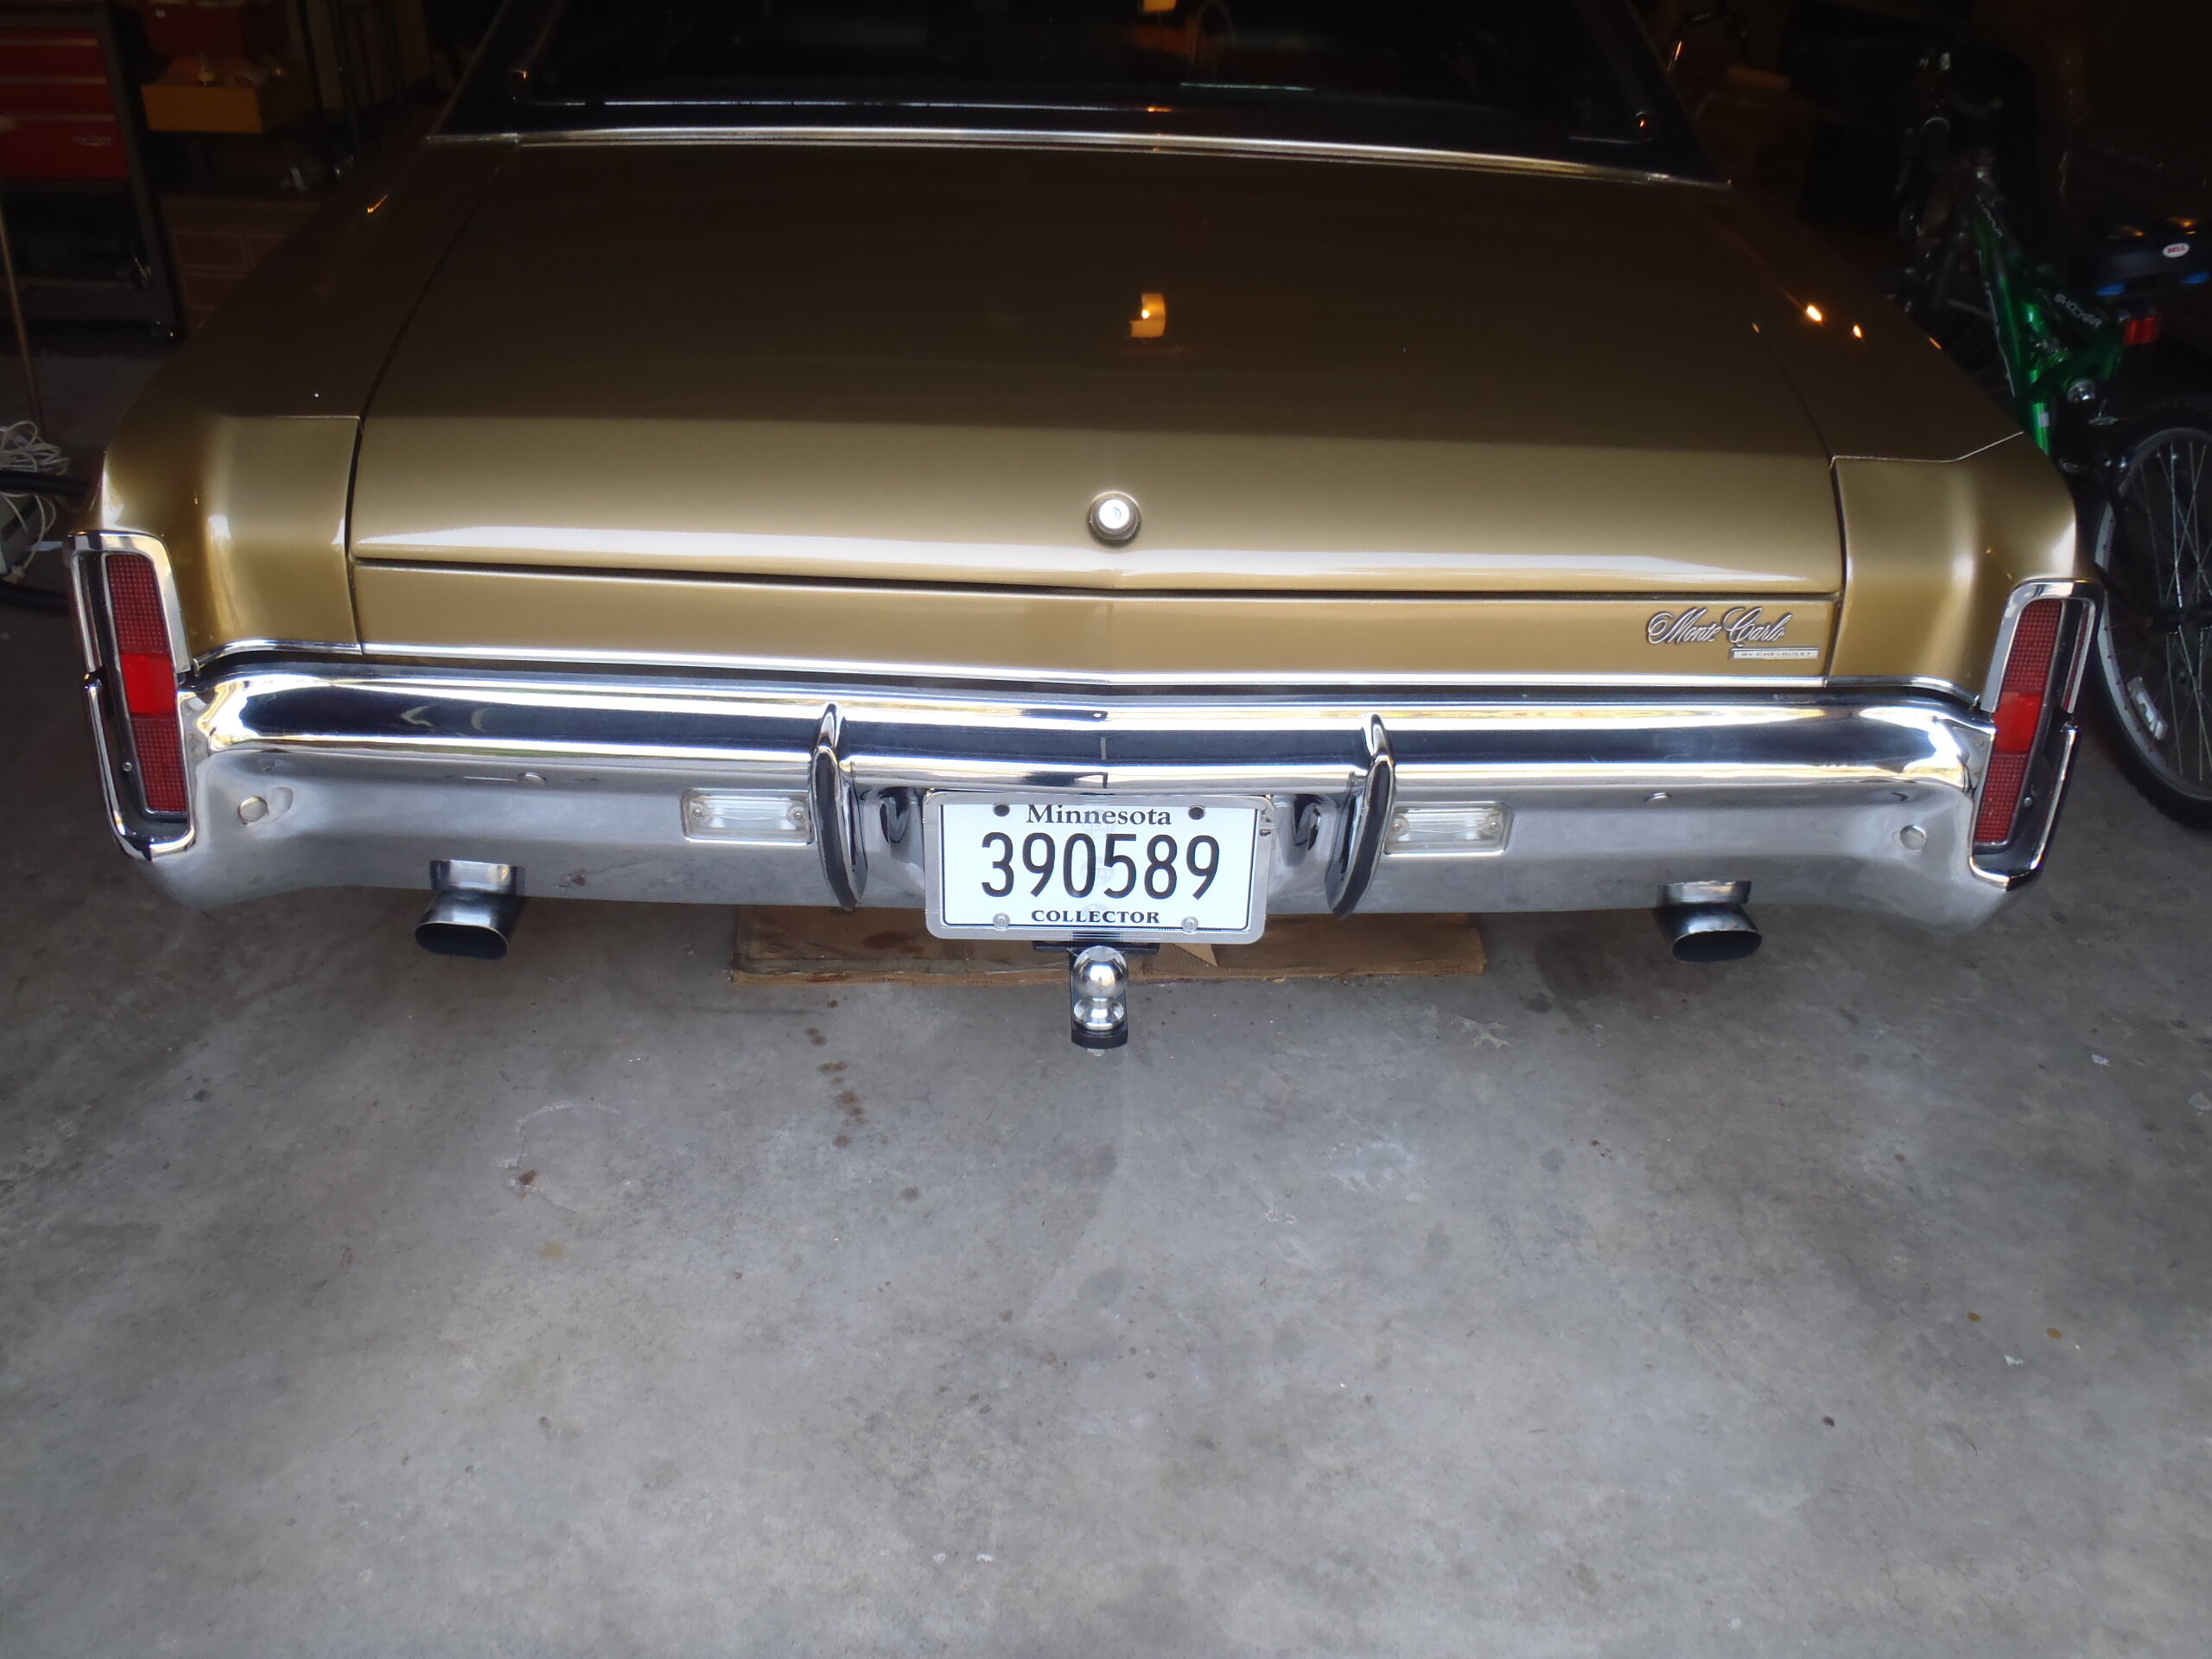
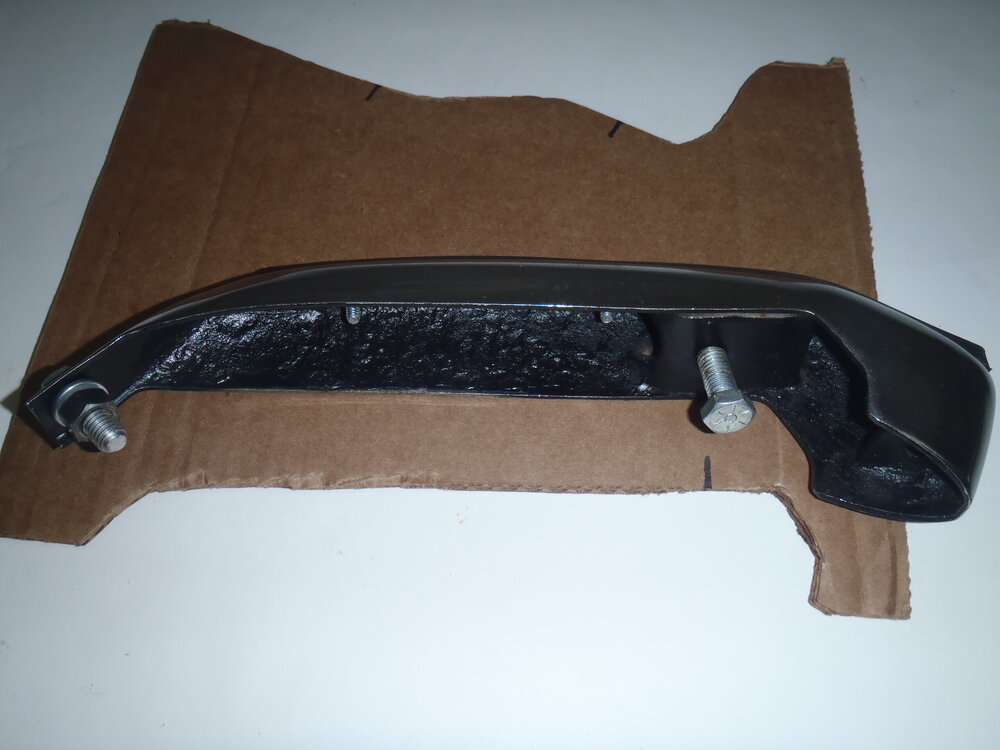
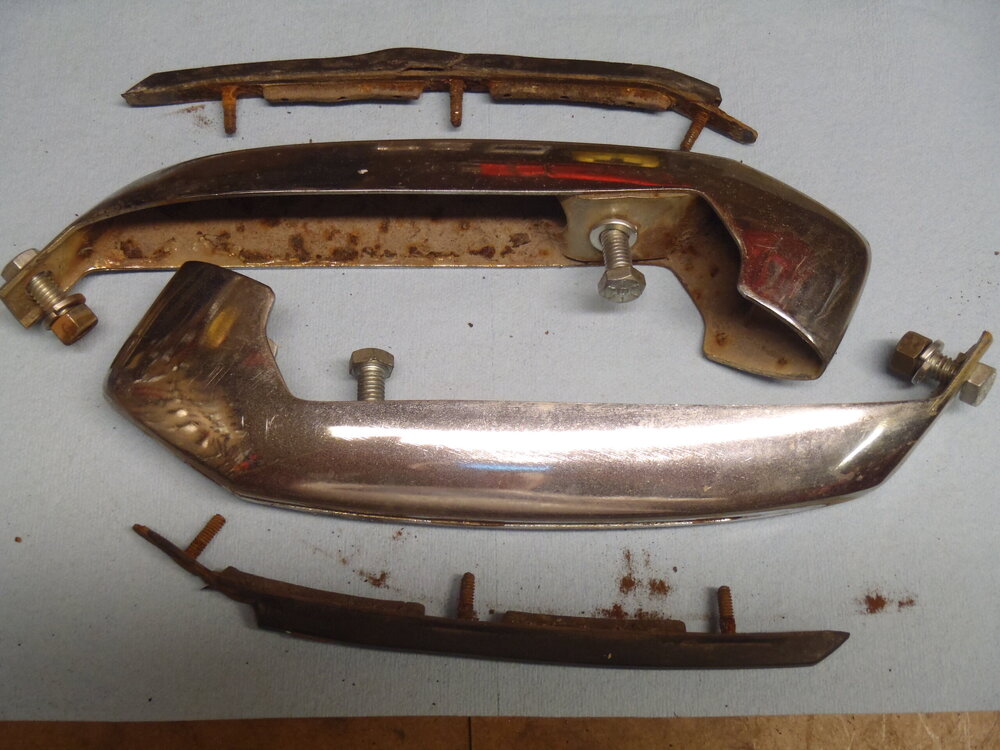
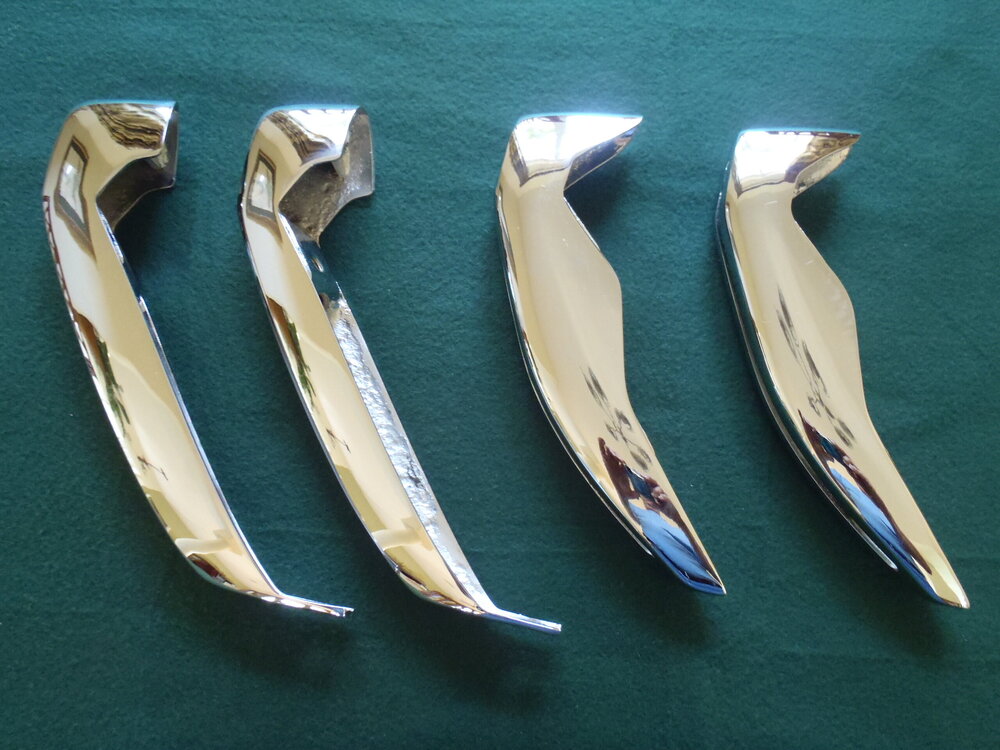
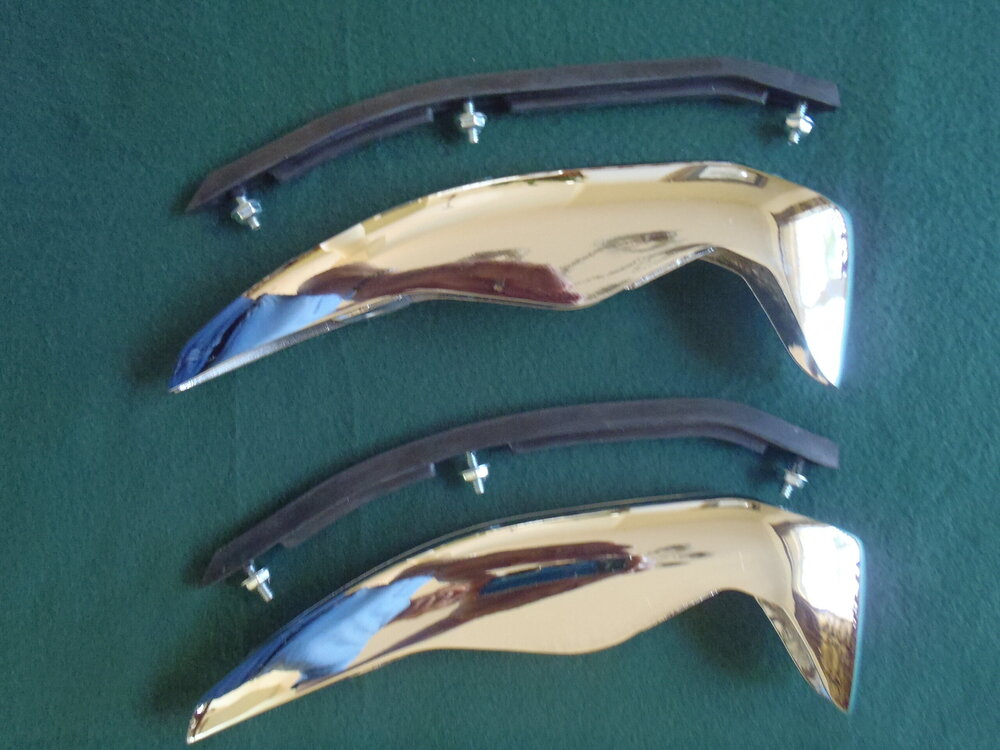
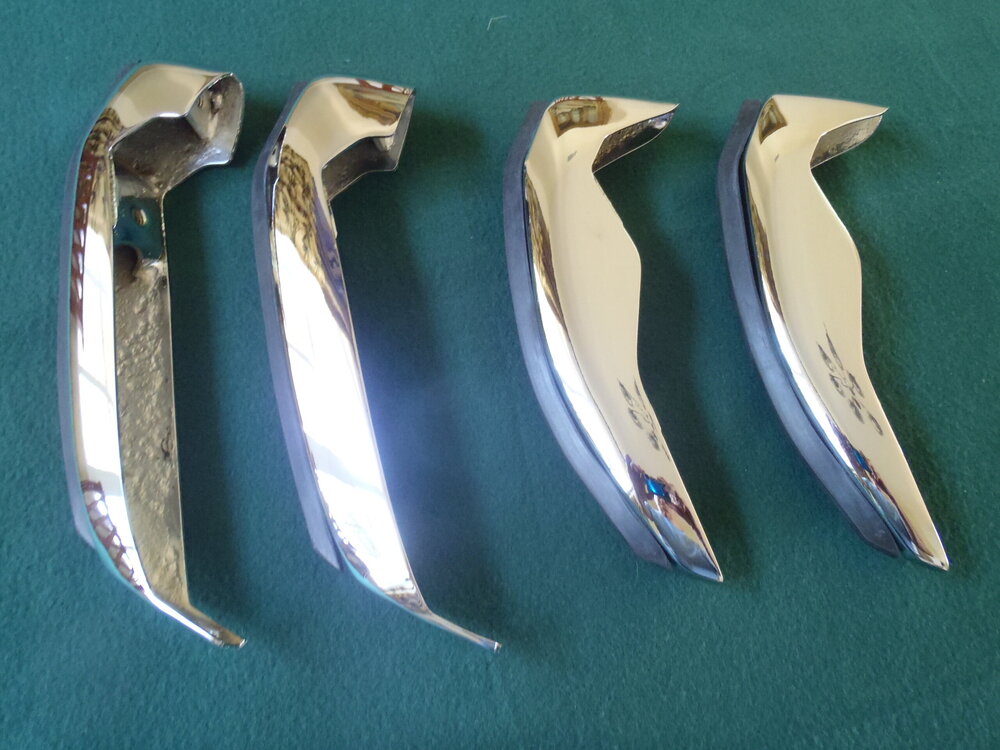
Good for you! I think first gen Montes look partially naked without bumper guards. I have managed to find and install three pairs (two rear; one front) on my two Montes. One rear pair was NOS in the original box but those don't show up very often. I got another complete set from a member here that was pretty rough but I planned to completely refurbish them with rechroming and new rubber strips anyway. I stripped the old rubber and attachment bolts off all four pieces and sent them to Tri-City Plating in Elizabethton, TN for rechroming. After they returned them, I cleaned and painted the insides with Bumper Chrome spray paint, installed new rubber strips from the Parts Place and installed them on my '70. It cost $75 apiece for the replating and around $40 a set for the new rubber strips but those prices have probably gone up by now. I have some detailed installation photos for both front and rear guards, if you are interested. Good luck.


-
It'll be a hot day in February before I order from OPGI again! Oh, wait .... that might be tomorrow! 😄
-
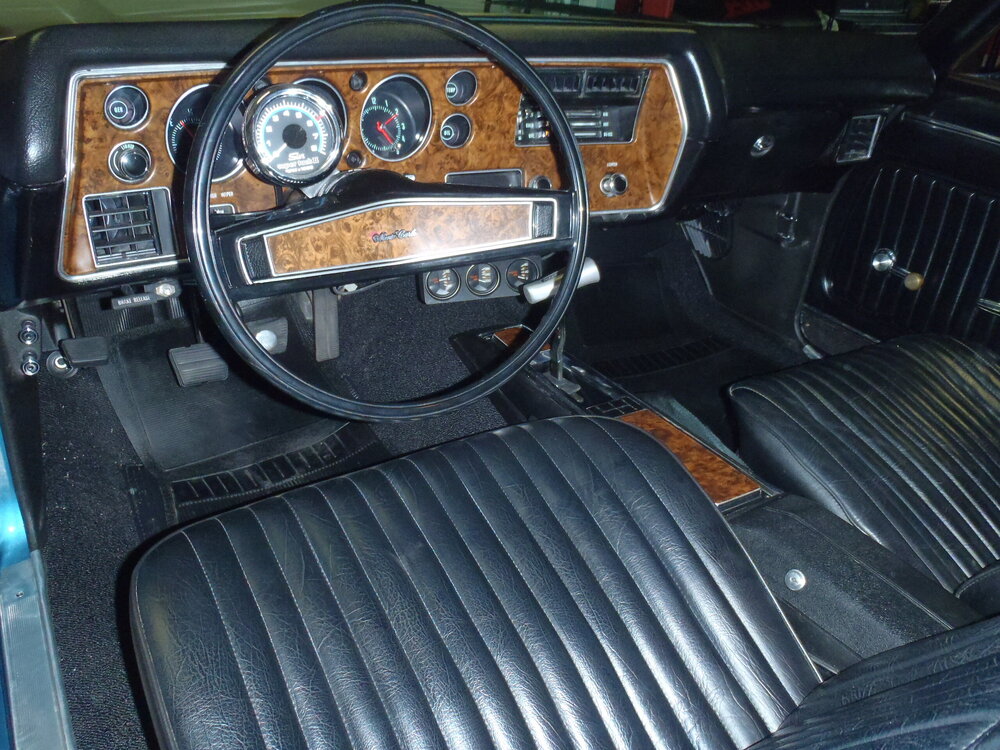
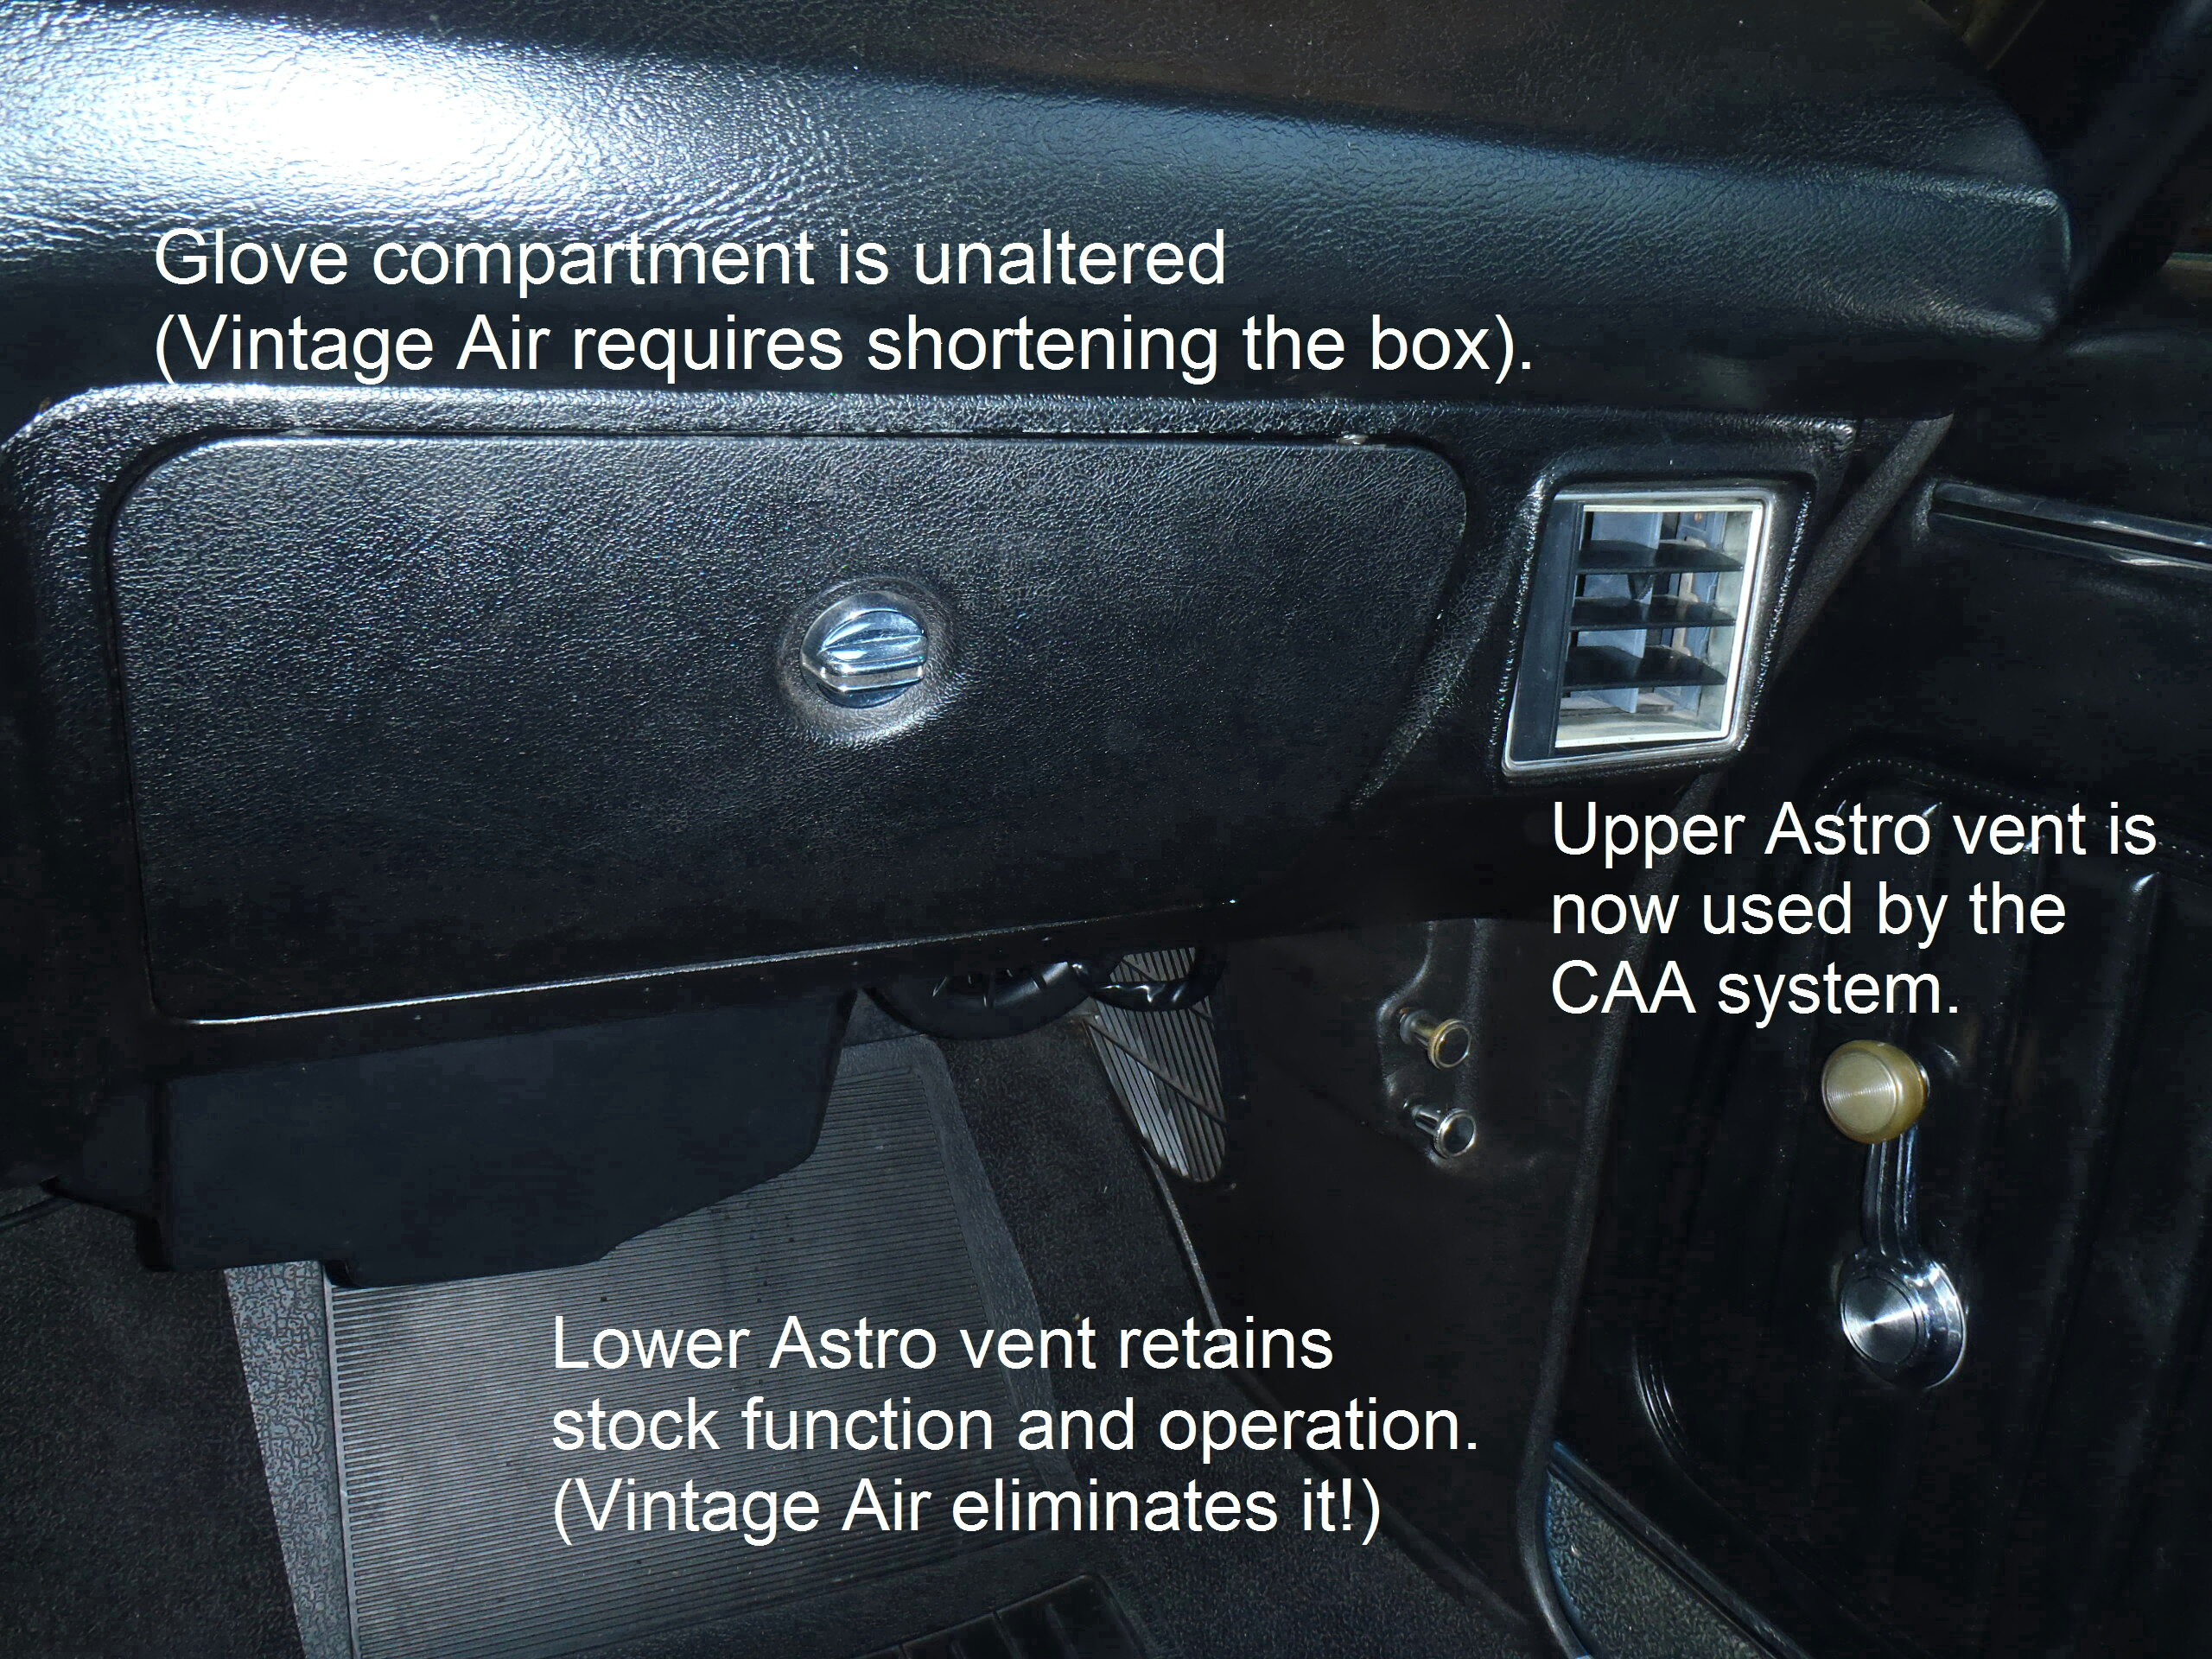
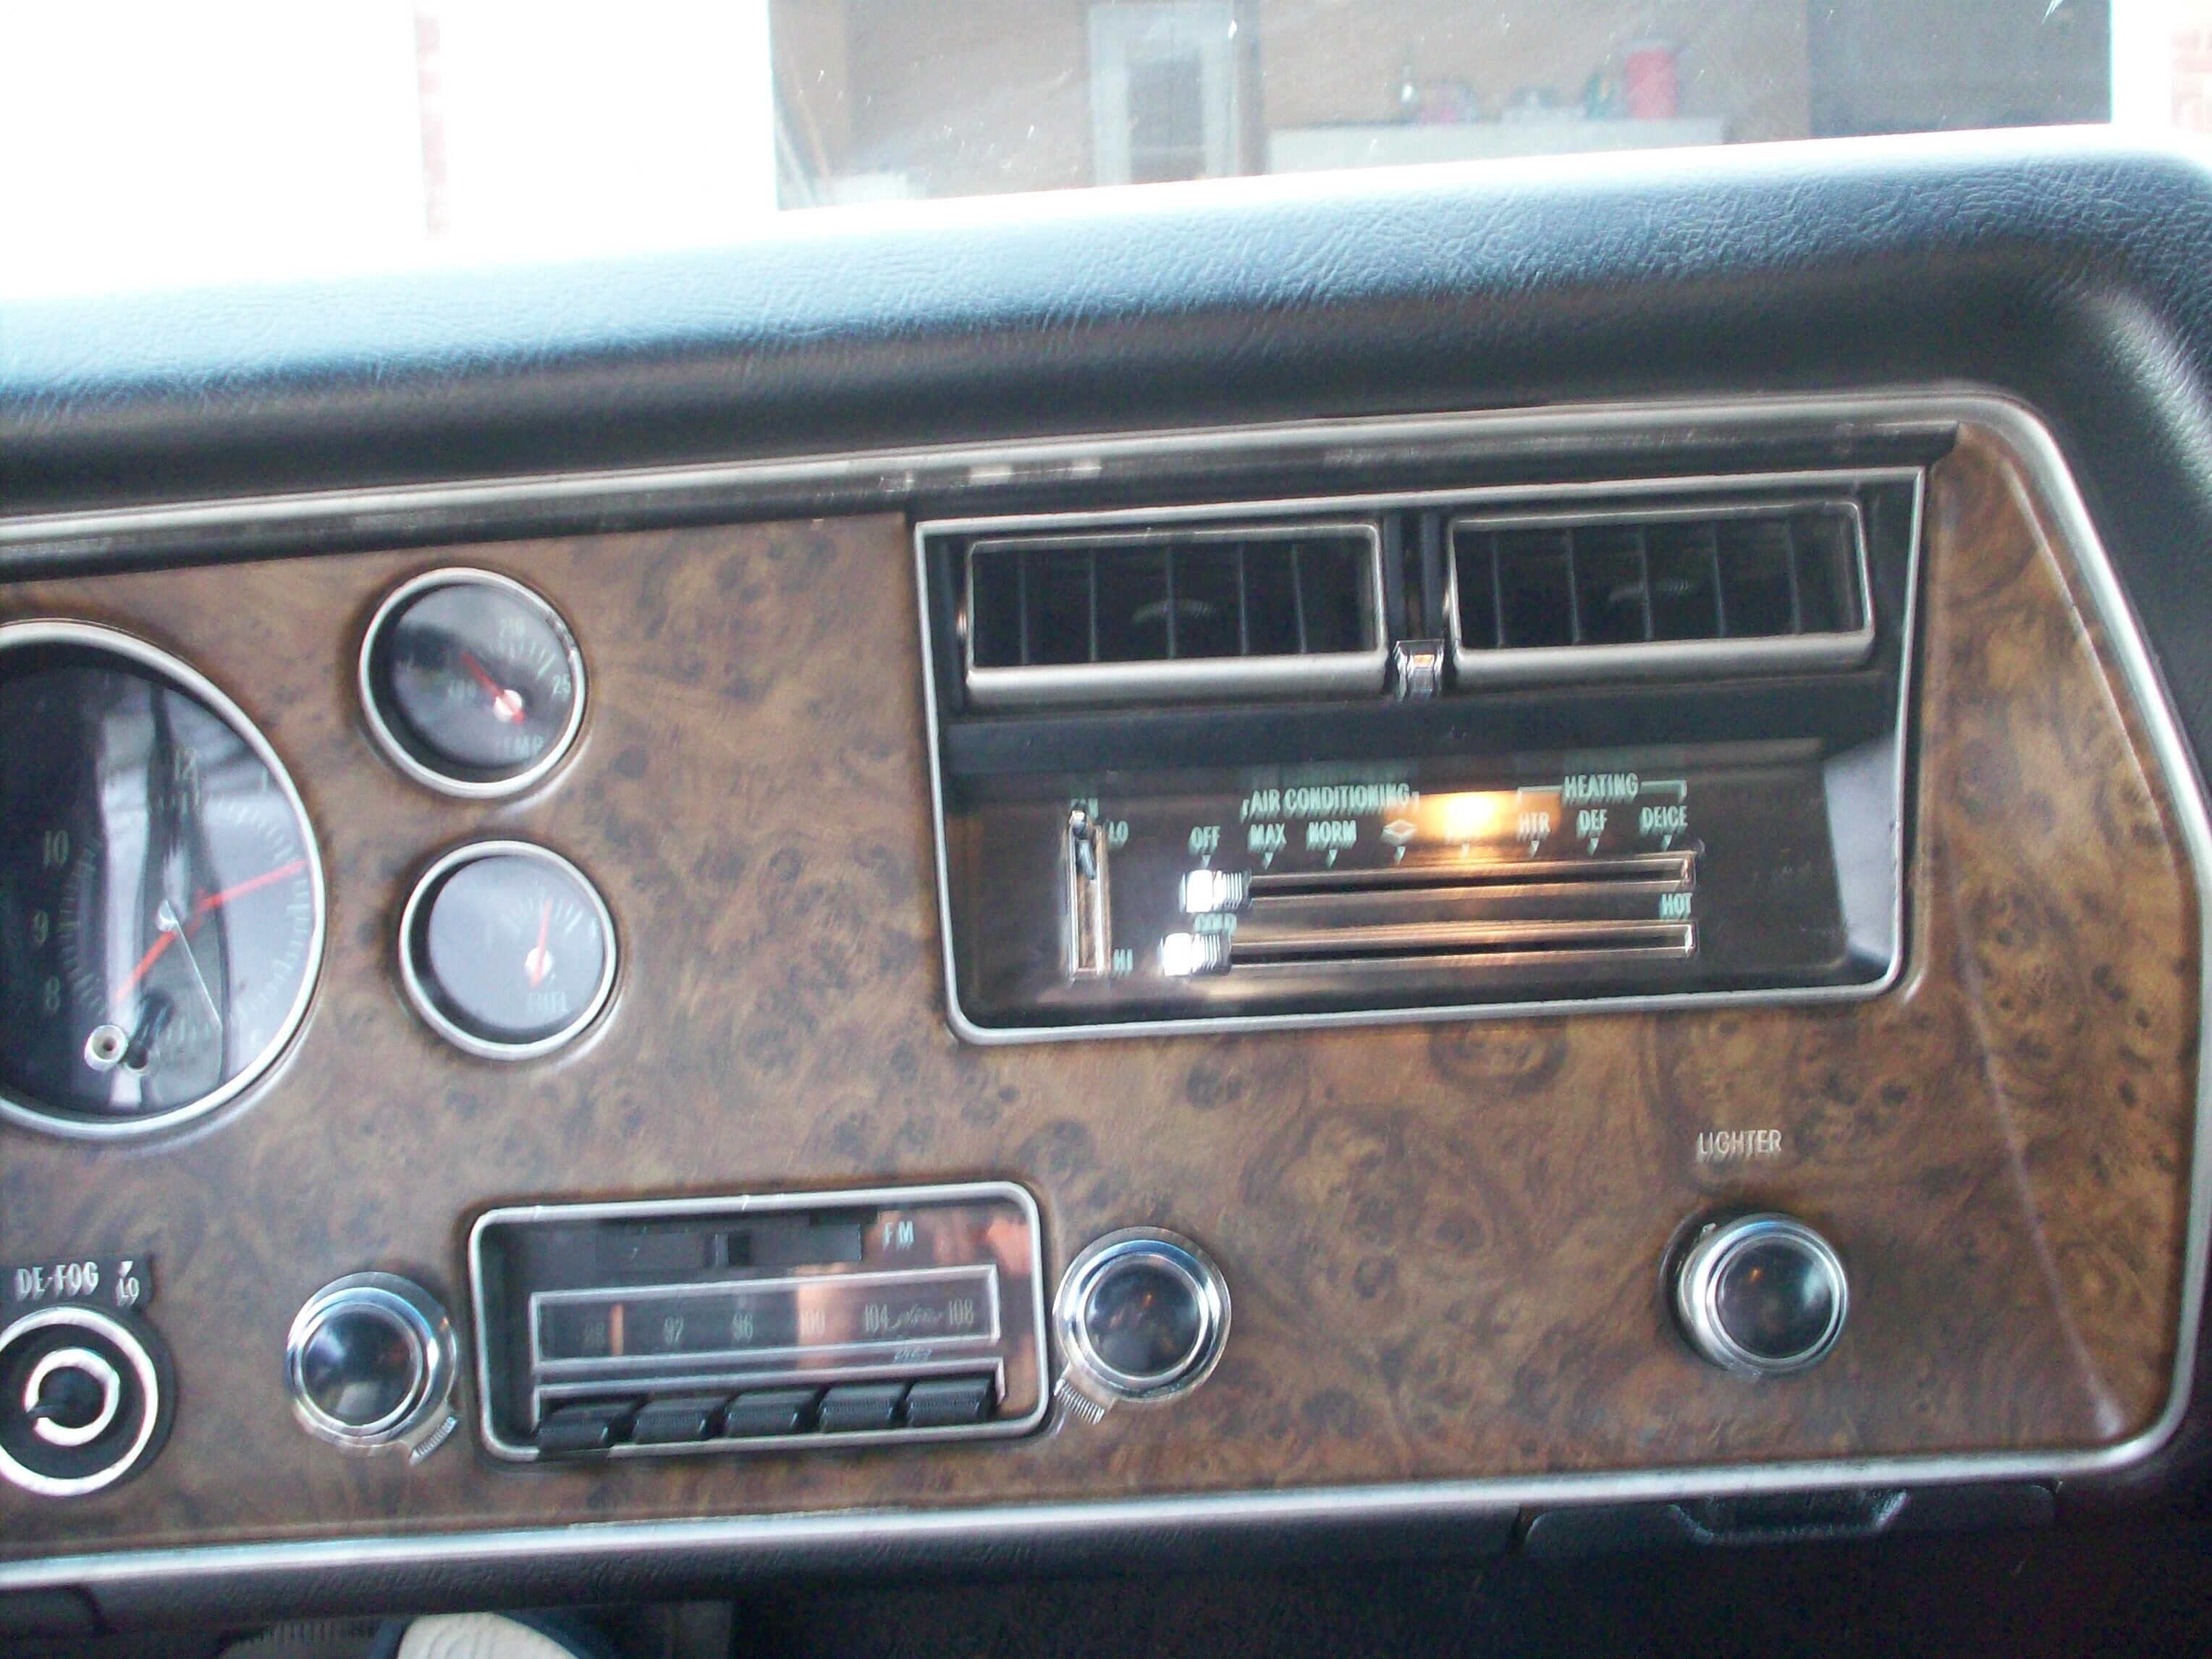
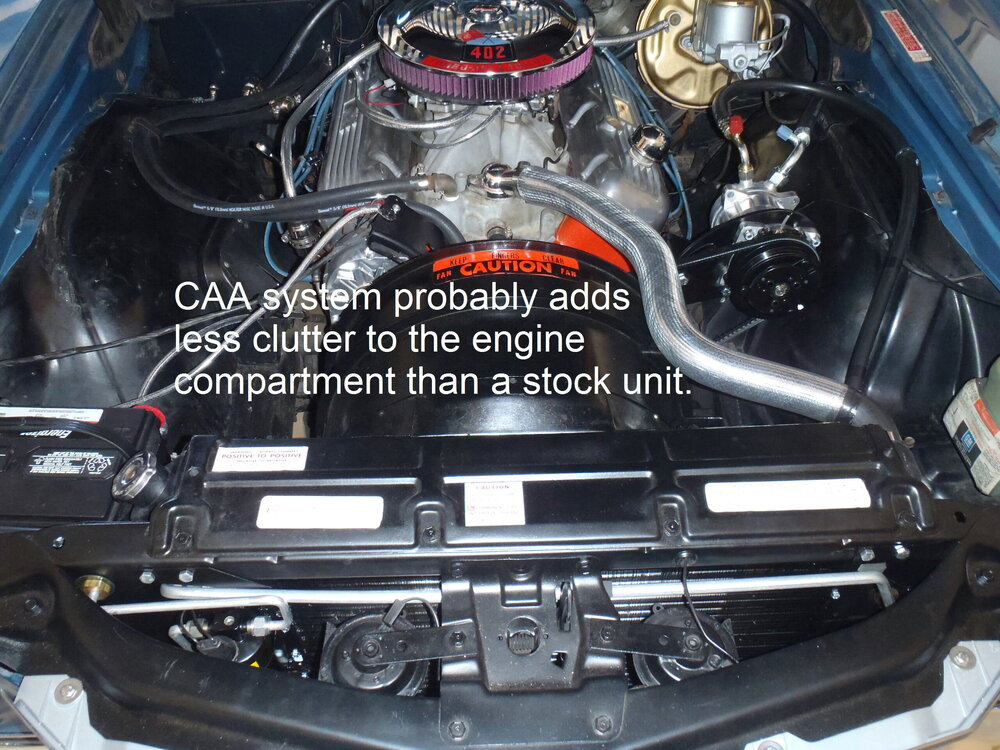
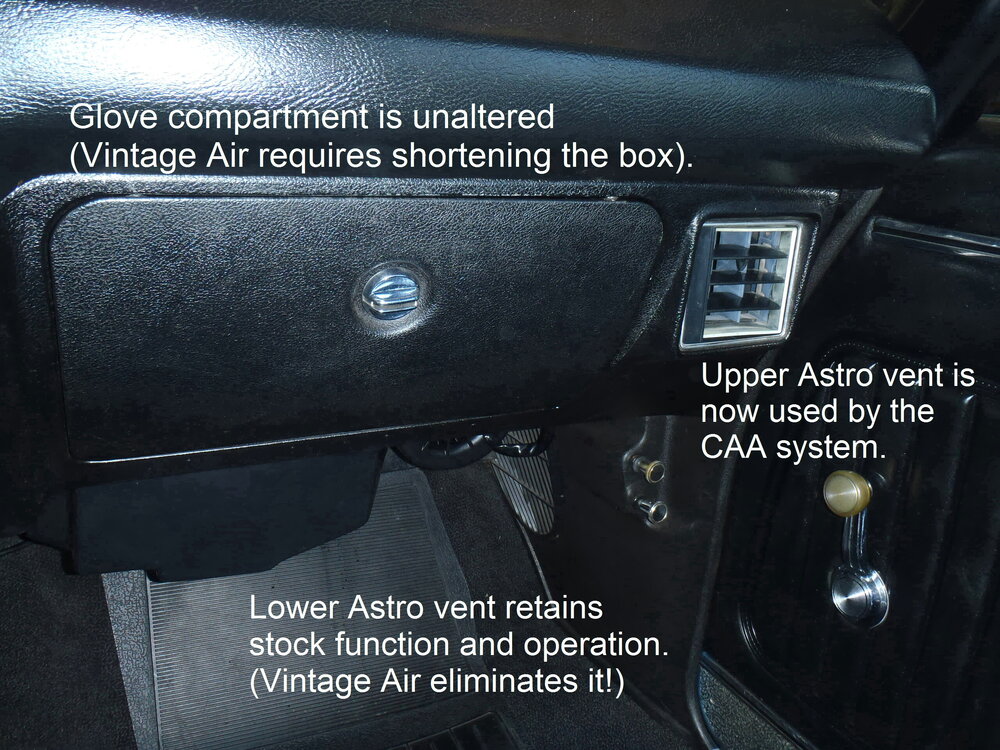
Bruce, you possibly want to keep your '71 all original but if you really want to add A/C, I suggest you give a hard look at the Classic Auto Air system for the '71 Chevelle. If you contact their service/support reps and tell them it is for a Monte Carlo, they will ship the kit with extra long hoses to accommodate the stretched front end. That kit is very straightforward to install (some but not too much work), takes lesss room in the engine compartment and preserves the function of your lower (kick panel) astro vents. You used to be able to get the manual 3 lever/cable control system (see photo) but they may have moved to total digital by now.
-
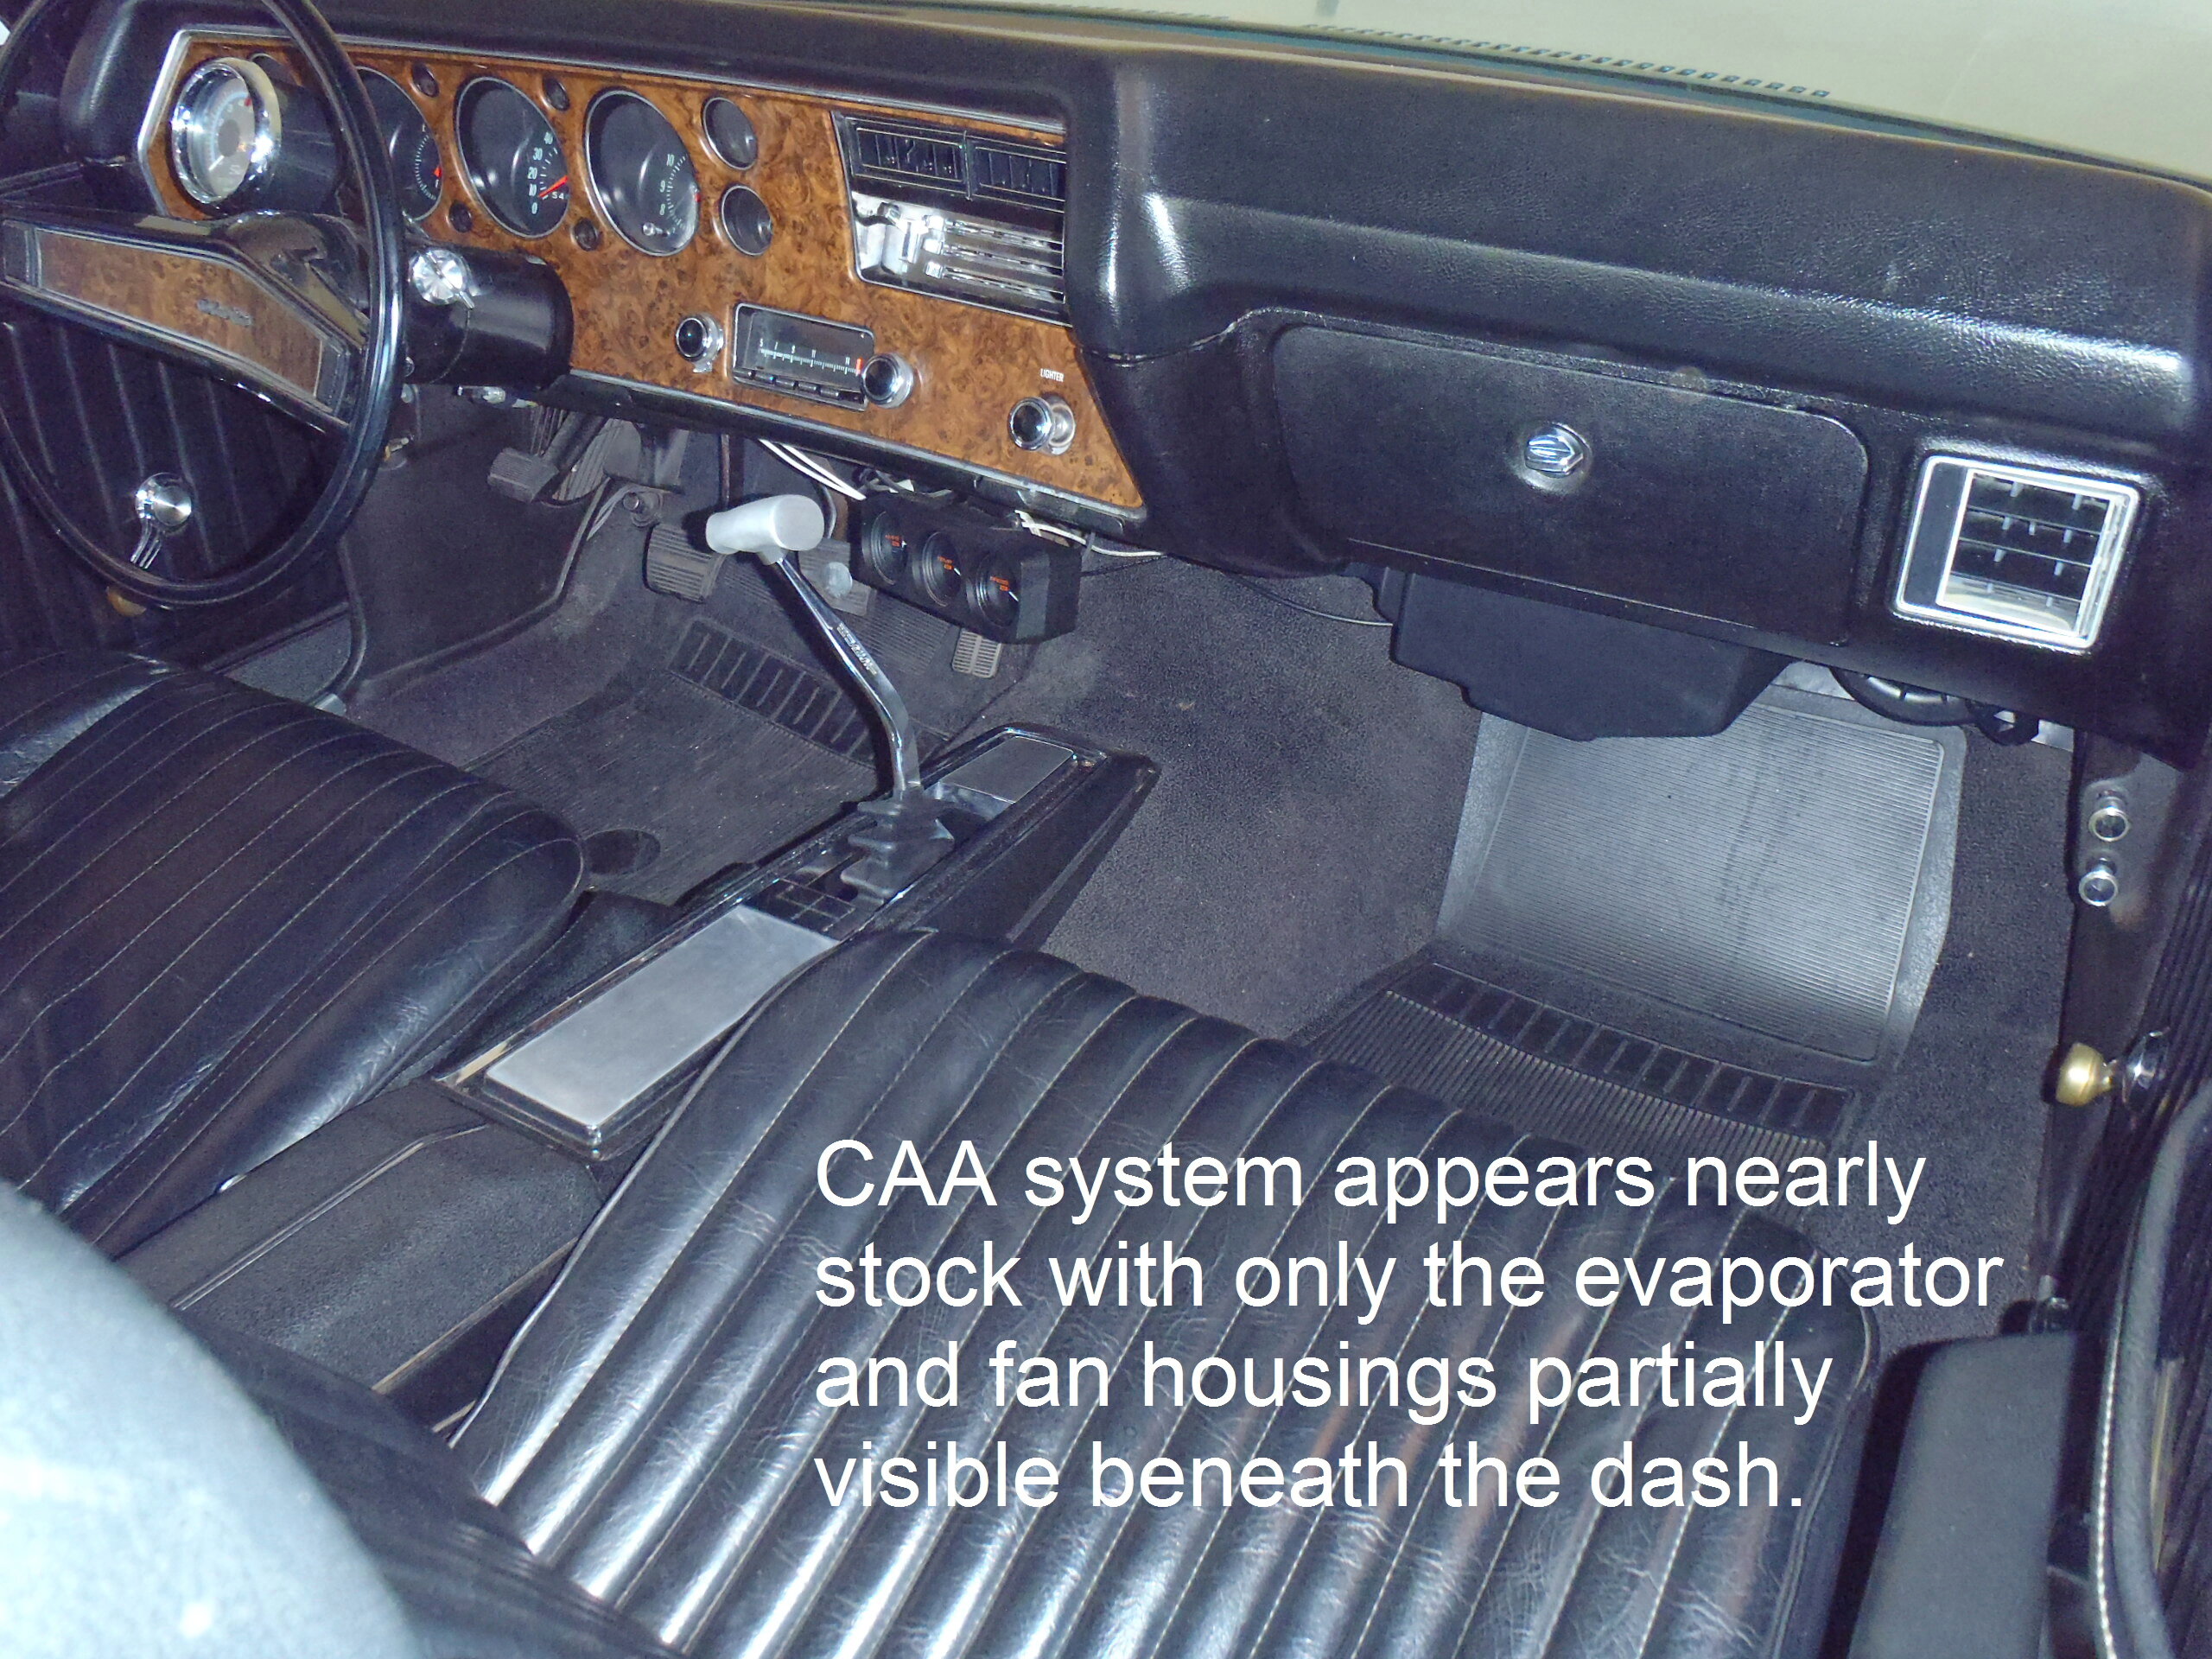
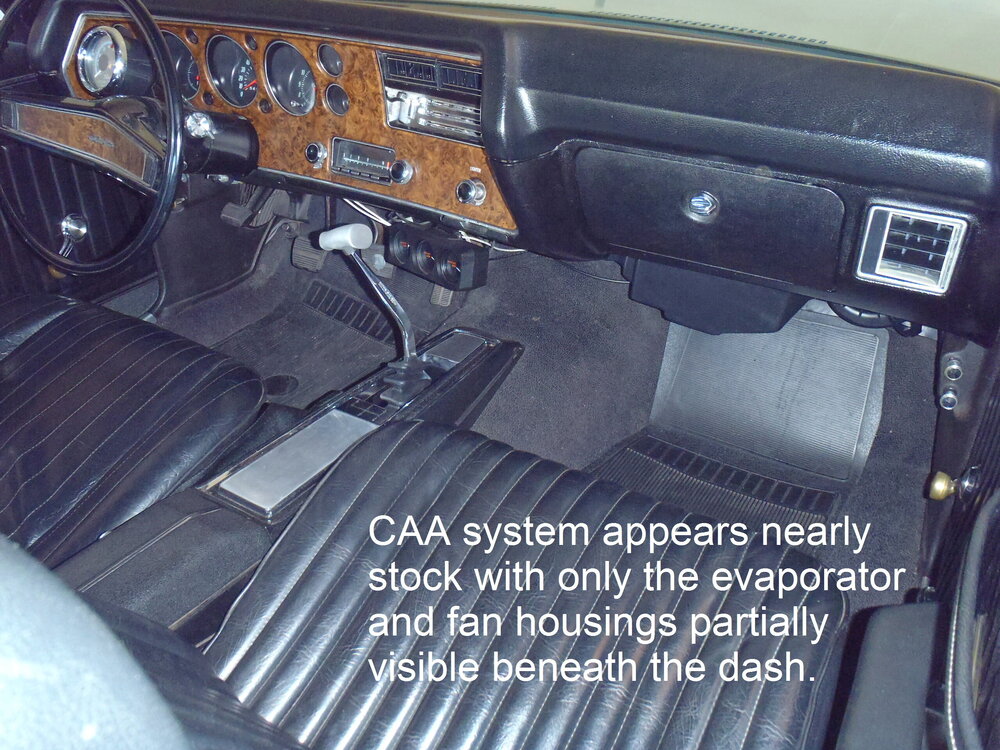
John, I currently own a factory heater only '70 that I have installed Classic Auto Air in (as shown in the photos below). As I said in my prior post, I had to remove the A/C box from a '70 SS that I also owed for eight years. Three of the four pictures I sent earlier were of that car, not the '70 non-A/C car I still own and drive in FL. Sorry for the confusion. Good luck with your project. Based on all you have already done, it sounds like there is probably no going back now! 😄

-
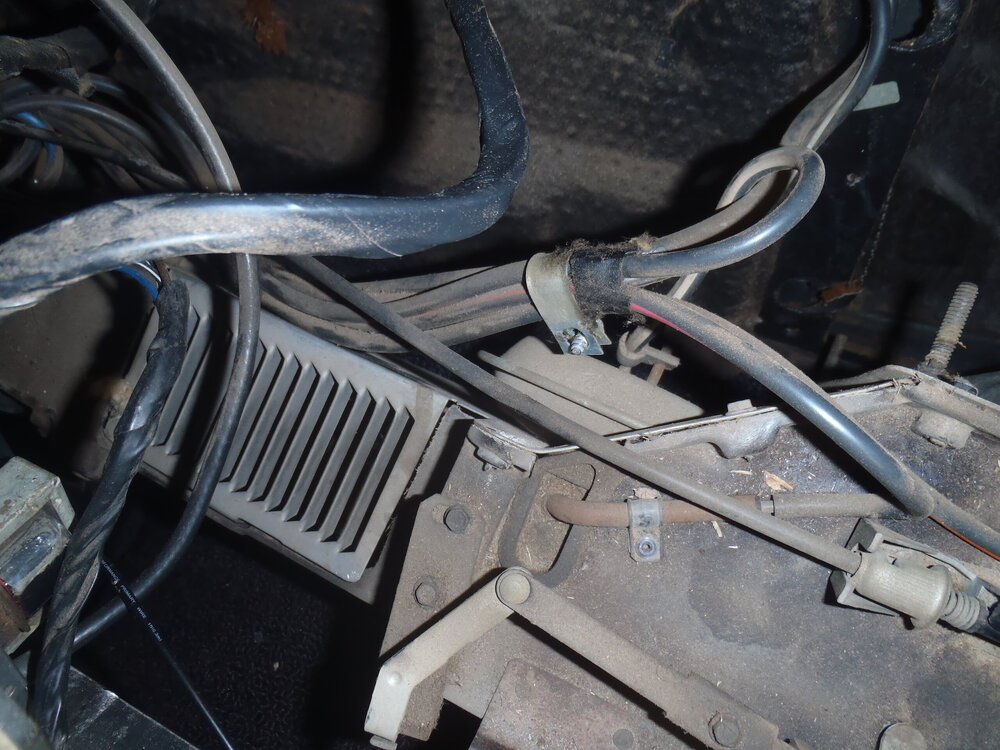
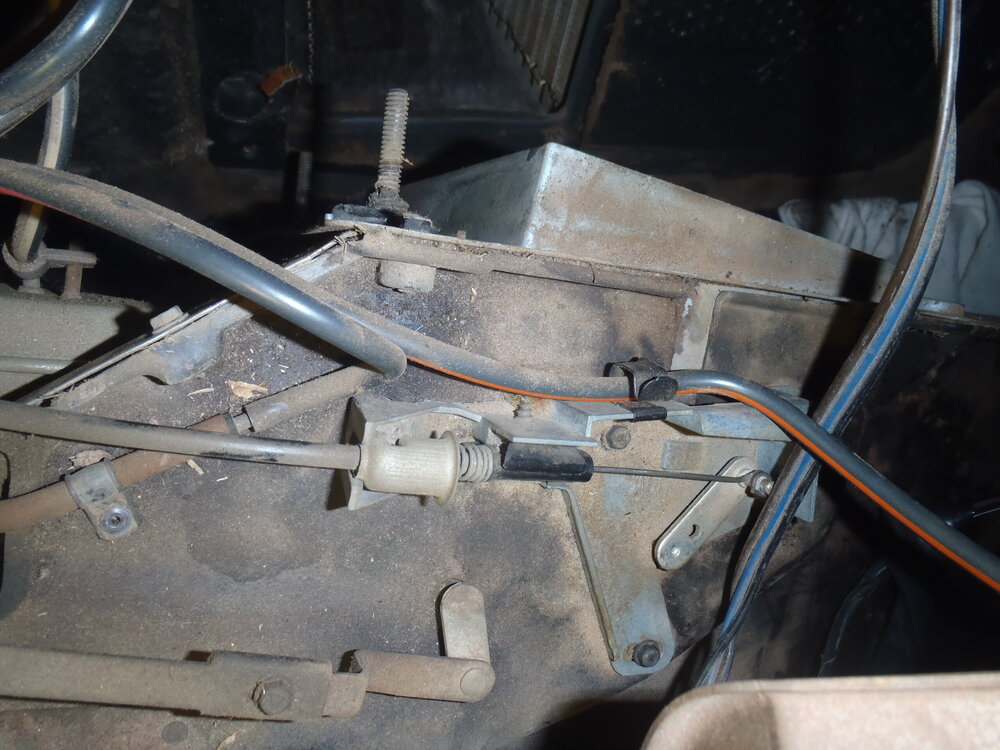
John, I'm not sure I can help you much with your questions. The A/C and non-A/C systems on first gen Montes are worlds apart in size, complexity, controls and operation. Maybe you have figured out a way to replace the vacuum operated functions with the three levers and cables of a non-A/C panel but I but I am highly skeptical. The three manual levers on the non-A/C panel control Fresh Air, Heater temperature and windshield defrost. As you know, with an A/C box all of that stuff is controlled by the various positions on the top lever on an A/C panel by using vacuum circuits. IMO, you would be much better off just using the right hand side of your A/C panel after installing an A/C delete plate on your firewall. I had to remove the A/C box from my '70 SS (to "de-mouse" it) so I know how complex it is and how it fundamentally switches between heating and cooling. Since the sole function of the lower lever and cable on the A/C system (see photos) was to manually flip the door that connected the air box to the A/C evaporator on the engine side of the firewall (simultaneously blocking the heater portion), you can just leave it in the far right position. I can't imagine that deactivating the A/C portion of your system by removing the engine compartment components would also deactivate the heating portion including its vacuum operation. If you really want a heater-only control panel, I'm pretty sure you are going to need an original heater-only box plus an A/C delete plate. In addition, your A/C car does not have the Astro Ventilation system that a non-A/C car has (i.e. no knobs to operate fresh air inputs on the dash ends or in the kick panels. If you want to have an operational Astro Ventilation system, I suggest you find a non-A/C car in a salvage yard and strip out the entire system including kick panels and dash vents. Sorry to be a pessimist but I would never attempt what you are trying/hoping to do!