Rob Peters
-
Posts
4,336 -
Joined
-
Last visited
-
Days Won
441
Content Type
Profiles
Articles
Forums
Gallery
Events
Everything posted by Rob Peters
-
Surface rust on Delco Remy component
Rob Peters replied to 71MonteCarloMD's topic in Electrical Tech
If it works and can be freshened to look nice I am always for using original parts because they hold up better than repo parts. rob -
What did you do to your Monte Carlo today?
Rob Peters replied to Canuck's topic in General 70-72 Monte Carlo Forum
I just did the same thing a few weeks ago. rob -
Bruce, my 70 350 2brl is exactly the same. From experience I know if that small ground wire to the fender is missing, broken, loose or corroded where it attaches to the fender all of your lights will flicker when the motor is running. rob
-
Two keys here and the first one is that you are planningoing to replace it in the future so why not go ahead and do it now. Key number 2..... Ryan, with as much as you have put into this car and engine, why take a needless chance or risk. rob
-
What did you do to your Monte Carlo today?
Rob Peters replied to Canuck's topic in General 70-72 Monte Carlo Forum
Very nice Aaron!! rob -
Pulling the fuses one or two at a time was going to be my suggestion. You say you did that for a day for each fuse. You may want to give each one a little more than one day. To divide and conquer try this..... Pull half of the fuses and let it set for a week and then check the battery. If it does not drain reinsert those fuses and pull the other half and do the same. If either time you get a drain pull half of that group and do the same. You did not say if you have a trunk light and under hood light. If you do remove the light bulbs. Sometimes those mercury switches don't shut the light off and that could cause a drain. rob
-
What did you do to your Monte Carlo today?
Rob Peters replied to Canuck's topic in General 70-72 Monte Carlo Forum
Looking Good Doug... Post more pictures once you get it out into the sunshine. Almost ready to cruise!!! rob -
I don't understand why a float issue would only fill #8 with fuel, who can answer. Just a thought. Once you find the cause I would recommend draining the oil and replacing the oil and filter because with that much fuel sitting in #8 I suspect some of it would have to seeped into the oil pan, etc rob
-
What did you do to your Monte Carlo today?
Rob Peters replied to Canuck's topic in General 70-72 Monte Carlo Forum
Doug, that is all any of us hope for when we start a project -
What did you do to your Monte Carlo today?
Rob Peters replied to Canuck's topic in General 70-72 Monte Carlo Forum
Looking good Doug, can't wait to see the final results. rob -
Regarding the solenoid.... That is an idle dropout solenoid. One of the purposes of that solenoid is this. When the key is turned on that solenoid will energize (extend slightly). When adjusting the throttle idle this solenoid is energized and at the end of the solenoid is a bolt head that screws into that solenoid that is used to adjust the idle speed. When the key is turned off the solenoid deenergizes which moves the throttle below idle speed to help prevent engine runon (dieseling) after the key is turned off. I am not sure what caused the gas in cylinder 8 issue. Maybe a valve issue. I am sure some of the more knowledgeable engine guru's may help on that one rob
-
Pertronix Ignitor Distributor Conversion........Anyone done one?
Rob Peters replied to NWmonte71's topic in Electrical Tech
I am not sure if that is the wire they are talking about. That is an idle dropout solenoid. One of the purposes of that solenoid is this. When the key is turned on that solenoid will energize (extend slightly). When adjusting the throttle idle this solenoid is energized and at the end of the solenoid is a bolt head that screws into that solenoid that is used to adjust the idle speed. When the key is turned off the solenoid deenergizes which moves the throttle below idle speed to help prevent engine runon (dieseling) after the key is turned off. rob -
I am not having any problems with the site and pop-up ads. I will tell you that I got a notice recently when I logged onto my phone that it was due a software update from the manufacturer and following the software update I started getting popups every time I enter my photo gallery but again, nothing here on the site. rob
-
My son and I have a new project
Rob Peters replied to dejh22's topic in General 70-72 Monte Carlo Forum
Oh my, I needed to get my glasses..... when I first read your post I thought you said "Wow, that thing really poops which would have been a pretty crappy comment. rob -
SWEET!!!!
-
You can go to this link and it will show the different Chevelle dashes: http://chevellestuff.net/faq/gauges.htm rob
-
Spray Paint recommendation for 72 Grill
Rob Peters replied to 72-CLASSIC_RIDE's topic in Restorers - Archive
Doug, it would be interesting to see it without the water still on it. Personally, without the water on it I think it would look fine. Please keep in mind nobody will be as critical as you are on your work, we are always more critical of ourselves than others are on us. If they were to get down onto their hands and knees to inspect it shame on them. Don't point out the mistakes and nobody will see them. rob -
Before I was looking at the picture of the front of your car on my tablet. Now that I am on my laptop with a larger screen I am positive it is in fact a 70 grille. rob
-
If I try to magnify that picture it becomes this pixelated to tell but to me it looks more like a 70 than a 71. The 71 has defined horizontal fins where the 70 has tiny boxes made up of horizontal and vertical lines. rob
-
If I try to magnify that picture it becomes this pixelated to tell but to me it looks more like a 70 than a 71. The 71 has defined horizontal fins where the 70 has tiny boxes made up of horizontal and vertical lines. rob
-
Aaron, I have not seen that COLOUR any of the meets or car shows I have attended either. rob
-
Dave, While that picture is very close to the color of the car it is slightly darker due to slight discoloration/darkening of the original picture. That said, it was a very classy looking color for a Monte but like I said, the First Gen Monte looks good in almost any color. There is only one original color I really don't much like on a Monte but I will not say which year the color is from or what color it is.... It is a personal like/dislike thing. rob
-
I have listed all of the 70 Monte Codes on your other post where you posted pictures of your very pretty 70SS. Check it out there or you can go to our home page and click on the link for "Technical Information" and from there not only will you see the colors and codes listed but also a color chart. rob
-
Open your hood. On the cowl on the drivers side will be the body tag. The body tag is on the horizontal area between the windshield and where the hood hinge attaches. On the right side of the tag you will see the paint PNT code. Use that paint code and then look at the chart below. The paint code will be either a pair of two digit numbers or a two digit number followed by a letter. If the car has no vinyl top both of the two digit numbers will be the same. If it is a two tone painted car it will have two different two digit numbers and if it has a vinyl roof it will have one set of two digit numbers followed by a letter designating the color of a vinyl roof. I hope this helps. rob 1970 Paint Codes Code Color 10 Classic White 14 Cortez Silver 17 Shadow Gray 19 Tuxedo black 25 Astro Blue 28 Fathom Blue 34 Misty Turquoise 45 Green Mist 48 Autumn Gold 50 Gobi Beige 55 Champagne Gold 58 Autumn Gold 63 Desert Sand 75 Cranberry Red 78 Black Cherry Codes Two Tone Colors 25-10 Astro Blue w/Classic White Top 25-28 Astro Blue w/Fathom Blue Top 28-25 Fathom Blue w/Astro Blue Top 34-10 Misty Turquoise w/Classic White Top 55-10 Champagne Gold w/Classic White Top 58-10 Autumn Gold w/Classic White Top 63-10 Desert Sand w/Classic White Top
-
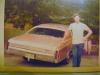
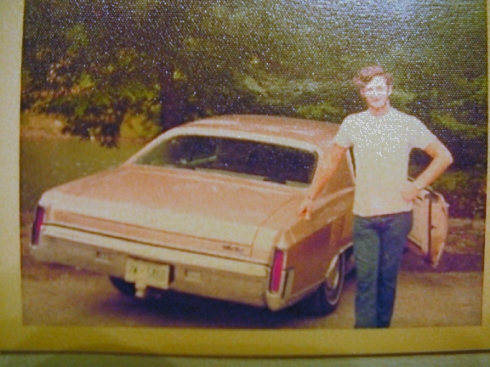
I know this is a very poor picture, in reality it is a picture of a picture. This is a picture of me with my original Desert Sand Monte Carlo. rob