Rob Peters
-
Posts
4,338 -
Joined
-
Last visited
-
Days Won
442
Content Type
Profiles
Articles
Forums
Gallery
Events
Everything posted by Rob Peters
-
What did you do to your Monte Carlo today?
Rob Peters replied to Canuck's topic in General 70-72 Monte Carlo Forum
Mark, You can upload them as thumbnails that can be opened larger when clicked on. From the post box click on "More Reply Options" next to the "Post" button. The screen will change. From there click "choose File" Then choose where the document/picture can be found and click on that document and the document link will show up next to the "Choose File" button. Then click on "Attach File". You will then see that file show up but until you click on the box to the right of the file called 'Add To Post", it will not embed into your post. Now, you will see the link embedded into your post. You can add multiple documents and when you click on " Add Post"...... BINGO, all done rob -
What did you do to your Monte Carlo today?
Rob Peters replied to Canuck's topic in General 70-72 Monte Carlo Forum
excitement building more.......It's Alive It's Alive -
It really looks fantastic!!!! The excitement builds.... reassembly on the horizon. rob
-
Caulk for inside Trunk Bumper Bolts
Rob Peters replied to 72-CLASSIC_RIDE's topic in Restorers - Archive
I think if you google both Duck Seal and DumDum putty you will see they may be the same thing. Thanks Steve, I had forgotten they were one in the same. rob -
Caulk for inside Trunk Bumper Bolts
Rob Peters replied to 72-CLASSIC_RIDE's topic in Restorers - Archive
When I removed my bumper the nearest thing I could come up with was something called Duck Seal. It is used in electrical work where an electrical cable goes through a hole in the wall. If you look at many homes where the exterior wire enters the house this is sometimes used. rob -
Very nice work. It looks great. rob
-
That's great to hear. rob
-
Dan, it was my understanding that the wide 3/4" belt molding along the bottom of the side windows WAS an option on other First Gen's rob
-
Interior project snowballing.... questions about rusty floor
Rob Peters replied to Supaflytnt's topic in Interior Tech
I may add that there may be a trade school in your area that gives a course on the basics. We have a member here, Steve Levanti, who has restored a number of cars. Steve works in the banking industry, not exactly a job that teaches one how to weld, do body repair, paint a car, upholster a car, rebuild a suspension and drivetrain. One day I asked Steve where he learned to do these things and he replied.... 'I go to the library and get books, what the library doesn'thave I buy and I learn by reading how to do it and then learn by applying what I have read'. Anyone who has seen or benefited from Steves book-learnin will tell younoone can do it better. rob -
I see you went with the best color....BLUE and the best year...1970 rob
-
Washer Bottle Monitor Rebuild
Rob Peters replied to Rob Peters's topic in General 70-72 Monte Carlo Forum
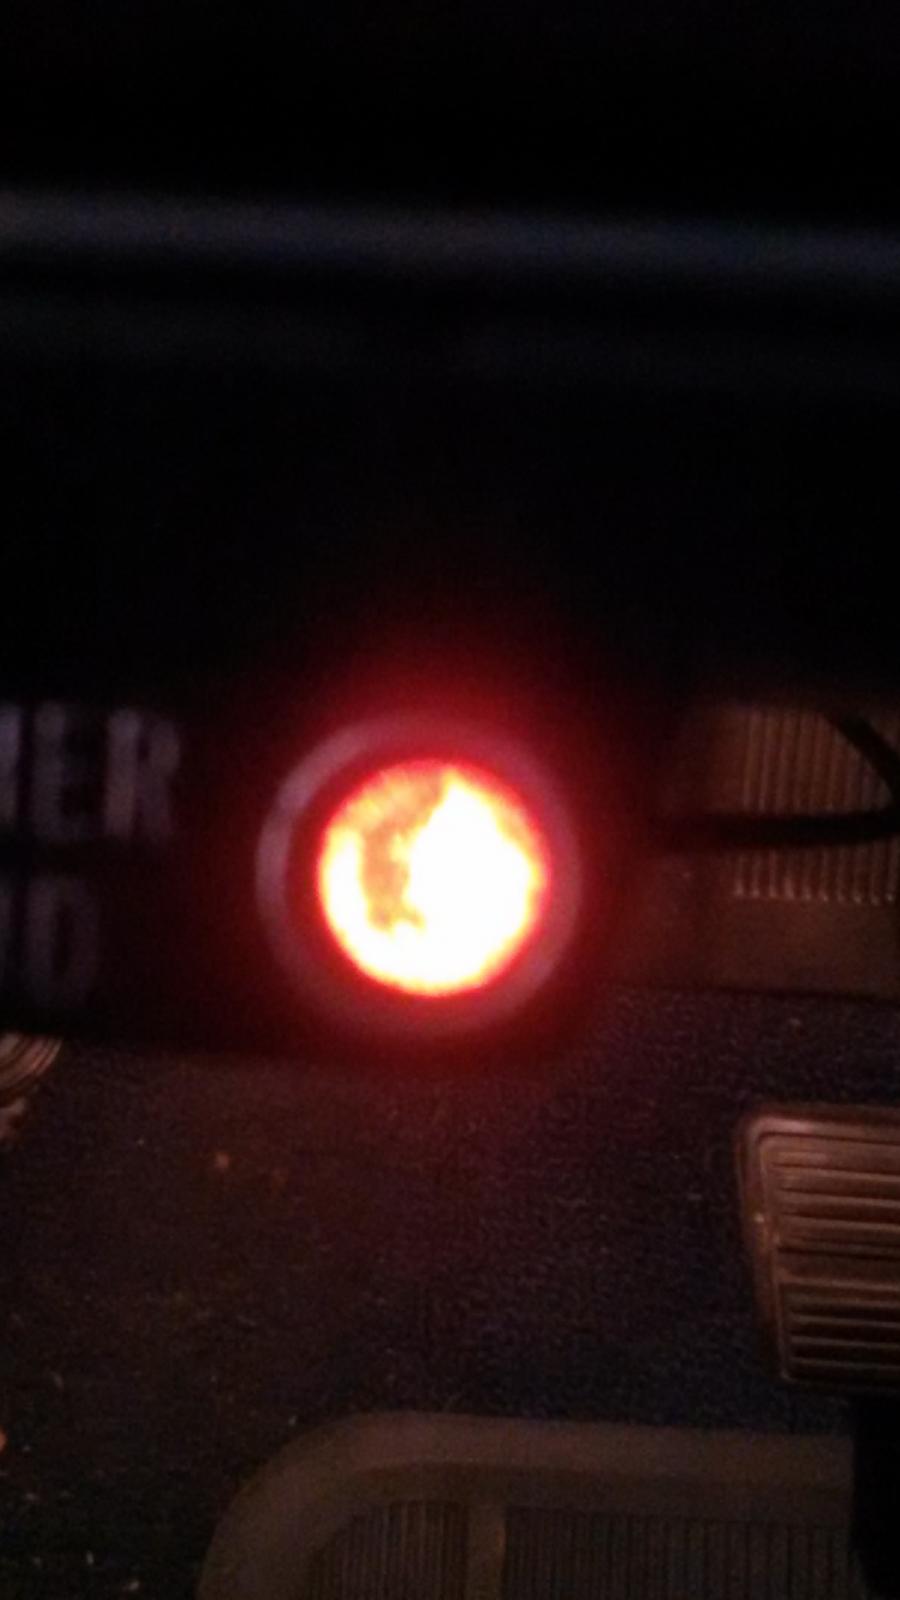
Today I installed the new wash bottle. I tested it with the bottle empty and it glowed red just as it should. Here is a picture of what an empty bottle indication looks like: I did not get picture of a indication of a non-empty bottle because I got side tracked due to the fact the washer pump is malfunctioning and I started working on that. rob
-
Regarding the bushings. I agree with Dennis on the squeaking Poly bushings. The polly bushings will last and last which is a good thing but if they squeak after awhile you really don't need them to last a long time. I stayed original rubber bushings. After all the original rubber bushings on my car lasted 31 years and when I replaced them, they still looked very nice so if the like original bushings lasted 30 years and the new ones last that long it will be someone elses problem, not mine. rob
-
To what Rod said. rob
-
Washer Bottle Monitor Rebuild
Rob Peters replied to Rob Peters's topic in General 70-72 Monte Carlo Forum
OK, I have fixed the picture problem now so you can relate what I was saying with Pictures..... After all, if there are no pictures...... IT DIDN'T HAPPEN, right? rob -
Washer Bottle Monitor Rebuild
Rob Peters replied to Rob Peters's topic in General 70-72 Monte Carlo Forum
Sorry everyone, the pictures did not attach. I will have to come back to this over the next few days because I need to go to bed because I have to be up very early tomorrow... rob
-
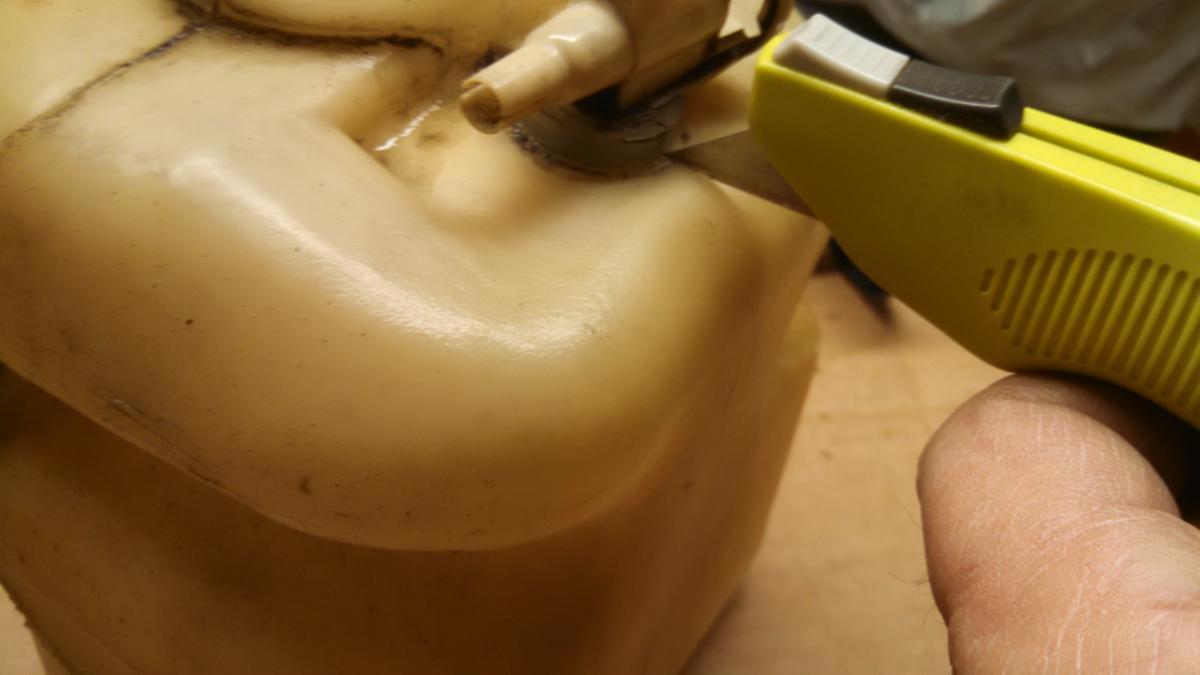
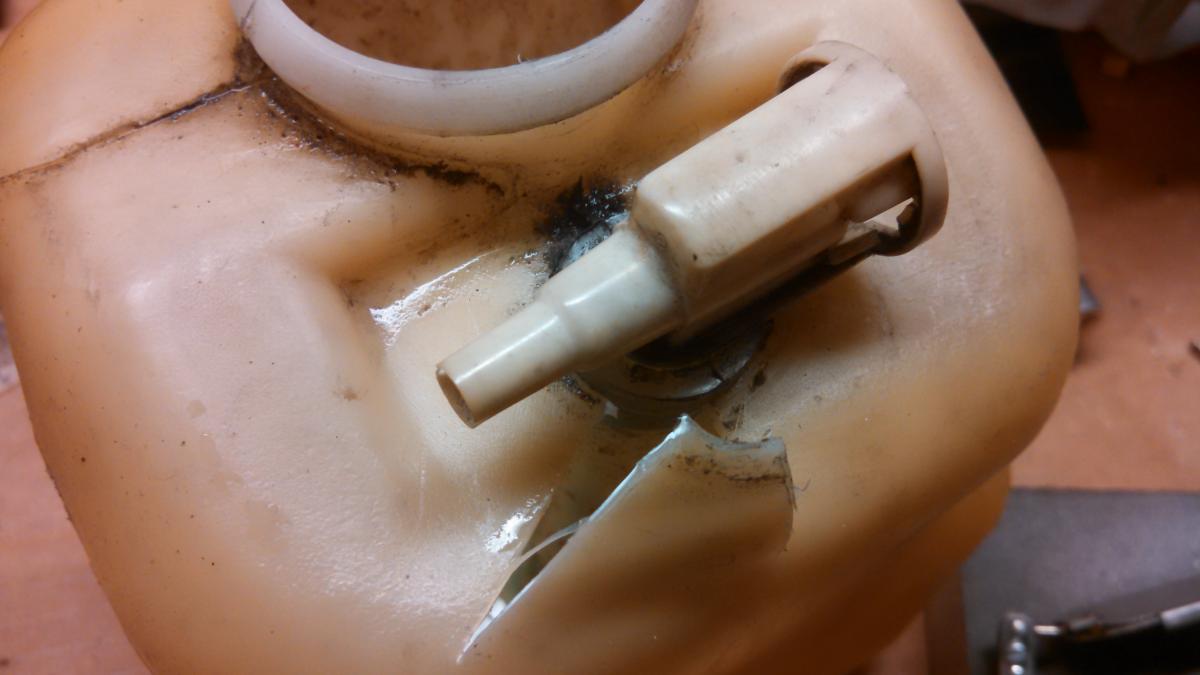
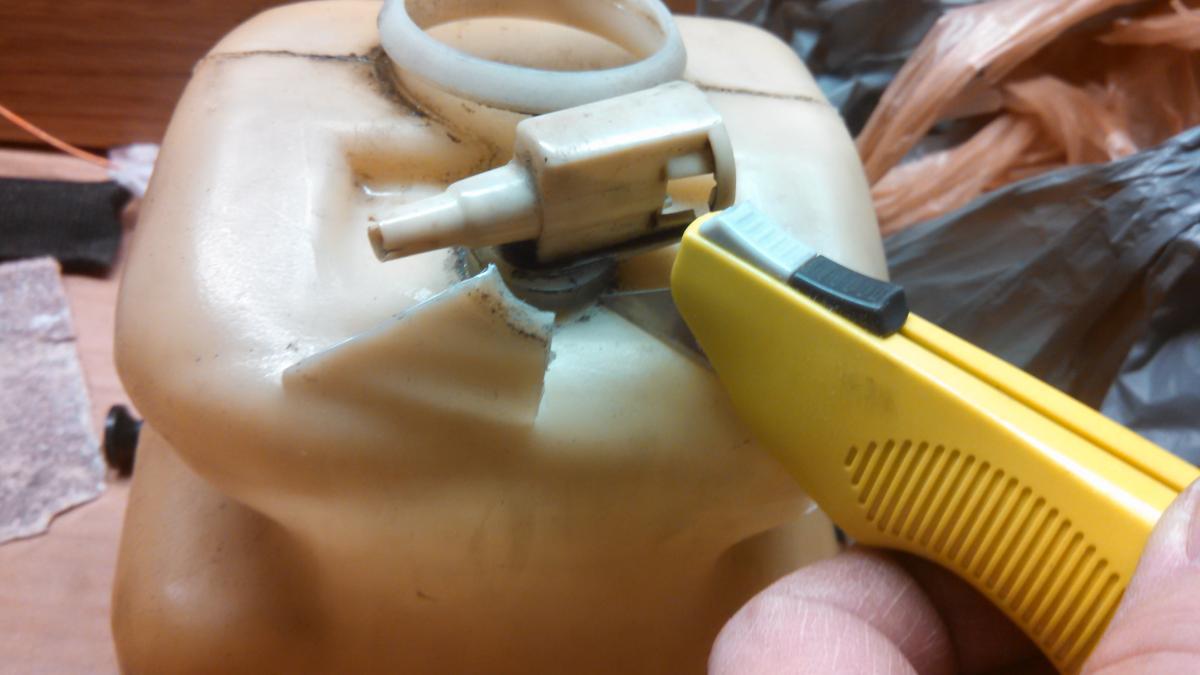
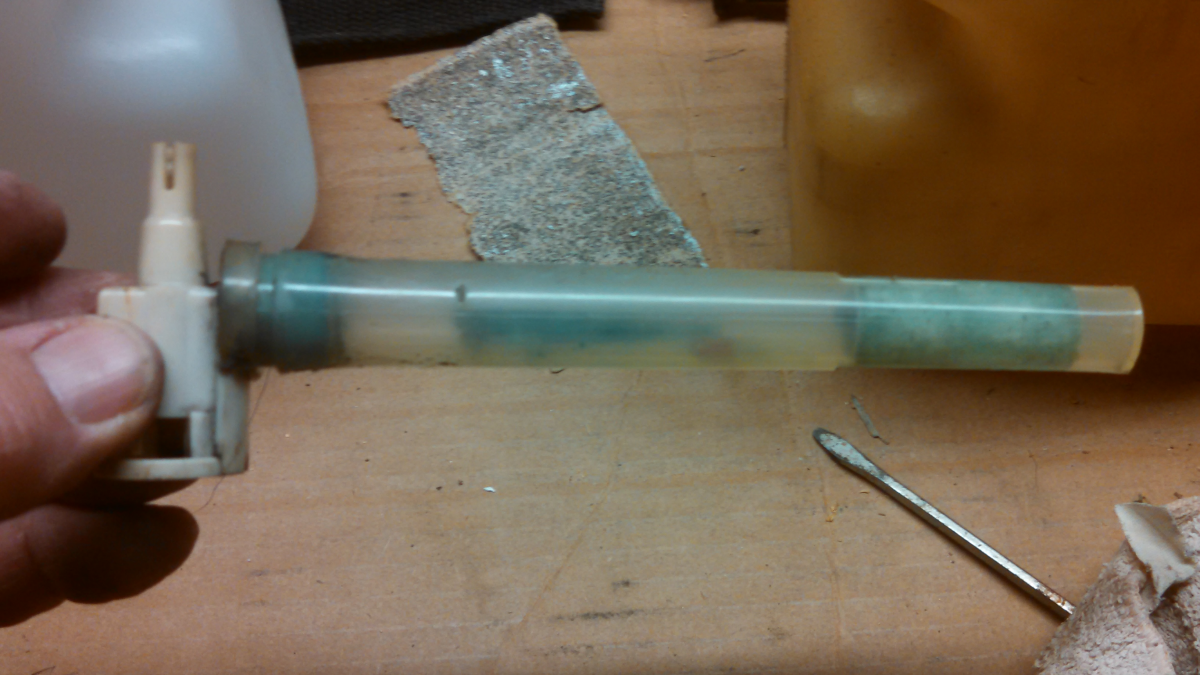
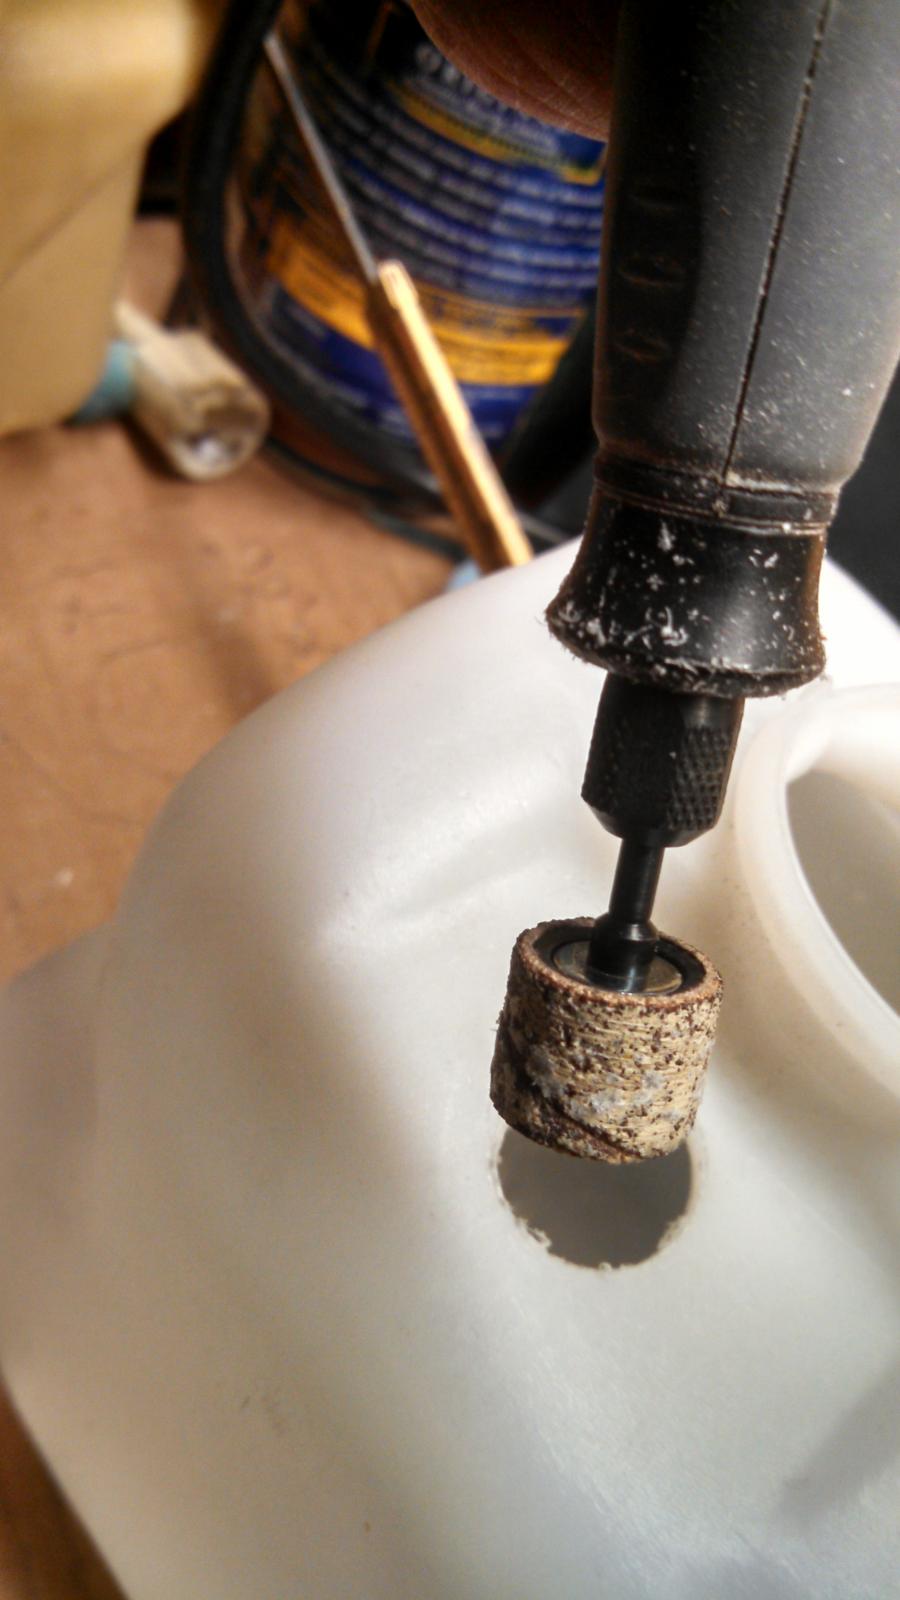
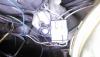
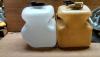
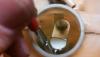
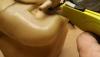
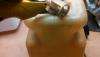
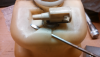
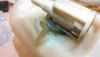
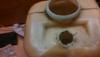
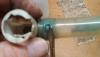
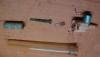
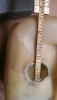
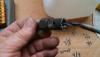
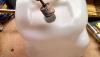
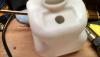
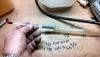
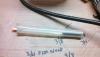
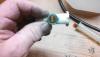
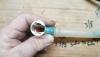
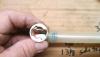
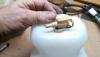
I received my new Washer Monitor assembly this week. Today we took a little ride and swung by Lutty's Chevy Warehouse and I picked up a new Washer Bottle. If you plan to do a rebuild of this float assembly I advise, since washer bottles are reproduced and available and the monitor assembly is not, to get a new bottle and modify it for the float assembly to go into rather than risk damaging the monitor assembly trying to pull or pry it from the old bottle. This is what I did and below is my process In the first three pictures I show the two sides of the Monitor and wiring. To remove th Fiber optic line, in the first picture, you will notice the hold where the fiber optic line goes in is slotted. Since the plastc is old and may be brittle, carefully spread the slot open slightly and pull the fiber optic line from this slotted area. The second picture shows the lamp, the lamp is removed by slightly pushing in on the socket and turning it till it will pull out. In the third picture I show the area of the wiper motor and washer assembly electrical connections. Some here have said they have seen these monitors with the power wire spliced in here and the ground wire going to the fender. As you can see from the picture mine is wired right into the wiper motor and washer assembly. In the next two pictures you will see the old bottle and new bottle side by side. You will notice my original bottle is squared off on the bottom but the new one is angled on the lower left side but other than that they look to be the same. In another post here I think it was Carl Hanson who said the original factory bottles had an area in the upper recessed section with a knockout hole for the monitor but the reproduction bottles do not have this. In the second picture I was trying to see exactly what holds the monitor into the wash bottle using an inspection mirror. What I could see but itt is hard to tell from the picture, the tube at the top is larger and then tapers down slightly as it extends into the bottle. What you can't see in the picture is at the top of the taper the tube has a recessed area so when the tube is inserted into the bottle you would use pressure and if you make the hole the proper size, as you slide the tube down into the bottle the plastic of the bottle will snap into this groove in the tube. The following 6 pictures are covering the removal of the wash monitor from the old bottle. Since the old bottles, over all of these years, have become stiff and brittle I felt it would be hard to remove the monitor from it without damaging the monitor so I made a slit at 6:00, and 8:00 and then lifted that flap portion away from the monitor and then at the 4:00 position and lifted that tab away so the monitor assembly could be removed out at that open section of the bottle. The 7th picture shows the old bottle with the monitor removed. The next three pictures are of the monitor after I removed it from the bottle. When I removed it the first thing I noticed was the old float assembly stem was broken and the pieces were inside the tube. In the second picture you will notice, at the tip of the screwdriver there is a slot in the tube and there is also a tab protrusion on themonitor head. To remove the tube from the head you can twist the tube clockwise and counter clockwise at the same time you rock it up and down and the tube will clear the tab. The third picture here shows the tube removed from the head and the broken pieces of the float assembly. Now to adapt the new bottle. The hole in the old bottle is centered left to right in th recessed area of the top of the bottle. The outer upper part of the hole is 3/4 of an inch from the outer edge of the filler neck on the bottle. The hole measured 3/4 inch in diameter. I first tried to use a hole saw to make the hole but as it started I noticed the cut was going to be too rough so I switched to a regular drill bit and and then used a dremel rotary tool to hone it out to the proper size. These next 5 pictures show the tools mentioned above and the final one will show the bottle with the hole ready to accept the monitor. Now we are in the home stretch. In the first picture below I am inserting the new float assembly into the float tube and the one after that shows the float fully inserted into the tube. The third one below shows inside the bottom of the monitor head. You will notice a slot inside the head. The the new color portion at the top of the new float assembly will slip up into this slot. As you insert the tube and float assembly into the head, aligning the colored portion into the slot and then push the tube until the slot in the tube seats itself onto the tab of the monitor head. Now, when you look into the lamp section of the monittor head you will notice the colored blade on the float assembly. The next to the last picture shows the monitor head and float tube mated together and ready to install into the bottle. If you have the hole the proper size you can use some liquid dish soap onto the opening of the hole and on the monitor tube and and gently work it into the wash bottle. The fianl picture show the completed assembly ready to mount back into the car. I hope this helps others. Sorry for the long post. rob


-
Tic, Tic Tic.... but no Tock, Tock, Tock. On a quiet night if you are sitting in it with the engine off you can hear it if you listen closely..... unless there is a Ford around that you could hear rusting rob
-
What did you do to your Monte Carlo today?
Rob Peters replied to Canuck's topic in General 70-72 Monte Carlo Forum
Very nice Ryan, can't wait to see it live and in person in Carlisle...this June rob -
CD2 Washer Monitor Float
Rob Peters replied to Mike Brichta's topic in General 70-72 Monte Carlo Forum
Carl, that is correct, the monitor only works when the wiper is turned on. rob -
Interior project snowballing.... questions about rusty floor
Rob Peters replied to Supaflytnt's topic in Interior Tech
personally, I think you are looking at new floor boards. Since you have that many areas with holes you more than likely have many areas that are quite thin and as long as you have it down that far I would put new floor panels. rob -
Interior project snowballing.... questions about rusty floor
Rob Peters replied to Supaflytnt's topic in Interior Tech
I was basing my telly mostly from the first picture where it looked like an area rested all the way through above the circular hole. I could be wrong but then again, until you do a real good wire brushing and/or grinding of the rust, and doing a metal strength test by pushing or tapping on the metal you may not know. Good luck!!! -
Interior project snowballing.... questions about rusty floor
Rob Peters replied to Supaflytnt's topic in Interior Tech
POR is great stuff but I see some pretty rough areas there so you may want to order new floor pans and replace them as needed. Even with the new ones you should use the POR product. rob -
CD2 Washer Monitor Float
Rob Peters replied to Mike Brichta's topic in General 70-72 Monte Carlo Forum
I sent my payment by Snail Mail and paid by check so mine may be delayed till my check clears. I am looking forward to seeing how things go with others and their tips and comments from doing theirs. rob -
Very Nice Larry!!!!!!!! rob
-
CD2 Washer Monitor Float
Rob Peters replied to Mike Brichta's topic in General 70-72 Monte Carlo Forum
OK, now that most us who have said we would like one of these have sent in their payment I have some questions. 1) I had read ages ago that the Wash Reservoir is the same with or without the wash monitor but you would have to cut your own hole into the new reservoir. Does anyone know if this is true? Either that or does anyone know where a monitor bottle can be purchased? 2) How is the wash monitor assemblyed mount into the bottle? Also, how do you remove the monitor assembly from the bottle without damaging it? 3) Once the monitor assembly is removed, what do we remove from the monitor to replace the new part we are buying. In other words, how is the old part removed without damaging the rest of the monitor and when we install the new part, what holds it into the the existing monitor assembly. 4) Once the new part is installed onto the monitor assembly what holds the monitor assembly into the bottle. I have noticed in the past that the monitor portion of the system is loose in the bottle and I can spin it part of the way around in the bottle opening but I was always afraid to try to remove it for fear I would break something. rob