Monteman1971
-
Posts
640 -
Joined
-
Last visited
-
Days Won
12
Content Type
Profiles
Articles
Forums
Gallery
Events
Everything posted by Monteman1971
-
Not really sure how much clearance I have.... As seen in the pic it's not that great...lol. But I have yet to scrape them except once when I was coming over an intersection and was a little to fast trying to make the light and hit the dip hard. I replaced the springs and shocks when I got the car in 2007/2008...maybe your springs are too weak and the car is sitting lower and compress to easily? Steve
-
I have the Hooker Super Comps on mine too. There is a name plate mounted to the header to show the make. The Super Comps have 2" primary tubes and a 3.5" collector. The right side drops right in with no issues. The left I had to make a slight dimple in cylinder #3 to clear the steering rod but it was no big deal. I do agree that the proportioning valve ends up to close to the headers and even the instructions say on a Monte you may need to move it. I made a "Z" bracket and moved it from the side of the frame to the top. There was no need to change any of the lines, they all moved pretty easily. With that said, I'm running stock front springs and a 26" tall tire up front and haven't had any clearance issues with the ground but I am careful on speed bumps and things of that sort. In the pic you can clearly see the electric cut outs but you get the idea of the headers too. Steve

-
Is this your 71 Monte? VIN 138571L153449
Monteman1971 replied to Canuck's topic in General 70-72 Monte Carlo Forum
Wow...that's amazing!!! What a great find for both of you!!! Steve -
What did you do to your Monte Carlo today?
Monteman1971 replied to Canuck's topic in General 70-72 Monte Carlo Forum
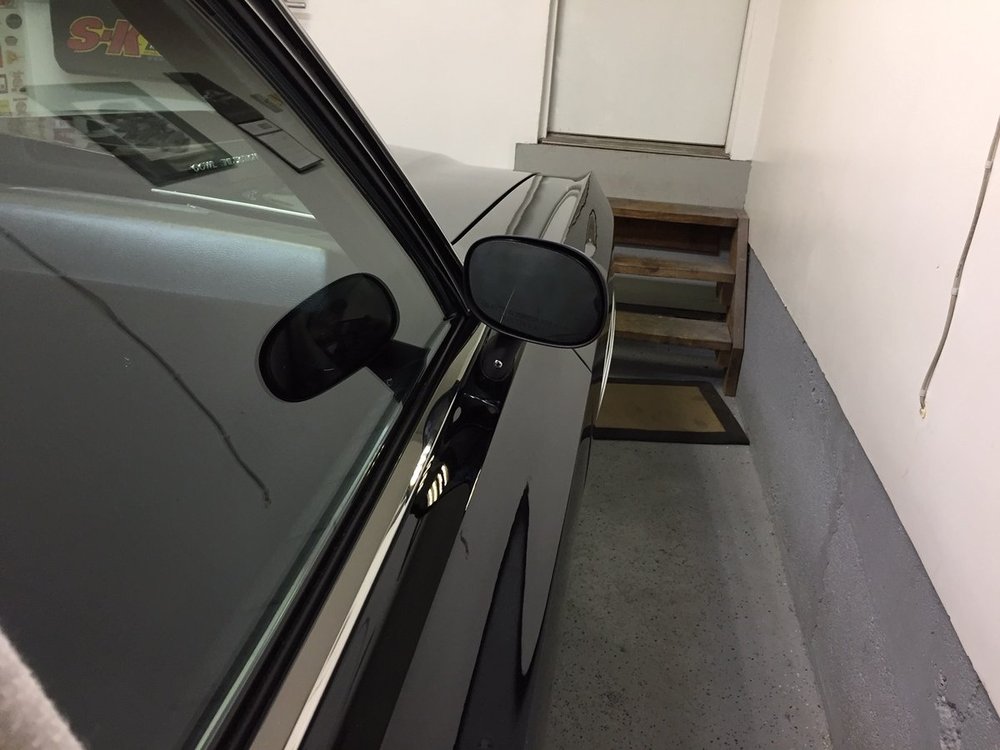
Not sure what your asking here....lol. I was able to get a new piece of glass for the mirror itself. A convex mirror so it has a bigger field of view. Steve -
What did you do to your Monte Carlo today?
Monteman1971 replied to Canuck's topic in General 70-72 Monte Carlo Forum
Mirror is finished.....

-
Not sure of the 1970 but mine was definitely just a black knob on the 1971. 4 speed pattern on the console. Steve
-
Looks like that's a Hurst shifter with the Hurst aftermarket ball Steve..... they all came with a Muncie Shifter and a non descript black knob from the factory. Steve
-
Definitely black........
-
Dan's got the answer..... the metal clips that come with the molding are impossible to use and will make a mess of your new trim. I also used the plastic clips on mine...work great! Steve
-
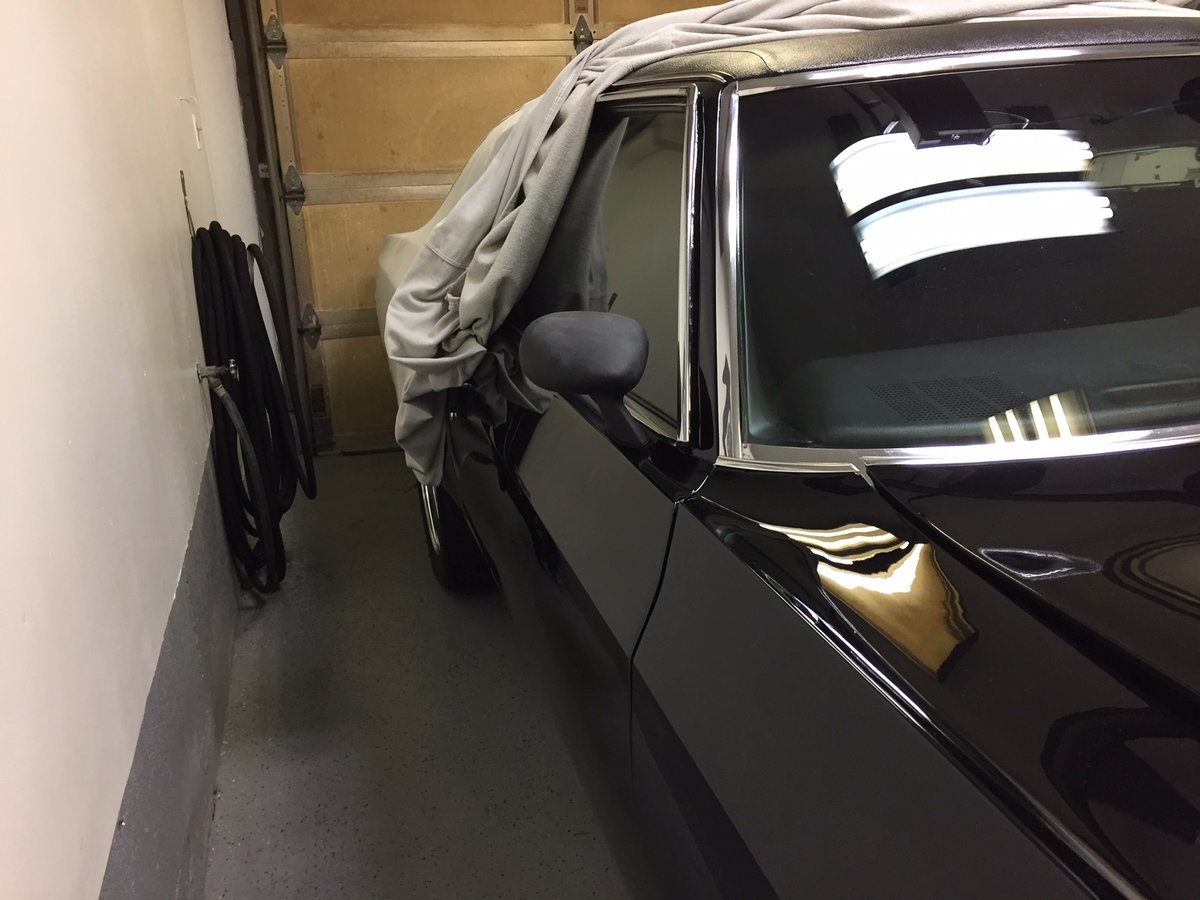
Be careful where you place the jack stands. They must be under the front and rear suspension. In my younger days (yes, that long ago...lol) I put the car up on stands on the four corners of the frame (behind the front tires and in front of the rear tires) and the body literally flexed to the point where the door gaps changed. Once down on all fours it went back to normal but the damage was already done....I got a crack in the bondo of the rear quarter panel where some rust repair had been done. Now I have a second set of baloney tires that I put on it for the winter and leave it on the ground. Steve
-
Mine is mounted on top of the glove box, under the dash pad. Once adjusted you rarely need to get at it so once it's set your done. Steve
-
Washer Pump Rebuild Success!!!
Monteman1971 replied to 1970mcss's topic in General 70-72 Monte Carlo Forum
I had restored mine with a new pump sometime ago but because I've never tried the washer, I don't know if it works....lol. But it is pretty!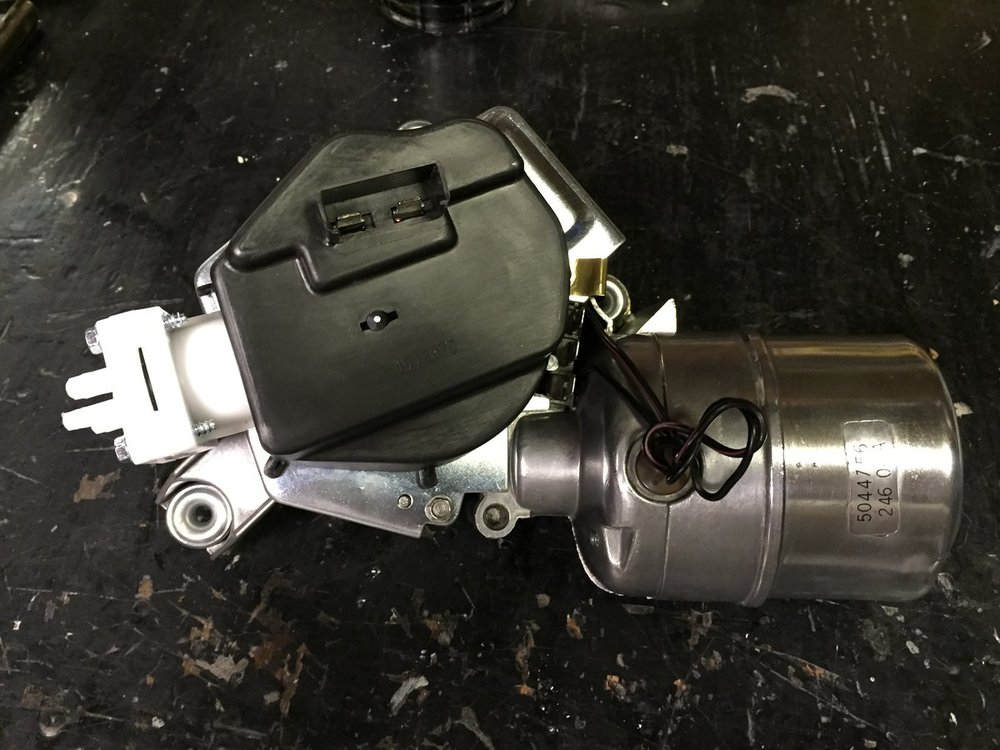
-
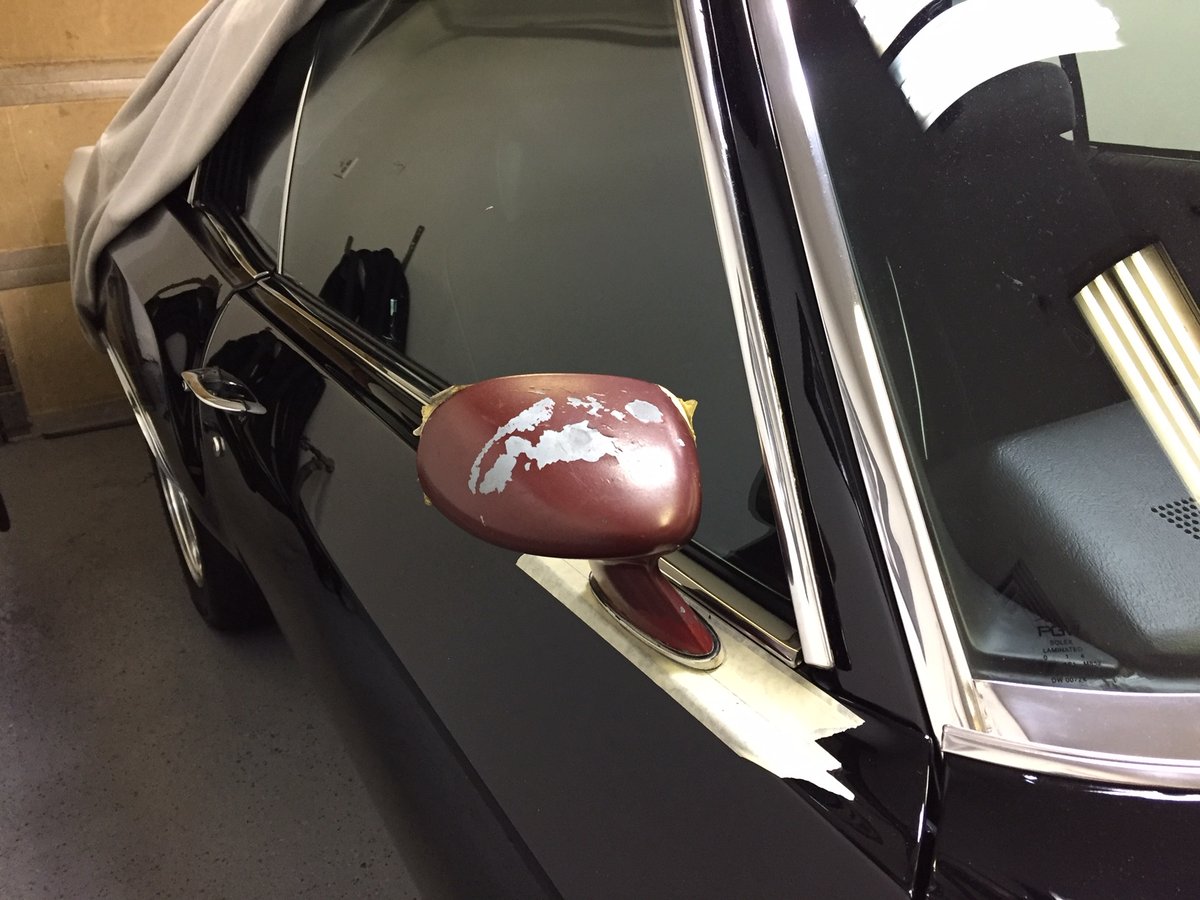
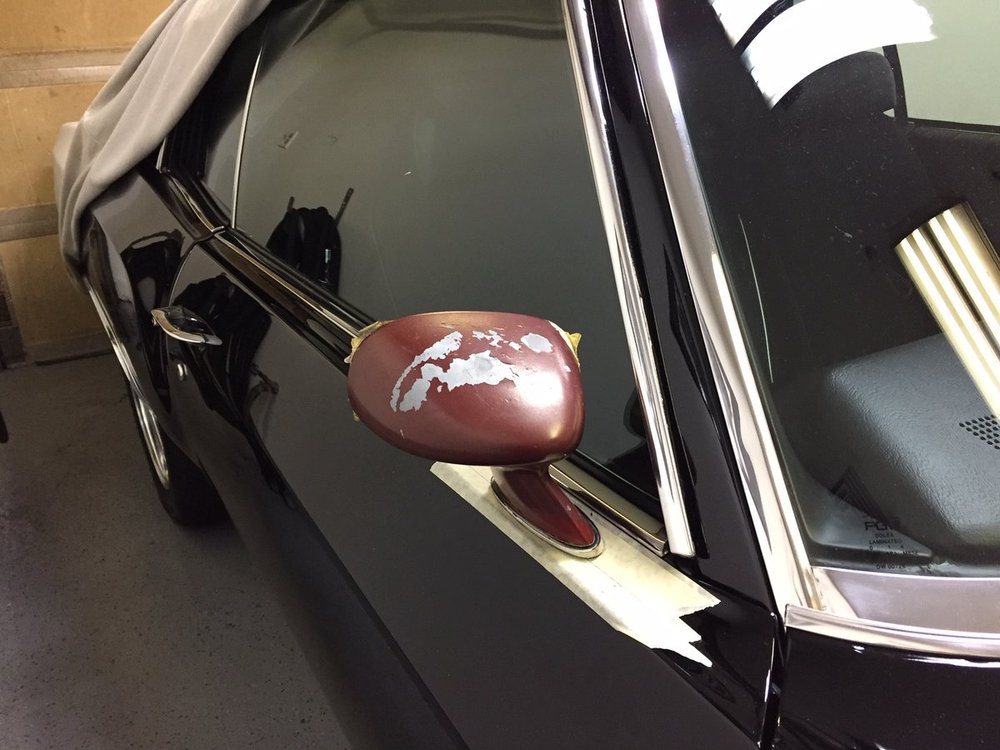
Right Side Sport Mirror
Monteman1971 replied to Monteman1971's topic in General 70-72 Monte Carlo Forum
It was a full days work with a lot of cutting and trimming over and over again so I don't think I want to do that again. On the bright side I do have an extra left side mount that I'm going to see if I can get it made in reverse order...stay tuned because I do have a plan for that! Steve -
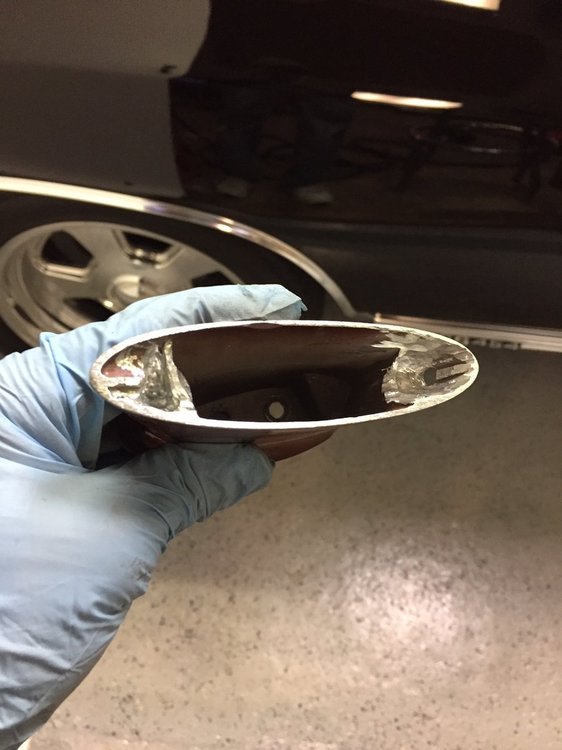
I was going to wait to post a final painted pic on the car but I couldn't hold out.... So with that here are some pics of a 1978 right side sport mirror that I heavily modified to work on the right side of my Monte. Driving without the right mirror was really a PITA and I've searched forever for the illusive correct mirror so in the end I had to create my own. As you know the 78 mirror is mounted on the side of the door with studs and not the top edge like our left side is. So I removed the studs, cut the base down, created what looks like how a factory mirror would be mounted and made my own. The bonus is that I used a factory mounting bracket and gasket so if I ever come across or if I'm ever able to create the correct right side base, I can simply swap the head off my current mirror and mount it back up in short time. Now the base is slightly different but unless your really looking for it and know something is up, you'd never tell. The hardest part was drilling holes in my door....ouch. It is now painted but I've ordered a new piece of glass (objects are closer than they appear) before the final assembly.
-
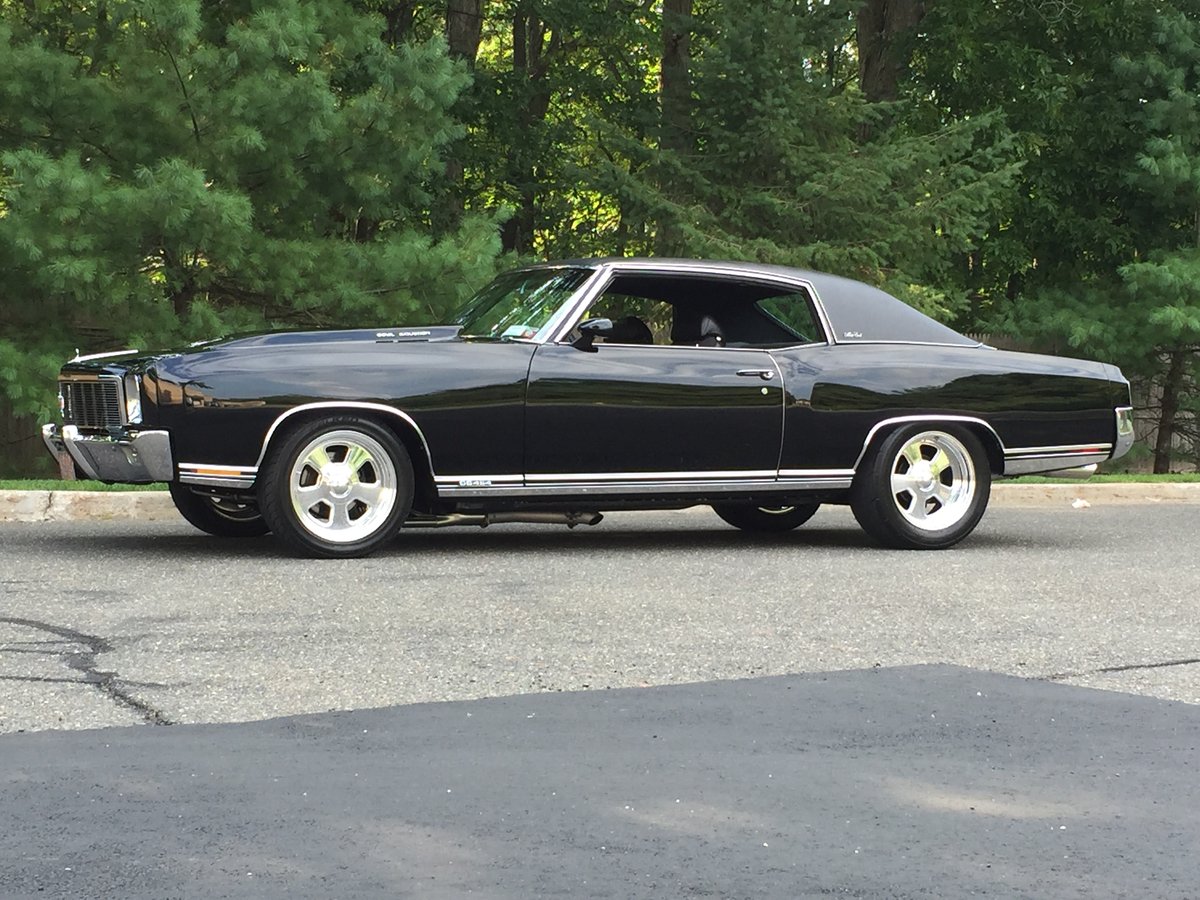
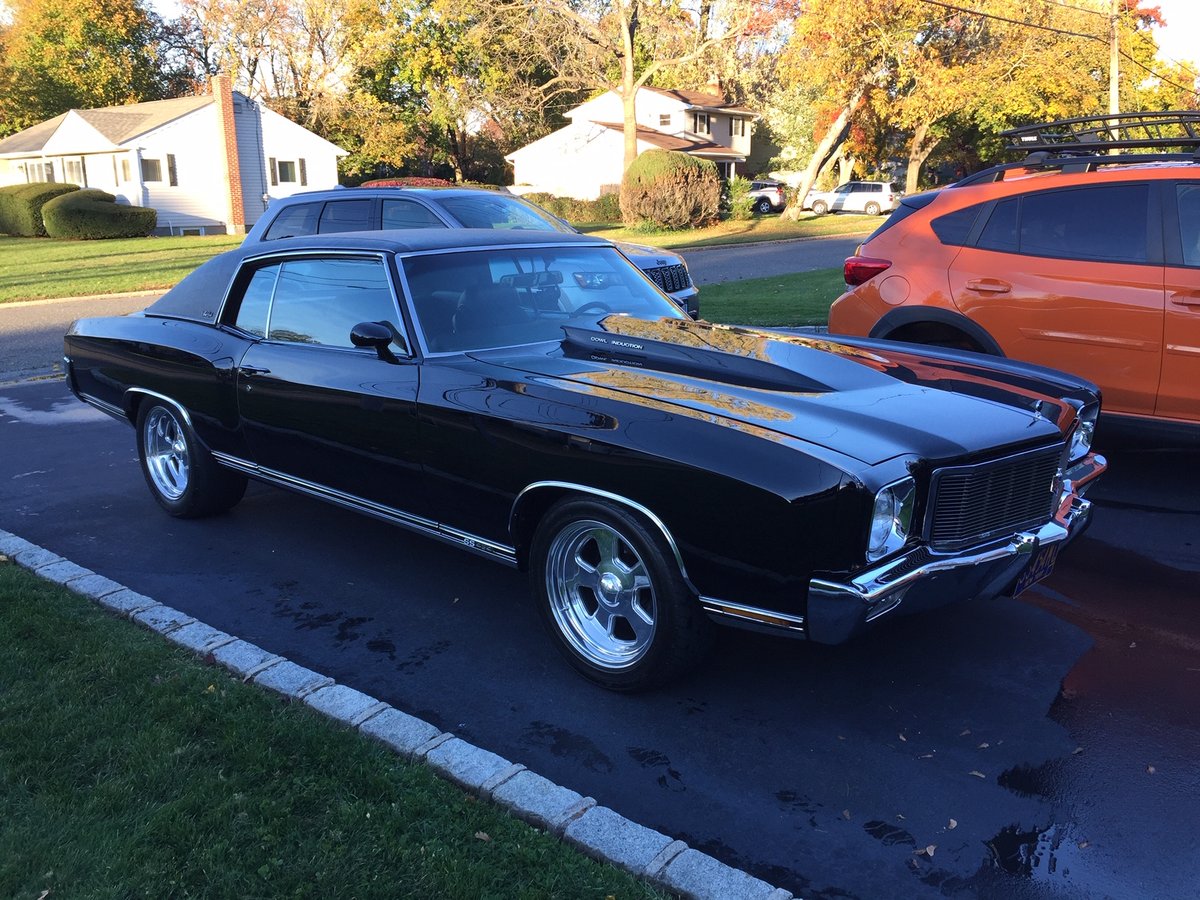
1971 SS 454...Triple Black...oh....I already own that...lol. Seriously, I feel the 71SS454 is the Monte to have and having a triple black one is the pinnacle of them all. I had actually sold my 71 402 4 speed car and bought a 71 Camaro that I loved but when this car came up for sale I had to go for it because I was dreaming of it since I was 18. My second choice would be the 71 402 4 speed but as many know I was offered some serious money for mine and had to sell it. Steve
-
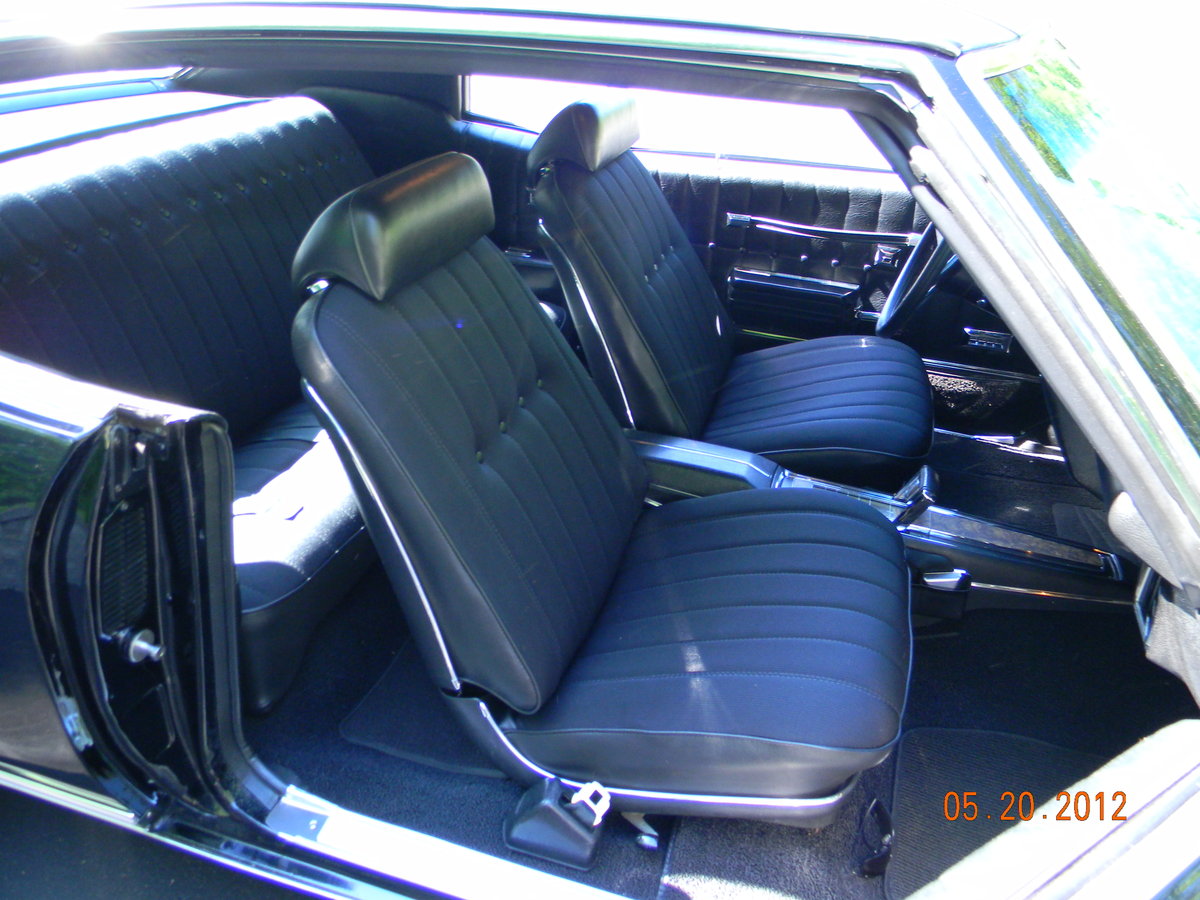
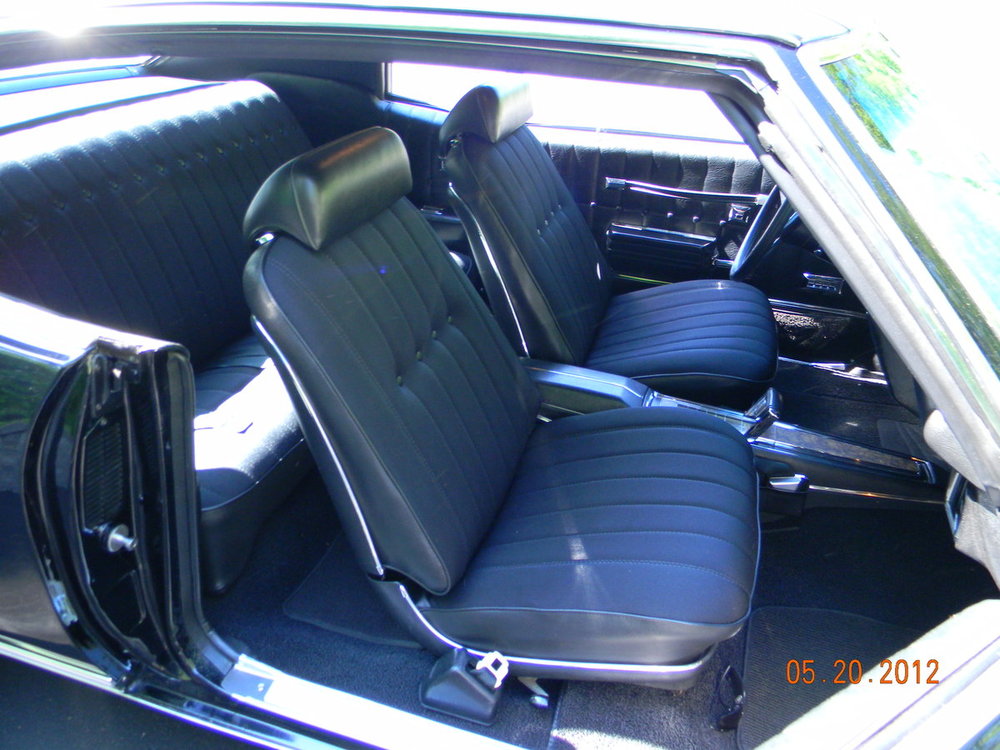
I've used the PUI seat material a few times in the past for 1971 and 1972 vinyl seats, never an issue and they look great. For My 71SS it has the factory cloth seats and the only place that had them at the time was C.A.R.S. but they are excellent (but of course more than twice the price of vinyl). I know the Legendary stuff is top quality and hear they are the only ones to use for a 1970 because the pleats are correct as opposed to the PUI 1970 seats that the pleats are not pronounce enough. As far as the headliner, it's not to bad if you have both front and rear glass out. Otherwise it's pretty tight to get in there and stretch the headliner properly. I suggest getting a lot of those binder clips to hold it in place as you work around the top before you start gluing anything. Steve
-
Call The Parts Place, I'm sure they will have them. Steve
-
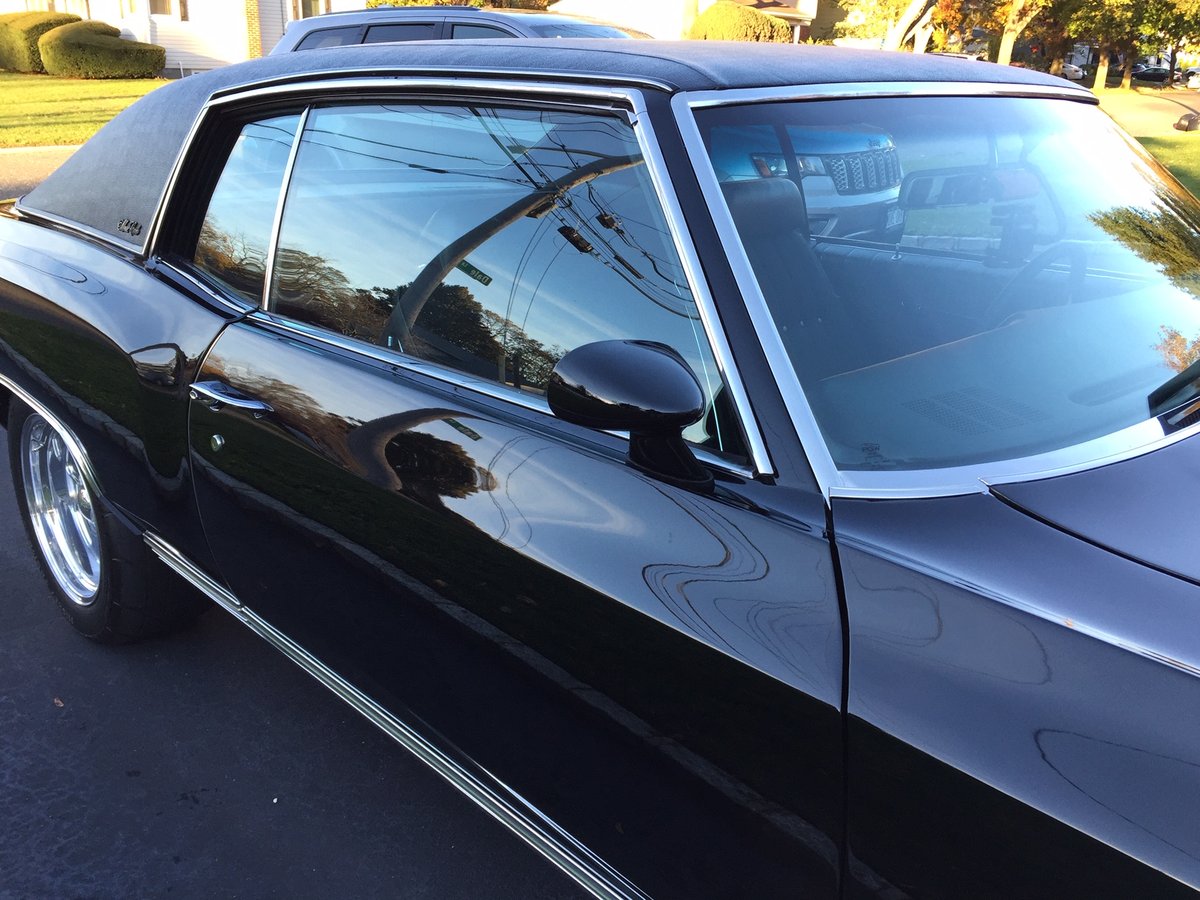
My 71 SS with bucket seats has the deluxe wide shoulder belt and the small head for the lap belt with the retractable left floor side. My headliner is the perforated with the unattached sun visors. If I remember correctly it was built in California, February 1971 and sold in Oregon. Triple black from the factory. Hope this helps Steve
-
A neighbor of mine just finished a frame on restoration of his 1970 Monte and used the AMD replacement full quarter panels on both sides. No, I did not do the install so some of this review is his words but from what I could see they were definitely the way to go if you need to replace your quarter panels. The fit and finish was right on. The wheel openings seemed dead on as well as the match to the rear panel and tail light extensions. He claimed even the holes for the side script were already drilled. He was there for the install and said they did not need to make any modifications to the panel to make it fit. Cut the old one off and welded the new one in. Considering I've seen those partial panels that are horrific, these are certainly worth their weight! So I recommend them. Anyone else have an experience with them? Please chime in!! Steve
-
Looks like a nice ride to me!!! What does it run? Steve
-
Anyone put their Monte on a rotisserie?
Monteman1971 replied to rtgz71's topic in General 70-72 Monte Carlo Forum
The Chevelle infra-structure "tub" is literally the same as the Montes so the mounting points should be the same. You could literally swap the outer sheet metal (including the outer wheel wells) and make whichever car you want. My 2 cents, Steve -
I had a single big fan that I installed inside the fan shroud. It was mounted with the typical zip ties against the rad. I felt keeping the shroud avoided having that big space between the engine and radiator and directed some air at the engine as well. I had it on a switch but it was real annoying to keep remembering to turn it on. I'd go with something that comes on automatically. Steve
-
I have a single aluminum round tank mounted to the cowl in sort of the same spot as Murphy.... It's pretty trick if I must say so myself....lol. Sorry, no pic. Steve
-
Old family photos with our 72 Monte Carlo
Monteman1971 replied to Britton Hickman's topic in General 70-72 Monte Carlo Forum
Nice rides!! Thanks for sharing!! -
Car looks fantastic!!!! Great build and I love the wheels!