monte70car Posted November 12, 2012 Author Share Posted November 12, 2012 We are finally getting to the last few items to do before the filler worker can start. We did get the outer skin all welded up(no pictures of that) Got the under side part of the hood squared away and in place And with the filler plate in place there will be some body work done to this area as well. Quote Link to comment Share on other sites More sharing options...
monte70car Posted November 13, 2012 Author Share Posted November 13, 2012 Got a few more items done on the hood today still have some welding to do but so far it's taken shape nicely Quote Link to comment Share on other sites More sharing options...
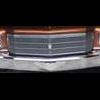
bobsmc Posted November 13, 2012 Share Posted November 13, 2012 starting to look good rob! Quote Link to comment Share on other sites More sharing options...
monte70car Posted November 16, 2012 Author Share Posted November 16, 2012 The under side should be done by Friday night then a coat of rust convertor primer. The front edge of the nose will be dressed up to look like its one piece Quote Link to comment Share on other sites More sharing options...
monte70car Posted November 18, 2012 Author Share Posted November 18, 2012 While I lost the temp I had this afternoon so nothing got done to the top side of the hood today. I did get the under side finish up and to a point I am happy with. Quote Link to comment Share on other sites More sharing options...
monte70car Posted November 24, 2012 Author Share Posted November 24, 2012 The under side of the hood is all done and looks good. We turned the hood back over to tackle the top side got one lay of filler down Been using Bondo's metal filler but that's a different post for that. Quote Link to comment Share on other sites More sharing options...
bigscaht Posted November 30, 2012 Share Posted November 30, 2012 hey heres a question...do you think you could do a cowl hood for a Nova..a friend of mine brought that up in a convo..so I though I would ask if it was possible???? Quote Link to comment Share on other sites More sharing options...
monte70car Posted December 5, 2012 Author Share Posted December 5, 2012 Hopefully this warm weather sticks around for a few more days or maybe a few more weeks. body lines are taken shape nicely Quote Link to comment Share on other sites More sharing options...
black07ss Posted December 5, 2012 Share Posted December 5, 2012 NOPE i'm sending down some 30 degree air for you ERT. Holding off on the snow for now Quote Link to comment Share on other sites More sharing options...
monte70car Posted December 14, 2012 Author Share Posted December 14, 2012 Though I would share some pictures body lines looks good the passenger side needs some sanding and more filler work. The factory hood spear in place Quote Link to comment Share on other sites More sharing options...
Vaughn Posted December 14, 2012 Share Posted December 14, 2012 Great work Rob, nicely done!!!! Quote Link to comment Share on other sites More sharing options...
monte70car Posted December 14, 2012 Author Share Posted December 14, 2012 Thanks Vaughn the end goal is it should be close to the one on my. Quote Link to comment Share on other sites More sharing options...
bobsmc Posted December 14, 2012 Share Posted December 14, 2012 hey rob, i was thinking about the process that you are going thru. if i wanted a non functional cowl hood... would it be easier to skin the back half of the monte hood[top sheet metal] and then just take the cowl portion and weld it to the monte inner portion. in steed of doing all the structural work to the inner hood?? thoughts? Quote Link to comment Share on other sites More sharing options...
monte70car Posted December 14, 2012 Author Share Posted December 14, 2012 Bob to do a non-functioning cowl hood you would still need the bracing as the air comes in though the inner door. I will try and see if I have so detail pictures of the under side of the hood. We originally planed to cut the cowl part out and weld it on a Monte hood but then you have under side bracing which is different between the two hoods. Extending the nose made more sense, since the width and the end point at the windshield were the same on both hoods just a matter of where the hood latch was at. Quote Link to comment Share on other sites More sharing options...
monte70car Posted December 15, 2012 Author Share Posted December 15, 2012 Bob you have the inner door which can be seen in this picture that would need the mounting points. Here is a picture showing where the showing how the inner door feeds air into the air cleaner you would still need the under hood bracing and since the reg dome hood and the functional cowl hood runs the same price cowl induction seen to be worth the extra mile to me. I'm open to try anything for someone but the turn around time would probably be longer. Here is a picture of what your thinking that Leo's son did under side of Leo's Quote Link to comment Share on other sites More sharing options...
bobsmc Posted December 15, 2012 Share Posted December 15, 2012 rob i was thinking about just removing the upper skin on the monte hood from the point u cut the nose so that the framing would be original and then do the same on the cowl hood. removing the skins at the spot welds on the sides and cutting the front section to match the nose of the monte sheetmetal. i personally dont want or need the cowl induction... i just want the appearance.i currently have a glass hood with the look im after.but its glass.when i take it on the highway it flaps like its paper.lol. i liked my steel hood. Quote Link to comment Share on other sites More sharing options...
KLASSIK1 Posted December 16, 2012 Share Posted December 16, 2012 we are currently finishing another hood minus the functional under skeleton , still has the flapper door but we did not add the air cleaner seal area , lots of hard work no matter what approach you take , i will post some pictures of my 72 someday with the 71 Torino hood scoop 1 of 1 , not my idea i have to give credit to a friend who originally had it on his car , we painted it a couple years ago and put it on my 72 cool stuff , looks really mean , see if i can get a picture up here Leo Quote Link to comment Share on other sites More sharing options...
Sam (Bones) Posted December 16, 2012 Share Posted December 16, 2012 those torino scoops are awesome! Quote Link to comment Share on other sites More sharing options...
monte70car Posted January 1, 2013 Author Share Posted January 1, 2013 Here is some new pictures of the hood Quote Link to comment Share on other sites More sharing options...
monte70car Posted January 21, 2013 Author Share Posted January 21, 2013 Well the hood is in the final stages. Three months ago we started out with this As of right now it has one coat of primer on it which has been sanded with 220girt and 400girt to get raid of some bad areas and then another coat and it's ready for pick up Quote Link to comment Share on other sites More sharing options...
monte70car Posted January 29, 2013 Author Share Posted January 29, 2013 Here it is the final coat of primer went on today in this crazy weather 50° today The outer door or what some call the flapper door also got primed so its all one color. The next stop for this hood is louisiana on a red Monte red and grey sounds like a good color combo to me Quote Link to comment Share on other sites More sharing options...
NewTimer Posted January 30, 2013 Share Posted January 30, 2013 Awesome! Weather in my neck of the woods had a high of 73 today! (40 miles south of you) Took the Monte for a drive today. Quote Link to comment Share on other sites More sharing options...
monte70car Posted March 16, 2013 Author Share Posted March 16, 2013 The last bite of primer went down on the hood this afternoon got the outer door bolt in place need to bolt the vacuum pod in and it will be ready to leave our little work shop. and it will look much better in a gloss color then a flat grey it currently is. Quote Link to comment Share on other sites More sharing options...
bigtankjones Posted March 16, 2013 Share Posted March 16, 2013 Man. That looks Nice Bob Quote Link to comment Share on other sites More sharing options...
Mo's70MCs Posted March 16, 2013 Share Posted March 16, 2013 Nice! Nothing like the finished product. Quote Link to comment Share on other sites More sharing options...

Recommended Posts
Join the conversation
You can post now and register later. If you have an account, sign in now to post with your account.