Palmbchmonte Posted February 20, 2018 Share Posted February 20, 2018 Update on the freshly pulled 402...just started evaluation of why this car was sitting for 40 years... and didn't take long :-( 1 Quote Link to comment Share on other sites More sharing options...
72-CLASSIC_RIDE Posted February 20, 2018 Share Posted February 20, 2018 Update on the freshly pulled 402...just started evaluation of why this car was sitting for 40 years... and didn't take long :-( Doug Quote Link to comment Share on other sites More sharing options...
Rob Peters Posted February 21, 2018 Share Posted February 21, 2018 Dang.... That ain't good but could be much worse. rob Quote Link to comment Share on other sites More sharing options...
Palmbchmonte Posted February 22, 2018 Share Posted February 22, 2018 Progress on the 402 tear down. I am sure you guys and girls can see why this motor failed. I ran out of time last night...but I feel much better about rebuilding this block now. The cylinders appear (from what I can see so far) very nice and there is hardly any ridge. Quote Link to comment Share on other sites More sharing options...
71MonteCarloMD Posted February 26, 2018 Share Posted February 26, 2018 Took Monte to local shop for 4bbl Rochester carb rebuilt and adjustment, should get it back by end of week. Quote Link to comment Share on other sites More sharing options...
Paul Bell Posted March 1, 2018 Share Posted March 1, 2018 FINALLY finished my valve covers. 1 Quote Link to comment Share on other sites More sharing options...
willie Posted March 1, 2018 Share Posted March 1, 2018 I like them Paul. Cooooool!!!! Quote Link to comment Share on other sites More sharing options...
MCfan Posted March 2, 2018 Share Posted March 2, 2018 Added one more entry on my "Don't do this!" list. Specifically, don't forget to air up your AirLift 1000 bags to at least 5 psi after you deflate them for an exhaust system upgrade. Doing so will result in the air bags looking like this: Fortunately, AirLift has a solution for forgetful guys like me - they offer replacement air bags for all of their systems at a very reasonable price. I ordered two replacement bags from Amazon last week and installed them this afternoon. All better now - lesson learned! 1 Quote Link to comment Share on other sites More sharing options...
Rock Posted March 2, 2018 Share Posted March 2, 2018 Why would you deflate them? I’ll stick with the coilovers Quote Link to comment Share on other sites More sharing options...
Rock Posted March 2, 2018 Share Posted March 2, 2018 Quote Link to comment Share on other sites More sharing options...
MCfan Posted March 2, 2018 Share Posted March 2, 2018 Why would you deflate them? In hindsight, maybe I shouldn't have (or didn't need to). When I was replacing the exhaust system, I had the whole car up on jack-stands to allow working room underneath. With the rear axle dropped fully down (tires well off the floor) the inflated air bags were now awkwardly positioned in a less compressed coil spring and the slack was out of the air lines. So, I reasoned that it would be less stressful on that system to simply deflate the air bags while I did the exhaust upgrade project. Maybe that was not a bad thing to do but forgetting to re-inflate the bags and running them for several months without minimum air pressure was a big mistake. I have no doubt that those bags (properly inflated) will last for many years and miles. The material on the old bags was still thick and flexible but, due to under-inflation, had been pinched between the coils and flexed in ways it wasn't designed for. I have no experience with coil overs but I like being able to adjust ride height and feel quickly with an air hose and gauge. Quote Link to comment Share on other sites More sharing options...
72-CLASSIC_RIDE Posted March 3, 2018 Share Posted March 3, 2018 Hey all, Spent the last few days completing my LED Tail Lights (they look awesome), fixed the loose Monte Script on passenger side Sail Panel,completed adding plastic wire loom(s) to clean up under Hood & this was a 1st for me, Pin Striping my Rally Caps & Beauty Rings. I have a dash of red showing under the hood and my seat belt pads, so decided I would experiment & see what it would look like with the red Pin Stripe on Caps & Rings. I have also been preparing to try to repair some paint chips that I have read up on how too do & gathering the items that hopefully will help me do a adequate job (News at Eleven)! Here is a couple pic's of Pin Striping. This was the best Presentation look I thought! Doug 2 Quote Link to comment Share on other sites More sharing options...
72-CLASSIC_RIDE Posted March 3, 2018 Share Posted March 3, 2018 Here is a pic or two with the wire looms now hiding most of the wiring inside them. Doug Quote Link to comment Share on other sites More sharing options...
Paul Bell Posted March 3, 2018 Share Posted March 3, 2018 I did this. Quote Link to comment Share on other sites More sharing options...
72-CLASSIC_RIDE Posted March 3, 2018 Share Posted March 3, 2018 I did this. Were they stickers Paul? I remember seeing something quite similar on eBAY that were on Rally Caps. Doug Quote Link to comment Share on other sites More sharing options...
Paul Bell Posted March 3, 2018 Share Posted March 3, 2018 Yes, they're shaped metallic stickers. The guy really didn't want to sell them without the caps but he did it-just this once. Sucks, I'd really like a set sitting in a drawer. I've searched everywhere, I can't find them elsewhere or who makes them. If and when I do, I'll share. Quote Link to comment Share on other sites More sharing options...
rsorg Posted March 4, 2018 Share Posted March 4, 2018 going for a drive today, sunny and warmer Quote Link to comment Share on other sites More sharing options...
rsorg Posted March 4, 2018 Share Posted March 4, 2018 going for a drive today, sunny and warmer Quote Link to comment Share on other sites More sharing options...
Paul Bell Posted March 27, 2018 Share Posted March 27, 2018 I'm inching along with the little things on my car, some big things that are costly are on the waiting list. I'm getting the under hood buttoned up. One fuel rail crossover fitting hit the ignition coils so I had to shorten the rail a bit. It's pretty packed back there. Somewhere in there I have to bolt the Lokar trans dip to the firewall next to the wiper motor. The wiper motor. The original burned out. A replacement from Pep Boys was only $44 (!) and bench tested perfect. Installed, it was acting up. I determined the dash switch had a bad ground. With great effort, I added a ground. It worked! Then it started acting up again and the motor stopped working. It now bench tests bad. I'm not continuing until I replace the switch. I've learned far more than I imagined I would about this system. It's an insane double toggled ground system. Quote Link to comment Share on other sites More sharing options...
72jrfan88 Posted March 29, 2018 Share Posted March 29, 2018 Hey all, Spent the last few days completing my LED Tail Lights (they look awesome), fixed the loose Monte Script on passenger side Sail Panel,completed adding plastic wire loom(s) to clean up under Hood & this was a 1st for me, Pin Striping my Rally Caps & Beauty Rings. I have a dash of red showing under the hood and my seat belt pads, so decided I would experiment & see what it would look like with the red Pin Stripe on Caps & Rings. I have also been preparing to try to repair some paint chips that I have read up on how too do & gathering the items that hopefully will help me do a adequate job (News at Eleven)! Here is a couple pic's of Pin Striping. This was the best Presentation look I thought! Doug Those turned out great doug! They remind me of those red line tires that some of the 60's chevelles came with. Makes me wonder how those would look with red line tires!! 1 Quote Link to comment Share on other sites More sharing options...
Paul Bell Posted April 17, 2018 Share Posted April 17, 2018 Test fit number, well, I forget how many times now. Final check for lower hose fitting angle. I still need to get the P/S tank and add an idler pulley to get more belt wrap around the alternator. Billet Specialties told me: "No, you can't space everything away from the block" "No, you can't use a crank wheel and pickup" "No, you can't use an electric water pump" "No, you can't use the bigger AD244 alternator" "No, you can't add an idler pulley" Quote Link to comment Share on other sites More sharing options...
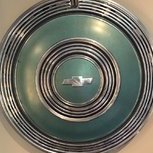
Monteman1971 Posted May 1, 2018 Share Posted May 1, 2018 Replated front bumper done by Tri City Plating in TN. They always do a really nice job at a reasonable price. 1 Quote Link to comment Share on other sites More sharing options...
Michael Boyte Posted May 1, 2018 Share Posted May 1, 2018 !!!! SWEET !!!! That car always looks Fantastic !! When the Soprano's show up at a car show, it's always worth the gate fee just to see the cars that Steve has been associated with 1 Quote Link to comment Share on other sites More sharing options...
72-CLASSIC_RIDE Posted May 3, 2018 Share Posted May 3, 2018 Hey All, Been spending the Winter touching up paint chips (my 1st experience)! I 1st stripped the wax from car and a fair job to date on paint repairing. Yesterday I was rubbing car with Maquires #9 Compound to remove scratches and the dull finish where I was sanding paint repair(s). A guy walking up the street said nice car and asked me if it was a 1966 or 67. A little confused, I told him 1972. He squinted at the Rear Tail Panel to read the script and at which point I told him it is a Monte Carlo. Now I don't really have a mental picture for a Cadillac of year(s) stated, but he told me that's what he thought it was. At 1st I thought "what a Goof" but after consideration looked at his mistake as a compliment. Imagine what that type of comparison says about the styling. Yeah, you can call it a Cadillac anytime...................... Doug Quote Link to comment Share on other sites More sharing options...
Dans '70 Z20 Posted May 8, 2018 Share Posted May 8, 2018 Took the plates off her yesterday. Watched her leave for her new home today. Hope she likes Long Island. - Dave Dan and Mike securing her to the trailer. And,... watching her leave. Goodbye ole friend. Well since this day she has gotten a lot of love. Motor and tranny both went to bed over last 12 months. Mike has had the 4L80 done overkill, installed a 650hp 434 small block 2 months ago and having a 4000# triple plate 9" converter installed as we speak and getting tranny mount to tuck up nicely above frame rather than below. Motor has the swapped firing order. Sounds real nice and goes like a raped ape. You will all see her in June. Dan Quote Link to comment Share on other sites More sharing options...

Recommended Posts
Join the conversation
You can post now and register later. If you have an account, sign in now to post with your account.