Stuckin70s Posted August 18, 2023 Share Posted August 18, 2023 Most excellent... Love the car's color and the wheels a nice punch! Quote Link to comment Share on other sites More sharing options...
cny first gen 71 Posted August 19, 2023 Share Posted August 19, 2023 Well today turned out to be a crap day, we had reservations for camping and were planning on leaving at around 1:00 well Lisa bought a new freezer and was being delivered today between 10 and 1 no big deal. I got to her house at around 2 still wasn't there so we waited until 3 and said 15 minutes and we were leaving. They had instructions where to leave it and wasn't supposed to rain. So 3:15 we said let's go well that's when they show up so we had it put in garage and headed out. Good thing we waited because it started raining. We got to campground signed in and filled up with water went to our site and almost the entire site was under water, they said the only other site they have I a little smaller so we looked our camper wouldn't fit so we canceled we got 18 dollars of our 85 dollars back. She's pretty upset. Came home all the way in the rain didn't unhook camper because it was still raining. I could go on but I won't. Just another bad day of many lately. Thanks for letting me rant. Definitely a few cold beverages tonight! 2 3 Quote Link to comment Share on other sites More sharing options...
Rob Peters Posted August 19, 2023 Share Posted August 19, 2023 Steve, so sorry it was such a crappy day. Sometimes it just paynto chew through the restraints. rob 2 Quote Link to comment Share on other sites More sharing options...
cny first gen 71 Posted August 20, 2023 Share Posted August 20, 2023 Feeling a little nostalgic today so took car out for ice cream at a place my wife and I used to go when we were dating. Cruised through some of the old neighborhoods and saw a dear old friend sitting on her front porch, Of course I stopped to chat and had a wonderful visit. Now sitting out on my deck having some cold ones. 5 Quote Link to comment Share on other sites More sharing options...
Rob Peters Posted August 20, 2023 Share Posted August 20, 2023 She looks great Steve.... You can't beat a BLUE Monte. rob 2 Quote Link to comment Share on other sites More sharing options...
Searsman Posted August 20, 2023 Share Posted August 20, 2023 Was supposed to go to a cruise today but wife was sick so neither of us got to go. Had everything ready but Monte just had to sit and pout.. so later on I drove her to the local drive thru for some cold Rocky Mountain spring water and sat around enjoying those for the rest of the evening.. at least I got to drive to the store. Some days ya just have to make the best of it…A cold beverage er “several “ a little music 🎼 Lynyrd skynyrd , made the day quite tolerable.. 7 Quote Link to comment Share on other sites More sharing options...
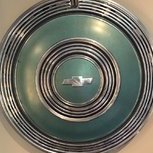
Canuck Posted August 20, 2023 Author Share Posted August 20, 2023 I had a little fun with wheels. I needed to put the Cooper Cobras from the 71 onto the 72 for the buyer of the 72. He will be driving it home long distance and the 23 year-old yellow letter Goodyears that were on the 72 were too risky for a road trip. I put the original set of wheels and bias ply tires that came with the 72 on the 71 temporarily while I have new tires mounted on the rallys for the 71. What a sleeper! Just for fun I measured the height of the letters on the various brands I had as I was curious about the difference in size. Goodyear 7/8" tall Cooper 7/8" tall BFG 13/16" tall I always thought the Coopers had much bigger letters than BFG but very little difference. I guess the main reason the Coopers appear much bigger is due to BFG using lower case letters. 6 Quote Link to comment Share on other sites More sharing options...
jft69z Posted August 20, 2023 Share Posted August 20, 2023 The 72 sold? Quote Link to comment Share on other sites More sharing options...
Canuck Posted August 20, 2023 Author Share Posted August 20, 2023 1 hour ago, jft69z said: The 72 sold? Sale pending. Should be wrapped up soon. 7 Quote Link to comment Share on other sites More sharing options...
jft69z Posted August 20, 2023 Share Posted August 20, 2023 16 minutes ago, Canuck said: Sale pending. Should be wrapped up soon. Good for you! Quote Link to comment Share on other sites More sharing options...
70MC402 Posted August 20, 2023 Share Posted August 20, 2023 Yesterday a friend of mine and I pulled the 402 out along with the trans so I could clean the front frame section and the firewall, as well as replace the 402 with a 505 I recently finished. The frame was pretty crusty but nothing worse than superficial rust found in front of the firewall with the wire wheel. Going to use implement paint on the frame to see how it does, if it looks good I’ll likely do the firewall with it too. Quote Link to comment Share on other sites More sharing options...
Searsman Posted August 20, 2023 Share Posted August 20, 2023 3 hours ago, Canuck said: Sale pending. Should be wrapped up soon. Great! Congratulations to ou ,and the purchaser ! 1 Quote Link to comment Share on other sites More sharing options...
cny first gen 71 Posted August 20, 2023 Share Posted August 20, 2023 3 hours ago, 70MC402 said: Yesterday a friend of mine and I pulled the 402 out along with the trans so I could clean the front frame section and the firewall, as well as replace the 402 with a 505 I recently finished. The frame was pretty crusty but nothing worse than superficial rust found in front of the firewall with the wire wheel. Going to use implement paint on the frame to see how it does, if it looks good I’ll likely do the firewall with it too. Frame and firewall look pretty good 👍 booster could use a little sprucing up too while your there. 1 Quote Link to comment Share on other sites More sharing options...
70MC402 Posted August 21, 2023 Share Posted August 21, 2023 2 hours ago, cny first gen 71 said: Frame and firewall look pretty good 👍 booster could use a little sprucing up too while your there. Yeah the booster will be getting replaced! I’m torn on what size to go with but I know I want smaller than the stock 11 inch booster. Quote Link to comment Share on other sites More sharing options...
Stuckin70s Posted August 21, 2023 Share Posted August 21, 2023 Do you know what the correct color is for the firewall. Between zeibart tar and grease I'm not sure. I have both sides of the firewall stripped. In the same area, inside the cowl where the wiper transmission rides, there was black paint there. After stripper I found original color and more flat black. I plan on changing the vehicle color so I may just stick with a rattle can flat black in the cowl... Thoughts? Quote Link to comment Share on other sites More sharing options...
Traveler Posted August 21, 2023 Share Posted August 21, 2023 Progress got to love it! Had the suspension upgraded to UMI upper and lower front and rear control arms front qa1 coil overs, inner and outer tie rod ends, front and rear sway bars, got the gas gauge to work, new alternator (seems 100A wasn’t enough to handle fuel injection gas pump 2 radiator fans bigger battery) even got the power steering pump to stop squealing finally got it running and driving right and lost it to paint it up prison hopefully just the next 6 weeks not sure what happened but my checking account got lighter lol just the interior left to do, then I’m done except the AC, radio, shucks is it ever going to end 2 Quote Link to comment Share on other sites More sharing options...
cny first gen 71 Posted August 21, 2023 Share Posted August 21, 2023 1 minute ago, Stuckin70s said: Do you know what the correct color is for the firewall. Between zeibart tar and grease I'm not sure. I have both sides of the firewall stripped. In the same area, inside the cowl where the wiper transmission rides. There was black paint then after stripper I found original color and more flat black. I plan on changing the vehicle color so I may just stick with a rattle can flat black in the cowl... Thoughts? It's actually a semi gloss or satin black I belive, that's what I used on mine anyhow. 3 Quote Link to comment Share on other sites More sharing options...
MC1of80 Posted August 21, 2023 Share Posted August 21, 2023 Semi gloss black or satin. Eastwood under hood satin black is what we have been using with great results. A little pricy though. Also used Eastwood satin chassis black on the chassis. Way more durable than just plain ol paint. 7 Quote Link to comment Share on other sites More sharing options...
Stuckin70s Posted August 21, 2023 Share Posted August 21, 2023 MC1of80, thank you for the guidance and the pictures... That appears to be exactly what I believed it to look like. I have not decided on the frame yet as it needs to come off one more time. We used hammerite on a coworkers 64 Impala about 10 years ago, I need to see how it is holding up. I'm also going to box in the frame like the station wagons for strength and sneak in a receiver hitch. Some of the folks on this site did a wonderful job hiding the receiver. Thank you again! Stay Safe. 2 1 Quote Link to comment Share on other sites More sharing options...
Stuckin70s Posted August 27, 2023 Share Posted August 27, 2023 Thanks to everyone this forum has been an inspiration to keep me going... One small bite at a time. New boot on the lower steering shaft this week. Took it to a shop and then later found all I needed to do was heat up the nylon mid area and give it a smack with the hammer. Monte lower steering shaft.mp4 1 Quote Link to comment Share on other sites More sharing options...
Stuckin70s Posted August 27, 2023 Share Posted August 27, 2023 Yesterday's bite was 8-hours going through the wiper motor. 51-years of sludge had it binding. May have been an exercise in futility since we cannot purchase the piston '0' ring*. Soaked plastic parts in dawn dish soap, light sandblasting on the washer pump housing and fresh grease. Does anyone know how hot these motors get. I ran this one on the bench about 40 minutes on low (4amp) and the motor ran about 140 degrees F. On high the amperage went down to 3 amps, temperature stayed the same. End game here is to put a rotor pump hidden in the fender and push through the stock. Finished! Bench Testing: This fellows video was wonderful given the fact that the wiring diagrams did not match the motors pin out. 3 Quote Link to comment Share on other sites More sharing options...
stangeba Posted August 28, 2023 Share Posted August 28, 2023 18 hours ago, Stuckin70s said: Thanks to everyone this forum has been an inspiration to keep me going... One small bite at a time. New boot on the lower steering shaft this week. Took it to a shop and then later found all I needed to do was heat up the nylon mid area and give it a smack with the hammer. Monte lower steering shaft.mp4 3.29 MB · 0 downloads Question, I think I remember something about this shaft (like my 71 Monte) is / was collapsible on impact in a collision. What is needed to repair it if it is impacted? I assume there is one or two tiny plastic sticks that would be broken. Are they to be replaced? Who has them? Thanks! 1 Quote Link to comment Share on other sites More sharing options...
Stuckin70s Posted August 28, 2023 Share Posted August 28, 2023 (edited) I believe the plastic dots were for ease on assembly line. I cannot imagine assembly with that thing sliding up and down while attaching to the steering gear box. There is negligible "slop" without the nylon. After cleaning (see video) the parts slide very smoothly. I may look into flowing hot glue into the space after assembly just to keep the schmuck out of the hole preventing if from doing its job on impact. The "two posts" appeared where they had flowed the nylon into the space during the build. Just like the Piston O-ring for the washer pump I am sure they are made of unobtainium and are on intragalactic back-order! 😀 Update 7SEPT23: Discussion on link below replacing with high-temperature Glue gun and nylon screws. https://www.mgexp.com/article/easy-mgb-steering-column-repairs.337 Edited September 7, 2023 by Stuckin70s update information Quote Link to comment Share on other sites More sharing options...
Canuck Posted August 30, 2023 Author Share Posted August 30, 2023 Today was rally wheel painting day. These are for the copper 71. New 255/60 Cooper Cobras will be mounted next week. Cleaned and scuffed up Primer Painted 8 Quote Link to comment Share on other sites More sharing options...
70MC402 Posted September 3, 2023 Share Posted September 3, 2023 Got the firewall all cleaned up, the 505 and the th400 mated back together. Swapped the used FTI 3000 stall converter for the Coan 3800 stall today. Earlier this week made up a new 1/2 inch aluminum fuel line, waited until today for the “tubing Armor” from the stop shop and got that in today. Quote Link to comment Share on other sites More sharing options...

Recommended Posts
Join the conversation
You can post now and register later. If you have an account, sign in now to post with your account.